controls MINI COOPER 2005 Workshop Manual
[x] Cancel search | Manufacturer: MINI, Model Year: 2005, Model line: COOPER, Model: MINI COOPER 2005Pages: 165, PDF Size: 4.64 MB
Page 99 of 165
97
OVERVIEW REPAIRSOPERATIONCONTROLS DATA INDEX
TIRE INFLATION PRESSURE Information for your safetyIt is not merely the tire's service life, but
also driving safety and driving comfort that
depend on the condition of the tires and
the maintenance of the specified tire pres
-
sure.
Check tire inflation pressures regu
-
larly and correct them if necessary,
including the space-saver spare tire: at
least twice a month and before long jour
-
neys. Failure to observe this precaution can
result in incorrect tire pressures, which
cause unstable handling response as well
as tire damage, and can ultimately lead to
an accident.
Do not drive with deflated, i.e. flat, tires
except if Run Flat tires are fitted. A flat tire
greatly impairs steering and braking
response, and can lead to complete loss of
control over the vehicle.
-
mum of 1.25
miles / 2
km or when the
vehicle has been parked for at least 2
hours.
Warm tires have higher pressures.
After correcting the tire inflation pressure,
reinitialize the Flat Tire Monitor, refer to
page
71.
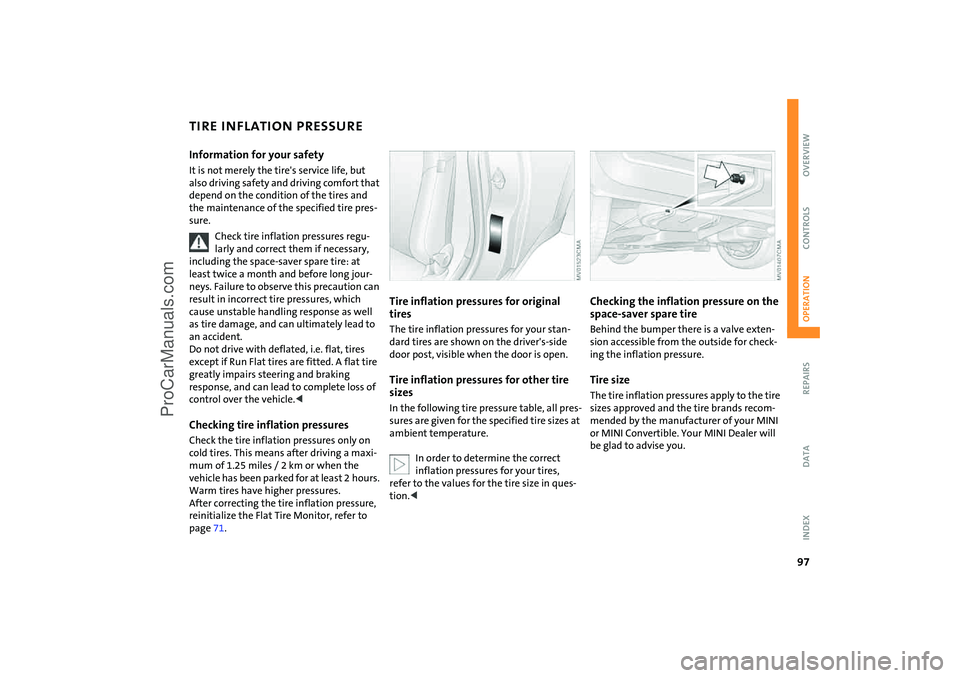
Tire inflation pressures for original tiresThe tire inflation pressures for your stan
-
dard tires are shown on the driver's-side
door post, visible when the door is open.Tire inflation pressures for other tire
sizesIn the following tire pressure table, all pres
-
sures are given for the specified tire sizes at
ambient temperature.
In order to determine the correct inflation pressures for your tires,
refer to the values for the tire size in ques
-
tion.<
Checking the inflation pressure on the space-saver spare tireBehind the bumper there is a valve exten
-
sion accessible from the outside for check
-
ing the inflation pressure.Tire sizeThe tire inflation pressures apply to the tire
sizes approved and the tire brands recom
-
mended by the manufacturer of your MINI
or MINI Convertible. Your MINI Dealer will
be glad to advise you.
ProCarManuals.com
Page 101 of 165

99
OVERVIEW REPAIRSOPERATIONCONTROLS DATA INDEX
TIRE CODINGKnowing the tire code on the tire's sidewall
makes it easier for you to choose and iden
-
tify the correct tires.Tire sizee.g. 205/45
R 17 84 V
Nominal width in mm Cross-sectional
ratio in % Radial belt construction Rim diameter in inches Load index,
not on ZR tiresSpeed code letter,
in front of the R on ZR tiresSpeed code letters:Q = up to 100 mph / 160
km/h
T= up to 118
mph
/ 190
km/h
H= up to 131
mph
/ 210
km/h
V= up to 150
mph
/ 240
km/h
W= up to 167
mph
/ 270
km/h
Tire Identification NumberTires with DOT codes meet the guidelines
of the U.S. Department of Transportation.
DOT code:e.g. DOT xxxx xxx 2704Manufacturer's code
for tire make Tire size and
tire version Tire age Tire ageThe date on which the tire was manufac
-
tured is indicated by the code on the side
-
wall:
DOT...2704 indicates that the tire was man
-
ufactured in Week 27 of the year 2004.The manufacturer of your vehicle recom
-
mends replacing all tires after 6
years at
the latest, even if a tire service life of
10
years is possible.
Uniform Tire Quality GradingQuality grades can be found where applica
-
ble on the tire sidewall between tread
shoulder and maximum section width.
For example:Treadwear 200 Traction AATemperature A
DOT quality gradesTread wear Traction AA A B C Temperature A B C
All passenger car tires must conform to Federal Safety Requirements in
addition to these grades.<
Tread wearThe tread wear grade is a comparative rat
-
ing based on the wear rate of the tire when
tested under controlled conditions on a
specified government test course.
For example, a tire graded 150 would wear
one and one-half, 1
γ, times as well on the
government course as a tire graded 100.
The relative performance of tires depends
upon the actual conditions of their use,
however, and may depart significantly
from the norm due to variations in driving
habits, service practices and differences in
road characteristics and climate.
ProCarManuals.com
Page 103 of 165

101
OVERVIEW REPAIRSOPERATIONCONTROLS DATA INDEX
TIRE CONDITION
RUN FLAT TIRES
*
Wear indicators in the tread-groove base, arrow, are spread around the circumfer
-
ence of the tire and are marked on the side
wall of the tire with TWI, Tread Wear Indi
-
cator. The indicators in the tread indicate at 1/16 in / 1.6
mm tread depth that the
legally permitted wear limit has been
reached.
Wheel/tire damage
Due to low-profile tires, please note that wheels, tires and suspension
parts are more susceptible to road hazards
and consequential damage.
Unusual vibrations while driving can indi
-
cate tire damage or other damage to the
vehicle. This may be caused, for example,
by driving over a curb. This is also true for
abnormalities in the vehicle's handling
characteristics, such as a pronounced ten
-
dency to pull to the left or right.
In such situations, reduce your speed
immediately. Drive carefully to the nearest
MINI Dealer or tire dealer, or have the vehi
-
cle towed there, if necessary.
Tire damage, up to and including blowouts,
can endanger the lives of both the vehicle
occupants and other road users.<
You will recognize Run Flat tires by a circu
-
lar symbol containing the letters RSC on
the side of the tire.
Run Flat tires consist of self-contained tires
and special rims. The tire reinforcement
ensures that driving remains possible to a
restricted degree in the event of a pressure
drop or even a flat tire. Continuing driving with a damaged
tire Depending on the load, you can continue
driving with Run Flat tires at a maximum
speed of 50
mph
/ 80
km/h.
ProCarManuals.com
Page 105 of 165
103
OVERVIEW REPAIRSOPERATIONCONTROLS DATA INDEX
NEW WHEELS AND TIRESThe correct wheels and tires
The manufacturer of your vehicle
recommends mounting only wheels
and tires that it has specifically tested and
approved for use on your particular model.
Although other wheels and tires may theo
-
retically have the same dimensions, varia
-
tions in factors such as manufacturing tol
-
erances can result in contact between tire
and bodywork, ultimately leading to seri
-
ous accidents. The manufacturer of your
vehicle cannot evaluate non-approved
wheels and tires to determine if they are
suited for use, and therefore cannot ensure
the operating safety of the vehicle if they
are fitted.
and tread configuration. In the event of a
flat tire, remount the previous wheel and
tire combination as soon as possible.Recommended tire sizes and brands:For each tire size, certain tire brands have
been tested, classified as road safe and
approved by the manufacturer of your
vehicle. You can find out about these from
a professional tire center, preferably your
MINI Dealer. Observe any local regulations,
e.g. on making a corresponding entry in the
vehicle documents. The factory-approved radial belt tires are
matched to your vehicle and provide opti
-
mum safety and driving comfort when
used properly.Run Flat tires:If your vehicle is equipped with Run Flat
tires, refer to Run Flat tires, please note the
following: when mounting new tires or
replacing summer tires with winter tires, or
vice versa, use only Run Flat tires since no
spare wheel is available in the event of a
flat. The manufacturer of your vehicle will
be glad to advise you.Special characteristics of winter tires The manufacturer of your vehicle recom
-
mends winter tires for driving in adverse
winter road conditions. While all-season
tires with the M+S designation provide bet
-
ter winter traction than summer tires, they
generally do not achieve the full perfor
-
mance of winter tires. Observing speed ratings:
Never exceed the maximum speed for which the winter tires are rated.
Unprofessional attempts by laymen to ser
-
vice tires can lead to damage and acci
-
dents. Have this work performed by skilled
professionals only. The technicans at your
MINI Dealer will be glad to assist you with
the required professional knowledge and
specialized equipment.
-
tect the tires against contact with oil,
grease and fuel. Do not exceed the tire
inflation pressure specified on the tire side
-
wall.
ProCarManuals.com
Page 107 of 165
105
OVERVIEW REPAIRSOPERATIONCONTROLS DATA INDEX
BONNET
Do not attempt to service your vehi
-
cle if you do not have the required
technical background. If you are not famil
-
iar with the regulations to be observed,
have the necessary work on your vehicle
carried out only by a MINI Dealer or a work
-
shop that has specially trained personnel
working in accordance with the specifica
-
tions of the MINI manufacturer.
Work that is improperly carried out could
result in consequential damage and pose
safety hazards.<
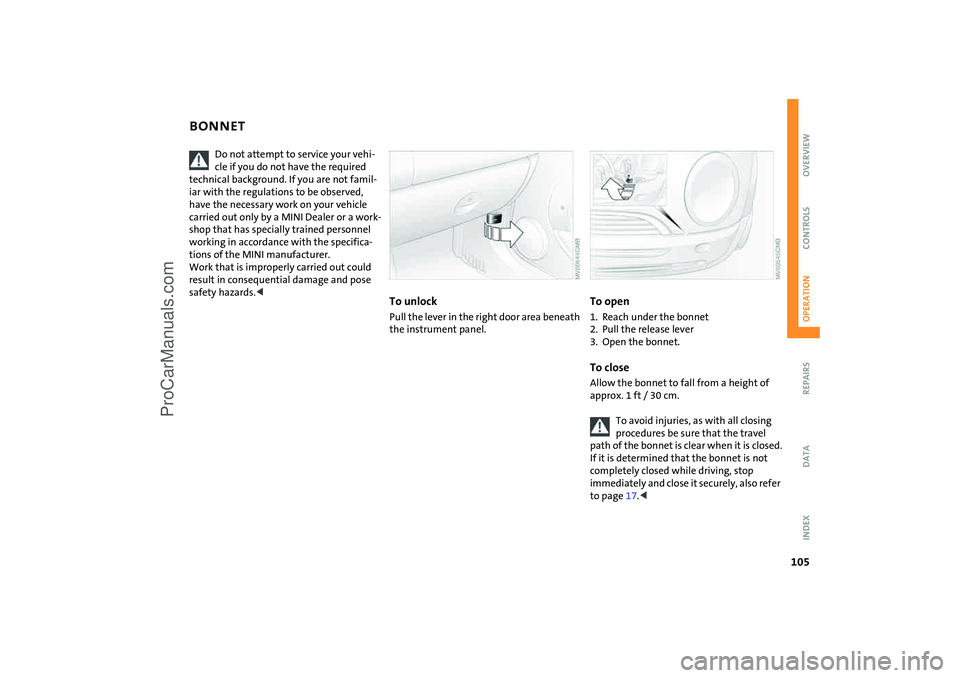
To unlockPull the lever in the right door area beneath
the instrument panel.
To open1. Reach under the bonnet2. Pull the release lever3. Open the bonnet.To closeAllow the bonnet to fall from a height of
approx.
1 ft / 30
cm.
To avoid injuries, as with all closing procedures be sure that the travel
path of the bonnet is clear when it is closed.
If it is determined that the bonnet is not
completely closed while driving, stop
immediately and close it securely, also refer
to page
17.<
ProCarManuals.com
Page 109 of 165

107
OVERVIEW
REPAIRS OPERATIONCONTROLS
DATA
INDEX
1 Reservoir for windshield and rear
window
* washer system
108
2 Vehicle identification number
3 Coolant expansion tank
110
4 Engine oil filler neck
109
5 Auxiliary termin al for jump-
starting
134
6 Brake fluid reservoir
111
7 Reservoir for headlamp cleaning system
108
8 Engine oil dipstick
108
ENGINE COMPARTMENT: MINI COOPER S AND MINI COOPER S CONVERTIBLE
ProCarManuals.com
Page 111 of 165
109
OVERVIEW REPAIRSOPERATIONCONTROLS DATA INDEX
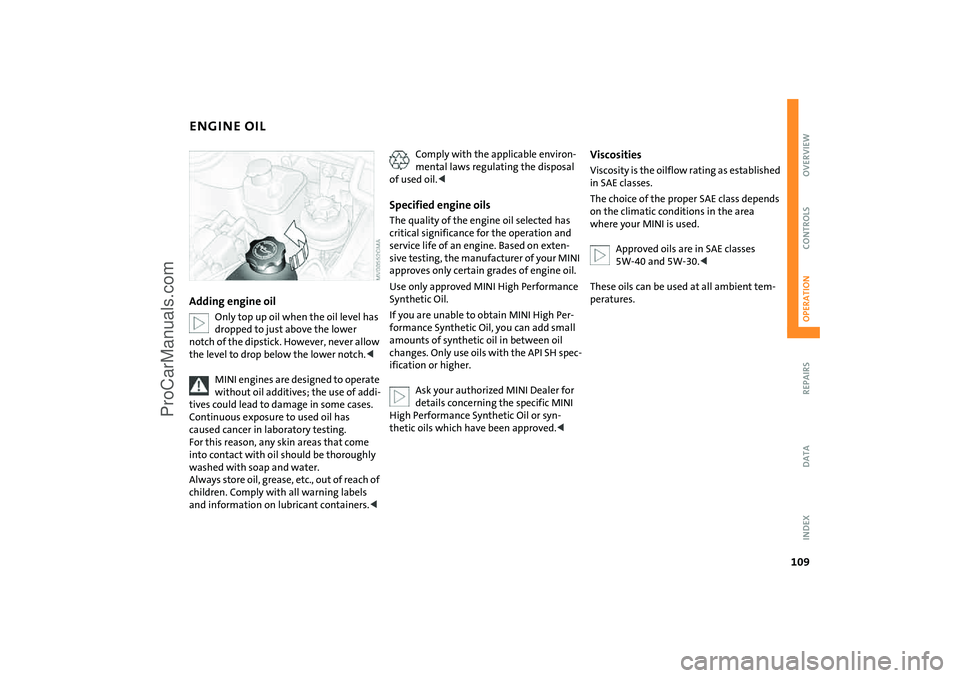
ENGINE OILAdding engine oil
Only top up oil when the oil level has dropped to just above the lower
notch of the dipstick. However, never allow
the level to drop below the lower notch.
tives could lead to damage in some cases.
Continuous exposure to used oil has
caused cancer in laboratory testing.
For this reason, any skin areas that come
into contact with oil should be thoroughly
washed with soap and water.
Always store oil, grease, etc., out of reach of
children. Comply with all warning labels
and information on lubricant containers.<
Comply with the applicable environ
-
mental laws regulating the disposal
of used oil.<
Specified engine oilsThe quality of the engine oil selected has
critical significance for the operation and
service life of an engine. Based on exten
-
sive testing, the manufacturer of your MINI
approves only certain grades of engine oil. Use only approved MINI High Performance
Synthetic Oil.If you are unable to obtain MINI High Per
-
formance Synthetic Oil, you can add small
amounts of synthetic oil in between oil
changes. Only use oils with the API SH spec
-
ification or higher.
Ask your authorized MINI Dealer for details concerning the specific MINI
High Performance Synthetic Oil or syn
-
thetic oils which have been approved.<
Viscosities Viscosity is the oilflow rating as established
in SAE classes.The choice of the proper SAE class depends
on the climatic conditions in the area
where your MINI is used.
Approved oils are in SAE classes 5W-40 and 5W-30.<
These oils can be used at all ambient tem
-
peratures.
ProCarManuals.com
Page 113 of 165

111
OVERVIEW REPAIRSOPERATIONCONTROLS DATA INDEX
BRAKE FLUIDWarning lamp
The warning lamp comes on although the parking brake is
released:
The brake fluid level in the reservoir is too
low, refer to page
16. At the same time,
brake pedal travel may become signifi
-
cantly longer.
Have the system checked immediately.
Display of the malfunction described above in Canadian mod
-
els.
Adding brake fluid To add brake fluid or to determine and cor
-
rect the cause of brake fluid loss, please
consult your MINI Dealer. Your MINI Dealer
is familiar with the specifications for fac
-
tory-approved brake fluids,
DOT
4.
Brake fluid loss may result in extended
brake pedal travel. If this occurs, refer to
the information on page
96.
Brake fluid is hygroscopic, that is, it absorbs moisture from the air over
time.
In order to ensure the brake system's safety
and reliability, have the brake fluid
changed every two years by a MINI Dealer
or a workshop that has specially trained
personnel working in accordance with the
specifications of the MINI manufacturer,
also refer to the Service and Warranty
Information Booklet for US
models or the
Warranty and Service Guide Booklet for
Canadian models. Brake fluid is toxic and
also damages vehicle paintwork. Always
store brake fluid in tightly closed original
containers kept well away from the reach
of children.
Do not spill the brake fluid and do not fill
the brake fluid reservoir beyond the MAX
mark. The brake fluid could ignite upon
contact with hot engine parts and cause
serious burns.<
Comply with the applicable environ
-
mental laws regulating the disposal
of brake fluid.<
ProCarManuals.com
Page 115 of 165
113
OVERVIEW REPAIRSOPERATIONCONTROLS DATA INDEX
OBD SOCKET
CARING FOR YOUR VEHICLE
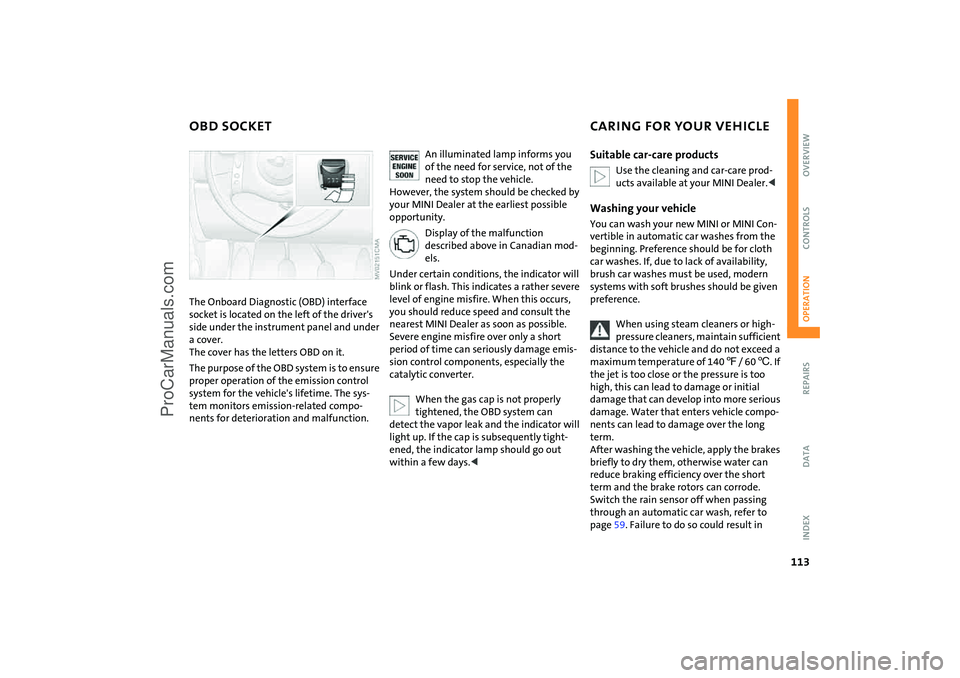
The Onboard Diagnostic (OBD) interface socket is located on the left of the driver's
side under the instrument panel and under
a cover.
The cover has the letters OBD on it.The purpose of the OBD system is to ensure
proper operation of the emission control
system for the vehicle's lifetime. The sys
-
tem monitors emission-related compo
-
nents for deterioration and malfunction.
An illuminated lamp informs you of the need for service, not of the
need to stop the vehicle.
However, the system should be checked by
your MINI Dealer at the earliest possible
opportunity.
Display of the malfunction described above in Canadian mod
-
els.
Under certain conditions, the indicator will
blink or flash. This indicates a rather severe
level of engine misfire. When this occurs,
you should reduce speed and consult the
nearest MINI Dealer as soon as possible.
Severe engine misfire over only a short
period of time can seriously damage emis
-
sion control components, especially the
catalytic converter.
When the gas cap is not properly tightened, the OBD system can
detect the vapor leak and the indicator will
light up. If the cap is subsequently tight
-
ened, the indicator lamp should go out
within a few days.<
Suitable car-care products
Use the cleaning and car-care prod
-
ucts available at your MINI Dealer.<
Washing your vehicleYou can wash your new MINI or MINI Con
-
vertible in automatic car washes from the
beginning. Preference should be for cloth
car washes. If, due to lack of availability,
brush car washes must be used, modern
systems with soft brushes should be given
preference.
When using steam cleaners or high-pressure cleaners, maintain sufficient
distance to the vehicle and do not exceed a
maximum temperature of 140
7/ 60
6. If
the jet is too close or the pressure is too
high, this can lead to damage or initial
damage that can develop into more serious
damage. Water that enters vehicle compo
-
nents can lead to damage over the long
term.
After washing the vehicle, apply the brakes
briefly to dry them, otherwise water can
reduce braking efficiency over the short
term and the brake rotors can corrode.
Switch the rain sensor off when passing
through an automatic car wash, refer to
page
59. Failure to do so could result in
ProCarManuals.com
Page 117 of 165
115
OVERVIEW REPAIRSOPERATIONCONTROLS DATA INDEX
CARING FOR YOUR VEHICLEner, heavy-duty grease remover, fuel or
similar>Wood paneling
*:
Please clean wood paneling and other
wood parts only with a damp cloth. Dry
off with a soft cloth>Safety belts:
Only clean using mild soap, leaving the
belts fitted.
Do not dry clean, as the fabric can be
destroyed.
Always roll up safety belts only when
dry.
Dirty safety belts prevent unrolling and
thus negatively affect safety>Floor carpets and floor mats
*:
If heavily soiled, clean using interior
cleaner. Floor mats can be removed to
allow the interior to be cleaned>Wiper blades:
Clean with soapy water. Replace wiper
blades twice a year, before and after the
cold season. This is particularly impor
-
tant on vehicles fitted with a rain sensor.Caring for leather* and imitation
leather The leather and imitation leather used by
the manufacturer of your MINI are high
quality products processed using state-of-
the-art methods and will retain their qual
-
ity level for many years if cared for prop
-
erly.Regular cleaning and care are necessary, as
dust and road dirt scratch in pores and
creases and lead to heavy wear as well as
premature brittleness of the leather and
imitation leather surface.
This is why you should use a cloth or vac
-
uum cleaner to remove dust on a regular
basis.Since dirt and oil slowly destroy the protec
-
tive layer of the leather and imitation
leather, a treatment with a leather care
product is necessary twice a year. This pre
-
serves the quality of the leather and pre
-
vents electrostatic charging.
Cleaning agents can contain hazard
-
ous or health-damaging substances.
For this reason, always observe the warn
-
ings on the package. For interior cleaning,
always open the doors or windows of the
vehicle.
Do not use any products that are not
intended for cleaning the vehicle.
vertible top largely depend on the proper
care and operation of the convertible top.
You should therefore observe the following
notes in particular:>Whenever possible, park your vehicle in
the shade to protect it from intense sun
-
light>Do not fold the convertible top when it is
wet, dirty or frozen; otherwise water
marks, moisture stains and chafing could
result>If the vehicle is parked in an enclosed
area for a longer period of time, make
sure that there is sufficient ventilation>Remove bird droppings immediately
because they have corrosive properties.
Never use spot removers, paint thin
-
ner, solvents, cleaning fuel or similar
since these products can destroy the rubber
seals and cause leaks.<
ProCarManuals.com