ECO mode MINI Coupe 2012 User Guide
[x] Cancel search | Manufacturer: MINI, Model Year: 2012, Model line: Coupe, Model: MINI Coupe 2012Pages: 218, PDF Size: 3.84 MB
Page 79 of 218
CONTROLSTechnology for driving comfort and safety
78
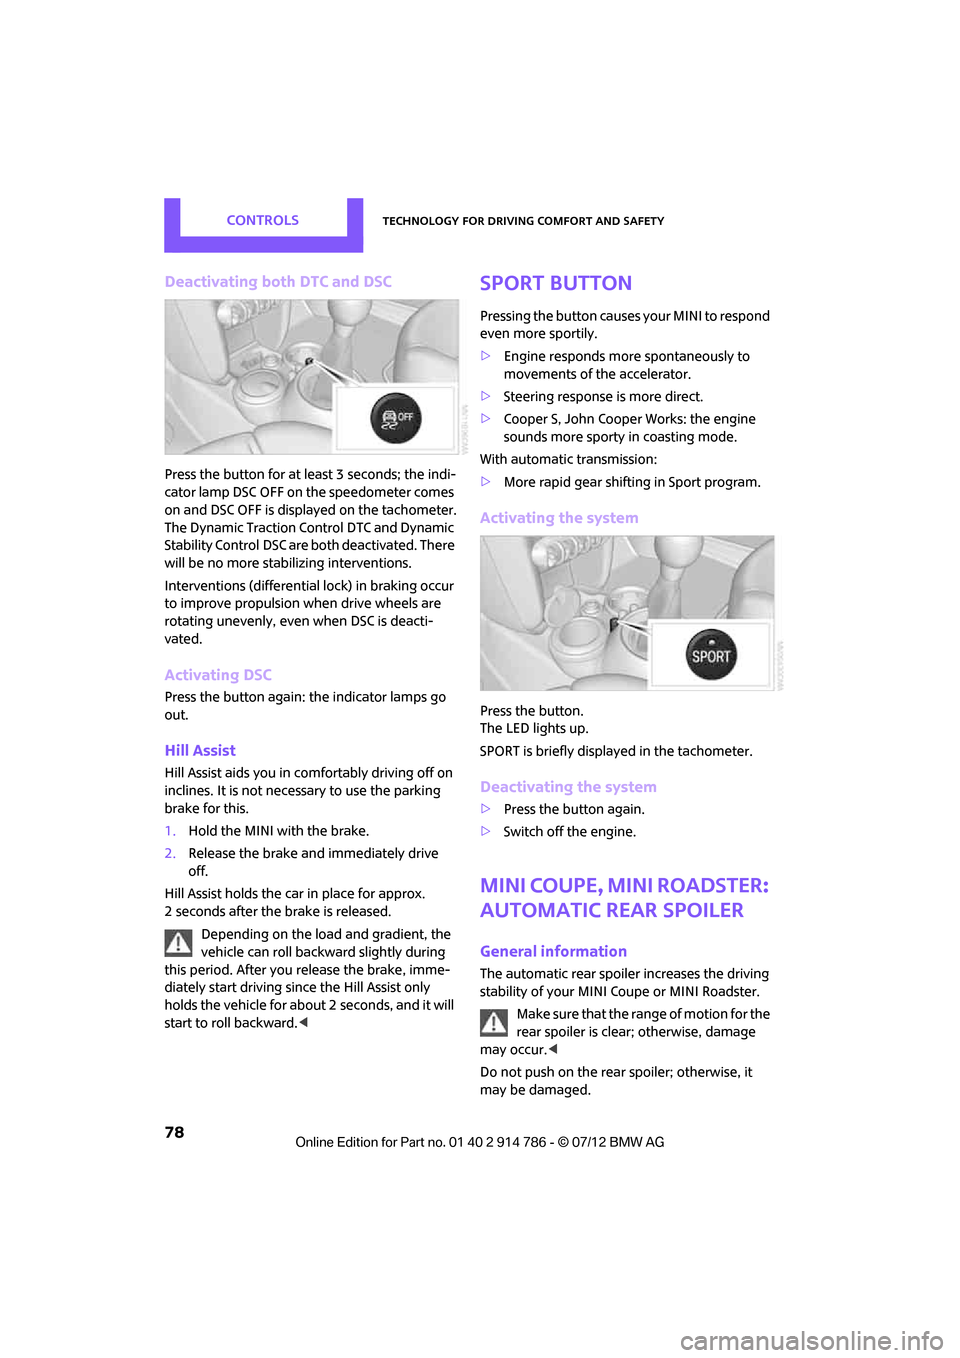
Deactivating both DTC and DSC
Press the button for at least 3 seconds; the indi-
cator lamp DSC OFF on the speedometer comes
on and DSC OFF is displayed on the tachometer.
The Dynamic Traction Control DTC and Dynamic
Stability Control DSC are both deactivated. There
will be no more stabilizing interventions.
Interventions (differential lock) in braking occur
to improve propulsion when drive wheels are
rotating unevenly, even when DSC is deacti-
vated.
Activating DSC
Press the button again: the indicator lamps go
out.
Hill Assist
Hill Assist aids you in co mfortably driving off on
inclines. It is not necessary to use the parking
brake for this.
1. Hold the MINI with the brake.
2. Release the brake and immediately drive
off.
Hill Assist holds the car in place for approx.
2 seconds after the brake is released. Depending on the load and gradient, the
vehicle can roll backwa rd slightly during
this period. After you release the brake, imme-
diately start driving since the Hill Assist only
holds the vehicle for about 2 seconds, and it will
start to roll backward. <
Sport button
Pressing the button causes your MINI to respond
even more sportily.
>Engine responds more spontaneously to
movements of the accelerator.
> Steering response is more direct.
> Cooper S, John Cooper Works: the engine
sounds more sporty in coasting mode.
With automatic transmission:
> More rapid gear shifting in Sport program.
Activating the system
Press the button.
The LED lights up.
SPORT is briefly displayed in the tachometer.
Deactivating the system
>Press the button again.
> Switch off the engine.
MINI Coupe, MINI Roadster:
automatic rear spoiler
General information
The automatic rear spoiler increases the driving
stability of your MINI Coupe or MINI Roadster.
Make sure that the ra nge of motion for the
rear spoiler is clear; otherwise, damage
may occur. <
Do not push on the rear spoiler; otherwise, it
may be damaged.
Online Edition for Part no. 01 40 2 914 786 - \251 07/12 BMW AG
Page 80 of 218
Technology for driving comfort and safetyCONTROLS
79
For information on car washing facilities and
care, refer to page161 and following.
Automatic mode
When starting the engine, a retracted rear
spoiler is in the automa tic mode. It is possible
that there will be some noise for a short time
when driving off because of the initialization of
the system.
Automatic extension:
When driving at speeds in excess of approx.
50 mph/80 km/h.
Automatic retraction:
When driving at speeds below 38 mph/60 km/h.
In the automatic mode, the rear spoiler
can not be retracted manually at speeds
greater than 37 mph/60 km/h. <
Manual mode
The manual mode can, for example, be used
when cleaning the rear spoiler while the ignition
is on or the engine is running. LED on switch is
on.
If the rear spoiler stops in an intermediate
position after repeat edly being extended
and retracted, then the system has become
overheated. After a short cooling down time, the
rear spoiler can again be operated.<
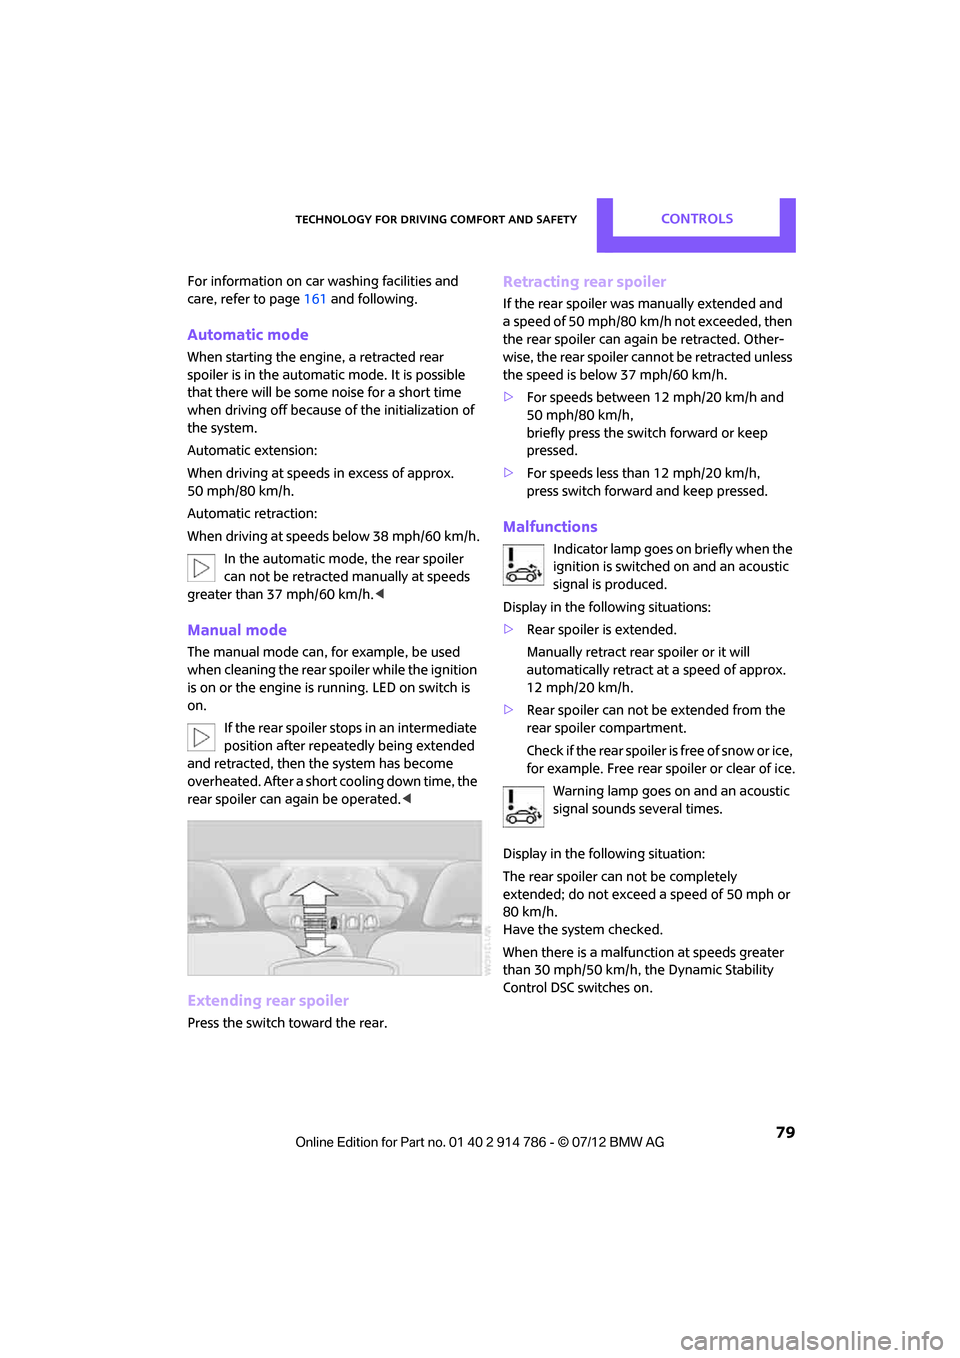
Extending rear spoiler
Press the switch toward the rear.
Retracting rear spoiler
If the rear spoiler was manually extended and
a speed of 50 mph/80 km/h not exceeded, then
the rear spoiler can again be retracted. Other-
wise, the rear spoiler cannot be retracted unless
the speed is below 37 mph/60 km/h.
> For speeds between 12 mph/20 km/h and
50 mph/80 km/h,
briefly press the switch forward or keep
pressed.
> For speeds less than 12 mph/20 km/h,
press switch forward and keep pressed.
Malfunctions
Indicator lamp goes on briefly when the
ignition is switched on and an acoustic
signal is produced.
Display in the following situations:
> Rear spoiler is extended.
Manually retract rear spoiler or it will
automatically retract at a speed of approx.
12 mph/20 km/h.
> Rear spoiler can not be extended from the
rear spoiler compartment.
Check if the rear spoiler is free of snow or ice,
for example. Free rear spoiler or clear of ice.
Warning lamp goes on and an acoustic
signal sounds several times.
Display in the following situation:
The rear spoiler can not be completely
extended; do not exceed a speed of 50 mph or
80 km/h.
Have the system checked.
When there is a malfunction at speeds greater
than 30 mph/50 km/h, the Dynamic Stability
Control DSC switches on.
Online Edition for Part no. 01 40 2 914 786 - \251 07/12 BMW AG
Page 96 of 218
ClimateCONTROLS
95
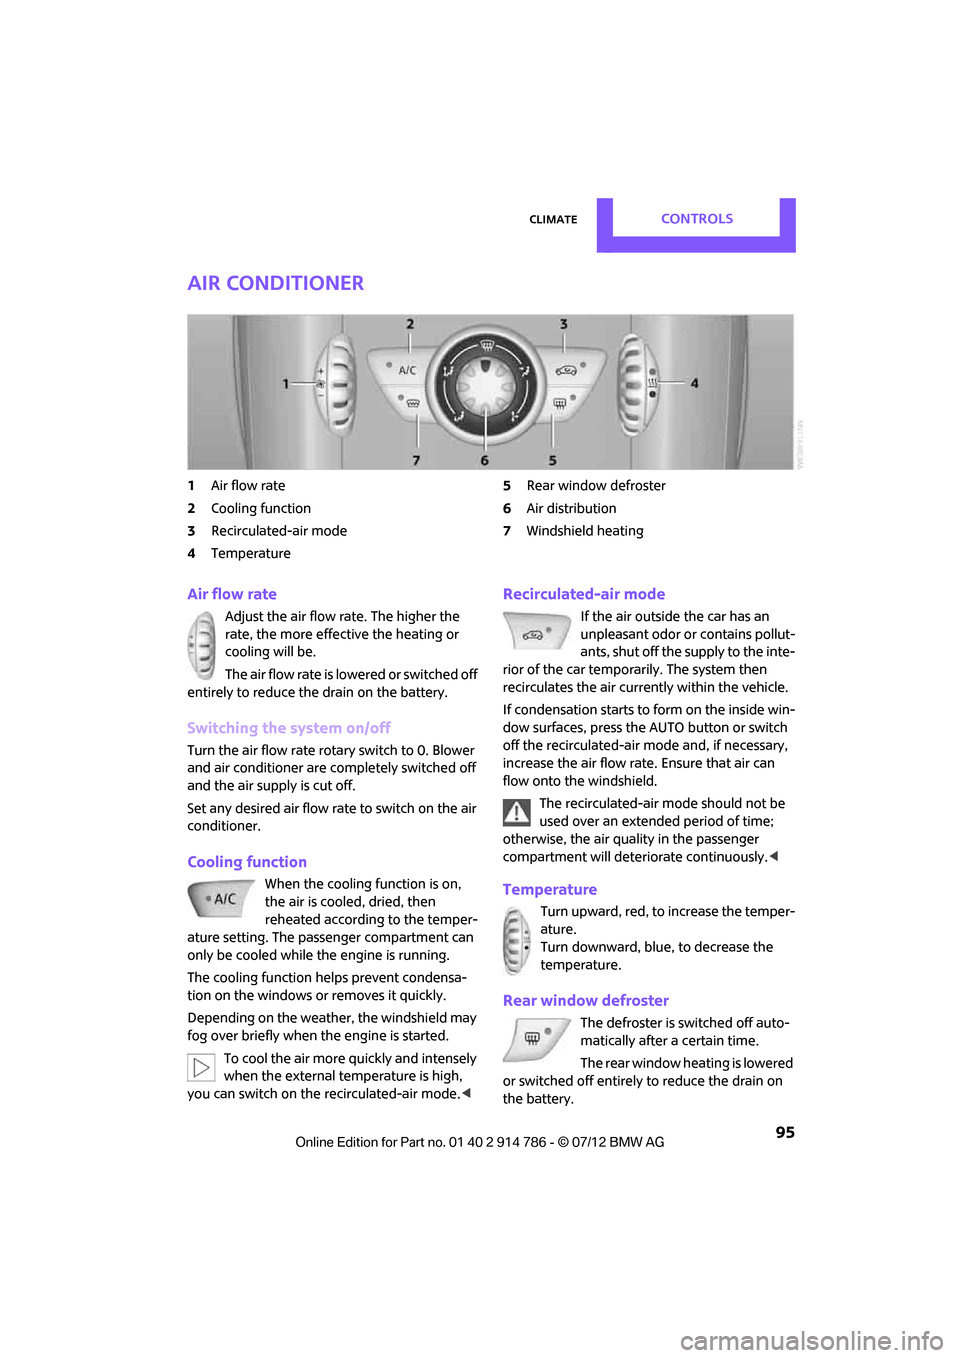
Air conditioner
1Air flow rate
2 Cooling function
3 Recirculated-air mode
4 Temperature 5
Rear window defroster
6 Air distribution
7 Windshield heating
Air flow rate
Adjust the air flow rate. The higher the
rate, the more effective the heating or
cooling will be.
The air flow rate is lowered or switched off
entirely to reduce the drain on the battery.
Switching the system on/off
Turn the air flow rate rota ry switch to 0. Blower
and air conditioner are co mpletely switched off
and the air supply is cut off.
Set any desired air flow rate to switch on the air
conditioner.
Cooling function
When the cooling function is on,
the air is cooled, dried, then
reheated according to the temper-
ature setting. The passenger compartment can
only be cooled while the engine is running.
The cooling function helps prevent condensa-
tion on the windows or removes it quickly.
Depending on the weather, the windshield may
fog over briefly when the engine is started.
To cool the air more quickly and intensely
when the external temperature is high,
you can switch on the recirculated-air mode.<
Recirculated-air mode
If the air outside the car has an
unpleasant odor or contains pollut-
ants, shut off the supply to the inte-
rior of the car temporarily. The system then
recirculates the air curre ntly within the vehicle.
If condensation starts to form on the inside win-
dow surfaces, press the AUTO button or switch
off the recirculated-air mode and, if necessary,
increase the air flow ra te. Ensure that air can
flow onto the windshield.
The recirculated-air mode should not be
used over an extended period of time;
otherwise, the air quality in the passenger
compartment will deteriorate continuously. <
Temperature
Turn upward, red, to increase the temper-
ature.
Turn downward, blue, to decrease the
temperature.
Rear window defroster
The defroster is switched off auto-
matically after a certain time.
The rear window he ating is lowered
or switched off entirely to reduce the drain on
the battery.
Online Edition for Part no. 01 40 2 914 786 - \251 07/12 BMW AG
Page 98 of 218
ClimateCONTROLS
97
Air flow rate, manual
Press the – button to reduce air flow. Press
the + button to increase it.
You can reactivate the automatic mode
for the air flow rate with the AUTO button.
The air flow rate is lowered or switched off
entirely to reduce the drain on the battery. The
display remains the same.
Switching the system on/off
Reduce the air flow by pressing the – button
repeatedly until the system is switched off. All
displays go out.
Press the AUTO button to switch the automatic
climate control back on.
AUTO program
The AUTO program adjusts the air
distribution to the windshield and
side windows, toward the upper body area and
into the footwell for you. The air flow rate and
your temperature specific ations will be adapted
to outside influences in accordance with sea-
sonal changes, e.g. sunlight.
The cooling function is automatically switched
on along with the AUTO program.
The program is switched of f if the air distribution
is manually adjusted or if the button is pressed
again.
Convertible Program
If the convertible top is open, the Convertible
Program is activated. During the Convertible
Program, the automatic cl imate control is opti-
mized for driving with the convertible top down.
Furthermore, with increasing vehicle speed, the
airflow is also increased.
If attaching the wind reflector, the perfor-
mance of the Convertible Program can be
significantly improved.<
Recirculated-air mode
If there are odors or pollutants in
the outside air, the supply of out-
side air can be shut off. The system
then recirculates the air currently within the
vehicle.
If condensation starts to form on the inside
window surfaces, press the AUTO button or
switch off the recirculated-air mode and, if
necessary, increase the air flow rate. Ensure that
air can flow onto the windshield.
The recirculated-air mode should not be
used over an extended period of time;
otherwise, the air quality in the passenger
compartment will deteriorate continuously. <
Maximum cooling
The automatic climate control
switches to the lowest tempera-
ture, high airflow and the recircu-
lated-air mode.
For maximum cooling, open the air vents for the
upper body area.
The air is cooled as quickly as possible:
> For an outside temperature of more than
327 /06
> While the motor is running.
Air distribution, manual
The flow of air is directed to the
windows, to the upper body area or
to the footwell as selected.
You can switch the automatic air
distribution back on by pressing the AUTO
button.
Temperature
Set the desired temperature individually.
The automatic climat e control achieves
this temperature as quickly as possible
regardless of the season, using maximum
cooling or heating power if necessary, and then
maintains it.
Online Edition for Part no. 01 40 2 914 786 - \251 07/12 BMW AG
Page 107 of 218
DRIVING TIPSThings to remember when driving
106
Things to remember when driving
Vehicle equipment
In this chapter, all production, country, and
optional equipment that is offered in the model
range is described. Equipment is also described
that is not available because of, for example,
selected options or coun try version. This also
applies to safety relate d functions and systems.
Break-in period
Moving parts need breaking-in time to adjust to
each other. Please follow the instructions below
in order to achieve the optimal service life and
economy of operation for your vehicle.
Engine and differential
Always obey all official speed limits.
Up to 1,200 miles/2,000 km
Drive at varying engine and road speeds, but do
not exceed the following:
> Gasoline engine
4,500 rpm or 100 mph/160 km/h
Avoid full-throttle operation and use of the
transmission's kickdown mode.
After driving 1,200 miles/2,000 km
Engine and vehicle speeds can be gradually
increased.
Tires
Due to technical factors associated with their
manufacture, tires do not achieve their full
traction potential until af ter an initial break-in
period. Therefore, drive cautiously during the
first 200 miles/300 km.
Brake system
Brakes require an initial break-in period of
approx. 300 miles/500 km to achieve optimized contact and wear patterns between brake pads
and rotors. Drive cautiously
during this break-in
period.
Clutch
The function of the clutch reaches its optimal
level only after a distan ce driven of approx.
300 miles/500 km. During this break-in period,
engage the clutch gently.
Following part replacement
The same break-in procedures should be
observed if any of the components mentioned
above have to be renewed in the course of the
vehicle's operating life.
General driving notes
Ground clearance
When driving, ensure that there is suffi-
cient ground clearance, such as when
entering underground parking garages, driving
over curbs or when driving in winter; otherwise
damage to the vehicle may result. <
Close the tailgate
Only drive with the tailgate closed. Failure
to do so may endanger passengers or
other road users or may damage the vehicle in
the event of an accident or a braking and
evasive maneuver. In a ddition, exhaust gas may
flow into the passenger compartment. <
If special circumstances make it absolutely
necessary to drive with the tailgate open:
1. Coupe: close all windows.
2. Switch off the recirculated-air mode and
switch the airflow contro l of the heating, air
conditioner, or automa tic climate control to
high, refer to page 95 or97.
Online Edition for Part no. 01 40 2 914 786 - \251 07/12 BMW AG
Page 113 of 218
DRIVING TIPSThings to remember when driving
112
ger the car's occupants, for example if sudden
braking or swerves are necessary.
Do not exceed the approved gross vehicle
weight and axle loads, page 203; otherwise, the
operating safety of the vehicle is no longer
assured and the vehicle will not be in compli-
ance with the construction and use regulations.
Heavy or hard objects should not be carried
loose inside the car, since they could be thrown
around, for example as a result of heavy braking,
sudden swerves, etc., and endanger the occu-
pants. Do not secure cargo using the fastening
points for the tether strap, page 52; they may
become damaged. <
Rear luggage rack
A special rack system is available as an option for
your MINI. Please note the information con-
tained in the assembly instructions.
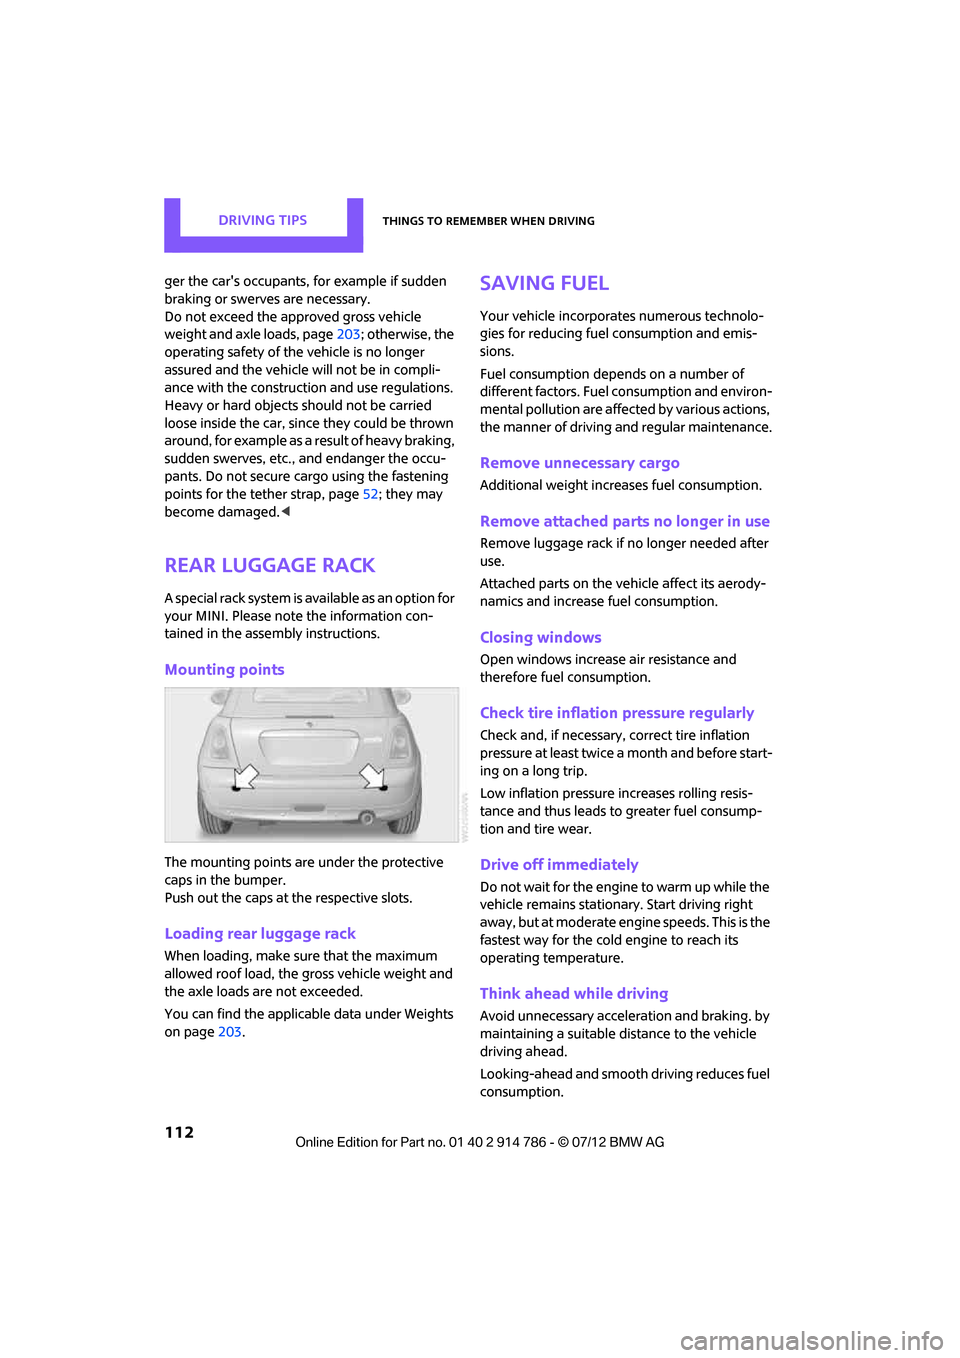
Mounting points
The mounting points are under the protective
caps in the bumper.
Push out the caps at the respective slots.
Loading rear luggage rack
When loading, make su re that the maximum
allowed roof load, the gross vehicle weight and
the axle loads are not exceeded.
You can find the applicable data under Weights
on page 203.
Saving fuel
Your vehicle incorporates numerous technolo-
gies for reducing fuel consumption and emis-
sions.
Fuel consumption depends on a number of
different factors. Fuel consumption and environ-
mental pollution are affect ed by various actions,
the manner of driving and regular maintenance.
Remove unnecessary cargo
Additional weight increases fuel consumption.
Remove attached parts no longer in use
Remove luggage rack if no longer needed after
use.
Attached parts on the ve hicle affect its aerody-
namics and increase fuel consumption.
Closing windows
Open windows increase air resistance and
therefore fuel consumption.
Check tire inflation pressure regularly
Check and, if necessary, correct tire inflation
pressure at least twice a month and before start-
ing on a long trip.
Low inflation pressure increases rolling resis-
tance and thus leads to greater fuel consump-
tion and tire wear.
Drive off immediately
Do not wait for the engine to warm up while the
vehicle remains stationary. Start driving right
away, but at moderate engi ne speeds. This is the
fastest way for the cold engine to reach its
operating temperature.
Think ahead while driving
Avoid unnecessary accelera tion and braking. by
maintaining a suitable di stance to the vehicle
driving ahead.
Looking-ahead and smooth driving reduces fuel
consumption.
Online Edition for Part no. 01 40 2 914 786 - \251 07/12 BMW AG
Page 122 of 218
Radio MINI Boost CDENTERTAINMENT
121
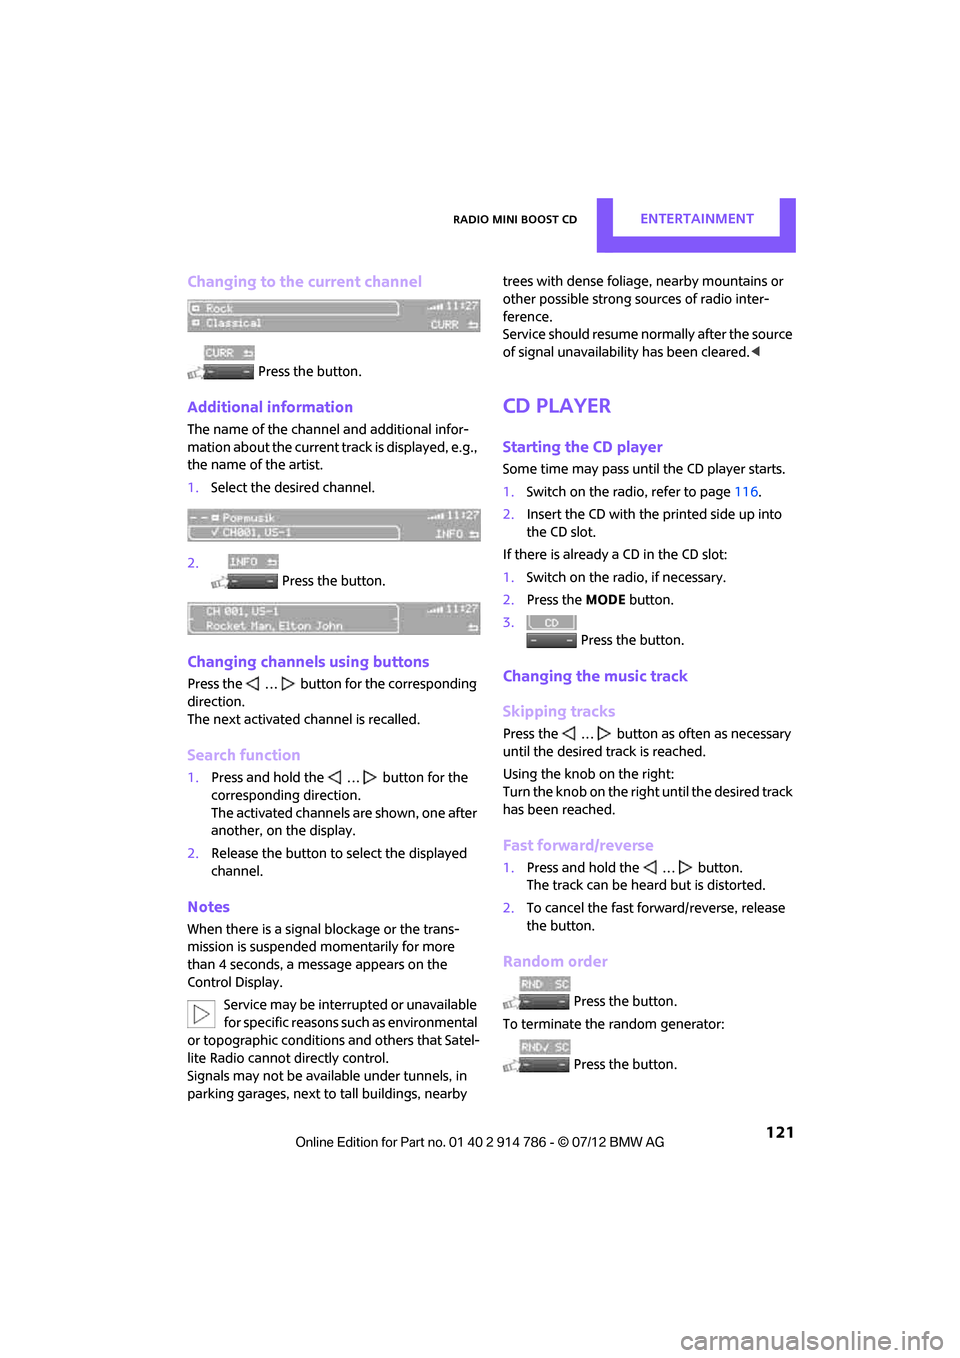
Changing to the current channel
Press the button.
Additional information
The name of the channel and additional infor-
mation about the current track is displayed, e.g.,
the name of the artist.
1.Select the desired channel.
2. Press the button.
Changing channels using buttons
Press the … button for the corresponding
direction.
The next activated channel is recalled.
Search function
1.Press and hold the … button for the
corresponding direction.
The activated channels are shown, one after
another, on the display.
2. Release the button to select the displayed
channel.
Notes
When there is a signal blockage or the trans-
mission is suspended momentarily for more
than 4 seconds, a mess age appears on the
Control Display.
Service may be interrupted or unavailable
for specific reasons such as environmental
or topographic conditions and others that Satel-
lite Radio cannot directly control.
Signals may not be available under tunnels, in
parking garages, next to tall buildings, nearby trees with dense foliage, nearby mountains or
other possible strong so
urces of radio inter-
ference.
Service should resume no rmally after the source
of signal unavailabil ity has been cleared.<
CD player
Starting the CD player
Some time may pass until the CD player starts.
1.Switch on the radio, refer to page 116.
2. Insert the CD with the printed side up into
the CD slot.
If there is already a CD in the CD slot:
1. Switch on the radio, if necessary.
2. Press the MODEbutton.
3. Press the button.
Changing the music track
Skipping tracks
Press the … button as often as necessary
until the desired track is reached.
Using the knob on the right:
Turn the knob on the right until the desired track
has been reached.
Fast forward/reverse
1.Press and hold the … button.
The track can be heard but is distorted.
2. To cancel the fast fo rward/reverse, release
the button.
Random order
Press the button.
To terminate the random generator:
Press the button.
Online Edition for Part no. 01 40 2 914 786 - \251 07/12 BMW AG
Page 144 of 218
Wheels and tiresMOBILITY
143
Wheels and tires
Vehicle equipment
In this chapter, all production, country, and
optional equipment that is offered in the model
range is described. Equipment is also described
that is not available because of, for example,
selected options or count ry version. This also
applies to safety related functions and systems.
Tire inflation pressures
Information for your safety
It is not merely the tires' service life, but also
driving comfort and, to a great extent, driving
safety that depend on the condition of the tires
and the maintenance of the specified tire pres-
sure.
Checking pressure
Check the tire inflatio n pressure regularly
and correct it, if nece ssary: at least twice a
month and before starting long trips. If you fail
to observe this precaution you may be driving
on tires with incorrect tire pressures, a condition
that can not only compromise your vehicle's
driving stability, but also lead to tire damage and
the risk of an accident. Do not drive with
deflated, i.e. flat tires, except when using run-
flat tires. A flat tire will seriously impair your
vehicle's handling and braking response.
Attempts to drive on a flat tire can lead to loss of
control over the vehicle. <
Check the tire inflation pressures only on cold
tires. This means after a maximum of 1.25 miles/
2 km driving or when the vehicle has been
parked for at least 2 hours. When tires are warm,
the tire inflation pressure is higher. After adjusting the tire inflation pressure,
reinitialize the Flat Tire Monitor, page 80,
or reset the Tire Pressure Monitor, page 82.<
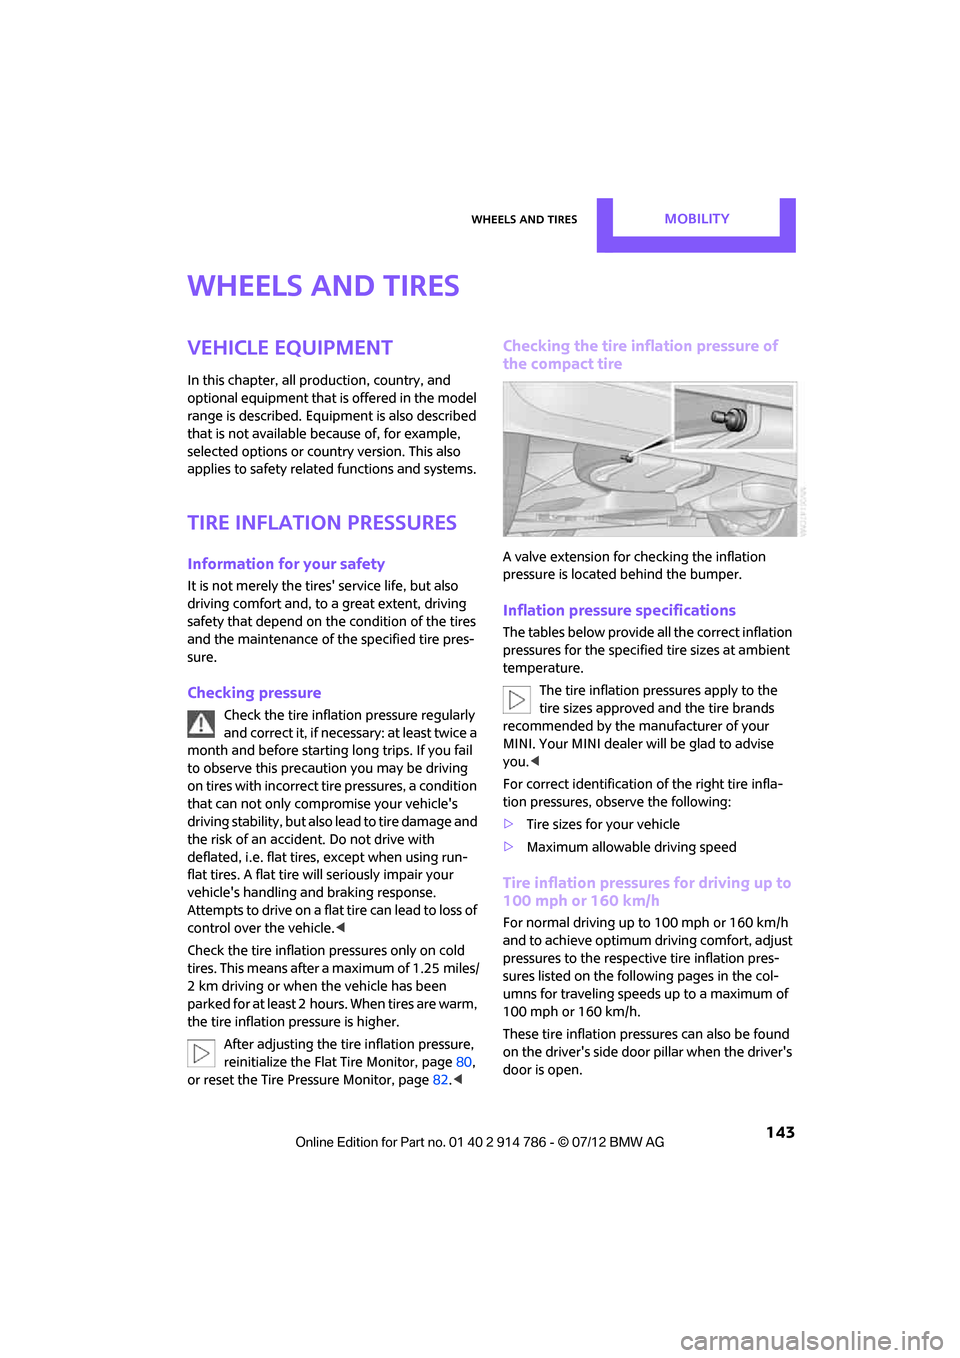
Checking the tire inflation pressure of
the compact tire
A valve extension for checking the inflation
pressure is located behind the bumper.
Inflation pressure specifications
The tables below provide all the correct inflation
pressures for the specifie d tire sizes at ambient
temperature.
The tire inflation pressures apply to the
tire sizes approved and the tire brands
recommended by the manufacturer of your
MINI. Your MINI dealer will be glad to advise
you. <
For correct identification of the right tire infla-
tion pressures, observe the following:
> Tire sizes for your vehicle
> Maximum allowable driving speed
Tire inflation pressures for driving up to
100 mph or 160 km/h
For normal driving up to 100 mph or 160 km/h
and to achieve optimum dr iving comfort, adjust
pressures to the respective tire inflation pres-
sures listed on the foll owing pages in the col-
umns for traveling speeds up to a maximum of
100 mph or 160 km/h.
These tire inflation pre ssures can also be found
on the driver's side door pillar when the driver's
door is open.
Online Edition for Part no. 01 40 2 914 786 - \251 07/12 BMW AG
Page 154 of 218
Wheels and tiresMOBILITY
153
New wheels and tires
Have new wheels and tires mounted only
by your MINI dealer or a specialized tire
shop that has specially trained personnel
working in accordance with the specifications of
the MINI manufacturer. If this work is not carried
out properly, there is a danger of subsequent
damage and related safety hazards. Make sure
that the new wheels are balanced. <
Retreaded tires
The manufacturer of your MINI recom-
mends that you avoid using retreaded
tires, as this could impair driving safety. The
causes for this include potentially different tire
casing structures and of ten wide variations in
tire age, which can result in a limited service
life.<
Correct wheels and tires
The manufacturer of your MINI recom-
mends mounting only wheels and tires
that it has specifically approved for use on your
particular model. Alth ough other wheels and
tires may theoretically have the same dimen-
sions, variations in factors such as manufac-
turing tolerances can re sult in contact between
tire and bodywork, ultimately leading to serious
accidents. The manufacturer of your MINI can-
not evaluate non-approved wheels and tires to
determine if they are su ited for use, and there-
fore cannot ensure the operating safety of the
vehicle if they are mounted. <
Your MINI dealer will be glad to inform you
about the correct wheel an d tire combination for
your vehicle.
The correct combination of wheels and tires is
also necessary to ensure reliable operation of
various vehicle systems such as ABS and DSC.
To maintain good handling and vehicle
response, use only tires of a single brand and
tread configuration. After a tire has been
damaged, mount the previous wheel and tire
combination again as soon as possible.
Wheels with Tire Pressure Monitor TPM
electronics
When mounting new tires or changing over from
summer to winter tires, or vice versa, only use
wheels with TPM electronics; otherwise, the Tire
Pressure Monitor may not be able to detect a
puncture, refer to page 83. Your MINI dealer will
be glad to advise you.
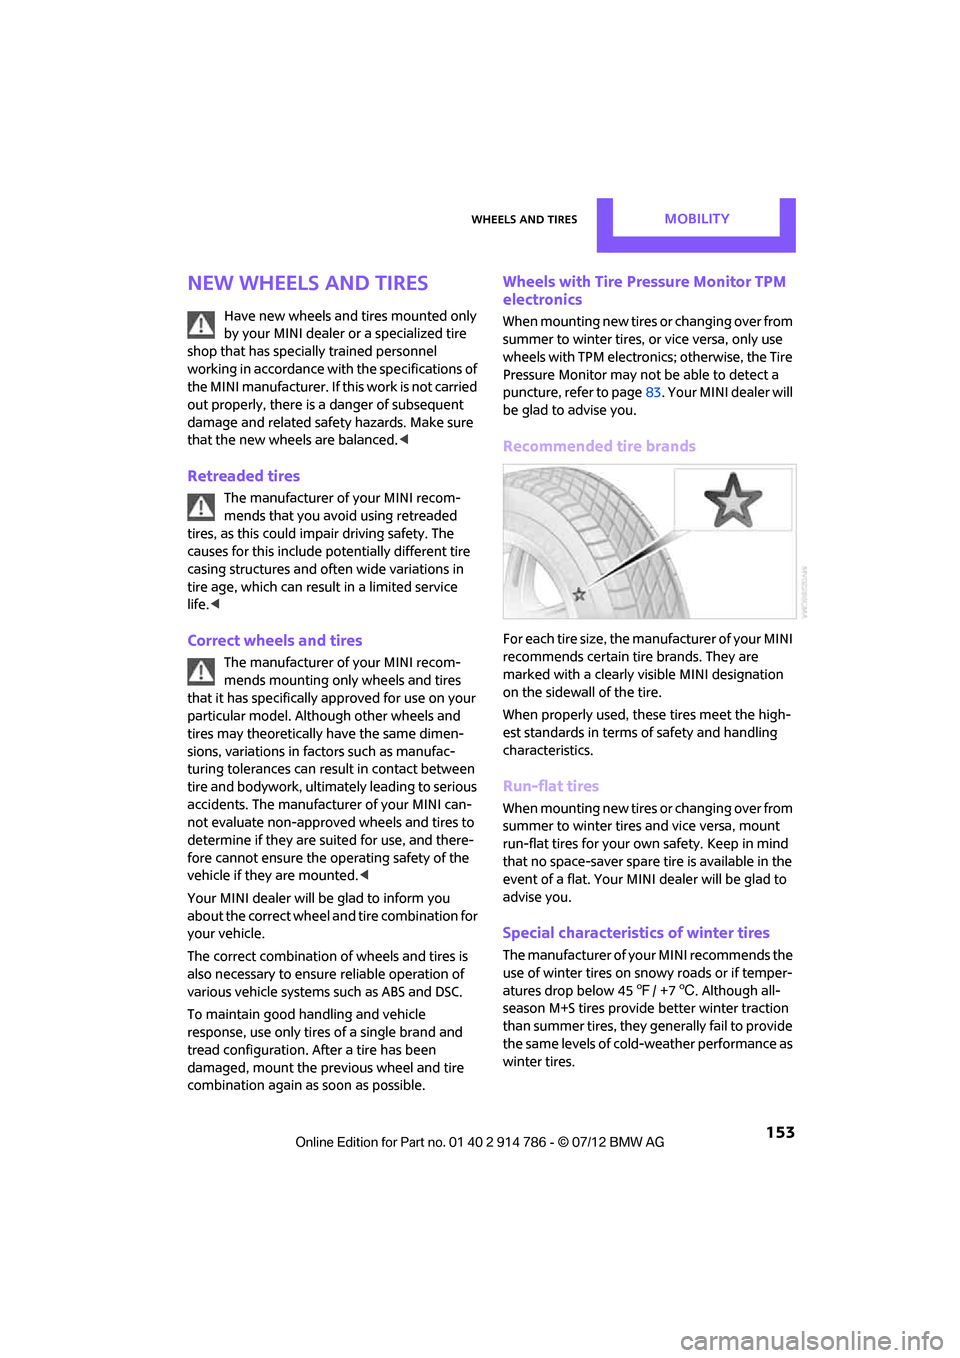
Recommended tire brands
For each tire size, the manufacturer of your MINI
recommends certain tire brands. They are
marked with a clearly visible MINI designation
on the sidewall of the tire.
When properly used, these tires meet the high-
est standards in terms of safety and handling
characteristics.
Run-flat tires
When mounting new tires or changing over from
summer to winter tires and vice versa, mount
run-flat tires for your ow n safety. Keep in mind
that no space-saver spare tire is available in the
event of a flat. Your MINI dealer will be glad to
advise you.
Special characteristics of winter tires
The manufacturer of your MINI recommends the
use of winter tires on snowy roads or if temper-
atures drop below 45 7/ +7 6. Although all-
season M+S tires provide better winter traction
than summer tires, they generally fail to provide
the same levels of cold-weather performance as
winter tires.
Online Edition for Part no. 01 40 2 914 786 - \251 07/12 BMW AG
Page 160 of 218
MaintenanceMOBILITY
159
Maintenance
Vehicle equipment
In this chapter, all production, country, and
optional equipment that is offered in the model
range is described. Equipment is also described
that is not available because of, for example,
selected options or count ry version. This also
applies to safety related functions and systems.
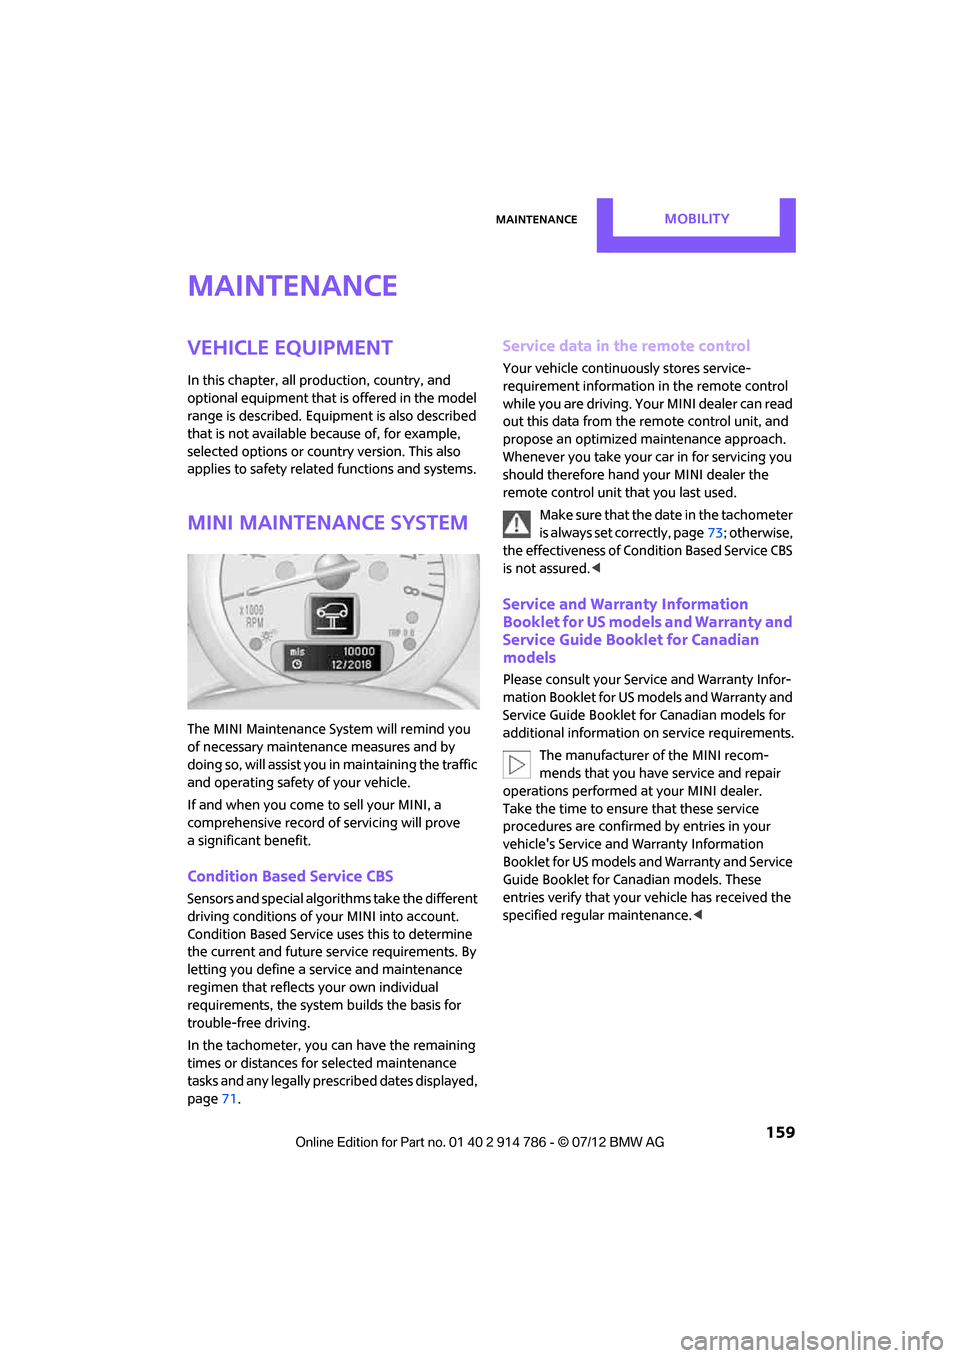
MINI Maintenance System
The MINI Maintenance System will remind you
of necessary maintenance measures and by
doing so, will assist you in maintaining the traffic
and operating safety of your vehicle.
If and when you come to sell your MINI, a
comprehensive record of servicing will prove
a significant benefit.
Condition Based Service CBS
Sensors and special algori thms take the different
driving conditions of your MINI into account.
Condition Based Service uses this to determine
the current and future se rvice requirements. By
letting you define a service and maintenance
regimen that reflects your own individual
requirements, the system builds the basis for
trouble-free driving.
In the tachometer, you can have the remaining
times or distances for selected maintenance
tasks and any legally prescribed dates displayed,
page 71.
Service data in the remote control
Your vehicle continuously stores service-
requirement info rmation in the remote control
while you are driving. Your MINI dealer can read
out this data from the remote control unit, and
propose an optimized maintenance approach.
Whenever you take your car in for servicing you
should therefore hand your MINI dealer the
remote control unit that you last used.
Make sure that the date in the tachometer
is always set correctly, page 73; otherwise,
the effectiveness of Condition Based Service CBS
is not assured. <
Service and Warranty Information
Booklet for US models and Warranty and
Service Guide Booklet for Canadian
models
Please consult your Service and Warranty Infor-
mation Booklet for US models and Warranty and
Service Guide Booklet for Canadian models for
additional information on service requirements.
The manufacturer of the MINI recom-
mends that you have service and repair
operations performed at your MINI dealer.
Take the time to ensure that these service
procedures are confirmed by entries in your
vehicle's Service and Warranty Information
Booklet for US models and Warranty and Service
Guide Booklet for Canadian models. These
entries verify that your vehicle has received the
specified regula r maintenance.<
Online Edition for Part no. 01 40 2 914 786 - \251 07/12 BMW AG