key MINI Coupe 2014 (Mini Connected) User Guide
[x] Cancel search | Manufacturer: MINI, Model Year: 2014, Model line: Coupe, Model: MINI Coupe 2014Pages: 288, PDF Size: 6.72 MB
Page 116 of 288
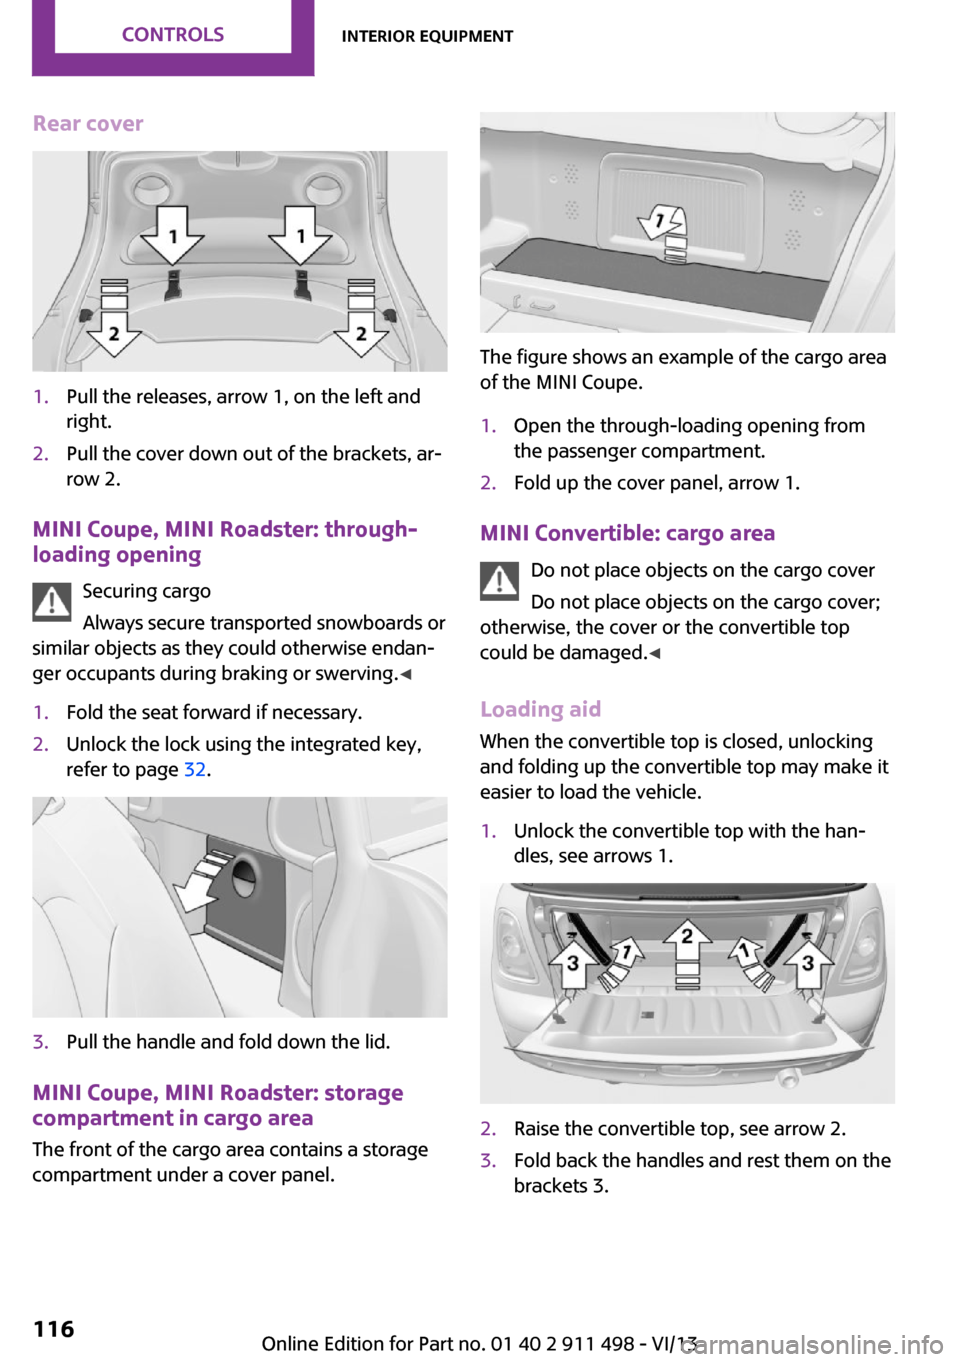
Rear cover1.Pull the releases, arrow 1, on the left and
right.2.Pull the cover down out of the brackets, ar‐
row 2.
MINI Coupe, MINI Roadster: through- loading opening
Securing cargo
Always secure transported snowboards or
similar objects as they could otherwise endan‐
ger occupants during braking or swerving. ◀
1.Fold the seat forward if necessary.2.Unlock the lock using the integrated key,
refer to page 32.3.Pull the handle and fold down the lid.
MINI Coupe, MINI Roadster: storage
compartment in cargo area
The front of the cargo area contains a storage
compartment under a cover panel.
The figure shows an example of the cargo area
of the MINI Coupe.
1.Open the through-loading opening from
the passenger compartment.2.Fold up the cover panel, arrow 1.
MINI Convertible: cargo area
Do not place objects on the cargo cover
Do not place objects on the cargo cover;
otherwise, the cover or the convertible top
could be damaged. ◀
Loading aid When the convertible top is closed, unlocking
and folding up the convertible top may make it
easier to load the vehicle.
1.Unlock the convertible top with the han‐
dles, see arrows 1.2.Raise the convertible top, see arrow 2.3.Fold back the handles and rest them on the
brackets 3.Seite 116ControlsInterior equipment116
Online Edition for Part no. 01 40 2 911 498 - VI/13
Page 117 of 288
Enlarging the cargo area
When the convertible top is closed, the cargo
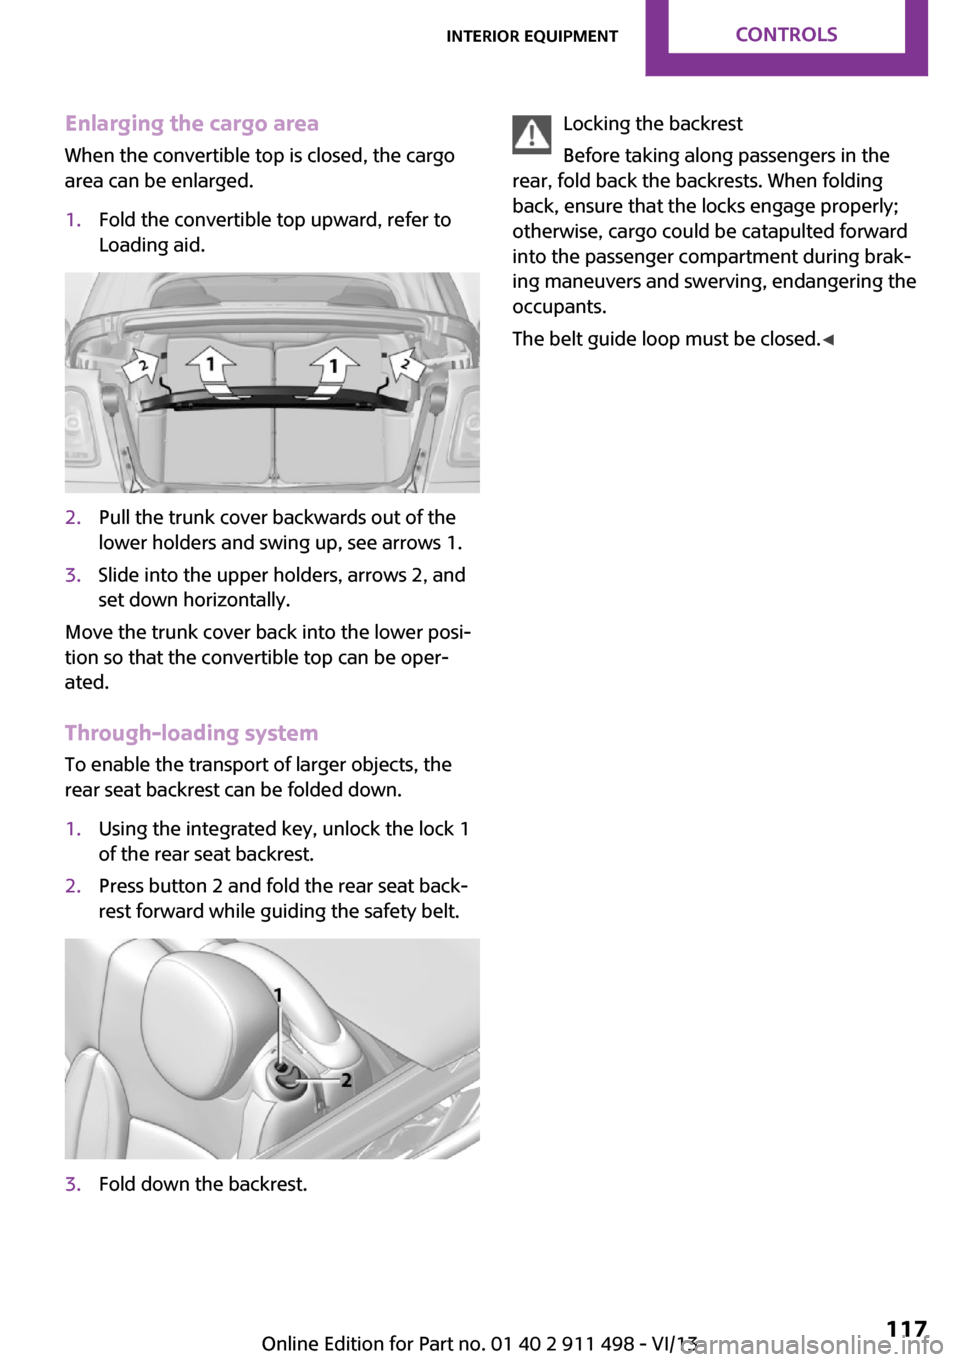
area can be enlarged.1.Fold the convertible top upward, refer to
Loading aid.2.Pull the trunk cover backwards out of the
lower holders and swing up, see arrows 1.3.Slide into the upper holders, arrows 2, and
set down horizontally.
Move the trunk cover back into the lower posi‐
tion so that the convertible top can be oper‐
ated.
Through-loading system
To enable the transport of larger objects, the
rear seat backrest can be folded down.
1.Using the integrated key, unlock the lock 1
of the rear seat backrest.2.Press button 2 and fold the rear seat back‐
rest forward while guiding the safety belt.3.Fold down the backrest.Locking the backrest
Before taking along passengers in the
rear, fold back the backrests. When folding
back, ensure that the locks engage properly;
otherwise, cargo could be catapulted forward
into the passenger compartment during brak‐
ing maneuvers and swerving, endangering the
occupants.
The belt guide loop must be closed. ◀Seite 117Interior equipmentControls117
Online Edition for Part no. 01 40 2 911 498 - VI/13
Page 119 of 288
MINI Convertible, MINI Roadster:
locking
Lock the glove compartment using the
integrated key of the remote control, refer to
page 32.
Ventilation
Depending on the vehicle's equipment, the
glove compartment can be ventilated and, if
the cooling function is switched on, cooled.
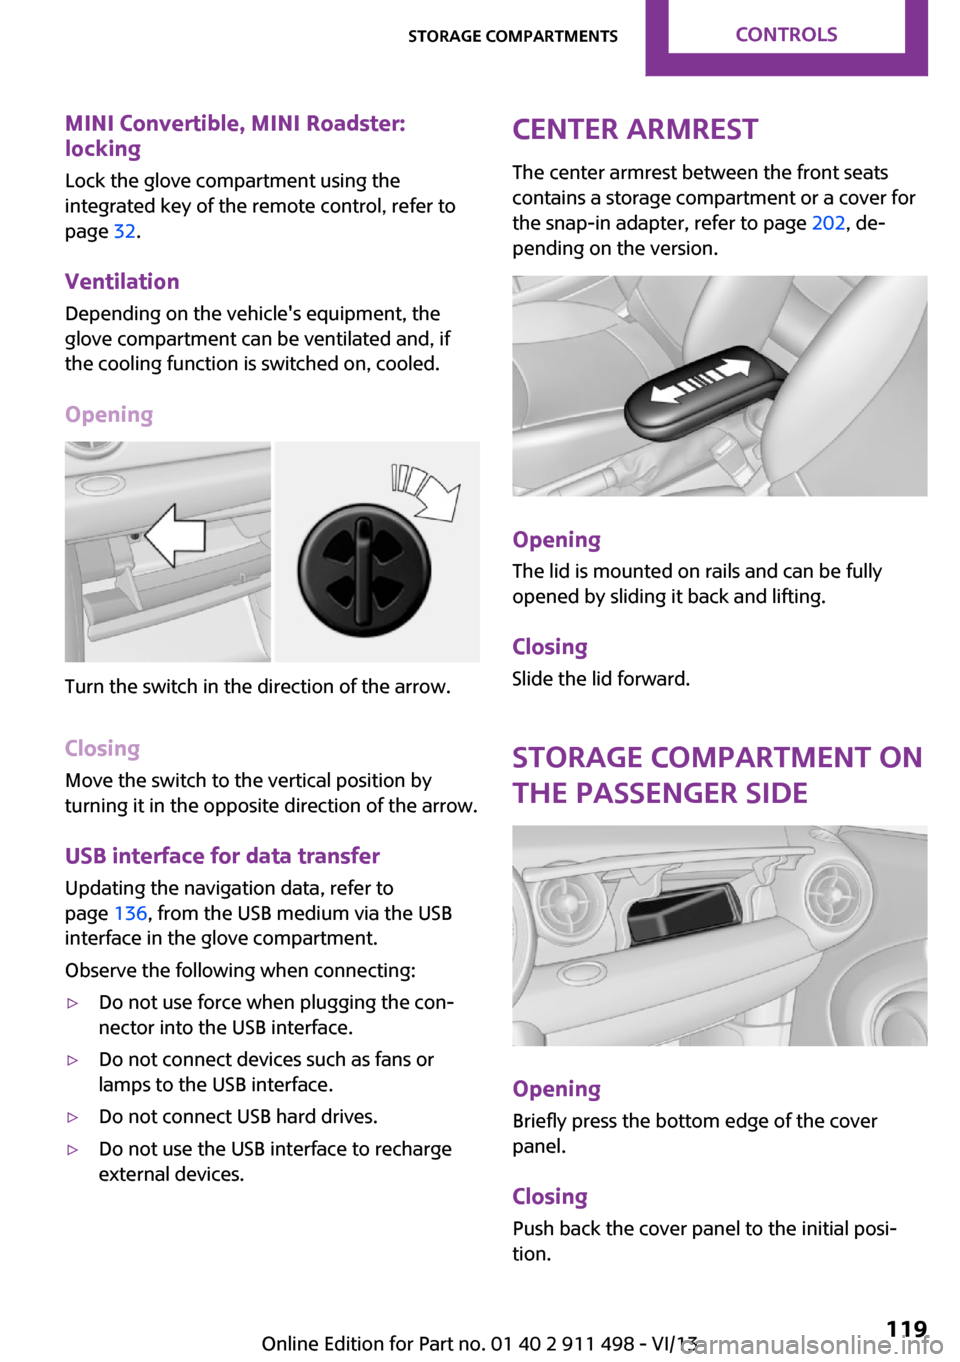
Opening
Turn the switch in the direction of the arrow.
ClosingMove the switch to the vertical position by
turning it in the opposite direction of the arrow.
USB interface for data transfer
Updating the navigation data, refer to
page 136, from the USB medium via the USB
interface in the glove compartment.
Observe the following when connecting:
▷Do not use force when plugging the con‐
nector into the USB interface.▷Do not connect devices such as fans or
lamps to the USB interface.▷Do not connect USB hard drives.▷Do not use the USB interface to recharge
external devices.Center armrest
The center armrest between the front seats
contains a storage compartment or a cover for
the snap-in adapter, refer to page 202, de‐
pending on the version.
Opening
The lid is mounted on rails and can be fully
opened by sliding it back and lifting.
ClosingSlide the lid forward.
Storage compartment on
the passenger side
Opening
Briefly press the bottom edge of the cover
panel.
ClosingPush back the cover panel to the initial posi‐
tion.
Seite 119Storage compartmentsControls119
Online Edition for Part no. 01 40 2 911 498 - VI/13
Page 142 of 288
Editing the destination
Destinations can be edited, for example to
change the house number of an existing entry.1."Navigation"2."Last destinations"3.Highlight the destination.4.Open "Options".5."Edit destination"
Deleting the last destinations
1."Navigation"2."Last destinations"3.Highlight the destination.4.Open "Options".5."Delete entry" or "Delete all last
destinations"
Special destinations
General information
Even with the latest navigation data, informa‐
tion on individual special destinations may
have changed; for example, gas stations might
not be in operation.
Opening the search for specialdestinations
Selection of special destinations, such as hotels
or tourist attractions.
1."Navigation"2."Points of Interest"3.Select the search function.
A-Z search
1."A-Z search"2."Town/City"3.Select or enter the town/city.4."Category"5.Select the category.6."Category details"
For some special destinations, it may be
possible to select multiple category details.
Move the MINI joystick to the left to leave
the category details.7."Keyword"8.Enter the keyword.
A list of the special destinations is dis‐
played.9.Select a special destination.
Details are displayed.
If multiple details are stored, you can leaf
through the pages.
If a phone number is available, a connec‐
tion can be established if necessary.10. Select the symbol.11."Start guidance" or "Add as another
destination"
Add a destination as a further destination,
refer to page 146.
Category search
1."Category search"2."Search destination"3.Select or enter the town/city.4."Category"5.Select the category.6."Category details"
For some special destinations, it may be
possible to select multiple category details.
Move the MINI joystick to the left to leave
the category details.7."Start search"
A list of the special destinations is dis‐
played.8.Select a special destination.
Details are displayed.
If multiple details are stored, you can leaf
through the pages.Seite 142NavigationDestination entry142
Online Edition for Part no. 01 40 2 911 498 - VI/13
Page 175 of 288
Information on connection▷The connected audio device is supplied
with a max. power of 500 mA if supported
by the device. Therefore, do not addition‐
ally connect the device to a socket in the
vehicle; otherwise, playback may be com‐
promised.▷Do not use force when plugging the con‐
nector into the USB interface.▷Do not connect devices such as fans or
lamps to the USB audio interface.▷Do not connect USB hard drives.▷Do not use the USB audio interface to re‐
charge external devices.
Bluetooth audio
At a glance
▷Music files on external devices such as au‐
dio devices or mobile phones can be played
back via Bluetooth.
Use of a mobile phone as an audio source,
refer to page 194.▷Bluetooth® is a registered trademark of
Bluetooth® SIG, Inc.▷The sound is output on the vehicle loud‐
speakers.▷The volume of the sound output is depend‐
ent on the device. If necessary, adjust the
volume on the device.▷Up to four external devices can be paired
with the vehicle.
Requirements
▷The device is suitable. Information under
www.mini.com/connectivity.▷The device is ready for operation.▷The ignition is switched on.▷Bluetooth is activated on the vehicle, refer
to page 193, and on the device.▷Bluetooth presettings must be made on the
device, such as for a connection withoutconfirmation or visibility; refer to the device
operating instructions.▷A number with at least four and a maxi‐
mum of 16 digits is defined as the Blue‐
tooth passkey. It is only required once for
pairing.
Pairing and connecting
Pairing a device
To avoid becoming distracted and posing
an unnecessary hazard both to your own vehi‐
cle's occupants and to other road users, only
pair the device while the vehicle is stationary. ◀
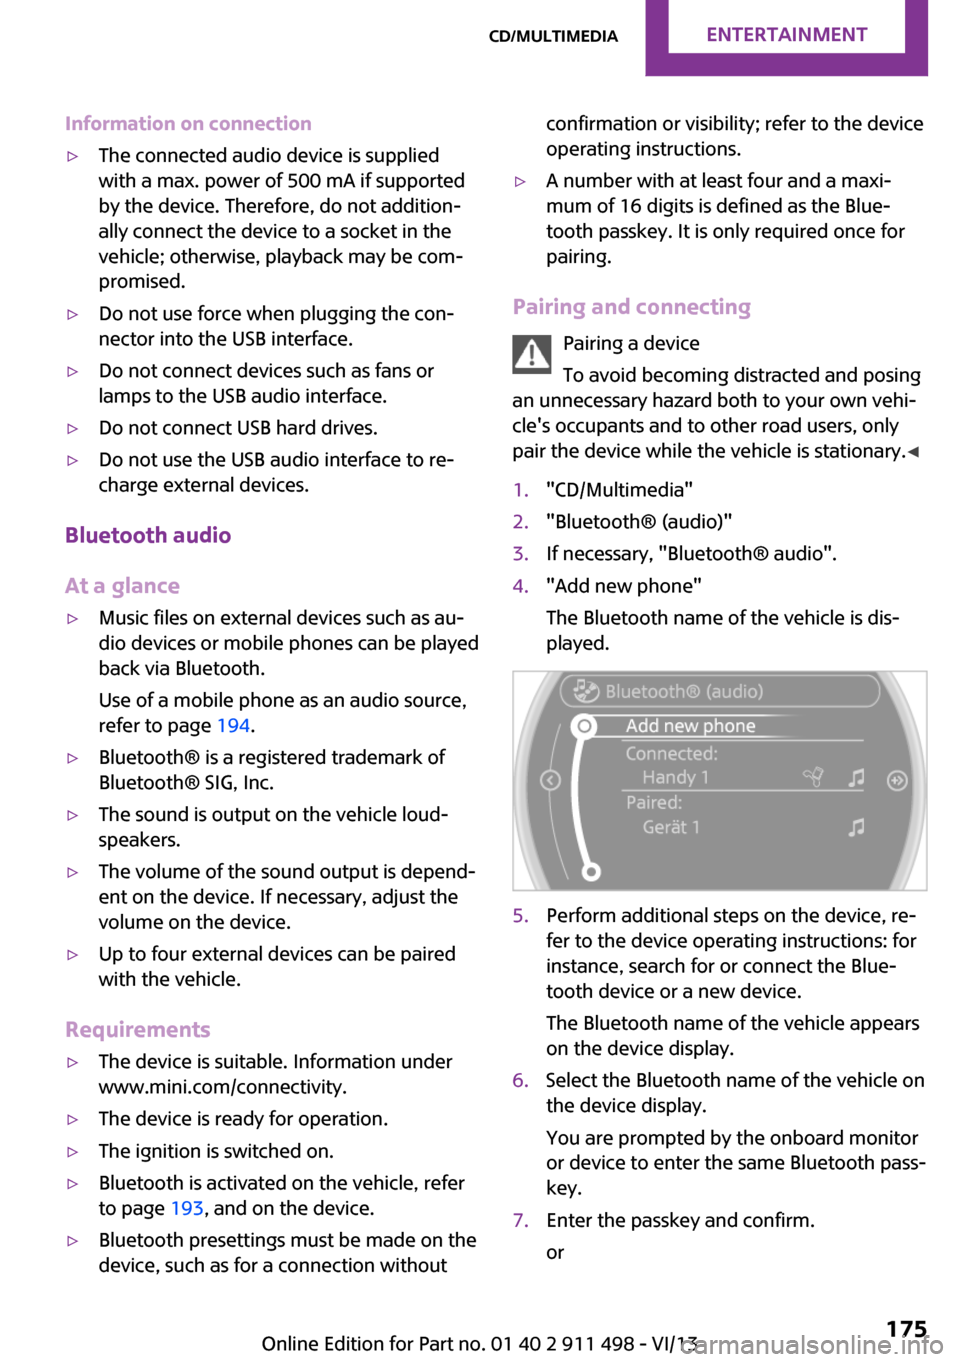
1."CD/Multimedia"2."Bluetooth® (audio)"3.If necessary, "Bluetooth® audio".4."Add new phone"
The Bluetooth name of the vehicle is dis‐
played.5.Perform additional steps on the device, re‐
fer to the device operating instructions: for
instance, search for or connect the Blue‐
tooth device or a new device.
The Bluetooth name of the vehicle appears
on the device display.6.Select the Bluetooth name of the vehicle on
the device display.
You are prompted by the onboard monitor
or device to enter the same Bluetooth pass‐
key.7.Enter the passkey and confirm.
orSeite 175CD/multimediaEntertainment175
Online Edition for Part no. 01 40 2 911 498 - VI/13
Page 178 of 288
The device could not be paired or connected.▷Do the Bluetooth passkeys on the device
and the vehicle match? Enter the same
passkey on the device and via the onboard
monitor.▷A multi-character passkey may be needed.▷Did it take longer than 30 seconds to enter
the passkey? Repeat the pairing procedure.▷Are too many Bluetooth devices connected
to the device or vehicle? Delete connec‐
tions with other devices if necessary.▷Is the mobile phone in power-save mode or
does it have only a limited remaining bat‐
tery life? Charge the mobile phone in the
snap-in adapter or via a charging cable.▷Depending on the mobile phone, it is possi‐
ble that only one device can be connected
to the vehicle. Unpair the connected device
from the vehicle and pair and connect only
one device.▷The device no longer reacts? Switch the de‐
vice off and on again.▷Repeat the pairing procedure.
Music cannot be played back.
▷Start the program for playing back music
data on the device and select a track on the
device if necessary.▷Switch the radio on and off again.
Music files can only be played back softly.
▷Adjust the volume settings on the device.
Videos can only be played back without audio
or with delayed audio.
▷Check the compatibility of the devices. In‐
formation under www.mini.com/connectiv‐
ity.
Playback is disturbed when buttons are pressed
or by other messages on the device.
▷Switch off the button tones and other signal
tones on the device.Playback is interrupted by a telephone call or
traffic bulletin and is not resumed automati‐
cally.▷Switch the radio on and off again.
Playback is not possible if the mobile phone is
connected via Bluetooth Audio while it is also
connected via the music interface for smart‐
phones in the snap-in adapter.
▷Disconnect one of the two connections; for
example, disconnect the audio connection,
refer to page 177, and restart playback.
If all points in this list have been checked and
the required function is still not available,
please contact the hotline or service center.
Software Update The vehicle supports various external devices
depending on the current software version.
With a software update, the vehicle can support
new mobile phones or new external device, for
example.
Software updates and related current informa‐
tion is available at www.mini.com/connectivity.
Displaying the current version
The currently installed software is displayed.
1."Settings"2."Software update"3."Show current version"
Updating the software
The software may only be updated when the
vehicle is stationary.
1.Store the file for the software-update in the
main director of a USB flash drive.2.Insert the USB flash drive into the USB au‐
dio interface in the center console. An up‐
date via the USB interface in the glove com‐
partment is not possible.3."Settings"4."Software update"Seite 178EntertainmentCD/multimedia178
Online Edition for Part no. 01 40 2 911 498 - VI/13
Page 182 of 288
Bluetooth hands-free systemVehicle equipmentThis chapter describes all series equipment as
well as country-specific and special equipment
offered for this model series.Therefore, it also
describes equipment that may not be found in
your vehicle, for instance due to the selected
special equipment or the country version. This
also applies to safety-related functions and sys‐
tems.
At a glance The concept
Mobile phones can be connected with the vehi‐
cle via Bluetooth.
Bluetooth® is a registered trademark of Blue‐
tooth® SIG, Inc.
After these devices are paired once, they are
recognized automatically when the ignition is
switched on as soon as they are in the vehicle
and can then be operated via the onboard
monitor, the buttons on the steering wheel,
and voice activation.
Up to four external devices can be paired.
Certain functions may need to be enabled by
the mobile phone provider or service provider.
Using the mobile phone while driving
Make entries only when traffic and road
conditions allow. Do not hold the mobile phone
in your hand while you are driving; use the
hands-free system instead. If you do not ob‐
serve this precaution, you can endanger the ve‐
hicle occupants and other road users. ◀
Approved mobile phones
Details on which mobile phones are supported
by the hands-free system can be obtained at
www.mini.com/connectivity.Displaying the vehicle identification
number and software part number
The vehicle identification number and software
part number are needed to determine which
mobile phones are supported by the mobile
phone preparation package. The software ver‐
sion of the mobile phone may also be required.1."Telephone"2.Open "Options".3."Bluetooth® info"4."Display system information"
These approved mobile phones with a certain
software version, support the vehicle functions
described below.
Malfunctions may occur with other mobile
phones or software versions.
Do not operate a mobile phone that is con‐
nected to the vehicle on the mobile phone key‐
pad, as this may lead to a malfunction.
Notes
At high temperatures, the charging function of
the mobile phone may be limited and functions
may not be executed.
When using the mobile phone via the vehicle,
note the operating instructions of the mobile phone.
Pairing/unpairing the
mobile phone
Requirements
▷The mobile phone is suitable, refer to
page 182.▷The mobile phone is ready for operation.▷Bluetooth is activated in the vehicle and on
the mobile phone.Seite 182CommunicationBluetooth hands-free system182
Online Edition for Part no. 01 40 2 911 498 - VI/13
Page 183 of 288
▷Bluetooth presettings may need to be
made on the mobile phone, e.g., for a con‐
nection without confirmation or visibility,
refer to the mobile phone operating in‐
structions.▷Deactivate Bluetooth audio if necessary.▷A number with at least four and a maxi‐
mum of 16 digits was defined as the Blue‐
tooth passkey. It is only required once for
pairing.▷Compare the control number on the Control
Display with the control number on the mo‐
bile phone display. Confirm the control
number on the mobile phone and in the
vehicle.▷The radio ready state is switched on.
Activating/deactivating Bluetooth
Bluetooth is not permitted everywhere. Comply
with all safety guidelines and regulations.
1."Telephone"2.Open "Options".3."Bluetooth®"
Pairing and connecting a mobile phone
Pairing the mobile phone
To avoid becoming distracted and posing
an unnecessary hazard both to your own vehi‐
cle's occupants and to other road users, only
pair the mobile phone while the vehicle is sta‐
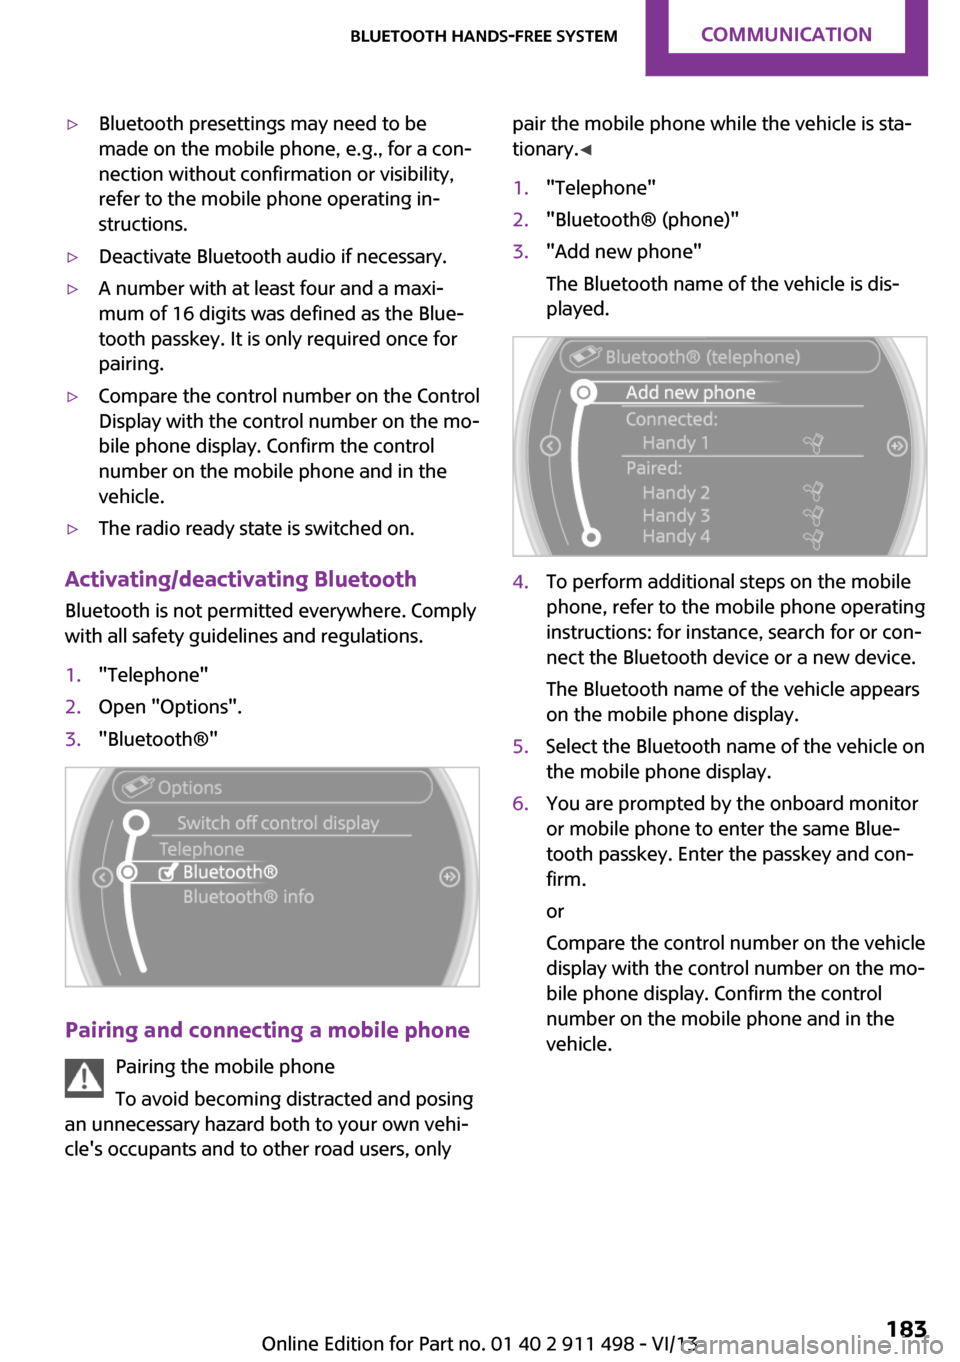
tionary. ◀1."Telephone"2."Bluetooth® (phone)"3."Add new phone"
The Bluetooth name of the vehicle is dis‐
played.4.To perform additional steps on the mobile
phone, refer to the mobile phone operating
instructions: for instance, search for or con‐
nect the Bluetooth device or a new device.
The Bluetooth name of the vehicle appears
on the mobile phone display.5.Select the Bluetooth name of the vehicle on
the mobile phone display.6.You are prompted by the onboard monitor
or mobile phone to enter the same Blue‐
tooth passkey. Enter the passkey and con‐
firm.
or
Compare the control number on the vehicle
display with the control number on the mo‐
bile phone display. Confirm the control
number on the mobile phone and in the
vehicle.Seite 183Bluetooth hands-free systemCommunication183
Online Edition for Part no. 01 40 2 911 498 - VI/13
Page 184 of 288
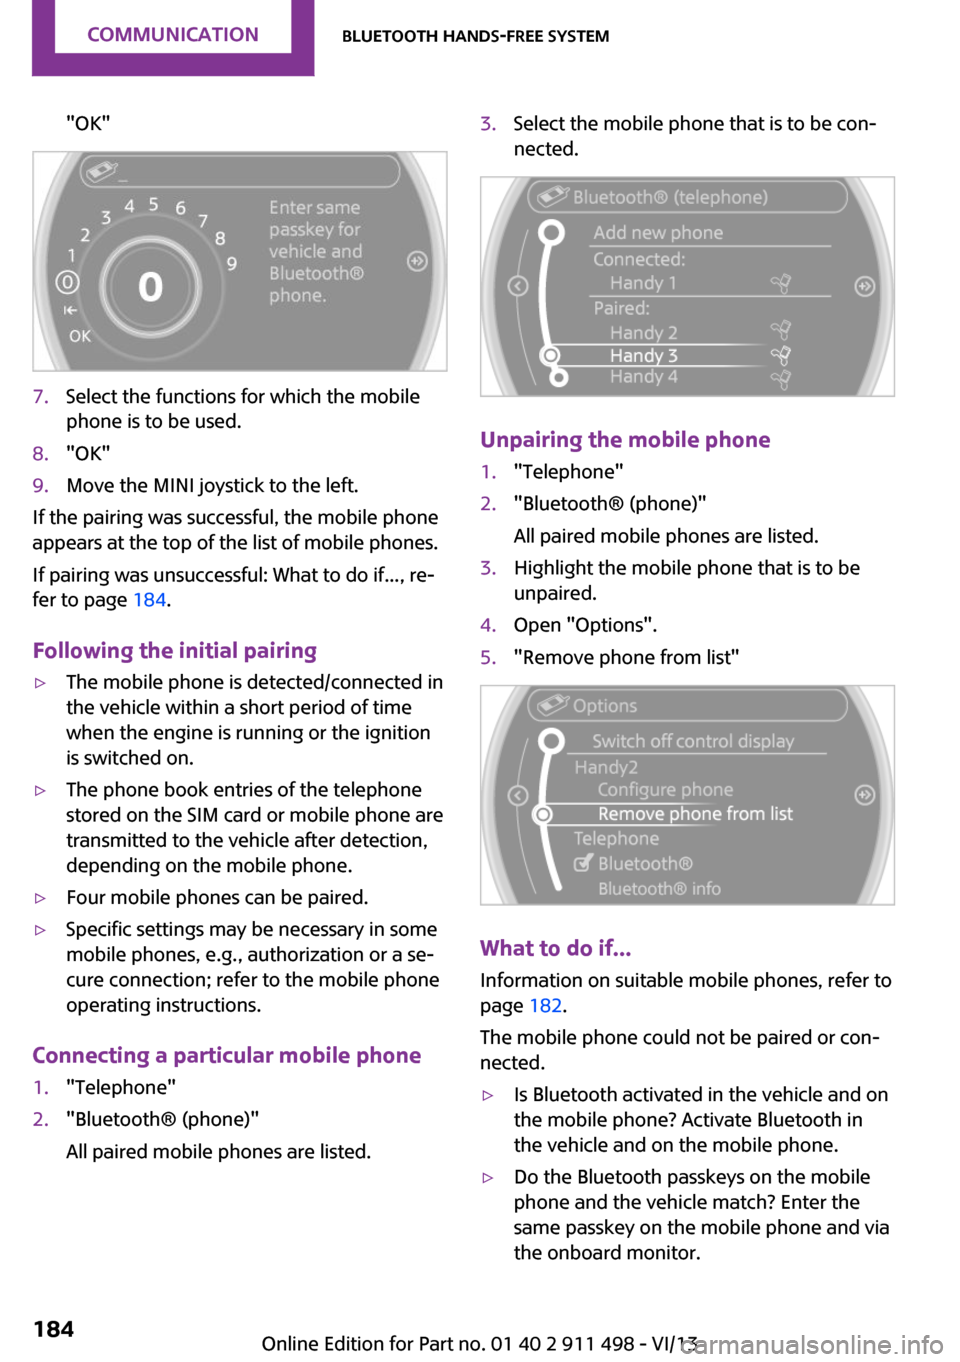
"OK"7.Select the functions for which the mobile
phone is to be used.8."OK"9.Move the MINI joystick to the left.
If the pairing was successful, the mobile phone
appears at the top of the list of mobile phones.
If pairing was unsuccessful: What to do if..., re‐
fer to page 184.
Following the initial pairing
▷The mobile phone is detected/connected in
the vehicle within a short period of time
when the engine is running or the ignition
is switched on.▷The phone book entries of the telephone
stored on the SIM card or mobile phone are
transmitted to the vehicle after detection,
depending on the mobile phone.▷Four mobile phones can be paired.▷Specific settings may be necessary in some
mobile phones, e.g., authorization or a se‐
cure connection; refer to the mobile phone
operating instructions.
Connecting a particular mobile phone
1."Telephone"2."Bluetooth® (phone)"
All paired mobile phones are listed.3.Select the mobile phone that is to be con‐
nected.
Unpairing the mobile phone
1."Telephone"2."Bluetooth® (phone)"
All paired mobile phones are listed.3.Highlight the mobile phone that is to be
unpaired.4.Open "Options".5."Remove phone from list"
What to do if...
Information on suitable mobile phones, refer to
page 182.
The mobile phone could not be paired or con‐
nected.
▷Is Bluetooth activated in the vehicle and on
the mobile phone? Activate Bluetooth in
the vehicle and on the mobile phone.▷Do the Bluetooth passkeys on the mobile
phone and the vehicle match? Enter the
same passkey on the mobile phone and via
the onboard monitor.Seite 184CommunicationBluetooth hands-free system184
Online Edition for Part no. 01 40 2 911 498 - VI/13
Page 185 of 288
▷A multi-character passkey may be needed.▷Did it take longer than 30 seconds to enter
the passkey? Repeat the pairing procedure.▷Are too many Bluetooth devices connected
to the mobile phone or vehicle? Delete con‐
nections with other devices if necessary.▷The mobile phone is in power-save mode
or has only a limited remaining battery life.
Charge the mobile phone via the charging
cable.▷Depending on the mobile phone, it is possi‐
ble that only one mobile phone can be con‐
nected to the vehicle. Unpair the connected
mobile phone from the vehicle and pair
and connect only one mobile phone.
The mobile phone no longer reacts.
▷Switch the mobile phone off and on again.▷Is the ambient temperature too high or
low? Do not expose the mobile phone to
extreme environmental conditions.
No phone book entries or only some phone
book entries are displayed, or they are incom‐
plete.
▷Transmission of the phone book entries is
not yet complete.▷It is possible that only the phone book en‐
tries of the mobile phone or the SIM card
are transmitted.▷It may not be possible to display phone
book entries with special characters.▷The number of phone book entries to be
stored is too high.▷Is the data volume of the contact too large,
e. g., due to stored information such as
notes? Reduce the data volume of the con‐
tact.
The phone connection quality is poor.
▷The strength of the Bluetooth signal on the
mobile phone can be adjusted, depending
on the mobile phone.▷Place the mobile phone in the area of the
center console.If all points in this list have been checked and
the required function is still not available, con‐
tact Customer Relations or the service center.
Controls Adjusting the volume
Turn the knob until the desired volume is se‐
lected. The setting is stored for the remote con‐
trol currently in use.
Incoming call
Receiving calls If the number of the caller is stored in the
phone book and is transmitted by the network,
the name of the contact is displayed. Other‐
wise, only the phone number is displayed.
If more than one phone number is assigned to
a contact, only the name of the contact is dis‐
played.
Accepting a call Press the button on the steering
wheel.
or
"Accept"
Seite 185Bluetooth hands-free systemCommunication185
Online Edition for Part no. 01 40 2 911 498 - VI/13