language MINI Coupe 2014 Owner's Manual (Mini Connected)
[x] Cancel search | Manufacturer: MINI, Model Year: 2014, Model line: Coupe, Model: MINI Coupe 2014Pages: 288, PDF Size: 6.72 MB
Page 25 of 288
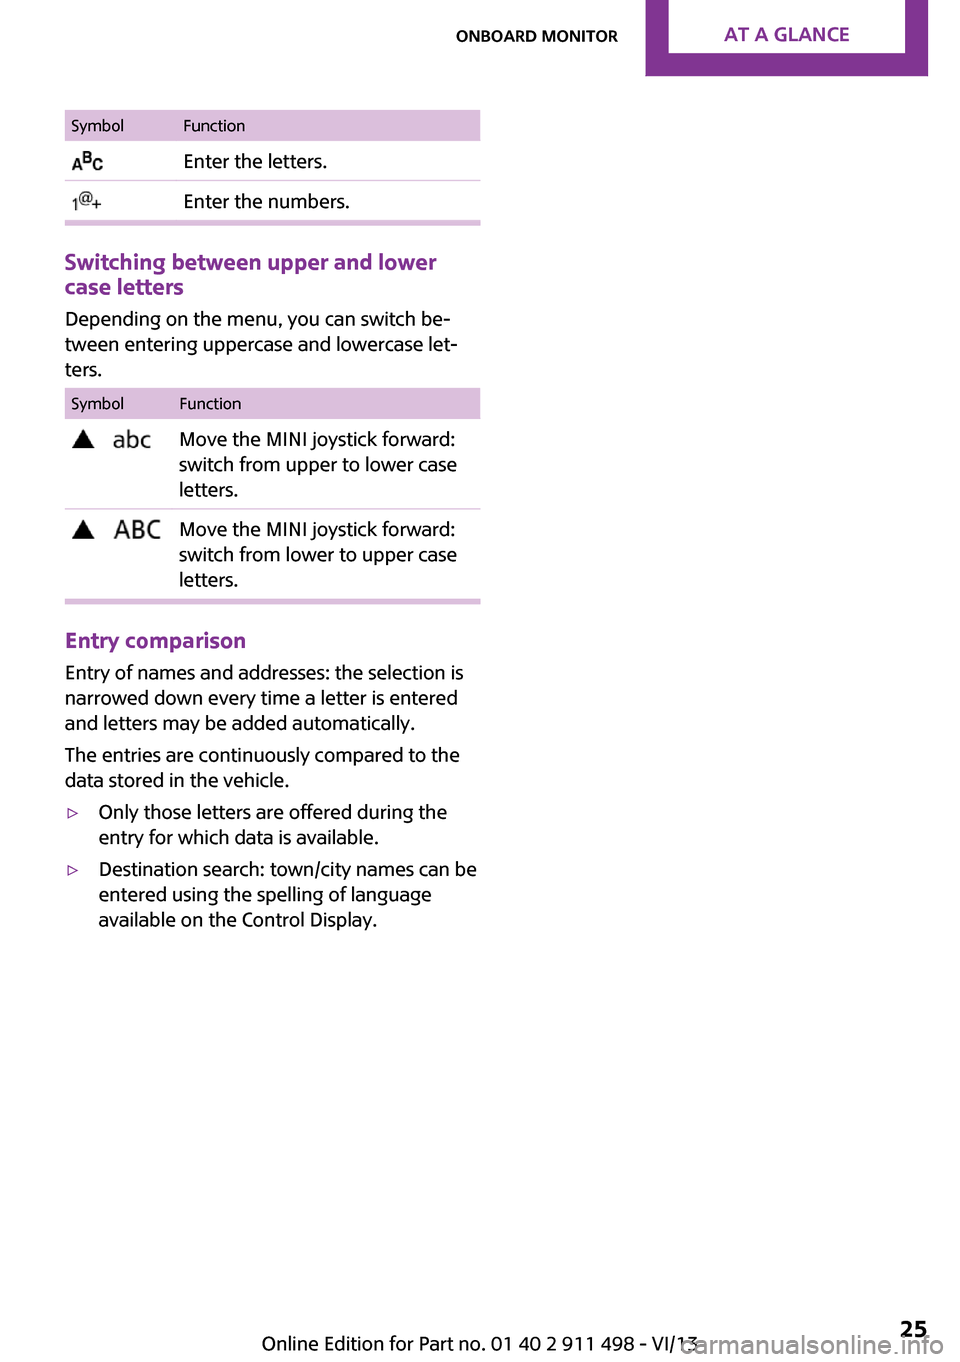
SymbolFunction Enter the letters. Enter the numbers.
Switching between upper and lower
case letters
Depending on the menu, you can switch be‐tween entering uppercase and lowercase let‐
ters.
SymbolFunction Move the MINI joystick forward:
switch from upper to lower case
letters. Move the MINI joystick forward:
switch from lower to upper case
letters.
Entry comparison
Entry of names and addresses: the selection is
narrowed down every time a letter is entered
and letters may be added automatically.
The entries are continuously compared to the
data stored in the vehicle.
▷Only those letters are offered during the
entry for which data is available.▷Destination search: town/city names can be
entered using the spelling of language
available on the Control Display.Seite 25Onboard monitorAt a glance25
Online Edition for Part no. 01 40 2 911 498 - VI/13
Page 26 of 288
Voice activation systemVehicle equipment
This chapter describes all series equipment as
well as country-specific and special equipment
offered for this model series.Therefore, it also
describes equipment that may not be found in
your vehicle, for instance due to the selected
special equipment or the country version. This
also applies to safety-related functions and sys‐
tems.
The concept▷Most functions that are displayed on the
Control Display can be operated with the
voice activation system using spoken com‐
mands. The system prompts you to make
your entries.▷Functions that can only be used when the
vehicle is stationary cannot be operated us‐
ing the voice activation system.▷The system uses a special microphone in
the headliner on the driver's side.▷›...‹ Verbal instructions in the Owner's
Manual to use with the voice activation sys‐
tem.
Requirements
Via the Control Display, set a language that is
also supported by the voice activation system
so that the spoken commands can be identi‐
fied.
Set the language, refer to page 80.
Using voice activation
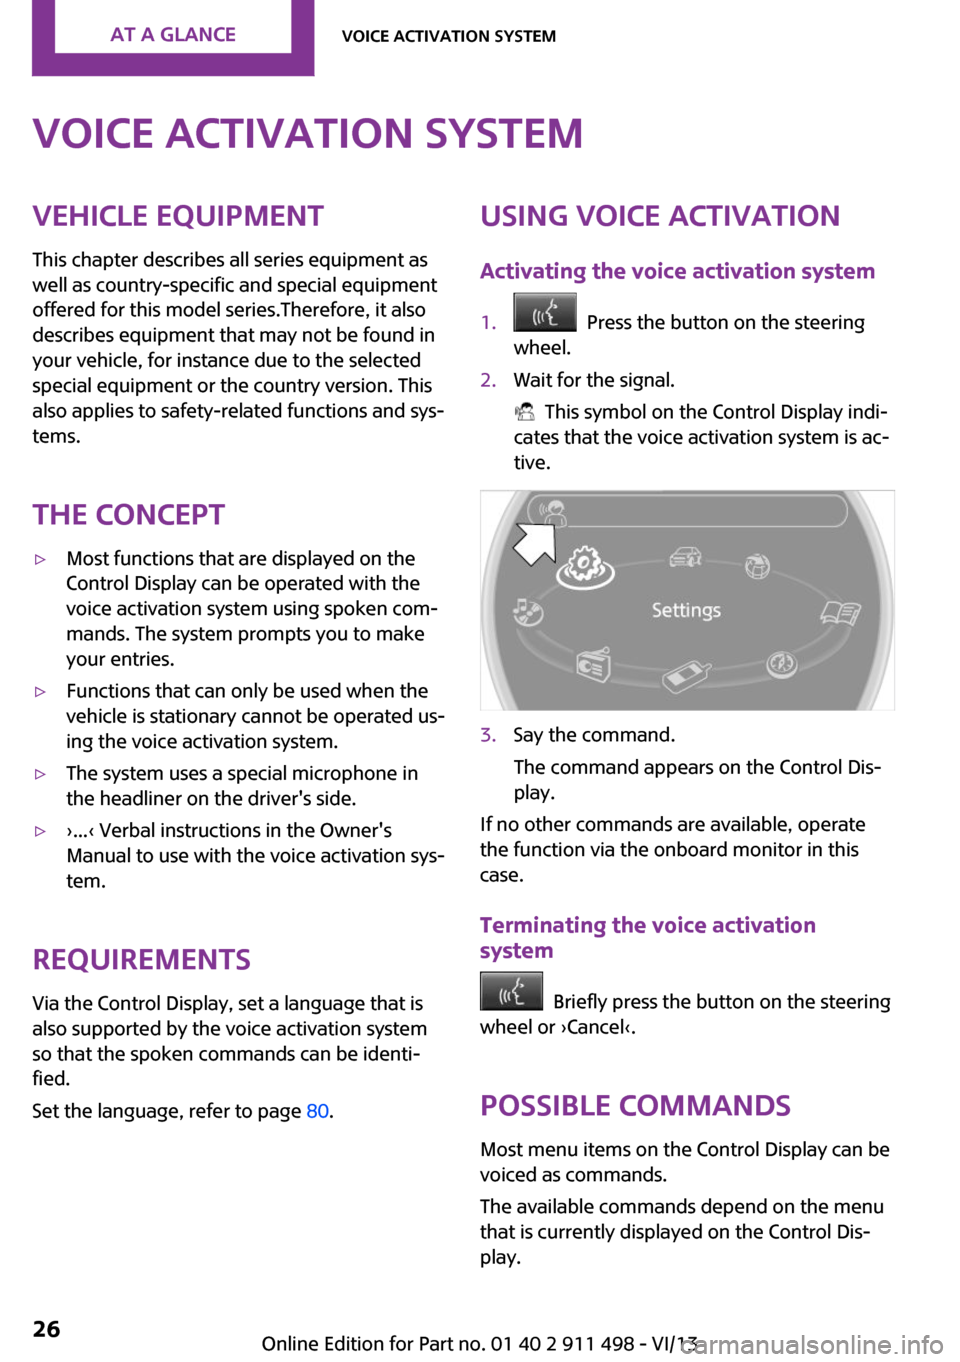
Activating the voice activation system1. Press the button on the steering
wheel.2.Wait for the signal.
This symbol on the Control Display indi‐
cates that the voice activation system is ac‐
tive.
3.Say the command.
The command appears on the Control Dis‐
play.
If no other commands are available, operate
the function via the onboard monitor in this
case.
Terminating the voice activation
system
Briefly press the button on the steering
wheel or ›Cancel‹.
Possible commands
Most menu items on the Control Display can be
voiced as commands.
The available commands depend on the menu
that is currently displayed on the Control Dis‐
play.
Seite 26At a glanceVoice activation system26
Online Edition for Part no. 01 40 2 911 498 - VI/13
Page 28 of 288
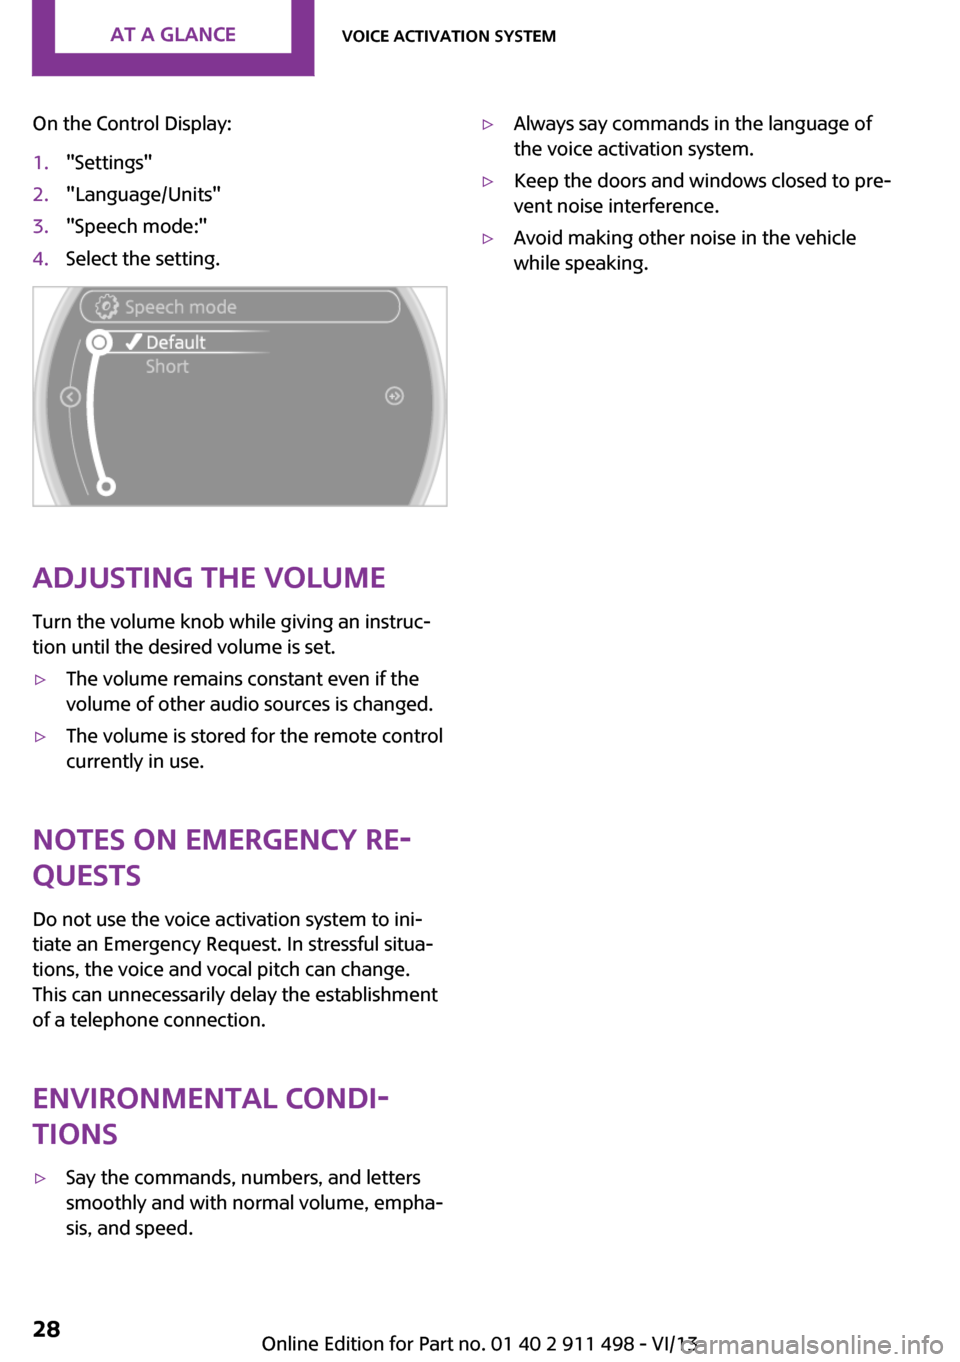
On the Control Display:1."Settings"2."Language/Units"3."Speech mode:"4.Select the setting.
Adjusting the volumeTurn the volume knob while giving an instruc‐
tion until the desired volume is set.
▷The volume remains constant even if the
volume of other audio sources is changed.▷The volume is stored for the remote control
currently in use.
Notes on Emergency Re‐
quests
Do not use the voice activation system to ini‐
tiate an Emergency Request. In stressful situa‐
tions, the voice and vocal pitch can change.
This can unnecessarily delay the establishment
of a telephone connection.
Environmental condi‐
tions
▷Say the commands, numbers, and letters
smoothly and with normal volume, empha‐
sis, and speed.▷Always say commands in the language of
the voice activation system.▷Keep the doors and windows closed to pre‐
vent noise interference.▷Avoid making other noise in the vehicle
while speaking.Seite 28At a glanceVoice activation system28
Online Edition for Part no. 01 40 2 911 498 - VI/13
Page 33 of 288
Personal Profile
The concept
You can set several of your vehicle's functions
to suit your personal needs and preferences.▷Through Personal Profile, most of these set‐
tings are stored for the remote control cur‐
rently in use.▷While the vehicle is being unlocked, the re‐
mote control is recognized and the settings
stored with it are called up and imple‐
mented.▷Your personal settings will be recognized
and called up again even if the vehicle has
been used in the meantime by someone
else with another remote control.▷The individual settings are stored for no
more than three remote controls.
Personal Profile settings
The following functions and settings can be
stored in a profile.
More information on the settings can be found
under:
▷Response of the central locking system
when the car is being unlocked, refer to
page 34.▷Automatic locking of the vehicle, refer to
page 37.▷Triple turn signal activation, refer to
page 68.▷Settings for the displays on the onboard
monitor, in the speedometer, and in the
tachometer:▷12h/24h clock format, refer to
page 79.▷Date format, refer to page 80.▷Brightness of the Control Display, refer
to page 80.▷Language on the Control Display, refer
to page 80.▷Units of measure for fuel consumption,
distance covered/remaining distances,
and temperature, refer to page 78.▷Light settings:▷Headlamp courtesy delay feature, refer
to page 86.▷Daytime running lights, refer to
page 86.▷Automatic climate control, refer to
page 110: AUTO program, activating/deac‐
tivating the cooling function, setting the
temperature, air volume, and air distribu‐
tion.▷Entertainment:▷Tone settings, refer to page 158.▷Volume, refer to page 158.
Central locking system
The concept
The central locking system becomes active
when the driver's door is closed.
The system simultaneously engages and re‐
leases the locks on the following:
▷Doors.▷Tailgate.▷Fuel filler flap.
Operating from the outside
▷Via the remote control.▷Via the door lock.▷In cars with Comfort Access, via the door
handles on the driver's and front passenger
sides.
The following takes place simultaneously when
locking/unlocking the vehicle via the remote
control:
▷Depending on the vehicle equipment, the
anti-theft protection is switched on and off
as well. The anti-theft protection makes itSeite 33Opening and closingControls33
Online Edition for Part no. 01 40 2 911 498 - VI/13
Page 79 of 288
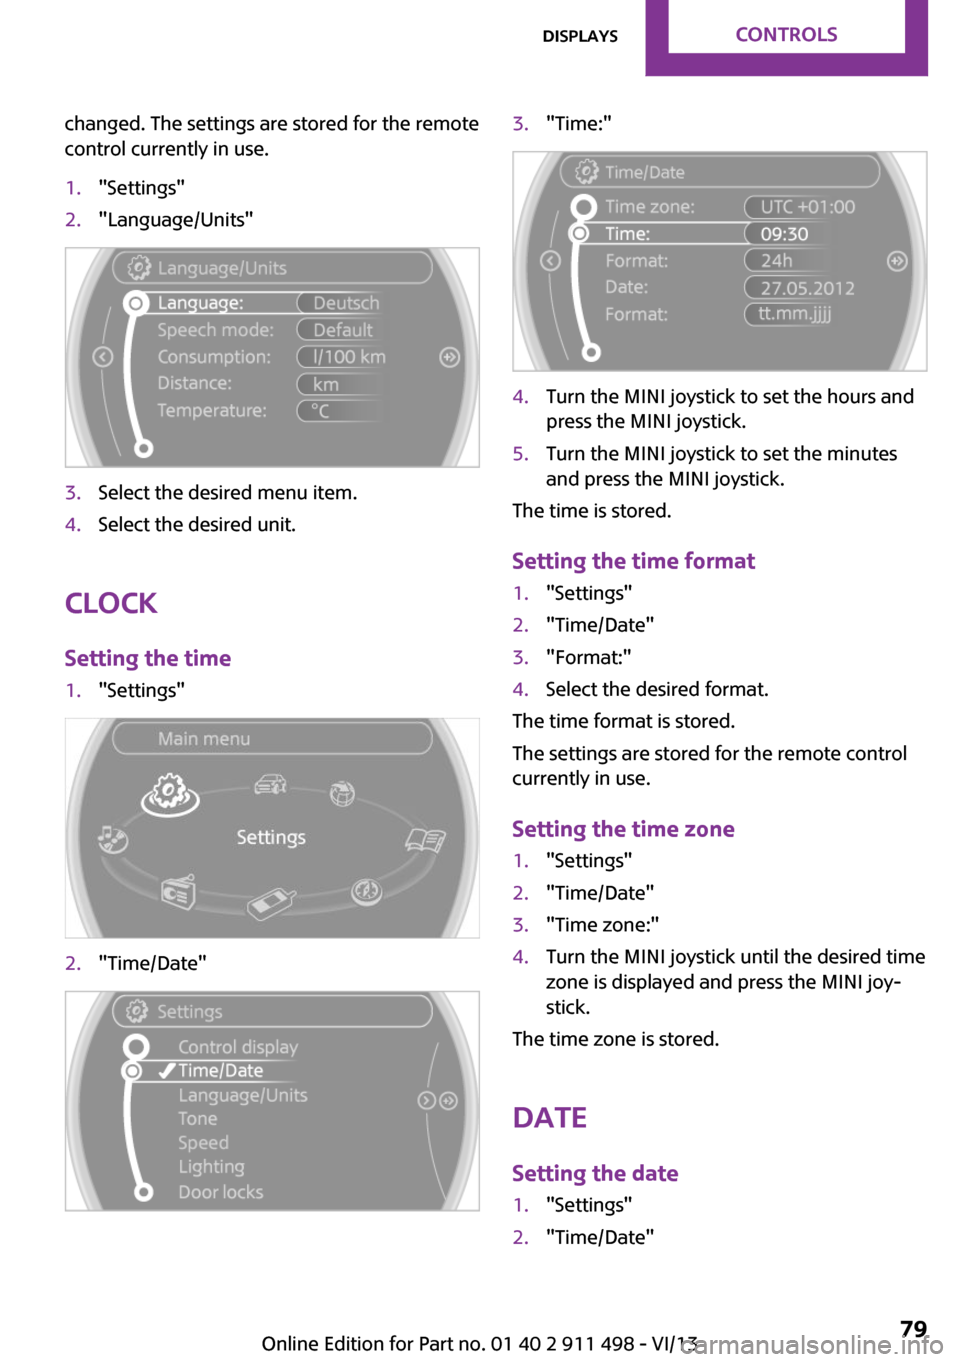
changed. The settings are stored for the remote
control currently in use.1."Settings"2."Language/Units"3.Select the desired menu item.4.Select the desired unit.
Clock
Setting the time
1."Settings"2."Time/Date"3."Time:"4.Turn the MINI joystick to set the hours and
press the MINI joystick.5.Turn the MINI joystick to set the minutes
and press the MINI joystick.
The time is stored.
Setting the time format
1."Settings"2."Time/Date"3."Format:"4.Select the desired format.
The time format is stored.
The settings are stored for the remote control
currently in use.
Setting the time zone
1."Settings"2."Time/Date"3."Time zone:"4.Turn the MINI joystick until the desired time
zone is displayed and press the MINI joy‐
stick.
The time zone is stored.
Date
Setting the date
1."Settings"2."Time/Date"Seite 79DisplaysControls79
Online Edition for Part no. 01 40 2 911 498 - VI/13
Page 80 of 288
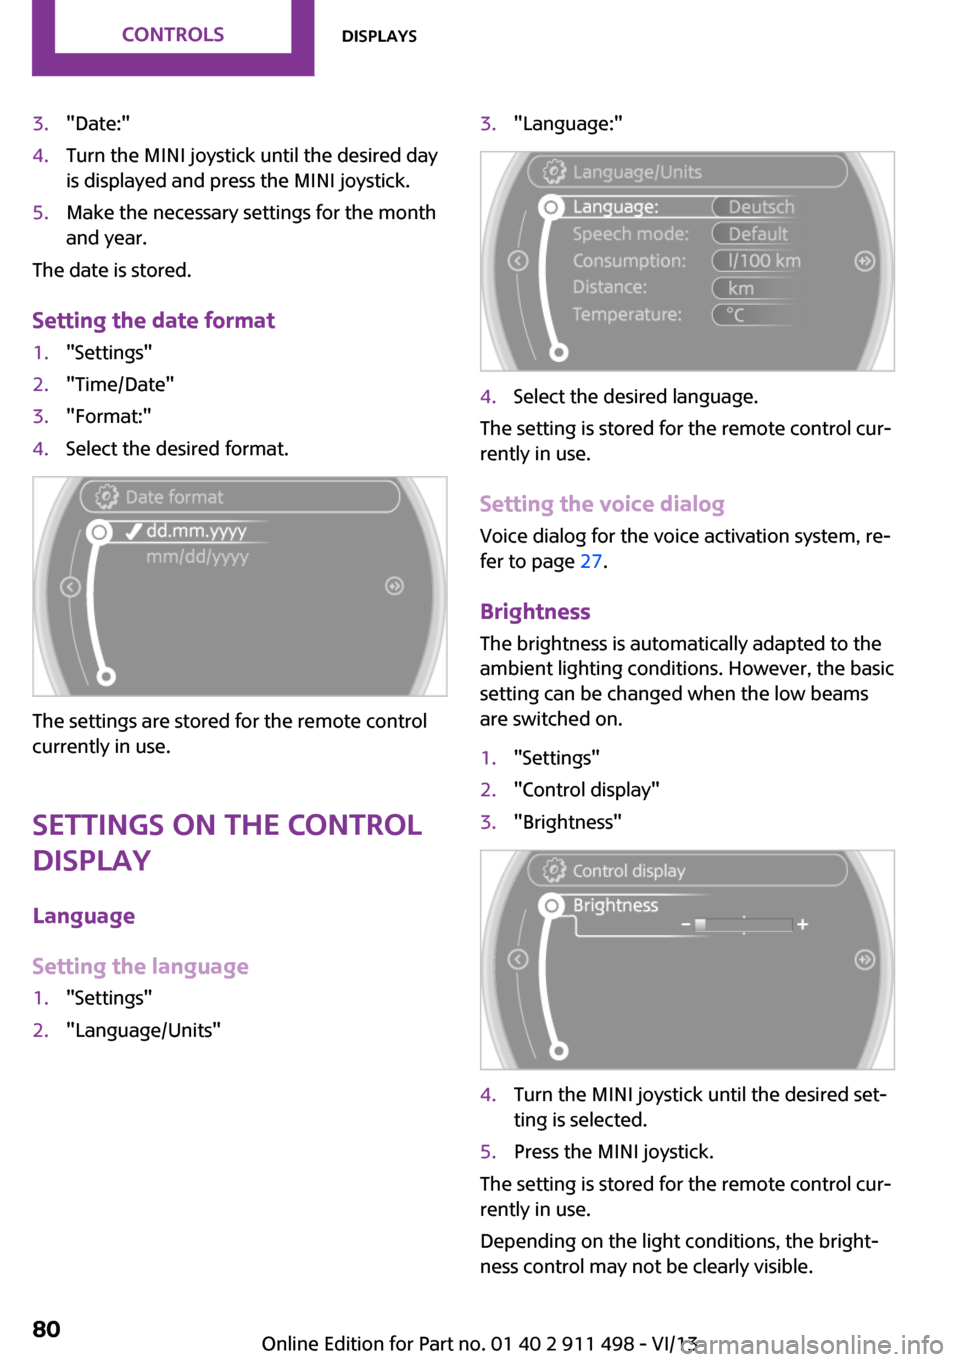
3."Date:"4.Turn the MINI joystick until the desired day
is displayed and press the MINI joystick.5.Make the necessary settings for the month
and year.
The date is stored.
Setting the date format
1."Settings"2."Time/Date"3."Format:"4.Select the desired format.
The settings are stored for the remote control
currently in use.
Settings on the Control Display
Language
Setting the language
1."Settings"2."Language/Units"3."Language:"4.Select the desired language.
The setting is stored for the remote control cur‐
rently in use.
Setting the voice dialog Voice dialog for the voice activation system, re‐
fer to page 27.
Brightness
The brightness is automatically adapted to the
ambient lighting conditions. However, the basic
setting can be changed when the low beams
are switched on.
1."Settings"2."Control display"3."Brightness"4.Turn the MINI joystick until the desired set‐
ting is selected.5.Press the MINI joystick.
The setting is stored for the remote control cur‐
rently in use.
Depending on the light conditions, the bright‐
ness control may not be clearly visible.
Seite 80ControlsDisplays80
Online Edition for Part no. 01 40 2 911 498 - VI/13
Page 144 of 288
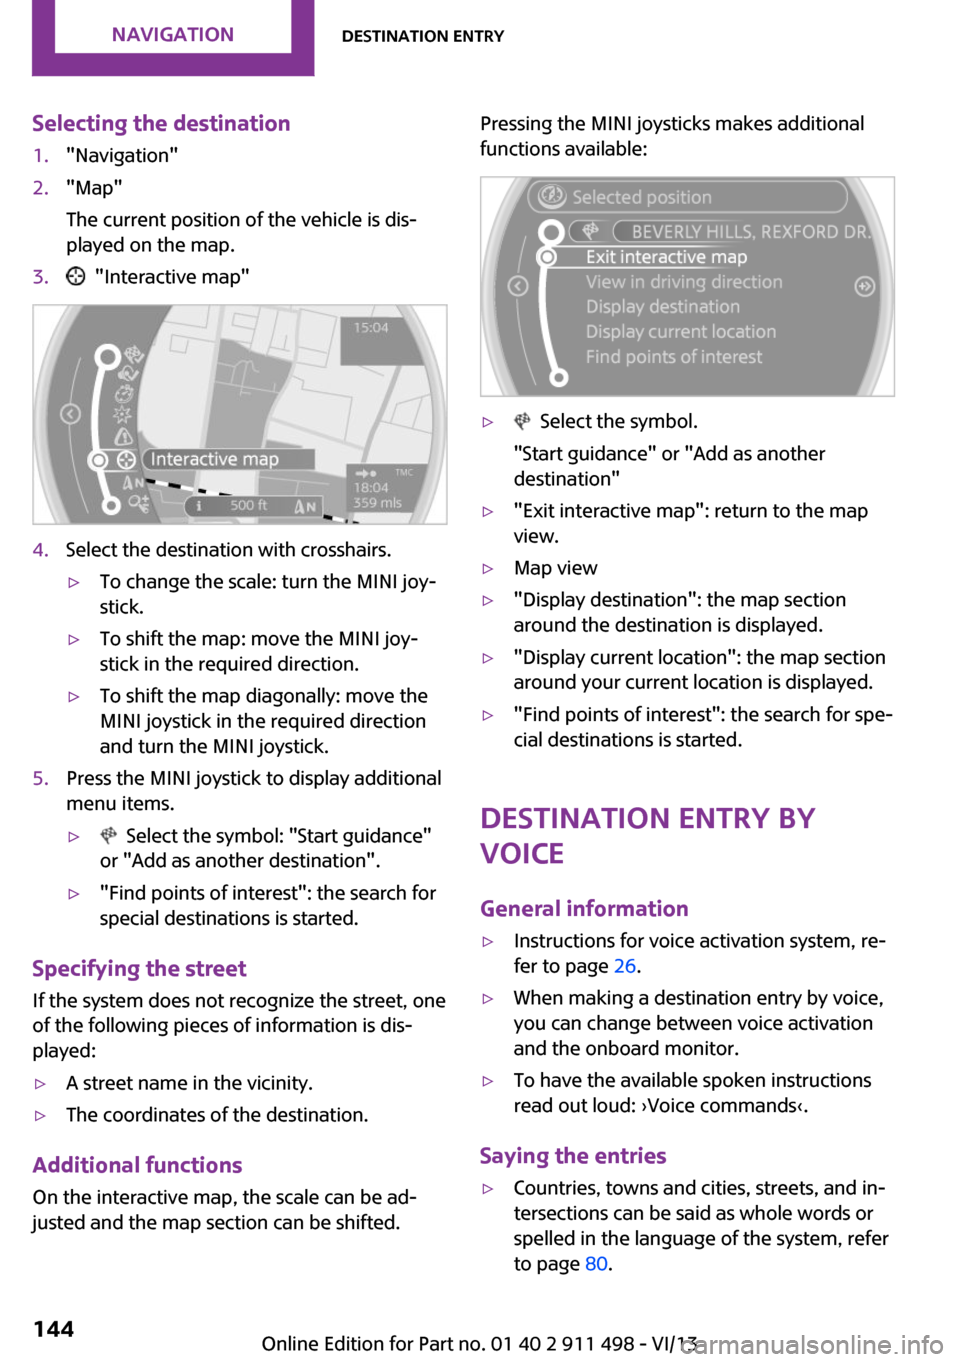
Selecting the destination1."Navigation"2."Map"
The current position of the vehicle is dis‐
played on the map.3. "Interactive map"4.Select the destination with crosshairs.▷To change the scale: turn the MINI joy‐
stick.▷To shift the map: move the MINI joy‐
stick in the required direction.▷To shift the map diagonally: move the
MINI joystick in the required direction
and turn the MINI joystick.5.Press the MINI joystick to display additional
menu items.▷ Select the symbol: "Start guidance"
or "Add as another destination".▷"Find points of interest": the search for
special destinations is started.
Specifying the street
If the system does not recognize the street, one
of the following pieces of information is dis‐
played:
▷A street name in the vicinity.▷The coordinates of the destination.
Additional functions
On the interactive map, the scale can be ad‐
justed and the map section can be shifted.
Pressing the MINI joysticks makes additional
functions available:▷ Select the symbol.
"Start guidance" or "Add as another
destination"▷"Exit interactive map": return to the map
view.▷Map view▷"Display destination": the map section
around the destination is displayed.▷"Display current location": the map section
around your current location is displayed.▷"Find points of interest": the search for spe‐
cial destinations is started.
Destination entry by
voice
General information
▷Instructions for voice activation system, re‐
fer to page 26.▷When making a destination entry by voice,
you can change between voice activation
and the onboard monitor.▷To have the available spoken instructions
read out loud: ›Voice commands‹.
Saying the entries
▷Countries, towns and cities, streets, and in‐
tersections can be said as whole words or
spelled in the language of the system, refer
to page 80.Seite 144NavigationDestination entry144
Online Edition for Part no. 01 40 2 911 498 - VI/13
Page 145 of 288
Example: to enter a town/city in a US states
as a whole word, the language of the sys‐
tem must be English.▷Spell the entry if the spoken language and
the language of the system differ.▷Say the letters smoothly, and avoid exag‐
gerating the pronunciation and inserting
lengthy pauses between the letters.▷The methods of entry depend on the navi‐
gation data in use and the country and lan‐
guage settings.
Entering a town/city separately
The town/city can be said as a complete word.
1. Press the button on the steering
wheel.2.›City‹ or ›Spell city‹3.Wait for the system to prompt you for the
town/city.4.Say the name of the town/city, or name at
least the first three letters.5.Select a location:▷Select a recommended town/city: ›Yes‹.▷Select a different town/city: ›New
entry‹.▷Select an entry: ›Entry ...‹, for instance,
entry 2.▷Spell an entry: ›Spell city‹.6.Continue making the entry as prompted by
the system.
If there are several towns/cities with the same
name:
Towns/cities of the same name are grouped in
a list and displayed as one location followed by
an ellipsis.
1.Select an entry: ›Yes‹ or ›Entry ...‹, e. g., En‐
try 2.2.Select the desired town/city.
The town/city can also be selected from the
list on the onboard monitor:Turn the MINI joystick until the destination
town/city is selected and press the
MINI joystick.
Entering a street or intersection
separately
Enter a street and intersection in the same way
as you would enter a town/city.
Entering a house number separately Depending on the data in the navigation sys‐
tem, house numbers up to number 2,000 can
be entered.
1.›House number‹2.Say the house number.3.›Yes‹ to confirm the house number.4.›Accept destination‹
Starting destination guidance
›Start guidance‹
Adding further intermediate
destinations
›Add as another destination‹
Further intermediate destinations can be
added.
Storing a destination The destination is automatically added to the
list of last destinations.
Planning a trip with in‐termediate destinations
New trip
Various intermediate destinations can be en‐
tered for a trip. The trip destination needs to be
entered first, destination entry, refer to
page 138.
Seite 145Destination entryNavigation145
Online Edition for Part no. 01 40 2 911 498 - VI/13
Page 270 of 288
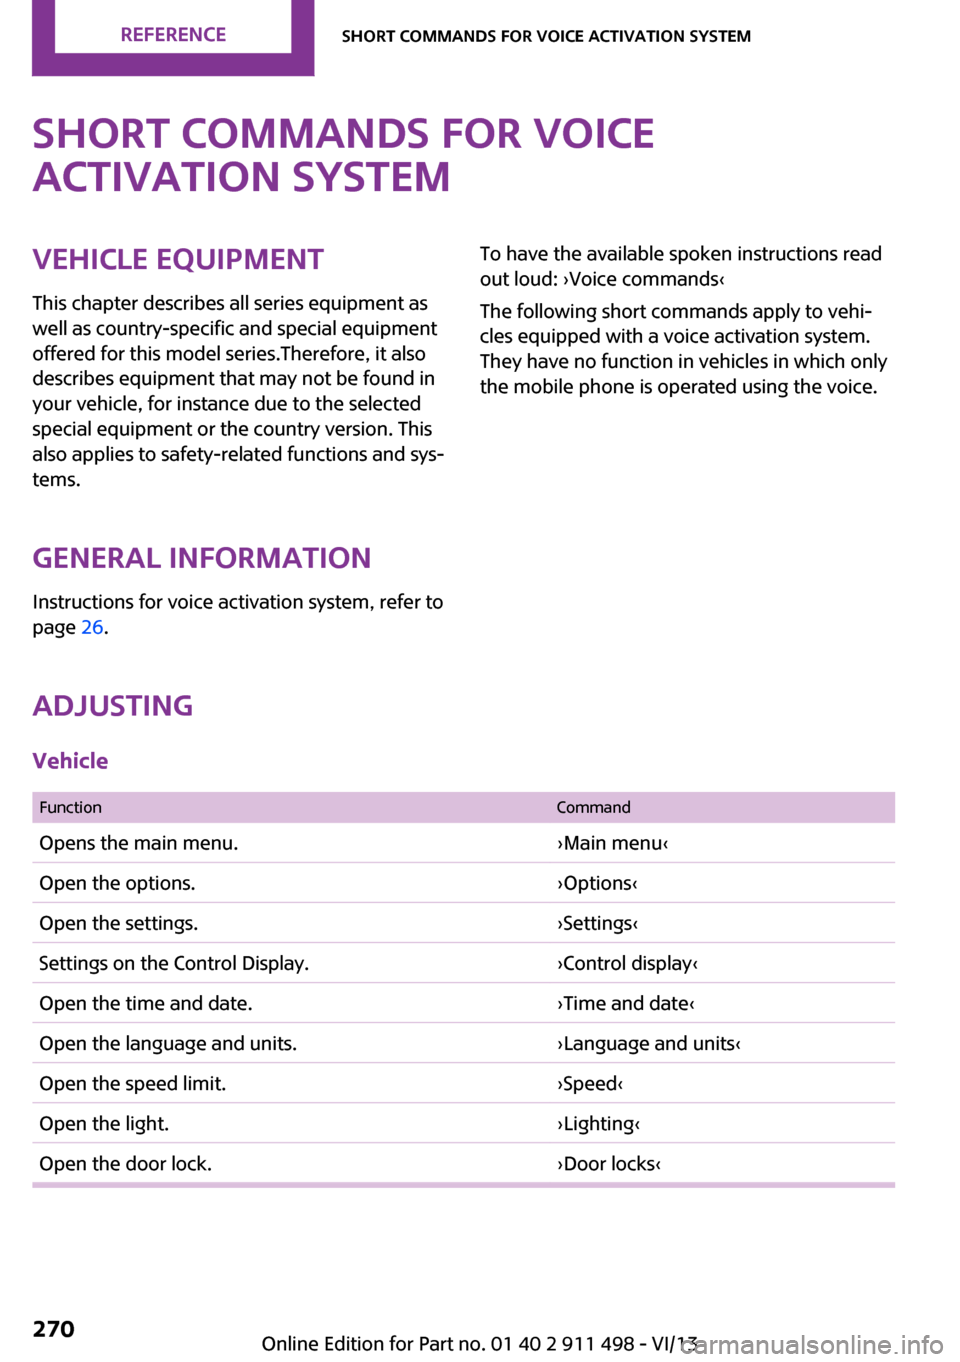
Short commands for voice
activation systemVehicle equipment
This chapter describes all series equipment as
well as country-specific and special equipment
offered for this model series.Therefore, it also
describes equipment that may not be found in
your vehicle, for instance due to the selected
special equipment or the country version. This
also applies to safety-related functions and sys‐
tems.
General information Instructions for voice activation system, refer to
page 26.To have the available spoken instructions read
out loud: ›Voice commands‹
The following short commands apply to vehi‐
cles equipped with a voice activation system.
They have no function in vehicles in which only
the mobile phone is operated using the voice.
Adjusting
Vehicle
FunctionCommandOpens the main menu.›Main menu‹Open the options.›Options‹Open the settings.›Settings‹Settings on the Control Display.›Control display‹Open the time and date.›Time and date‹Open the language and units.›Language and units‹Open the speed limit.›Speed‹Open the light.›Lighting‹Open the door lock.›Door locks‹Seite 270ReferenceShort commands for voice activation system270
Online Edition for Part no. 01 40 2 911 498 - VI/13
Page 280 of 288
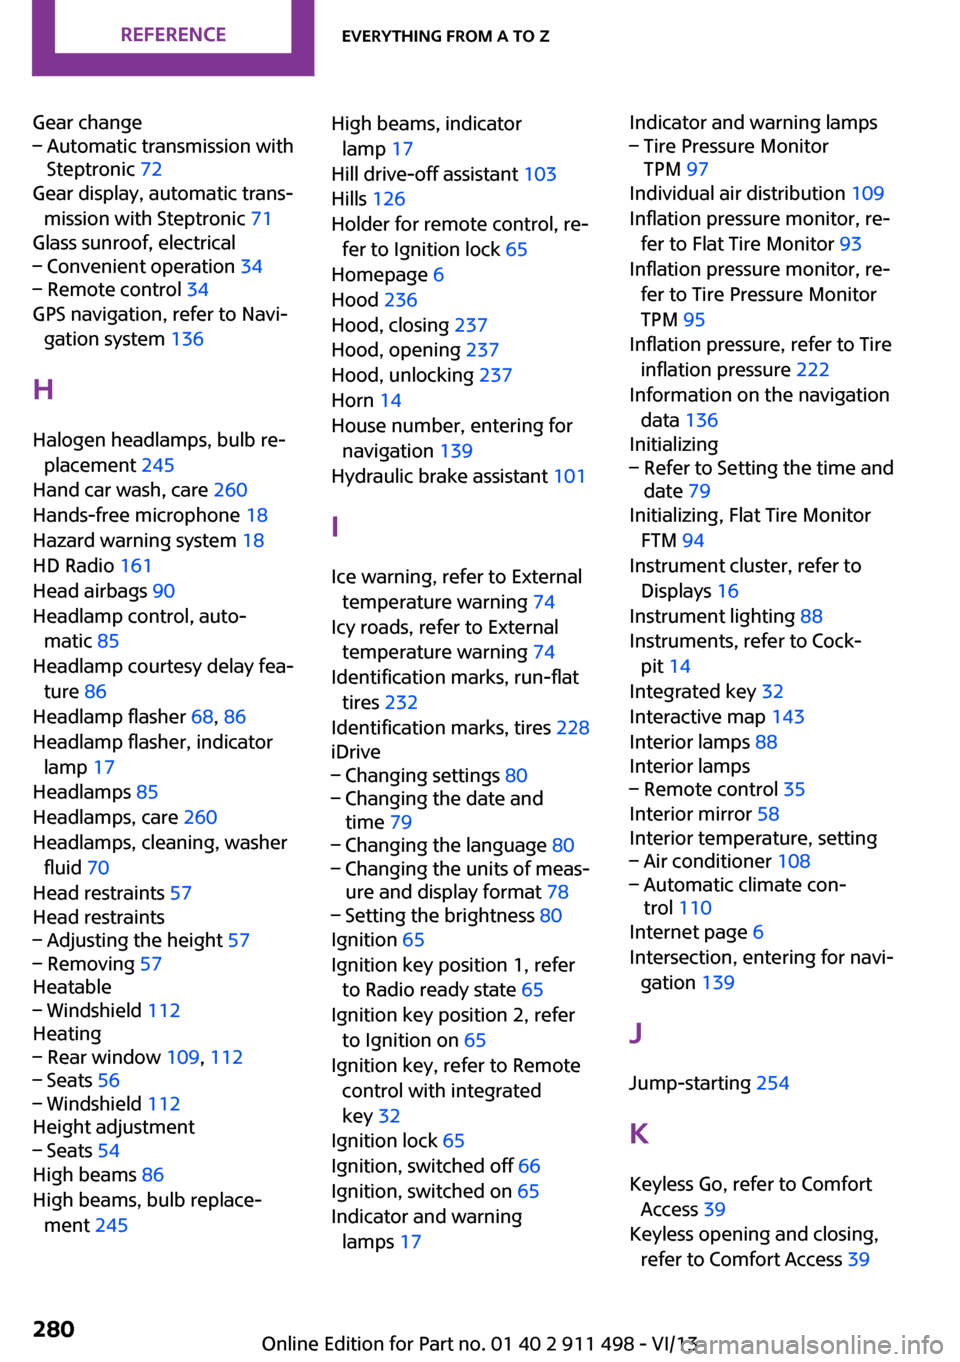
Gear change– Automatic transmission with
Steptronic 72
Gear display, automatic trans‐
mission with Steptronic 71
Glass sunroof, electrical
– Convenient operation 34– Remote control 34
GPS navigation, refer to Navi‐
gation system 136
H Halogen headlamps, bulb re‐ placement 245
Hand car wash, care 260
Hands-free microphone 18
Hazard warning system 18
HD Radio 161
Head airbags 90
Headlamp control, auto‐ matic 85
Headlamp courtesy delay fea‐
ture 86
Headlamp flasher 68, 86
Headlamp flasher, indicator lamp 17
Headlamps 85
Headlamps, care 260
Headlamps, cleaning, washer fluid 70
Head restraints 57
Head restraints
– Adjusting the height 57– Removing 57
Heatable
– Windshield 112
Heating
– Rear window 109, 112– Seats 56– Windshield 112
Height adjustment
– Seats 54
High beams 86
High beams, bulb replace‐ ment 245
High beams, indicator
lamp 17
Hill drive-off assistant 103
Hills 126
Holder for remote control, re‐ fer to Ignition lock 65
Homepage 6
Hood 236
Hood, closing 237
Hood, opening 237
Hood, unlocking 237
Horn 14
House number, entering for navigation 139
Hydraulic brake assistant 101
I
Ice warning, refer to External temperature warning 74
Icy roads, refer to External temperature warning 74
Identification marks, run-flat tires 232
Identification marks, tires 228
iDrive– Changing settings 80– Changing the date and
time 79– Changing the language 80– Changing the units of meas‐
ure and display format 78– Setting the brightness 80
Ignition 65
Ignition key position 1, refer to Radio ready state 65
Ignition key position 2, refer to Ignition on 65
Ignition key, refer to Remote control with integrated
key 32
Ignition lock 65
Ignition, switched off 66
Ignition, switched on 65
Indicator and warning lamps 17
Indicator and warning lamps– Tire Pressure Monitor
TPM 97
Individual air distribution 109
Inflation pressure monitor, re‐ fer to Flat Tire Monitor 93
Inflation pressure monitor, re‐ fer to Tire Pressure Monitor
TPM 95
Inflation pressure, refer to Tire inflation pressure 222
Information on the navigation data 136
Initializing
– Refer to Setting the time and
date 79
Initializing, Flat Tire Monitor
FTM 94
Instrument cluster, refer to Displays 16
Instrument lighting 88
Instruments, refer to Cock‐ pit 14
Integrated key 32
Interactive map 143
Interior lamps 88
Interior lamps
– Remote control 35
Interior mirror 58
Interior temperature, setting
– Air conditioner 108– Automatic climate con‐
trol 110
Internet page 6
Intersection, entering for navi‐ gation 139
J
Jump-starting 254
K Keyless Go, refer to Comfort Access 39
Keyless opening and closing, refer to Comfort Access 39
Seite 280ReferenceEverything from A to Z280
Online Edition for Part no. 01 40 2 911 498 - VI/13