navigation system MINI Hardtop 2 Door 2002 Owner's Manual
[x] Cancel search | Manufacturer: MINI, Model Year: 2002, Model line: Hardtop 2 Door, Model: MINI Hardtop 2 Door 2002Pages: 140, PDF Size: 1.63 MB
Page 4 of 140

CONTENTS
2
© 2002 Bayerische Motoren Werke
Aktiengesellschaft
Munich, Germany
Reprinting, including excerpts, only with the
written consent of BMW AG, Munich.
Order No. 01 41 0 156 724
US English II/02
Printed in Germany
Printed on environmentally friendly paper
(bleached without chlorine, suitable for recycling).
Using this Owner's Manual
Notes on the Owner's Manual 6
Symbols used 6
Symbol for vehicle parts 6
Your individual vehicle 6
Editorial notice 7
For your own safety 8
Reporting safety defects 9
At a glance
Cockpit 12
Display elements 13
Display elements with navigation
system 14
Indicator and warning lamps 15
Multifunction steering wheel MFL 18
Controls and features
Opening and closing:
Keys 22
Central locking system 23
Opening and closing Ð from outside 23
Opening and closing Ð from inside 26
Tailgate 27
Electric power windows 28
Sliding/tilt sunroof 29
Roller sun blind 30
Adjustments:
Correct sitting posture 31
Seats 31
Entry to the rear 33
Seat heating 34
Head restraints 34
Safety belts 35
Steering wheel 35
Mirrors 36
Airbags 37
Transporting children safely 38
Vehicle Memory 41
Page 16 of 140

14
DISPLAY ELEMENTS WITH NAVIGATION SYSTEM
*
1 Tachometer 55
with indicator and warning lamps, see
from page 15
2 Display for computer 583 Speedometer with indicator and warning
lamps, see from page 15
4 Trip odometer, reset to zero 555 Indicator for
>
Odometer 55
>
Trip odometer 55
>
Service Interval 57
>
Program display for Continuously
Variable Transmission (CVT) 48
Page 17 of 140

15
OVERVIEW REPAIRS OPERATION CONTROLS DATA INDEX
INDICATOR AND WARNING LAMPS
Technology
that monitors itself
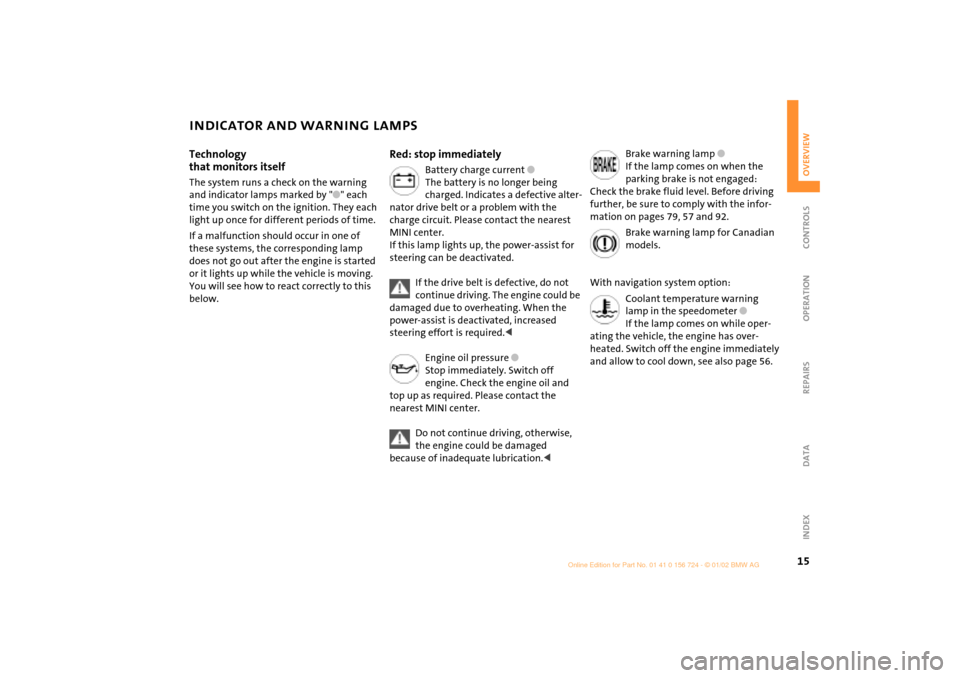
The system runs a check on the warning
and indicator lamps marked by "
l
" each
time you switch on the ignition. They each
light up once for different periods of time.
If a malfunction should occur in one of
these systems, the corresponding lamp
does not go out after the engine is started
or it lights up while the vehicle is moving.
You will see how to react correctly to this
below.
Red: stop immediately
Battery charge current
l
The battery is no longer being
charged. Indicates a defective alter-
nator drive belt or a problem with the
charge circuit. Please contact the nearest
MINI center.
If this lamp lights up, the power-assist for
steering can be deactivated.
If the drive belt is defective, do not
continue driving. The engine could be
damaged due to overheating. When the
power-assist is deactivated, increased
steering effort is required.
<
Engine oil pressure
l
Stop immediately. Switch off
engine. Check the engine oil and
top up as required. Please contact the
nearest MINI center.
Do not continue driving, otherwise,
the engine could be damaged
because of inadequate lubrication.
<
Brake warning lamp
l
If the lamp comes on when the
parking brake is not engaged:
Check the brake fluid level. Before driving
further, be sure to comply with the infor-
mation on pages 79, 57 and 92.
Brake warning lamp for Canadian
models.
With navigation system option:
Coolant temperature warning
lamp in the speedometer
l
If the lamp comes on while oper-
ating the vehicle, the engine has over-
heated. Switch off the engine immediately
and allow to cool down, see also page 56.
Page 18 of 140

16
INDICATOR AND WARNING LAMPS
Yellow: stop immediately
Flat Tire Monitor
l
Flashes: tire failure.
Reduce speed immediately and
stop the vehicle.
With safety (run-flat) tires:
Reduce vehicle speed carefully to under
50 mph (80 km/h).
In both cases, avoid hard brake applications
and steering maneuvers. Check the tire
inflation pressures.
Conduct in the event of a flat tire, see
pages 106, 110.
General information on the system, see
page 62
Red and yellow: continue to drive;
drive cautiously
Brake warning lamp together with
yellow indicator lamps for ABS, EBV
and ASC+T/DSC:
The control system ABS, EBV and
ASC+T/DSC has failed. Drive
cautiously and defensively. Avoid
full brake applications. Please have
the system checked by your MINI
center as soon as possible.
More information on pages 60, 61
Brake warning lamp together with
the yellow indicator warning lamps
ABS, EBV and ASC+T/DSC for Cana-
dian models.
Red: an important reminder
Brake warning lamp
with parking brake applied.
More information on the parking
brake on page 44
Parking brake lamp for Canadian
models.
Fasten safety belts
l
Depending on model, with acoustic
signal
*
. Lights up either for several
seconds or until the belt is engaged, de-
pending on version.
More information on page 35
Depending on the level of equipment,
the indicator lamp is in the vicinity of
the navigation system.
<
Airbags
l
Please have the system inspected
at your MINI center.
More information on pages 31, 37
Depending on the level of equipment,
the indicator lamp is in the vicinity of
the navigation system.
<
Hood/tailgate
Lights up when the hood and/or
tailgate are open.
More information on pages 27, 86
Page 58 of 140

56
FUEL GAUGE TEMPERATURE GAUGE In the navigation system
Please also comply with the instruc-
tions in the previous column.<
Once indicator lamp 1 switches from
orange to red, there are still approx.
2.1 gallons (8 liters) of fuel in the fuel tank.
Low temperatureThe needle is located at the bottom or on
the right.
The engine is still cold. Drive at moderate
engine and vehicle speeds.Center positionNormal operating temperature of the
engine.High temperatureAs soon as there is a deviation from the
center position upwards or to the left:
Drive moderately and at low engine speed,
if necessary, switch off the engine and
allow to cool down.
Checking coolant level, see page 91.
1 Red indicator lamp When you switch on the ignition, warning
lamp 1 comes on briefly to confirm that the
system is operational.
If the lamp comes on while operating the
vehicle, the engine has overheated. Switch
off the engine immediately and allow it to
cool down.Navigation system option
Coolant temperature warning
lamp in the tachometer.
If the lamp comes on while oper-
ating the vehicle, the engine has over-
heated. Switch off the engine immediately
and allow it to cool down.
Page 60 of 140

58
CLOCK COMPUTER
*
Settings
From ignition key position 1:
Left button: hours
Right button: minutes
Move forward in increments:
Press the button
or
Fast forward:
Press and hold the button
Changeover from 24-hour to 12-hour
mode:
Press both buttons at the same time for
approx. 5 seconds.
Mode selectionWith the ignition key in position 1 and
higher, you can use the button in the turn
signal indicator lever to retrieve informa-
tion from the computer for display in the
tachometer. By pressing the button briefly,
you can call up a new function for display.
The displays appear in the following order:
Outside temperature, cruising range,
average fuel consumption, average vehicle
speed.
Starting with ignition key position 1, the
last active setting is displayed.
If the vehicle is equipped with a navi-
gation system, see chapter covering
the computer in the navigation system
Owner's Manual.<
Page 132 of 140

EVERYTHING FROM A TO Z
130D
Dashboard 12
Data
dimensions 121
engine 120
weights 122
Data, technical 120
Daytime driving lamps 49
Decommissioning the
vehicle 96
Deep water, see Water on
roadways 77
Defrosting position 66
Defrosting windows 69
air conditioner system 66
automatic climate
control 69
Dimensions 121
Dirt on the paintwork 94
Disc brakes 79
Displacement 120
Display elements 13,
14
coolant temperature
gauge 56
fuel gauge 55
indicator and warning
lamps 15
odometer 55
Service Interval Display 57
with navigation system 14 Display lighting 50
Distance remaining 59
Door keys 22
Doors
locking 24
manual operation 25
remote control 23
unlocking 24
DOT Quality Grades 83
Drink holder, see Beverage
holder 70
Driving lamps 49
Driving notes, general 76
Dry air 65,
68
Dynamic Stability Control
(DSC) 16, 61
E
Easy Entry 33
EBV (Electronic Brake Force
Distribution) 16
Electric power windows 28
Electrical defect
driver's door 25
sliding/tilt sunroof 30
Electrical system 124
Electronic Brake Force
Distribution (EBV) 16 Electronic transmission control
module (EP), Continuously
Variable automatic
Transmission (CVT) 48
Emergency operation
driver's door 25
sliding/tilt sunroof 30
tailgate 27
Engine 76
electronics 17
power output 17
speed 17,
55
starting 42
switching off 43
Engine compartment
MINI COOPER 87
MINI COOPER S 88
Engine oil 89
additives 90
prescribed oils 90
pressure 15
Entry to the rear 33
EP (electronic transmission
control module),
Continuously Variable
automatic Transmission
(CVT) 48
Exterior finish, care 94
Exterior mirrors 36
Eyelets, towing 115
F
Failure, tires 62,
106,
110
Filler cap cover 77
Filling capacities 123
Filling, tank 123
First-aid kit 113
Flat tire 62,
106
Flat Tire Monitor 16,
17,
62
Floor carpets 95
Floor coverings 95
Floor mats 95
Fog lamps 50
Foldable rear backrest 71
"Follow me home" lamps 49
Footbrake 79
Footwell lamps
bulb replacement 105
Front fog lamps 50
bulb replacement 102
Front seat adjustment 31
Fuel consumption 59
Fuel consumption display 55
Fuel gauge 55
Fuel preparation 120
Fuel quality 78
Fuel reserve indicator 55
Fuel tank capacity 123
Fuses 112
Page 134 of 140

EVERYTHING FROM A TO Z
132
Luggage compartment
cover 71
Luggage compartment lamp
bulb replacement 105
Luggage rack
see Roof-mounted luggage
rack 73
Lumbar support 32 M
M+S tires 85
Maintenance 57,
93
Maintenance System 93
Manual operation
driver's door 25
sliding/tilt sunroof 30
tailgate 27
Manual transmission 45
Manufacturer 6
Master key 22
initialization 22
MD player, see separate
Owner's Manual
Mechanical key 22
MFL (Multifunction steering
wheel) 18
Microfilter 66,
69
Mini Disc player, see separate
Owner's Manual MINI Maintenance System 93
MINI manufacturer 6
MINI Mobility System 100
Mirrors 36
Mobility System, see MINI
Mobility System 100
Modifications, technical 96
Multifunction steering wheel
(MFL) 18
Multifunction switch 49
N
Navigation system, see
separate Owner's
Manual 14
Non-smoker's equipment
package, see Cigarette lighter
socket 70
Nozzles 66,
69
O
OBD interface socket 96
Odometer 55
Oil 89
additives 90
level 15
prescribed oils 90
pressure 15 Oil change intervals, see Service
and Warranty Booklet (US
models)/Warranty and
Service Guide Booklet
(Canadian models)
Oil service 57
Old batteries 111
Onboard tool kit 100
Opening
from inside 26
from outside 23
Outside temperature
display 59
P
Package tray, see Luggage
compartment cover 71
Park Distance Control (PDC) 63
Parking brake 16,
44
Parking lamps 49
bulb replacement 102
Parking lamps/Low beams 49
Parking, vehicle 76
PDC (Park Distance Control) 63
Plastic 95
Pollen 66
Pollen filter 69
Power output 17, 120 Power supply 12 V 70
Power windows 28
Pressure, tires 80,
109
Q
Quality Grading, tire 83 R
Radiator 91
Radio, see separate Owner's
Manual
Rain sensor 51
Reading lamps 50
Rear backrest
foldable 71
Rear fog lamp 50
bulb replacement 103
Rear lamps 45,
103
Rear window defroster
automatic climate
control 68
heating and climate
control 65
Rear window wiper 52
replacing 100
Rearview mirror 36
Recirculated-air mode
air contitioner system 65
automatic climate
control 68