run flat MINI Hardtop 2 Door 2002 Owner's Manual
[x] Cancel search | Manufacturer: MINI, Model Year: 2002, Model line: Hardtop 2 Door, Model: MINI Hardtop 2 Door 2002Pages: 140, PDF Size: 1.63 MB
Page 18 of 140

16
INDICATOR AND WARNING LAMPS
Yellow: stop immediately
Flat Tire Monitor
l
Flashes: tire failure.
Reduce speed immediately and
stop the vehicle.
With safety (run-flat) tires:
Reduce vehicle speed carefully to under
50 mph (80 km/h).
In both cases, avoid hard brake applications
and steering maneuvers. Check the tire
inflation pressures.
Conduct in the event of a flat tire, see
pages 106, 110.
General information on the system, see
page 62
Red and yellow: continue to drive;
drive cautiously
Brake warning lamp together with
yellow indicator lamps for ABS, EBV
and ASC+T/DSC:
The control system ABS, EBV and
ASC+T/DSC has failed. Drive
cautiously and defensively. Avoid
full brake applications. Please have
the system checked by your MINI
center as soon as possible.
More information on pages 60, 61
Brake warning lamp together with
the yellow indicator warning lamps
ABS, EBV and ASC+T/DSC for Cana-
dian models.
Red: an important reminder
Brake warning lamp
with parking brake applied.
More information on the parking
brake on page 44
Parking brake lamp for Canadian
models.
Fasten safety belts
l
Depending on model, with acoustic
signal
*
. Lights up either for several
seconds or until the belt is engaged, de-
pending on version.
More information on page 35
Depending on the level of equipment,
the indicator lamp is in the vicinity of
the navigation system.
<
Airbags
l
Please have the system inspected
at your MINI center.
More information on pages 31, 37
Depending on the level of equipment,
the indicator lamp is in the vicinity of
the navigation system.
<
Hood/tailgate
Lights up when the hood and/or
tailgate are open.
More information on pages 27, 86
Page 64 of 140

62
FLAT TIRE MONITORThe conceptThe tire inflation pressure is determined
from the signals of the ABS sensors.
The system provides an alert whenever the
tire inflation pressure drops below the
pressure in any other tire. RequirementSo that the system can "familiarize" itself
with the correct inflation pressure, please
do the following:
1. Check the tire inflation pressure in all
tires
2. Compare them with the inflation pres-
sure table, see page 81, and adjust the
pressures if necessary
3. Initialize the system.
Check the tire inflation pressure
regularly and correct it if necessary,
see page 80.<
Flat tire
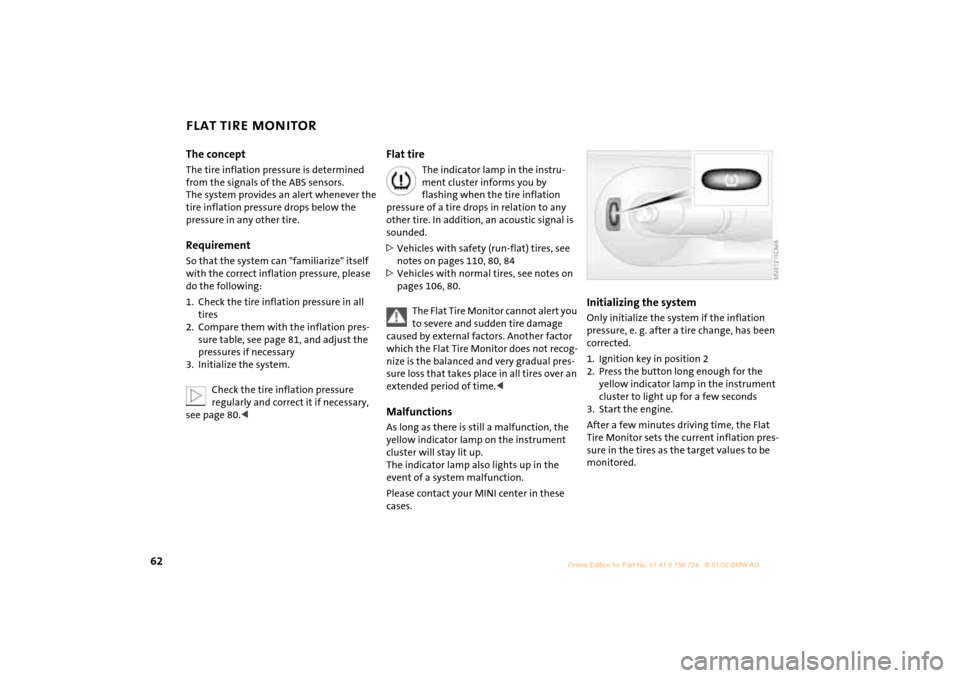
The indicator lamp in the instru-
ment cluster informs you by
flashing when the tire inflation
pressure of a tire drops in relation to any
other tire. In addition, an acoustic signal is
sounded.
>Vehicles with safety (run-flat) tires, see
notes on pages 110, 80, 84
>Vehicles with normal tires, see notes on
pages 106, 80.
The Flat Tire Monitor cannot alert you
to severe and sudden tire damage
caused by external factors. Another factor
which the Flat Tire Monitor does not recog-
nize is the balanced and very gradual pres-
sure loss that takes place in all tires over an
extended period of time.<
MalfunctionsAs long as there is still a malfunction, the
yellow indicator lamp on the instrument
cluster will stay lit up.
The indicator lamp also lights up in the
event of a system malfunction.
Please contact your MINI center in these
cases.
Initializing the systemOnly initialize the system if the inflation
pressure, e. g. after a tire change, has been
corrected.
1. Ignition key in position 2
2. Press the button long enough for the
yellow indicator lamp in the instrument
cluster to light up for a few seconds
3. Start the engine.
After a few minutes driving time, the Flat
Tire Monitor sets the current inflation pres-
sure in the tires as the target values to be
monitored.
Page 82 of 140

80
TIRE INFLATION PRESSUREInformation for your safetyThe factory-approved radial tires are
matched to the vehicle and have been
selected to provide optimum safety and
driving comfort if used properly.
It is not merely the tire's service life, but
also driving comfort and Ð above all else Ð
driving safety that depend on the condition
of the tires and the maintenance of the
specified tire pressure.
Incorrect inflation pressure is a frequent
cause of tire damage. It also significantly
influences the roadholding ability of your
MINI.
Check tire inflation pressures regularly
Ð at least every two weeks and before
beginning a longer trip. Failure to observe
these precautions can result in incorrect tire
pressures, which cause instable handling
response as well as tire damage, and can
ultimately lead to an accident.
Also check the inflation pressure on the
space-saver spare tire.
brands recommended by the manufacturer,
which your MINI center can provide for you.
Inflation pressures are on a sticker attached
to the B-pillar and visible with the driver's
door open.Checking tire inflation pressuresAll pressures are specified in the standard
units of pressure for your country (bar, psi,
kilopascal), and apply to cold tires (tires at
ambient temperature).
Vehicles with Flat Tire Monitor:
After correcting the tire inflation pressure,
reinitialize the Flat Tire Monitor, see
page 62.
Checking the inflation pressure on the
space-saver spare tire*There is a valve extension accessible from
the outside on the bumper for checking the
inflation pressure.Safety (run-flat) tires* Safety tires are an optional extra consisting
of self-contained tires and special rims. The
tire reinforcement ensures that the tire
retains residual safety in the event of pres-
sure drop and driving remains possible to a
restricted degree. The vehicle is equipped
with a Flat Tire Monitor which indicates a
flat-tire.
More information, see pages 62, 110.
Page 86 of 140

84
TIRE REPLACEMENT WHEEL AND TIRE COMBINATIONS Tire age The date on which the tire was manufac-
tured is indicated by the code on the side-
wall:
DOT ... 1202 indicates that the tire was
manufactured in Week 12 of the year 2002.
The manufacturer of your MINI recom-
mends replacement of all tires Ð including
the space-saver spare tire, after no more
than 6 years. Safety (run-flat) tires*
For replacement, use only safety tires,
as in the event of a flat tire there is no
space-saver spare tire.
You will recognize safety tires by a circular
symbol containing the letters RSC on the
side of the tire, see pages 110, 80.<
The right choiceThe factory-approved normal tires and
safety tires are matched to the vehicle and
have been selected to provide optimum
driving safety and the desired driving
comfort.
Never mount wheels and tires that
have not been specifically approved
by the manufacturer for use on your partic-
ular model. Although other wheels and
tires may theoretically have the same
dimensions, variations in factors such as
manufacturing tolerances can result in
contact between tire and bodywork, ulti-
mately leading to serious accidents. The
manufacturer cannot evaluate non-
approved wheels and tires to determine if
they are suited for use, and therefore
cannot ensure the operating safety of the
vehicle if they are fitted.<
The manufacturer has tested certain tire
brands in each size, categorized them as
safe for use on the road, and approved
them. Contact your MINI center for more
details.
The correct wheel and tire combina-
tion affects various systems that
would otherwise be impaired, e.g. ABS,
ASC+T and DSC.
For this reason, use only tires of the same
manufacture and tread configuration. In
the event of a flat tire, for example,
remount the approved wheel and tire
combination as soon as possible.<
StorageStore tires in a cool, dry place, protecting
them against light whenever possible.
Protect the tires against contact with oil,
grease and fuel.Tire changes between axlesDepending on individual operating condi-
tions, different wear patterns appear on
the front and rear axles. In the interests of
safety and optimized handling characteris-
tics, a change between the axles is not
recommended.
Page 112 of 140

110
FLAT TIRE Ð SAFETY (RUN-FLAT) TIRES
*
You will recognize safety tires by a circular
symbol containing the letters RSC on the
side of the tire.
Safety tires consist of self-contained tires
and special rims. The tire reinforcement
ensures that the tire retains some residual
safety in the event of pressure drop and
driving remains possible to a restricted
degree.
The reinforcement on the flanks of
the safety tires means that it is
usually not possible to detect an air loss
from outside.<
Flat tire The yellow indicator lamp in the instru-
ment cluster lights up to indicate a flat tire.
In addition, a gong sounds, see
pages 17, 62.
1. Reduce vehicle speed carefully to under
50 mph (80 km/h), avoiding hard brake
applications and steering maneuvers
2. Do not exceed a speed of 50 mph
(80 km/h)
3. Identify damaged tires; check tire infla-
tion pressures on all four wheels at the
next opportunity, see page 80
4. Correct the tire inflation pressure if you
wish to continue your journey and this is
permitted, see next column
5. Have damaged tires changed by your
MINI center, see page 84.
Your MINI center has the information
needed for working with safety tires
and is equipped with the necessary special
tools. They provide advice if you wish to
replace the tires on your MINI or wish to
re-equip from summer to winter tires Ð or
vice versa, see also pages 80, 84, 85.<
For safety reasons, do not have a
damaged safety tire repaired.<
Continuing driving with a damaged
tireDriving can continue under certain condi-
tions with safety tires, depending on the
vehicle load and the severity of the tire
damage, at a maximum speed of 50 mph
(80 km/h).
You can determine the possible mileage for
continued driving on the basis of the
following general indications:
>Tire inflation pressure 0 bar (0 psi):
approx. 95 miles (150 km)
>Tire inflation pressure 0.5 bar Ð 1 bar
(7.2 psi Ð 14.5 psi): approx. 300 miles
(500 km)
>Tire inflation pressure greater than 1 bar
(14.5 psi): approx. 600 miles (1,000 km).
Page 118 of 140

116
TOW-STARTING AND TOWINGTow-starting
On vehicles with Continuously Vari-
able automatic Transmission (CVT), it
is not permitted to start the engine by tow-
starting. The transmission could be
damaged.
For jump-starting, see page 113
.<
Only tow-start vehicles with a catalytic
converter when the engine is cold, other-
wise, unburned fuel in the catalytic
converter could catch fire. It is better to use
jumper cables.
1. Switch on the hazard warning flashers
(comply with national regulations)
2. Ignition key in position 2
3. Engage 3rd gear
4. Tow-start with the clutch pedal pressed
5. Slowly release the clutch
6. When the engine starts, press the clutch
pedal again
7. Switch off the hazard warning flashers.
Have the cause of the starting problems
rectified by your MINI center.
Towing
Only tow vehicles with Continuously
Variable automatic Transmission
(CVT) with the front wheels raised or on a
special transport vehicle, otherwise the
transmission can be damaged.<
1 Ignition key in position 1:
The brake lamps, turn signals, horn and
windshield wipers can be operated
2 Switch on the hazard warning flashers
(comply with national regulations).
If the electrical system has failed, place
some kind of warning on the towed vehicle,
e. g. a sign or warning triangle in the rear
window.
Ensure that if the electrical system
has failed the ignition key is in posi-
tion 1, otherwise the steering lock could
engage and make it impossible to steer the
vehicle.
When the engine is not running, there is no
power-assist. This means that greater
effort is required for braking and
steering.<
Towing with a commercial tow truck >Do not tow with sling-type equipment
>Use a wheel-lift or flatbed carrier
>Please comply with applicable towing
laws.
Never allow passengers to ride in a
towed vehicle for any reason.<
Page 135 of 140

EVERYTHING FROM A TO Z
133
OVERVIEW REPAIRS OPERATION CONTROLS DATA INDEX
Recirculation of air 65,
68
Reclining seat 31
Refueling 77
Remaining distance for
service 57
Remote control 23
battery 22
battery changing 22
initialization 22
Removing mist,
windows 66,
69
Removing window mist
air conditioner system 66
automatic climate
control 69
Replacement key 22
Reporting safety defects 9
Restraint system 38
Reverse gear 45, 47
Rod antenna 94
Roller sun blind, rear window
blind 30
Rubber parts 95
Run-flat tire, see Safety
tires 80,
84,
85,
110
S
Safety belts 16,
31,
35,
95
adjusting 35
Safety lock buttons 26
Safety tires 80,
84,
110
winter tires 84, 85
Screwdriver 100
Seats 31
Securing cargo 72
Selector lever shiftlock 42,
46
Service and Warranty Booklet
(US models)/Warranty and
Service Guide Booklet
(Canadian models) 93
Service Interval Display 57, 93
Shiftlock 46
Side airbags 37
Side turn signal indicators
bulb replacement 102
Sitting 31
Sliding/tilt sunroof 29
convenience feature 25
safety function 30
Smoker's equipment
package 70
Snow chains 85
Space-saver spare tire
changing tires 106 Spare key 22
Spark plugs 124
Speed 120
Speeds 85
Split rear backrest 71
Spray jets 52
Standing lamps 49
bulb replacement 102
Starting 42
problems 43,
113,
114,
115
with a discharged
battery 113,
114
Steering lock 42
Storage, tires 84
Sun visors 36
Switches 12
Switching off, engine 43
Symbols 6
T
Tachometer 55
Tail lamps
bulb replacement 103
Tailgate 16,
27
manual unlocking 27
Tank capacity 77
Tank content, filling
capacities 123 Technical data 120
Technical modifications 96
Temperature
automatic climate
control 68
heating and climate
control 65
tires 83
Temperature display 59
engine coolant 56
Temperature layering 66,
69
Temperatures, high 77
The right tires 84
Third brake lamp
bulb replacement 104
Tire change
tire change set 106
Tire changes between axles 84
Tire failure 16
safety tires 110
space-saver spare tire 106
Tire inflation pressure 80, 85
Tires 80
all-season tires 85
break-in 76
changing 106
condition 82,
85
damage 82
Page 136 of 140

EVERYTHING FROM A TO Z
134
inflation pressure 80
M+S tires 85
replacement 83
safety tires 80,
84,
85,
110
snow chains 85
storage 84
temperature 83
the right choice 84
tread 82
winter tires 85
with emergency running
properties, see Safety
tires 80,
84,
85,
110
Tools 100
Torque 120
Tow bar 115
Tow fitting 115
Tow socket for tow
fittings 115
Towing 115
with bar 115
with Continuously Variable
automatic Transmission
(CVT) 116
Towing eyelets 115 Tow-starting 115,
116
with Continuously Variable
automatic Transmission
(CVT) 116
Tow-starting and towing 115
Traction 83
Trailer nose weight 122
Transmission 45
Transmission fault,
Continuously Variable
automatic Transmission
(CVT) 48
Transporting children
safely 38
Tread wear 83
Trip odometer 55
Turn signal indicators 17,
49
bulb replacement 102
U
Uniform Tire Quality
Grading 83
V
Vanity mirror 36
bulb replacement 105
illuminated 36
Vehicle
battery 124
decommissioning 96
dimensions 121
exterior finish 94
operating 42
settings 41
washing 94
weight 122
Vehicle Memory 41
Ventilation 66
draft-free 66,
69
W
Warning lamp 15
Warning triangle 113
Washer systems 89
Washer/wiper system 51
Waste container 70
Water on roadways
deep water 77
Wearing safety belt 16,
35
Weights 122 Wheel and tire
combinations 84
Wheel stud
wrench 100,
106,
107
Wheelbase 121
Width 121
Windows, convenience
feature 25
Windshield heating
automatic climate
control 68
heating and climate
control 65
Windshield washer
system 51,
89
filling 89
Windshield wipers 51,
100
care 95
replacing 100
Winter tires 85
all-season tires 85
safety tires 84,
85
Wiper/washer system 51
Work in the engine
compartment 86