key MINI Hardtop 2 Door 2004 Owner's Guide
[x] Cancel search | Manufacturer: MINI, Model Year: 2004, Model line: Hardtop 2 Door, Model: MINI Hardtop 2 Door 2004Pages: 152, PDF Size: 1.41 MB
Page 59 of 152

57
OVERVIEW REPAIRS OPERATIONCONTROLS DATA INDEX
ONBOARD COMPUTER
*
Mode selection
With the ignition key in position 1 and higher,
you can use the button in the turn signal indi-
cator lever to retrieve information from the
onboard computer for display in the tachom-
eter. By pressing the button briefly, you can
call up a new function for display.
The displays appear in the following order:
Outside temperature, range, average con-
sumption and current consumption, aver-
age speed and current speed.
Starting with ignition key position 1, the
last active setting is displayed.
If the vehicle is equipped with a navi-
gation system, you will find more
information on the onboard computer in
the navigation system Owner's Manual.<
Outside temperature If the vehicle is equipped with a tachome-
ter, but not with an onboard computer, the
outside temperature is displayed.
You can have the units 6 or 7 set
by your MINI Dealer.<
Ice warning If the outside temperature falls below
approx. 37 7 / +36, the onboard com-
puter automatically switches to the outside
temperature display.
In addition, an acoustic signal can be heard
and the display flashes for a short time.
The ice warning does not exclude the
possibility that surface ice can form
at temperatures above 37 7 / +36, e.g.
on bridges and shaded roads.<
With navigation system option:
The temperature is displayed in the status
line of the navigation system, refer to the
Owner's Manual for the navigation system.Current vehicle speedIf the vehicle is equipped with a tachome-
ter, but not with an onboard computer, the
current vehicle speed is displayed.
With the ignition key in position 1 and
higher, you can use the button in the turn
signal indicator lever to call this up in the
tachometer display. Briefly press the but-
ton to switch the display from the outside
temperature to the current vehicle speed.
Page 66 of 152
64
PARK DISTANCE CONTROL (PDC)
*
The concept
The PDC assists you when you back into a
parking space. A signal tone tells you the
current distance to an object behind your
vehicle. To do this, four ultrasonic sensors
in the rear bumper measure the distance to
the nearest object.
The sensors on each side have a range of
approx. 2 ft / 60 cm, the middle sensors
one of approx. 5 ft / 1.5 m.
PDC is a parking aid that can identify
objects if they are approached slowly,
as is generally the case when parking.
Avoid driving towards objects rapidly; due
to underlying physical principles, the sys-
tem may otherwise alert you too late for
you to take evasive steps.
one second after you select reverse gear or
place the selector lever in position R.
Wait for this one second before you
drive backwards.<
The system is deactivated when you shift
away from Reverse.
You can have a signal tone set by your
MINI Dealer as a confirmation that
PDC has been activated.<
Acoustical signalsThe distance to an object is indicated by a
tone sounding at intervals. As the distance
between vehicle and object decreases, the
intervals between the tones become
shorter. A continuous tone indicates the
presence of an object less than 8 in / 20 cm
away.
The warning signal is canceled after
approx. three seconds if the distance to the
object remains constant during this time,
for instance if you are moving parallel to a
wall.MalfunctionSystem malfunctions will be indicated by a
continuous high-pitched tone when the
system is activated the first time. Please
have your MINI Dealer resolve the problem.Volume controlThe volume of the Park Distance Control
signal can be adjusted from level 1, soft, to
level 6, loud.
The volume can be set by your MINI
Dealer.<
System limitations
Even with PDC, final responsibility for
estimating the distance between the
vehicle and any objects always remains
with the driver.
Even when sensors are involved, there is a
blind spot in which objects cannot be de-
tected. Recognition of some objects can be
beyond the limits of physical ultrasonic
measurement, for example with towing
bars or hitches or with thin or wedge-
shaped objects. Moreover, low objects that
have already been detected, such as a curb
edge, can disappear out of the range of the
sensors before a continuous tone sounds.
Loud sources of sound outside and inside
your vehicle can drown the PDC signal
tone.<
Keep the sensors clean and free of ice
or snow in order to ensure that they
will continue to operate effectively.
Do not apply high pressure spray to the
sensors for a prolonged period of time.
Always maintain a distance which is
greater than 4 in / 10 cm.<
Page 67 of 152
65
OVERVIEW REPAIRS OPERATIONCONTROLS DATA INDEX
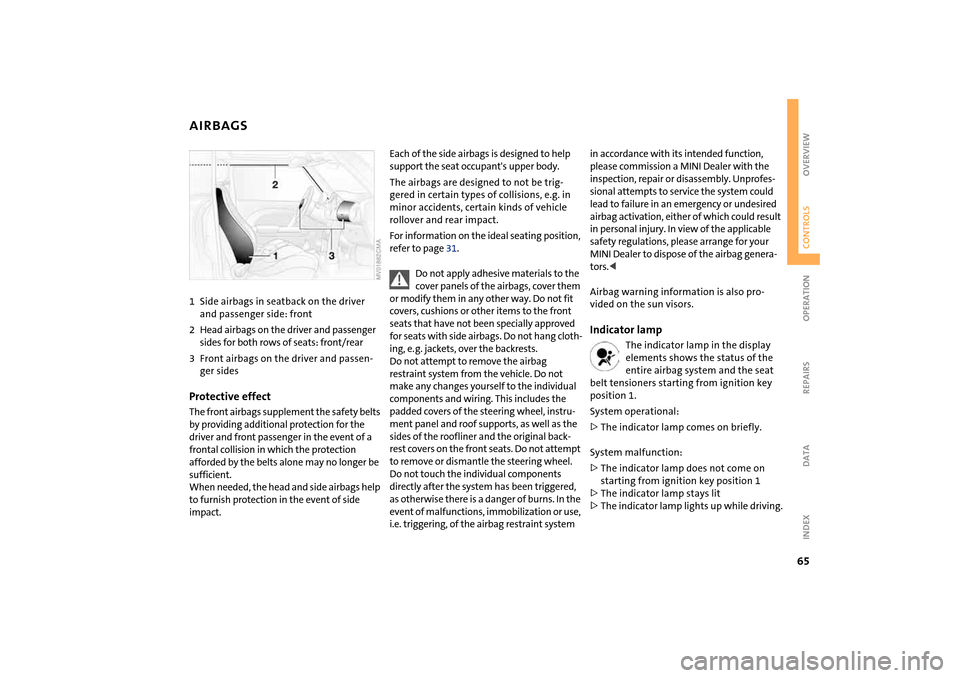
AIRBAGS1Side airbags in seatback on the driver
and passenger side: front
2Head airbags on the driver and passenger
sides for both rows of seats: front/rear
3Front airbags on the driver and passen-
ger sidesProtective effectThe front airbags supplement the safety belts
by providing additional protection for the
driver and front passenger in the event of a
frontal collision in which the protection
afforded by the belts alone may no longer be
sufficient.
When needed, the head and side airbags help
to furnish protection in the event of side
impact.
Each of the side airbags is designed to help
support the seat occupant's upper body.
The airbags are designed to not be trig-
gered in certain types of collisions, e.g. in
minor accidents, certain kinds of vehicle
rollover and rear impact.
For information on the ideal seating position,
refer to page 31.
Do not apply adhesive materials to the
cover panels of the airbags, cover them
or modify them in any other way. Do not fit
covers, cushions or other items to the front
seats that have not been specially approved
for seats with side airbags. Do not hang cloth-
ing, e. g. jackets, over the backrests.
Do not attempt to remove the airbag
restraint system from the vehicle. Do not
make any changes yourself to the individual
components and wiring. This includes the
padded covers of the steering wheel, instru-
ment panel and roof supports, as well as the
sides of the roofliner and the original back-
rest covers on the front seats. Do not attempt
to remove or dismantle the steering wheel.
Do not touch the individual components
directly after the system has been triggered,
as otherwise there is a danger of burns. In the
event of malfunctions, immobilization or use,
i.e. triggering, of the airbag restraint system
in accordance with its intended function,
please commission a MINI Dealer with the
inspection, repair or disassembly. Unprofes-
sional attempts to service the system could
lead to failure in an emergency or undesired
airbag activation, either of which could result
in personal injury. In view of the applicable
safety regulations, please arrange for your
MINI Dealer to dispose of the airbag genera-
tors.<
Airbag warning information is also pro-
vided on the sun visors.Indicator lamp
The indicator lamp in the display
elements shows the status of the
entire airbag system and the seat
belt tensioners starting from ignition key
position 1.
System operational:
>The indicator lamp comes on briefly.
System malfunction:
>The indicator lamp does not come on
starting from ignition key position 1
>The indicator lamp stays lit
>The indicator lamp lights up while driving.
Page 76 of 152

74
ASHTRAY, DRINKS HOLDERS CIGARETTE LIGHTER, 12 V POWER SUPPLY AshtrayThe ashtray is located in one of the bever-
age holders in the center console.
In the rear, an ashtray can also be fitted in
the beverage holder at the end of the cen-
ter console.Beverage holders There are two beverage holders at the front
of the center console. Another is located at
the end of the center console in the rear.
From ignition key position 1:
Press the cigarette lighter in.
Remove as soon as the lighter jumps back
out.
Hold or touch the hot cigarette
lighter by the knob only. Holding or
touching it in other areas could result in
burns.
flashlights, car vacuum cleaners, etc., up to
a rating of approx. 200 watts at 12 volts.
Avoid damaging the socket with plugs of
different shapes or sizes.
A second 12 V socket is on the left-hand
side of the cargo area.
When the vehicle is equipped with a MINI
Mobility System, the 12 V socket is also for
supplying the compressor.
Page 124 of 152

122
MINI MOBILITY SYSTEM
*
Pumping in liquid sealant
1. Shake the filling canister
2. Screw the filling hose onto the filling
canister
3. Unscrew the dust protection cap from
the valve of the defective tire
4. Screw out the valve core with the valve
remover. The valve remover is located in
a package with the filling hose
Place the valve core and valve
remover only on clean surfaces.<
5. Remove the cap from the filling hose
6. Push the filling hose onto the tire valve
7. Hold the filling canister with the cap
down and squeeze.
Squeeze the entire contents of the canis-
ter into the tire
8. Remove filling hose
9. Screw valve core into the tire valve with
the valve remover.
In the event of a lost or dirty valve
core you will find another valve core
in a package with the filling hose.<
Please remember that the liquid can-
ister must be replaced every four
years if the equipment has not been
used.<
Reinflating the tire1. Screw hose 1 with manometer onto the
tire valve
2. Connect plug 3 to the cigarette lighter
socket in the vehicle interior, refer to
page 74
3. Ignition key in position 1:
Turn on compressor 2
4. Inflate the tires to at least 26 psi /
180 kPa, but not to more than 36 psi /
250 kPa.
To check the current air pressure, shut
off the device for a short time
Do not run the compressor for
longer than 6 minutes, otherwise
the device will overheat and possibly be
damaged.<
Page 125 of 152
123
OVERVIEW REPAIRSOPERATION CONTROLS DATA INDEX
MINI MOBILITY SYSTEM
*
If an air pressure of 26 psi /
180 kPa cannot be reached,
unscrew the hose 1 and drive back and
forth about 33 ft / 10 m so that the liq-
uid sealant is distributed in the tire.
Afterwards repeat the procedure.
If an air pressure of 26 psi / 180 kPa is
still not reached, the tire is too badly
damaged. Please contact the nearest
MINI Dealer.<
5. Turn off compressor 2
6. Unscrew hose 1 from the tire valve
7. Store the MINI Mobility System back in
the vehicle.
The instructions for using the MINI
Mobility System are also given on the
equipment.<
Distributing liquid sealantImmediately drive for approx. 10 minutes,
so that the liquid sealant is uniformly dis-
tributed.
Do not exceed a speed of 40 mph /
60 km/h.
If possible do not drive at a speed lower
than 10 mph / 20 km/h.<
Checking tire inflation pressure 1. After driving for approx. 10 minutes, pull
over at a suitable location
2. Screw hose with manometer back onto
the tire valve
3. Check tire pressure
The tire inflation pressure must be at
least 18 psi / 130 kPa betragen.
If it is not, do not continue driving.<
If 18 psi / 130 kPa are displayed:
4. Ignition key position 1:
Turn on compressor 2. Correct the tire
inflation pressure to the specified value,
refer to the tire inflation pressure table
on page 88
5. Replace the tire as soon as possible.
The use of the MINI Mobility System
may be ineffective with tire damage
larger than approx. 1/6 in / 4 mm. Please
contact the nearest MINI Dealer if the tire
cannot be made drivable with the MINI
Mobility System.<
Driving on
Do not exceed the permitted maxi-
mum speed of 50 mph / 80 km/h;
otherwise an accident could happen.<
Replace the defective tire as soon as
possible and have the new wheel/tire
assembly balanced.
Have the MINI Mobility System refilled.
Please contact your MINI Dealer.<
Tire change setYour MINI is additionally equipped with a
tire change set. This is located in the MINI
COOPER in the cargo area under the floor
mat.
When changing a tire, always observe the
safety measures on page 116, and follow
the procedure described on page 119 ff.
In case of a flat tire the tire change
set is not necessary due to the avail-
ability of the MINI Mobility System.<
Page 131 of 152
129
OVERVIEW REPAIRSOPERATION CONTROLS DATA INDEX
TOWINGTow-startingIt is not possible to start the engine of a
vehicle equipped with an automatic trans-
mission by towing or pushing.
For instructions on jump starting, refer to
page 126.
Never attempt to use your vehicle to push
another car, since damage to the energy-
absorbing bumpers could result.Towing a vehicle
Only tow vehicles with Continuously
Variable automatic Transmission
(CVT) with the front wheels raised or on a
special transport vehicle, otherwise the
transmission can be damaged.<
1. Place gear selector lever in neutral or idle
2. Towing speed:
Max. 45 mph / 70 km/h
3. Towing distance:
Max. 95 miles / 150 km
4. Leave the ignition key at position 1 to
ensure that the brake lamps, turn sig-
nals, horn and windshield wipers remain
operative, and to prevent the steering
lock detent from engaging
5. Switch on the hazard-warning system,
observe country-specific regulations.
Find some means of identifying the vehicle
in tow, for instance, by turning on the haz-
ard warning flashers.
Make sure that the ignition key
remains in position 1 even when the
electrical system has failed to prevent the
steering lock from engaging.
The steering and brakes are without power
assist when the engine is off. This means
that increased effort is required for steer-
ing and braking.<
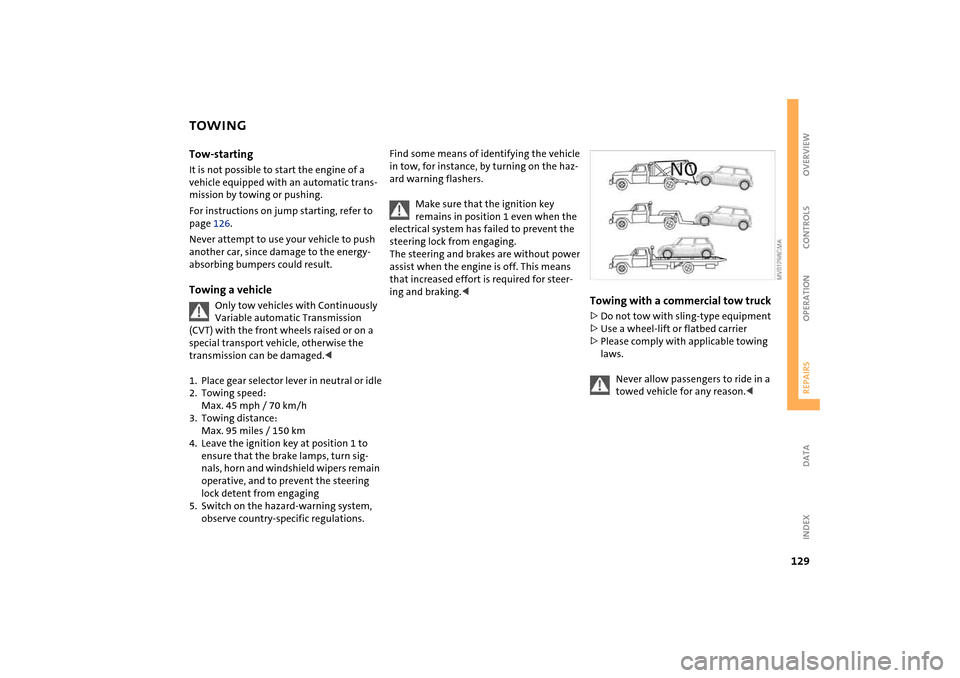
Towing with a commercial tow truck>Do not tow with sling-type equipment
>Use a wheel-lift or flatbed carrier
>Please comply with applicable towing
laws.
Never allow passengers to ride in a
towed vehicle for any reason.<
Page 141 of 152
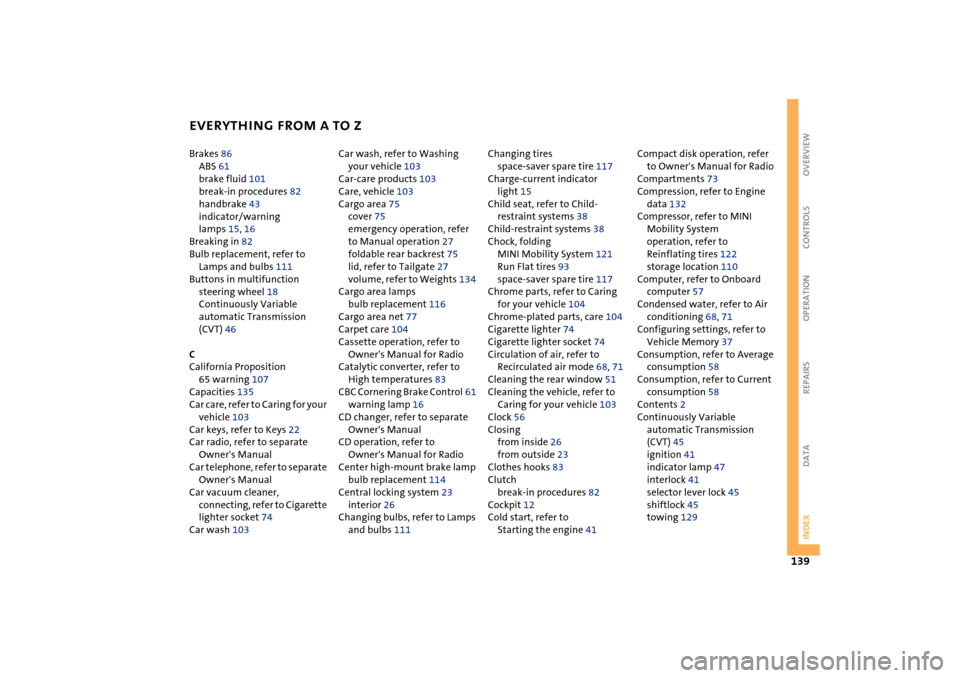
EVERYTHING FROM A TO Z
139
OVERVIEW REPAIRS OPERATION CONTROLS DATA INDEX
Brakes 86
ABS 61
brake fluid 101
break-in procedures 82
handbrake 43
indicator/warning
lamps 15, 16
Breaking in 82
Bulb replacement, refer to
Lamps and bulbs 111
Buttons in multifunction
steering wheel 18
Continuously Variable
automatic Transmission
(CVT) 46
C
California Proposition
65 warning 107
Capacities 135
Car care, refer to Caring for your
vehicle 103
Car keys, refer to Keys 22
Car radio, refer to separate
Owner's Manual
Car telephone, refer to separate
Owner's Manual
Car vacuum cleaner,
connecting, refer to Cigarette
lighter socket 74
Car wash 103 Car wash, refer to Washing
your vehicle 103
Car-care products 103
Care, vehicle 103
Cargo area 75
cover 75
emergency operation, refer
to Manual operation 27
foldable rear backrest 75
lid, refer to Tailgate 27
volume, refer to Weights 134
Cargo area lamps
bulb replacement 116
Cargo area net 77
Carpet care 104
Cassette operation, refer to
Owner's Manual for Radio
Catalytic converter, refer to
High temperatures 83
CBC Cornering Brake Control 61
warning lamp 16
CD changer, refer to separate
Owner's Manual
CD operation, refer to
Owner's Manual for Radio
Center high-mount brake lamp
bulb replacement 114
Central locking system 23
interior 26
Changing bulbs, refer to Lamps
and bulbs 111 Changing tires
space-saver spare tire 117
Charge-current indicator
light 15
Child seat, refer to Child-
restraint systems 38
Child-restraint systems 38
Chock, folding
MINI Mobility System 121
Run Flat tires 93
space-saver spare tire 117
Chrome parts, refer to Caring
for your vehicle 104
Chrome-plated parts, care 104
Cigarette lighter 74
Cigarette lighter socket 74
Circulation of air, refer to
Recirculated air mode 68, 71
Cleaning the rear window 51
Cleaning the vehicle, refer to
Caring for your vehicle 103
Clock 56
Closing
from inside 26
from outside 23
Clothes hooks 83
Clutch
break-in procedures 82
Cockpit 12
Cold start, refer to
Starting the engine 41 Compact disk operation, refer
to Owner's Manual for Radio
Compartments 73
Compression, refer to Engine
data 132
Compressor, refer to MINI
Mobility System
operation, refer to
Reinflating tires 122
storage location 110
Computer, refer to Onboard
computer 57
Condensed water, refer to Air
conditioning 68, 71
Configuring settings, refer to
Vehicle Memory 37
Consumption, refer to Average
consumption 58
Consumption, refer to Current
consumption 58
Contents 2
Continuously Variable
automatic Transmission
(CVT) 45
ignition 41
indicator lamp 47
interlock 41
selector lever lock 45
shiftlock 45
towing 129
Page 142 of 152
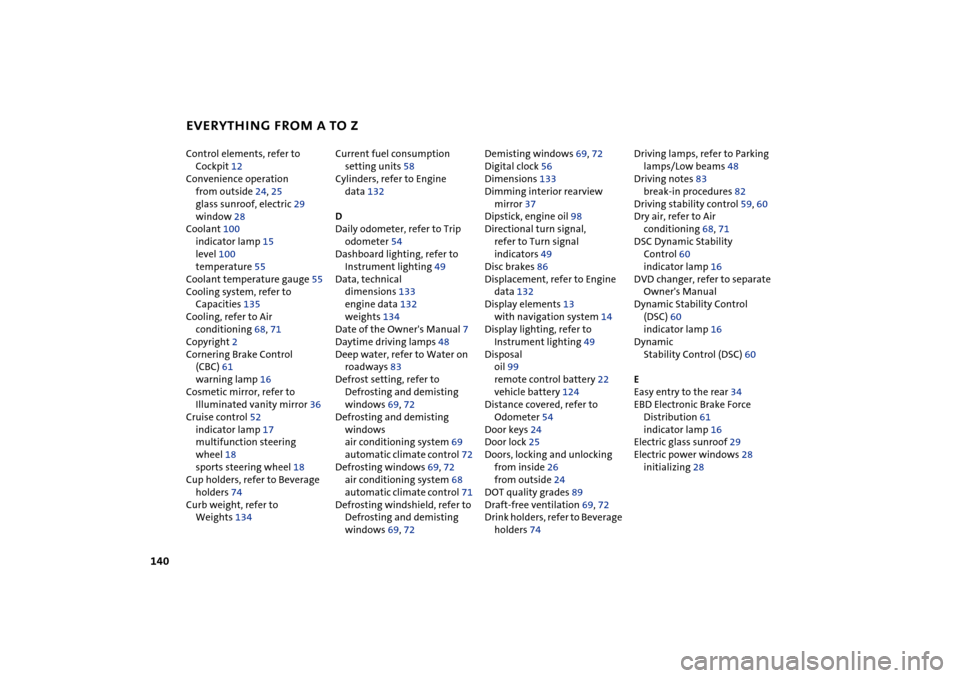
EVERYTHING FROM A TO Z
140
Control elements, refer to
Cockpit 12
Convenience operation
from outside 24, 25
glass sunroof, electric 29
window 28
Coolant 100
indicator lamp 15
level 100
temperature 55
Coolant temperature gauge 55
Cooling system, refer to
Capacities 135
Cooling, refer to Air
conditioning 68, 71
Copyright 2
Cornering Brake Control
(CBC) 61
warning lamp 16
Cosmetic mirror, refer to
Illuminated vanity mirror 36
Cruise control 52
indicator lamp 17
multifunction steering
wheel 18
sports steering wheel 18
Cup holders, refer to Beverage
holders 74
Curb weight, refer to
Weights 134 Current fuel consumption
setting units 58
Cylinders, refer to Engine
data 132
D
Daily odometer, refer to Trip
odometer 54
Dashboard lighting, refer to
Instrument lighting 49
Data, technical
dimensions 133
engine data 132
weights 134
Date of the Owner's Manual 7
Daytime driving lamps 48
Deep water, refer to Water on
roadways 83
Defrost setting, refer to
Defrosting and demisting
windows 69, 72
Defrosting and demisting
windows
air conditioning system 69
automatic climate control 72
Defrosting windows 69, 72
air conditioning system 68
automatic climate control 71
Defrosting windshield, refer to
Defrosting and demisting
windows 69, 72 Demisting windows 69, 72
Digital clock 56
Dimensions 133
Dimming interior rearview
mirror 37
Dipstick, engine oil 98
Directional turn signal,
refer to Turn signal
indicators 49
Disc brakes 86
Displacement, refer to Engine
data 132
Display elements 13
with navigation system 14
Display lighting, refer to
Instrument lighting 49
Disposal
oil 99
remote control battery 22
vehicle battery 124
Distance covered, refer to
Odometer 54
Door keys 24
Door lock 25
Doors, locking and unlocking
from inside 26
from outside 24
DOT quality grades 89
Draft-free ventilation 69, 72
Drink holders, refer to Beverage
holders 74 Driving lamps, refer to Parking
lamps/Low beams 48
Driving notes 83
break-in procedures 82
Driving stability control 59, 60
Dry air, refer to Air
conditioning 68, 71
DSC Dynamic Stability
Control 60
indicator lamp 16
DVD changer, refer to separate
Owner's Manual
Dynamic Stability Control
(DSC) 60
indicator lamp 16
Dynamic
Stability Control (DSC) 60
E
Easy entry to the rear 34
EBD Electronic Brake Force
Distribution 61
indicator lamp 16
Electric glass sunroof 29
Electric power windows 28
initializing 28
Page 144 of 152
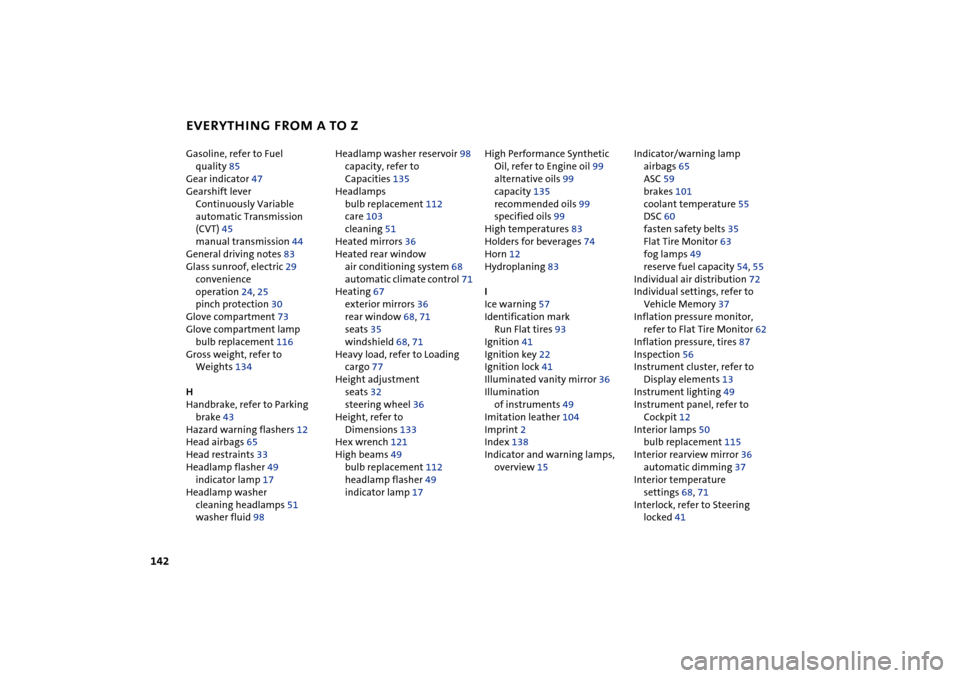
EVERYTHING FROM A TO Z
142
Gasoline, refer to Fuel
quality 85
Gear indicator 47
Gearshift lever
Continuously Variable
automatic Transmission
(CVT) 45
manual transmission 44
General driving notes 83
Glass sunroof, electric 29
convenience
operation 24, 25
pinch protection 30
Glove compartment 73
Glove compartment lamp
bulb replacement 116
Gross weight, refer to
Weights 134
H
Handbrake, refer to Parking
brake 43
Hazard warning flashers 12
Head airbags 65
Head restraints 33
Headlamp flasher 49
indicator lamp 17
Headlamp washer
cleaning headlamps 51
washer fluid 98 Headlamp washer reservoir 98
capacity, refer to
Capacities 135
Headlamps
bulb replacement 112
care 103
cleaning 51
Heated mirrors 36
Heated rear window
air conditioning system 68
automatic climate control 71
Heating 67
exterior mirrors 36
rear window 68, 71
seats 35
windshield 68, 71
Heavy load, refer to Loading
cargo 77
Height adjustment
seats 32
steering wheel 36
Height, refer to
Dimensions 133
Hex wrench 121
High beams 49
bulb replacement 112
headlamp flasher 49
indicator lamp 17 High Performance Synthetic
Oil, refer to Engine oil 99
alternative oils 99
capacity 135
recommended oils 99
specified oils 99
High temperatures 83
Holders for beverages 74
Horn 12
Hydroplaning 83
I
Ice warning 57
Identification mark
Run Flat tires 93
Ignition 41
Ignition key 22
Ignition lock 41
Illuminated vanity mirror 36
Illumination
of instruments 49
Imitation leather 104
Imprint 2
Index 138
Indicator and warning lamps,
overview 15 Indicator/warning lamp
airbags 65
ASC 59
brakes 101
coolant temperature 55
DSC 60
fasten safety belts 35
Flat Tire Monitor 63
fog lamps 49
reserve fuel capacity 54, 55
Individual air distribution 72
Individual settings, refer to
Vehicle Memory 37
Inflation pressure monitor,
refer to Flat Tire Monitor 62
Inflation pressure, tires 87
Inspection 56
Instrument cluster, refer to
Display elements 13
Instrument lighting 49
Instrument panel, refer to
Cockpit 12
Interior lamps 50
bulb replacement 115
Interior rearview mirror 36
automatic dimming 37
Interior temperature
settings 68, 71
Interlock, refer to Steering
locked 41