service MINI Hardtop 2 Door 2005 Owner's Guide
[x] Cancel search | Manufacturer: MINI, Model Year: 2005, Model line: Hardtop 2 Door, Model: MINI Hardtop 2 Door 2005Pages: 165, PDF Size: 2.32 MB
Page 114 of 165

112
MINI MAINTENANCE SYSTEMThe MINI maintenance system helps main
-
tain your vehicle's road safety and opera
-
tional safety. Please bear in mind that regular mainte
-
nance is not only necessary for the safety of
your vehicle, but also plays a significant
role in maintaining the resale value of the
vehicle.
Service interval displayWhile conventional systems specify main
-
tenance according to fixed distances
driven, the MINI Maintenance System takes
account of the operating conditions of the
vehicle, for distances can be driven in many
different ways:
60,000
miles
/ 100,000
km short distance
operation can not be equated with
60,000
miles
/ 100,000
km long distance
operation from a maintenance standpoint.
The condition-based MINI Maintenance
System includes the Engine Oil Service and
Inspections I and II.Determining the maintenance intervals
according to the actual use of the vehicle
covers every kind of operating situation.
People who drive very little, i.e. much less
than 6,000
miles
/ 10,000
km per year,
should have the engine oil changed at least
every 2 years since oil deteriorates over
time, regardless of use.
For more information on the service inter
-
val display, refer to page
65.
Service and Warranty Information
Booklet for US models, Warranty and
Service Guide Booklet for Canadian
models For additional information on maintenance
intervals and procedures, please refer to
the Service and Warranty Information
Booklet for US
models or the Warranty and
Service Guide Booklet for Canadian models.
As a precaution against rust, it is advisable
to have the body checked for damage from
rocks or gravel at the same time, depending
upon operating conditions.
The manufacturer of your MINI rec
-
ommends having maintenance and
repair work carried out only by a MINI
Dealer or a workshop that has specially
trained personnel working in accordance
with the specifications of the MINI manu
-
facturer.
Make sure that maintenance work is con
-
firmed with an entry in the Service and
Warranty Information Booklet for
US
models or the Warranty and Service
Guide Booklet for Canadian models. These
entries are your proof that the vehicle has
received regular maintenance.<
Page 115 of 165
113
OVERVIEW REPAIRSOPERATIONCONTROLS DATA INDEX
OBD SOCKET
CARING FOR YOUR VEHICLE
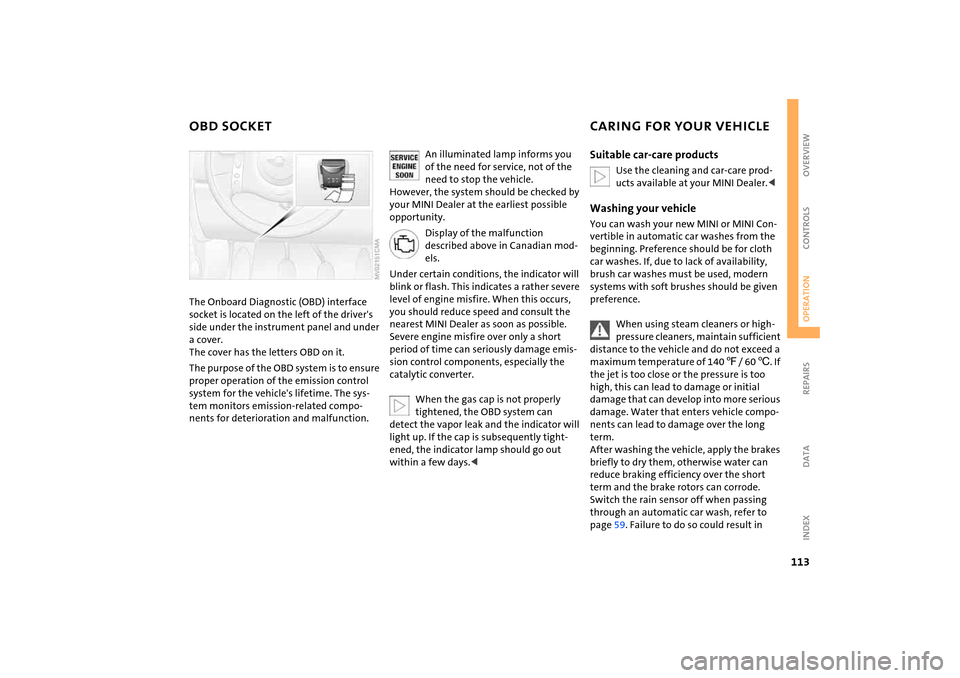
The Onboard Diagnostic (OBD) interface socket is located on the left of the driver's
side under the instrument panel and under
a cover.
The cover has the letters OBD on it.The purpose of the OBD system is to ensure
proper operation of the emission control
system for the vehicle's lifetime. The sys
-
tem monitors emission-related compo
-
nents for deterioration and malfunction.
An illuminated lamp informs you of the need for service, not of the
need to stop the vehicle.
However, the system should be checked by
your MINI Dealer at the earliest possible
opportunity.
Display of the malfunction described above in Canadian mod
-
els.
Under certain conditions, the indicator will
blink or flash. This indicates a rather severe
level of engine misfire. When this occurs,
you should reduce speed and consult the
nearest MINI Dealer as soon as possible.
Severe engine misfire over only a short
period of time can seriously damage emis
-
sion control components, especially the
catalytic converter.
When the gas cap is not properly tightened, the OBD system can
detect the vapor leak and the indicator will
light up. If the cap is subsequently tight
-
ened, the indicator lamp should go out
within a few days.<
Suitable car-care products
Use the cleaning and car-care prod
-
ucts available at your MINI Dealer.<
Washing your vehicleYou can wash your new MINI or MINI Con
-
vertible in automatic car washes from the
beginning. Preference should be for cloth
car washes. If, due to lack of availability,
brush car washes must be used, modern
systems with soft brushes should be given
preference.
When using steam cleaners or high-pressure cleaners, maintain sufficient
distance to the vehicle and do not exceed a
maximum temperature of 140
7/ 60
6. If
the jet is too close or the pressure is too
high, this can lead to damage or initial
damage that can develop into more serious
damage. Water that enters vehicle compo
-
nents can lead to damage over the long
term.
After washing the vehicle, apply the brakes
briefly to dry them, otherwise water can
reduce braking efficiency over the short
term and the brake rotors can corrode.
Switch the rain sensor off when passing
through an automatic car wash, refer to
page
59. Failure to do so could result in
Page 117 of 165
115
OVERVIEW REPAIRSOPERATIONCONTROLS DATA INDEX
CARING FOR YOUR VEHICLEner, heavy-duty grease remover, fuel or
similar>Wood paneling
*:
Please clean wood paneling and other
wood parts only with a damp cloth. Dry
off with a soft cloth>Safety belts:
Only clean using mild soap, leaving the
belts fitted.
Do not dry clean, as the fabric can be
destroyed.
Always roll up safety belts only when
dry.
Dirty safety belts prevent unrolling and
thus negatively affect safety>Floor carpets and floor mats
*:
If heavily soiled, clean using interior
cleaner. Floor mats can be removed to
allow the interior to be cleaned>Wiper blades:
Clean with soapy water. Replace wiper
blades twice a year, before and after the
cold season. This is particularly impor
-
tant on vehicles fitted with a rain sensor.Caring for leather* and imitation
leather The leather and imitation leather used by
the manufacturer of your MINI are high
quality products processed using state-of-
the-art methods and will retain their qual
-
ity level for many years if cared for prop
-
erly.Regular cleaning and care are necessary, as
dust and road dirt scratch in pores and
creases and lead to heavy wear as well as
premature brittleness of the leather and
imitation leather surface.
This is why you should use a cloth or vac
-
uum cleaner to remove dust on a regular
basis.Since dirt and oil slowly destroy the protec
-
tive layer of the leather and imitation
leather, a treatment with a leather care
product is necessary twice a year. This pre
-
serves the quality of the leather and pre
-
vents electrostatic charging.
Cleaning agents can contain hazard
-
ous or health-damaging substances.
For this reason, always observe the warn
-
ings on the package. For interior cleaning,
always open the doors or windows of the
vehicle.
Do not use any products that are not
intended for cleaning the vehicle.
vertible top largely depend on the proper
care and operation of the convertible top.
You should therefore observe the following
notes in particular:>Whenever possible, park your vehicle in
the shade to protect it from intense sun
-
light>Do not fold the convertible top when it is
wet, dirty or frozen; otherwise water
marks, moisture stains and chafing could
result>If the vehicle is parked in an enclosed
area for a longer period of time, make
sure that there is sufficient ventilation>Remove bird droppings immediately
because they have corrosive properties.
Never use spot removers, paint thin
-
ner, solvents, cleaning fuel or similar
since these products can destroy the rubber
seals and cause leaks.<
Page 121 of 165
OVERVIEW
CONTROLS
OPERATION, CARE, MAINTENANCE
OWNER SERVICE PROCEDURES
INDEX TECHNICAL DATA
119
OVERVIEW REPAIRSOPERATION CONTROLS DATA INDEX
Repairs
Page 123 of 165
121
OVERVIEW REPAIRSOPERATION CONTROLS DATA INDEX
WIPER BLADES
LAMPS AND BULBS
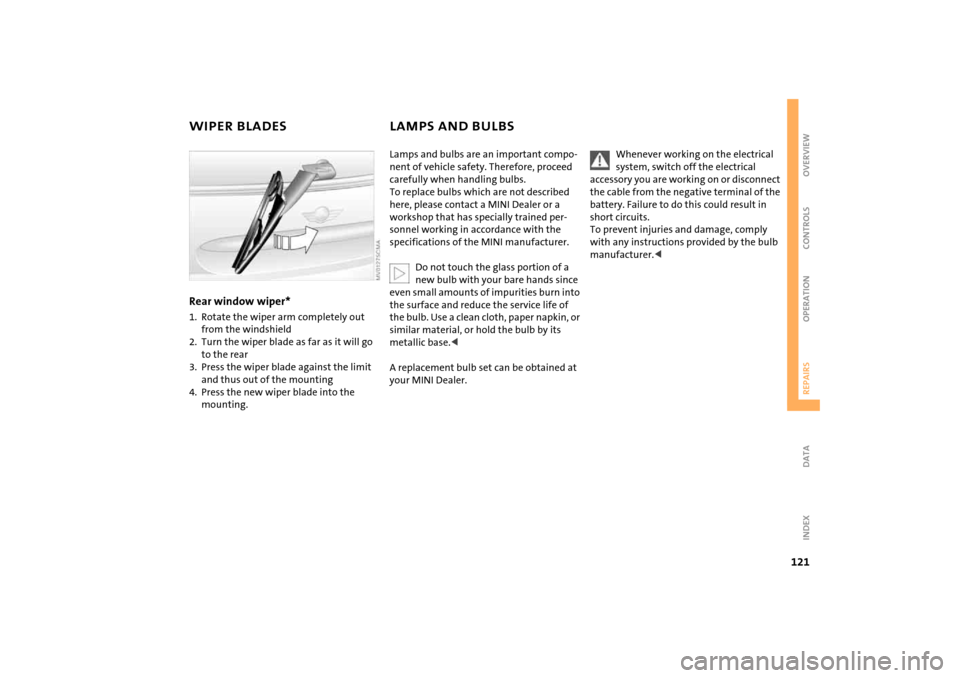
Rear window wiper* 1. Rotate the wiper arm completely out
from the windshield2. Turn the wiper blade as far as it will go
to the rear3. Press the wiper blade against the limit
and thus out of the mounting4. Press the new wiper blade into the
mounting.
Lamps and bulbs are an important compo
-
nent of vehicle safety. Therefore, proceed
carefully when handling bulbs.
To replace bulbs which are not described
here, please contact a MINI Dealer or a
workshop that has specially trained per
-
sonnel working in accordance with the
specifications of the MINI manufacturer.
Do not touch the glass portion of a new bulb with your bare hands since
even small amounts of impurities burn into
the surface and reduce the service life of
the bulb. Use a clean cloth, paper napkin, or
similar material, or hold the bulb by its
metallic base.<
A replacement bulb set can be obtained at
your MINI Dealer.
Whenever working on the electrical system, switch off the electrical
accessory you are working on or disconnect
the cable from the negative terminal of the
battery. Failure to do this could result in
short circuits.
To prevent injuries and damage, comply
with any instructions provided by the bulb
manufacturer.<
Page 124 of 165
122
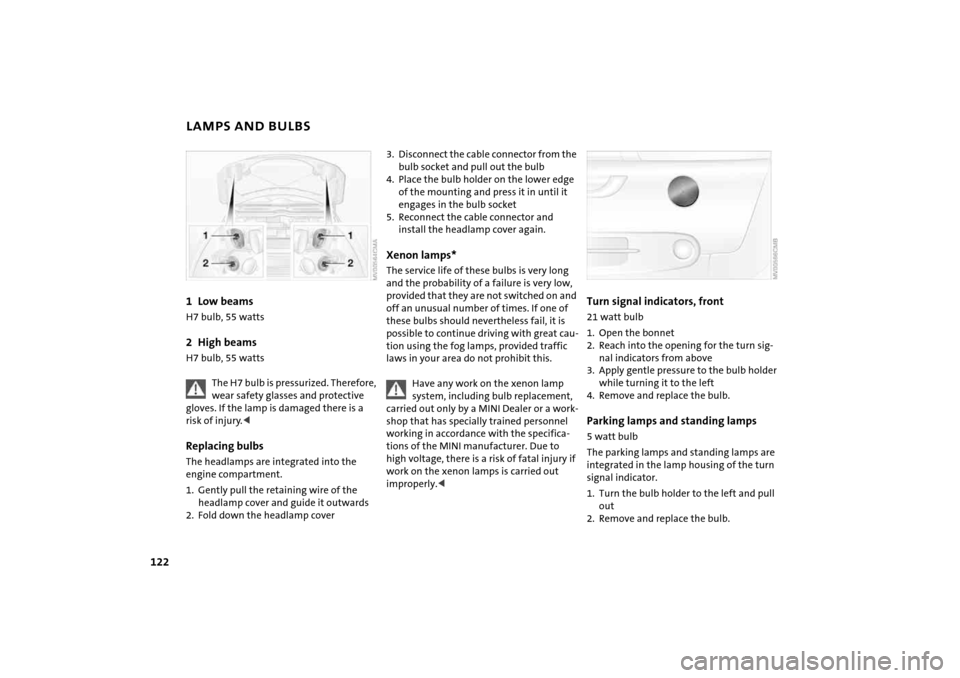
LAMPS AND BULBS1 Low beams
H7 bulb, 55
watts
2 High beams
H7 bulb, 55
watts
The H7 bulb is pressurized. Therefore, wear safety glasses and protective
gloves. If the lamp is damaged there is a
risk of injury.<
Replacing bulbs The headlamps are integrated into the
engine compartment.1. Gently pull the retaining wire of the
headlamp cover and guide it outwards2. Fold down the headlamp cover
3. Disconnect the cable connector from the
bulb socket and pull out the bulb4. Place the bulb holder on the lower edge
of the mounting and press it in until it
engages in the bulb socket 5. Reconnect the cable connector and
install the headlamp cover again.Xenon lamps* The service life of these bulbs is very long
and the probability of a failure is very low,
provided that they are not switched on and
off an unusual number of times. If one of
these bulbs should nevertheless fail, it is
possible to continue driving with great cau
-
tion using the fog lamps, provided traffic
laws in your area do not prohibit this.
Have any work on the xenon lamp system, including bulb replacement,
carried out only by a MINI Dealer or a work
-
shop that has specially trained personnel
working in accordance with the specifica
-
tions of the MINI manufacturer. Due to
high voltage, there is a risk of fatal injury if
work on the xenon lamps is carried out
improperly.<
Turn signal indicators, front 21 watt bulb
1. Open the bonnet2. Reach into the opening for the turn sig
-
nal indicators from above
3. Apply gentle pressure to the bulb holder
while turning it to the left4. Remove and replace the bulb.Parking lamps and standing lamps 5 watt bulb The parking lamps and standing lamps are
integrated in the lamp housing of the turn
signal indicator.1. Turn the bulb holder to the left and pull
out2. Remove and replace the bulb.
Page 134 of 165

132
BATTERYStorage location MINI COOPER and MINI COOPER Convert
-
ible:The battery is located in the engine com
-
partment. Exact location, refer to page
106
.
MINI COOPER
S and MINI COOPER
S Con
-
vertible:The battery is located in the luggage com
-
partment under the floor mat.Battery careThe battery is absolutely maintenance-free,
that is, the original electrolyte will normally
last for the service life of the battery under
moderate climatic conditions. Your MINI
Dealer will be glad to advise you if you have
any questions regarding the battery. Charging the batteryOnly charge the battery in the vehicle via
the terminals in the engine compartment
with the engine switched off, refer to
'Jump-starting', page
134
ff.
Disposal
After replacing old batteries, return the used batteries to your MINI
Dealer or to a recycling point. Maintain the
battery in an upright position for transport
and storage. Secure the battery to prevent
it from tilting during transport.<
Power failure After a temporary power failure, e.g. due to
a discharged battery, some of your vehicle's
equipment will function only to a limited
extent and must be reinitialized or read
-
justed. Individual settings are also lost and
must be reprogrammed:>Time:
Must be reset, refer to page
63
>Electric power windows:
Must be reinitialized, refer to page
32
>Radio
*:
The stations must be reset, refer to the
Owner's Manual for Radio>Navigation system
*:
It may take some time for its operability
to be restored, refer to the Owner's Man
-
ual for Navigation System.
Page 141 of 165

OVERVIEW
CONTROLS
OPERATION, CARE, MAINTENANCE
OWNER SERVICE PROCEDURES
INDEX TECHNICAL DATA
139
OVERVIEW REPAIRS OPERATION CONTROLS DATA INDEX
Data
Page 149 of 165

OVERVIEW
CONTROLS
OPERATION, CARE, MAINTENANCE
OWNER SERVICE PROCEDURES
INDEX TECHNICAL DATA
147
OVERVIEW REPAIRS OPERATION CONTROLS DATA INDEX
Index
Page 155 of 165
EVERYTHING FROM A TO Z
153
OVERVIEW REPAIRS OPERATION CONTROLS DATA INDEX
Interlock, refer to Steering
locked
51
Intermittent operation of the
wipers
59
Interval
display, service
112
J Jack
125
, 129
points
128
Jack, refer to Tire change set
MINI Mobility System
129
Run Flat tires
102
space-saver spare tire
125
Jacking points
128
Jets, refer to Ventilation
77, 80
Jets, refer to Windshield
washer jets
60
Jump-starting
134
K Keys
24
Kickdown
55
Knock control
94
L Lamp defect
121
Lamp replacement, refer to
Lamps and bulbs
121
Lamps and bulbs
121
Lamps, refer to Parking lamps/
Low beams
57
Lashing eyelets, refer to
Securing the load
88
LATCH child-restraint
mounting system
50
Leather care
115
LEDs light-emitting diodes
124
Length, refer to
Dimensions
141
, 142
License plate lamp, bulb
replacement
124
Lifting handle, space-saver
spare tire
125
Light switch
57
Light-alloy wheels, care
114
Light-emitting diodes
(LEDs)
124
Lighter
82
Lighting of the instruments
58
'Lights on' warning
57
Load securing devices, refer to
Securing the load
88
Loading the vehicle
86
Loads, refer to Loading cargo
86
Locking
from inside
28
from outside
26
Locking/unlocking the vehicle,
acknowledgment
signals
26, 27
Low beams
57
bulb replacement
122
Lower back support, refer to
Lumbar support
43
Luggage compartment
cover
85
emergency operation, refer
to Manual release
30
opening from the outside
29
opening with the remote
control
26
opening/closing, refer to
Tailgate
29
tailgate
29
volume
143
, 144
Luggage compartment in the
MINI
85
Luggage compartment lid
emergency operation, refer
to Manual release
30
opening, remote control
26
Luggage compartment lid, refer
to Tailgate
29
Luggage compartment net
88
Luggage rack, refer to Roof-
mounted luggage rack
89
Lumbar support
43
M M+S tires, refer to Winter
tires
103
Maintenance system
112
Make-up mirror, illuminated
47
Malfunction
Continuously Variable
automatic Transmission
(CVT)
56
convertible top
37
door lock
27
fuel filler door
95
glass sunroof, electric
34
tailgate
30
Manual air distribution
76
Manual operation
door lock
27
driver's door
27
fuel filler door
95
glass sunroof, electric
34
power convertible top
37
tailgate
30
transmission lock for
Continuously Variable
automatic Transmission
(CVT)
54
Manual transmission
53
Master keys with remote
control
24
Maximum cooling
79
Maximum speed, with winter
tires
103
MC operation, refer to
Owner's Manual for Radio