remote control MINI Hardtop 2 Door 2006 Owner's Manual
[x] Cancel search | Manufacturer: MINI, Model Year: 2006, Model line: Hardtop 2 Door, Model: MINI Hardtop 2 Door 2006Pages: 168, PDF Size: 2.22 MB
Page 5 of 168
3
OVERVIEW REPAIRS OPERATION CONTROLS DATA INDEX
Driving:
Ignition lock53
Starting the engine53
Switching off the engine54
Parking brake54
Manual transmission55
Automatic transmission with
Steptronic56
Parking lamps/Low beams59
Turn signal indicator/Headlamp
flasher60
Instrument lighting61
Fog lamps61
Interior lamps61
Washer/wiper system62
Washer fluid63
Cruise control64
Everything under control:
Odometer66
Clock66
Fuel gauge66
Coolant temperature gauge67
Tachometer68
Service interval display68
Onboard computer69Technology for safety and driving
convenience:
Driving stability control systems71
Flat Tire Monitor73
Airbags75
Park Distance Control (PDC)77
Controlling the climate for pleasant
driving:
Air conditioning system78
Automatic climate control81
Interior conveniences:
Glove compartment84
Center armrest84
Drinks holders, ashtray85
Cigarette lighter, 12 V power supply85
Integrated universal remote control86
Loading and transporting cargo:
Luggage compartment in the MINI88
Luggage compartment in the MINI
Convertible89
Loading cargo90
Roof-mounted luggage rack93OPERATION, CARE, MAINTENANCE
Special operating instructions:
Break-in procedures96
General driving notes96
Refueling99
Wheels and tires:
Tire inflation pressure101
Tire coding105
Tire condition106
Run Flat tires108
New wheels and tires109
Snow chains110
Page 26 of 168

24
KEYS CENTRAL LOCKING SYSTEM
Depending on your vehicle's equipment
vesion, you will have received the following
keys:
1 Master keys with remote control
2 Spare key
Master keys with remote control
In every master key with remote control,
there is an extended-life battery as a power
supply that is charged automatically in the
ignition lock as you drive.
You should therefore use each master key at
least twice a year to maintain the charge sta-
tus.
Depending on which master key the vehicle
detects when it is unlocked, different settings
will be called up and executed inside the vehi-
cle, refer to Vehicle Memory on page49.
Spare key
For keeping in a safe place, e.g. in your wal-
let. This key is not intended for constant
use.
The concept
The central locking system is ready for
operation whenever the driver's door is
closed. The doors, the tailgate and the fuel
filler door are unlocked or locked.
The central locking system locks or unlocks
your vehicle:
>When operated from the outside via the
remote control as well as via the door
lock
>When operated from the inside via a
switch
>The vehicle is unlocked automatically
when the ignition key is pulled out of the
ignition switch.
If operated from outside, the anti-theft sys-
tem is activated at the same time. This pre-
vents the doors from being unlocked via
safety lock buttons or door handles.
In the event of a sufficiently severe acci-
dent, the central locking system unlocks
automatically. The hazard warning flashers
and interior lamps are also switched on.
Page 27 of 168

25
OVERVIEW REPAIRS OPERATIONCONTROLS DATA INDEX
OPENING AND CLOSING: FROM OUTSIDE
Via remote control
When the vehicle is unlocked or locked, the
anti-theft system is also deactivated/acti-
vated and the interior lamp is switched on/
off.
People or animals could lock the
doors from the inside. Always take
the vehicle keys with you so that the vehi-
cle can be opened again from the outside at
any time.<
For US owners only
The transmitter and receiver units comply
with part 15 of the FCC, Federal Communi-
cations Commission, regulations. Opera-
tion is governed by the following:
FCC ID: LX8765S
LX8765E
LX8CAS
Compliance statement:
This device complies with part 15 of the
FCC Rules. Operation is subject to the fol-
lowing two conditions:
>This device may not cause harmful inter-
ference, and
>this device must accept any interference
received, including interference that may
cause undesired operation.
Any unauthorized modifications or
changes to these devices could void
the user's authority to operate this equip-
ment.<
Page 28 of 168
26
OPENING AND CLOSING: FROM OUTSIDE
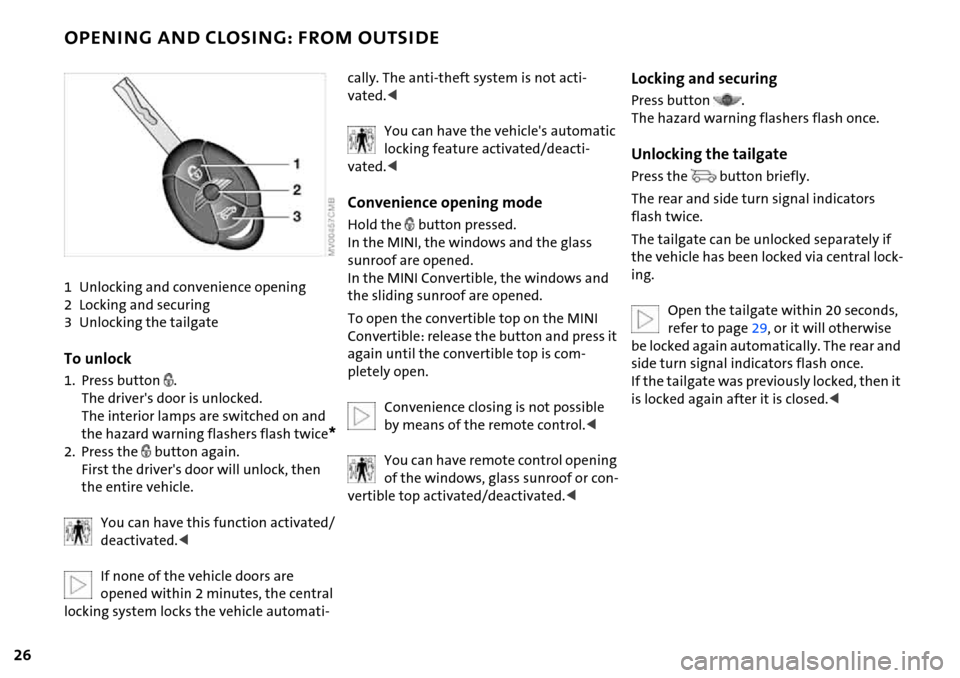
1 Unlocking and convenience opening
2 Locking and securing
3 Unlocking the tailgate
To unlock
1. Press button .
The driver's door is unlocked.
The interior lamps are switched on and
the hazard warning flashers flash twice
*
2. Press the button again.
First the driver's door will unlock, then
the entire vehicle.
You can have this function activated/
deactivated.<
If none of the vehicle doors are
opened within 2 minutes, the central
locking system locks the vehicle automati-
cally. The anti-theft system is not acti-
vated.<
You can have the vehicle's automatic
locking feature activated/deacti-
vated.<
Convenience opening mode
Hold the button pressed.
In the MINI, the windows and the glass
sunroof are opened.
In the MINI Convertible, the windows and
the sliding sunroof are opened.
To open the convertible top on the MINI
Convertible: release the button and press it
again until the convertible top is com-
pletely open.
Convenience closing is not possible
by means of the remote control.<
You can have remote control opening
of the windows, glass sunroof or con-
vertible top activated/deactivated.<
Locking and securing
Press button .
The hazard warning flashers flash once.
Unlocking the tailgate
Press the button briefly.
The rear and side turn signal indicators
flash twice.
The tailgate can be unlocked separately if
the vehicle has been locked via central lock-
ing.
Open the tailgate within 20 seconds,
refer to page29, or it will otherwise
be locked again automatically. The rear and
side turn signal indicators flash once.
If the tailgate was previously locked, then it
is locked again after it is closed.<
Page 29 of 168

27
OVERVIEW REPAIRS OPERATIONCONTROLS DATA INDEX
OPENING AND CLOSING: FROM OUTSIDE
Malfunction
Local radio waves can interfere with func-
tions of the remote control.
If this occurs, lock and unlock the vehicle
via a door lock.
In the event of a system malfunction,
please contact your MINI Dealer. You can
also obtain replacement keys there.
If it is no longer possible to lock the
vehicle with the remote control, then
the battery is discharged. Use the corre-
sponding key for a longer journey so that
its battery can be recharged.<
Via the door lock
1. Turn the key.
The driver's door is unlocked.
2. Turn the key again.
All other doors, the tailgate and the fuel
filler door are unlocked.
You can have this function activated/
deactivated.<
When the vehicle is locked, the hazard
warning flashers flash once.
When the vehicle is unlocked, the hazard
warning flashers flash twice
*.
Manual operation
In the event of an electrical malfunction,
the driver's door can be unlocked or locked
by turning the key in the door lock to the
end positions.
Convenience closing via the door lock
You can also close the power windows,
glass sunroof or the convertible top via the
door lock.
With the door closed, hold the key in the
locking position.
In the MINI Convertible, the convertible top
is closed first and then the side windows.
You can have the closing of the win-
dows and glass sunroof via the door
lock activated/deactivated.<
Page 31 of 168
29
OVERVIEW REPAIRS OPERATIONCONTROLS DATA INDEX
TAILGATE
To open from the outside
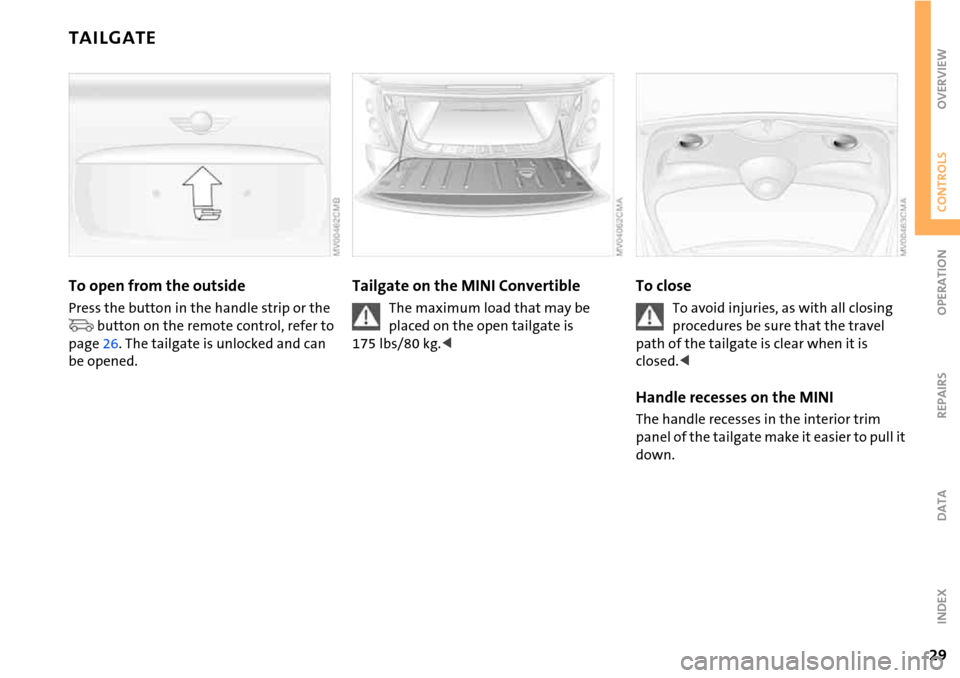
Press the button in the handle strip or the
button on the remote control, refer to
page26. The tailgate is unlocked and can
be opened.
Tailgate on the MINI Convertible
The maximum load that may be
placed on the open tailgate is
175 lbs/80 kg.<
To close
To avoid injuries, as with all closing
procedures be sure that the travel
path of the tailgate is clear when it is
closed.<
Handle recesses on the MINI
The handle recesses in the interior trim
panel of the tailgate make it easier to pull it
down.
Page 34 of 168
32
ELECTRIC POWER WINDOWS
Convenience operation
For convenience operation using the
remote control refer to page26, for opera-
tion via the door lock refer to page27.
To initialize power windows
If the battery is disconnected, e.g. for
changing batteries or vehicle storage,
reinitialize the power windows. Otherwise
the windows will not be lowered when the
convertible top or doors are opened.<
1. Close the doors
2. Close both windows
3. Press both switches of the power win-
dows upwards for approx. one second.
In the event of a system malfunction,
please contact your MINI Dealer.
Power windows in the MINI
Convertible
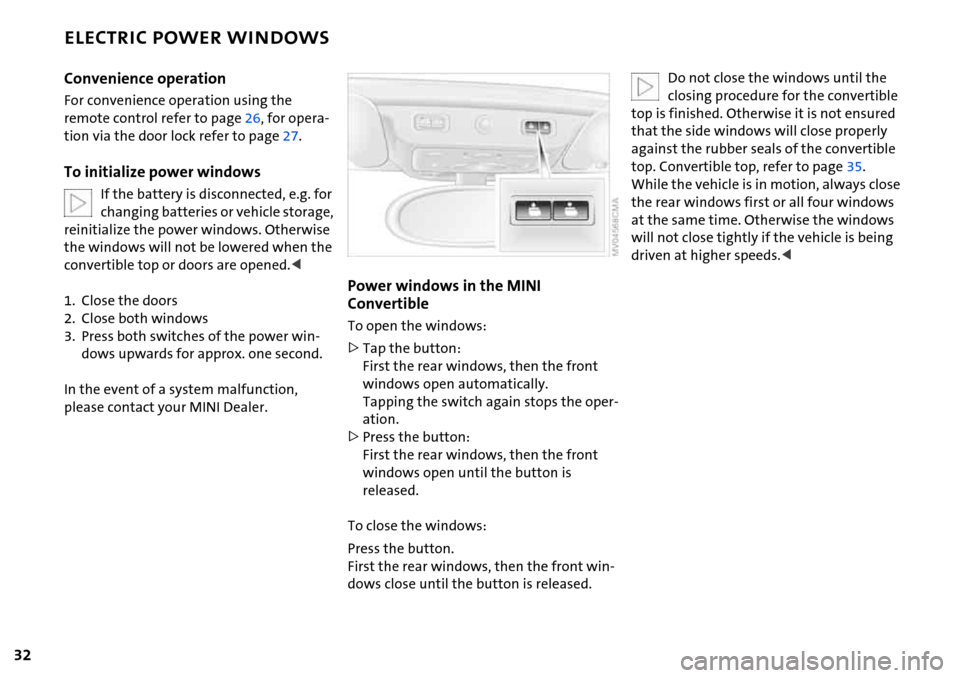
To open the windows:
>Tap the button:
First the rear windows, then the front
windows open automatically.
Tapping the switch again stops the oper-
ation.
>Press the button:
First the rear windows, then the front
windows open until the button is
released.
To close the windows:
Press the button.
First the rear windows, then the front win-
dows close until the button is released.
Do not close the windows until the
closing procedure for the convertible
top is finished. Otherwise it is not ensured
that the side windows will close properly
against the rubber seals of the convertible
top. Convertible top, refer to page35.
While the vehicle is in motion, always close
the rear windows first or all four windows
at the same time. Otherwise the windows
will not close tightly if the vehicle is being
driven at higher speeds.<
Page 36 of 168
34
GLASS SUNROOF, ELECTRIC*ROLLER SUN BLIND*
Trap protection
If, while closing, the glass sunroof encoun-
ters resistance within roughly the last 8 in/
20 cm, the closing procedure is interrupted
and the roof reopens.
Despite the trap protection, be
extremely careful that the travel path
of the sunroof is not obstructed whenever
it is closed. Otherwise, it is not guaranteed
that the closing procedure will be inter-
rupted, for instance if the obstructions
offer very little resistance.
You can disable the trap protection by
pressing the switch past the pressure point
and holding it. When closing the sunroof
from the raised position, ensure that the
travel path of the sunroof is not obstructed
since the trap protection is not active in
this position.<
Convenience operation
For convenience operation using the
remote control refer to page26, for opera-
tion via the door lock refer to page27.
Manual opening and closing
In the event of an electrical malfunction,
you can also open and close the glass sun-
roof manually:
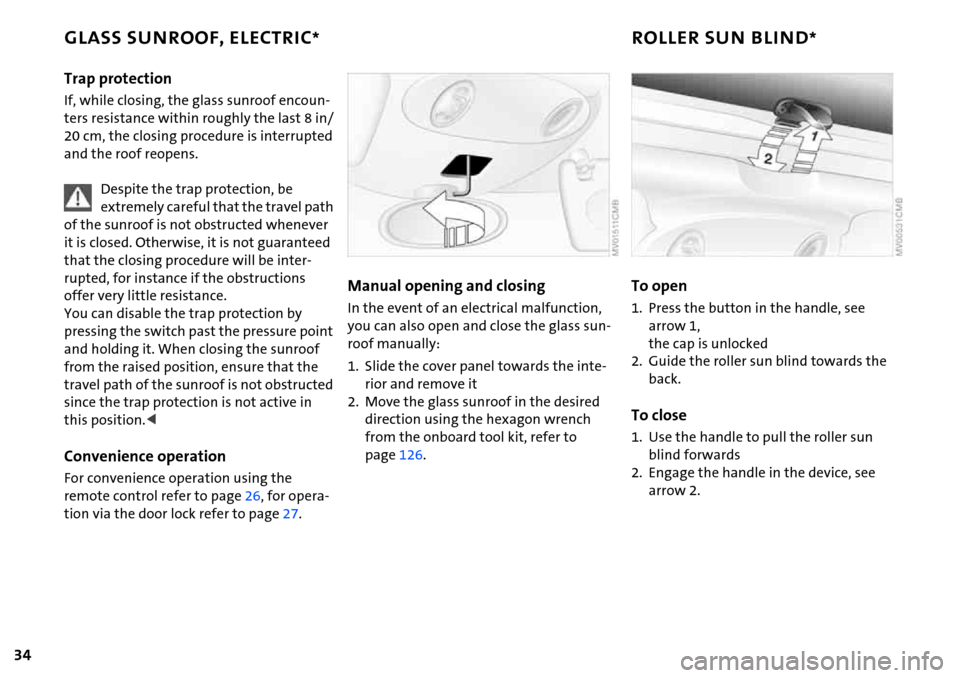
1. Slide the cover panel towards the inte-
rior and remove it
2. Move the glass sunroof in the desired
direction using the hexagon wrench
from the onboard tool kit, refer to
page126.
To open
1. Press the button in the handle, see
arrow 1,
the cap is unlocked
2. Guide the roller sun blind towards the
back.
To close
1. Use the handle to pull the roller sun
blind forwards
2. Engage the handle in the device, see
arrow 2.
Page 39 of 168
37
OVERVIEW REPAIRS OPERATIONCONTROLS DATA INDEX
CONVERTIBLE TOP WITH INTEGRATED SLIDING SUNROOF
Checking
>The LED lights up during convertible top
operation until the opening or closing
procedure is completely finished
>The LED flashes after the button has
been released.
The opening or closing procedure is not
completely finished; additionally, a sig-
nal sounds.
The procedure can be continued in the
desired direction by pressing the appro-
priate button
>The LED flashes rapidly. The convertible
top cannot be operated.
The luggage compartment cover is not in
its lower position, refer to page89, or the
loading aid is not correctly locked, refer
to page89.
Interruption
The automatic movement is immediately
interrupted when the buttons for convert-
ible top operation are released. The proce-
dure can be continued in the desired direc-
tion by pressing the appropriate buttons.
If the opening or closing procedure is inter-
rupted by releasing the respective button,
the convertible top stays in its current posi-
tion for several seconds before it slowly
moves into a more stable position. The pro-
cedure can be continued by pressing the
appropriate button.
Movement is also interrupted when there
is a mechanical blockage. In this case, in
order to operate the convertible top again:
1. Turn off the ignition and then switch it
on again
2. Press the button to continue the proce-
dure in the desired direction.
Opening and closing procedure
Do not interrupt and restart the clos-
ing procedure several times one after
another, or the convertible top mechanism
could be damaged.<
If the convertible top can be moved in
only one direction after several con-
secutive attempts to operate it, the con-
vertible top system has overheated. Allow
the system to cool down for approx.
20 minutes.<
If the battery is disconnected, e.g. for
changing batteries or vehicle storage,
reinitialize the power windows, refer to
page32. Otherwise the windows will not
be lowered when the convertible top is
opened.<
Convenience operation
For convenience operation using the
remote control refer to page26, for opera-
tion via the door lock refer to page27.
Page 88 of 168

86
INTEGRATED UNIVERSAL REMOTE CONTROL*
The concept
The integrated universal remote control
takes the place of up to three different con-
trol devices for different radio-remote-con-
trolled systems such as gate openers and
household alarm systems. The integrated
universal remote control detects and learns
the signal transmitted by the original con-
trol device.
The signal of an original control device can
be programmed onto one of the three
memory buttons 1. The system in question
can then be operated by means of the pro-
grammed memory button 1. Signal trans-
mission is indicated by LED 2.
If you decide to sell your vehicle one day, in
the interest of your own security, remem-
ber to delete the programs before the vehi-
cle leaves your possession, refer to page87.
While programming is in progress
and before operating any pro-
grammed system by remote control using
the integrated universal remote control,
make sure that the movement area of the
system in question is clear of people, ani-
mals and inanimate obstructions, in order
to avoid possible injury or damage. Also
comply with the safety precautions issued
for the original control device.<
Checking compatibility
If this symbol is shown on the pack-
aging or in the operating instruc-
tions of the original control device,
it is safe to assume that the remote-con-
trolled system is compatible with the inte-
grated universal remote control.
If you have any additional question,
please contact your MINI Dealer or
call: 1-800-355-3515.
You can also find more information on the
Internet at
www.miniusa.com or
www.homelink.com.
HomeLink is a registered trademark of
Johnson Controls, Inc.<
Programming
1 Memory buttons
2LED
Fixed-code control device
1. Switch on the ignition
2. During initial operation: press both
outer buttons 1 for approx. 20 seconds
until LED 2 flashes. This clears all three
memory buttons 1
3. Hold the original control device approx.
2 to 8 in/5 to 20 cm away from memory
buttons 1.
The required distance between the
control device and memory
buttons 1 may vary, depending on the
system of the original control device in
question.<