engine MINI Hardtop 4 Door 2016 Owner's Manual (Mini Connected)
[x] Cancel search | Manufacturer: MINI, Model Year: 2016, Model line: Hardtop 4 Door, Model: MINI Hardtop 4 Door 2016Pages: 246, PDF Size: 6.36 MB
Page 5 of 246
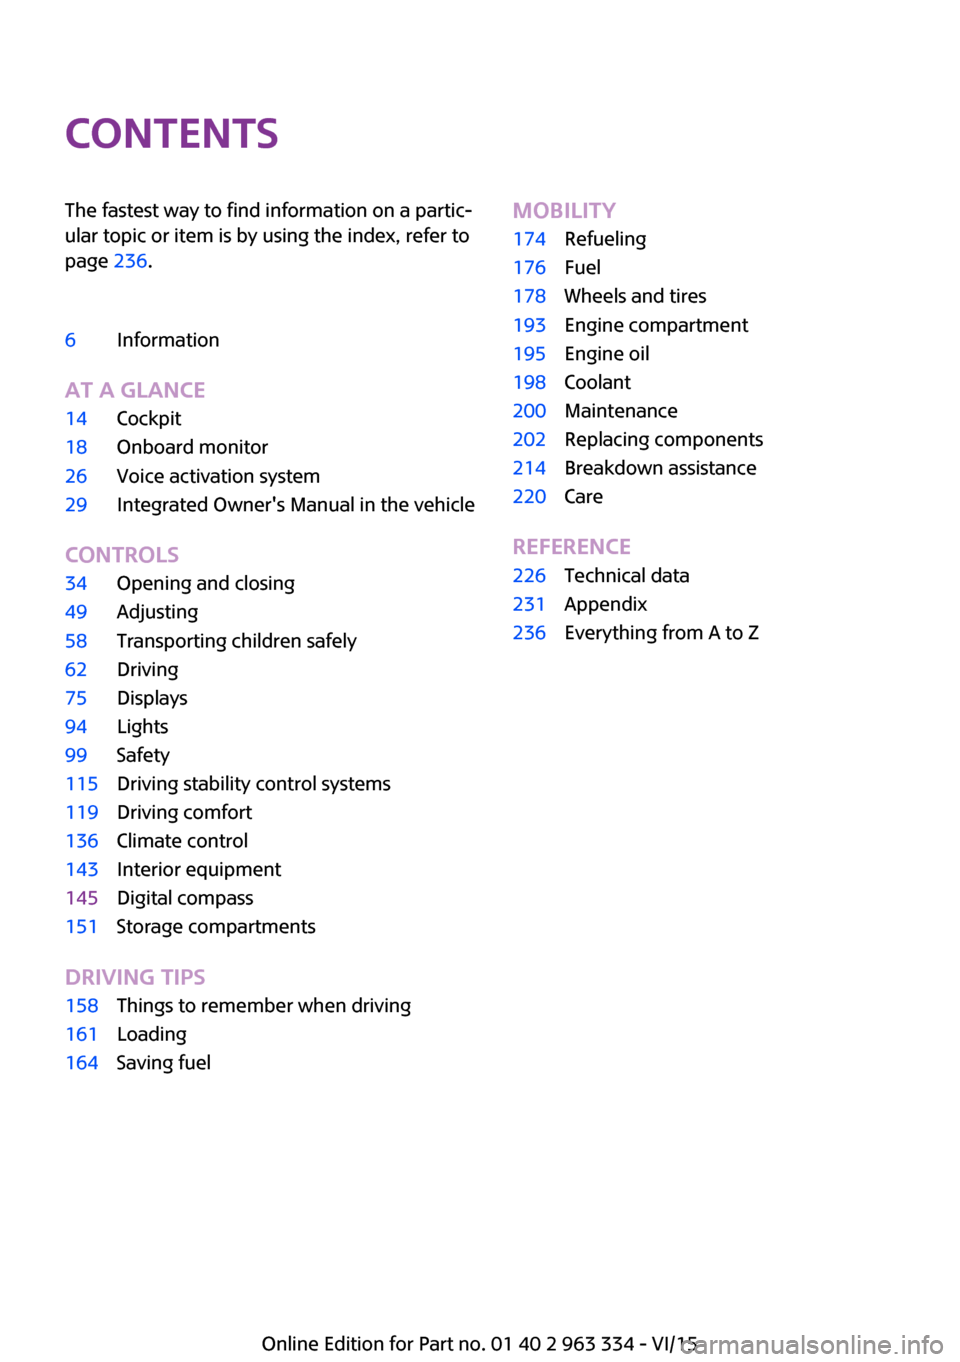
ContentsThe fastest way to find information on a partic‐
ular topic or item is by using the index, refer to
page 236.6Information
AT A GLANCE
14Cockpit18Onboard monitor26Voice activation system29Integrated Owner's Manual in the vehicle
CONTROLS
34Opening and closing49Adjusting58Transporting children safely62Driving75Displays94Lights99Safety115Driving stability control systems119Driving comfort136Climate control143Interior equipment145Digital compass151Storage compartments
DRIVING TIPS
158Things to remember when driving161Loading164Saving fuelMOBILITY174Refueling176Fuel178Wheels and tires193Engine compartment195Engine oil198Coolant200Maintenance202Replacing components214Breakdown assistance220Care
REFERENCE
226Technical data231Appendix236Everything from A to Z
Online Edition for Part no. 01 40 2 963 334 - VI/15
Page 8 of 246
another manufacturer can be used with MINI
vehicles without presenting a safety hazard,
even if a country-specific official approval was
issued. The manufacturer of your vehicle does
not evaluate whether these products are suita‐
ble for MINI vehicles under all usage conditions.
California Proposition 65 Warning
California laws require us to state the following
warning:
Engine exhaust and a wide variety of automo‐
bile components and parts, including compo‐
nents found in the interior furnishings in a vehi‐
cle, contain or emit chemicals known to the
State of California to cause cancer and birth de‐
fects and reproductive harm. In addition, cer‐
tain fluids contained in vehicles and certain
products of component wear contain or emit
chemicals known to the State of California to
cause cancer and birth defects or other repro‐
ductive harm. Battery posts, terminals and re‐
lated accessories contain lead and lead com‐
pounds. Wash your hands after handling. Used
engine oil contains chemicals that have caused
cancer in laboratory animals. Always protect
your skin by washing thoroughly with soap and
water.
Service and warranty
We recommend that you read this publication
thoroughly. Your vehicle is covered by the fol‐
lowing warranties:▷New Vehicle Limited Warranty.▷Rust Perforation Limited Warranty.▷Federal Emissions System Defect Warranty.▷Federal Emissions Performance Warranty.▷California Emission Control System Limited
Warranty.
Detailed information about these warranties is
listed in the Service and Warranty Information
Booklet for US models or in the Warranty and
Service Guide Booklet for Canadian models.
Your vehicle has been specifically adapted and
designed to meet the particular operating con‐
ditions and homologation requirements in your
country and continental region in order to de‐
liver the full driving pleasure while the vehicle is
operated under those conditions. If you wish to
operate your vehicle in another country or re‐
gion, you may be required to adapt your vehi‐
cle to meet different prevailing operating con‐
ditions and homologation requirements. You
should also be aware of any applicable war‐
ranty limitations or exclusions for such country
or region. In such case, please contact Cus‐
tomer Relations for further information.
Maintenance
Maintain the vehicle regularly to sustain the
road safety, operational reliability and the New
Vehicle Limited Warranty.
Specifications for required maintenance meas‐
ures:▷MINI Maintenance system▷Service and Warranty Information Booklet
for US models▷Warranty and Service Guide Booklet for
Canadian models
If the vehicle is not maintained according to
these specifications, this could result in serious
damage to the vehicle. Such damage is not
covered by the MINI New Vehicle Limited War‐
ranty.
Data memory
Many electronic components on your vehicle
are equipped with data memories that tempo‐
rarily or permanently store technical informa‐
tion about the condition of the vehicle, events
and faults. This technical information generally
records the state of a component, a module, a
system or the environment:
▷Operating mode of system components, fill
levels for instance.Seite 8Information8
Online Edition for Part no. 01 40 2 963 334 - VI/15
Page 10 of 246
Vehicle identification
number
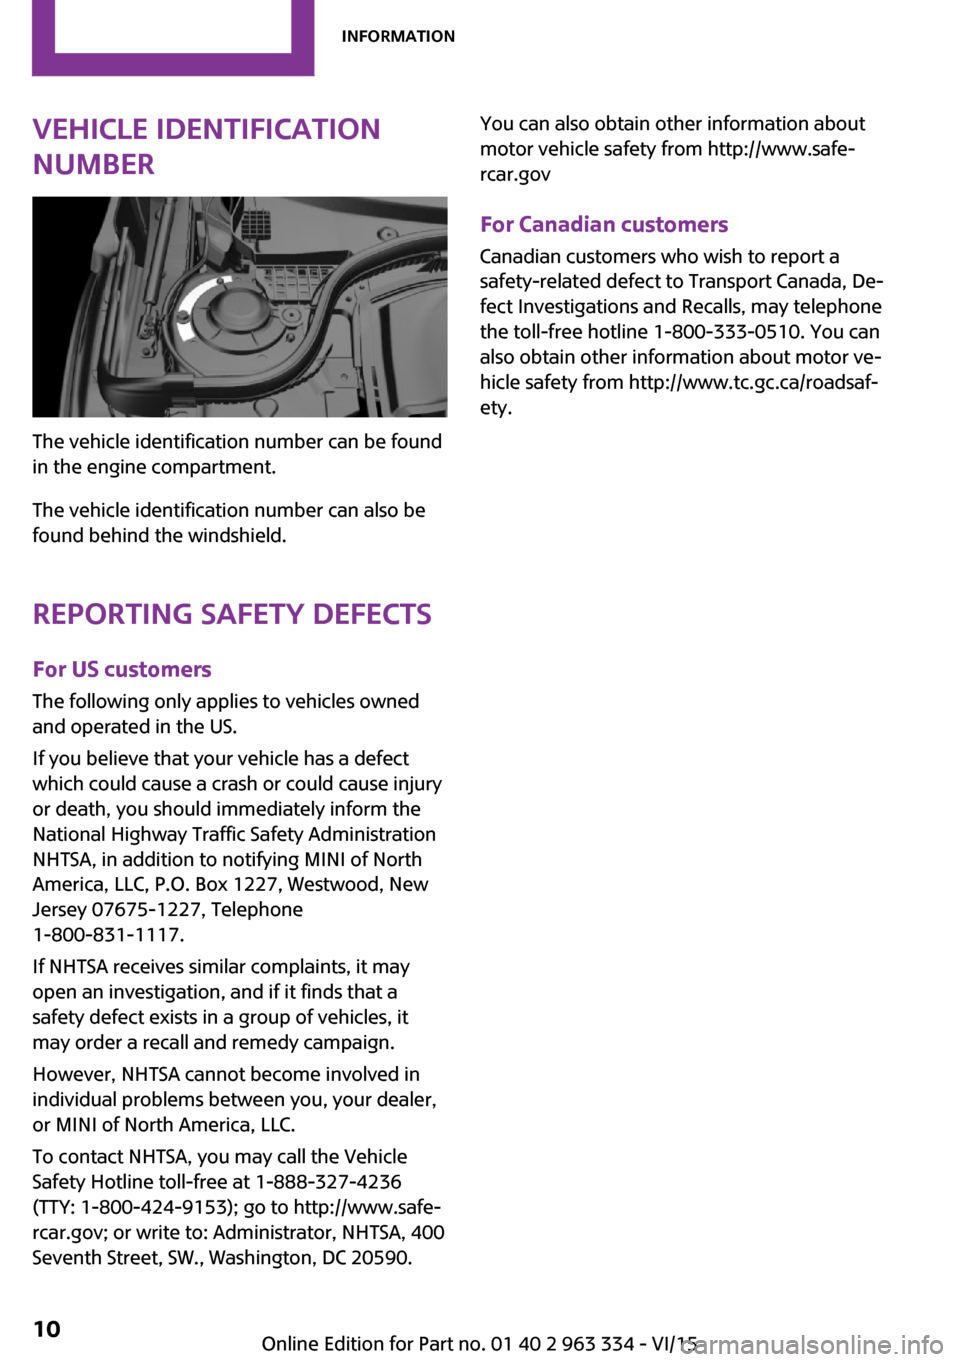
The vehicle identification number can be found
in the engine compartment.
The vehicle identification number can also be
found behind the windshield.
Reporting safety defects For US customers
The following only applies to vehicles owned
and operated in the US.
If you believe that your vehicle has a defect
which could cause a crash or could cause injury or death, you should immediately inform the
National Highway Traffic Safety Administration
NHTSA, in addition to notifying MINI of North
America, LLC, P.O. Box 1227, Westwood, New
Jersey 07675-1227, Telephone
1-800-831-1117.
If NHTSA receives similar complaints, it may
open an investigation, and if it finds that a
safety defect exists in a group of vehicles, it may order a recall and remedy campaign.
However, NHTSA cannot become involved in
individual problems between you, your dealer,
or MINI of North America, LLC.
To contact NHTSA, you may call the Vehicle
Safety Hotline toll-free at 1-888-327-4236
(TTY: 1-800-424-9153); go to http://www.safe‐
rcar.gov; or write to: Administrator, NHTSA, 400
Seventh Street, SW., Washington, DC 20590.
You can also obtain other information about
motor vehicle safety from http://www.safe‐
rcar.gov
For Canadian customers
Canadian customers who wish to report a
safety-related defect to Transport Canada, De‐
fect Investigations and Recalls, may telephone
the toll-free hotline 1-800-333-0510. You can
also obtain other information about motor ve‐
hicle safety from http://www.tc.gc.ca/roadsaf‐
ety.Seite 10Information10
Online Edition for Part no. 01 40 2 963 334 - VI/15
Page 16 of 246
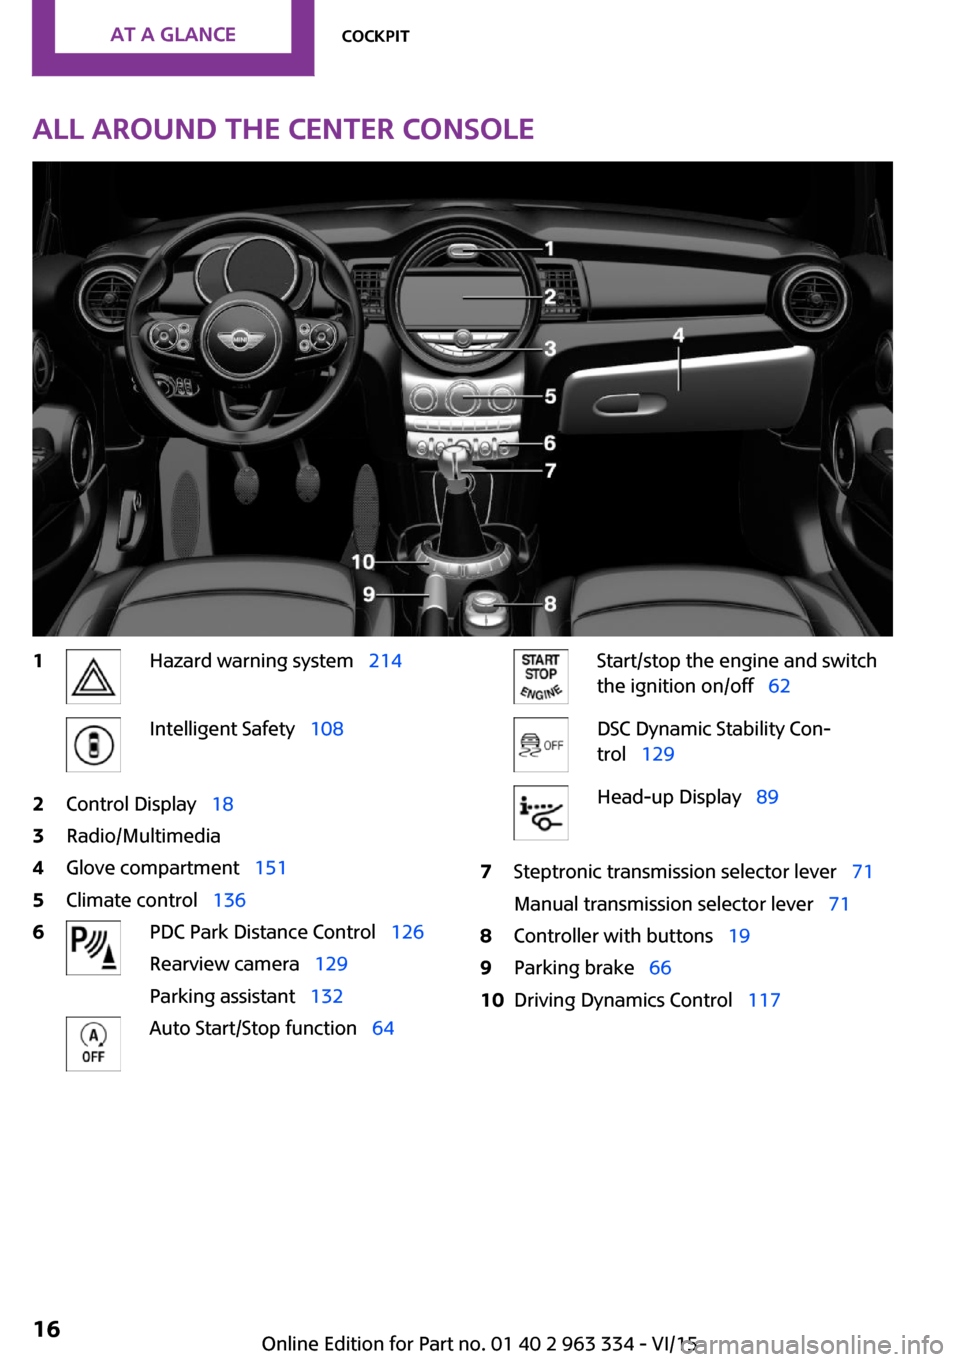
All around the center console1Hazard warning system 214Intelligent Safety 1082Control Display 183Radio/Multimedia4Glove compartment 1515Climate control 1366PDC Park Distance Control 126
Rearview camera 129
Parking assistant 132Auto Start/Stop function 64Start/stop the engine and switch
the ignition on/off 62DSC Dynamic Stability Con‐
trol 129Head-up Display 897Steptronic transmission selector lever 71
Manual transmission selector lever 718Controller with buttons 199Parking brake 6610Driving Dynamics Control 117Seite 16AT A GLANCECockpit16
Online Edition for Part no. 01 40 2 963 334 - VI/15
Page 35 of 246

The battery compartment is accessible.3.Slide the key in the cover of the battery
compartment and raise the cover.4.Insert a battery of the same type with the
positive side facing up.5.Insert lid and cover.
Have old batteries disposed of by a
dealer’s service center or another quali‐
fied service center or repair shop or
take them to a collection point.
New remote controls
New remote controls are available from a
dealer’s service center or another qualified
service center or repair shop.
Loss of the remote controls The lost remote control can be blocked by a
dealer’s service center or another qualified
service center or repair shop.
Emergency detection of remote control
It is possible to switch on the ignition or start
the engine in situations such as the following:
▷Interference of radio transmission to re‐
mote control by external sources e.g., by
radio masts.▷Empty battery in remote control.▷Interference from radio transmissions
through mobile devices in close proximity
to remote control.▷Interference of radio transmission by
charger while charging items such as mo‐
bile devices in the vehicle.
A Check Control message is displayed if an at‐
tempt is made to switch on the ignition or start
the engine.
Starting the engine via emergencydetection of the remote control
Steptronic transmission: if a corresponding
Check Control message appears, hold the re‐
mote control, as shown, against the marked
area on the steering column and press the
Start/Stop button within 10 seconds while
pressing the brake.
Manual transmission: if a corresponding Check
Control message appears, hold the remote con‐
trol, as shown, against the marked area on the
steering column and press the Start/Stop but‐
ton within 10 seconds while pressing the
clutch.
Seite 35Opening and closingCONTROLS35
Online Edition for Part no. 01 40 2 963 334 - VI/15
Page 38 of 246
When the door is opened, the window is low‐
ered more to make it easier to enter the vehi‐
cle.
You can set how the vehicle is to be unlocked.
Create the settings, refer to page 42.
The alarm system, refer to page 43, is dis‐
armed.
Convenient opening Press and hold this button on the re‐
mote control after unlocking.
The windows and the glass sunroof are opened,
as long as the button on the remote control is
pressed.
Locking WARNING
Unlocking from the inside is only possible
with special knowledge.
If people must spend a longer time in the vehi‐
cle while it is very hot or cold outside, there is
risk of injuries or danger to life. Do not lock the
vehicle from the outside when there are people
in it. ◀
The driver's door must be closed. Press button on the remote control.
The alarm system, refer to page 43, is armed.
If the vehicle horn honks twice when you lock
the car, this means that the engine or ignition is
still switched on. In this case, the engine or ig‐
nition must be switched off by means of the
Start/Stop button.
Switching on interior lights and
courtesy lights
Press button on the remote control
with the vehicle locked.
The courtesy lamps are only switched on when
it is dark outside. This function is not available,if the interior lamps were switched off man‐
ually.
If the button is pressed within 10 seconds of
when the vehicle was locked Interior motion
sensor and tilt alarm sensor of the anti-theft
warning system, refer to page 44, are turned
off. After locking, wait 10 seconds before press‐
ing the button again.
Panic mode
You can trigger the alarm system if you find
yourself in a dangerous situation.
Press button on the remote control for
at least 3 seconds.
To switch off the alarm: press any button.
Unlocking the tailgate Press button on the remote control for
approx. 1 second.
The tailgate opens slightly, regardless of
whether the vehicle was previously locked or
unlocked.
To avoid locking it into the vehicle, do not place
the remote control in the cargo area.
Depending on the features and the country
version, it is also possible to have door un‐
locked. Create the settings, refer to page 42.
If the doors were not unlocked, the tailgate is
locked again as soon as it closes.
CAUTION
Sharp-edged or pointed objects can hit
the rear window and heat conductors while
driving. There is risk of property damage. Cover
the edges and ensure that pointed objects do
not hit the rear window. ◀
Malfunction Remote control detection by the vehicle can
among others be malfunctioning under the fol‐ lowing circumstances:Seite 38CONTROLSOpening and closing38
Online Edition for Part no. 01 40 2 963 334 - VI/15
Page 41 of 246

Opening from the insideWith the vehicle is stationary, press the
button in the driver's footwell.
Closing
Recessed grips on the inside trim of the tailgate
can be used to conveniently pull down the tail‐
gate.
Comfort Access The concept
The vehicle can be accessed without activating
the remote control.
All you need to do is to have the remote control
with you, such as in your pants pocket.
The vehicle automatically detects the remote
control when it is in close proximity or in the
car's interior.
Comfort Access supports the following func‐
tions:
▷Unlocking/locking of the vehicle.▷Convenient closing.▷Separate unlocking of the tailgate.▷Start the engine.
Information
To avoid locking it into the vehicle, do not place
the remote control in the cargo area.
Functional requirements▷There are no sources of interference
nearby.▷To lock the vehicle, the remote control
must be located outside of the vehicle near
the doors.▷The next unlocking and locking cycle is not
possible until after approx. 2 seconds.▷The engine can only be started if the re‐
mote control is in the vehicle.
Unlocking
On the driver's or front passenger's door han‐
dle, press the button.
This corresponds to pressing the remote control
button:
Locking
On the driver's or front passenger's door han‐
dle, press the button.
This corresponds to pressing the remote control
button:
Seite 41Opening and closingCONTROLS41
Online Edition for Part no. 01 40 2 963 334 - VI/15
Page 44 of 246

Indicator lamp on the interior rearview
mirror▷The indicator lamp flashes briefly every
2 seconds:
The alarm system is armed.▷The indicator lamp flashes after locking:
Doors, hood or tailgate are not correctly
closed. Correctly closed access points are
secured.
After 10 seconds, the indicator lamp flashes
continuously. Interior motion sensor and tilt
alarm sensor are not active.
When the still open access is closed, interior
motion sensor and tilt alarm sensor will be
switched on.▷The indicator lamp goes out after unlock‐
ing:
The vehicle has not been tampered with.▷The indicator lamp flashes after unlocking
until the engine ignition is switched on, but
no longer than approx. 5 minutes:
An alarm has been triggered.
Tilt alarm sensor The tilt of the vehicle is monitored.
The alarm system responds in situations such as
attempts to steal a wheel or when the car is
towed.
Interior motion sensor The windows and glass sunroof must be closed
for the system to function properly.
Avoiding unintentional alarms
The tilt alarm sensor and interior motion sensor
can be switched off together, such as in the fol‐
lowing situations:▷In automatic car washes.▷In duplex garages.▷During transport on trains carrying vehicles,
at sea or on a trailer.▷With animals in the vehicle.
Switching off the tilt alarm sensor and
interior motion sensor
Press the remote control button again
within 10 seconds as soon as the vehi‐
cle is locked.
The indicator lamp lights up for approx. 2 sec‐
onds and then continues to flash.
The tilt alarm sensor and interior motion sensor
are turned off until the vehicle is locked again.
Switching off the alarm
▷Unlock vehicle with the remote control or
switch on the ignition, if needed through
emergency detection of remote control, re‐
fer to page 35.▷For Comfort Access: If you have the remote
control with you, unlock vehicle using the
button on the driver's side or passenger
side door.
Power windows
Information WARNING
Unattended children or animals can move
the vehicle and endanger themselves and traf‐
fic, e.g. with the following actions:
▷Pressing the Start/Stop button.▷Releasing the parking brake.▷Opening and closing of doors or windows.Seite 44CONTROLSOpening and closing44
Online Edition for Part no. 01 40 2 963 334 - VI/15
Page 56 of 246

Deactivating
Slide the switch to the passenger side mirror
position.
Fold in and out CAUTION
Depending on the vehicle width, the ve‐
hicle can be damaged in car washes. There is
risk of property damage. Before washing, fold
in the mirrors by hand or with the button. ◀
Press button.
Possible at speeds up to approx.
15 mph/20 km/h.
Beneficial in the following situations:▷In car washes.▷On narrow roads.▷For folding mirrors back out that were
folded away manually.
Mirrors that were folded in are folded out auto‐
matically at a speed of approx.
25 mph/40 km/h.
Automatic heating
Both exterior mirrors are automatically heated
whenever the engine is running.
Automatic dimming featureBoth exterior mirrors are automatically dim‐
med. Photocells are used to control the Interior rearview mirror, refer to page 56.
Interior rearview mirror, manually
dimmable
Flip lever
To reduce the blinding effect of the interior rear
view mirror, flip the lever forward.
Turn knob
Turn the knob to reduce the blinding effect by
the interior mirror.
Interior rearview mirror, automatic
dimming feature
The concept
Photocells are used for control:
Seite 56CONTROLSAdjusting56
Online Edition for Part no. 01 40 2 963 334 - VI/15
Page 62 of 246

DrivingVehicle features and op‐
tions
This chapter describes all standard, country-
specific and optional features offered with the
series. It also describes features that are not
necessarily available in your car, e. g., due to
the selected options or country versions. This
also applies to safety-related functions and sys‐
tems. The respectively applicable country provi‐
sions must be observed when using the respec‐
tive features and systems.
Start/Stop button The concept Pressing the Start/Stop button
switches the ignition on or off
and starts the engine.
Steptronic transmission: the en‐
gine starts in selector lever posi‐
tion P or N with the brake pedal pressed when
you press the Start/Stop button.
Manual transmission: the engine starts with the
clutch pedal pressed when the Start/Stop but‐
ton is pressed.
Ignition on Steptronic transmission: press the Start/Stop
button, and do not press on the brake pedal at
the same time.
Manual transmission: press the Start/Stop but‐
ton without stepping on the clutch pedal.
All vehicle systems are ready for operation.
Most of the indicator and warning lights in the
instrument cluster light up for a varied length of
time.To save battery power when the engine is off,
switch off the ignition and any unnecessary
electronic systems/power consumers.
Ignition off
Manual transmission: press the Start/Stop but‐
ton again without stepping on the clutch pedal.
Steptronic transmission: shift to selector lever
position P, press the Start/Stop button again
without stepping on the brake.
All indicator lights in the instrument cluster go
out.
To save battery power when the engine is off,
switch off the ignition and any unnecessary electronic systems/power consumers.
The ignition is switched off automatically in the
following situations while the vehicle is station‐
ary and the engine is off:▷During locking, also with the low beams ac‐
tivated.▷Shortly before the battery is discharged
completely, so that the engine can still be
started. This function is only available when
the low beams are turned off.▷When opening and closing the driver door,
if the driver's safety belt is unbuckled and
the low beams are turned off.▷While the driver's safety belt is unbuckled
with driver's door open and low beams off.▷The low beams switch to parking lights af‐
ter approx. 15 minutes of no use.
Radio ready state
Activate radio-ready state: when the engine is
running: press the Start/Stop button.
Some electronic systems/power consumers re‐
main ready for operation.
The radio-ready state is switched off automati‐
cally in the following situations:
Seite 62CONTROLSDriving62
Online Edition for Part no. 01 40 2 963 334 - VI/15