check engine MINI Paceman 2013 User Guide
[x] Cancel search | Manufacturer: MINI, Model Year: 2013, Model line: Paceman, Model: MINI Paceman 2013Pages: 275, PDF Size: 4.23 MB
Page 216 of 275
Engine compartmentMOBILITY
215
Hood
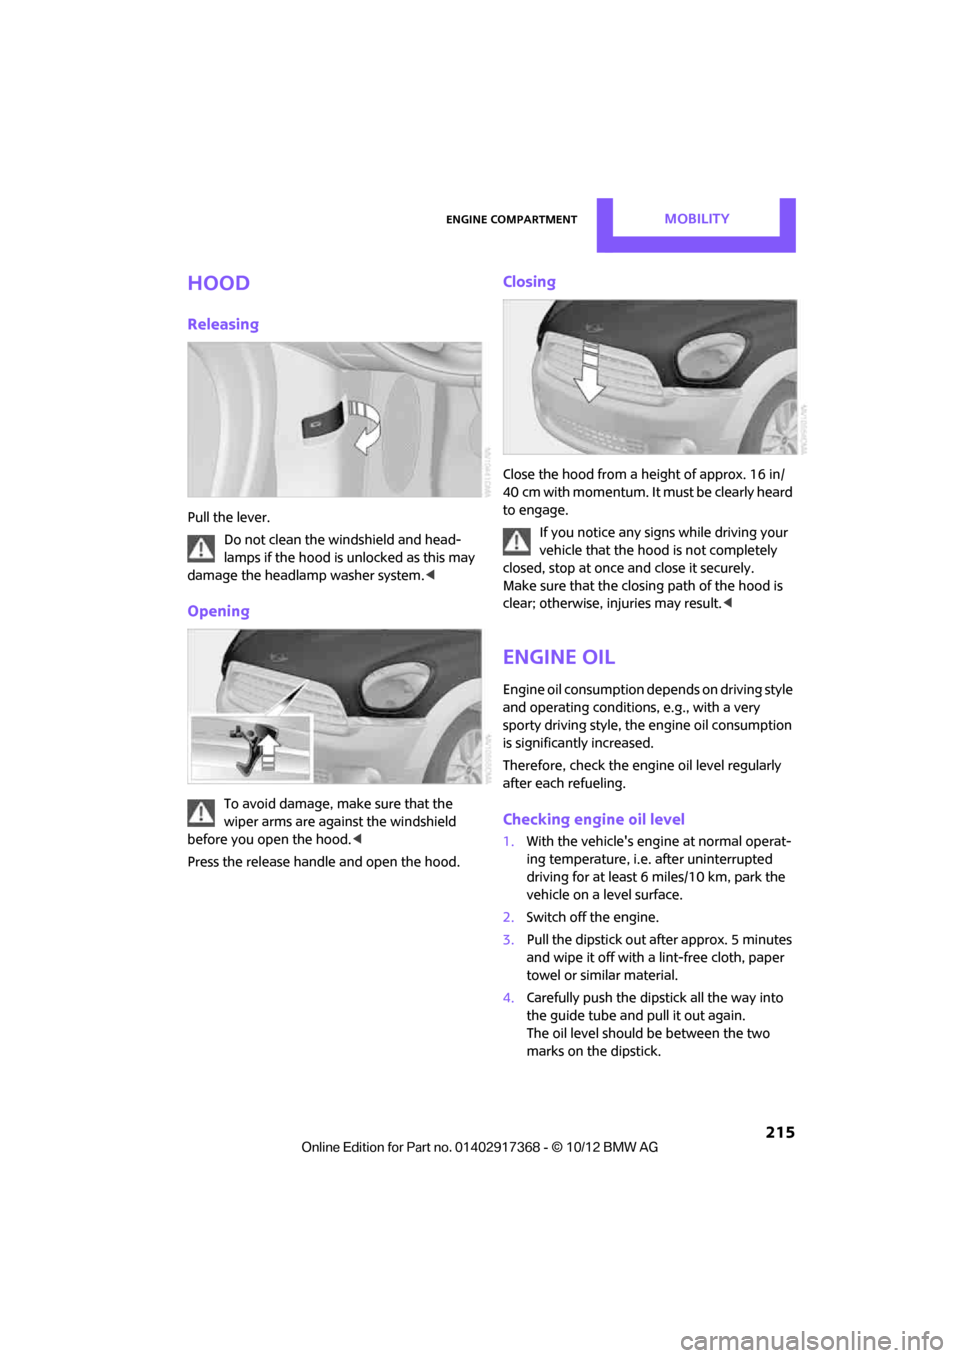
Releasing
Pull the lever.Do not clean the windshield and head-
lamps if the hood is unlocked as this may
damage the headlamp washer system. <
Opening
To avoid damage, make sure that the
wiper arms are against the windshield
before you open the hood. <
Press the release handle and open the hood.
Closing
Close the hood from a height of approx. 16 in/
40 cm with momentum. It must be clearly heard
to engage. If you notice any signs while driving your
vehicle that the hood is not completely
closed, stop at once and close it securely.
Make sure that the closing path of the hood is
clear; otherwise, injuries may result. <
Engine oil
Engine oil consumption depends on driving style
and operating conditions, e.g., with a very
sporty driving style, the engine oil consumption
is significantly increased.
Therefore, check the engine oil level regularly
after each refueling.
Checking engine oil level
1. With the vehicle's engi ne at normal operat-
ing temperature, i.e. after uninterrupted
driving for at least 6 miles/10 km, park the
vehicle on a level surface.
2. Switch off the engine.
3. Pull the dipstick out after approx. 5 minutes
and wipe it off with a lint-free cloth, paper
towel or similar material.
4. Carefully push the dipstick all the way into
the guide tube and pull it out again.
The oil level should be between the two
marks on the dipstick.
00320051004F004C00510048000300280047004C0057004C005200510003
Page 217 of 275

MOBILITYEngine compartment
216
The oil quantity corresponding to the difference
between the two marks on the dipstick is
1USquart/1liter.Do not fill beyond the upper mark on the
dipstick. Excess oil will damage the
engine. <
Adding engine oil
Do not add the maximum quantity of
1 US quart/1 liter of engine oil until the oil level
has dropped to just above the lower mark on the
dipstick, page 215.
Add oil within the next 30 miles/50 km;
otherwise, the engine could be dam-
aged. <
If too much motor oil is added, immedi-
ately have the vehicle checked; otherwise,
damage to the engine may result. <
Keep oils, grease, etc. out of the reach of
children and comply with the warnings on
the containers. Otherwise, health hazards may
result. <
Oil types for refilling
Notes
Do not use oil additives as this could result
in engine damage. <
When choosing oil, make sure that it
belongs to one of the SAE viscosity classes
0W-40, 0W-30, 5W-40 an d 5W-30; otherwise,
malfunctions and damage to the engine may
result. <
The engine oil quality is critical for the life of the
engine.
Some types of oil may not be available in every
country.
Approved oil types
Additional information on approved types of oil
can be found at a MINI dealer.
Alternative oil types
If the approved engine oils are not available, up
to 1 US quart/1 liter of another oil with the fol-
lowing specification may be used:
Gasoline engines
BMW High Performance SAE 5W-30
BMW Longlife-01
BMW Longlife-01 FE
Gasoline engines
API SM or higher specifications
00320051004F004C00510048000300280047004C0057004C005200510003
Page 218 of 275
Engine compartmentMOBILITY
217
Oil change
Only MINI dealers are to perform oil changes.
Coolant
Coolant consists of half water and half additive.
Not all commercially available additives are suit-
able for your MINI. Your MINI dealer knows
which additives are suitable and will be glad to
advise you.Only use suitable additives; otherwise,
engine damage may result. Because addi-
tives are harmful to your health, it is important
to follow the instructions on the containers. <
Comply with the appropriate environmen-
tal protection regulations when disposing
of coolant additives. <
Coolant temperature
A warning lamp will come on if the coolant, and
therefore the engine, becomes too hot.
A message appears on the Control Display.
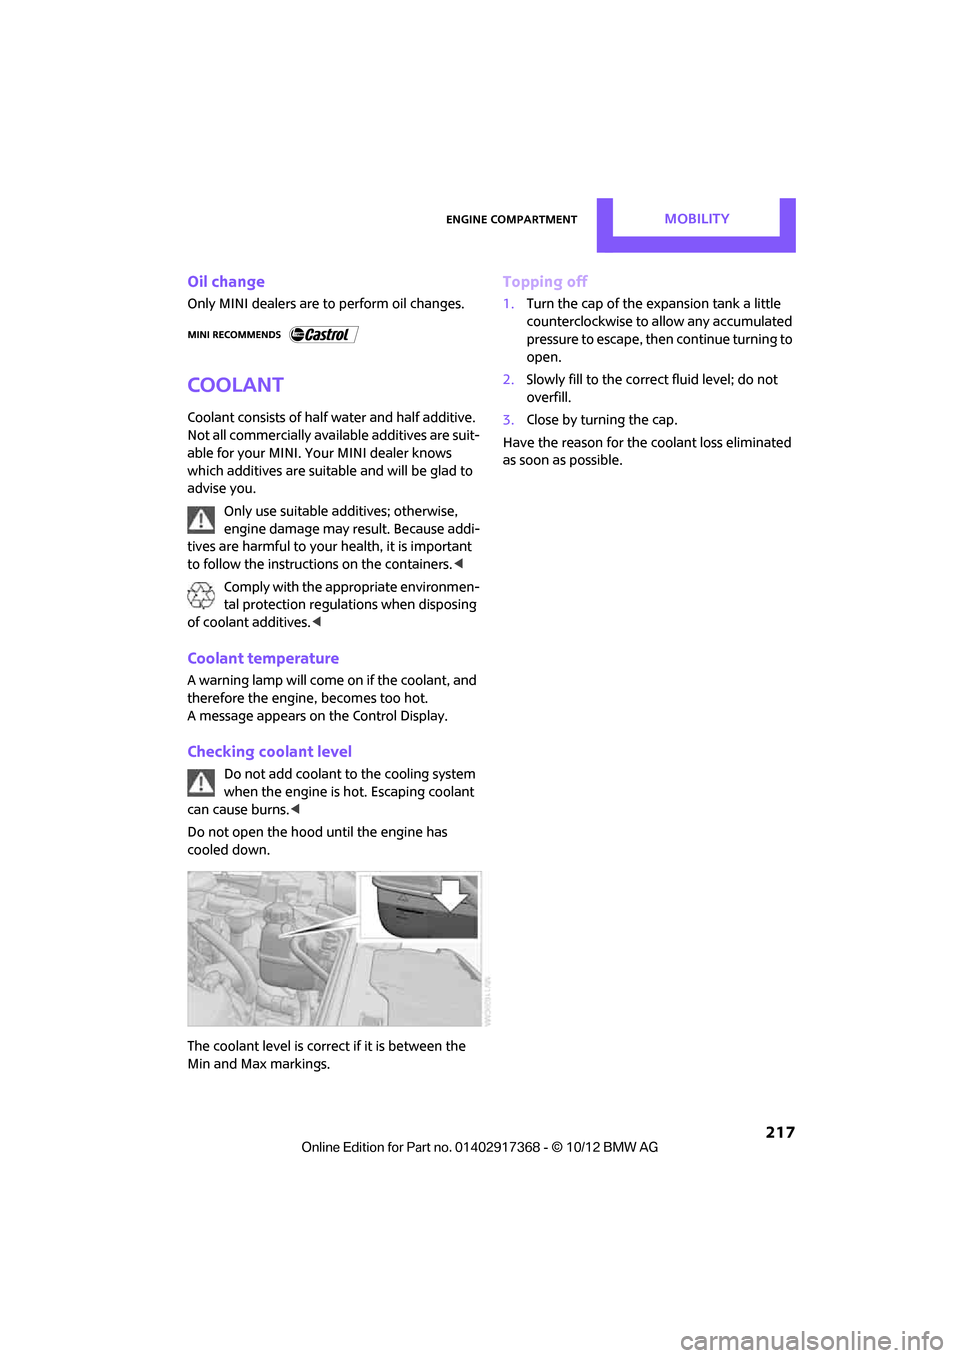
Checking coolant level
Do not add coolant to the cooling system
when the engine is hot. Escaping coolant
can cause burns. <
Do not open the hood until the engine has
cooled down.
The coolant level is correct if it is between the
Min and Max markings.
Topping off
1. Turn the cap of the expansion tank a little
counterclockwise to allow any accumulated
pressure to escape, then continue turning to
open.
2. Slowly fill to the correct fluid level; do not
overfill.
3. Close by turning the cap.
Have the reason for the coolant loss eliminated
as soon as possible.
00320051004F004C00510048000300280047004C0057004C005200510003
Page 220 of 275

MaintenanceMOBILITY
219
Socket for On-Board
Diagnosis OBD
The primary components that make up the
emissions can be checked by a device via the
OBD socket.
Emissions
The warning lamps come on. The vehicle
is producing higher emissions. You can
continue your journey, but moderate
your speed and exercise due caution.
Have the car checked as soon as possible.
Under certain circumstances, one of the lamps
will flash or light up continuously. This indicates
excessive misfiring or a malfunction in the
engine. If this happens, reduce your speed and
visit the nearest MINI dealer as soon as possible.
Severe misfiring can quickly lead to serious dam-
age of emissions-related components, espe-
cially the catalytic converter. In addition,
mechanical engine components can become
damaged.
If the fuel cap is not properly tightened,
the OBD system may conclude that fuel
vapors are escaping, causing an indica-
tor to light up. If the fuel cap is then tightened,
the indicator should go out within a few days.
00320051004F004C00510048000300280047004C0057004C005200510003
Page 235 of 275
MOBILITYReplacing components
234
Check Control messages are no longer dis-
played.
Charging the battery
Note
Do not connect battery chargers to the
sockets installed in the vehicle at the fac-
tory; otherwise you may cause damage to the
battery. <
Only charge the battery in the vehicle when the
engine is off. Connectio ns, refer to Jump-start-
ing on page 236.
General information
To guarantee the full service life of the battery,
make sure that the battery is always properly
charged.
It may be necessary to charge the battery in the
following situations:
>If frequent short trips are taken.
> If the vehicle is frequently parked for more
than a month.
Disposal
After replacing old ba tteries, return the
used batteries to your MINI dealer or to a
recycling center. Maintain the battery in an
upright position for transport and storage.
Always secure the battery against tipping over
during transport. <
Power failure
After a temporary power loss, some equipment
may not be fully function al and may require ini-
tialization. Individual settings are also lost and
must be reprogrammed:
> Time and date
These values must be updated, page 66.
> Radio
In some cases, statio ns may have to be
stored again, page 143.
> Onboard monitor
Operability must be waited for, page118.>
Glass sunroof, electric
It may only be possible to tilt the sunroof, if
applicable. The system must be initialized.
Contact your near est MINI dealer.
Indicator and warning lamps
Lights up in red:
Battery is no longer being charged.
Alternator malfunction.
Switch off all unnecessary electrical consumers.
Have the battery checked without delay. Lights up in yellow:
Battery charge level very low, battery
aged, or battery not securely con-
nected.
Charge it by taking a long er drive or by using an
external charger. If th e display appears again,
have the battery checked as soon as possible.
Fuses
Do not attempt to repair a blown fuse or
replace it with a fuse of a different color or
Ampere rating. To do this could cause a fire in
the vehicle resulting from a circuit overload.
Have fuses replaced by your MINI dealer. <
A fuse assignment diag ram is located on the
inside of the fuse box cover panels.
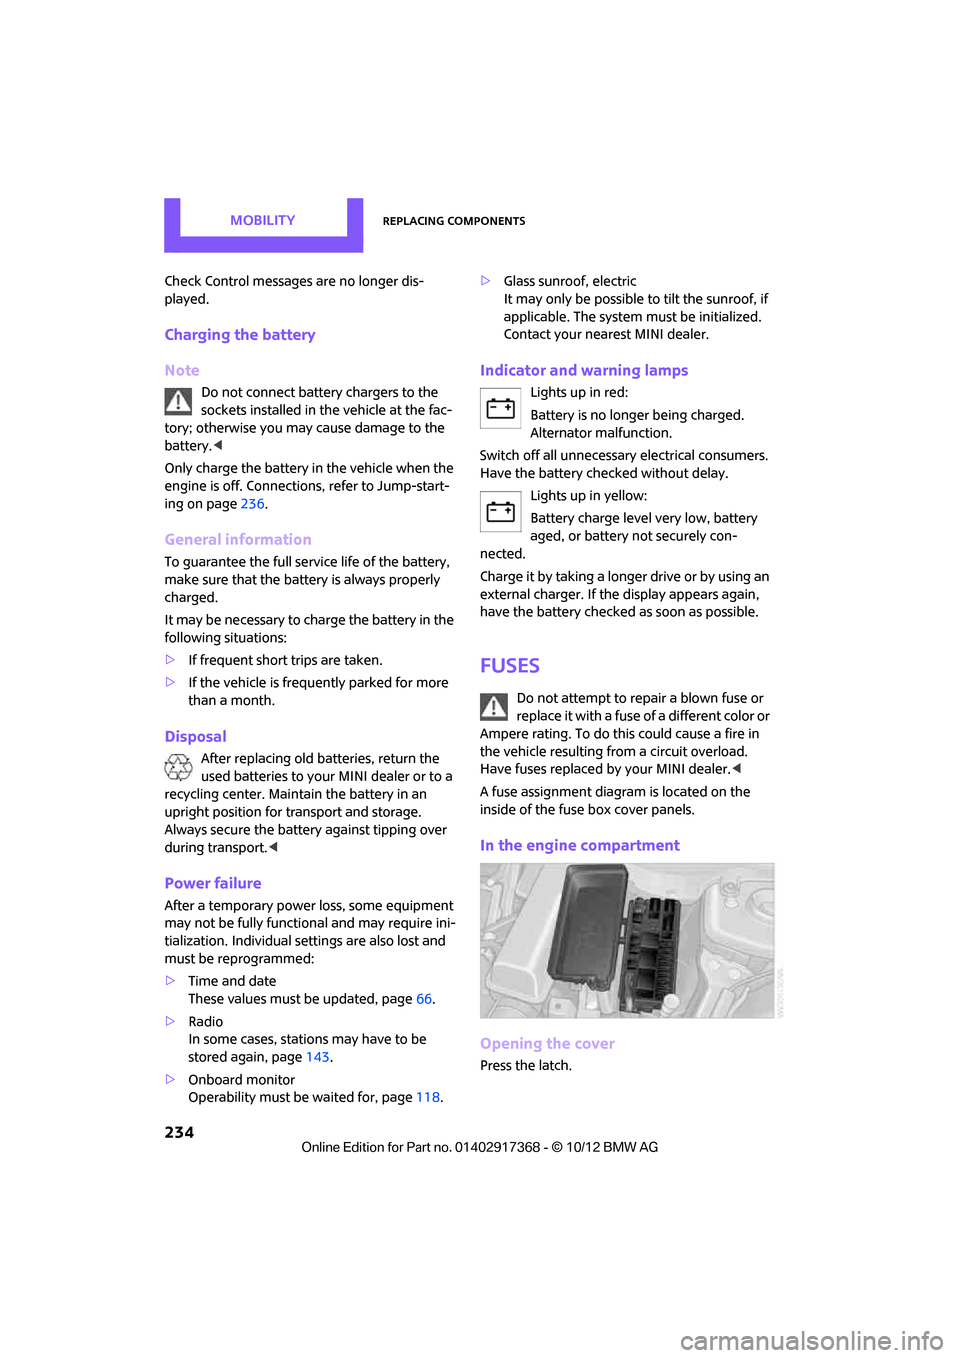
In the engine compartment
Opening the cover
Press the latch.
00320051004F004C00510048000300280047004C0057004C005200510003
Page 237 of 275

MOBILITYGiving and receiving assistance
236
Giving and receiving assistance
Vehicle equipment
In this chapter, all production, country, and
optional equipment that is offered in the model
range is described. Equipment is also described
that is not available because of, for example,
selected options or coun try version. This also
applies to safety relate d functions and systems.
Roadside Assistance
Roadside Assistance is available by phone
24 hours a day in many countries. You can
obtain assistance there in the event of a vehicle
breakdown.
First aid pouch
Some of the articles co ntained in the first aid
pouch have a limited service life. Therefore,
check the expiration dates of the contents regu-
larly and replace any item s in good time, if nec-
essary.
The first aid pouch is located on the rear cargo
well by the left side trim panel or under the pull-
out floor panel.
Warning triangle
In the cargo area under the loading sill.
To remove, open the two clasps.
Jump-starting
If the car's own battery is flat, your MINI's engine
can be started by connecting two jumper cables
to another vehicle's battery. You can also use
the same method to help start another vehicle.
Only use jumper cables with fully-insulated
clamp handles.
Do not touch any electrically live parts
wh en t he e ngine is run nin g, or a fatal acci-
dent may occur. Carefully adhere to the follow-
ing sequence, both to prevent damage to one or
both vehicles, and to guard against possible per-
sonal injuries. <
Preparation
1.Check whether the battery of the other vehi-
cle has a voltage of 12 volts and approxi-
mately the same capa citance in Ah. This
information can be found on the battery.
2. Switch off the engine of the support vehicle.
3. Switch off any consumers in both vehicles.
There must not be any contact between
the bodies of the two vehicles; otherwise,
there is a danger of shorting. <
00320051004F004C00510048000300280047004C0057004C005200510003
Page 238 of 275

Giving and receiving assistanceMOBILITY
237
Connecting jumper cables
Connect the jumper cables in the correct
o r d e r , s o t h a t n o s parks which could cause
injury occur. <
1. Open the battery cover in the engine com-
partment to access the positive terminal of
your MINI.
2. Release the tabs on the left and right sides of
the positive termin al cover, arrows1, and lift
the cover to open, arrow 2.
3. Attach one terminal clamp of the plus/+
jumper cable to the positive terminal of the
battery or to a starting-aid terminal of the
vehicle providing assistance.
4. Attach the second terminal clamp of the
plus/+ jumper cable to the positive terminal
of the battery or a starting-aid terminal of
the vehicle to be started.
5. Attach one terminal clamp of the minus/–
jumper cable to the negative terminal of the
battery or to an engine or body ground of
the assisting vehicle. Body ground in MINI:
6.
Attach the second terminal clamp of the
minus/– jumper cable to the negative termi-
nal of the battery or to the engine or body
ground of the vehicle to be started.
Starting the engine
1.Start the engine of the donor vehicle and
allow it to run for a few minutes at slightly
increased idle speed.
2. Start the engine of the vehicle to be started
in the usual manner.
If the first start attempt is not successful,
wait a few minutes be fore another attempt
in order to allow the discharged battery to
recharge.
3. Let the engines run for a few minutes.
4. Disconnect the jumper cables by reversing
the above connecting sequence.
If necessary, have the battery checked and
recharged. Never use spray fluids to start the
engine.<
Tow-starting, towing
away
Observe applicable laws and regulations
for tow-starting and towing. <
Do not transport an y passengers other
than the driver in a vehicle that is being
towed. <
00320051004F004C00510048000300280047004C0057004C005200510003
Page 241 of 275

MOBILITYGiving and receiving assistance
240
Tow-starting
Avoid tow-starting the vehicle whenever possi-
ble; instead, jump-start the engine, page236.
Vehicles with a catalyti c converter should only
be tow-started when the engine is cold, vehicles
with an automatic transmission cannot be tow-
started at all.
1. Switch on hazard warning flashers, comply
with local regulations.
2. Switch on the ignition, page 50.
3. Shift into 3rd gear.
4. Have the vehicle tow-started with the clutch
completely depressed and then slowly
release the clutch. Afte r the engine starts,
immediately depress the clutch completely
again.
5. Stop at a suitable lo cation, remove the tow
bar or rope and switch off the hazard warn-
ing flashers.
6. Have the vehicle checked.
00320051004F004C00510048000300280047004C0057004C005200510003
Page 261 of 275
260
REFERENCEEverything from A to Z
Everything from A to Z
Index
A
ABS Antilock Brake System72
Accepting a call 167,179
Accessories, see Vehicle equipment 4
Acknowledgment signals for locking/unlocking vehicle 28
Activated-charcoa l filter for
automatic climate control 91
Adaptive Light Control 85
Adding engine oil 216
Additives
– coolant 217
– engine oil 216
Address, entering 126
Address for navigation
– entering 120,126
Adjusting temperature inside the car, refer to Air
conditioner 88
Adjusting temperature inside the car, refer to Automatic
climate control 90
Adjusting the tone during audio operation, refer to
Tone control 141
Airbags 81
– sitting safely 38
– warning lamp 83
Air conditioner 88
Air conditioning mode
– air conditioner 88
– automatic cl imate control90
– ventilation 92
Air distribution
– automatic 90
– individual 89
– manual 89 Air flow rate
88,90
– air conditioning system 88
– automatic climate control 90
– heating, ventilation 88
Airing, refer to Ventilation92
Air pressure, checking, refer to
Tire inflation pressure 203
Air recirculation, refer to Recirculated-air
mode 89,90
Air supply
– air conditioner 88
– automatic climate control 90
– ventilation 92
AKI, refer to Fuel grade 201
Alarm system 32
ALL4 all-wheel drive system 74
All-season tires, refer to Winter
tires 213
A ll-wh
ee
l drive, refer to
ALL4 74
AM, waveband 143
Ambient air, refer to
Recirculated-air
mode 89,90
Ambient lighting 87
Antenna, care 220
Antifreeze
– coolant 217
– washer fluid 57
Antilock Brake System ABS 72
Anti-theft alarm system, refer
to Alarm system 32
Approved axle loads, refer to Weights 249
Approved engine oils 216
Approved gross vehicle weight, refer to Weights 249
Armrest, refer to Center armrest 97 Arrival time
– computer
62
– route guidance 129
Ashtray 100
Assistant systems, refer to
– Dynamic Stability Control
DSC 72
Audio 140
– controls 140
– switching on/off 140
– tone control 141
– volume 141
Audio device, external 97
Automatic
– air distribution 90
– air flow rate 90
– cruise control 58
– headlamp control 84
Automatic climate control 88
– automatic air distribution 90
Automatic transmission with Steptronic 52
– Interlock 53
– overriding selector lever lock 54
– Shiftlock 53
– sport program 54
AUTO program for automatic climate control 90
Auxiliary phone 176
AUX-In, refer to External audio device 97
AUX-In connection 153
Average fuel consumption 61
– setting the units 64
Average speed 62
Avoiding highways for navigation 129
Axle loads, refer to
Weights 249
00320051004F004C00510048000300280047004C0057004C005200510003
Page 263 of 275
REFERENCEEverything from A to Z
262
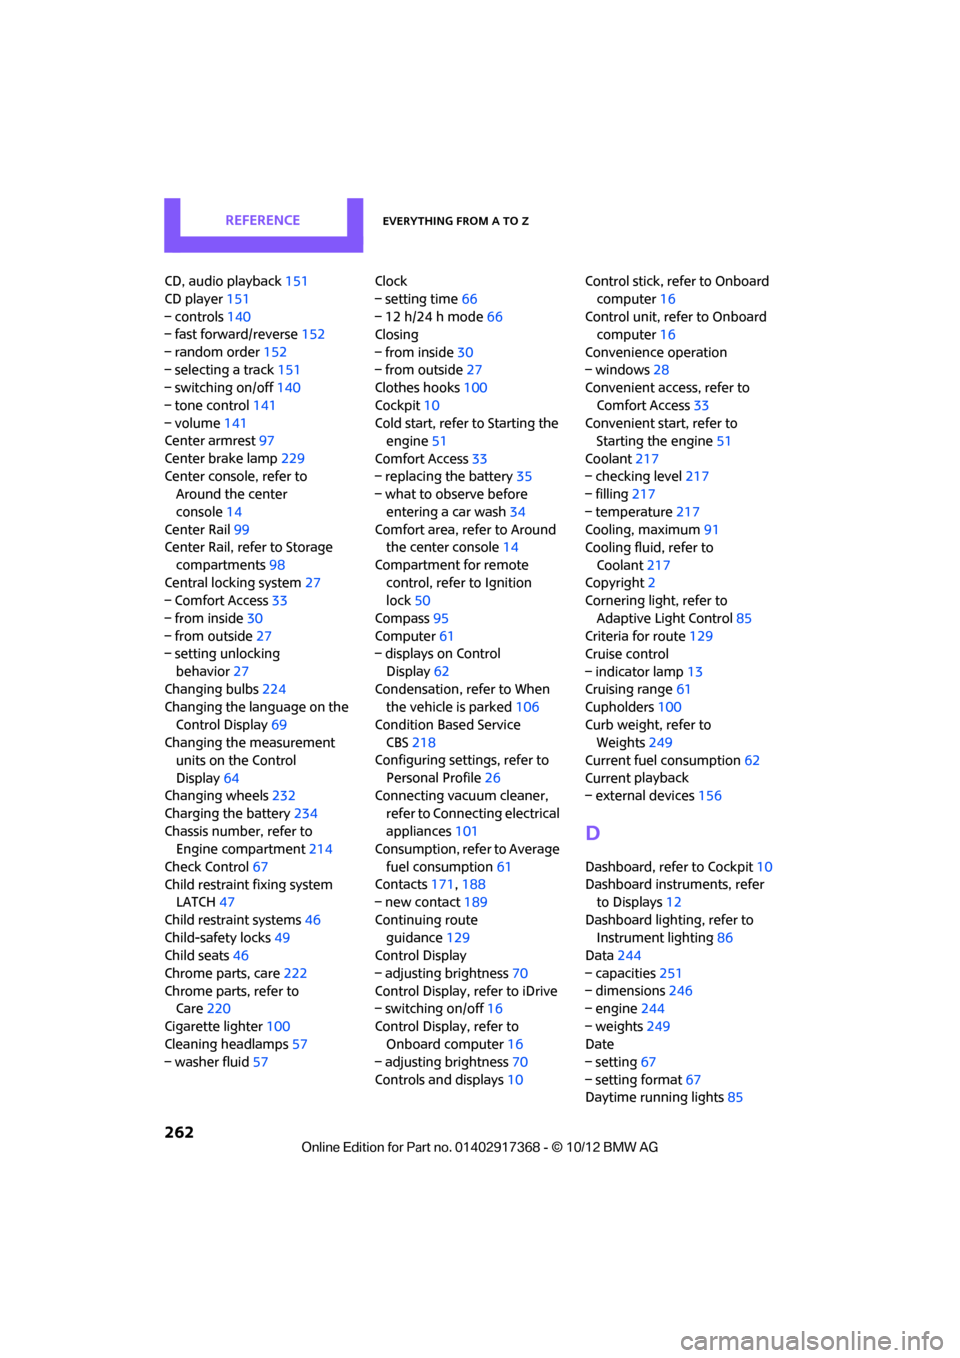
CD, audio playback151
CD player 151
– controls 140
– fast forward/reverse 152
– random order 152
– selecting a track 151
– switching on/off 140
– tone control 141
– volume 141
Center armrest 97
Center brake lamp 229
Center console, refer to Around the center
console 14
Center Rail 99
Center Rail, refer to Storage
compartments 98
Central locking system 27
– Comfort Access 33
– from inside 30
– from outside 27
– setting unlocking
behavior 27
Changing bulbs 224
Changing the language on the
Control Display 69
Changing the measurement units on the Control
Display 64
Changing wheels 232
Charging the battery 234
Chassis number, refer to Engine compartment 214
Check Control 67
Child restraint fixing system LATCH 47
Child restraint systems 46
Child-safety locks 49
Child seats 46
Chrome parts, care 222
Chrome parts, refer to Care 220
Cigarette lighter 100
Cleaning headlamps 57
– washer fluid 57 Clock
– setting time
66
– 12 h/24 h mode 66
Closing
– from inside 30
– from outside 27
Clothes hooks 100
Cockpit 10
Cold start, refer to Starting the engine 51
Comfort Access 33
– replacing the battery 35
– what to observe before
enteri ng a car wash
34
C o
mfort area, refer to Around
the center console 14
Compartment for remote control, refer to Ignition
lock 50
Compass 95
Computer 61
– displays on Control
Display 62
Condensation, refer to When the vehicle is parked 106
Condition Based Service CBS 218
Configuring settings, refer to
Personal Profile 26
Connecting vacuum cleaner,
refer to Connecting electrical
appliances 101
Consumption, refer to Average
fuel consumption 61
Contacts 171,188
– new contact 189
Continuing route guidance 129
Control Display
– adjusting brightness 70
Control Display, refer to iDrive
– switching on/off 16
Control Display, refer to Onboard computer 16
– adjusting brightness 70
Controls and displays 10Control stick, refer to Onboard
computer 16
Control unit, refer to Onboard computer 16
Convenience operation
– windows 28
Convenient access, refer to
Comfort Access 33
Convenient star t, refer to
Starting the engine 51
Coolant 217
– checking level 217
– filling 217
– temperature 217
Cooling, maximum 91
Cooling fluid, refer to
Coolant 217
Copyright 2
Cornering light, refer to
Adaptive Light Control 85
Criteria for route 129
Cruise control
– indicator lamp 13
Cruising range 61
Cupholders 100
Curb weight, refer to Weights 249
Current fuel consumption 62
Curren t playback
– external d
evices156
D
Dashboard, refer to Cockpit 10
Dashboard instruments, refer to Displays 12
Dashboard lighting, refer to Instrument lighting 86
Data 244
– capacities 251
– dimensions 246
– engine 244
– weights 249
Date
– setting 67
– setting format 67
Daytime running lights 85
00320051004F004C00510048000300280047004C0057004C005200510003