light MINI Paceman 2013 Service Manual
[x] Cancel search | Manufacturer: MINI, Model Year: 2013, Model line: Paceman, Model: MINI Paceman 2013Pages: 275, PDF Size: 4.23 MB
Page 110 of 275

Things to remember when drivingDRIVING TIPS
109
Flat load floor
Do not exceed a maximum load of
330 lbs/150 kg on the load floor; other-
wise, damage may result. <
Access to the storage space
Under the load floor, there is storage space, e.g.,
for the cargo net.
1.Reach into the recess, arrow 1, at the back
edge of the load floor.
MINI Countryman:
MINI Paceman:
2. Lift up the pull-out floor panel at the rear,
arrow 1 and fold it forward, arrow 2. Before closing the tailgate, put the load floor
back on the cargo area floor.
Removing
If necessary, the load floor can be removed.
1.
Fold load floor together.
2. Pull the load floor back slightly out of the
take-up.
3. Then take it out toward the top.
The folded together load floor can be placed into
the luggage compartment.
MINI Countryman: cargo net
Ensure that the cargo net is firmly
attached; otherwise, injuries may occur.<
Before installing
1.Remove the pouch with the cargo net from
the storage compartment under the pull-out
floor panel in the cargo area.
2. Remove the cargo net from the pouch, then
unroll and unfold it.
After use, fold the cargo net together, roll it
back up in the same way, and place it in the
pouch so that it can be stowed under the
floor panel again. When doing so, make sure
that hooks and tensioning buckles do not
rest against the rod elements.
3. Unfold the cargo net until the rod elements
snap into place.
00320051004F004C00510048000300280047004C0057004C005200510003
Page 111 of 275

DRIVING TIPSThings to remember when driving
110
Installing behind the front seats
1.If necessary, remove the cargo area cover.
2. Fold down the rear seat backrests, refer to
Expanding cargo area.
3. Insert each cargo net mounting pin all the
way into its respective front mount in the
headliner, arrow 1, and push it forward.
4. Attach the hook, arrow 2, at the bottom of
each retaining strap to the respective eye on
the vehicle floor.
5. Lash the cargo net se curely. To do so,
tighten the retaining straps at the tensioning
buckles.
Removing
When removing and stowing the cargo net, pro-
ceed in the reverse sequence.
To fold closed, press the release button, arrow.
MINI Countryman: bag holders
Holders on the left and right side of the support
for the cargo area cover, arrow, e.g. for hanging
shopping bags or storage bags.
Only hang light shopping bags or suitable
items on the holders. Otherwise, this may
create a hazard due to flying objects, for exam-
ple in the event of braking and evasive maneu-
vers.
Transport heavy luggage only if it is appropri-
ately secured in the cargo area. <
Determining cargo limit
1.Locate the following statement on your
vehicle's placard:
The combined weight of occupants
and cargo should never exceed
XXX kg or YYY lbs. Otherwise, this could
damage the vehicle and produce unstable
vehicle operating conditions. <
2. Determine the combined weight of the
driver and passengers that will be riding in
your vehicle.
3. Subtract the combined weight of the driver
and passengers from XXX pounds or YYY
kilograms.
00320051004F004C00510048000300280047004C0057004C005200510003
Page 113 of 275

DRIVING TIPSThings to remember when driving
112
Securing cargo
MINI Countryman:
MINI Paceman:
>Secure smaller and lighter items using
retaining or draw
straps.
> Heavy-duty cargo straps for securing larger
and heavier objects are available at your
MINI dealer.
> These cargo straps are fastened using eight
securing eyes.
Two of them are located on the side wall,
arrows 1, of the cargo area.
Two of them are located on the rear wall,
arrows 2, of the cargo area.
To use the lower lashing eyes, raise or remove
the pull-out floor panel.
Comply with the information enclosed with the
load-securing devices.
Always position and secure the cargo as
described above, so that it cannot endan-
ger the car's occupants, for example if sudden
braking or swerves are necessary.
Do not exceed the approved gross vehicle
weight and axle loads, page 248; otherwise, the vehicle's operating safety is no longer assured
and the vehicle will not be in compliance with
the construction and use regulations.
Heavy or hard objects should not be carried
loose inside the car, since they could be thrown
around, for example as a result of heavy braking,
sudden swerves, etc., and endanger the occu-
pants. Do not secure cargo using the fastening
points for the tether strap, page
47; they may
become damaged. <
Roof-mounted luggage
rack
A special rack system is av ailable as an option for
your MINI. Your MINI dealer will be glad to
advise you. Comply with the installation instruc-
tions supplied with the rack system.
Loading roof-mounted luggage rack
Because roof racks raise the vehicle's center of
gravity when loaded, they have a major effect
on vehicle handling and steering response.
You should therefore always remember not to
exceed the approved roof load capacity, the
approved gross vehicle we ight or the axle loads
when loading the rack.
You can find more information under Weights in
the technical specifications.
The roof load must be distributed uniformly and
should not be too large in area. Heavy items
should always be placed at the bottom.
When loading, make sure that there is sufficient
space for the movement of the glass roof.
Fasten roof-mounted cargo correctly and
securely to prevent it from shifting or falling off
during the trip.
Drive smoothly. Avoid su dden acceleration and
braking maneuvers, and take corners gently.
00320051004F004C00510048000300280047004C0057004C005200510003
Page 115 of 275

DRIVING TIPSThings to remember when driving
114
Avoid high engine speeds
Use first gear only for driving off. In second and
higher gears, accelerate smoothly to a suitable
engine and road speed. In doing so, avoid high
engine speeds and shift up early.
When you reach your desired traveling speed,
shift to the highest suitable gear and drive at
constant speed.
As a rule: driving at lo w engine speeds lowers
fuel consumption and reduces wear.
Coasting
When approaching a red traffic light, take your
foot off the accelerator and let the car roll to a
stop in the highest gear possible.
On a downhill gradient, take your foot off the
accelerator and let the vehicle coast in a suitable
gear.
Fuel supply is shut off automatically when the
vehicle is coasting.
Switch off the engine during lengthy
stops
Switch off the engine when stopping for lengthy
periods, e.g. at traffic li ghts, railroad crossings or
in traffic jams.
Switch off any features that are not
currently required
Features such as air conditioning, seat heaters
and the rear window defroster require a great
deal of energy and result in greater fuel con-
sumption, especially in city driving and during
Stop & Go operation. For this reason, switch off
these features if they are not really needed.
Have the vehicle serviced
Have your vehicle servic ed regularly to achieve
good economy and a long vehicle life. The man-
ufacturer of your MINI recommends having the
vehicle serviced by a MINI dealer. Also note the
MINI Maintenance System, page 218.
Driving on poor roads
Your MINI with ALL4 drive is at home on any
type of street or road. It combines an all-wheel
drive system with the ad vantages of a normal
passenger car.
Do not drive on unpa ved terrain, as other-
wise the vehicle may be damaged. <
When you are driving on poor roads, there are a
few points which you shou ld strictly observe for
your own safety, for that of your passengers,
and for the safety of the vehicle:
> Familiarize yourself with the vehicle before
beginning to drive and do not take risks
under any circumstances.
> Adapt your speed to road conditions. The
steeper and rougher the road surface is, the
lower the speed should be.
> When driving on very steep uphill or down-
hill grades, make sure in advance that the
engine oil and coolant levels are close to the
maximum mark, refer to page 215.
> While driving, watch carefully for obstacles
such as rocks or holes. Try to avoid these
obstacles whenever possible.
> Make sure that the un dercarriage does not
touch the ground, for example on hilltops
and bumpy roads. The ground clearance of
the vehicle is a maximum of approx. 6.0 in/
15 cm. Please note that the ground clear-
ance can vary depending on loading and the
driving conditions of the vehicle.
> Only drive through road surface water up to
a maximum water depth of 1 ft/30 cm and
only at walking speed ; do not remain sta-
tionary.
> After driving through water at low speed,
lightly press the brake pedal several times to
dry the brakes and to prevent the braking
effect from being reduced by wetness.
00320051004F004C00510048000300280047004C0057004C005200510003
Page 121 of 275
NAVIGATIONDestination entry
120
Destination entry
General information
In entering your destination you can select from
among the following options:
>Manual destination entry, see below
> Selecting destination from address book,
page 122
> Last destin ations, page 123
> Special destinations, refer to page 124
> Entering the destinatio n via map, refer to
page 125
> Selecting home address, refer to page 123
> Entering destinatio n via voice, page126
After selecting your dest ination you can proceed
to start the route guidance, page 129.
Manual destination
entry
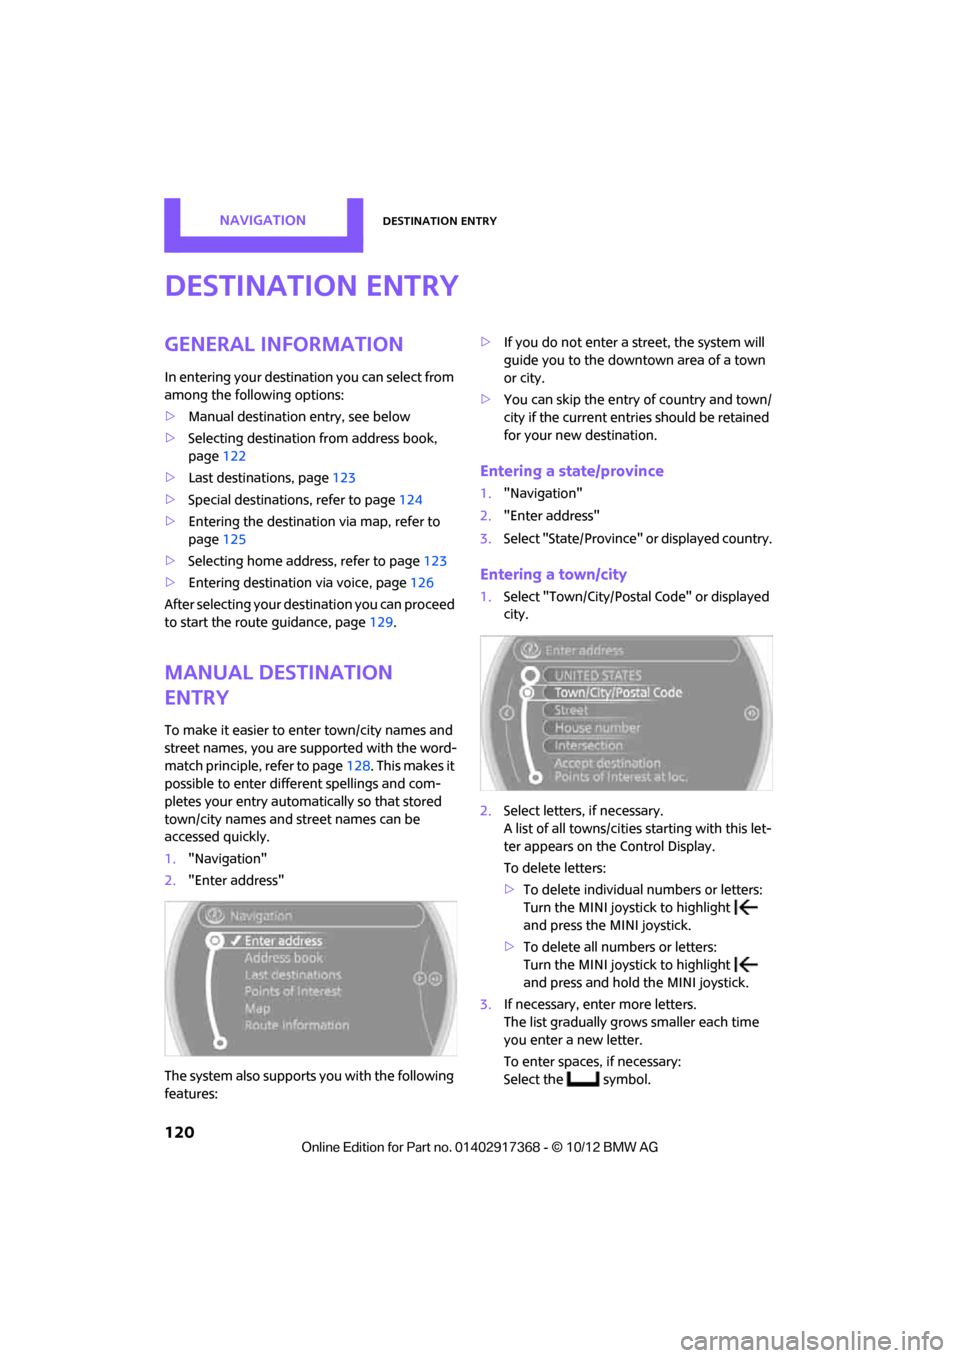
To make it easier to enter town/city names and
street names, you are supported with the word-
match principle, refer to page128. This makes it
possible to enter different spellings and com-
pletes your entry automatically so that stored
town/city names and st reet names can be
accessed quickly.
1. "Navigation"
2. "Enter address"
The system also supports you with the following
features: >
If you do not enter a street, the system will
guide you to the downtown area of a town
or city.
> You can skip the entry of country and town/
city if the current entries should be retained
for your new destination.
Entering a state/province
1."Navigation"
2. "Enter address"
3. Select "State/Province" or displayed country.
Entering a town/city
1.Select "Town/City/Postal Code" or displayed
city.
2. Select letters, if necessary.
A list of all towns/cities starting with this let-
ter appears on the Control Display.
To delete letters:
>To delete individual numbers or letters:
Turn the MINI joystick to highlight
and press the MINI joystick.
> To delete all numbers or letters:
Turn the MINI joystick to highlight
and press and hold the MINI joystick.
3. If necessary, enter more letters.
The list gradually grow s smaller each time
you enter a new letter.
To enter spaces, if necessary:
Select the symbol.
00320051004F004C00510048000300280047004C0057004C005200510003
Page 122 of 275
Destination entryNAVIGATION
121
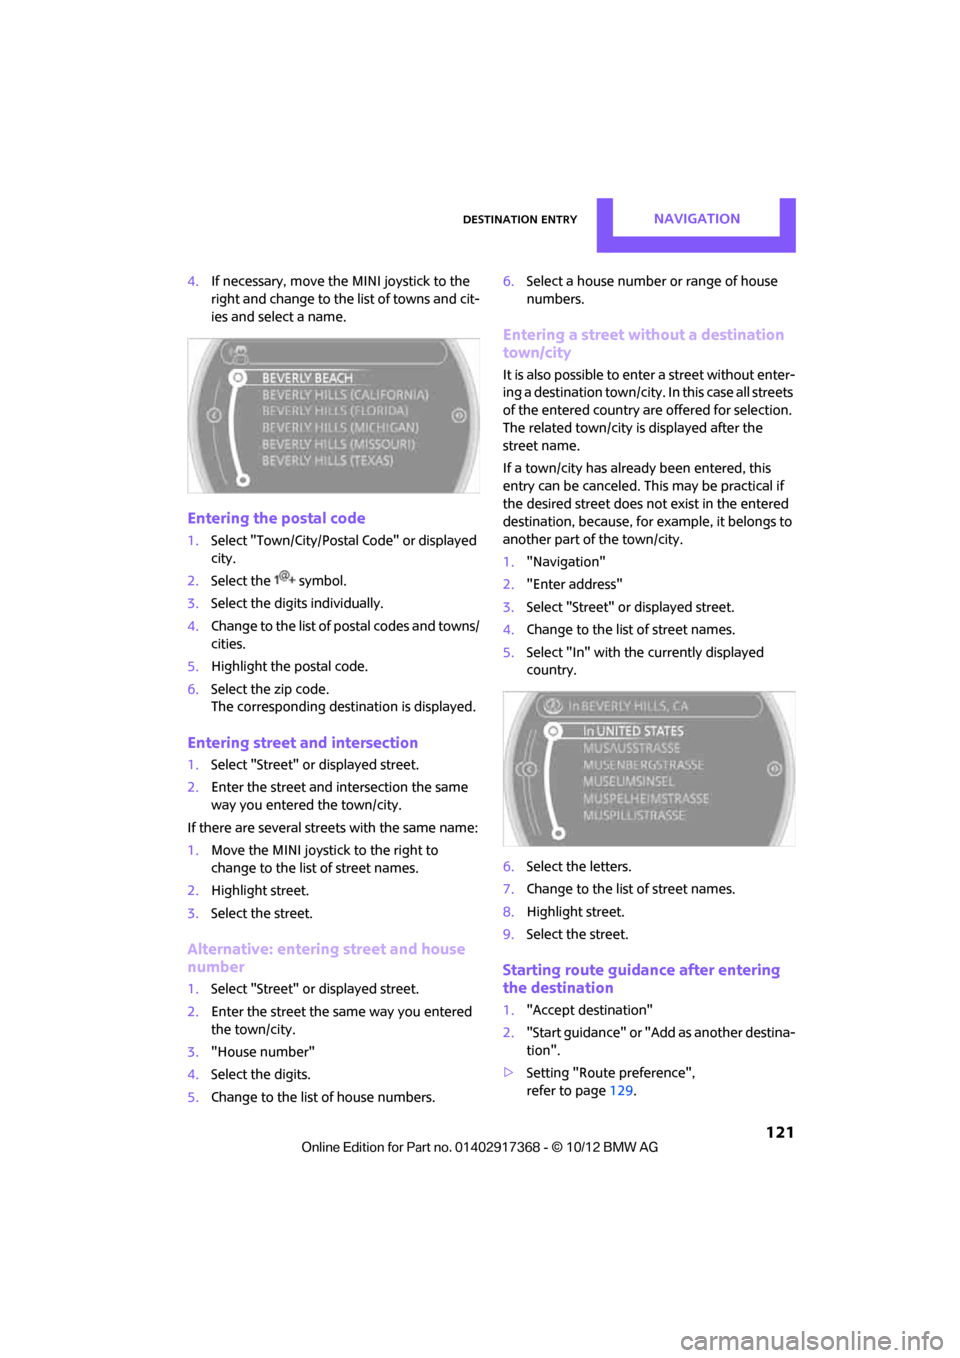
4.If necessary, move the MINI joystick to the
right and change to the list of towns and cit-
ies and select a name.
Entering the postal code
1. Select "Town/City/Postal Code" or displayed
city.
2. Select the symbol.
3. Select the digits individually.
4. Change to the list of postal codes and towns/
cities.
5. Highlight the postal code.
6. Select the zip code.
The corresponding dest ination is displayed.
Entering street and intersection
1.Select "Street" or displayed street.
2. Enter the street and intersection the same
way you entered the town/city.
If there are several streets with the same name:
1. Move the MINI joystick to the right to
change to the list of street names.
2. Highlight street.
3. Select the street.
Alternative: entering street and house
number
1.Select "Street" or displayed street.
2. Enter the street the same way you entered
the town/city.
3. "House number"
4. Select the digits.
5. Change to the list of house numbers. 6.
Select a house number or range of house
numbers.
Entering a street without a destination
town/city
It is also possible to enter a street without enter-
ing a destination town/city. In this case all streets
of the entered country are offered for selection.
The related town/city is displayed after the
street name.
If a town/city has already been entered, this
entry can be canceled. Th is may be practical if
the desired street does not exist in the entered
destination, because, for example, it belongs to
another part of the town/city.
1. "Navigation"
2. "Enter address"
3. Select "Street" or displayed street.
4. Change to the list of street names.
5. Select "In" with the currently displayed
country.
6. Select the letters.
7. Change to the list of street names.
8. Highlight street.
9. Select the street.
Starting route guidance after entering
the destination
1."Accept destination"
2. "Start guidance" or "Add as another destina-
tion".
> Setting "Route preference",
refer to page 129.
00320051004F004C00510048000300280047004C0057004C005200510003
Page 124 of 275
Destination entryNAVIGATION
123
4.Depending on the select ion, select an exist-
ing contact from the list or the type of
address and enter the last and first name.
5. "Store in vehicle"
Editing or deleting an address
1."Navigation"
2. "Address book"
3. Highlight the entry.
4. Open "Options".
5. "Edit in Contacts" or "Delete entry".
Using home address as destination
The home address must be stored as a destina-
tion. Refer to Defining a home address,
page 172 or page 189.
1. "Navigation"
2. "Address book"
3. "Home"
4. "Start guidance"
Last destinations
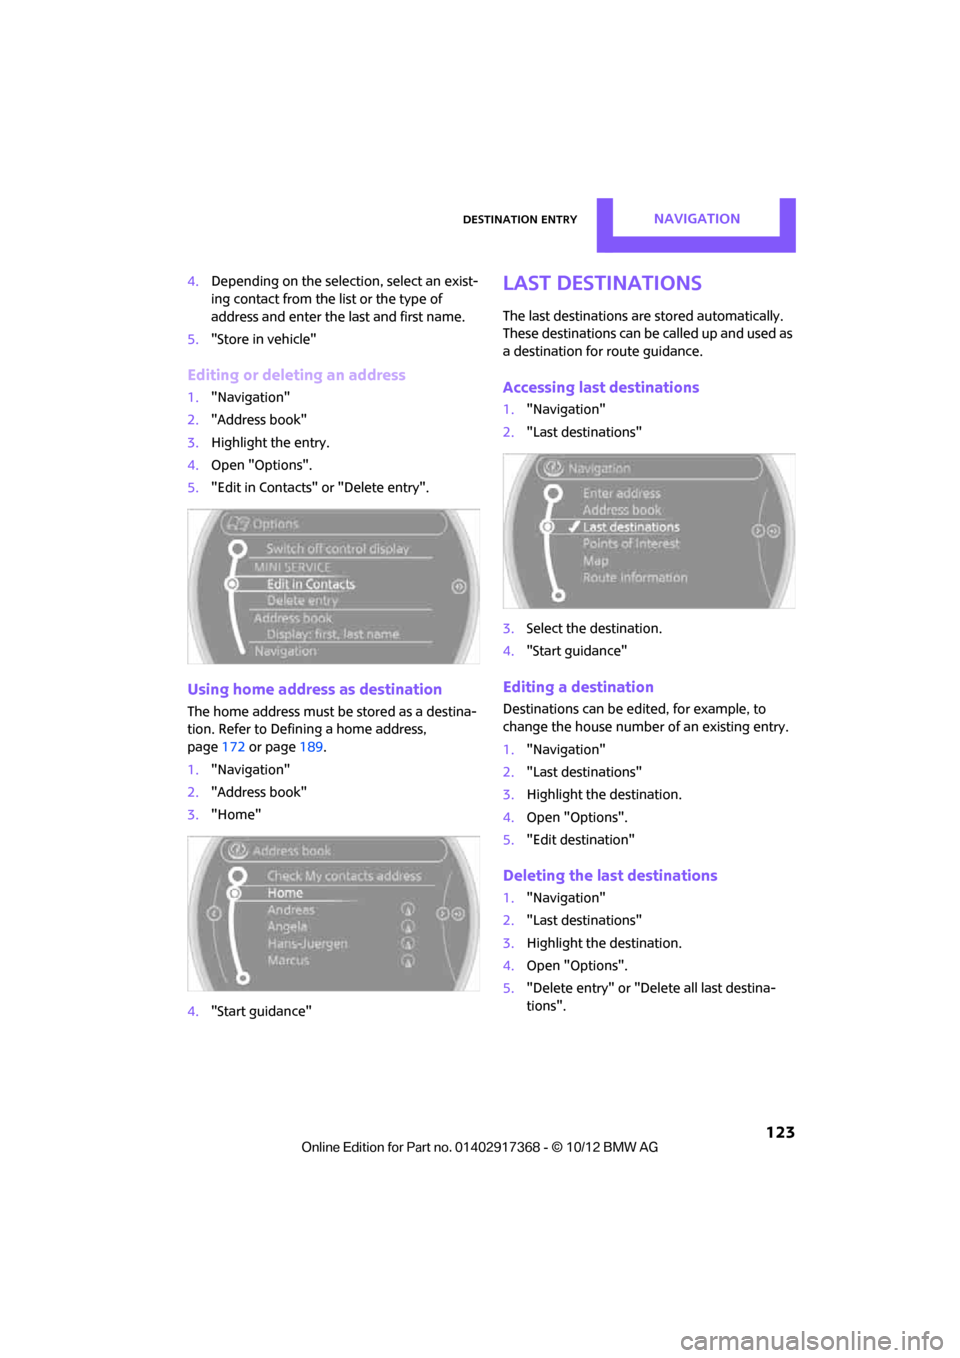
The last destinations ar e stored automatically.
These destinations can be called up and used as
a destination for route guidance.
Accessing last destinations
1. "Navigation"
2. "Last destinations"
3. Select the destination.
4. "Start guidance"
Editing a destination
Destinations can be ed ited, for example, to
change the house number of an existing entry.
1. "Navigation"
2. "Last destinations"
3. Highlight the destination.
4. Open "Options".
5. "Edit destination"
Deleting the last destinations
1."Navigation"
2. "Last destinations"
3. Highlight the destination.
4. Open "Options".
5. "Delete entry" or "Delete all last destina-
tions".
00320051004F004C00510048000300280047004C0057004C005200510003
Page 126 of 275
Destination entryNAVIGATION
125
Starting the search for special
destinations
1."Start search"
2. A list of the special destinations is displayed.
>"At current location"
The special destinations are displayed in
order of their distance and are displayed
with a direction arro w pointing toward
the destination.
> "At destination", "At different location",
"Along route"
The special destinations are displayed in
order of their distance from the search
point.
> Destinations of the se lected category are
displayed in the map display as symbols.
The display depends on the map scale
and the category.
3. Highlight special destination.
4. Select the special destination.
5. Select the symbol.
6. "Start guidance" or "Add as another destina-
tion".
The distance from the de stination is displayed.
Displaying special destinations in the
map
To display symbols of the special destinations in
the map:
1. "Navigation"
2. "Map"
3. Open "Options".
4. "Display Points of Interest" 5.
Select the settings.
Entering the destination
via map
If you only know the loca tion of a destination or
street, then you can enter the destination with
the aid of the map.
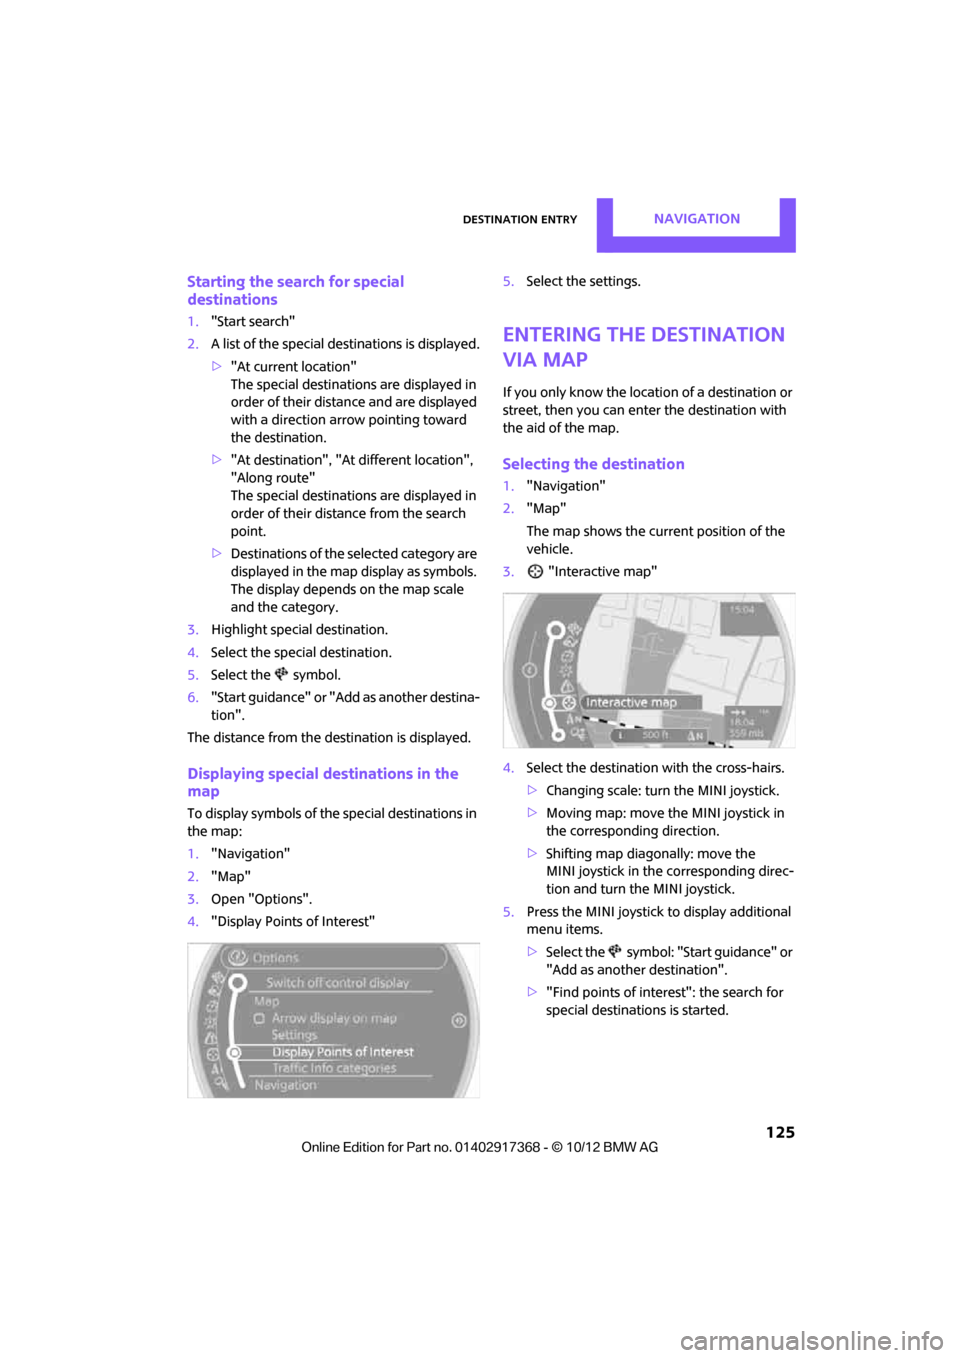
Selecting the destination
1. "Navigation"
2. "Map"
The map shows the curre nt position of the
vehicle.
3. "Interactive map"
4. Select the destination with the cross-hairs.
> Changing scale: turn the MINI joystick.
> Moving map: move the MINI joystick in
the corresponding direction.
> Shifting map diagonally: move the
MINI joystick in the corresponding direc-
tion and turn the MINI joystick.
5. Press the MINI joystick to display additional
menu items.
>Select the symbol: "Start guidance" or
"Add as another destination".
> "Find points of interest": the search for
special destinations is started.
00320051004F004C00510048000300280047004C0057004C005200510003
Page 131 of 275
NAVIGATIONRoute guidance
130
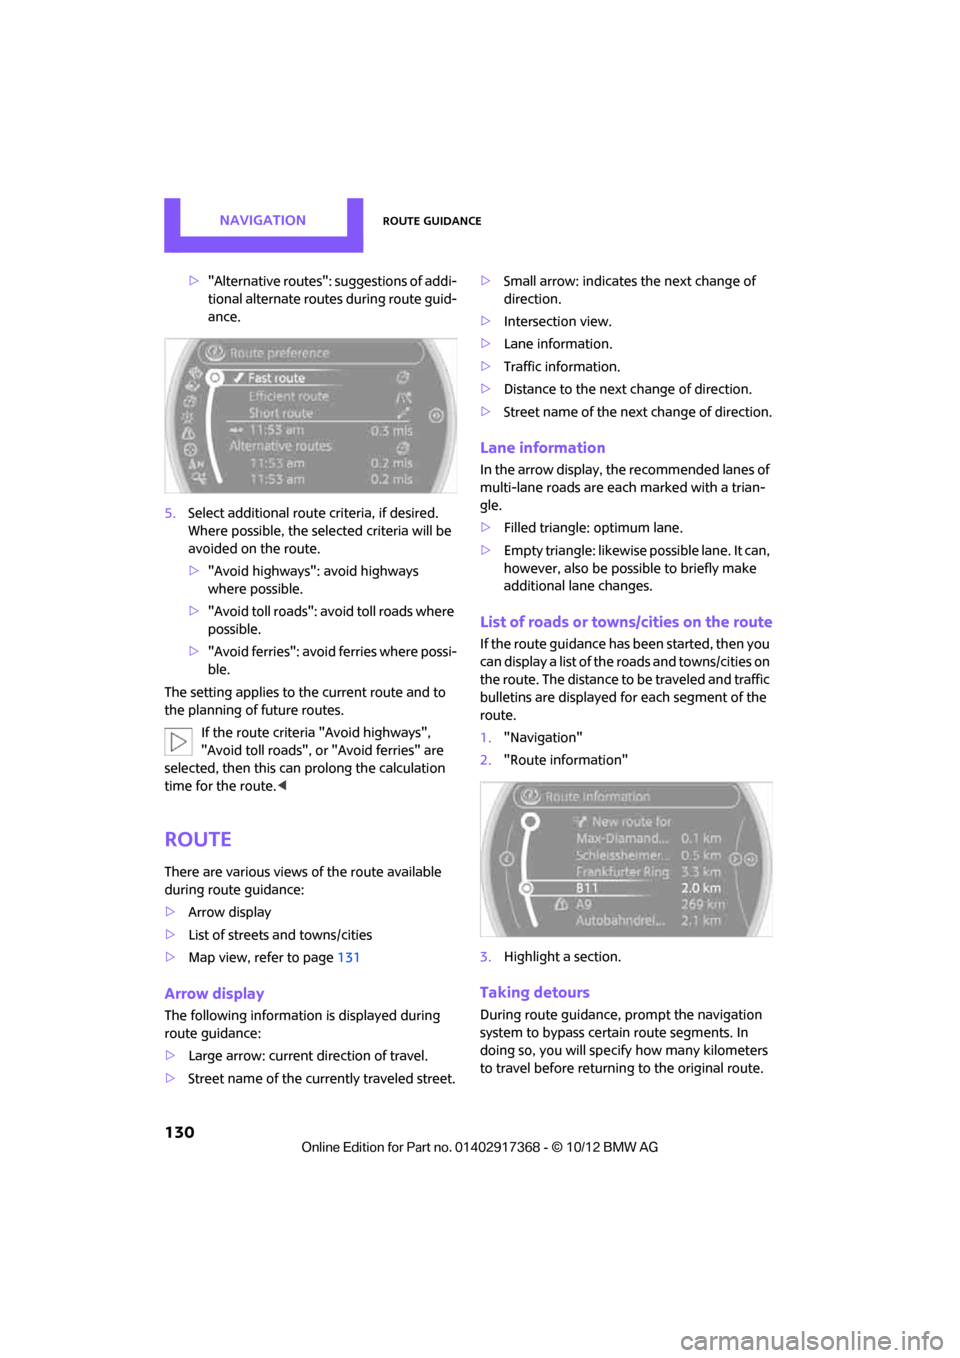
>"Alternative routes": suggestions of addi-
tional alternate routes during route guid-
ance.
5. Select additional route criteria, if desired.
Where possible, the selected criteria will be
avoided on the route.
>"Avoid highways": avoid highways
where possible.
> "Avoid toll roads": avoid toll roads where
possible.
> "Avoid ferries": avoid ferries where possi-
ble.
The setting applies to the current route and to
the planning of future routes.
If the route criteria "Avoid highways",
"Avoid toll roads", or "Avoid ferries" are
selected, then this can prolong the calculation
time for the route. <
Route
There are various views of the route available
during route guidance:
>Arrow display
> List of streets and towns/cities
> Map view, refer to page 131
Arrow display
The following information is displayed during
route guidance:
>Large arrow: current direction of travel.
> Street name of the currently traveled street. >
Small arrow: indicates the next change of
direction.
> Intersection view.
> Lane information.
> Traffic information.
> Distance to the next change of direction.
> Street name of the next change of direction.
Lane information
In the arrow display, the recommended lanes of
multi-lane roads are each marked with a trian-
gle.
>Filled triangle: optimum lane.
> Empty triangle: likewise possible lane. It can,
however, also be possi ble to briefly make
additional lane changes.
List of roads or towns/cities on the route
If the route guidance has been started, then you
can display a list of the roads and towns/cities on
the route. The distance to be traveled and traffic
bulletins are displayed fo r each segment of the
route.
1. "Navigation"
2. "Route information"
3. Highlight a section.
Taking detours
During route guidance, prompt the navigation
system to bypass certai n route segments. In
doing so, you will specif y how many kilometers
to travel before returning to the original route.
00320051004F004C00510048000300280047004C0057004C005200510003
Page 133 of 275
NAVIGATIONRoute guidance
132
Traffic information, refer to page133.
Planned route
After route guidance is started, the planned
route is displayed on the map.
Status boxes
Show/hide: press the MINI joystick.
>Upper status box: time, phone details, and
entertainment details.
> Lower status box: symb ol for active route
guidance, traffic inform ation status, arrival
time, and distance from destination.
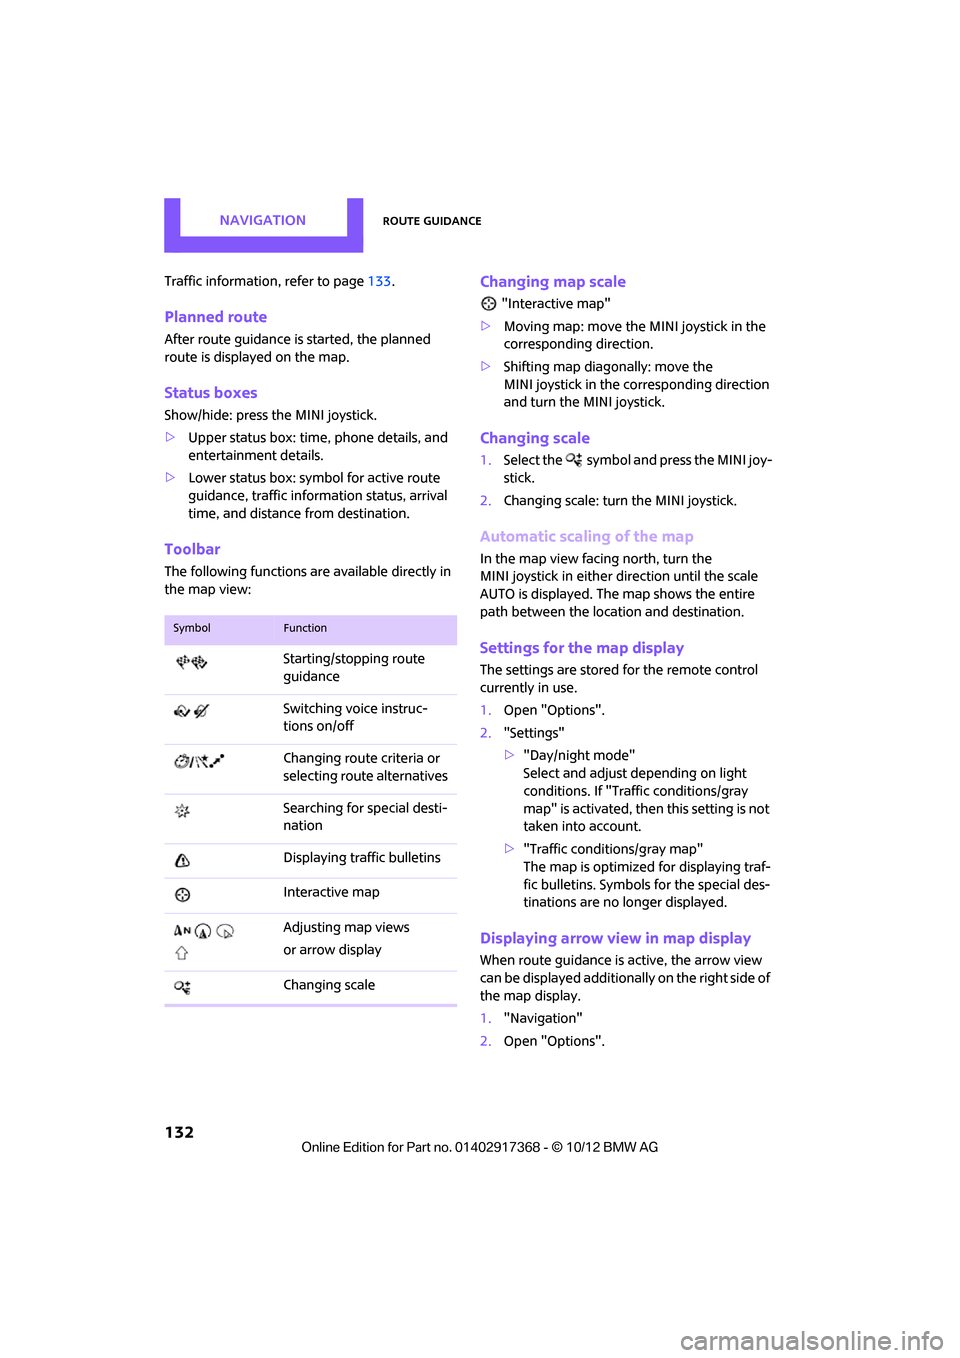
Toolbar
The following functions ar e available directly in
the map view:
Changing map scale
"Interactive map"
> Moving map: move the MINI joystick in the
corresponding direction.
> Shifting map diagonally: move the
MINI joystick in the co rresponding direction
and turn the MINI joystick.
Changing scale
1. Select the symbol and press the MINI joy-
stick.
2. Changing scale: turn the MINI joystick.
Automatic scaling of the map
In the map view facing north, turn the
MINI joystick in either direction until the scale
AUTO is displayed. The map shows the entire
path between the location and destination.
Settings for the map display
The settings are stored for the remote control
currently in use.
1.Open "Options".
2. "Settings"
>"Day/night mode"
Select and adjust depending on light
conditions. If "Traffic conditions/gray
map" is activated, then this setting is not
taken into account.
> "Traffic conditions/gray map"
The map is optimized for displaying traf-
fic bulletins. Symbols for the special des-
tinations are no longer displayed.
Displaying arrow view in map display
When route guidance is active, the arrow view
can be displayed additionally on the right side of
the map display.
1. "Navigation"
2. Open "Options".
SymbolFunction
Starting/stopping route
guidance
Switching voice instruc-
tions on/off
Changing route criteria or
selecting route alternatives
Searching for special desti-
nation
Displaying traffic bulletins
Interactive map
Adjusting map views
or arrow display
Changing scale
00320051004F004C00510048000300280047004C0057004C005200510003