ESP MINI Paceman 2016 (Mini Connected) User Guide
[x] Cancel search | Manufacturer: MINI, Model Year: 2016, Model line: Paceman, Model: MINI Paceman 2016Pages: 223, PDF Size: 5.52 MB
Page 47 of 223
To unlock the safety belt1.Open the belt buckle.2.Remove the child restraint fixing system.3.Allow the belt webbing to be pulled in com‐
pletely.
Center safety belt: unlock belt buckle 3 in
addition, refer to page 40.
Guide the safety belt to the holder on the
headliner.
LATCH child restraint fix‐
ing system
LATCH: Lower Anchors and Tethers for Children.
Information
Pay attention to the operating and safety infor‐
mation of the child restraint system manufac‐
turer when installing and using LATCH child re‐
straint fixing system.
Mounts for the lower LATCH anchors
The lower anchors may be used to attach the
CRS to the vehicle seat up to a combined child
and CRS weight of 65 lb/30 kg when the child is
restrained by the internal harnesses.
WARNING
If the LATCH child restraint fixing systems
are not correctly engaged, the protective effect
of the LATCH child restraint fixing system can
be limited. There is risk of injuries or danger to
life. Make sure that the lower anchors are se‐
curely engaged and that the LATCH child re‐
straint fixing system fits securely against the
backrest. ◀
Before installing the child seat, pull the belt out
of the area for the child restraint fixing system.
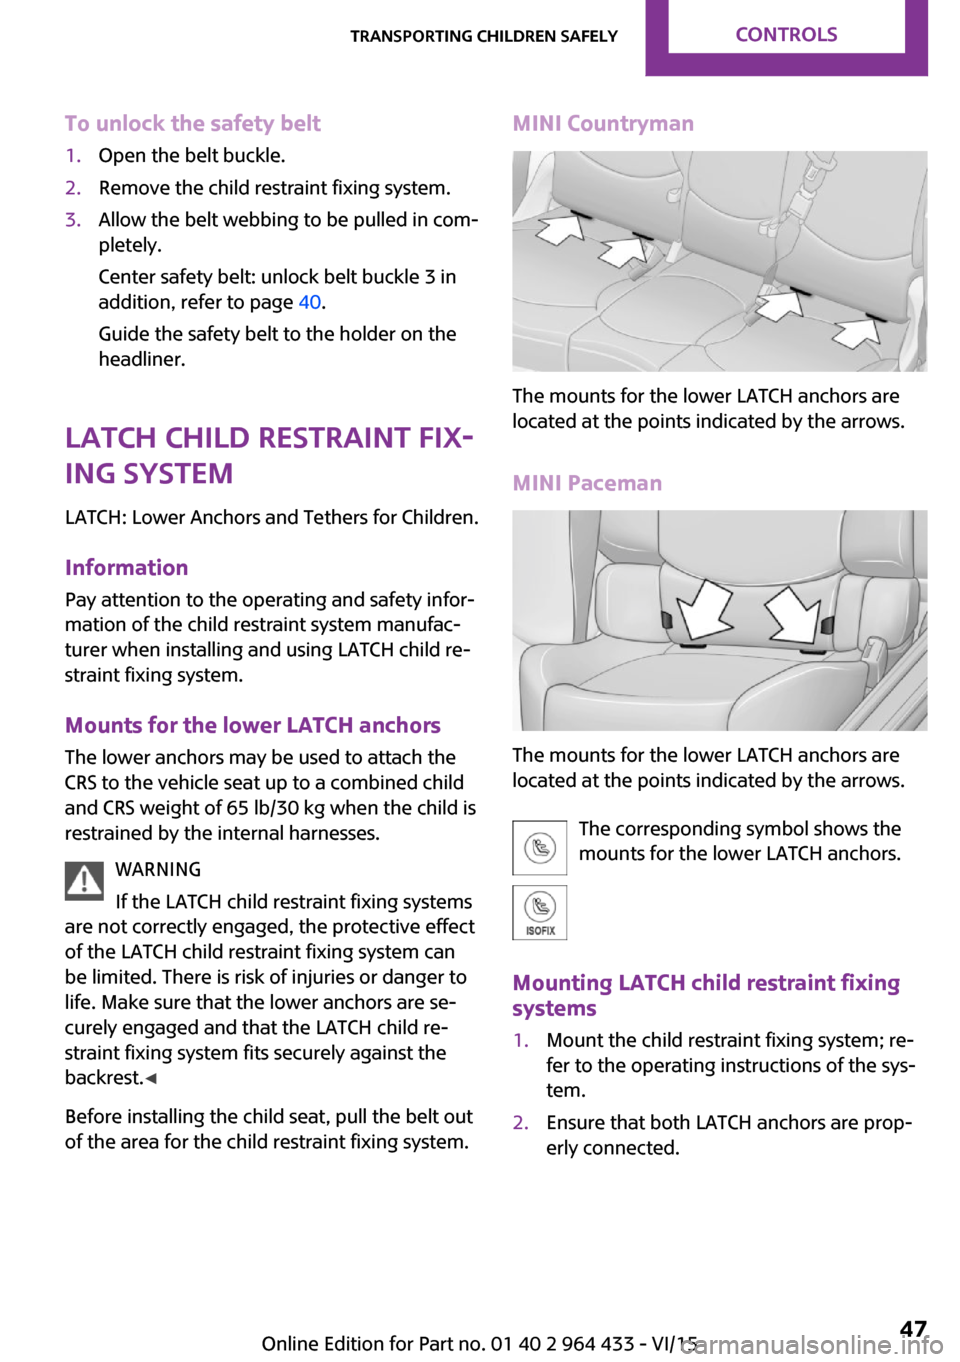
MINI Countryman
The mounts for the lower LATCH anchors are
located at the points indicated by the arrows.
MINI Paceman
The mounts for the lower LATCH anchors are
located at the points indicated by the arrows.
The corresponding symbol shows the
mounts for the lower LATCH anchors.
Mounting LATCH child restraint fixing systems
1.Mount the child restraint fixing system; re‐
fer to the operating instructions of the sys‐
tem.2.Ensure that both LATCH anchors are prop‐
erly connected.Seite 47Transporting children safelyCONTROLS47
Online Edition for Part no. 01 40 2 964 433 - VI/15
Page 61 of 223
DisplaysVehicle features and op‐tions
This chapter describes all standard, country-
specific and optional features offered with the
series. It also describes features that are not
necessarily available in your car, e. g., due to
the selected options or country versions. This
also applies to safety-related functions and sys‐
tems.
When using the features and systems described
here, adhere to local regulations.
Odometer, external tem‐
perature display, clock
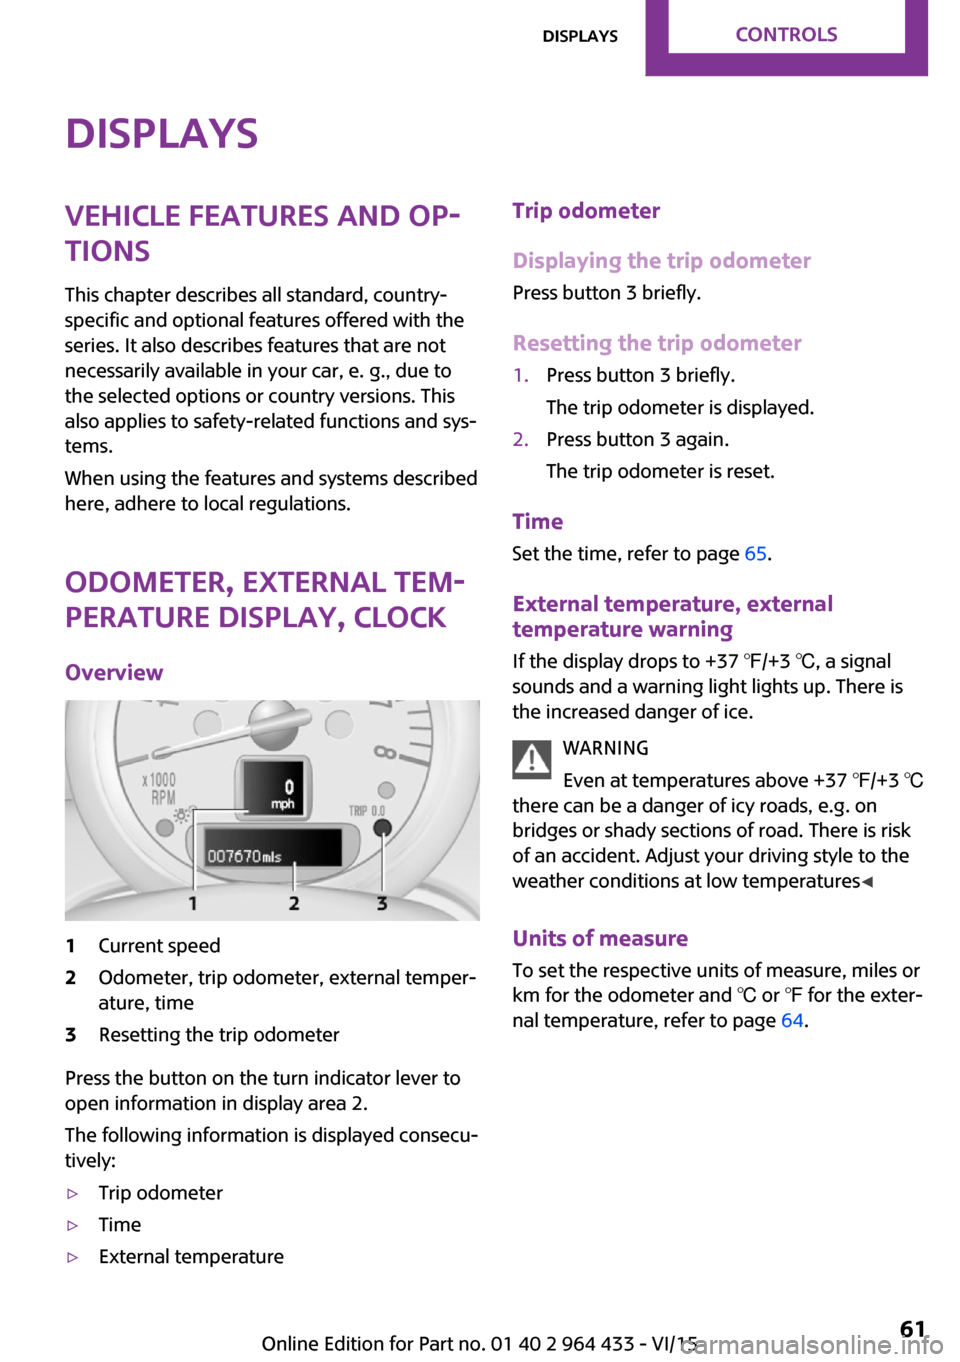
Overview1Current speed2Odometer, trip odometer, external temper‐
ature, time3Resetting the trip odometer
Press the button on the turn indicator lever to
open information in display area 2.
The following information is displayed consecu‐
tively:
▷Trip odometer▷Time▷External temperatureTrip odometer
Displaying the trip odometer Press button 3 briefly.
Resetting the trip odometer1.Press button 3 briefly.
The trip odometer is displayed.2.Press button 3 again.
The trip odometer is reset.
Time
Set the time, refer to page 65.
External temperature, external
temperature warning
If the display drops to +37 ℉/+3 ℃, a signal
sounds and a warning light lights up. There is
the increased danger of ice.
WARNING
Even at temperatures above +37 ℉/+3 ℃
there can be a danger of icy roads, e.g. on
bridges or shady sections of road. There is risk
of an accident. Adjust your driving style to the
weather conditions at low temperatures ◀
Units of measure
To set the respective units of measure, miles or
km for the odometer and ℃ or ℉ for the exter‐
nal temperature, refer to page 64.
Seite 61DisplaysCONTROLS61
Online Edition for Part no. 01 40 2 964 433 - VI/15
Page 62 of 223

Tachometer
It is imperative that you avoid engine speeds in
the red warning field. In this range, the fuel
supply is interrupted to protect the engine.
Coolant temperature A warning light will come on if the coolant, and
therefore the engine, becomes too hot.
Check the coolant level, refer to page 170.
Fuel gauge
The arrow next to the fuel pump symbol on the
fuel gauge indicates the side of the vehicle with
the fuel filler flap.
The vehicle inclination may cause the display to
vary.
Notes on refueling, refer to page 150.
Filling capacities, refer to page 211.
Range After the reserve range is reached:
▷The remaining LEDs change from orange to
red, arrow.▷The remaining range is shown on the tach‐
ometer.▷When a dynamic driving style is used, such
as when corners are taken rapidly, engine
functions are not ensured.
A warning light lights up below a range of ap‐
prox. 30 miles/50 km.
CAUTION
With a range of less than 30 miles/50 km
it is possible that the engine will no longer have
sufficient fuel. Engine functions are no longer
ensured. There is risk of property damage. Re‐
fuel promptly. ◀
Computer Opening information in the tachometer
Press the button on the turn indicator lever.
Overview of the information
The following information is displayed consecu‐
tively by repeatedly pressing the button on the
turn indicator lever:
▷Range.▷Average fuel consumption.▷Current fuel consumption.▷Average speed.
To set the corresponding units of measure, re‐
fer to page 64.
Seite 62CONTROLSDisplays62
Online Edition for Part no. 01 40 2 964 433 - VI/15
Page 67 of 223

SymbolFunctionRoadworthiness testFront brake padsRear brake padsBrake fluidExit the display, refer to
page 64Next setting or information, re‐
fer to page 64
Check Control
The concept
The Check Control monitors vehicle functions
and alerts you to any malfunctions in the sys‐
tems being monitored.
A Check Control message consists of indicator
and warning lights in the instrument cluster
and, in some circumstances, an acoustic signal.
Indicator/warning lights
The indicator and warning lights can light up in
a variety of combinations and colors in display
area 1 or 2.
Several of the lights are checked for proper
functioning and light up temporarily when the
engine is started or the ignition is switched on.
The symbol indicates that Check Control
messages have been stored. The Check Control
messages can be displayed later.
What to do in case of a malfunction
The meaning of each light in the event of a
malfunction and tips on how to respond are
provided in the list, refer to page 194.
Seite 67DisplaysCONTROLS67
Online Edition for Part no. 01 40 2 964 433 - VI/15
Page 68 of 223

Hiding Check Control messages
Press the button on the turn indicator lever.
Some Check Control messages are displayed
continuously and are not cleared until the mal‐
function is eliminated. If several malfunctions
occur at once, the messages are displayed con‐
secutively.
Other Check Control messages are hidden au‐
tomatically after approx. 20 seconds. However,
they are stored and can be displayed again
later.
Viewing stored Check Control messages
The stored Check Control messages can only be
displayed while the driver's door is closed.
1.Press the button on the turn indicator lever
repeatedly until "SET/INFO" is displayed.2.Press and hold the button until the display
changes.3.Press the button repeatedly until the corre‐
sponding symbol and "CHECK INFO" ap‐
pear on the display.4.Press and hold the button.
If there is no Check Control message, this is
indicated by "CHECK OK".
If a Check Control message has been
stored, the corresponding message is dis‐
played.5.Press the button to check for other mes‐
sages.Seite 68CONTROLSDisplays68
Online Edition for Part no. 01 40 2 964 433 - VI/15
Page 72 of 223

Depending on the steering angle and other pa‐
rameters, the light from the headlight follows
the course of the road.
Activating With the ignition switch on, turn the light switch
to position 3, refer to page 69.
To avoid blinding oncoming traffic, the Adap‐
tive Light Control does not swivel to the driver's
side when the vehicle is at a standstill.
When driving in reverse, Adaptive Light Control
is not active.
Malfunction The warning light lights up. Adaptive
Light Control is malfunctioning or has
failed. Have the system checked as
soon as possible.
More information, refer to page 194.
Fog lights
Overview
To switch on the front fog lights: press the
switch.
To switch off, press the respective switch up‐
ward or downward again.
Fog lights The parking lights or low beams must be
switched on. The green indicator lamp lights up
when the front fog lights are switched on.
Depending on the vehicle equipment, the front
fog lights are switched off when the headlight
flasher or the high-beams are activated.
If the automatic headlight control is activated,
refer to page 69, the low beams are switched
on automatically when the front fog lights are
switched on.
Instrument lighting
The parking lights or low beams must be
switched on to adjust the brightness. The
brightness is increased to a certain limit and is then reduced again.▷Press the button briefly: the brightness
changes in stages.▷Press and hold the button: the brightness
changes continuously.
Interior lights
The interior lights, the footwell lights and thecargo area light are controlled automatically.
To avoid draining the battery, all lights inside
the vehicle are switched off some time after the
ignition is switched off.
Seite 72CONTROLSLamps72
Online Edition for Part no. 01 40 2 964 433 - VI/15
Page 74 of 223

SafetyVehicle features and op‐
tions
This chapter describes all standard, country-
specific and optional features offered with the
series. It also describes features that are not
necessarily available in your car, e. g., due to
the selected options or country versions. This
also applies to safety-related functions and sys‐
tems.When using the features and systems described
here, adhere to local regulations.
Airbags
The graphic shows the MINI Paceman as an ex‐ ample.1Front airbags2Knee airbag3Side airbag4Head airbagsFront airbags
Front airbags help protect the driver and front
passenger by responding to frontal impacts in
which safety belts alone cannot provide ade‐
quate restraint.Side airbags
In a lateral impact, the side airbag supports the
side of the body in the chest and lap area.
Head airbags
In a lateral impact, the head airbag supports
the head.Seite 74CONTROLSSafety74
Online Edition for Part no. 01 40 2 964 433 - VI/15
Page 76 of 223
WARNING
The ensure the front-seat passenger air‐
bag function, it must be detected, whether a
person occupies the front passenger seat. The
entire seat cushion area must be used for this
purpose. There is risk of injuries or danger to
life. Make sure that the front passenger keeps
his or her feet in the floor area. ◀
Malfunction of the automatic
deactivation system
When transporting older children and adults,
the front passenger airbags may be deactivated
in certain sitting positions. In this case, the indi‐
cator lamp for the front passenger airbags
lights up.
In this case, change the sitting position so that
the front passenger airbags are activated and
the indicator lamp goes out.
If it is not possible to activate the airbags, have
the person sit in the rear.
To make sure that occupation of the seat cush‐
ion can be detected correctly:▷Do not attach covers, cushions, ball mats or
other items to the front passenger seat un‐
less they are specifically determined to be
safe for use on the front passenger seat.▷Do not place electronic devices on the pas‐
senger seat if a child restraint fixing system
is mounted on the seat.▷Do not place objects under the seat that
could press against the seat from below.Indicator light for the front passenger airbags
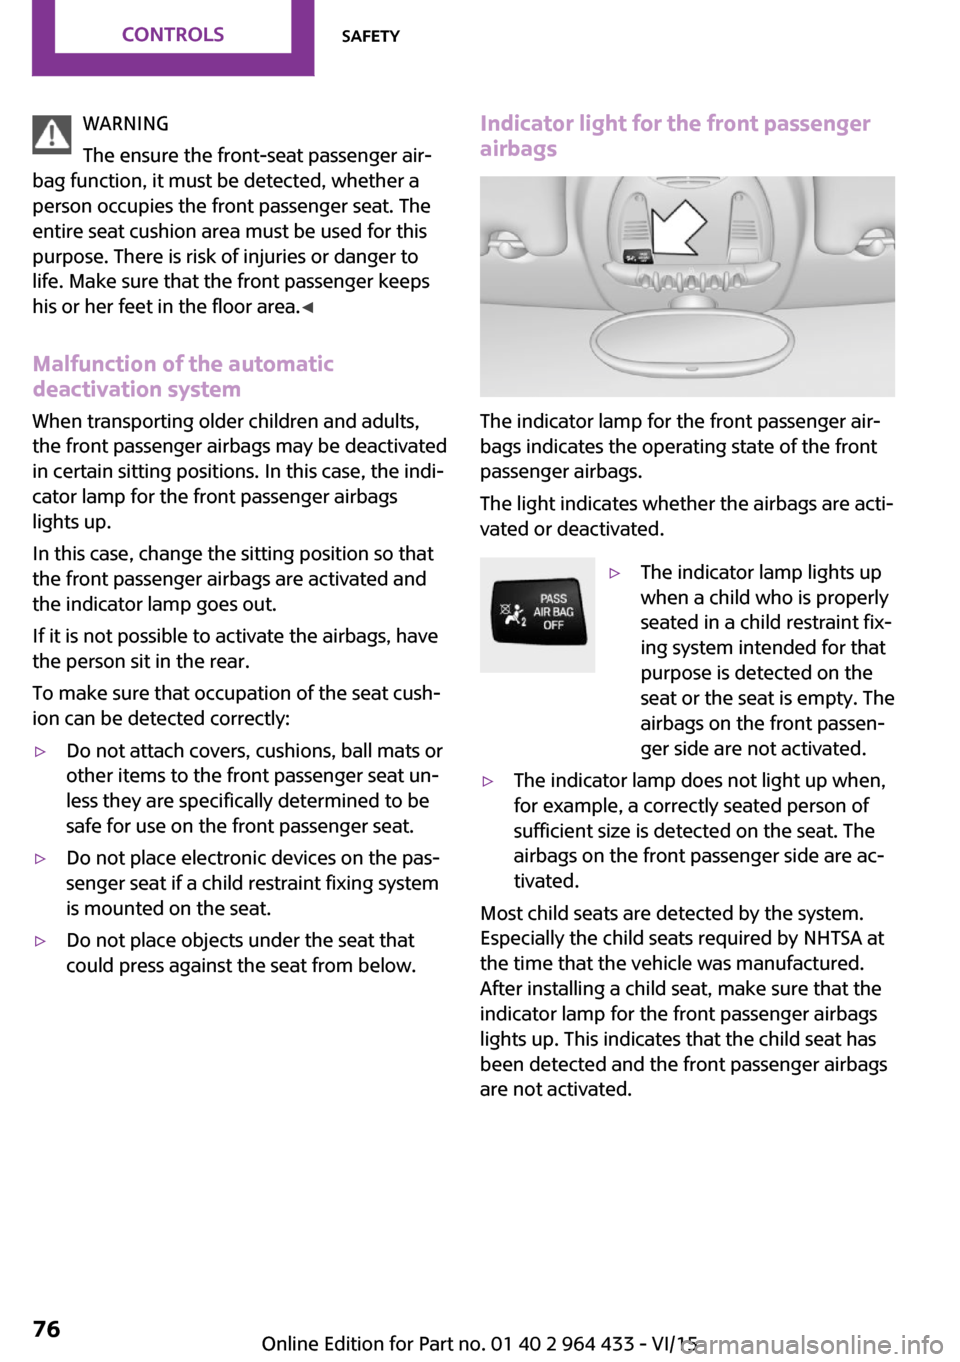
The indicator lamp for the front passenger air‐
bags indicates the operating state of the front
passenger airbags.
The light indicates whether the airbags are acti‐
vated or deactivated.
▷The indicator lamp lights up
when a child who is properly
seated in a child restraint fix‐
ing system intended for that
purpose is detected on the
seat or the seat is empty. The
airbags on the front passen‐
ger side are not activated.▷The indicator lamp does not light up when,
for example, a correctly seated person of
sufficient size is detected on the seat. The
airbags on the front passenger side are ac‐
tivated.
Most child seats are detected by the system.
Especially the child seats required by NHTSA at
the time that the vehicle was manufactured.
After installing a child seat, make sure that the
indicator lamp for the front passenger airbags
lights up. This indicates that the child seat has
been detected and the front passenger airbags
are not activated.
Seite 76CONTROLSSafety76
Online Edition for Part no. 01 40 2 964 433 - VI/15
Page 77 of 223
Operational readiness of airbag system
Information WARNING
Individual components can be hot after
triggering of the airbag system. There is risk of
injuries. Do not touch individual components. ◀
WARNING
Improperly executed work can lead to
failure, malfunction or unintentional triggering of the airbag system. In the case of a malfunc‐
tion, the airbag system could not trigger as in‐ tended in the event of an accident despite re‐
spective accident severity. There is risk of
injuries or danger to life. Have the airbag sys‐
tem checked, repaired, dismantled and scrap‐
ped by a dealer’s service center or another
qualified service center or repair shop. ◀
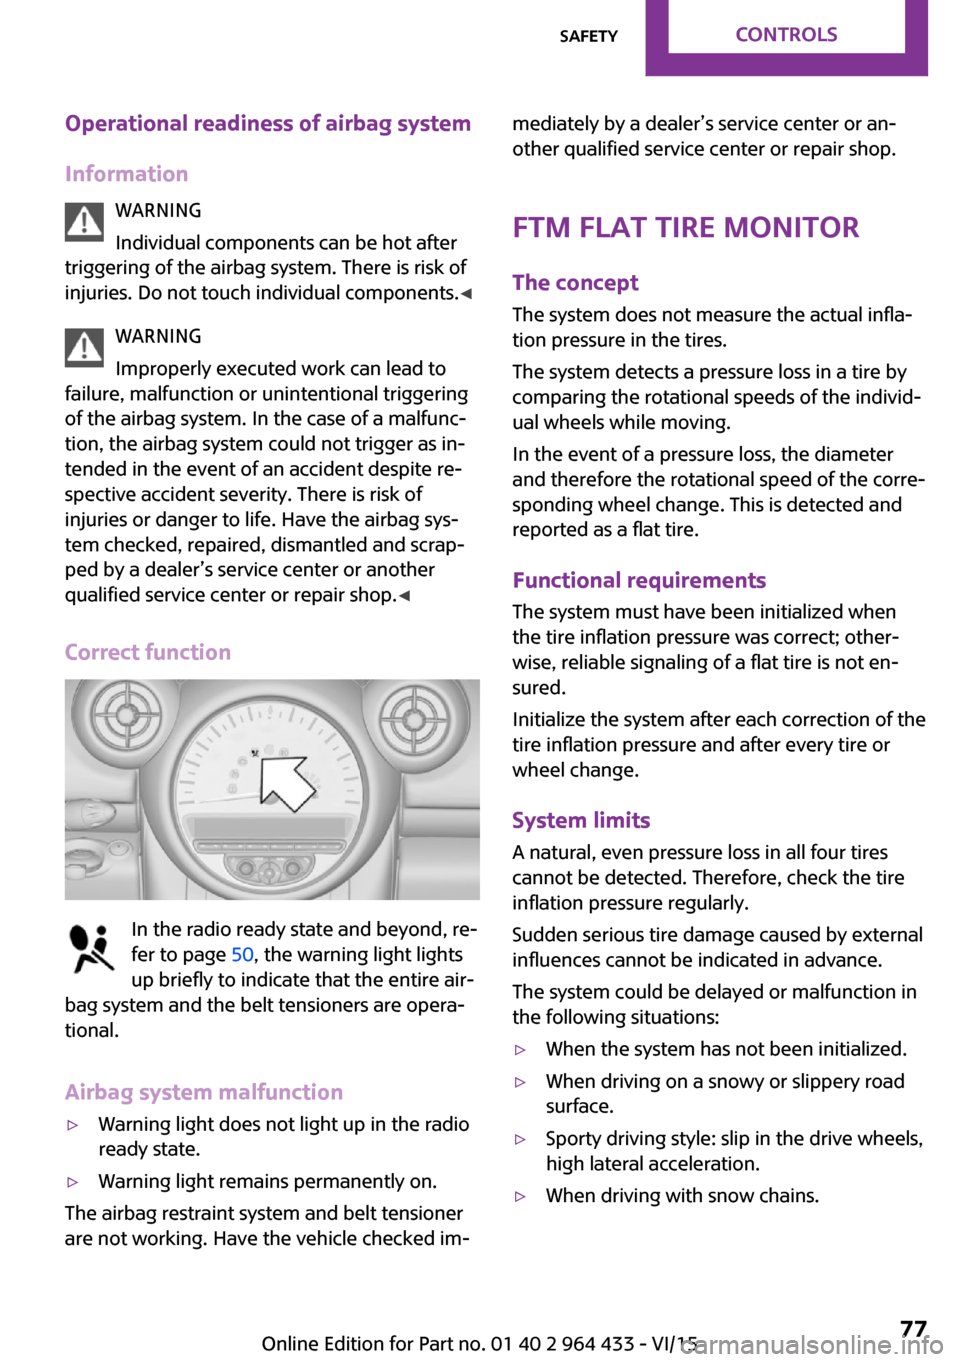
Correct function
In the radio ready state and beyond, re‐
fer to page 50, the warning light lights
up briefly to indicate that the entire air‐
bag system and the belt tensioners are opera‐
tional.
Airbag system malfunction
▷Warning light does not light up in the radio
ready state.▷Warning light remains permanently on.
The airbag restraint system and belt tensioner
are not working. Have the vehicle checked im‐
mediately by a dealer’s service center or an‐
other qualified service center or repair shop.
FTM Flat Tire Monitor
The concept
The system does not measure the actual infla‐
tion pressure in the tires.
The system detects a pressure loss in a tire by
comparing the rotational speeds of the individ‐
ual wheels while moving.
In the event of a pressure loss, the diameter
and therefore the rotational speed of the corre‐
sponding wheel change. This is detected and
reported as a flat tire.
Functional requirements
The system must have been initialized when
the tire inflation pressure was correct; other‐ wise, reliable signaling of a flat tire is not en‐
sured.
Initialize the system after each correction of the
tire inflation pressure and after every tire or
wheel change.
System limits
A natural, even pressure loss in all four tires
cannot be detected. Therefore, check the tire
inflation pressure regularly.
Sudden serious tire damage caused by external
influences cannot be indicated in advance.
The system could be delayed or malfunction in
the following situations:▷When the system has not been initialized.▷When driving on a snowy or slippery road
surface.▷Sporty driving style: slip in the drive wheels,
high lateral acceleration.▷When driving with snow chains.Seite 77SafetyCONTROLS77
Online Edition for Part no. 01 40 2 964 433 - VI/15
Page 78 of 223
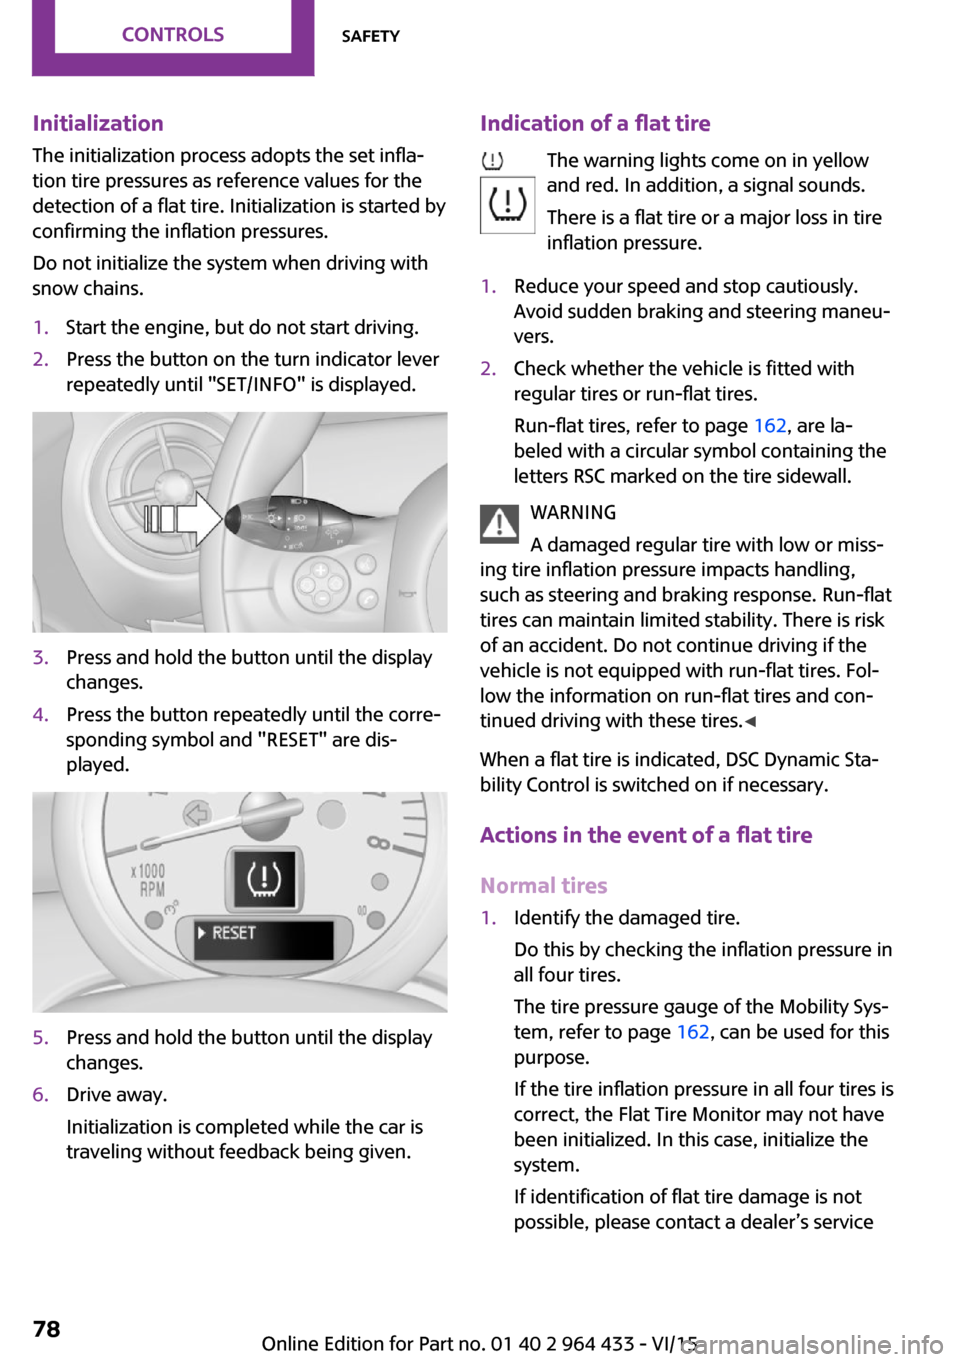
InitializationThe initialization process adopts the set infla‐
tion tire pressures as reference values for the
detection of a flat tire. Initialization is started by
confirming the inflation pressures.
Do not initialize the system when driving with
snow chains.1.Start the engine, but do not start driving.2.Press the button on the turn indicator lever
repeatedly until "SET/INFO" is displayed.3.Press and hold the button until the display
changes.4.Press the button repeatedly until the corre‐
sponding symbol and "RESET" are dis‐
played.5.Press and hold the button until the display
changes.6.Drive away.
Initialization is completed while the car is
traveling without feedback being given.Indication of a flat tire
The warning lights come on in yellow
and red. In addition, a signal sounds.
There is a flat tire or a major loss in tire
inflation pressure.1.Reduce your speed and stop cautiously.
Avoid sudden braking and steering maneu‐
vers.2.Check whether the vehicle is fitted with
regular tires or run-flat tires.
Run-flat tires, refer to page 162, are la‐
beled with a circular symbol containing the
letters RSC marked on the tire sidewall.
WARNING
A damaged regular tire with low or miss‐
ing tire inflation pressure impacts handling,
such as steering and braking response. Run-flat
tires can maintain limited stability. There is risk
of an accident. Do not continue driving if the
vehicle is not equipped with run-flat tires. Fol‐
low the information on run-flat tires and con‐
tinued driving with these tires. ◀
When a flat tire is indicated, DSC Dynamic Sta‐
bility Control is switched on if necessary.
Actions in the event of a flat tire
Normal tires
1.Identify the damaged tire.
Do this by checking the inflation pressure in
all four tires.
The tire pressure gauge of the Mobility Sys‐
tem, refer to page 162, can be used for this
purpose.
If the tire inflation pressure in all four tires is
correct, the Flat Tire Monitor may not have
been initialized. In this case, initialize the
system.
If identification of flat tire damage is not
possible, please contact a dealer’s serviceSeite 78CONTROLSSafety78
Online Edition for Part no. 01 40 2 964 433 - VI/15