warning light MINI Paceman 2016 (Mini Connected) Owner's Guide
[x] Cancel search | Manufacturer: MINI, Model Year: 2016, Model line: Paceman, Model: MINI Paceman 2016Pages: 223, PDF Size: 5.52 MB
Page 96 of 223

Interior equipmentVehicle features and op‐
tions
This chapter describes all standard, country-
specific and optional features offered with the
series. It also describes features that are not
necessarily available in your car, e. g., due to
the selected options or country versions. This
also applies to safety-related functions and sys‐
tems.
When using the features and systems described
here, adhere to local regulations.
Universal garage door
opener
The concept
The universal garage door opener can be used
to operate up to 3 functions in remote-control‐
led systems, such as garage door drives or
lighting systems. The universal garage door
opener replaces up to 3 different hand-held
transmitters. To operate it, the buttons on the
interior rearview mirror must be programmed
for the desired functions. The hand-held trans‐
mitter for the system is needed for the pro‐
gramming procedure.
WARNING
Body parts can be jammed when operat‐
ing remote-controlled systems, e.g. the garage
door, using the universal garage door opener.
There is risk of injuries or risk of property dam‐
age. Make sure that the area of movement of
the respective system is clear during program‐
ming and operation. Also follow the safety in‐
structions of the hand-held transmitter. ◀
Before selling the vehicle, delete the stored
functions for security reasons.Compatibility
If this symbol is printed on the packag‐
ing or in the operating instructions of
the system being operated, the system
is generally compatible with the universal ga‐
rage door opener.
If you have any questions, please contact:▷A dealer’s service center or another quali‐
fied service center or repair shop.▷www.homelink.com on the Internet.
HomeLink is a registered trademark of the
Gentex Corporation.
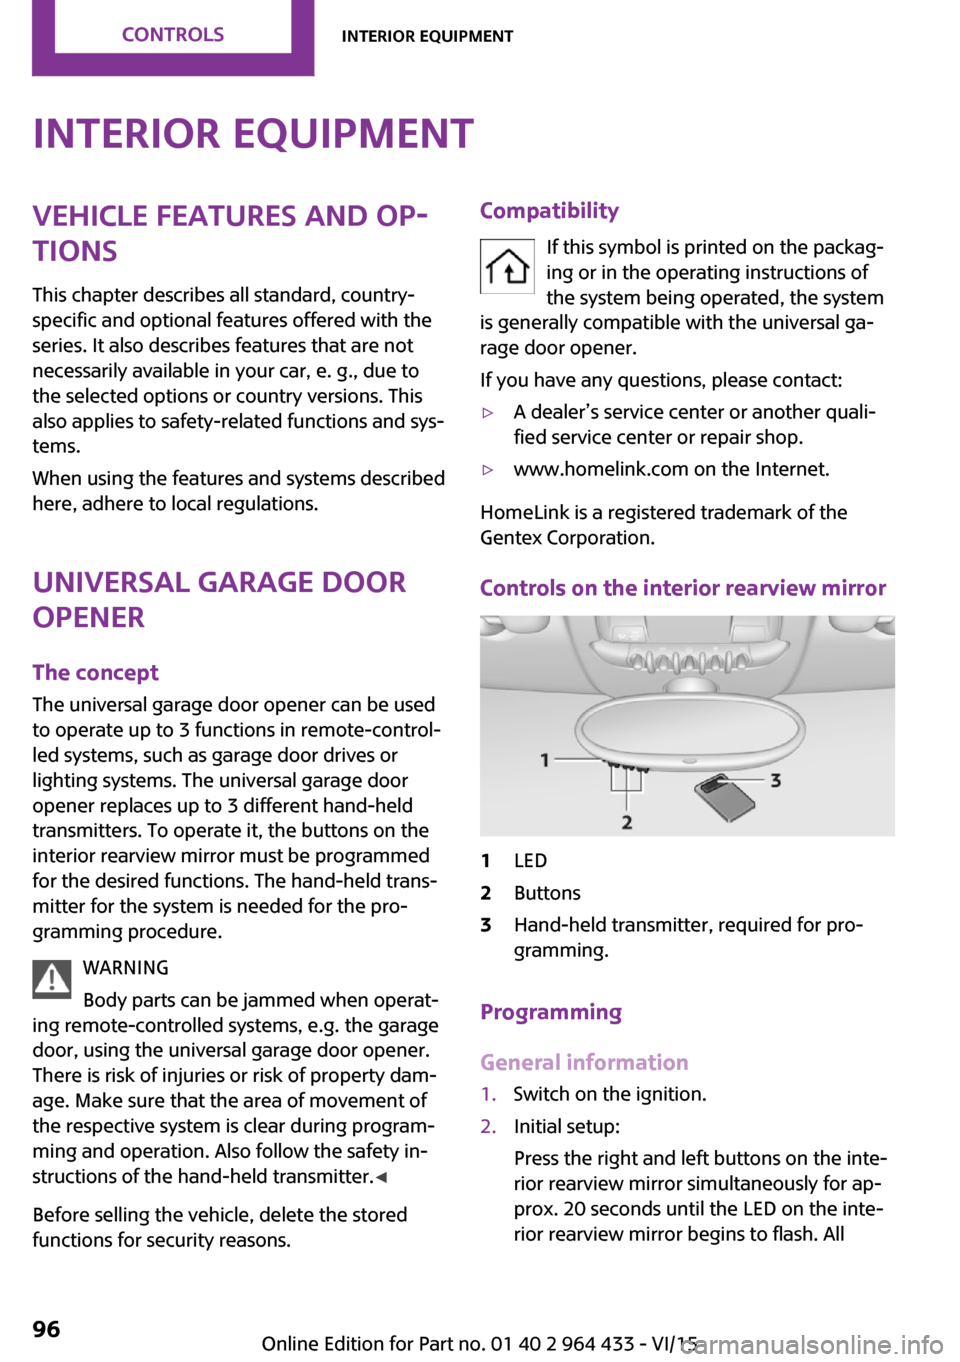
Controls on the interior rearview mirror
1LED2Buttons3Hand-held transmitter, required for pro‐
gramming.
Programming
General information
1.Switch on the ignition.2.Initial setup:
Press the right and left buttons on the inte‐
rior rearview mirror simultaneously for ap‐
prox. 20 seconds until the LED on the inte‐
rior rearview mirror begins to flash. AllSeite 96CONTROLSInterior equipment96
Online Edition for Part no. 01 40 2 964 433 - VI/15
Page 98 of 223

Canada: if the LED does not flash rapidly af‐
ter approx. 60 seconds, change the dis‐
tance and repeat the step. If programming
was aborted by the hand-held transmitter,
hold down the memory button and press
and release the button on the hand-held
transmitter several times for 2 seconds.
Controls
WARNING
Body parts can be jammed when operat‐
ing remote-controlled systems, e.g. the garage
door, using the universal garage door opener.
There is risk of injuries or risk of property dam‐
age. Make sure that the area of movement of
the respective system is clear during program‐
ming and operation. Also follow the safety in‐
structions of the hand-held transmitter. ◀
The system, such as the garage door, can be
operated using the button on the interior rear‐
view mirror with the engine running or the igni‐
tion switched on. When you are within the re‐
ception range of the system, press and hold the
button until the function is initiated. The LED on
the interior rearview mirror lights up continu‐
ously while the radio signal is being transmit‐
ted.
Deleting stored functions
Press the right and left buttons on the interior
rearview mirror simultaneously for approx.
20 seconds until the LED flashes rapidly. All
stored functions are deleted. The functions can‐
not be deleted individually.
Sun visor Glare protection
Folding down
Fold the sun visor down.
Folding up
Fold the sun visor up.
Glare protection from the side
Folding down1.Fold the sun visor down.2.Detach from the holder and pivot sideways
to the side window.
Folding up
To close the sun visor, proceed in reverse order.
Vanity mirror A vanity mirror is located behind a cover on
each sun visor.
To open, fold the cover up.
Depending on the vehicle equipment, mirror
lighting comes on when the cover is opened.
Digital compass
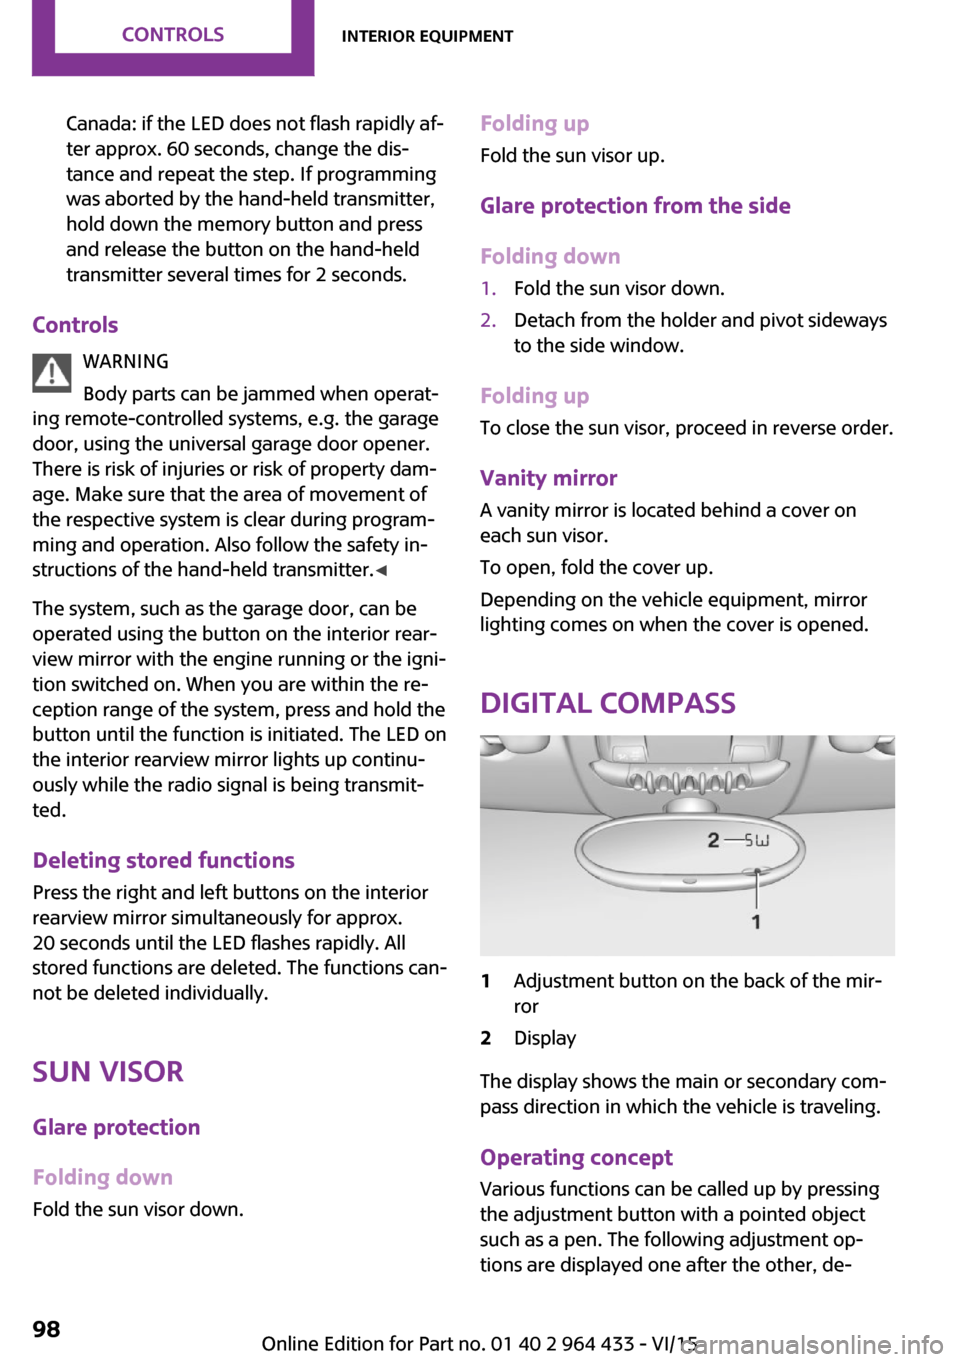
1Adjustment button on the back of the mir‐
ror2Display
The display shows the main or secondary com‐
pass direction in which the vehicle is traveling.
Operating concept
Various functions can be called up by pressing
the adjustment button with a pointed object
such as a pen. The following adjustment op‐
tions are displayed one after the other, de‐
Seite 98CONTROLSInterior equipment98
Online Edition for Part no. 01 40 2 964 433 - VI/15
Page 100 of 223

Right-hand/left-hand steering
The digital compass is set for right-hand or left-
hand steering at the factory.
Setting the language
Press the adjustment button for 12‑13 seconds.
Briefly press the adjustment button again to
switch between English "E" and German "O".
The setting is automatically saved after approx.
10 seconds.
Cupholders and ashtray/
lighter
Cupholders
Two cupholders are located in the center con‐
sole in the front.
MINI Countryman: two additional cupholders
are located at the end of the center console in
the rear. Additional cupholders can be installed
on the center rail.
MINI Paceman: additional cupholders are lo‐
cated in the console between the rear seats.
Depending on the equipment, additional cu‐
pholders can be installed on the center rail.
WARNING
Unsuitable containers in the cup holder
and hot beverages can damage the cup holder
and increase the risk of injuries in the event of
an accident. There is risk of injuries or risk of
property damage. Use light-weight, unbreaka‐
ble, and sealable containers. Do not transport
hot beverages. Do not force objects into the
cup holder. ◀
Ashtray
The ashtray is located in one of the cupholders
in the center console at the front.
EmptyingTake out the entire ashtray, arrow.
When installing, ensure that the ashtray is in‐
serted in the cupholder with the adapter.
Lighter
With the engine running or the ignition
switched on, press in the cigarette lighter.
Seite 100CONTROLSInterior equipment100
Online Edition for Part no. 01 40 2 964 433 - VI/15
Page 101 of 223

The lighter can be removed as soon as it pops
back out.
WARNING
Contact with hot heating elements or the
hot socket of the cigarette lighter can cause
burns. Flammable materials can ignite if the
cigarette lighter falls down or is held against
the respective objects. There is risk of fire and
injuries. Hold the cigarette lighter on its handle.
Make sure that children do not use the ciga‐
rette lighter and do not burn themselves, e.g.
by carrying the remote control along when ex‐
iting the vehicle. ◀
Connecting electrical de‐
vices
The lighter socket can be used as a socket for
electrical equipment while the engine is run‐
ning or when the ignition is switched on. The
total load of all sockets must not exceed
140 watts at 12 volt.
Avoid damaging the sockets by attempting to
insert plugs of unsuitable shape or size.
CAUTION
Battery chargers for the vehicle battery
can work with high voltages and currents,
which means that the 12V on-board network
can be overloaded or damaged. There is risk of
property damage. Only connect battery charg‐
ers for the vehicle battery to the starting aid
terminals in the engine compartment. ◀
CAUTION
If metal objects fall into the socket, they
can cause a short circuit. There is risk of prop‐
erty damage. Replace the cigarette lighter or socket cover again after using the socket. ◀
Socket in the center console Remove the cover or lighter, refer to page 100,
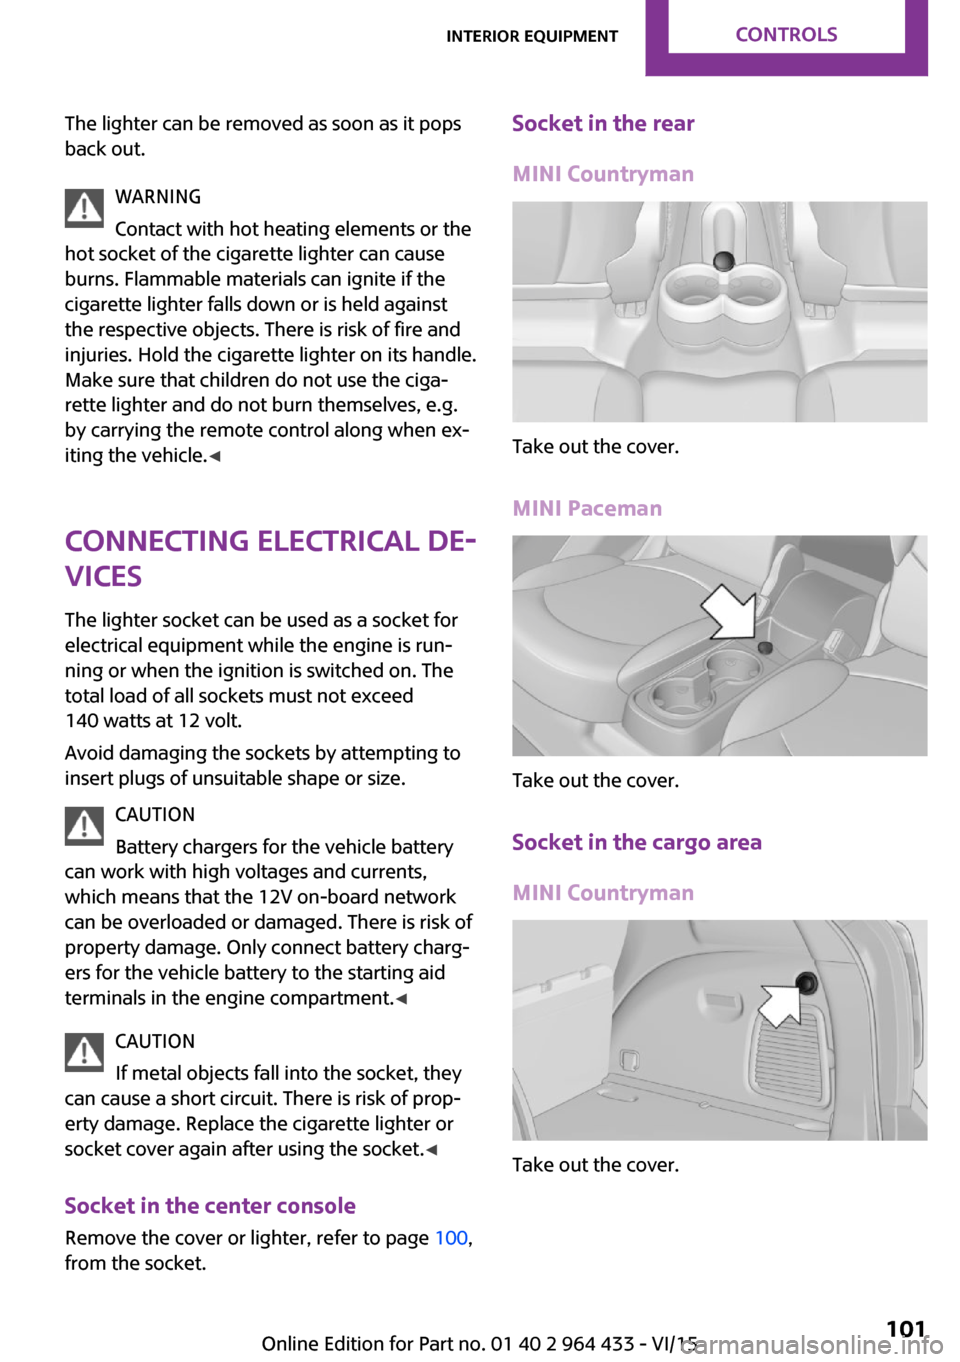
from the socket.Socket in the rear
MINI Countryman
Take out the cover.
MINI Paceman
Take out the cover.
Socket in the cargo area
MINI Countryman
Take out the cover.
Seite 101Interior equipmentCONTROLS101
Online Edition for Part no. 01 40 2 964 433 - VI/15
Page 102 of 223

MINI Paceman
Take out the cover.
Cargo area Cargo cover WARNING
Loose objects in the car's interior can be
thrown into the car's interior while driving, e.g.
in the event of an accident or during braking
and evasive maneuvers. There is risk of injuries.
Secure loose objects in the car's interior. ◀
When the tailgate is opened, the cargo cover is
raised.
When closing, ensure that the cargo cover is
resting on the rubber buffers of the securing
straps; otherwise, damage may occur when
closing the tailgate.
To load bulky luggage, the cover can be re‐
moved.
1.Detach the securing straps from the tail‐
gate.2.Lift the cover slightly, arrow 1, and pull it
back and out of the bracket, arrow 2.
MINI Countryman:
MINI Paceman:
MINI Countryman: rear seat backrests
Observe the instructions concerning the safety
belt, refer to page 38. Otherwise, personal pro‐
tection may be compromised.
WARNING
Danger of jamming with folding down the
backrests. There is risk of injuries or risk of property damage. Make sure that the area of
movement of the rear backrest is clear prior to
folding down. ◀
The rear seat backrest is divided at a ratio of
40-20-40.
When the outer rear seat backrests are folded down, it is not permissible for a person to travel
on the center seat.
Remove the third head restraint, refer to
page 42, if necessary.
Open the center safety belt and insert it in the
belt holder on the headliner, refer to page 40.
Enlarge the cargo area by adjusting the rear
seat backrests to a more upright position.
Seite 102CONTROLSInterior equipment102
Online Edition for Part no. 01 40 2 964 433 - VI/15
Page 105 of 223

Removing
To remove and stow the partition net, proceed
in reverse order.
To fold up, press the release button, arrow.
MINI Countryman: multi-function hook
Hooks designed for hanging shopping bags and
totes, for example, are located on the left and
right sides of the cargo cover support, arrow.
WARNING
Improper use of the multifunction hooks
can lead to a danger of objects flying about
during braking and evasive maneuvers. There is
risk of injuries and risk of property damage.
Only hang lightweight objects, e.g. shopping
bags, from the multifunction hooks. Only trans‐
port heavy luggage in the cargo area if it has
been appropriately secured. ◀
Seite 105Interior equipmentCONTROLS105
Online Edition for Part no. 01 40 2 964 433 - VI/15
Page 106 of 223

Storage compartmentsVehicle features and op‐
tions
This chapter describes all standard, country-
specific and optional features offered with the
series. It also describes features that are not necessarily available in your car, e. g., due to
the selected options or country versions. This
also applies to safety-related functions and sys‐
tems.
When using the features and systems described
here, adhere to local regulations.
Information WARNING
Loose objects in the car's interior can be
thrown into the car's interior while driving, e.g.
in the event of an accident or during braking
and evasive maneuvers. There is risk of injuries.
Secure loose objects in the car's interior. ◀
CAUTION
Anti-slip pads such as anti-slip mats can
damage the dashboard. There is risk of prop‐
erty damage. Do not use anti-slip pads. ◀
Storage compartments Interior▷Glove compartment, refer to page 106.▷Center armrest, refer to page 107.▷Center rail, refer to page 107.▷Compartments in the center console.▷Compartments in the doors.▷Pockets on the back of the front seat back‐
rests.▷Cupholders, refer to page 100.▷Clothes hooks, refer to page 107.
Cargo area
▷Lashing eyes, refer to page 118.▷Storage compartment under the flat load‐
ing floor, refer to page 104.▷Multi-function hook on the cargo cover
support, refer to page 105.
Glove compartment
Opening
Pull the handle to open the lid.
The light in the glove compartment switches
on.
Closing Fold up the cover.
WARNING
Folded open, the glove compartment
protrudes in the car's interior. Objects in the
glove compartment can be thrown into the
car's interior while driving, e.g. in the event of
an accident or during braking and evasive ma‐
neuvers. There is risk of injuries. Always close
the glove compartment immediately after us‐
ing it. ◀
Seite 106CONTROLSStorage compartments106
Online Edition for Part no. 01 40 2 964 433 - VI/15
Page 108 of 223

from the hooks, ensure that they will not ob‐
struct the driver's view. ◀
WARNING
Improper use of the clothes hooks can
lead to a danger of objects flying about during
braking and evasive maneuvers. There is risk of
injuries and risk of property damage. Only hang
lightweight objects, e.g. clothing articles, from
the clothes hooks. ◀
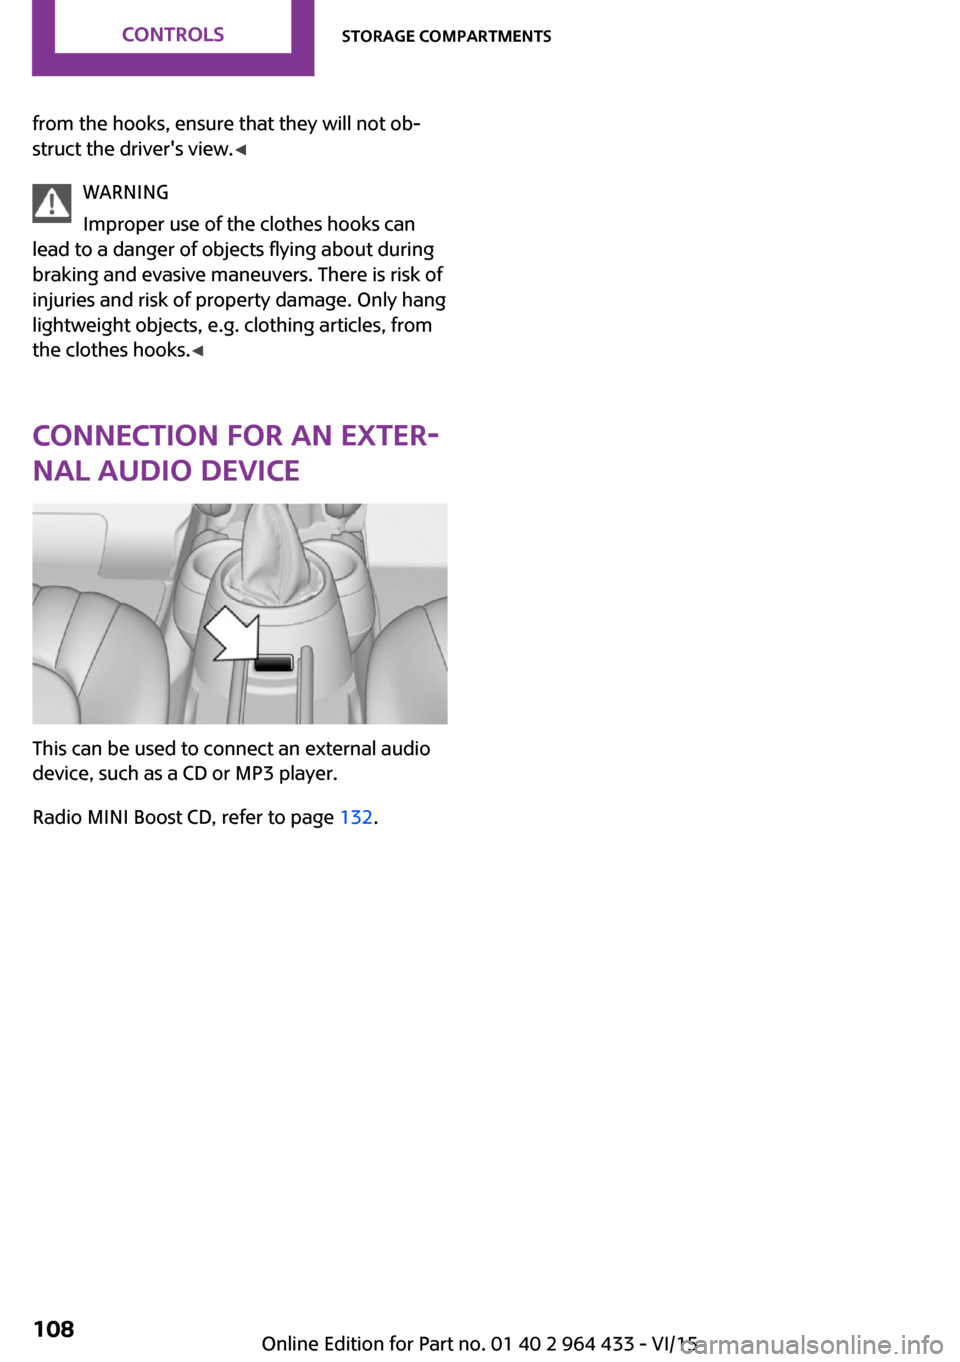
Connection for an exter‐
nal audio device
This can be used to connect an external audio
device, such as a CD or MP3 player.
Radio MINI Boost CD, refer to page 132.
Seite 108CONTROLSStorage compartments108
Online Edition for Part no. 01 40 2 964 433 - VI/15
Page 114 of 223

Objects in the area around the pedalsWARNING
Objects in the driver's floor area can limit
the pedal distance or block a depressed pedal.
There is risk of an accident. Stow objects in the
vehicle such that they are secured and cannot
enter into the driver's floor area. Use floor mats
that are suitable for the vehicle and can be
safely attached to the floor. Do not use loose
floor mats and do not layer several floor mats.
Make sure that there is sufficient clearance for
the pedals. Ensure that the floor mats are se‐
curely fastened again after they were removed,
e.g. for cleaning. ◀
Driving in wet conditions When roads are wet or there is heavy rain,
briefly exert gentle pressure on the brake pedal
every few miles.
Ensure that this action does not endanger other
road users.
The heat generated in this process helps dry
the brake discs and pads.
In this way braking efficiency will be available
when you need it.
Hills
Drive long or steep downhill gradients in the
gear in which the least braking is required. Oth‐
erwise, the brake system may overheat, result‐
ing in a reduction in the brake system effi‐
ciency.
You can increase the engine's braking effect by
shifting down, going all the way to first gear, if
necessary.
Downshifting in manual mode of the Steptronic
transmission, refer to page 58.
WARNING
Light but consistent brake pressure can
lead to high temperatures, brakes wearing out
and possibly even brake failure. There is risk ofan accident. Avoid placing excessive load on
the brake system. ◀
WARNING
In idle or with the engine switched off,
safety-relevant functions are restricted or not
available anymore, e.g. braking effect of the
engine or braking force and steering support.
There is risk of an accident. Do not drive in idle
or with the engine switched off. ◀
Brake disc corrosion Corrosion on the brake discs and contamina‐
tion on the brake pads are furthered by:▷Low mileage.▷Extended periods when the vehicle is not
used at all.▷Infrequent use of the brakes.
Corrosion occurs when the minimum pressure
that must be exerted by the pads during brake
applications to clean the discs is not reached.
Should corrosion form on the brake discs, the
brakes will tend to respond with a pulsating ef‐
fect that generally cannot be corrected.
When the vehicle is parked
When using the automatic climate control, con‐
densation water develops that exits under‐
neath the vehicle.
Therefore, traces of condensed water under the
vehicle are normal.
After the engine is switched off, the coolant
pump may continue running for some time in
the MINI Cooper S. This causes noises in the en‐
gine compartment.
Driving on poor roadsYour MINI with ALL4 all-wheel drive feels com‐
fortable on all streets and roads. It combines an
all-wheel drive system with the advantages of a
normal passenger car.
Seite 114DRIVING TIPSThings to remember when driving114
Online Edition for Part no. 01 40 2 964 433 - VI/15
Page 118 of 223

Securing cargoLashing eyes in the cargo area
MINI Countryman
MINI Paceman
Securing cargo
▷Secure smaller and lighter pieces with tight‐
ening belts or straps.▷Secure larger and heavier pieces with cargo
straps.
Adhere to the information included with
the cargo straps.▷Eight mounting eyes are available for fas‐
tening the cargo straps.
Two of them are located on the side wall of
the cargo area, arrows 1, and two are lo‐
cated on the rear wall of the cargo area, ar‐
rows 2.
WARNING
Improperly stowed objects can shift and
be thrown into the car's interior, e.g. in the
event of an accident or during braking and eva‐
sive maneuvers. Vehicle occupants can be hit
and injured. There is risk of injuries. Stow and
secure objects and cargo properly.
Do not secure cargo using the upper LATCH
mounting points, refer to page 48; otherwise,
these may become damaged. ◀
Roof-mounted luggage
rack
InformationA special rack system is available as an optional
accessory.
Securing
Follow the installation instructions of the roof
rack.
Ensure that adequate clearance is available for
the movement of the glass sunroof.
Loading Because roof racks raise the vehicle's center ofgravity when loaded, they have a major effect
on vehicle handling and steering response.
Therefore, note the following when loading and driving:▷Do not exceed the approved roof/axle
loads and the approved gross vehicle
weight.▷Distribute the roof load uniformly.▷The roof load should not extend past the
loading area.▷Always load the heaviest pieces on the bot‐
tom.▷Secure the roof luggage firmly, e.g., tie with
ratchet straps.▷Do not let objects project into the opening
path of the tailgate.▷Drive smoothly. Avoid sudden acceleration
and braking maneuvers. Take corners gen‐
tly.Seite 118DRIVING TIPSLoading118
Online Edition for Part no. 01 40 2 964 433 - VI/15