VEHICLE IDENTIFICATION
GENERAL00-21
OPTION CODES (380 Series)
EXPORT CODES
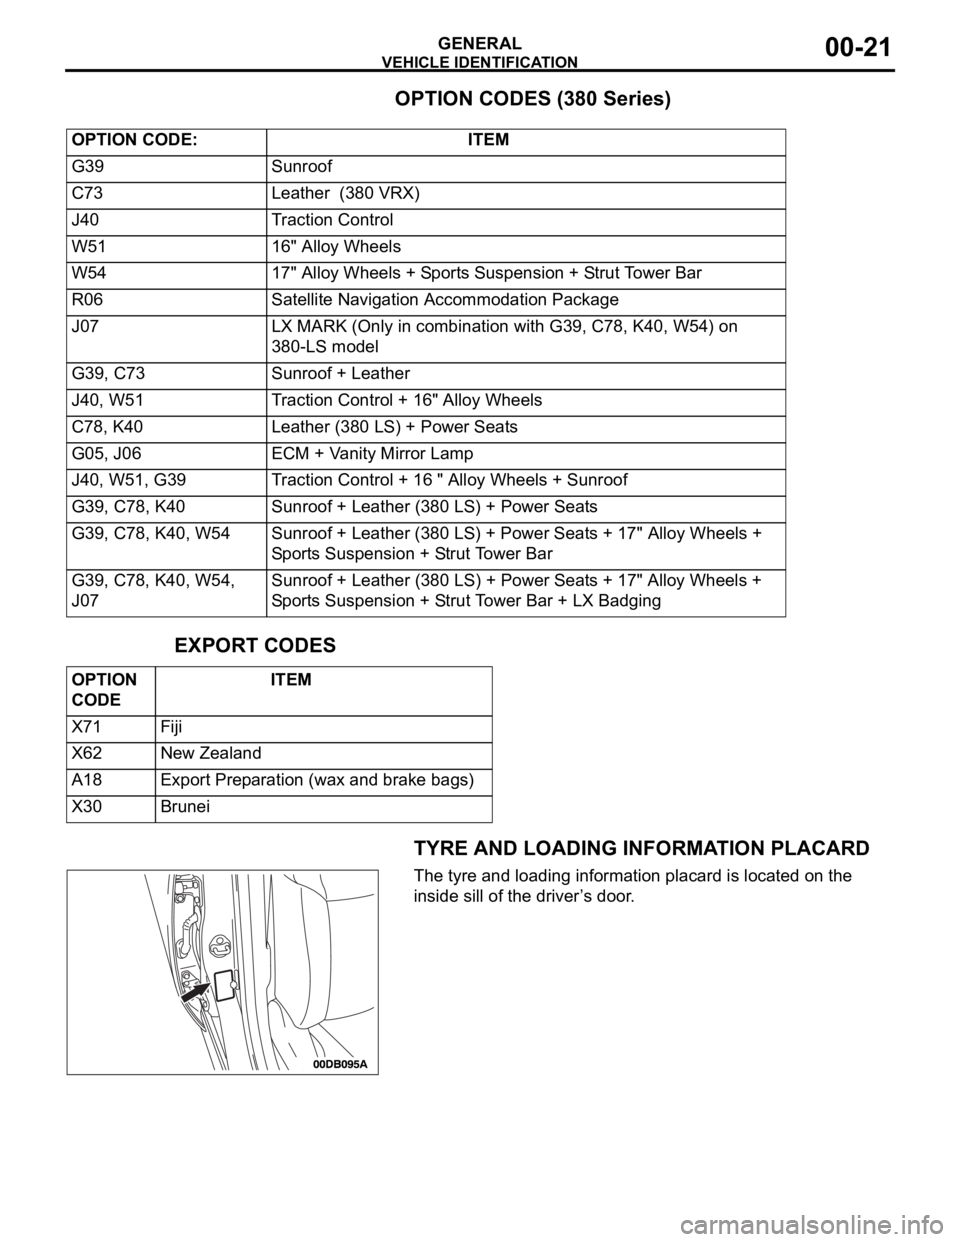
TYRE AND LOADING INFORMATION PLACARD
The tyre and loading information placard is located on the
inside sill of the driver’s door. OPTION CODE: ITEM
G39 Sunroof
C73 Leather (380 VRX)
J40 Traction Control
W51 16" Alloy Wheels
W54 17" Alloy Wheels + Sports Suspension + Strut Tower Bar
R06 Satellite Navigation Accommodation Package
J07 LX MARK (Only in combination with G39, C78, K40, W54) on
380-LS model
G39, C73 Sunroof + Leather
J40, W51 Traction Control + 16" Alloy Wheels
C78, K40 Leather (380 LS) + Power Seats
G05, J06 ECM + Vanity Mirror Lamp
J40, W51, G39 Traction Control + 16 " Alloy Wheels + Sunroof
G39, C78, K40 Sunroof + Leather (380 LS) + Power Seats
G39, C78, K40, W54 Sunroof + Leather (380 LS) + Power Seats + 17" Alloy Wheels +
Sports Suspension + Strut Tower Bar
G39, C78, K40, W54,
J07Sunroof + Leather (380 LS) + Power Seats + 17" Alloy Wheels +
Sports Suspension + Strut Tower Bar + LX Badging
OPTION
CODE ITEM
X71 Fiji
X62 New Zealand
A18 Export Preparation (wax and brake bags)
X30 Brunei
DRIVE SHAFT ASSEMBLY
FRONT AXLE26-16
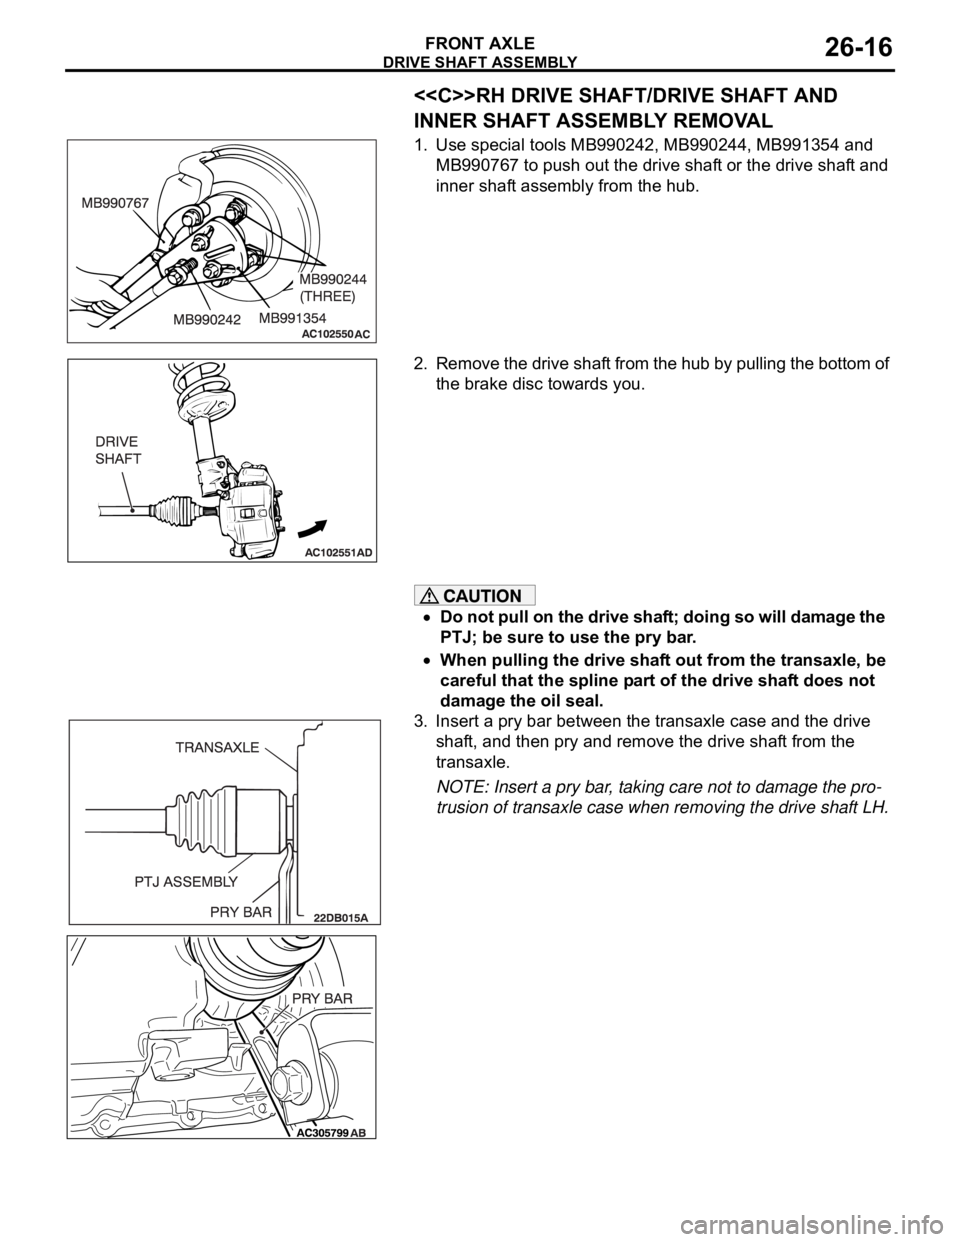
<>RH DRIVE SHAFT/DRIVE SHAFT AND
INNER SHAFT ASSEMBLY REMOVAL
1. Use special tools MB990242, MB990244, MB991354 and
MB990767 to push out the drive shaft or the drive shaft and
inner shaft assembly from the hub.
2. Remove the drive shaft from the hub by pulling the bottom of
the brake disc towards you.
Do not pull on the drive shaft; doing so will damage the
PTJ; be sure to use the pry bar.
When pulling the drive shaft out from the transaxle, be
careful that the spline part of the drive shaft does not
damage the oil seal.
3. Insert a pry bar between the transaxle case and the drive
shaft, and then pry and remove the drive shaft from the
transaxle.
NOTE: Insert a pry bar, taking care not to damage the pro-
trusion of transaxle case when removing the drive shaft LH.

