MITSUBISHI ASX 2009 1.G Owners Manual
Manufacturer: MITSUBISHI, Model Year: 2009, Model line: ASX, Model: MITSUBISHI ASX 2009 1.GPages: 368, PDF Size: 8.13 MB
Page 141 of 368
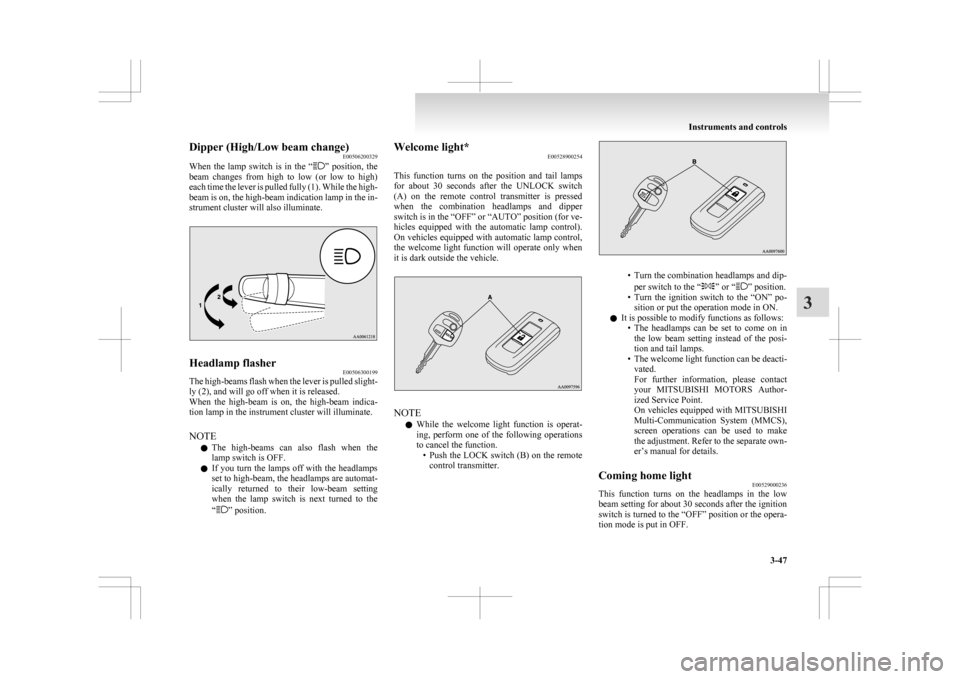
Dipper (High/Low beam change)
E00506200329
When
the lamp switch is in the “ ”
position, the
beam changes from high to low (or low to high)
each time the lever is pulled fully (1). While the high-
beam is on, the high-beam indication lamp in the in-
strument cluster will also illuminate. Headlamp flasher
E00506300199
The high-beams flash when the lever is pulled slight-
ly (2), and will go off when it is released.
When
the high-beam is on, the high-beam indica-
tion lamp in the instrument cluster will illuminate.
NOTE
l The high-beams can also flash when the
lamp switch is OFF.
l If you turn the lamps off with the headlamps
set to high-beam, the headlamps are automat-
ically returned to their low-beam setting
when the lamp switch is next turned to the
“ ” position. Welcome light*
E00528900254
This
function turns on the position and tail lamps
for about 30 seconds after the UNLOCK switch
(A) on the remote control transmitter is pressed
when the combination headlamps and dipper
switch is in the “OFF” or “AUTO” position (for ve-
hicles equipped with the automatic lamp control).
On vehicles equipped with automatic lamp control,
the welcome light function will operate only when
it is dark outside the vehicle. NOTE
l While
the welcome light function is operat-
ing, perform one of the following operations
to cancel the function. • Push the LOCK switch (B) on the remotecontrol transmitter. • Turn the combination headlamps and dip-
per switch to the “ ” or “ ” position.
• Turn
the ignition switch to the “ON” po-
sition or put the operation mode in ON.
l It is possible to modify functions as follows:
• The headlamps can be set to come on inthe low beam setting instead of the posi-
tion and tail lamps.
• The welcome light function can be deacti- vated.
For further information, please contact
your MITSUBISHI MOTORS Author-
ized Service Point.
On vehicles equipped with MITSUBISHI
Multi-Communication System (MMCS),
screen operations can be used to make
the adjustment. Refer to the separate own-
er’s manual for details.
Coming home light E00529000236
This function turns on the headlamps in the low
beam
setting for about 30 seconds after the ignition
switch is turned to the “OFF” position or the opera-
tion mode is put in OFF. Instruments and controls
3-47 3
Page 142 of 368
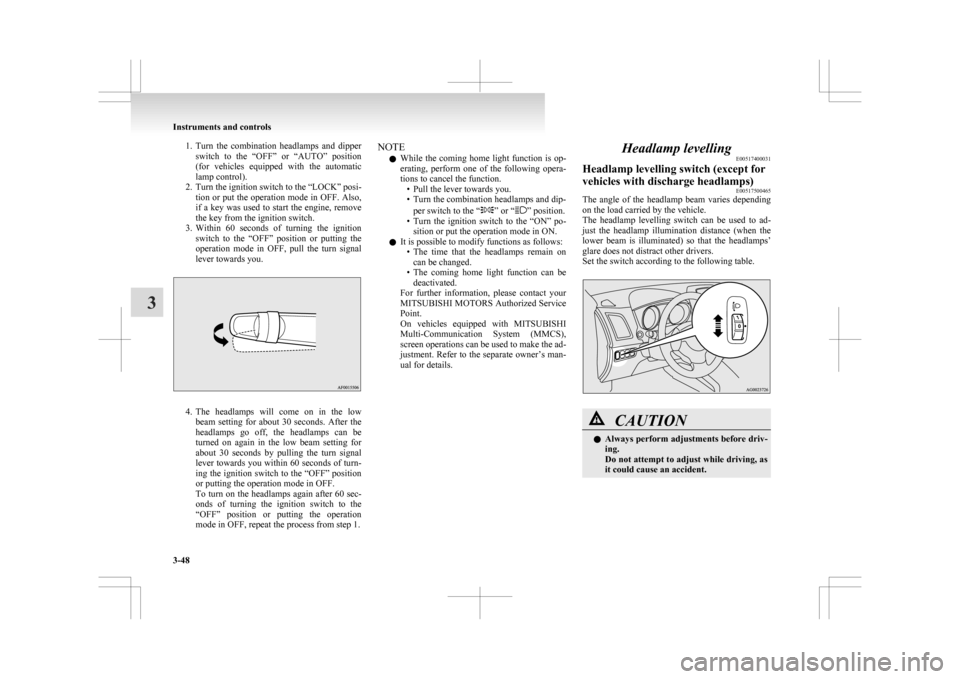
1. Turn the combination headlamps and dipper
switch to the “OFF” or “AUTO” position
(for vehicles equipped with the automatic
lamp control).
2. Turn the ignition switch to the “LOCK” posi- tion or put the operation mode in OFF. Also,
if a key was used to start the engine, remove
the key from the ignition switch.
3. Within 60 seconds of turning the ignition switch to the “OFF” position or putting the
operation mode in OFF, pull the turn signal
lever towards you. 4. The
headlamps will come on in the low
beam setting for about 30 seconds. After the
headlamps go off, the headlamps can be
turned on again in the low beam setting for
about 30 seconds by pulling the turn signal
lever towards you within 60 seconds of turn-
ing the ignition switch to the “OFF” position
or putting the operation mode in OFF.
To turn on the headlamps again after 60 sec-
onds of turning the ignition switch to the
“OFF” position or putting the operation
mode in OFF, repeat the process from step 1. NOTE
l While
the coming home light function is op-
erating, perform one of the following opera-
tions to cancel the function. • Pull the lever towards you.
• Turn the combination headlamps and dip-
per switch to the “ ” or “ ” position.
• Turn
the ignition switch to the “ON” po-
sition or put the operation mode in ON.
l It is possible to modify functions as follows:
• The time that the headlamps remain oncan be changed.
• The coming home light function can be deactivated.
For further information, please contact your
MITSUBISHI MOTORS Authorized Service
Point.
On vehicles equipped with MITSUBISHI
Multi-Communication System (MMCS),
screen operations can be used to make the ad-
justment. Refer to the separate owner’s man-
ual for details. Headlamp levelling
E00517400031
Headlamp levelling switch (except for
vehicles with discharge headlamps) E00517500465
The angle of the headlamp beam varies depending
on the load carried by the vehicle.
The
headlamp levelling switch can be used to ad-
just the headlamp illumination distance (when the
lower beam is illuminated) so that the headlamps’
glare does not distract other drivers.
Set the switch according to the following table. CAUTION
l
Always
perform adjustments before driv-
ing.
Do not attempt to adjust while driving, as
it could cause an accident. Instruments and controls
3-48
3
Page 143 of 368
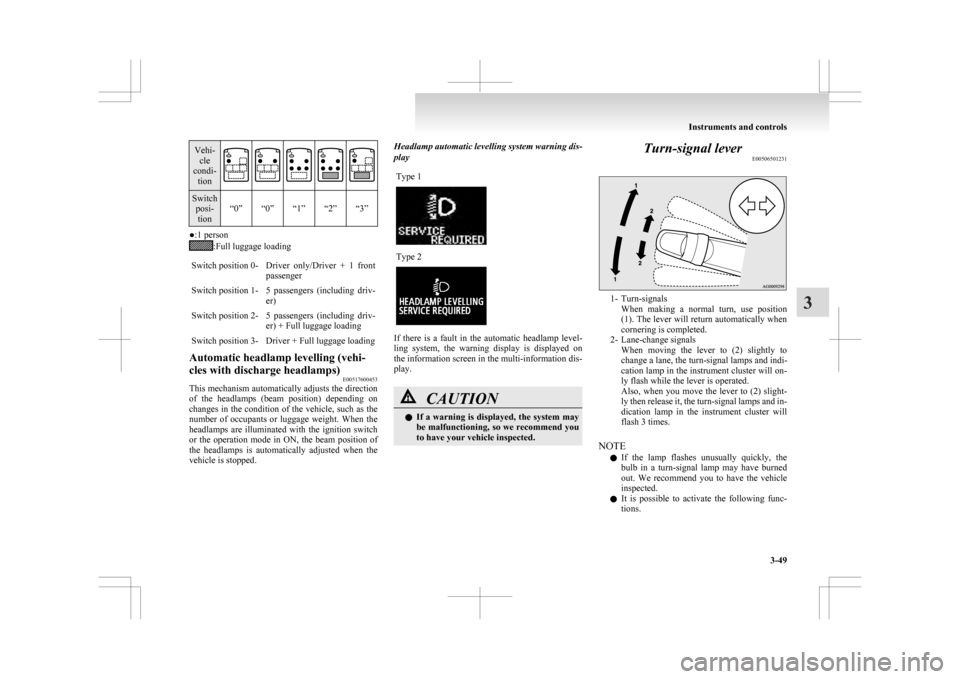
Vehi-
cle
condi- tion Switch
posi-tion “0” “0” “1” “2” “3” ●:1 person
:Full luggage loading
Switch position 0- Driver only/Driver + 1 front passenger
Switch position 1- 5 passengers (including driv- er)
Switch position 2- 5 passengers (including driv- er) + Full luggage loading
Switch position 3- Driver + Full luggage loading
Automatic headlamp levelling (vehi-
cles with discharge headlamps) E00517600453
This mechanism automatically adjusts the direction
of
the headlamps (beam position) depending on
changes in the condition of the vehicle, such as the
number of occupants or luggage weight. When the
headlamps are illuminated with the ignition switch
or the operation mode in ON, the beam position of
the headlamps is automatically adjusted when the
vehicle is stopped. Headlamp automatic levelling system warning dis-
play
Type 1 Type 2
If there is a fault in the automatic headlamp level-
ling
system, the warning display is displayed on
the information screen in the multi-information dis-
play. CAUTION
l
If
a warning is displayed, the system may
be malfunctioning, so we recommend you
to have your vehicle inspected. Turn-signal lever
E00506501231 1- Turn-signals
When
making a normal turn, use position
(1). The lever will return automatically when
cornering is completed.
2- Lane-change signals When moving the lever to (2) slightly to
change a lane, the turn-signal lamps and indi-
cation lamp in the instrument cluster will on-
ly flash while the lever is operated.
Also, when you move the lever to (2) slight-
ly then release it, the turn-signal lamps and in-
dication lamp in the instrument cluster will
flash 3 times.
NOTE l If the lamp flashes unusually quickly, the
bulb in a turn-signal lamp may have burned
out. We recommend you to have the vehicle
inspected.
l It is possible to activate the following func-
tions. Instruments and controls
3-49 3
Page 144 of 368
• Flashing of the turn-signal lamps when
the lever is operated with the ignition
switch or the operation mode is in ACC.
• Deactivate the turn-signal lamp 3-flash function for lane changes.
• The time required to operate the lever for the 3-flash function can be adjusted.
For further information, we recommend you
to consult a MITSUBISHI MOTORS Author-
ized Service Point.
On vehicles equipped with MITSUBISHI
Multi-Communication System (MMCS),
screen operations can be used to make the ad-
justment. Refer to the separate owner’s man-
ual for details. Hazard warning flasher switch
E00506600860
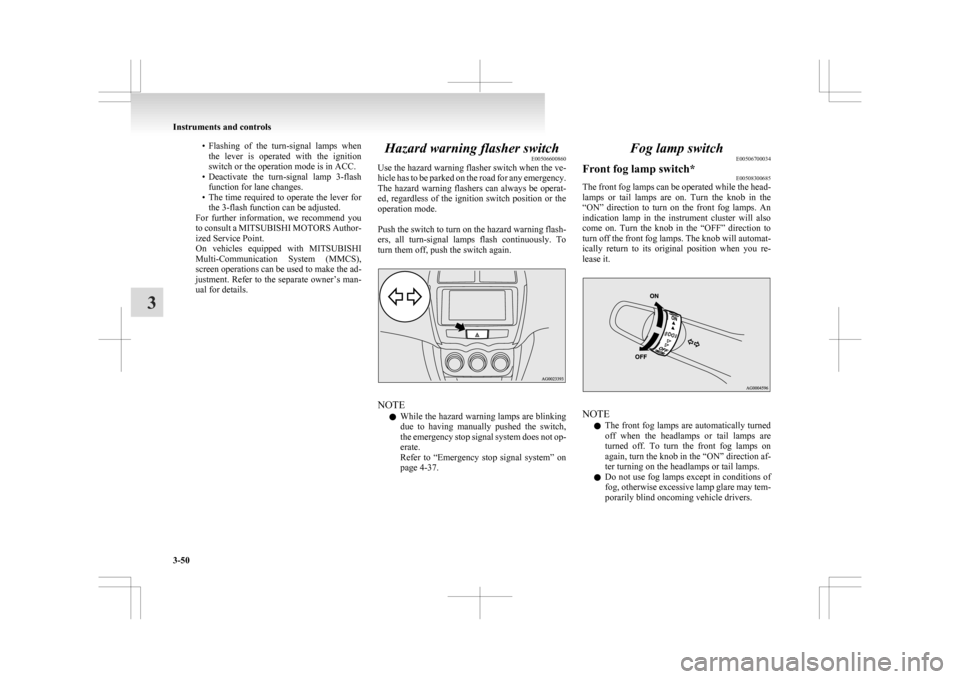
Use
the hazard warning flasher switch when the ve-
hicle has to be parked on the road for any emergency.
The hazard warning flashers can always be operat-
ed, regardless of the ignition switch position or the
operation mode.
Push the switch to turn on the hazard warning flash-
ers, all turn-signal lamps flash continuously. To
turn them off, push the switch again. NOTE
l While
the hazard warning lamps are blinking
due to having manually pushed the switch,
the emergency stop signal system does not op-
erate.
Refer to “Emergency stop signal system” on
page 4-37. Fog lamp switch
E00506700034
Front fog lamp switch* E00508300685
The front fog lamps can be operated while the head-
lamps
or tail lamps are on. Turn the knob in the
“ON” direction to turn on the front fog lamps. An
indication lamp in the instrument cluster will also
come on. Turn the knob in the “OFF” direction to
turn off the front fog lamps. The knob will automat-
ically return to its original position when you re-
lease it. NOTE
l The
front fog lamps are automatically turned
off when the headlamps or tail lamps are
turned off. To turn the front fog lamps on
again, turn the knob in the “ON” direction af-
ter turning on the headlamps or tail lamps.
l Do not use fog lamps except in conditions of
fog, otherwise excessive lamp glare may tem-
porarily blind oncoming vehicle drivers. Instruments and controls
3-50
3
Page 145 of 368
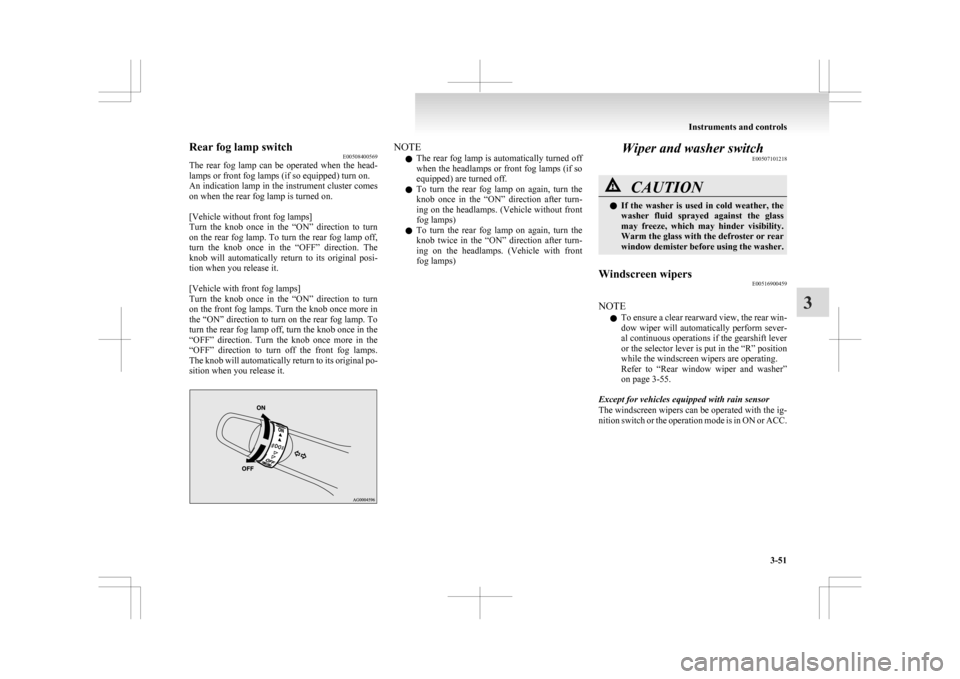
Rear fog lamp switch
E00508400569
The
rear fog lamp can be operated when the head-
lamps or front fog lamps (if so equipped) turn on.
An indication lamp in the instrument cluster comes
on when the rear fog lamp is turned on.
[Vehicle without front fog lamps]
Turn the knob once in the “ON” direction to turn
on the rear fog lamp. To turn the rear fog lamp off,
turn the knob once in the “OFF” direction. The
knob will automatically return to its original posi-
tion when you release it.
[Vehicle with front fog lamps]
Turn the knob once in the “ON” direction to turn
on the front fog lamps. Turn the knob once more in
the “ON” direction to turn on the rear fog lamp. To
turn the rear fog lamp off, turn the knob once in the
“OFF” direction. Turn the knob once more in the
“OFF” direction to turn off the front fog lamps.
The knob will automatically return to its original po-
sition when you release it. NOTE
l The
rear fog lamp is automatically turned off
when the headlamps or front fog lamps (if so
equipped) are turned off.
l To turn the rear fog lamp on again, turn the
knob once in the “ON” direction after turn-
ing on the headlamps. (Vehicle without front
fog lamps)
l To turn the rear fog lamp on again, turn the
knob twice in the “ON” direction after turn-
ing on the headlamps. (Vehicle with front
fog lamps) Wiper and washer switch
E00507101218 CAUTION
l
If
the washer is used in cold weather, the
washer fluid sprayed against the glass
may freeze, which may hinder visibility.
Warm the glass with the defroster or rear
window demister before using the washer.
Windscreen wipers E00516900459
NOTE l To
ensure a clear rearward view, the rear win-
dow wiper will automatically perform sever-
al continuous operations if the gearshift lever
or the selector lever is put in the “R” position
while the windscreen wipers are operating.
Refer to “Rear window wiper and washer”
on page 3-55.
Except for vehicles equipped with rain sensor
The windscreen wipers can be operated with the ig-
nition switch or the operation mode is in ON or ACC. Instruments and controls
3-51 3
Page 146 of 368
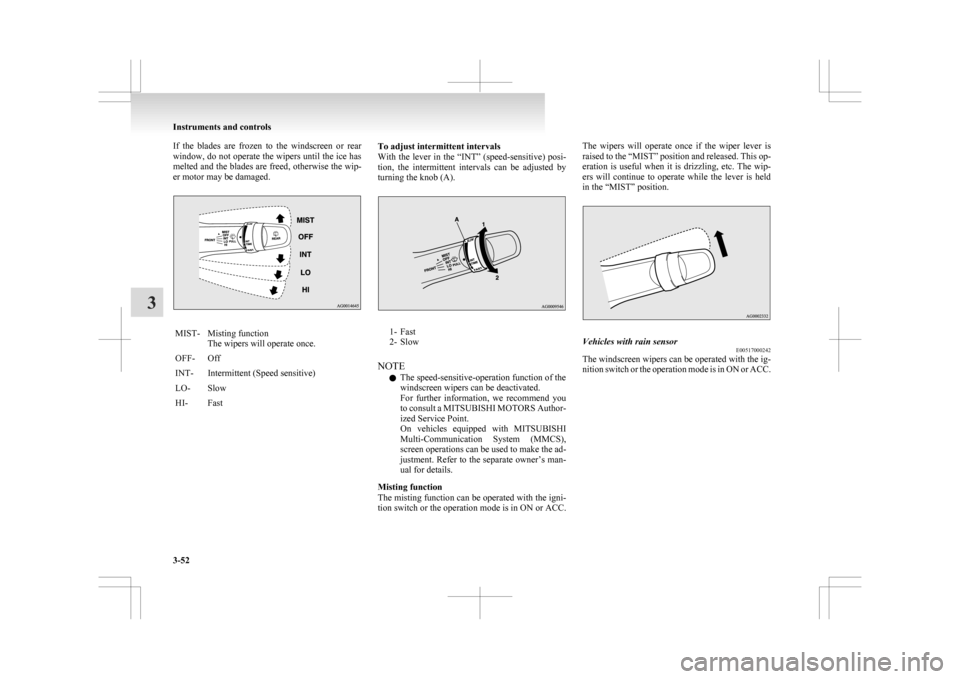
If the blades are frozen to the windscreen or rear
window,
do not operate the wipers until the ice has
melted and the blades are freed, otherwise the wip-
er motor may be damaged. MIST- Misting function
The wipers will operate once.
OFF- Off
INT- Intermittent (Speed sensitive)
LO- Slow
HI- Fast To adjust intermittent intervals
With
the lever in the “INT” (speed-sensitive) posi-
tion, the intermittent intervals can be adjusted by
turning the knob (A). 1- Fast
2-
Slow
NOTE l The speed-sensitive-operation function of the
windscreen wipers can be deactivated.
For further information, we recommend you
to consult a MITSUBISHI MOTORS Author-
ized Service Point.
On vehicles equipped with MITSUBISHI
Multi-Communication System (MMCS),
screen operations can be used to make the ad-
justment. Refer to the separate owner’s man-
ual for details.
Misting function
The misting function can be operated with the igni-
tion switch or the operation mode is in ON or ACC. The wipers will operate once if the wiper lever is
raised
to the “MIST” position and released. This op-
eration is useful when it is drizzling, etc. The wip-
ers will continue to operate while the lever is held
in the “MIST” position. Vehicles with rain sensor
E00517000242
The windscreen wipers can be operated with the ig-
nition
switch or the operation mode is in ON or ACC. Instruments and controls
3-52
3
Page 147 of 368
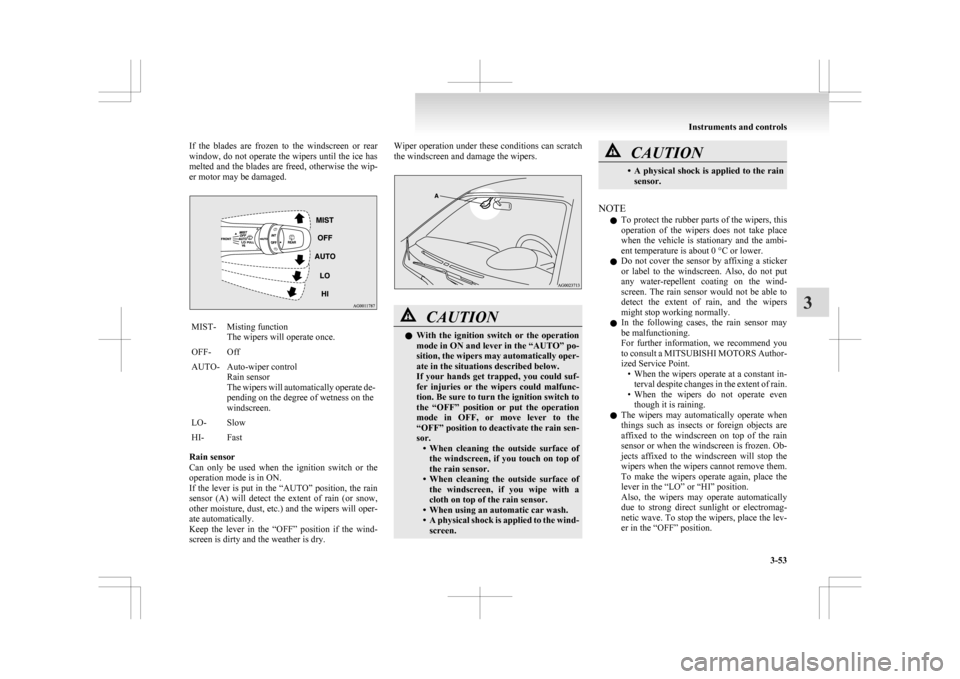
If the blades are frozen to the windscreen or rear
window,
do not operate the wipers until the ice has
melted and the blades are freed, otherwise the wip-
er motor may be damaged. MIST- Misting function
The wipers will operate once.
OFF- Off
AUTO- Auto-wiper control Rain sensor
The
wipers will automatically operate de-
pending on the degree of wetness on the
windscreen.
LO- Slow
HI- Fast
Rain sensor
Can
only be used when the ignition switch or the
operation mode is in ON.
If the lever is put in the “AUTO” position, the rain
sensor (A) will detect the extent of rain (or snow,
other moisture, dust, etc.) and the wipers will oper-
ate automatically.
Keep the lever in the “OFF” position if the wind-
screen is dirty and the weather is dry. Wiper operation under these conditions can scratch
the windscreen and damage the wipers.
CAUTION
l
With
the ignition switch or the operation
mode in ON and lever in the “AUTO” po-
sition, the wipers may automatically oper-
ate in the situations described below.
If your hands get trapped, you could suf-
fer injuries or the wipers could malfunc-
tion. Be sure to turn the ignition switch to
the “OFF” position or put the operation
mode in OFF, or move lever to the
“OFF” position to deactivate the rain sen-
sor. • When cleaning the outside surface ofthe windscreen, if you touch on top of
the rain sensor.
• When cleaning the outside surface of the windscreen, if you wipe with a
cloth on top of the rain sensor.
• When using an automatic car wash.
• A physical shock is applied to the wind- screen. CAUTION
• A
physical shock is applied to the rain
sensor.
NOTE l To
protect the rubber parts of the wipers, this
operation of the wipers does not take place
when the vehicle is stationary and the ambi-
ent temperature is about 0 °C or lower.
l Do not cover the sensor by affixing a sticker
or label to the windscreen. Also, do not put
any water-repellent coating on the wind-
screen. The rain sensor would not be able to
detect the extent of rain, and the wipers
might stop working normally.
l In the following cases, the rain sensor may
be malfunctioning.
For further information, we recommend you
to consult a MITSUBISHI MOTORS Author-
ized Service Point.
• When the wipers operate at a constant in-terval despite changes in the extent of rain.
• When the wipers do not operate even though it is raining.
l The wipers may automatically operate when
things such as insects or foreign objects are
affixed to the windscreen on top of the rain
sensor or when the windscreen is frozen. Ob-
jects affixed to the windscreen will stop the
wipers when the wipers cannot remove them.
To make the wipers operate again, place the
lever in the “LO” or “HI” position.
Also, the wipers may operate automatically
due to strong direct sunlight or electromag-
netic wave. To stop the wipers, place the lev-
er in the “OFF” position. Instruments and controls
3-53 3
Page 148 of 368
l
Contact a MITSUBISHI MOTORS Author-
ized Service Point when replacing the wind-
screen or reinforcing the glass around the sen-
sor.
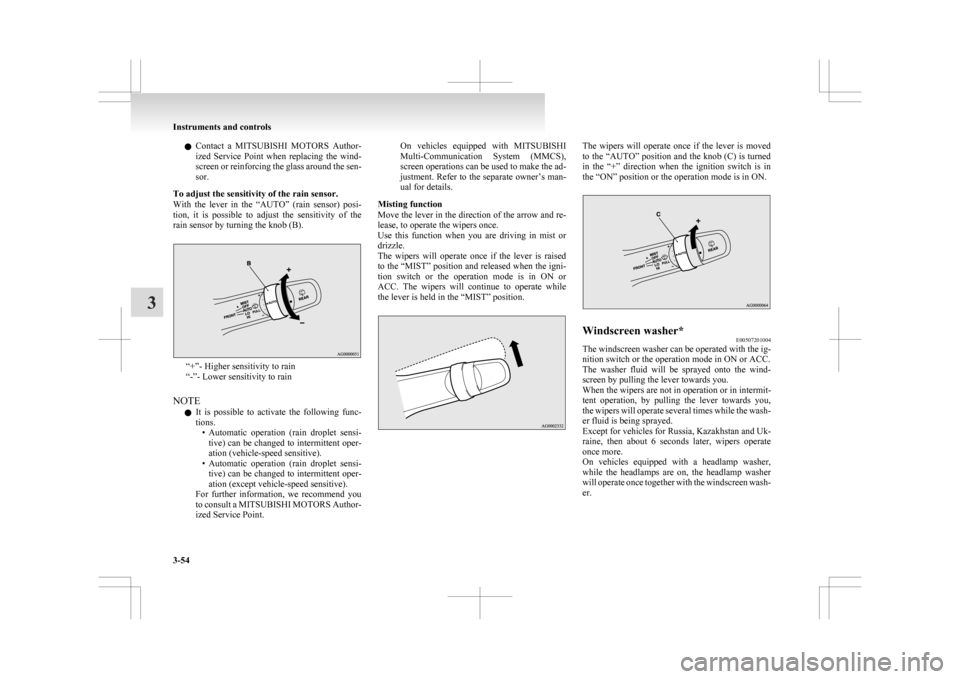
To adjust the sensitivity of the rain sensor.
With the lever in the “AUTO” (rain sensor) posi-
tion, it is possible to adjust the sensitivity of the
rain sensor by turning the knob (B). “+”- Higher sensitivity to rain
“-”- Lower sensitivity to rain
NOTE l It
is possible to activate the following func-
tions. • Automatic operation (rain droplet sensi-tive) can be changed to intermittent oper-
ation (vehicle-speed sensitive).
• Automatic operation (rain droplet sensi- tive) can be changed to intermittent oper-
ation (except vehicle-speed sensitive).
For further information, we recommend you
to consult a MITSUBISHI MOTORS Author-
ized Service Point. On vehicles equipped with MITSUBISHI
Multi-Communication
System (MMCS),
screen operations can be used to make the ad-
justment. Refer to the separate owner’s man-
ual for details.
Misting function
Move the lever in the direction of the arrow and re-
lease, to operate the wipers once.
Use this function when you are driving in mist or
drizzle.
The wipers will operate once if the lever is raised
to the “MIST” position and released when the igni-
tion switch or the operation mode is in ON or
ACC. The wipers will continue to operate while
the lever is held in the “MIST” position. The wipers will operate once if the lever is moved
to
the “AUTO” position and the knob (C) is turned
in the “+” direction when the ignition switch is in
the “ON” position or the operation mode is in ON. Windscreen washer*
E00507201004
The windscreen washer can be operated with the ig-
nition switch or the operation mode in ON or ACC.
The
washer fluid will be sprayed onto the wind-
screen by pulling the lever towards you.
When the wipers are not in operation or in intermit-
tent operation, by pulling the lever towards you,
the wipers will operate several times while the wash-
er fluid is being sprayed.
Except for vehicles for Russia, Kazakhstan and Uk-
raine, then about 6 seconds later, wipers operate
once more.
On vehicles equipped with a headlamp washer,
while the headlamps are on, the headlamp washer
will operate once together with the windscreen wash-
er. Instruments and controls
3-54
3
Page 149 of 368
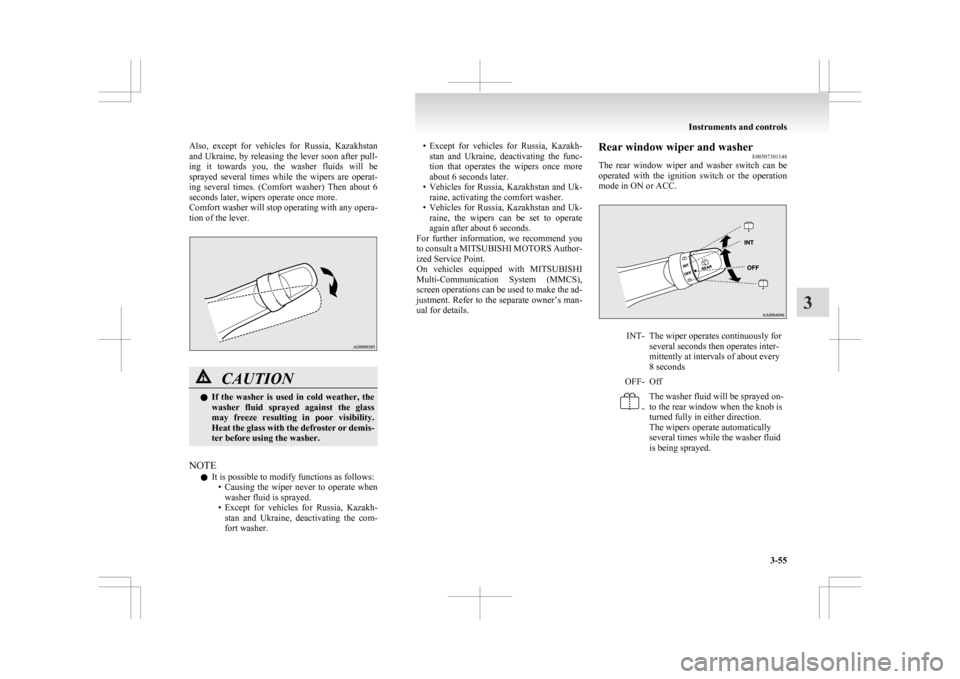
Also, except for vehicles for Russia, Kazakhstan
and
Ukraine, by releasing the lever soon after pull-
ing it towards you, the washer fluids will be
sprayed several times while the wipers are operat-
ing several times. (Comfort washer) Then about 6
seconds later, wipers operate once more.
Comfort washer will stop operating with any opera-
tion of the lever. CAUTION
l
If
the washer is used in cold weather, the
washer fluid sprayed against the glass
may freeze resulting in poor visibility.
Heat the glass with the defroster or demis-
ter before using the washer.
NOTE l It is possible to modify functions as follows:
• Causing
the wiper never to operate when
washer fluid is sprayed.
• Except for vehicles for Russia, Kazakh- stan and Ukraine, deactivating the com-
fort washer. • Except
for vehicles for Russia, Kazakh-
stan and Ukraine, deactivating the func-
tion that operates the wipers once more
about 6 seconds later.
• Vehicles for Russia, Kazakhstan and Uk- raine, activating the comfort washer.
• Vehicles for Russia, Kazakhstan and Uk- raine, the wipers can be set to operate
again after about 6 seconds.
For further information, we recommend you
to consult a MITSUBISHI MOTORS Author-
ized Service Point.
On vehicles equipped with MITSUBISHI
Multi-Communication System (MMCS),
screen operations can be used to make the ad-
justment. Refer to the separate owner’s man-
ual for details. Rear window wiper and washer
E00507301148
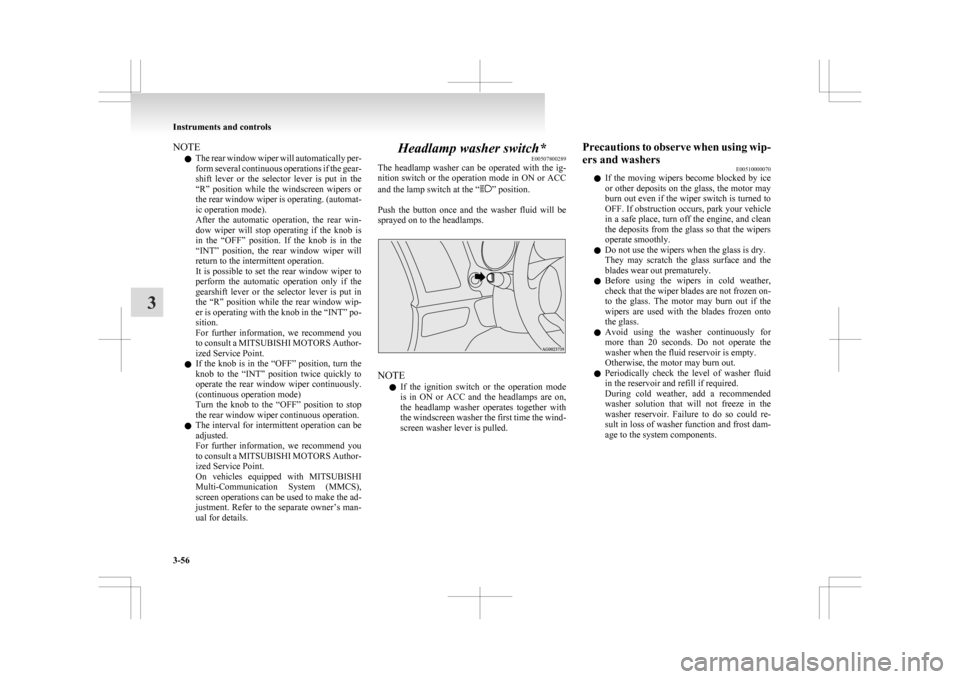
The
rear window wiper and washer switch can be
operated with the ignition switch or the operation
mode in ON or ACC. INT- The wiper operates continuously for
several seconds then operates inter-
mittently at intervals of about every
8 seconds
OFF- Off -
The washer fluid will be sprayed on-
to the rear window when the knob is
turned fully in either direction.
The wipers operate automatically
several times while the washer fluid
is being sprayed. Instruments and controls
3-55 3
Page 150 of 368
NOTE
l The
rear window wiper will automatically per-
form several continuous operations if the gear-
shift lever or the selector lever is put in the
“R” position while the windscreen wipers or
the rear window wiper is operating. (automat-
ic operation mode).
After the automatic operation, the rear win-
dow wiper will stop operating if the knob is
in the “OFF” position. If the knob is in the
“INT” position, the rear window wiper will
return to the intermittent operation.
It is possible to set the rear window wiper to
perform the automatic operation only if the
gearshift lever or the selector lever is put in
the “R” position while the rear window wip-
er is operating with the knob in the “INT” po-
sition.
For further information, we recommend you
to consult a MITSUBISHI MOTORS Author-
ized Service Point.
l If the knob is in the “OFF” position, turn the
knob to the “INT” position twice quickly to
operate the rear window wiper continuously.
(continuous operation mode)
Turn the knob to the “OFF” position to stop
the rear window wiper continuous operation.
l The interval for intermittent operation can be
adjusted.
For further information, we recommend you
to consult a MITSUBISHI MOTORS Author-
ized Service Point.
On vehicles equipped with MITSUBISHI
Multi-Communication System (MMCS),
screen operations can be used to make the ad-
justment. Refer to the separate owner’s man-
ual for details. Headlamp washer switch*
E00507800289
The
headlamp washer can be operated with the ig-
nition switch or the operation mode in ON or ACC
and the lamp switch at the “ ” position.
Push
the button once and the washer fluid will be
sprayed on to the headlamps. NOTE
l If
the ignition switch or the operation mode
is in ON or ACC and the headlamps are on,
the headlamp washer operates together with
the windscreen washer the first time the wind-
screen washer lever is pulled. Precautions to observe when using wip-
ers and washers
E00510000070
l If
the moving wipers become blocked by ice
or other deposits on the glass, the motor may
burn out even if the wiper switch is turned to
OFF. If obstruction occurs, park your vehicle
in a safe place, turn off the engine, and clean
the deposits from the glass so that the wipers
operate smoothly.
l Do not use the wipers when the glass is dry.
They may scratch the glass surface and the
blades wear out prematurely.
l Before using the wipers in cold weather,
check that the wiper blades are not frozen on-
to the glass. The motor may burn out if the
wipers are used with the blades frozen onto
the glass.
l Avoid using the washer continuously for
more than 20 seconds. Do not operate the
washer when the fluid reservoir is empty.
Otherwise, the motor may burn out.
l Periodically check the level of washer fluid
in the reservoir and refill if required.
During cold weather, add a recommended
washer solution that will not freeze in the
washer reservoir. Failure to do so could re-
sult in loss of washer function and frost dam-
age to the system components. Instruments and controls
3-56
3