clock adjust MITSUBISHI ASX 2009 1.G Owners Manual
[x] Cancel search | Manufacturer: MITSUBISHI, Model Year: 2009, Model line: ASX, Model: MITSUBISHI ASX 2009 1.GPages: 368, PDF Size: 8.13 MB
Page 219 of 368

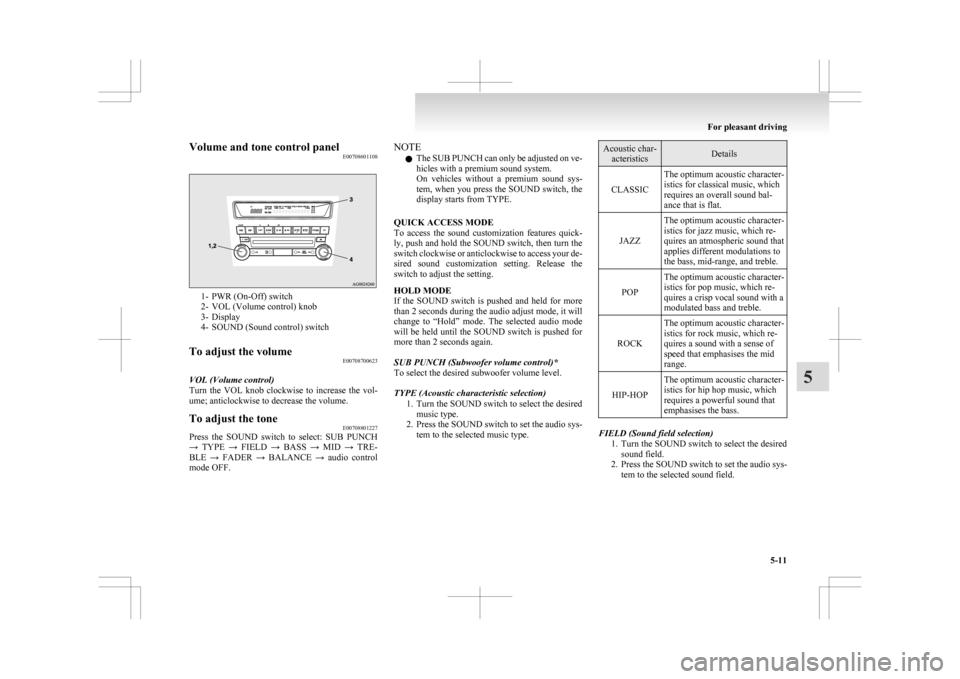
Volume and tone control panel
E007086011081- PWR (On-Off) switch
2-
VOL (Volume control) knob
3- Display
4- SOUND (Sound control) switch
To adjust the volume E00708700623
VOL (Volume control)
Turn
the VOL knob clockwise to increase the vol-
ume; anticlockwise to decrease the volume.
To adjust the tone E00708801227
Press the SOUND switch to select: SUB PUNCH
→
TYPE → FIELD → BASS → MID → TRE-
BLE → FADER → BALANCE → audio control
mode OFF. NOTE
l The
SUB PUNCH can only be adjusted on ve-
hicles with a premium sound system.
On vehicles without a premium sound sys-
tem, when you press the SOUND switch, the
display starts from TYPE.
QUICK ACCESS MODE
To access the sound customization features quick-
ly, push and hold the SOUND switch, then turn the
switch clockwise or anticlockwise to access your de-
sired sound customization setting. Release the
switch to adjust the setting.
HOLD MODE
If the SOUND switch is pushed and held for more
than 2 seconds during the audio adjust mode, it will
change to “Hold” mode. The selected audio mode
will be held until the SOUND switch is pushed for
more than 2 seconds again.
SUB PUNCH (Subwoofer volume control)*
To select the desired subwoofer volume level.
TYPE (Acoustic characteristic selection) 1. Turn the SOUND switch to select the desiredmusic type.
2. Press the SOUND switch to set the audio sys- tem to the selected music type. Acoustic char-
acteristics Details
CLASSIC The optimum acoustic character-
istics for classical music, which
requires an overall sound bal-
ance that is flat.
JAZZ The optimum acoustic character-
istics for jazz music, which re-
quires an atmospheric sound that
applies different modulations to
the bass, mid-range, and treble.
POP The optimum acoustic character-
istics for pop music, which re-
quires a crisp vocal sound with a
modulated bass and treble.
ROCK The optimum acoustic character-
istics for rock music, which re-
quires a sound with a sense of
speed that emphasises the mid
range.
HIP-HOP The optimum acoustic character-
istics for hip hop music, which
requires a powerful sound that
emphasises the bass. FIELD (Sound field selection)
1. Turn
the SOUND switch to select the desired
sound field.
2. Press the SOUND switch to set the audio sys- tem to the selected sound field. For pleasant driving
5-11 5
Page 247 of 368

Notes on CD-Rs/RWs
E00725100055
l You
may have trouble playing back some
CD-R/RW discs recorded on CD recorders
(CD-R/RW drives), either due to their record-
ing characteristics or dirt, fingerprints,
scratches, etc. on the disc surface.
l CD-R/RW discs are less resistant to high tem-
peratures and high humidity than ordinary mu-
sic CDs and can therefore be damaged and
rendered unplayable if left inside your vehi-
cle for a long time.
l Depending on the combination of the writing
software, the CD recorder (CD-R/RW drive),
and the disc used to create a CD-R/RW, the
disc might not play successfully.
l This player cannot play the CD-R/RW discs
if the session is not closed.
l This player cannot play CD-R/RW discs
which contain other than CD-DA or MP3 da-
ta (Video CD, etc.).
l Be sure to observe the handling instructions
for the CD-R/RW disc. WARNING
l Operating
the CD player in a manner oth-
er than specifically instructed herein may
result in hazardous radiation exposure.
Do not remove the cover and attempt to
repair the CD player by yourself. There
are no user serviceable parts inside. If the
CD player is not working correctly, it is
recommended that you have it inspected. Antenna
E00710500543
To remove
Turn the pole (A) anticlockwise. To install
Screw
the pole (A) clockwise into the base (B) un-
til it is securely retained.
NOTE
l Be sure to remove the roof antenna in the fol-
lowing cases:
• When using an automatic car wash.
• When placing a car cover over the vehicle.
• When driving into a structure that has alow ceiling. Digital clock*
E00711800455
Automatic
mode and manual mode is available for
digital clock adjustment.
Select the automatic mode or the manual mode by
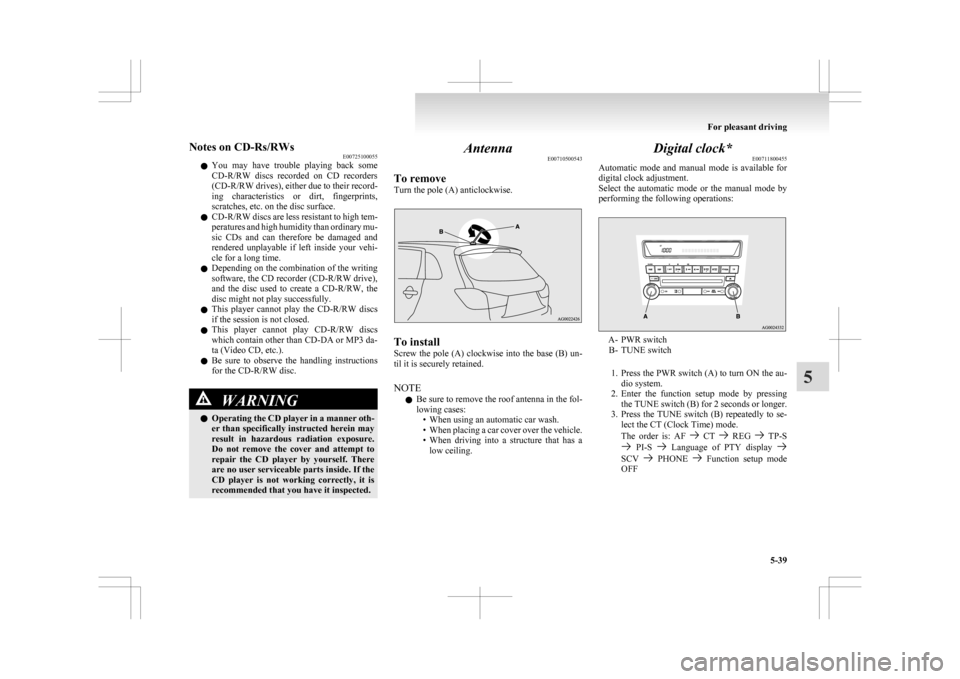
performing the following operations: A- PWR switch
B-
TUNE switch
1. Press the PWR switch (A) to turn ON the au- dio system.
2. Enter the function setup mode by pressing the TUNE switch (B) for 2 seconds or longer.
3. Press the TUNE switch (B) repeatedly to se- lect the CT (Clock Time) mode.
The order is: AF CT REG TP-S
PI-S Language of PTY display
SCV PHONE Function setup mode
OFF For pleasant driving
5-39 5
Page 248 of 368

(Refer to “Function setup mode” on page
5-16.) NOTE
l Although
“PHONE” appears on the display,
the PHONE function is inoperative.
4. Turn the TUNE switch (B) left and right and select either ON or OFF. CT ON- Automatic mode
CT OFF- Manual mode NOTE
l After
selecting a mode, you can leave the func-
tion setup mode by taking either of the fol-
lowing steps: • Press the TUNE switch (B) for at least 2seconds.
• Make no entry for 10 seconds.
Automatic mode
The automatic adjustment mode can set the local
time automatically by using the signal from local
RDS stations. Refer to “Radio data system (RDS)”
on page 5-13. Manual mode
The
manual mode is also available in case the auto-
matic mode shows the incorrect time when the ad-
jacent local RDS stations are located in a different
time zone. Refer to “Radio data system (RDS)” on
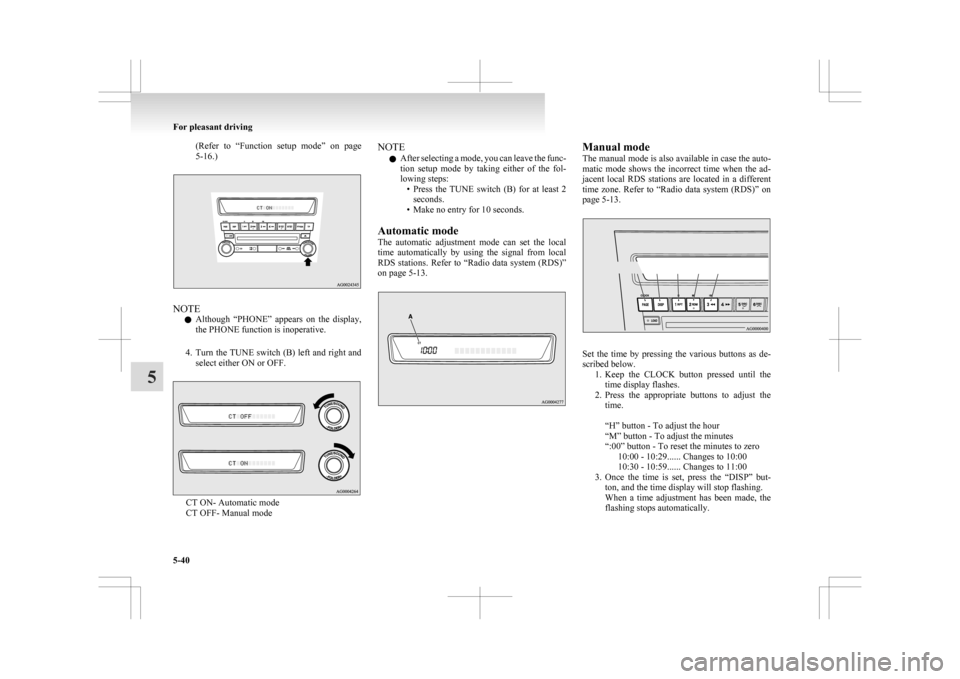
page 5-13. Set the time by pressing the various buttons as de-
scribed below.
1. Keep
the CLOCK button pressed until the
time display flashes.
2. Press the appropriate buttons to adjust the time.
“H” button - To adjust the hour
“M” button - To adjust the minutes
“:00” button - To reset the minutes to zero 10:00 - 10:29...... Changes to 10:00
10:30 - 10:59...... Changes to 11:00
3. Once the time is set, press the “DISP” but- ton, and the time display will stop flashing.
When a time adjustment has been made, the
flashing stops automatically. For pleasant driving
5-40
5
Page 249 of 368

NOTE
l If
the battery cables are disconnected during
repairs or for any other reason, reset the
clock to the correct time after they are recon-
nected.
l The digital clock does not have a second dis-
play. When the “minute” display is adjusted
and reset to zero, the clock begins at zero sec-
onds for the selected minute. Link System*
E00764500012
The
Link System takes overall control of the devi-
ces connected via the USB input terminal or the
Bluetooth ®
2.0 interface allowing the connected de-
vices to be operated by using the switches in the ve-
hicle or voice commands.
See the following section for details on how to op-
erate.
Refer to “Bluetooth ®
2.0 interface” on page 5-41.
Refer to “USB input terminal” on page 5-57.
Refer to “To play tracks from USB device” on
page 5-22.
Refer to “To play tracks from a Bluetooth ®
device”
on page 5-30.
Refer to “To use the external audio input function”
on page .
Bluetooth ®
is a registered trademark of BLUE-
TOOTH SIG, INC.
Link System End User Licence Agree-
ment E00764600013
You have acquired a device that includes software
licensed
by MITSUBISHI MOTORS CORPORA-
TION from JOHNSON CONTROLS Inc (the auto-
motive experience business unit), and their subse-
quent 3 rd
party suppliers. For a complete list of
these 3 rd
party products and their end user licence
agreements, please go to the following website.
http://www.jciblueconnect.com/faq.taf Bluetooth
®
2.0 interface*
E00726000370
The Bluetooth ®
2.0 interface allows for making/re-
ceiving hands-free calls in the vehicle using a Blue-
tooth ®
compatible cellular phone based on the wire-
less communication technology commonly known
as Bluetooth ®
. It also allows the user to play mu-
sic, saved in a Bluetooth ®
music player, from the
vehicle’s speakers.
The system is equipped with a voice recognition
function, which allows you to make hands-free
calls by simple switch operations and voice com-
mand operations using a defined voice tree.
The Bluetooth ®
2.0 interface can be used when the
ignition switch or the operation mode is in ON or
ACC.
Before you can use the Bluetooth ®
2.0 interface,
you must pair the Bluetooth ®
device and Blue-
tooth ®
2.0 interface. Refer to “Connecting the Blue-
tooth® 2.0 interface and Bluetooth® device” on
page 5-46.
Bluetooth ®
is a registered trademark of BLUE-
TOOTH SIG, INC. For pleasant driving
5-41 5