Drive mode MITSUBISHI ASX 2012 (in English) Workshop Manual
[x] Cancel search | Manufacturer: MITSUBISHI, Model Year: 2012, Model line: ASX, Model: MITSUBISHI ASX 2012Pages: 378, PDF Size: 18.2 MB
Page 155 of 378
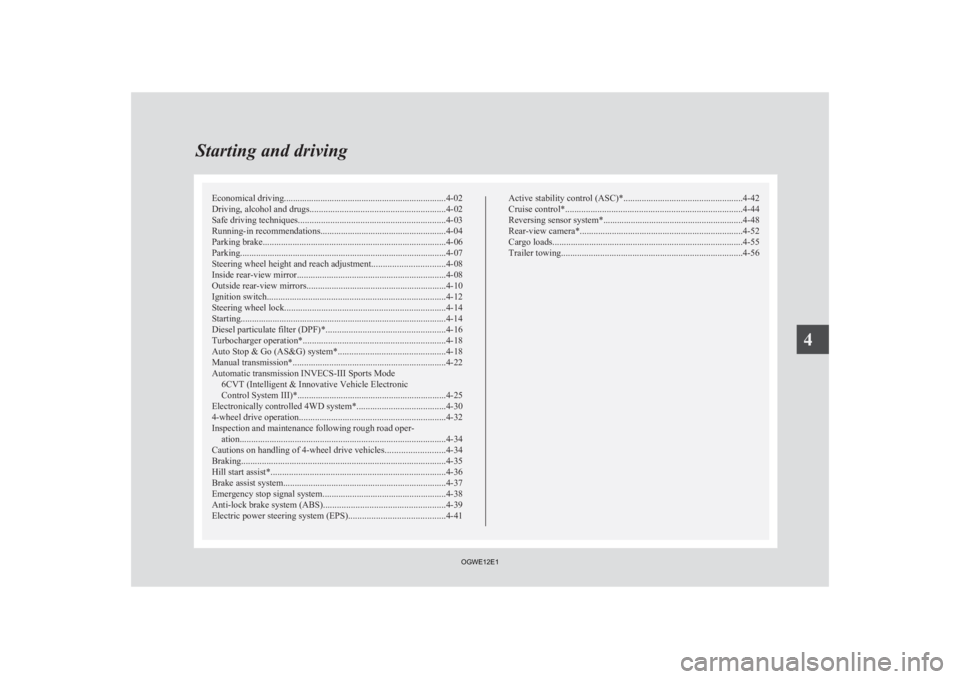
Economical driving.......................................................................4-02
Driving, alcohol and drugs
........................................................... 4-02
Safe driving techniques ................................................................ 4-03
Running-in recommendations
.......................................................4-04
Parking brake................................................................................ 4-06
Parking.......................................................................................... 4-07
Steering wheel height and reach adjustment ................................4-08
Inside rear-view mirror ................................................................. 4-08
Outside rear-view mirrors ............................................................. 4-10
Ignition switch .............................................................................. 4-12
Steering wheel lock ...................................................................... 4-14
Starting..........................................................................................4-14
Diesel particulate filter (DPF)* .................................................... 4-16
Turbocharger operation* .............................................................. 4-18
Auto Stop & Go (AS&G) system*............................................... 4-18
Manual transmission* ................................................................... 4-22
Automatic transmission INVECS-III Sports Mode 6CVT (Intelligent & Innovative Vehicle Electronic
Control System III)*................................................................. 4-25
Electronically controlled 4WD system* .......................................4-30
4-wheel drive operation ................................................................ 4-32
Inspection and maintenance following rough road oper- ation.......................................................................................... 4-34
Cautions on handling of 4-wheel drive vehicles ..........................4-34
Braking......................................................................................... 4-35
Hill start assist* ............................................................................ 4-36
Brake assist system....................................................................... 4-37
Emergency stop signal system ...................................................... 4-38
Anti-lock brake system (ABS) ..................................................... 4-39
Electric power steering system (EPS) ..........................................4-41 Active stability control (ASC)*
.................................................... 4-42
Cruise control* ............................................................................. 4-44
Reversing sensor system*............................................................. 4-48
Rear-view camera* ....................................................................... 4-52
Cargo loads................................................................................... 4-55
Trailer towing ............................................................................... 4-56Starting and driving
4
OGWE12E1
Page 156 of 378
Economical driving
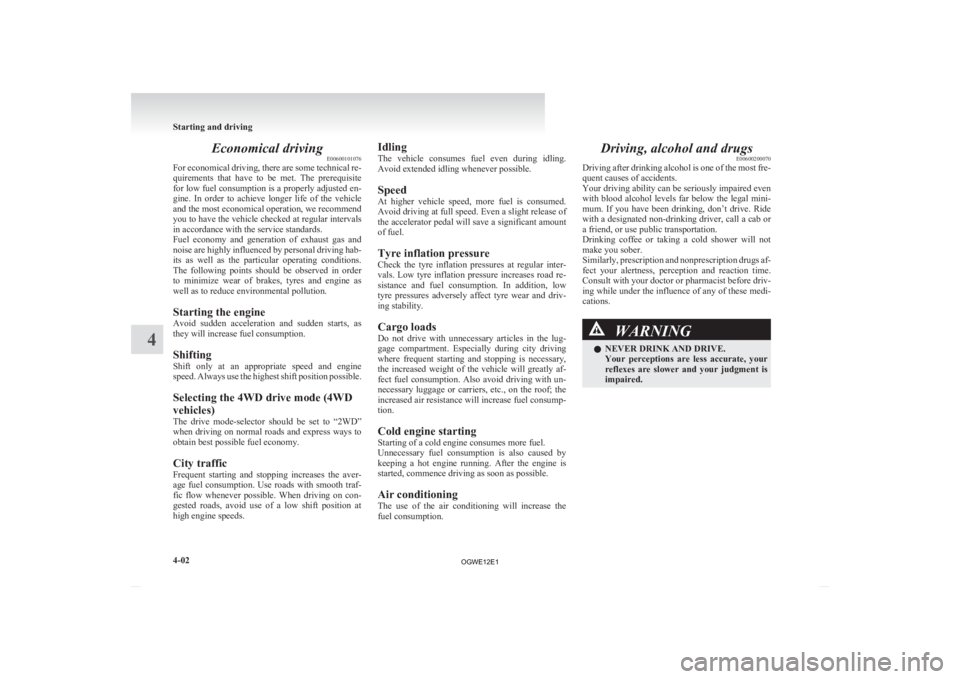
E00600101076
For
economical driving, there are some technical re-
quirements that have to be met. The prerequisite
for low fuel consumption is a properly adjusted en-
gine. In order to achieve longer life of the vehicle
and the most economical operation, we recommend
you to have the vehicle checked at regular intervals
in accordance with the service standards.
Fuel economy and generation of exhaust gas and
noise are highly influenced by personal driving hab-
its as well as the particular operating conditions.
The following points should be observed in order
to minimize wear of brakes, tyres and engine as
well as to reduce environmental pollution.
Starting the engine
Avoid sudden acceleration and sudden starts, as
they will increase fuel consumption.
Shifting
Shift only at an appropriate speed and engine
speed. Always use the highest shift position possible.
Selecting the 4WD drive mode (4WD
vehicles)
The drive mode-selector should be set to “2WD”
when driving on normal roads and express ways to
obtain best possible fuel economy.
City traffic
Frequent starting and stopping increases the aver-
age fuel consumption. Use roads with smooth traf-
fic flow whenever possible. When driving on con-
gested roads, avoid use of a low shift position at
high engine speeds. Idling
The
vehicle consumes fuel even during idling.
Avoid extended idling whenever possible.
Speed
At higher vehicle speed, more fuel is consumed.
Avoid driving at full speed. Even a slight release of
the accelerator pedal will save a significant amount
of fuel.
Tyre inflation pressure
Check the tyre inflation pressures at regular inter-
vals. Low tyre inflation pressure increases road re-
sistance and fuel consumption. In addition, low
tyre pressures adversely affect tyre wear and driv-
ing stability.
Cargo loads
Do not drive with unnecessary articles in the lug-
gage compartment. Especially during city driving
where frequent starting and stopping is necessary,
the increased weight of the vehicle will greatly af-
fect fuel consumption. Also avoid driving with un-
necessary luggage or carriers, etc., on the roof; the
increased air resistance will increase fuel consump-
tion.
Cold engine starting
Starting of a cold engine consumes more fuel.
Unnecessary fuel consumption is also caused by
keeping a hot engine running. After the engine is
started, commence driving as soon as possible.
Air conditioning
The use of the air conditioning will increase the
fuel consumption. Driving, alcohol and drugs
E00600200070
Driving
after drinking alcohol is one of the most fre-
quent causes of accidents.
Your driving ability can be seriously impaired even
with blood alcohol levels far below the legal mini-
mum. If you have been drinking, don’t drive. Ride
with a designated non-drinking driver, call a cab or
a friend, or use public transportation.
Drinking coffee or taking a cold shower will not
make you sober.
Similarly, prescription and nonprescription drugs af-
fect your alertness, perception and reaction time.
Consult with your doctor or pharmacist before driv-
ing while under the influence of any of these medi-
cations. WARNING
l NEVER DRINK AND DRIVE.
Your
perceptions are less accurate, your
reflexes are slower and your judgment is
impaired. Starting and driving
4-02
4
OGWE12E1
Page 158 of 378
Running-in recommendations
E00600402379
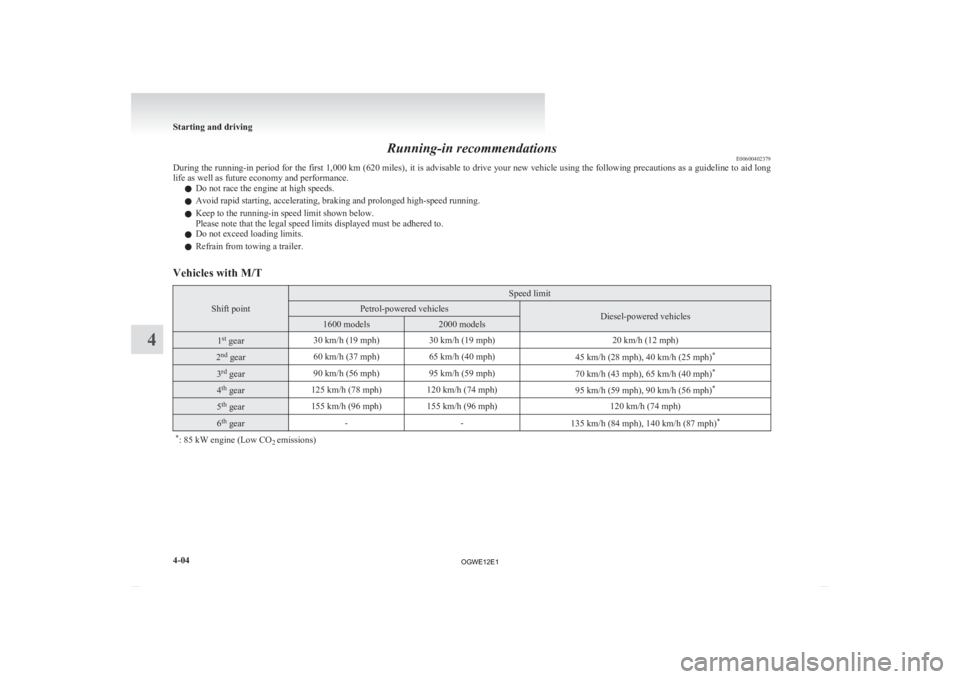
During
the running-in period for the first 1,000 km (620 miles), it is advisable to drive your new vehicle using the following precautions as a guideline to aid long
life as well as future economy and performance.
l Do not race the engine at high speeds.
l Avoid rapid starting, accelerating, braking and prolonged high-speed running.
l Keep to the running-in speed limit shown below.
Please note that the legal speed limits displayed must be adhered to.
l Do not exceed loading limits.
l Refrain from towing a trailer.
Vehicles with M/T Shift point Speed limit
Petrol-powered vehicles
Diesel-powered vehicles
1600 models 2000 models
1
st
gear 30 km/h (19 mph)
30 km/h (19 mph) 20 km/h (12 mph)2
nd
gear 60 km/h (37 mph)
65 km/h (40 mph)
45 km/h (28 mph), 40 km/h (25 mph)*3
rd
gear 90 km/h (56 mph)
95 km/h (59 mph)
70 km/h (43 mph), 65 km/h (40 mph)*4
th
gear 125 km/h (78 mph) 120 km/h (74 mph)
95 km/h (59 mph), 90 km/h (56 mph)*5
th
gear 155 km/h (96 mph) 155 km/h (96 mph)
120 km/h (74 mph)6
th
gear -
-
135 km/h (84 mph), 140 km/h (87 mph) *
* : 85 kW engine (Low CO 2 emissions) Starting and driving
4-04
4
OGWE12E1
Page 159 of 378

Vehicles with CVT
Shift point Speed limit
“D” (DRIVE)
130 km/h (81 mph)In sports mode 1
st
position 50 km/h (30 mph)2
nd
position 60 km/h (37 mph)3
rd
position 70 km/h (43 mph)4
th
position 90 km/h (56 mph)5
th
position 120 km/h (74 mph)6
th
position 130 km/h (81 mph) Starting and driving
4-05 4
OGWE12E1
Page 165 of 378
CAUTION
l
Do not drive the vehicle with the mirror
folded in.
The lack of rearward visibility normally
provided by the mirror could lead to an
accident.
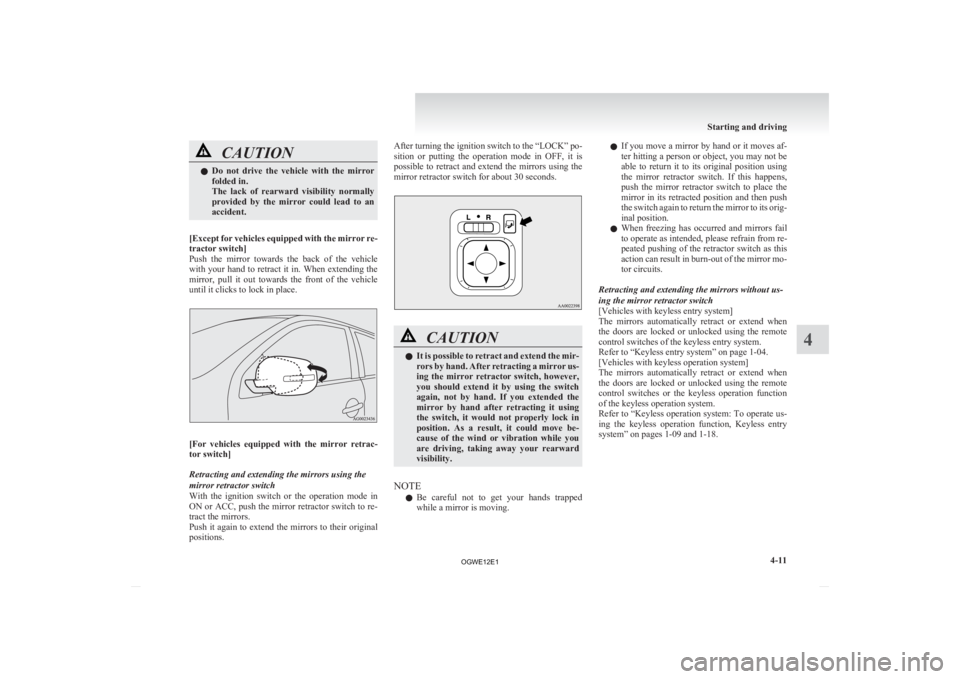
[Except
for vehicles equipped with the mirror re-
tractor switch]
Push the mirror towards the back of the vehicle
with your hand to retract it in. When extending the
mirror, pull it out towards the front of the vehicle
until it clicks to lock in place. [For
vehicles equipped with the mirror retrac-
tor switch]
Retracting and extending the mirrors using the
mirror retractor switch
With the ignition switch or the operation mode in
ON or ACC, push the mirror retractor switch to re-
tract the mirrors.
Push it again to extend the mirrors to their original
positions. After turning the ignition switch to the “LOCK” po-
sition
or putting the operation mode in OFF, it is
possible to retract and extend the mirrors using the
mirror retractor switch for about 30 seconds. CAUTION
l
It
is possible to retract and extend the mir-
rors by hand. After retracting a mirror us-
ing the mirror retractor switch, however,
you should extend it by using the switch
again, not by hand. If you extended the
mirror by hand after retracting it using
the switch, it would not properly lock in
position. As a result, it could move be-
cause of the wind or vibration while you
are driving, taking away your rearward
visibility.
NOTE l Be
careful not to get your hands trapped
while a mirror is moving. l
If
you move a mirror by hand or it moves af-
ter hitting a person or object, you may not be
able to return it to its original position using
the mirror retractor switch. If this happens,
push the mirror retractor switch to place the
mirror in its retracted position and then push
the switch again to return the mirror to its orig-
inal position.
l When freezing has occurred and mirrors fail
to operate as intended, please refrain from re-
peated pushing of the retractor switch as this
action can result in burn-out of the mirror mo-
tor circuits.
Retracting and extending the mirrors without us-
ing the mirror retractor switch
[Vehicles with keyless entry system]
The mirrors automatically retract or extend when
the doors are locked or unlocked using the remote
control switches of the keyless entry system.
Refer to “Keyless entry system” on page 1-04.
[Vehicles with keyless operation system]
The mirrors automatically retract or extend when
the doors are locked or unlocked using the remote
control switches or the keyless operation function
of the keyless operation system.
Refer to “Keyless operation system: To operate us-
ing the keyless operation function, Keyless entry
system” on pages 1-09 and 1-18. Starting and driving
4-11 4
OGWE12E1
Page 166 of 378
NOTE
l Functions
can be modified as stated below.
Consult a MITSUBISHI MOTORS Author-
ized Service Point.
On vehicles equipped with MITSUBISHI
Multi-Communication System (MMCS),
screen operations can be used to make the ad-
justment. Refer to the separate owner’s man-
ual for details. • Automatically extend when the followingoperation is performed.
[Except for vehicles equipped with key-
less operation system]
Turn the ignition switch to the “ON” or
“ACC” position.
[Vehicles equipped with keyless opera-
tion system]
Put the operation mode in ON or ACC.
• Automatically retract when the driver’s door is opened after turning the ignition
switch to the “LOCK” position or putting
the operation mode in OFF.
• Automatically extend when the vehicle speed reaches 30 km/h (19 mph).
• Deactivate the automatic extension func- tion.
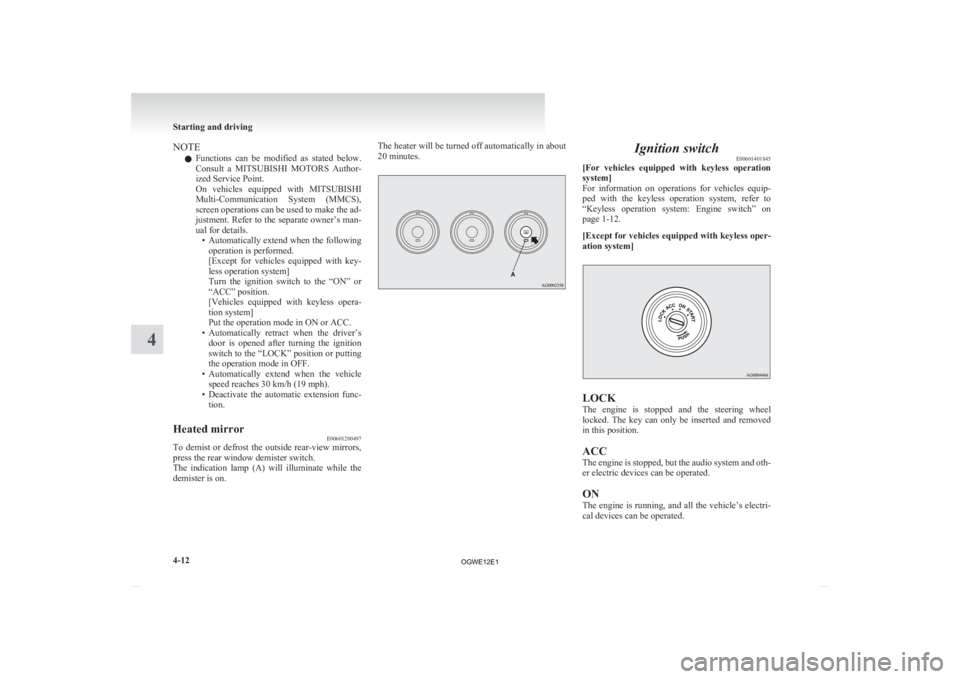
Heated mirror E00601200497
To demist or defrost the outside rear-view mirrors,
press the rear window demister switch.
The
indication lamp (A) will illuminate while the
demister is on. The heater will be turned off automatically in about
20 minutes. Ignition switch
E00601401845
[For
vehicles equipped with keyless operation
system]
For information on operations for vehicles equip-
ped with the keyless operation system, refer to
“Keyless operation system: Engine switch” on
page 1-12.
[Except for vehicles equipped with keyless oper-
ation system] LOCK
The
engine is stopped and the steering wheel
locked. The key can only be inserted and removed
in this position.
ACC
The engine is stopped, but the audio system and oth-
er electric devices can be operated.
ON
The engine is running, and all the vehicle’s electri-
cal devices can be operated. Starting and driving
4-12
4
OGWE12E1
Page 174 of 378
gine will not stop automatically even if the ve-
hicle is stopped.
•
Driver’s seat belt is not fastened
• Bonnet is open
• After the engine restarts automatically, the vehicle speed has not exceeded ap-
proximately 5 km/h (3 mph)
• Brake booster vacuum pressure is low be- cause the brake pedal is depressed repeat-
edly or depressed harder than usual
• After the ignition switch is turned from the “ON” position to the “START” posi-
tion, approximately 30 seconds or more
have not elapsed.
• After the engine restarts automatically and the vehicle stops again within 10 sec-
onds.
• After presing the engine switch to start the engine from the operation mode is in
ON, approximately 30 seconds or more
have not elapsed
• Engine coolant temperature is low
• Ambient temperature is lower than ap- proximately 3 °C
• Air conditioning is operating and passen- ger compartment has not sufficiently
cooled
• Mode selection dial is set to the demister position.
Refer to “Demisting of the windscreen
and door windows: For quick demisting”
on page 5-08.
• When the air conditioning is operated in AUTO mode where the temperature con-
trol dial is set to the max. hot or the max.
cool position (for vehicles with automatic
air conditioning). • Electric power consumption is high, such
as when the rear window demister or oth-
er electrical components are operating or
the blower speed is set to a high setting.
• Battery voltage or battery performance is low
• Check engine warning lamp is illumina-
ted or the “ ”
display/indicator is blinking
l If the Auto Stop & Go (AS&G) system oper-
ates while the air conditioning is operating,
both the engine and the air conditioning com-
pressor will stop. Therefore, only the blower
will operate.
l If the demisting function and the Auto Stop
& Go (AS&G) system are needed at the
same time, it is recommended to set the
mode selection dial to the Foot/demister posi-
tion.
Refer to “Mode selection dial” on page
5-02.
l If the air conditioning is operating, set the
temperature control dial higher to lengthen
the time that the engine is stopped automati-
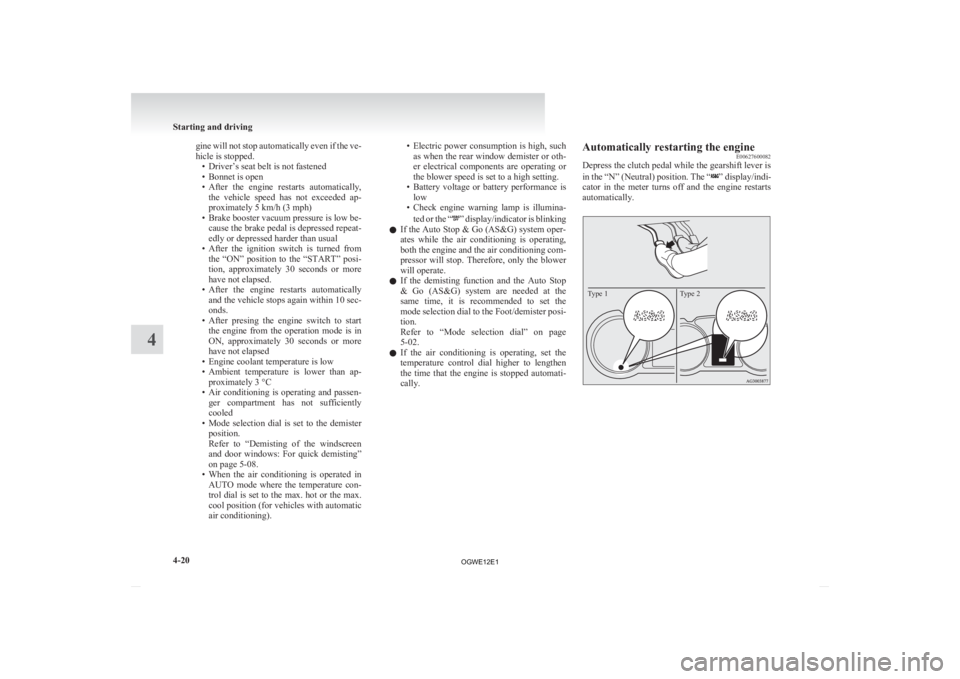
cally. Automatically restarting the engine
E00627600082
Depress the clutch pedal while the gearshift lever is
in
the “N” (Neutral) position. The “ ” display/indi-
cator
in the meter turns off and the engine restarts
automatically.
Type 2
Type 1 Starting and driving
4-20
4
OGWE12E1
Page 179 of 378
Automatic transmission
INVECS-III Sports Mode 6CVT
(Intelligent & Innovative Vehicle Electronic Control System III)* E00602100031
The
INVECS-III uses optimization and adaptation
functions to optimally match the gear ratio to driv-
ing and road conditions.
The CVT is capable of changing the gear ratio auto-
matically and steplessly to suit driving conditions
in all phases of vehicle operation. It therefore real-
izes smooth, shock-free operation and excellent
fuel efficiency. CAUTION
l
Automatic
downshifts may not take place
while the CVT fluid is still cool immedi-
ately after you start driving. To cause a
downshift, depress the brake pedal, man-
ually shift down when necessary.
Always strive to drive safely in accord-
ance with road conditions.
Selector lever operation E00602200221
The CVT selects an optimum gear ratio automati-
cally,
depending on the speed of the vehicle and
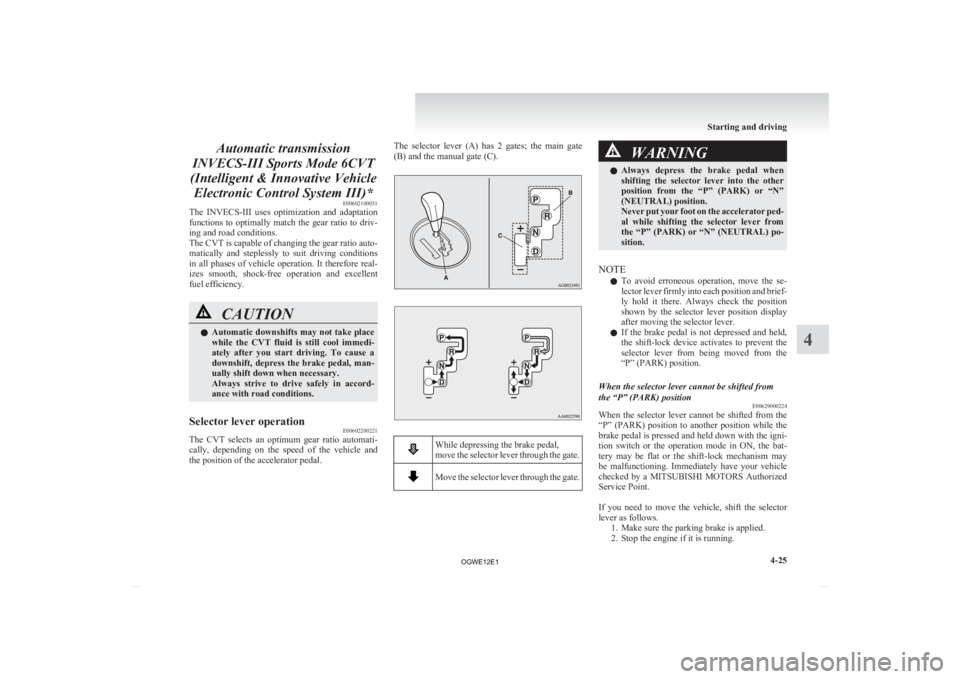
the position of the accelerator pedal. The selector lever (A) has 2 gates; the main gate
(B) and the manual gate (C).
While depressing the brake pedal,
move
the selector lever through the gate. Move the selector lever through the gate. WARNING
l Always
depress the brake pedal when
shifting the selector lever into the other
position from the “P” (PARK) or “N”
(NEUTRAL) position.
Never put your foot on the accelerator ped-
al while shifting the selector lever from
the “P” (PARK) or “N” (NEUTRAL) po-
sition.
NOTE l To
avoid erroneous operation, move the se-
lector lever firmly into each position and brief-
ly hold it there. Always check the position
shown by the selector lever position display
after moving the selector lever.
l If the brake pedal is not depressed and held,
the shift-lock device activates to prevent the
selector lever from being moved from the
“P” (PARK) position.
When the selector lever cannot be shifted from
the “P” (PARK) position E00629000224
When the selector lever cannot be shifted from the
“P”
(PARK) position to another position while the
brake pedal is pressed and held down with the igni-
tion switch or the operation mode in ON, the bat-
tery may be flat or the shift-lock mechanism may
be malfunctioning. Immediately have your vehicle
checked by a MITSUBISHI MOTORS Authorized
Service Point.
If you need to move the vehicle, shift the selector
lever as follows. 1. Make sure the parking brake is applied.
2. Stop the engine if it is running. Starting and driving
4-25 4
OGWE12E1
Page 180 of 378

3. Insert a straight blade (or minus) screwdriver
with a cloth over its tip into notch (A) of the
cover. Pry gently as shown to remove the cov-
er. 4. Depress the brake pedal with the right foot.
5. Turn
the ignition switch to the “ACC” posi-
tion or put the operation mode in ACC.
6. Insert a straight blade (or minus) screwdriver in the shiftlock release hole (B). Shift the se-
lector lever to the “N” (NEUTRAL) position
while pressing the straight blade (or minus)
screwdriver down. Selector lever position display
E00602300394
When
the ignition switch is turned to the “ON” po-
sition or the operation mode is put in ON, the posi-
tion of the selector lever is indicated in the multi-
information display.
Type 1 Type 2 Selector lever positions (Main gate)
E00602400180
“P” PARK
This
position locks the transmission to prevent the
vehicle from moving. The engine can be started in
this position.
“R” REVERSE
This position is to back up. CAUTION
l
Never
shift into the “P” (PARK) or “R”
(REVERSE) position while the vehicle is
in motion to avoid a transmission damage. “N” NEUTRAL
At this position the transmission is disengaged. It is
the
same as the neutral position on a manual trans-
mission, and should only be used when the vehicle
is stationary for an extended length of time during
driving, such as in a traffic jam. WARNING
l Never
move the selector lever to the “N”
(NEUTRAL) position while driving. A se-
rious accident could occur since you
could accidentally move the lever into the
“P” (PARK) or “R” (REVERSE) position
or you will lose engine braking.
l On a gradient the engine should be star-
ted in the “P” (PARK) position, not in the
“N” (NEUTRAL) position.
l Always keep your right foot on the brake
pedal when shifting into or out of “N”
(NEUTRAL), to minimize the risk of loss
of control.
“D” DRIVE
This
position is for normal driving. The transmis-
sion automatically selects a suitable gear ratio for
your speed and acceleration.
Engine braking is automatically applied when nec-
essary, depending on road conditions. CAUTION
l
Never
shift into the “D” (DRIVE) posi-
tion from the “R” (REVERSE) position
while the vehicle is in motion to avoid
transmission damage. Starting and driving
4-26
4
OGWE12E1
Page 181 of 378
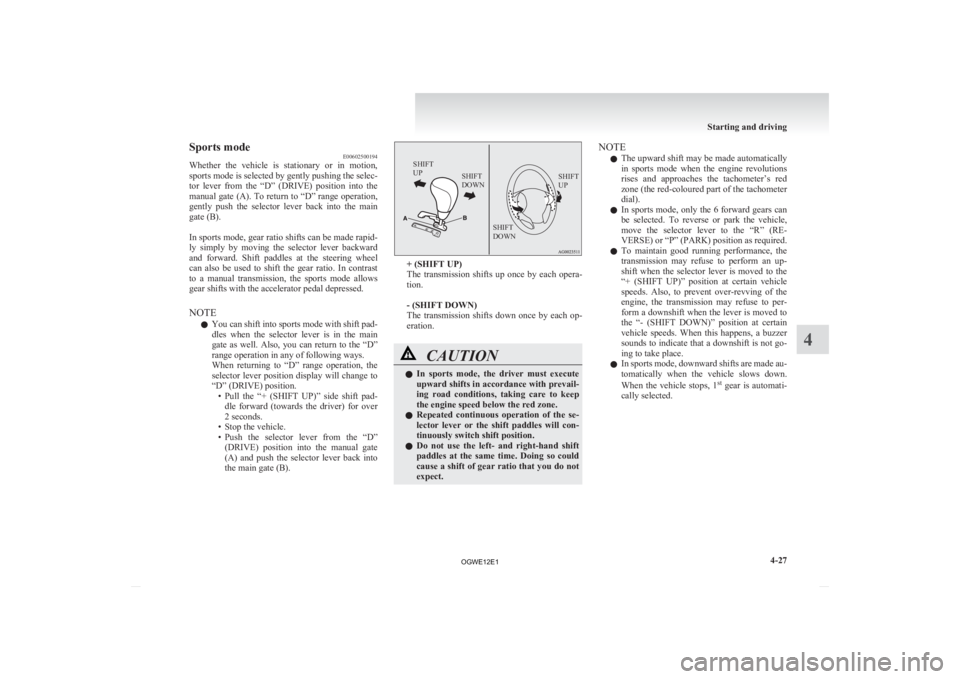
Sports mode
E00602500194
Whether
the vehicle is stationary or in motion,
sports mode is selected by gently pushing the selec-
tor lever from the “D” (DRIVE) position into the
manual gate (A). To return to “D” range operation,
gently push the selector lever back into the main
gate (B).
In sports mode, gear ratio shifts can be made rapid-
ly simply by moving the selector lever backward
and forward. Shift paddles at the steering wheel
can also be used to shift the gear ratio. In contrast
to a manual transmission, the sports mode allows
gear shifts with the accelerator pedal depressed.
NOTE
l You can shift into sports mode with shift pad-
dles when the selector lever is in the main
gate as well. Also, you can return to the “D”
range operation in any of following ways.
When returning to “D” range operation, the
selector lever position display will change to
“D” (DRIVE) position.
• Pull the “+ (SHIFT UP)” side shift pad-dle forward (towards the driver) for over
2 seconds.
• Stop the vehicle.
• Push the selector lever from the “D” (DRIVE) position into the manual gate
(A) and push the selector lever back into
the main gate (B).
SHIFT
UP SHIFT
DOWN SHIFT
UP
SHIFT
DOWN + (SHIFT UP)
The
transmission shifts up once by each opera-
tion.
- (SHIFT DOWN)
The transmission shifts down once by each op-
eration. CAUTION
l
In
sports mode, the driver must execute
upward shifts in accordance with prevail-
ing road conditions, taking care to keep
the engine speed below the red zone.
l Repeated continuous operation of the se-
lector lever or the shift paddles will con-
tinuously switch shift position.
l Do not use the left- and right-hand shift
paddles at the same time. Doing so could
cause a shift of gear ratio that you do not
expect. NOTE
l The
upward shift may be made automatically
in sports mode when the engine revolutions
rises and approaches the tachometer’s red
zone (the red-coloured part of the tachometer
dial).
l In sports mode, only the 6 forward gears can
be selected. To reverse or park the vehicle,
move the selector lever to the “R” (RE-
VERSE) or “P” (PARK) position as required.
l To maintain good running performance, the
transmission may refuse to perform an up-
shift when the selector lever is moved to the
“+ (SHIFT UP)” position at certain vehicle
speeds. Also, to prevent over-revving of the
engine, the transmission may refuse to per-
form a downshift when the lever is moved to
the “- (SHIFT DOWN)” position at certain
vehicle speeds. When this happens, a buzzer
sounds to indicate that a downshift is not go-
ing to take place.
l In sports mode, downward shifts are made au-
tomatically when the vehicle slows down.
When the vehicle stops, 1 st
gear is automati-
cally selected. Starting and driving
4-27 4
OGWE12E1