headlamp MITSUBISHI ASX 2014 (in English) User Guide
[x] Cancel search | Manufacturer: MITSUBISHI, Model Year: 2014, Model line: ASX, Model: MITSUBISHI ASX 2014Pages: 418, PDF Size: 14.02 MB
Page 154 of 418
![MITSUBISHI ASX 2014 (in English) User Guide When you want to keep thelamps on:
1. In the following cases, turn the lamp
switch to the “OFF” position.
[Except for vehicles equipped with key-
less operation system]
The ignition swi MITSUBISHI ASX 2014 (in English) User Guide When you want to keep thelamps on:
1. In the following cases, turn the lamp
switch to the “OFF” position.
[Except for vehicles equipped with key-
less operation system]
The ignition swi](/img/19/34863/w960_34863-153.png)
When you want to keep thelamps on:
1. In the following cases, turn the lamp
switch to the “OFF” position.
[Except for vehicles equipped with key-
less operation system]
The ignition switch is in the “LOCK” or
“ACC” position.
[For vehicles equipped with keyless op- eration system]
The operation mode is in OFF or ACC.
2. Turn on the lamps with the switch in the
“
” or “” position again, then the
lamps will remain on.
NOTEl When the engine was started using the key,
if the driver’s door is opened and the key is
removed, the lamp monitor buzzer sounds at a high pitch intermittently.
The buzzer stops when the driver’s door is closed. (The warning is also displayed on the
multi-information display.)
The buzzer stops in the following manner.
• Turn the lamp switch to the “OFF” posi-
tion.
• Close the driver’s door.
l When the engine was started using the key-
less operation function, if the driver’s door is
opened and the operation mode is put inNOTEOFF, the lamp monitor buzzer sounds at a high pitch intermittently.
The buzzer stops when the driver’s door is closed. (The warning is also displayed on the
multi-information display.)
The buzzer stops in the following manner.
• Turn the lamp switch to the “OFF” posi-
tion.
• Close the driver’s door.Lamp monitor buzzer
E00506100559
[When the engine was started using the key]
If the driver’s door is opened when the key is
in the “LOCK” or “ACC” position or re-
moved from the ignition switch while the
lamps are on, a buzzer will sound to remind the driver to turn off the lamps.
[When the engine was started using the key-
less operation function]
If the driver’s door is opened when the opera- tion mode is in ACC or OFF with the lamps
illuminated, a buzzer will sound to remind the driver to turn off the lamps.
In both cases, the buzzer will automatically
stop if the auto-cutoff function is activated, the lamp switch is turned off, or the door is
closed.
Dipper (High/Low beam
change)
E00506200329
When the lamp switch is in the “” posi-
tion, the beam changes from high to low (or
low to high) each time the lever is pulled fully (1). While the high-beam is on, the
high-beam indication lamp in the instrument
cluster will also illuminate.
Headlamp flasher
E00506300199
The high-beams flash when the lever is pulled slightly (2), and will go off when it is
released.
When the high-beam is on, the high-beam in- dication lamp in the instrument cluster will il-
luminate.
Combination headlamps and dipper switch
5-50 OGAE14E1Instruments and controls5
Page 155 of 418
NOTElThe high-beams can also flash when the
lamp switch is OFF.
l If you turn the lamps off with the headlamps
set to high-beam, the headlamps are auto- matically returned to their low-beam setting
when the lamp switch is next turned to the
“
” position.
Welcome light*
E00528901642
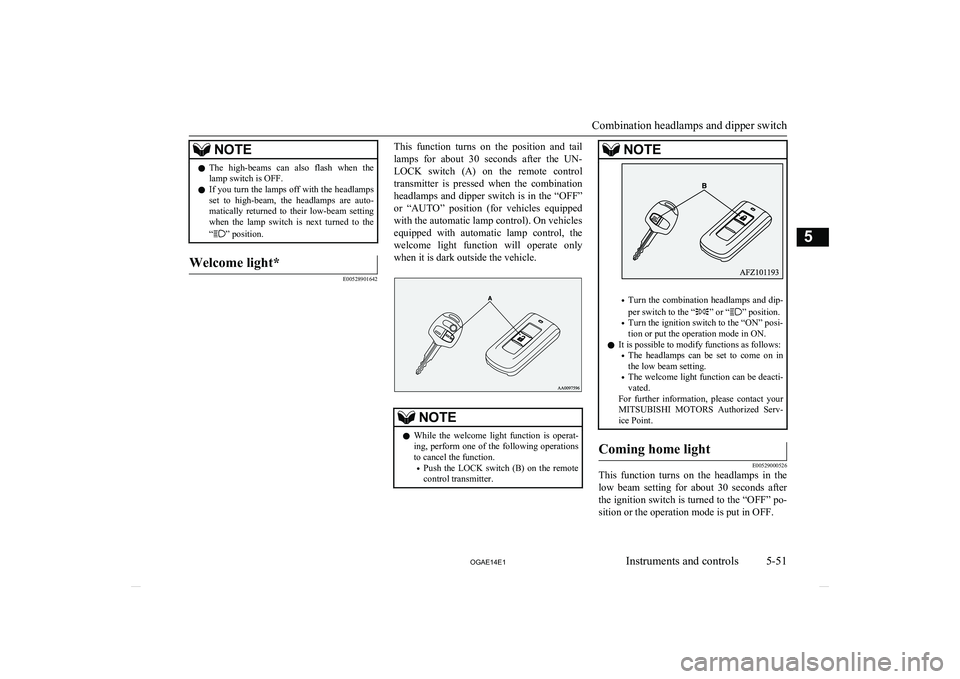
This function turns on the position and tail
lamps for about 30 seconds after the UN- LOCK switch (A) on the remote control
transmitter is pressed when the combination
headlamps and dipper switch is in the “OFF”
or “AUTO” position (for vehicles equipped with the automatic lamp control). On vehicles
equipped with automatic lamp control, the welcome light function will operate only
when it is dark outside the vehicle.NOTEl While the welcome light function is operat-
ing, perform one of the following operations to cancel the function.
• Push the LOCK switch (B) on the remote
control transmitter.NOTE
• Turn the combination headlamps and dip-
per switch to the “” or “” position.
• Turn the ignition switch to the “ON” posi-
tion or put the operation mode in ON.
l It is possible to modify functions as follows:
• The headlamps can be set to come on in
the low beam setting.
• The welcome light function can be deacti-
vated.
For further information, please contact your MITSUBISHI MOTORS Authorized Serv-
ice Point.
Coming home light
E00529000526
This function turns on the headlamps in the
low beam setting for about 30 seconds after the ignition switch is turned to the “OFF” po- sition or the operation mode is put in OFF.
Combination headlamps and dipper switch
5-51
OGAE14E1Instruments and controls5
Page 156 of 418
1.Turn the combination headlamps and
dipper switch to the “OFF” or “AUTO”
position (for vehicles equipped with the
automatic lamp control).
2. Turn the ignition switch to the “LOCK”
position or put the operation mode in
OFF. Also, if a key was used to start the engine, remove the key from the ignition
switch.
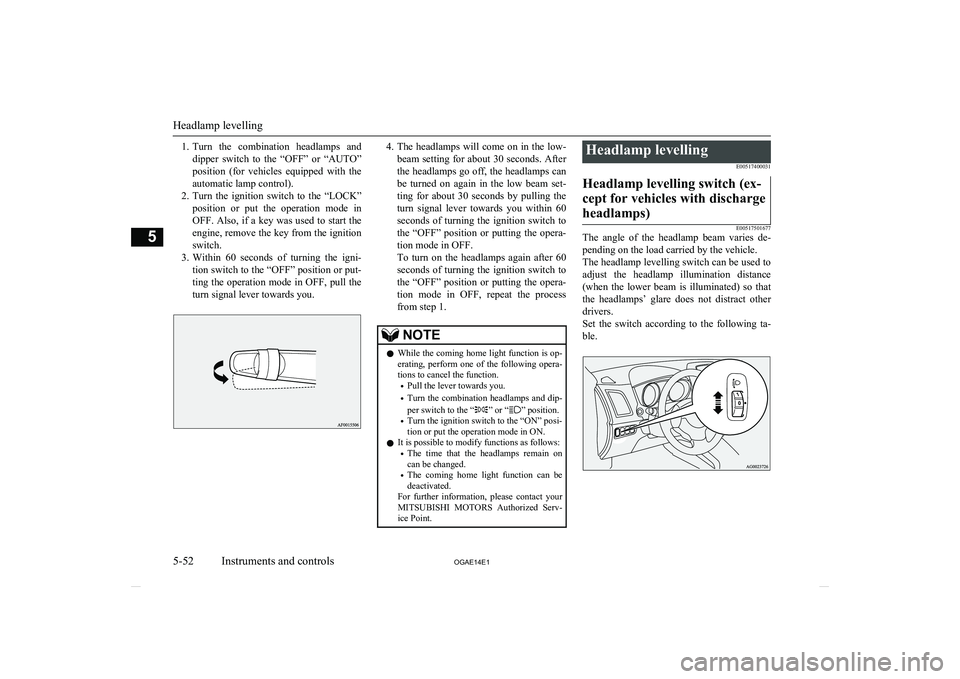
3. Within 60 seconds of turning the igni-
tion switch to the “OFF” position or put-ting the operation mode in OFF, pull the
turn signal lever towards you.4. The headlamps will come on in the low-
beam setting for about 30 seconds. After
the headlamps go off, the headlamps can be turned on again in the low beam set-
ting for about 30 seconds by pulling the turn signal lever towards you within 60seconds of turning the ignition switch to
the “OFF” position or putting the opera-
tion mode in OFF.
To turn on the headlamps again after 60 seconds of turning the ignition switch to the “OFF” position or putting the opera-
tion mode in OFF, repeat the process
from step 1.NOTEl While the coming home light function is op-
erating, perform one of the following opera-
tions to cancel the function.
• Pull the lever towards you.
• Turn the combination headlamps and dip-
per switch to the “
” or “” position.
• Turn the ignition switch to the “ON” posi-
tion or put the operation mode in ON.
l It is possible to modify functions as follows:
• The time that the headlamps remain on
can be changed.
• The coming home light function can be
deactivated.
For further information, please contact your MITSUBISHI MOTORS Authorized Serv-
ice Point.
Headlamp levelling
E00517400031Headlamp levelling switch (ex-
cept for vehicles with dischargeheadlamps)
E00517501677
The angle of the headlamp beam varies de-
pending on the load carried by the vehicle.
The headlamp levelling switch can be used to adjust the headlamp illumination distance
(when the lower beam is illuminated) so that the headlamps’ glare does not distract other
drivers.
Set the switch according to the following ta- ble.
Headlamp levelling
5-52 OGAE14E1Instruments and controls5
Page 157 of 418
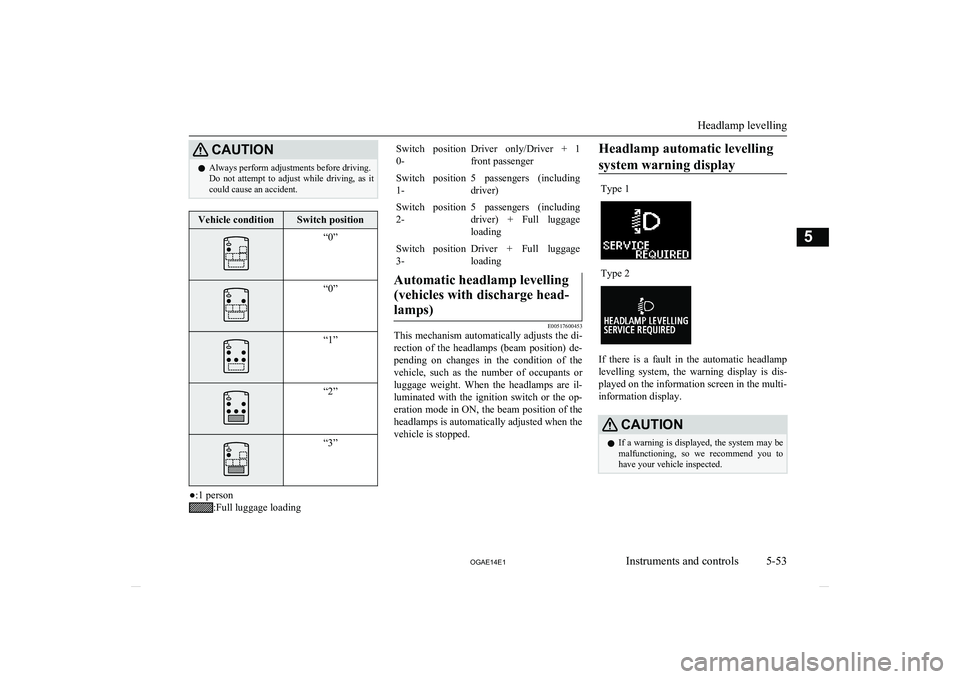
CAUTIONlAlways perform adjustments before driving.
Do not attempt to adjust while driving, as it could cause an accident.Vehicle conditionSwitch position“0”“0”“1”“2”“3”
●:1 person
:Full luggage loading
Switch position
0-Driver only/Driver + 1
front passengerSwitch position 1-5 passengers (including
driver)Switch position 2-5 passengers (including
driver) + Full luggage loadingSwitch position3-Driver + Full luggage loadingAutomatic headlamp levelling
(vehicles with discharge head- lamps)
E00517600453
This mechanism automatically adjusts the di-
rection of the headlamps (beam position) de- pending on changes in the condition of the
vehicle, such as the number of occupants or luggage weight. When the headlamps are il-
luminated with the ignition switch or the op- eration mode in ON, the beam position of the
headlamps is automatically adjusted when the vehicle is stopped.
Headlamp automatic levelling
system warning displayType 1Type 2
If there is a fault in the automatic headlamp levelling system, the warning display is dis-
played on the information screen in the multi- information display.
CAUTIONl If a warning is displayed, the system may be
malfunctioning, so we recommend you to
have your vehicle inspected.
Headlamp levelling
5-53
OGAE14E1Instruments and controls5
Page 159 of 418
Fog lamp switchE00506700034Front fog lamp switch*
E00508300702
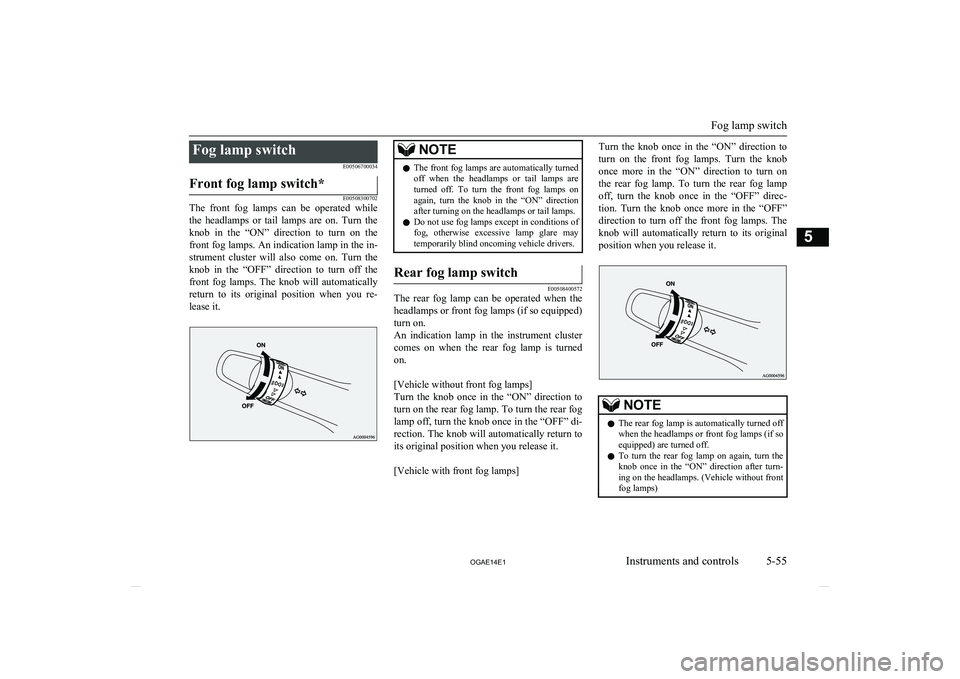
The front fog lamps can be operated while
the headlamps or tail lamps are on. Turn the knob in the “ON” direction to turn on the
front fog lamps. An indication lamp in the in- strument cluster will also come on. Turn theknob in the “OFF” direction to turn off the front fog lamps. The knob will automatically
return to its original position when you re- lease it.
NOTEl The front fog lamps are automatically turned
off when the headlamps or tail lamps are turned off. To turn the front fog lamps on again, turn the knob in the “ON” directionafter turning on the headlamps or tail lamps.
l Do not use fog lamps except in conditions of
fog, otherwise excessive lamp glare maytemporarily blind oncoming vehicle drivers.Rear fog lamp switch
E00508400572
The rear fog lamp can be operated when the
headlamps or front fog lamps (if so equipped)turn on.
An indication lamp in the instrument cluster
comes on when the rear fog lamp is turned on.
[Vehicle without front fog lamps]
Turn the knob once in the “ON” direction to
turn on the rear fog lamp. To turn the rear fog
lamp off, turn the knob once in the “OFF” di- rection. The knob will automatically return toits original position when you release it.
[Vehicle with front fog lamps]
Turn the knob once in the “ON” direction to
turn on the front fog lamps. Turn the knob once more in the “ON” direction to turn on
the rear fog lamp. To turn the rear fog lamp off, turn the knob once in the “OFF” direc-
tion. Turn the knob once more in the “OFF” direction to turn off the front fog lamps. The
knob will automatically return to its original
position when you release it.NOTEl The rear fog lamp is automatically turned off
when the headlamps or front fog lamps (if so
equipped) are turned off.
l To turn the rear fog lamp on again, turn the
knob once in the “ON” direction after turn-ing on the headlamps. (Vehicle without front
fog lamps)
Fog lamp switch
5-55
OGAE14E1Instruments and controls5
Page 160 of 418
NOTElTo turn the rear fog lamp on again, turn the
knob twice in the “ON” direction after turn-ing on the headlamps. (Vehicle with frontfog lamps)Wiper and washer switch
E00507101218CAUTIONlIf the washer is used in cold weather, the
washer fluid sprayed against the glass may
freeze, which may hinder visibility. Warm the glass with the defroster or rear window
demister before using the washer.Windscreen wipers
E00516900648NOTEl To ensure a clear rearward view, the rear
window wiper will automatically perform several continuous operations if the gearshiftlever or the selector lever is put in the “R”
position while the windscreen wipers are op- erating.
Refer to “Rear window wiper and washer” on page 5-60.Except for vehicles equipped
with rain sensor
The windscreen wipers can be operated with
the ignition switch or the operation mode is in ON or ACC.
If the blades are frozen to the windscreen or
rear window, do not operate the wipers until the ice has melted and the blades are freed,
otherwise the wiper motor may be damaged.
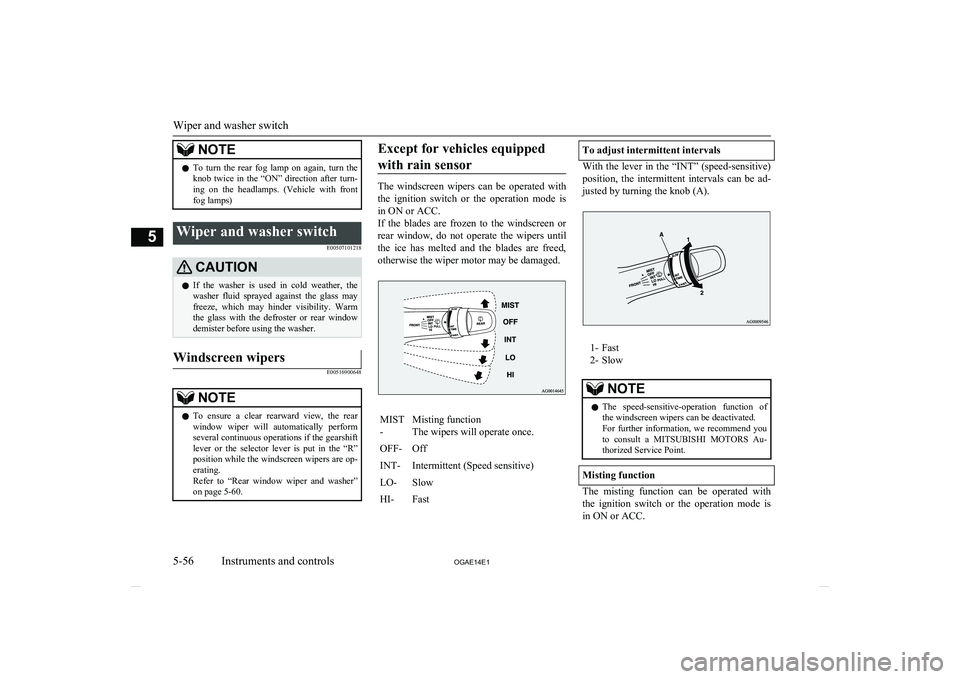
MIST
-Misting function
The wipers will operate once.OFF-OffINT-Intermittent (Speed sensitive)LO-SlowHI-FastTo adjust intermittent intervals
With the lever in the “INT” (speed-sensitive) position, the intermittent intervals can be ad-justed by turning the knob (A).
1- Fast
2- Slow
NOTEl The speed-sensitive-operation function of
the windscreen wipers can be deactivated.
For further information, we recommend you to consult a MITSUBISHI MOTORS Au-
thorized Service Point.
Misting function
The misting function can be operated with
the ignition switch or the operation mode isin ON or ACC.
Wiper and washer switch
5-56 OGAE14E1Instruments and controls5
Page 163 of 418
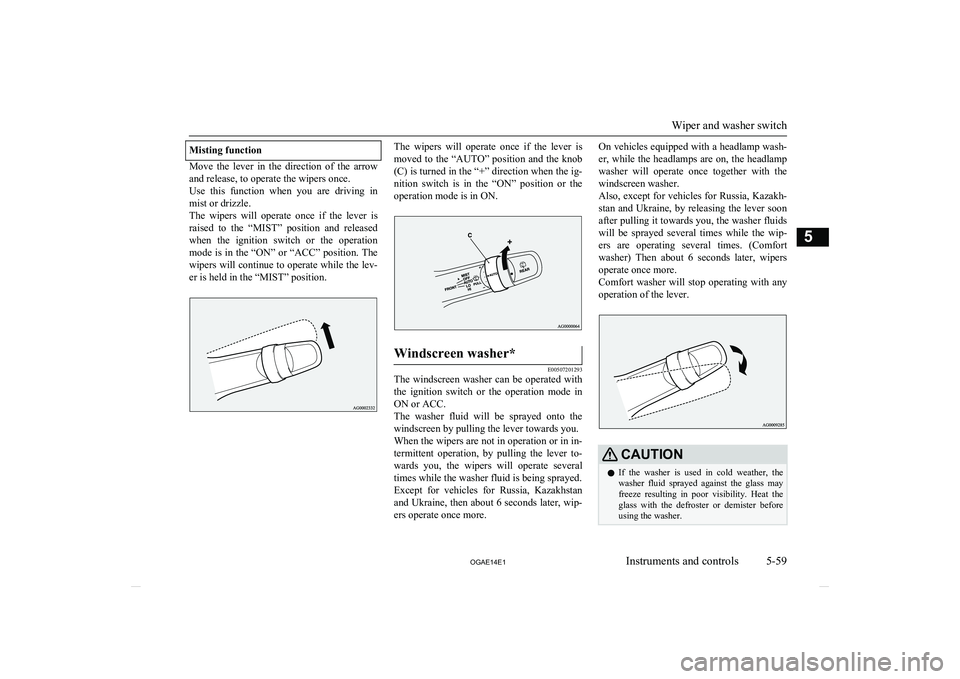
Misting function
Move the lever in the direction of the arrowand release, to operate the wipers once.
Use this function when you are driving in
mist or drizzle.
The wipers will operate once if the lever is raised to the “MIST” position and released
when the ignition switch or the operation
mode is in the “ON” or “ACC” position. The wipers will continue to operate while the lev- er is held in the “MIST” position.
The wipers will operate once if the lever ismoved to the “AUTO” position and the knob
(C) is turned in the “+” direction when the ig- nition switch is in the “ON” position or the operation mode is in ON.Windscreen washer*
E00507201293
The windscreen washer can be operated with the ignition switch or the operation mode in
ON or ACC.
The washer fluid will be sprayed onto the windscreen by pulling the lever towards you.When the wipers are not in operation or in in-
termittent operation, by pulling the lever to- wards you, the wipers will operate several times while the washer fluid is being sprayed.Except for vehicles for Russia, Kazakhstan
and Ukraine, then about 6 seconds later, wip- ers operate once more.
On vehicles equipped with a headlamp wash-
er, while the headlamps are on, the headlamp washer will operate once together with thewindscreen washer.
Also, except for vehicles for Russia, Kazakh- stan and Ukraine, by releasing the lever soon
after pulling it towards you, the washer fluids will be sprayed several times while the wip-
ers are operating several times. (Comfort
washer) Then about 6 seconds later, wipers
operate once more.
Comfort washer will stop operating with any operation of the lever.CAUTIONl If the washer is used in cold weather, the
washer fluid sprayed against the glass may
freeze resulting in poor visibility. Heat the
glass with the defroster or demister before using the washer.
Wiper and washer switch
5-59
OGAE14E1Instruments and controls5
Page 165 of 418
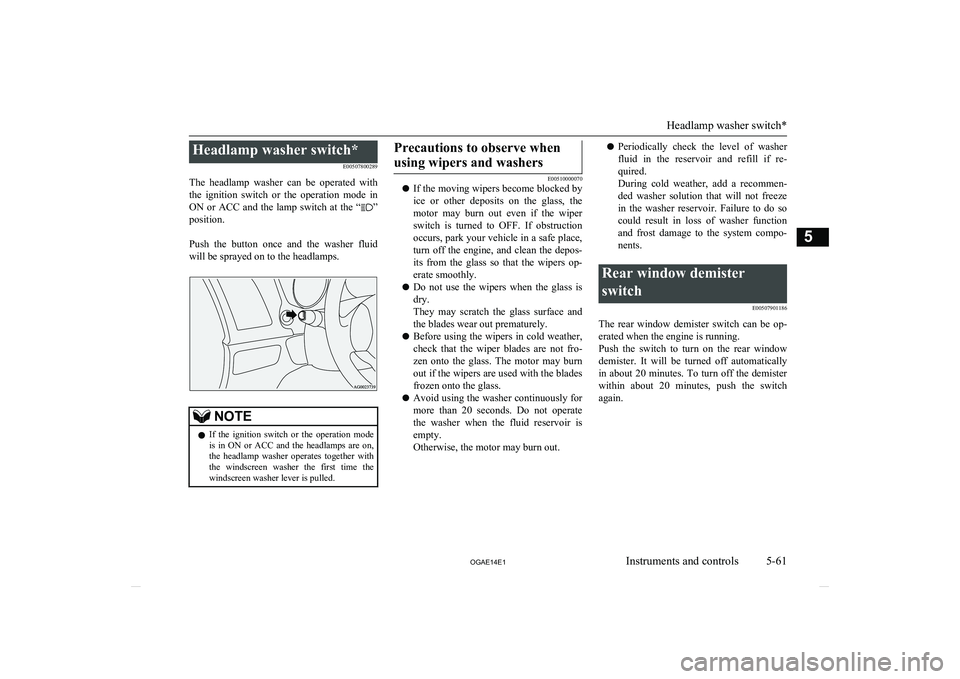
Headlamp washer switch*E00507800289
The headlamp washer can be operated with the ignition switch or the operation mode in ON or ACC and the lamp switch at the “
”
position.
Push the button once and the washer fluid will be sprayed on to the headlamps.
NOTEl If the ignition switch or the operation mode
is in ON or ACC and the headlamps are on,the headlamp washer operates together with the windscreen washer the first time thewindscreen washer lever is pulled.Precautions to observe when
using wipers and washers
E00510000070
l If the moving wipers become blocked by
ice or other deposits on the glass, the
motor may burn out even if the wiper switch is turned to OFF. If obstruction
occurs, park your vehicle in a safe place, turn off the engine, and clean the depos-
its from the glass so that the wipers op- erate smoothly.
l Do not use the wipers when the glass is
dry.
They may scratch the glass surface and the blades wear out prematurely.
l Before using the wipers in cold weather,
check that the wiper blades are not fro-zen onto the glass. The motor may burn
out if the wipers are used with the blades
frozen onto the glass.
l Avoid using the washer continuously for
more than 20 seconds. Do not operate the washer when the fluid reservoir isempty.
Otherwise, the motor may burn out.
l Periodically check the level of washer
fluid in the reservoir and refill if re-
quired.
During cold weather, add a recommen- ded washer solution that will not freeze
in the washer reservoir. Failure to do so
could result in loss of washer function and frost damage to the system compo- nents.Rear window demister
switch E00507901186
The rear window demister switch can be op-erated when the engine is running.
Push the switch to turn on the rear window
demister. It will be turned off automatically
in about 20 minutes. To turn off the demister
within about 20 minutes, push the switch again.
Headlamp washer switch*
5-61
OGAE14E1Instruments and controls5
Page 175 of 418
To reduce the glare
The lever (A) at the bottom of the mirror canbe used to adjust the mirror to reduce the
glare from the headlamps of vehicles behind
you during night driving.
1- Normal
2- Anti-glare
Outside rear-view mirrors
E00600900628To adjust the mirror position
E00601000642
The outside rear-view mirrors can be operat-
ed when the ignition switch or the operation
mode is in ON or ACC.
WARNINGl Do not attempt to adjust the rear-view
mirrors while driving. This can be dan-
gerous.
Always adjust the mirrors before driving.
l Your vehicle is equipped with convex type
mirrors.
Please take into consideration, that ob- jects you see in the mirror will look small-er and farther away compared to a nor-mal flat mirror.
Do not use this mirror to estimate dis-
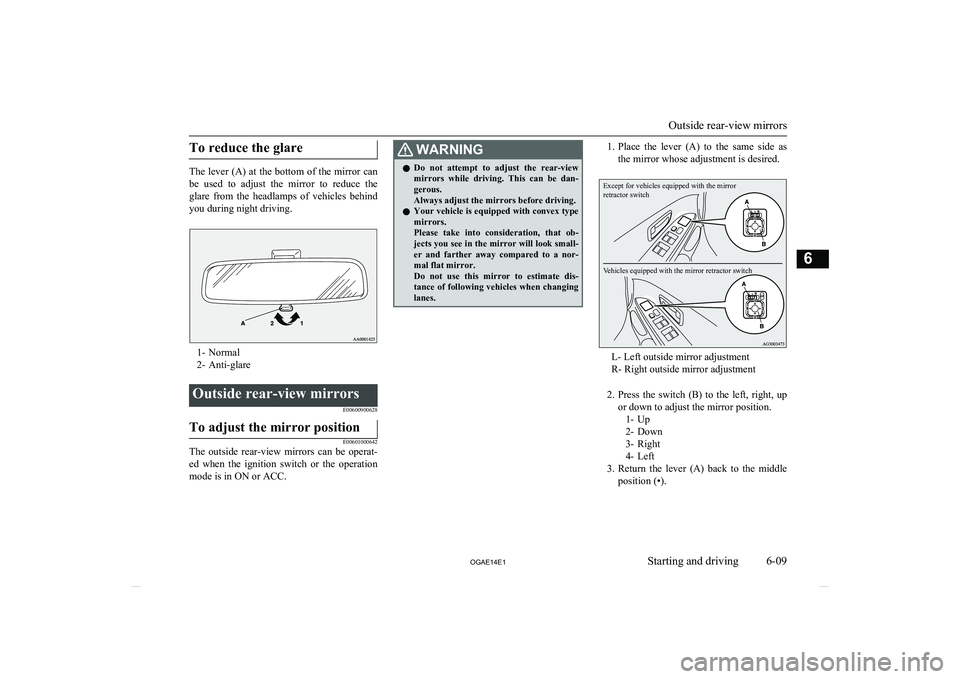
tance of following vehicles when changing lanes.1. Place the lever (A) to the same side as
the mirror whose adjustment is desired.Except for vehicles equipped with the mirror
retractor switchVehicles equipped with the mirror retractor switch
L- Left outside mirror adjustment
R- Right outside mirror adjustment
2. Press the switch (B) to the left, right, up
or down to adjust the mirror position. 1- Up
2- Down
3- Right
4- Left
3. Return the lever (A) back to the middle
position (•).
Outside rear-view mirrors
6-09
OGAE14E1Starting and driving6
Page 208 of 418
lCarefully wash the vehicle with water.
Drive the vehicle slowly while lightly depressing the brake pedal in order to
dry out the brakes. If the brakes still do not function properly, we recommend
you to have the brakes checked as soon as possible.
l Remove the insects, dried grass, etc.
clogging the radiator core.
l After driving through water, check the
engine, transmission and differential oil. If the oil or grease is milky or cloudy be-
cause of water contamination, it must be
replaced with new oil or grease.
l Check the inside of the vehicle. If water
entry is found, dry the carpet etc.
l Inspect the headlamps, If the headlamp
bulb is flooded with water, we recom-
mend you to have it drained.Cautions on handling of 4-
wheel drive vehicles E00606800818
Tyres and wheels
Since the driving torque can be applied to the
4 wheels, the driving performance of the ve- hicle when operating in 4-wheel drive is
greatly affected by the condition of the tyres.
Pay close attention to the tyres.
l Install only the specified tyres on all
wheels. Refer to “Tyres and wheels” on page 11-12.
l Be sure all 4 tyres and wheels are the
same size and type.
When it is necessary to replace any of
the tyres or wheels, replace all 4 tyres.
l All tyres should be rotated before the
wear difference between the front and
rear tyres is recognizable.
Good vehicle performance cannot be expec- ted if there is a difference in wear between tyres. Refer to “Tyre rotation” on page 10-14.
l Check the tyre inflation pressure regular-
ly.CAUTIONl Always use tyres of the same size, same
type, and same brand, and which have no wear differences. Using tyres of differentsize, type, brands or degree of wear, will in-
crease the differential oil temperature, result-
ing in possible damage to the driving sys-
tem. Further, the drive train will be subjec- ted to excessive loading possibly leading tooil leakage, component seizure, or other seri-
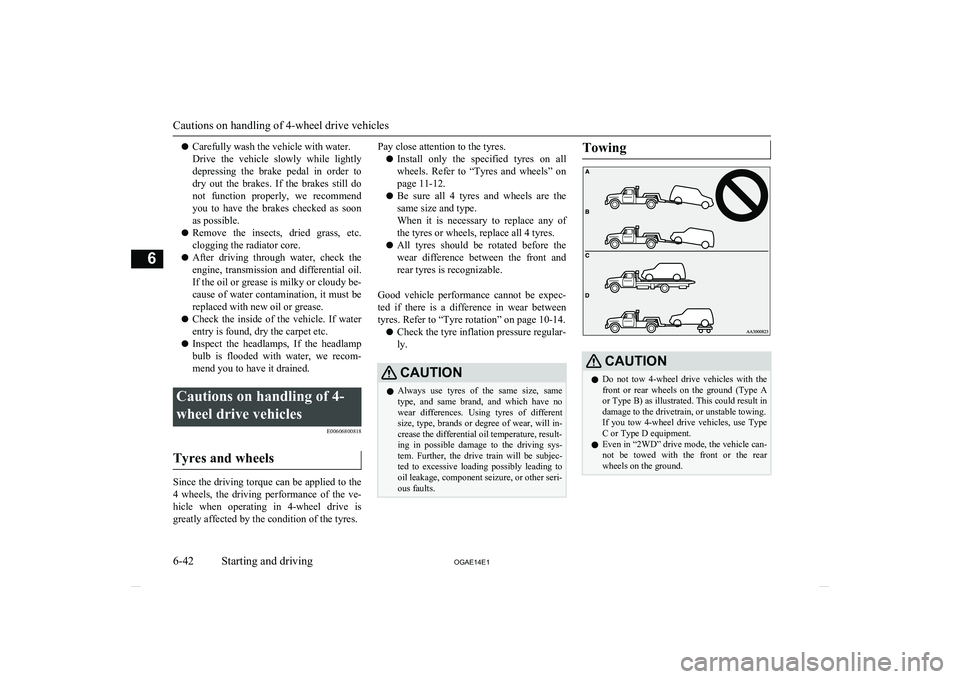
ous faults.TowingCAUTIONl Do not tow 4-wheel drive vehicles with the
front or rear wheels on the ground (Type Aor Type B) as illustrated. This could result in
damage to the drivetrain, or unstable towing.
If you tow 4-wheel drive vehicles, use Type C or Type D equipment.
l Even in “2WD” drive mode, the vehicle can-
not be towed with the front or the rear wheels on the ground.
Cautions on handling of 4-wheel drive vehicles
6-42 OGAE14E1Starting and driving6