heating MITSUBISHI ASX 2015 Owner's Manual (in English)
[x] Cancel search | Manufacturer: MITSUBISHI, Model Year: 2015, Model line: ASX, Model: MITSUBISHI ASX 2015Pages: 452, PDF Size: 20.1 MB
Page 43 of 452
3.If the engine still will not start, the en-
gine could be flooded with too much petrol. While depressing the brake pedal
(CVT ) or the clutch pedal ( M/T), push
the accelerator pedal all the way down
and hold it there, then press the engine
switch to crank the engine. If the engine does not start after 5 to 6 seconds, push
the engine switch to stop cranking the
engine, and release the accelerator pedal. Put the operation mode in OFF. Wait a few seconds, and then press the engine
switch to crank the engine again while
depressing the brake pedal ( CVT) or the
clutch pedal ( M/T), but do not push the
accelerator pedal. If the engine fails to
start, repeat these procedures. If the en-
gine still will not start, we recommend you to have the vehicle checked.Starting the engine (diesel-pow-
ered vehicles)
E00308601120
1. Fasten the seat belt.
2. Make sure the parking brake is applied. 3. Press and hold the brake pedal down
firmly with your right foot.
NOTEl After the engine has not started for a while,
the brake pedal effort needed to start the en- gine may become greater.
If this occurs, depress the brake pedal more
firmly than usual.
4. Fully depress and hold the clutch pedal
(M/T).
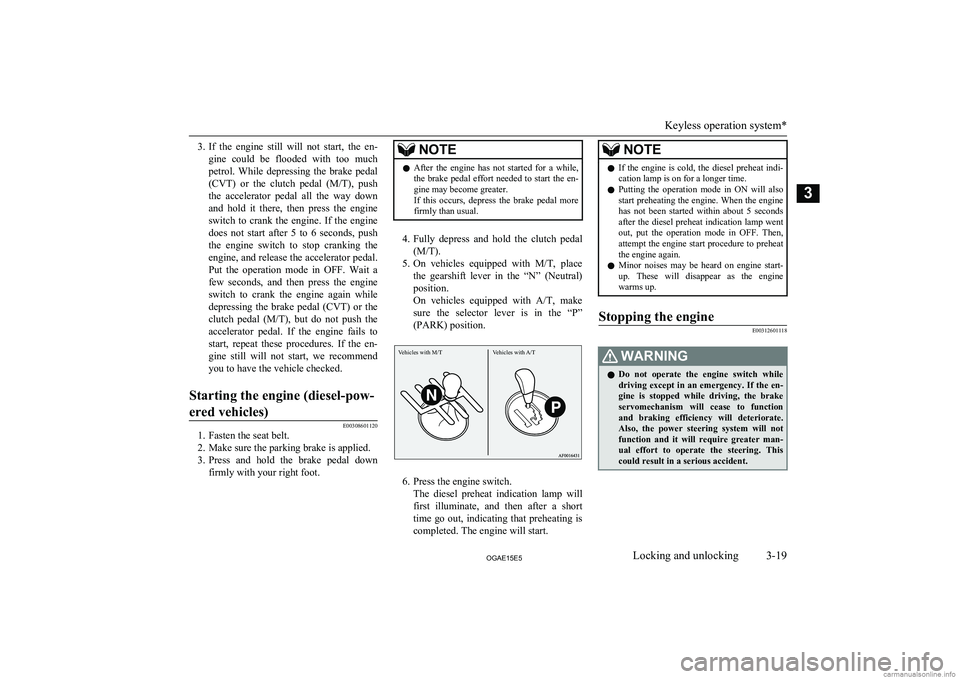
5. On vehicles equipped with M/T, place
the gearshift lever in the “N” (Neutral)
position.
On vehicles equipped with A/T, make
sure the selector lever is in the “P”
(PARK) position.
6. Press the engine switch. The diesel preheat indication lamp willfirst illuminate, and then after a short
time go out, indicating that preheating is completed. The engine will start.
NOTEl If the engine is cold, the diesel preheat indi-
cation lamp is on for a longer time.
l Putting the operation mode in ON will also
start preheating the engine. When the engine
has not been started within about 5 seconds after the diesel preheat indication lamp went
out, put the operation mode in OFF. Then, attempt the engine start procedure to preheatthe engine again.
l Minor noises may be heard on engine start-
up. These will disappear as the engine
warms up.Stopping the engine
E00312601118WARNINGl Do not operate the engine switch while
driving except in an emergency. If the en- gine is stopped while driving, the brakeservomechanism will cease to function
and braking efficiency will deteriorate. Also, the power steering system will notfunction and it will require greater man-
ual effort to operate the steering. This
could result in a serious accident.
Keyless operation system*
3-19OGAE15E5Locking and unlocking3 Vehicles with M/T Vehicles with A/T
Page 72 of 452
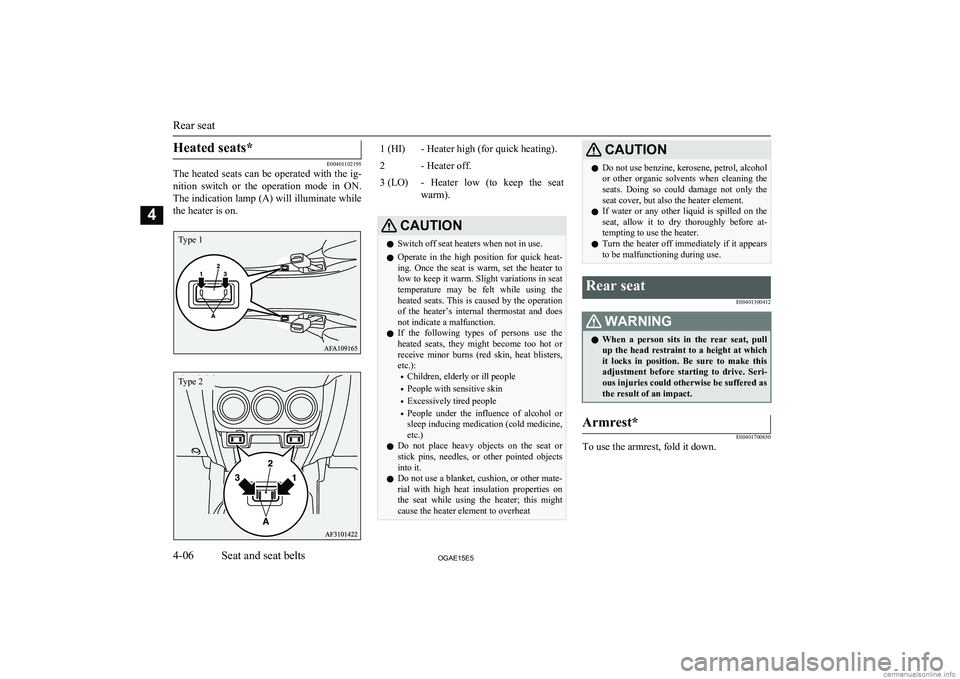
Heated seats*
E00401102195
The heated seats can be operated with the ig-
nition switch or the operation mode in ON.
The indication lamp (A) will illuminate while the heater is on.
1 (HI)- Heater high (for quick heating).2- Heater off.3 (LO)- Heater low (to keep the seat
warm).CAUTIONl Switch off seat heaters when not in use.
l Operate in the high position for quick heat-
ing. Once the seat is warm, set the heater to low to keep it warm. Slight variations in seat
temperature may be felt while using the heated seats. This is caused by the operation
of the heater’s internal thermostat and does not indicate a malfunction.
l If the following types of persons use the
heated seats, they might become too hot or receive minor burns (red skin, heat blisters,
etc.):
• Children, elderly or ill people
• People with sensitive skin
• Excessively tired people
• People under the influence of alcohol or
sleep inducing medication (cold medicine, etc.)
l Do not place heavy objects on the seat or
stick pins, needles, or other pointed objects into it.
l Do not use a blanket, cushion, or other mate-
rial with high heat insulation properties on the seat while using the heater; this might
cause the heater element to overheatCAUTIONl Do not use benzine, kerosene, petrol, alcohol
or other organic solvents when cleaning the seats. Doing so could damage not only the seat cover, but also the heater element.
l If water or any other liquid is spilled on the
seat, allow it to dry thoroughly before at-tempting to use the heater.
l Turn the heater off immediately if it appears
to be malfunctioning during use.Rear seat
E00401300412WARNINGlWhen a person sits in the rear seat, pull
up the head restraint to a height at which it locks in position. Be sure to make thisadjustment before starting to drive. Seri-
ous injuries could otherwise be suffered as the result of an impact.Armrest*
E00401700650
To use the armrest, fold it down.
Rear seat
4-06OGAE15E5Seat and seat belts4Type 1 Type 2
Page 115 of 452
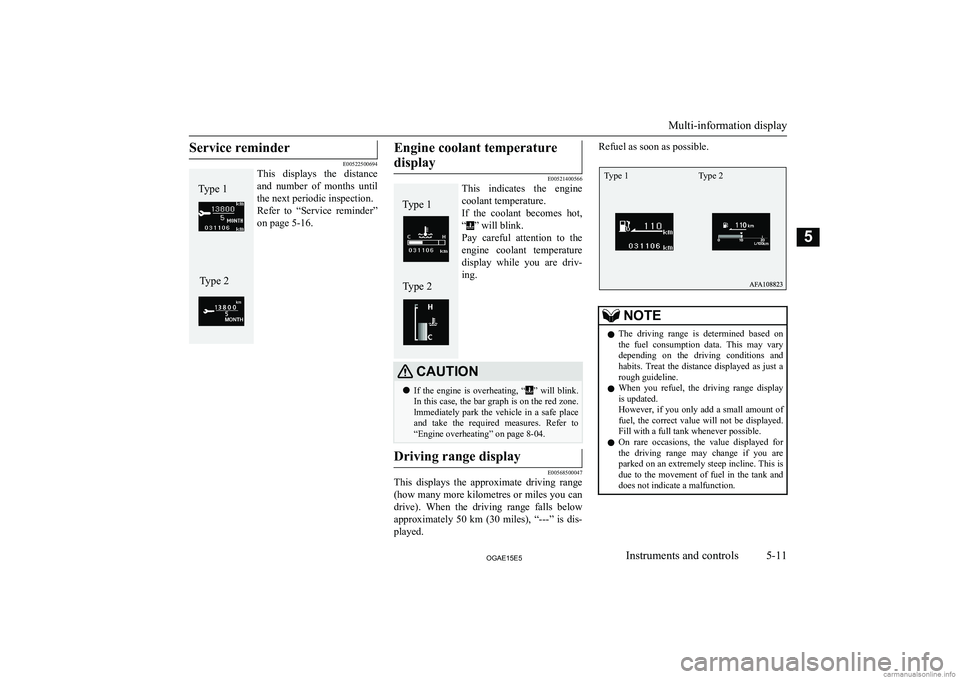
Service reminder
E00522500694
This displays the distance
and number of months until
the next periodic inspection.
Refer to “Service reminder” on page 5-16.
Engine coolant temperature
display
E00521400566
This indicates the engine
coolant temperature.
If the coolant becomes hot, “
” will blink.
Pay careful attention to the engine coolant temperature
display while you are driv-
ing.
CAUTIONl If the engine is overheating, “” will blink.
In this case, the bar graph is on the red zone.
lmmediately park the vehicle in a safe place
and take the required measures. Refer to “Engine overheating” on page 8-04.Driving range display
E00568500047
This displays the approximate driving range
(how many more kilometres or miles you can drive). When the driving range falls below
approximately 50 km (30 miles), “---” is dis-
played.
Refuel as soon as possible.NOTEl The driving range is determined based on
the fuel consumption data. This may vary depending on the driving conditions and habits. Treat the distance displayed as just a
rough guideline.
l When you refuel, the driving range display
is updated.
However, if you only add a small amount of
fuel, the correct value will not be displayed.
Fill with a full tank whenever possible.
l On rare occasions, the value displayed for
the driving range may change if you areparked on an extremely steep incline. This is
due to the movement of fuel in the tank and
does not indicate a malfunction.
Multi-information display
5-11OGAE15E5Instruments and controls5Type 1Type 2 Type 1Type 2 Type 1 Type 2
Page 148 of 452
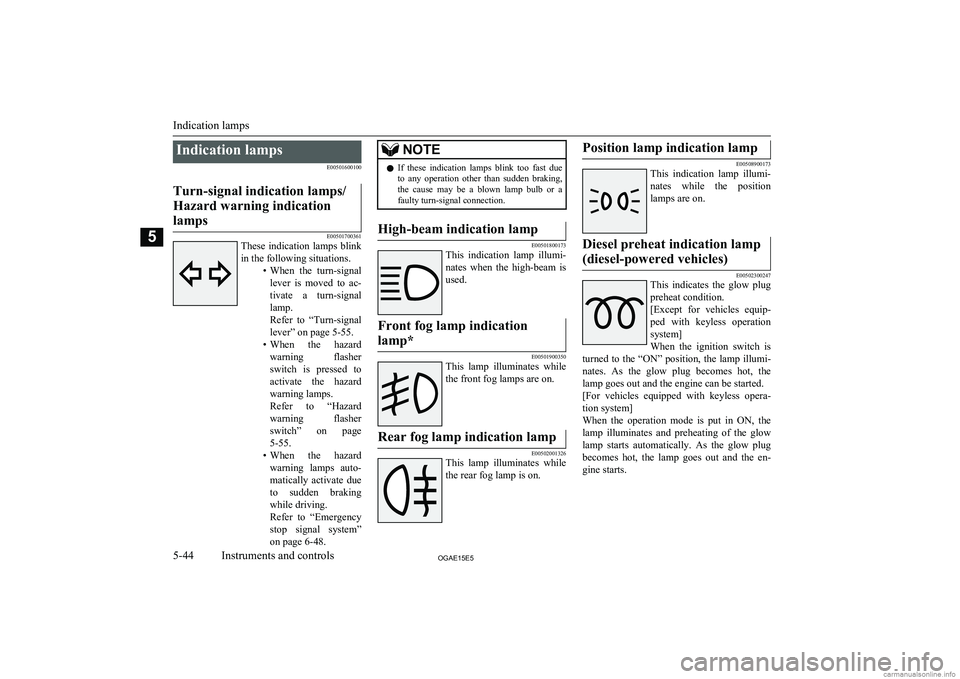
Indication lampsE00501600100Turn-signal indication lamps/
Hazard warning indication lamps
E00501700361
These indication lamps blink
in the following situations. •When the turn-signal
lever is moved to ac- tivate a turn-signal
lamp.
Refer to “Turn-signal
lever” on page 5-55.
• When the hazard
warning flasher switch is pressed toactivate the hazard
warning lamps.
Refer to “Hazard
warning flasher switch” on page
5-55.
• When the hazard
warning lamps auto- matically activate due
to sudden braking while driving.
Refer to “Emergency
stop signal system”
on page 6-48.
NOTEl If these indication lamps blink too fast due
to any operation other than sudden braking,
the cause may be a blown lamp bulb or a faulty turn-signal connection.High-beam indication lamp
E00501800173
This indication lamp illumi-
nates when the high-beam is used.
Front fog lamp indication
lamp*
E00501900350
This lamp illuminates while the front fog lamps are on.
Rear fog lamp indication lamp
E00502001326
This lamp illuminates while
the rear fog lamp is on.
Position lamp indication lamp
E00508900173
This indication lamp illumi-
nates while the position lamps are on.
Diesel preheat indication lamp
(diesel-powered vehicles)
E00502300247
This indicates the glow plug
preheat condition.
[Except for vehicles equip-
ped with keyless operation system]
When the ignition switch is
turned to the “ON” position, the lamp illumi-
nates. As the glow plug becomes hot, the lamp goes out and the engine can be started.
[For vehicles equipped with keyless opera- tion system]
When the operation mode is put in ON, the
lamp illuminates and preheating of the glow lamp starts automatically. As the glow plugbecomes hot, the lamp goes out and the en-
gine starts.
Indication lamps
5-44OGAE15E5Instruments and controls5
Page 166 of 452
NOTElThe rear window wiper will automatically
perform several continuous operations if thegearshift lever or the selector lever is put in
the “R” position while the windscreen wip-
ers or the rear window wiper is operating. (automatic operation mode).
After the automatic operation, the rear win-
dow wiper will stop operating if the knob is in the “OFF” position. If the knob is in the “INT” position, the rear window wiper will
return to the intermittent operation.
It is possible to set the rear window wiper to perform the automatic operation only if thegearshift lever or the selector lever is put in
the “R” position while the rear window wip-
er is operating with the knob in the “INT” position.
For further information, we recommend you to consult a MITSUBISHI MOTORS Au-
thorized Service Point.
l If the knob is in the “OFF” position, turn the
knob to the “INT” position twice quickly to operate the rear window wiper continuously.
(continuous operation mode)
Turn the knob to the “OFF” position to stop the rear window wiper continuous operation.
l The interval for intermittent operation can be
adjusted.
For further information, we recommend you
to consult a MITSUBISHI MOTORS Au-
thorized Service Point.Headlamp washer switch*
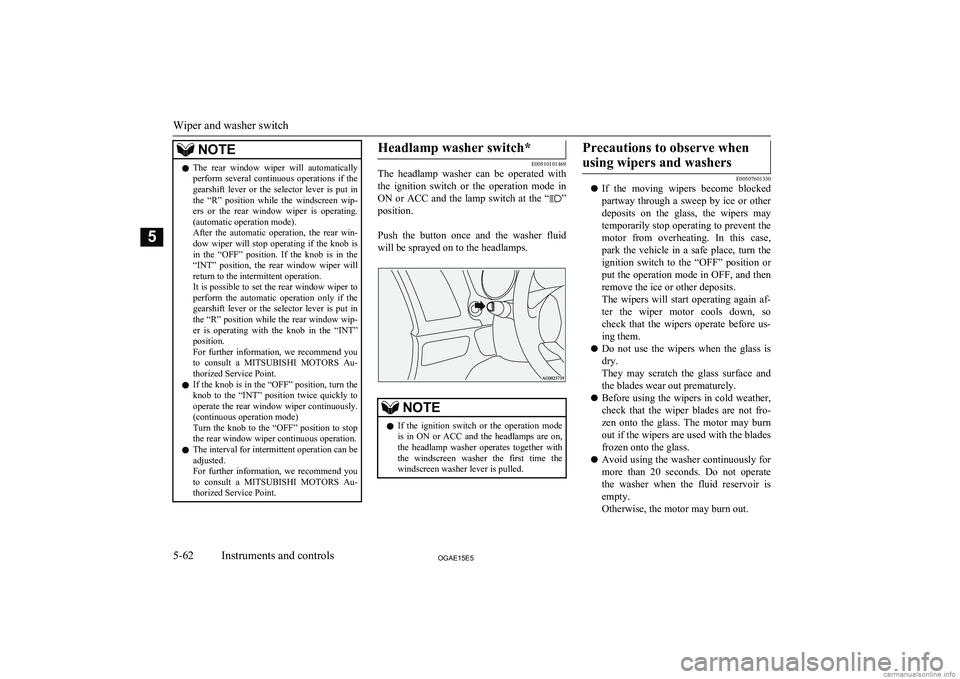
E00510101469
The headlamp washer can be operated with
the ignition switch or the operation mode in ON or ACC and the lamp switch at the “
”
position.
Push the button once and the washer fluid will be sprayed on to the headlamps.
NOTEl If the ignition switch or the operation mode
is in ON or ACC and the headlamps are on,the headlamp washer operates together with the windscreen washer the first time thewindscreen washer lever is pulled.Precautions to observe when
using wipers and washers
E00507601330
l If the moving wipers become blocked
partway through a sweep by ice or other deposits on the glass, the wipers maytemporarily stop operating to prevent the
motor from overheating. In this case,
park the vehicle in a safe place, turn the ignition switch to the “OFF” position or
put the operation mode in OFF, and then
remove the ice or other deposits.
The wipers will start operating again af- ter the wiper motor cools down, so
check that the wipers operate before us-
ing them.
l Do not use the wipers when the glass is
dry.
They may scratch the glass surface and the blades wear out prematurely.
l Before using the wipers in cold weather,
check that the wiper blades are not fro-zen onto the glass. The motor may burn
out if the wipers are used with the blades
frozen onto the glass.
l Avoid using the washer continuously for
more than 20 seconds. Do not operate the washer when the fluid reservoir isempty.
Otherwise, the motor may burn out.Wiper and washer switch
5-62OGAE15E5Instruments and controls5
Page 184 of 452
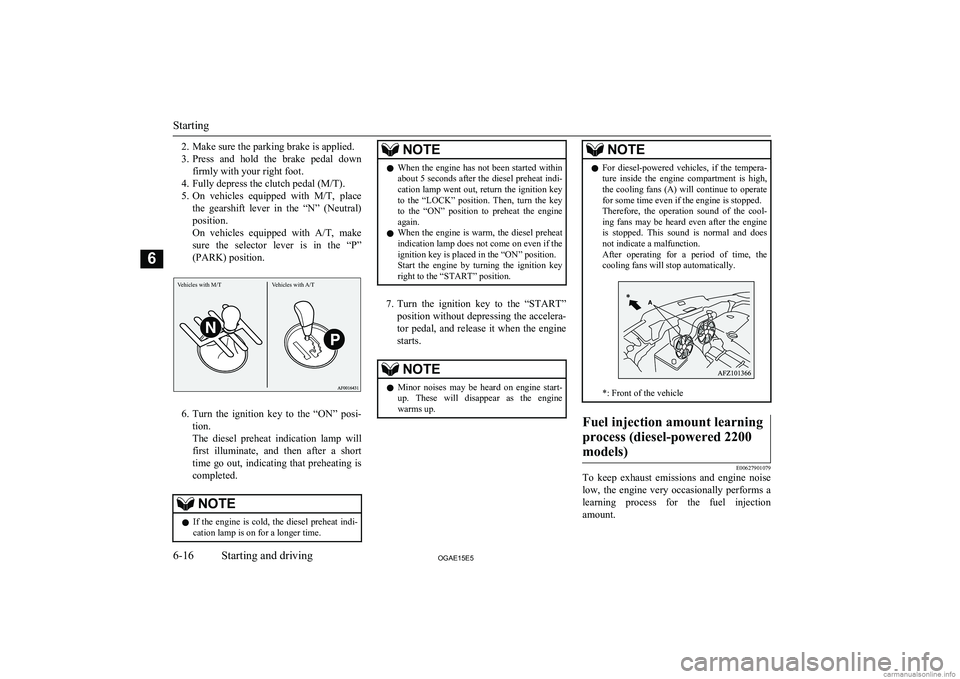
2. Make sure the parking brake is applied.
3. Press and hold the brake pedal down
firmly with your right foot.
4. Fully depress the clutch pedal (M/T).
5. On vehicles equipped with M/T, place
the gearshift lever in the “N” (Neutral) position.
On vehicles equipped with A/T, make
sure the selector lever is in the “P”
(PARK) position.
6. Turn the ignition key to the “ON” posi-
tion.
The diesel preheat indication lamp will first illuminate, and then after a short
time go out, indicating that preheating is completed.
NOTEl If the engine is cold, the diesel preheat indi-
cation lamp is on for a longer time.NOTEl When the engine has not been started within
about 5 seconds after the diesel preheat indi- cation lamp went out, return the ignition key
to the “LOCK” position. Then, turn the key
to the “ON” position to preheat the engine again.
l When the engine is warm, the diesel preheat
indication lamp does not come on even if the
ignition key is placed in the “ON” position.
Start the engine by turning the ignition key
right to the “START” position.
7. Turn the ignition key to the “START”
position without depressing the accelera- tor pedal, and release it when the engine
starts.
NOTEl Minor noises may be heard on engine start-
up. These will disappear as the engine
warms up.NOTEl For diesel-powered vehicles, if the tempera-
ture inside the engine compartment is high,
the cooling fans (A) will continue to operate for some time even if the engine is stopped.
Therefore, the operation sound of the cool-
ing fans may be heard even after the engine is stopped. This sound is normal and does
not indicate a malfunction.
After operating for a period of time, the cooling fans will stop automatically.
*: Front of the vehicle
Fuel injection amount learning
process (diesel-powered 2200 models)
E00627901079
To keep exhaust emissions and engine noise low, the engine very occasionally performs a
learning process for the fuel injection
amount.
Starting
6-16OGAE15E5Starting and driving6Vehicles with M/T Vehicles with A/T
Page 199 of 452
CAUTIONlIf malfunction occurs in the
A/T while driv-
ing, the warning display or the warning
display will appear on the information screen in the multi-information display.
In this case, immediately park your vehicle
in a safe place and follow these procedures:
When
warning display is showing
The automatic transmission fluid is over- heating.
Stop the vehicle in a safe place, place the se- lector lever in the “P” (PARK) position, and
open the bonnet with the engine running to allow the engine to cool down.
After a while, confirm that the
warning
display is no longer showing. It is safe to
continue driving if the display is no longer showing. If the warning display remains orappears frequently, we recommend you to have your vehicle inspected.
When
warning display is showing
It may be that there is something unusual happening in the A/T, causing a safety de-
vice to activate. We recommend you to have
your vehicle inspected as soon as possible.
Operation of the A/T
E00604200704
CAUTIONl Before selecting a gear with the engine run-
ning and the vehicle stationary, fully depressthe brake pedal to prevent the vehicle from
creeping.
The vehicle will begin to move as soon as the gear is engaged, especially when the en-
gine speed is high, at fast idle or with the air conditioning operating, the brakes should
only be released when you are ready to drive
away.
l Depress the brake pedal with the right foot at
all times.
Using the left foot could cause driver move- ment delay in case of an emergency.
l To prevent sudden acceleration, never race
the engine when shifting from the “P”
(PARK) or “N” (NEUTRAL) position.
l Operating the accelerator pedal while the
other foot is resting on the brake pedal will affect braking efficiency and may cause pre-
mature wear of brake pads.
l Use the selector lever in the correct shift po-
sition in accordance with driving conditions.
Never coast downhill backward with the se-
lector lever in the “D” (DRIVE) or sports mode position or coast forward with the se-
lector lever in the “R” (REVERSE) position.
The engine may stop and the unexpected in- crease in brake pedal effort and steeringwheel weight could lead to an accidentCAUTIONl Do not race the engine with brake pedal
pressed when the vehicle is stationary.
This can damage the A/T.
Also, when you depress the accelerator ped- al while holding down the brake pedal withthe selector lever in the “D” (DRIVE) posi-
tion, the engine revolutions may not rise as high as when performing the same operation
with the selector lever in the “N” (NEU-
TRAL) position.Passing acceleration
E00604500358
To gain extra acceleration in “D” (DRIVE)
position, push the accelerator to the floor.The A/T will automatically downshift.
NOTEl In “Sports mode”, downshifts do not take
place when the accelerator is depressed all
the way to the floor.Uphill/downhill driving
E00610500207
DRIVING UPHILL
The transmission prevents unnecessary up-
shifts even when the accelerator pedal is re- leased and ensures smooth driving.
Automatic transmission INVECS-II Sports Mode 6A/T (Intelligent & Innovative Vehicle Electronic Control System II)*
6-31OGAE15E5Starting and driving6
Page 205 of 452
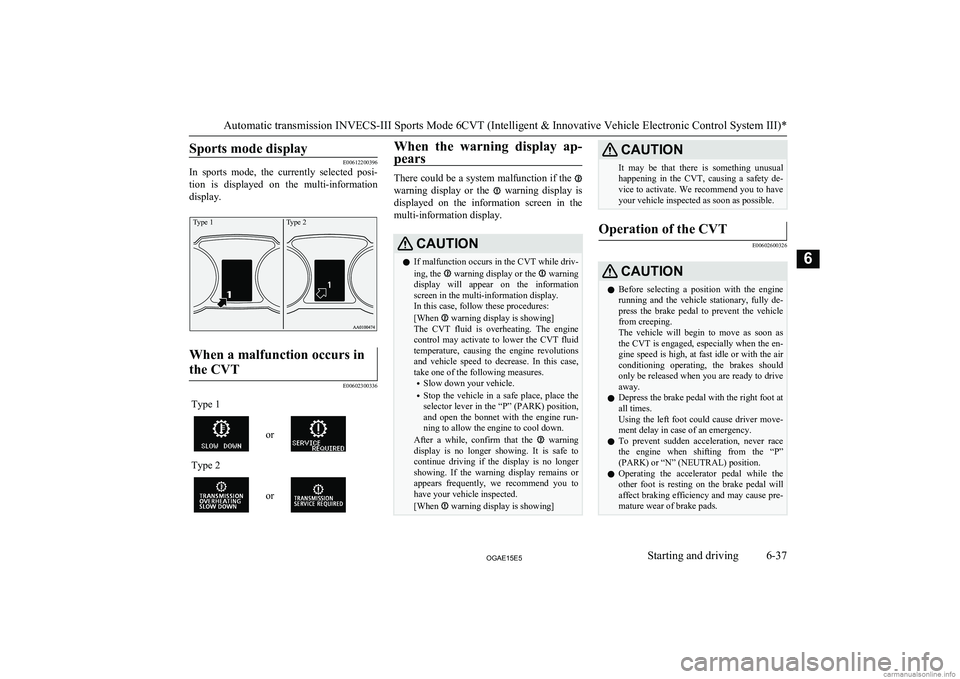
Sports mode display
E00612200396
In sports mode, the currently selected posi-
tion is displayed on the multi-information
display.
Type 1Type 2When a malfunction occurs in
the CVT
E00602300336
Type 1
or
Type 2
or
When the warning display ap-
pears
There could be a system malfunction if the
warning display or the warning display is
displayed on the information screen in the
multi-information display.
CAUTIONl If malfunction occurs in the CVT while driv-
ing, the warning display or the warning
display will appear on the information screen in the multi-information display.
In this case, follow these procedures:
[When
warning display is showing]
The CVT fluid is overheating. The engine control may activate to lower the CVT fluid
temperature, causing the engine revolutions
and vehicle speed to decrease. In this case, take one of the following measures.
• Slow down your vehicle.
• Stop the vehicle in a safe place, place the
selector lever in the “P” (PARK) position,
and open the bonnet with the engine run-
ning to allow the engine to cool down.
After a while, confirm that the
warning
display is no longer showing. It is safe to
continue driving if the display is no longer showing. If the warning display remains orappears frequently, we recommend you to have your vehicle inspected.
[When
warning display is showing]
CAUTIONIt may be that there is something unusual happening in the CVT, causing a safety de-
vice to activate. We recommend you to have your vehicle inspected as soon as possible.Operation of the CVT
E00602600326
CAUTIONl Before selecting a position with the engine
running and the vehicle stationary, fully de-
press the brake pedal to prevent the vehicle from creeping.
The vehicle will begin to move as soon as
the CVT is engaged, especially when the en- gine speed is high, at fast idle or with the air conditioning operating, the brakes should
only be released when you are ready to drive
away.
l Depress the brake pedal with the right foot at
all times.
Using the left foot could cause driver move- ment delay in case of an emergency.
l To prevent sudden acceleration, never race
the engine when shifting from the “P”
(PARK) or “N” (NEUTRAL) position.
l Operating the accelerator pedal while the
other foot is resting on the brake pedal will affect braking efficiency and may cause pre-
mature wear of brake pads.
Automatic transmission INVECS-III Sports Mode 6CVT (Intelligent & Innovative Vehicle Electronic Control System III)*
6-37OGAE15E5Starting and driving6
Page 210 of 452
NOTElThe driving posture should be more upright;
adjust the seat to a good position for easy
steering and pedal operation. Be sure to wear
the seat belt.
l After driving on rough roads, check each
part of the vehicle and wash it thoroughlywith water. Refer to the “Inspection andmaintenance following rough road opera-
tion” section and “Maintenance” section.CAUTIONl Setting the drive mode-selector to “4WD
LOCK” to drive on dry paved road will in-
crease fuel consumption, with possible noise generation.
Turning sharp corners
When turning a sharp corner in “4WD
LOCK” position at low speed, a slight differ- ence in steering may be experienced similar
to as if the brakes were applied. This is called tight corner braking and results from each of
the 4 tyres being at a different distance from
the corner. The phenomenon is typical of 4- wheel drive vehicles. If this occurs, either
straighten out the steering wheel, or change to “2WD” or “4WD AUTO” mode.
On snowy or icy roads
Set the drive mode-selector to “4WD AUTO”
or “4WD LOCK” in accordance with the road conditions, and then gradually depress the accelerator pedal for a smooth start.
NOTEl The use of snow tyres is recommended.
l Maintain a safe distance between vehicles,
avoid sudden braking, and use engine brak- ing (downshifting).CAUTIONl Avoid sudden braking, sudden acceleration
and sharp turning. Skidding occurs and con-
trol of the vehicle could be lost.
Driving on sandy or muddy
roads
Set the drive mode-selector to “4WD LOCK”
and then gradually depress the accelerator pedal for a smooth start. Keep the pressure on
the accelerator pedal as constant as possible,
and drive at low speed.
CAUTIONl Do not force the vehicle or drive recklessly
on sandy surfaces. In comparison with nor-
mal road surfaces, the engine and other
drive-system components are put under ex- cessive strain when driving on such a sur-
face. This could lead to accidents.
l If the engine coolant temperature display
flashes on the information screen in the mul-
ti-information display or the engine power
drops suddenly while the vehicle is being driven, park your vehicle immediately in asafe place.
Refer to “Engine overheating” on page
8-04 for details and take the required meas-
ures.
WARNINGl When attempting to rock your vehicle out
of a stuck position, be sure that the area
around the vehicle is clear of people and physical objects. The rocking motion may
cause the vehicle to suddenly launch for- ward or backward, causing injury or damage to nearby people or objects.NOTEl Avoid sudden braking, sudden acceleration
and sharp turning; such operations could re-
sult in the vehicle becoming stuck.
4-wheel drive operation
6-42OGAE15E5Starting and driving6
Page 212 of 452
Pay close attention to the tyres.l Install only the specified tyres on all
wheels. Refer to “Tyres and wheels” on page 11-13.
l Be sure all 4 tyres and wheels are the
same size and type.
When it is necessary to replace any of
the tyres or wheels, replace all 4 tyres.
l All tyres should be rotated before the
wear difference between the front and
rear tyres is recognizable.
Good vehicle performance cannot be expec- ted if there is a difference in wear between tyres. Refer to “Tyre rotation” on page 10-15.
l Check the tyre inflation pressure regular-
ly.CAUTIONl Always use tyres of the same size, same
type, and same brand, and which have no
wear differences. Using tyres of different size, type, brands or degree of wear, will in-
crease the differential oil temperature, result-
ing in possible damage to the driving sys-
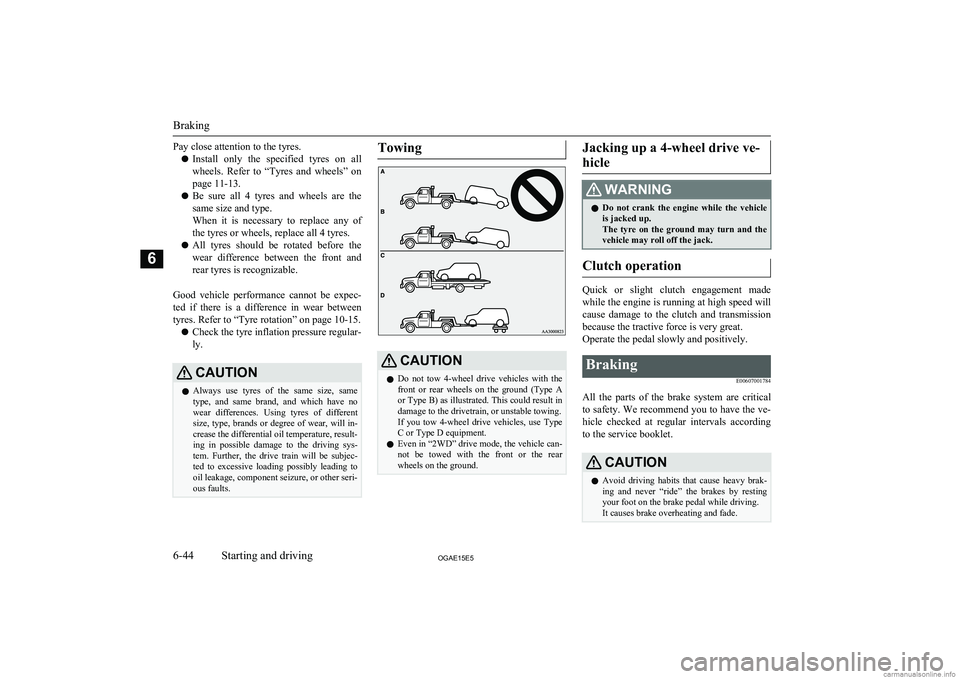
tem. Further, the drive train will be subjec- ted to excessive loading possibly leading tooil leakage, component seizure, or other seri-ous faults.TowingCAUTIONl Do not tow 4-wheel drive vehicles with the
front or rear wheels on the ground (Type Aor Type B) as illustrated. This could result in
damage to the drivetrain, or unstable towing.
If you tow 4-wheel drive vehicles, use Type C or Type D equipment.
l Even in “2WD” drive mode, the vehicle can-
not be towed with the front or the rear wheels on the ground.Jacking up a 4-wheel drive ve-
hicleWARNINGl Do not crank the engine while the vehicle
is jacked up.
The tyre on the ground may turn and the vehicle may roll off the jack.
Clutch operation
Quick or slight clutch engagement made
while the engine is running at high speed will
cause damage to the clutch and transmission because the tractive force is very great.
Operate the pedal slowly and positively.
Braking
E00607001784
All the parts of the brake system are critical
to safety. We recommend you to have the ve- hicle checked at regular intervals according
to the service booklet.
CAUTIONl Avoid driving habits that cause heavy brak-
ing and never “ride” the brakes by resting
your foot on the brake pedal while driving.
It causes brake overheating and fade.
Braking
6-44OGAE15E5Starting and driving6