MITSUBISHI COLT 2011 (in English) Owners Manual
Manufacturer: MITSUBISHI, Model Year: 2011, Model line: COLT, Model: MITSUBISHI COLT 2011Pages: 274, PDF Size: 17.88 MB
Page 91 of 274
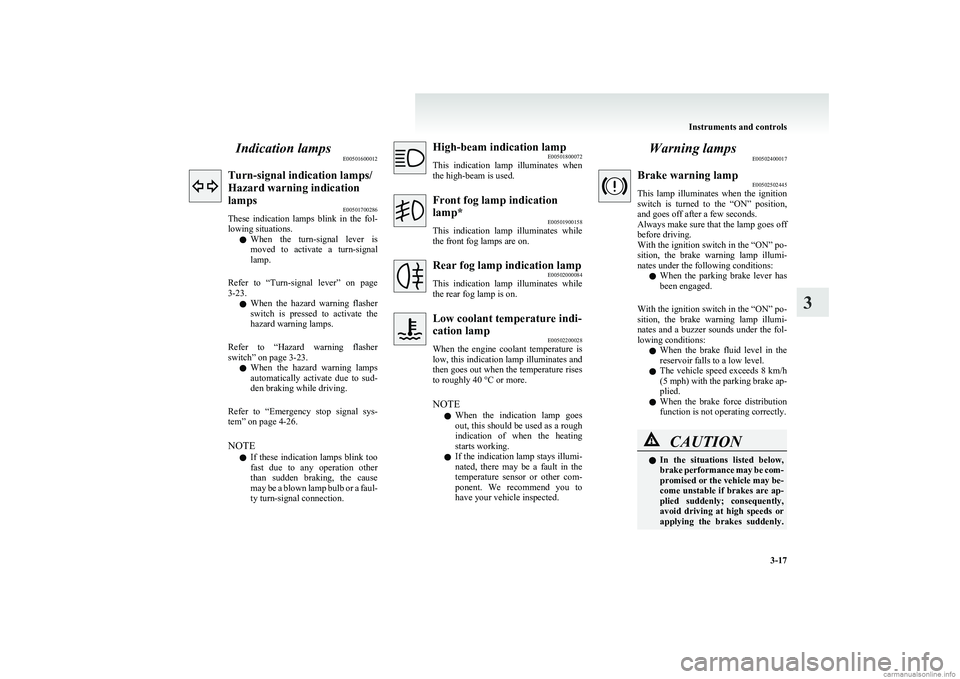
Indication lampsE00501600012Turn-signal indication lamps/
Hazard warning indication
lamps E00501700286
These indication lamps blink in the fol-
lowing situations.
l When the turn-signal lever is
moved to activate a turn-signal
lamp.
Refer to “Turn-signal lever” on page
3-23.
l When the hazard warning flasher
switch is pressed to activate the
hazard warning lamps.
Refer to “Hazard warning flasher
switch” on page 3-23.
l When the hazard warning lamps
automatically activate due to sud-
den braking while driving.
Refer to “Emergency stop signal sys-
tem” on page 4-26.
NOTE l If these indication lamps blink too
fast due to any operation other
than sudden braking, the cause
may be a blown lamp bulb or a faul-
ty turn-signal connection.High-beam indication lamp E00501800072
This indication lamp illuminates when
the high-beam is used.Front fog lamp indication
lamp* E00501900158
This indication lamp illuminates while
the front fog lamps are on.Rear fog lamp indication lamp E00502000084
This indication lamp illuminates while
the rear fog lamp is on.Low coolant temperature indi-
cation lamp E00502200028
When the engine coolant temperature is
low, this indication lamp illuminates and
then goes out when the temperature rises
to roughly 40 °C or more.
NOTE l When the indication lamp goes
out, this should be used as a rough
indication of when the heating
starts working.
l If the indication lamp stays illumi-
nated, there may be a fault in the
temperature sensor or other com-
ponent. We recommend you to
have your vehicle inspected.Warning lamps E00502400017Brake warning lamp E00502502445
This lamp illuminates when the ignition
switch is turned to the “ON” position,
and goes off after a few seconds.
Always make sure that the lamp goes off
before driving.
With the ignition switch in the “ON” po-
sition, the brake warning lamp illumi-
nates under the following conditions:
l When the parking brake lever has
been engaged.
With the ignition switch in the “ON” po-
sition, the brake warning lamp illumi-
nates and a buzzer sounds under the fol-
lowing conditions:
l When the brake fluid level in the
reservoir falls to a low level.
l The vehicle speed exceeds 8 km/h
(5 mph) with the parking brake ap-
plied.
l When the brake force distribution
function is not operating correctly.CAUTIONl In the situations listed below,
brake performance may be com-
promised or the vehicle may be-
come unstable if brakes are ap-
plied suddenly; consequently,
avoid driving at high speeds or
applying the brakes suddenly.
Instruments and controls
3-17
3
Page 92 of 274
CAUTIONFurthermore, the vehicle
should be brought immediately
to a stop in a safe location and
we recommend you to have it
checked. •The brake warning lamp
does not illuminate when
the parking brake is applied
or does not turn off when
the parking brake is re-
leased.
• The ABS warning lamp and
brake warning lamp illumi-
nate at the same time.
For details, refer to “ABS
warning lamp” on page
4-28.
• The brake warning lamp re-
mains illuminated during
driving.
l The vehicle should be brought
to a halt in the following man-
ner when brake performance
has deteriorated. •Depress the brake pedal
harder than usual.
Even if the brake pedal
moves down to the very end
of its possible stroke, keep it
pressed down hard.CAUTION• Should the brakes fail, use
engine braking to reduce
your speed and pull the park-
ing brake lever.
Depress the brake pedal to
operate the stop lamp to
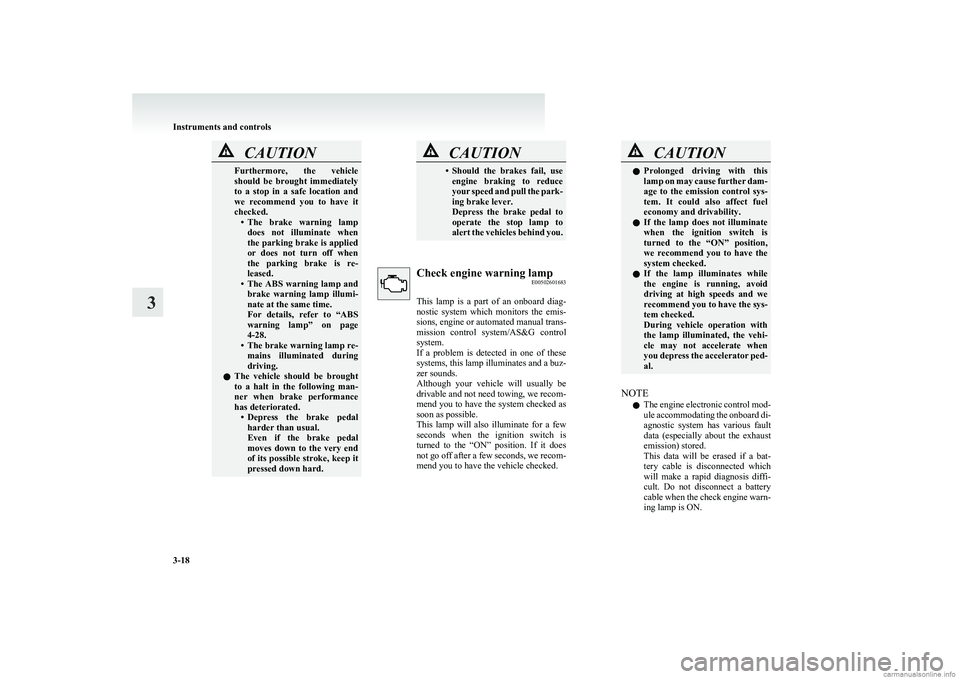
alert the vehicles behind you.Check engine warning lamp E00502601683
This lamp is a part of an onboard diag-
nostic system which monitors the emis-
sions, engine or automated manual trans-
mission control system/AS&G control
system.
If a problem is detected in one of these
systems, this lamp illuminates and a buz-
zer sounds.
Although your vehicle will usually be
drivable and not need towing, we recom-
mend you to have the system checked as
soon as possible.
This lamp will also illuminate for a few
seconds when the ignition switch is
turned to the “ON” position. If it does
not go off after a few seconds, we recom-
mend you to have the vehicle checked.CAUTIONl Prolonged driving with this
lamp on may cause further dam-
age to the emission control sys-
tem. It could also affect fuel
economy and drivability.
l If the lamp does not illuminate
when the ignition switch is
turned to the “ON” position,
we recommend you to have the
system checked.
l If the lamp illuminates while
the engine is running, avoid
driving at high speeds and we
recommend you to have the sys-
tem checked.
During vehicle operation with
the lamp illuminated, the vehi-
cle may not accelerate when
you depress the accelerator ped-
al.
NOTE
l The engine electronic control mod-
ule accommodating the onboard di-
agnostic system has various fault
data (especially about the exhaust
emission) stored.
This data will be erased if a bat-
tery cable is disconnected which
will make a rapid diagnosis diffi-
cult. Do not disconnect a battery
cable when the check engine warn-
ing lamp is ON.
Instruments and controls
3-18
3
Page 93 of 274
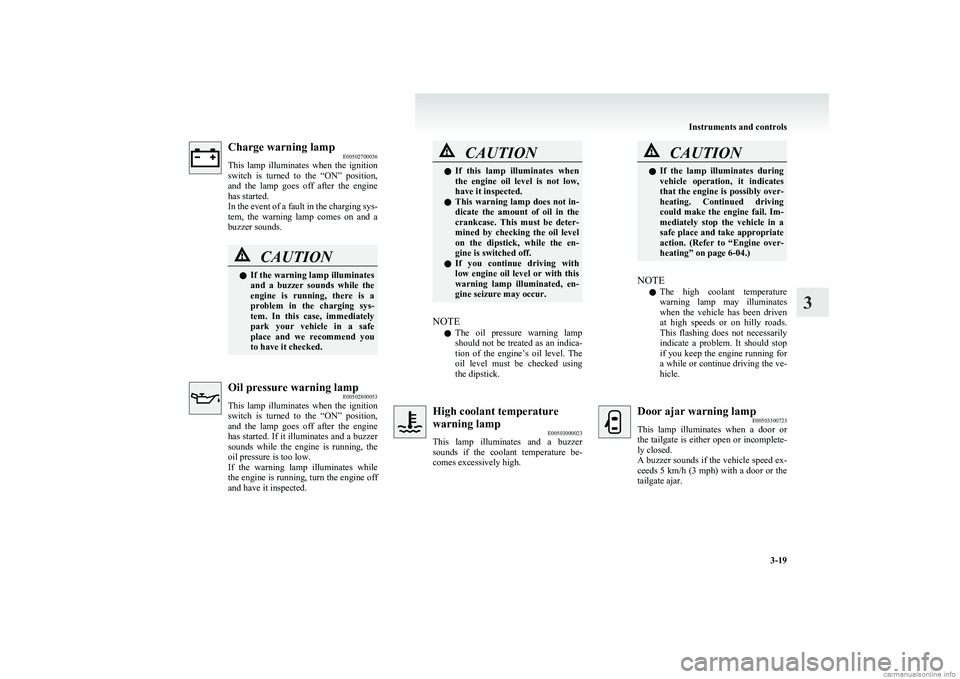
Charge warning lampE00502700036
This lamp illuminates when the ignition
switch is turned to the “ON” position,
and the lamp goes off after the engine
has started.
In the event of a fault in the charging sys-
tem, the warning lamp comes on and a
buzzer sounds.CAUTIONl If the warning lamp illuminates
and a buzzer sounds while the
engine is running, there is a
problem in the charging sys-
tem. In this case, immediately
park your vehicle in a safe
place and we recommend you
to have it checked.Oil pressure warning lamp E00502800053
This lamp illuminates when the ignition
switch is turned to the “ON” position,
and the lamp goes off after the engine
has started. If it illuminates and a buzzer
sounds while the engine is running, the
oil pressure is too low.
If the warning lamp illuminates while
the engine is running, turn the engine off
and have it inspected.CAUTIONl If this lamp illuminates when
the engine oil level is not low,
have it inspected.
l This warning lamp does not in-
dicate the amount of oil in the
crankcase. This must be deter-
mined by checking the oil level
on the dipstick, while the en-
gine is switched off.
l If you continue driving with
low engine oil level or with this
warning lamp illuminated, en-
gine seizure may occur.
NOTE
l The oil pressure warning lamp
should not be treated as an indica-
tion of the engine’s oil level. The
oil level must be checked using
the dipstick.
High coolant temperature
warning lamp E00503000023
This lamp illuminates and a buzzer
sounds if the coolant temperature be-
comes excessively high.CAUTIONl If the lamp illuminates during
vehicle operation, it indicates
that the engine is possibly over-
heating. Continued driving
could make the engine fail. Im-
mediately stop the vehicle in a
safe place and take appropriate
action. (Refer to “Engine over-
heating” on page 6-04.)
NOTE
l The high coolant temperature
warning lamp may illuminates
when the vehicle has been driven
at high speeds or on hilly roads.
This flashing does not necessarily
indicate a problem. It should stop
if you keep the engine running for
a while or continue driving the ve-
hicle.
Door ajar warning lamp E00503300723
This lamp illuminates when a door or
the tailgate is either open or incomplete-
ly closed.
A buzzer sounds if the vehicle speed ex-
ceeds 5 km/h (3 mph) with a door or the
tailgate ajar.
Instruments and controls
3-19
3
Page 94 of 274
CAUTIONlBefore moving your vehicle,
check that the warning lamp is
OFF.Combination headlamps and
dipper switch E00506000923
Headlamps
NOTE l Do not leave the headlamps and other lamps
on for a long time while the engine is station-
ary (not running). A rundown battery could
result.
l When it rains, or when the vehicle has been
washed, the inside of the lens sometimes be-
comes foggy. This is the same phenomenon
as when window glass mists up on a humid
day, and does not indicate a functional prob-
lem. When the lamp is switched on, the heat
will remove the fog. However, if water gath-
ers inside the lamp, we recommend you to
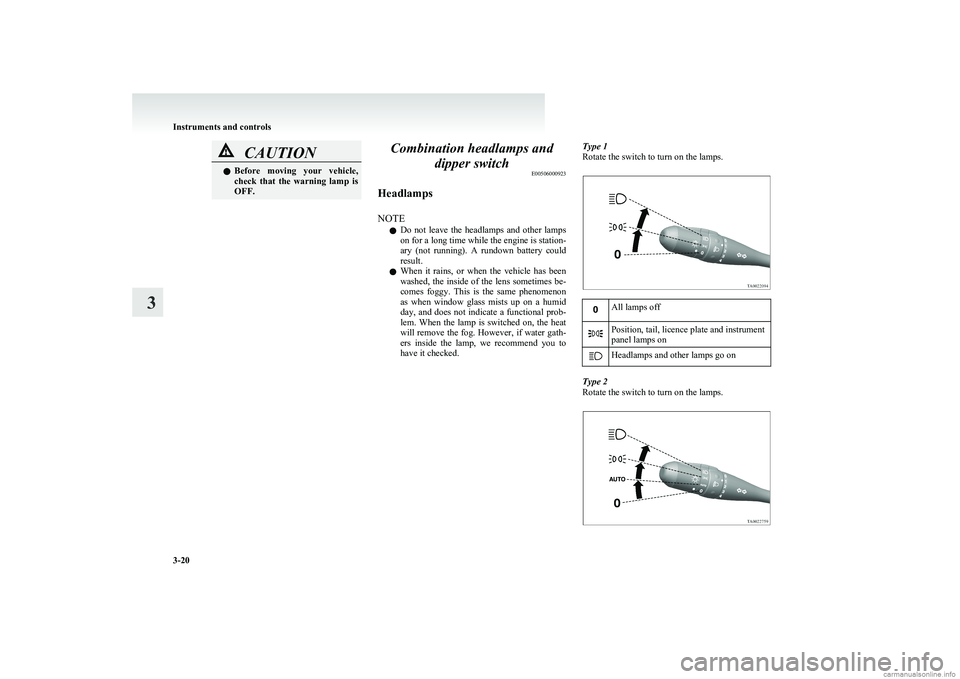
have it checked.Type 1
Rotate the switch to turn on the lamps.All lamps offPosition, tail, licence plate and instrument
panel lamps onHeadlamps and other lamps go on
Type 2
Rotate the switch to turn on the lamps.
Instruments and controls
3-20
3
Page 95 of 274
All lamps off
AUTO
With the ignition switch in the
“ON” position, headlamps, posi-
tion, tail, licence plate, and in-
strument panel lamps turn on
and off automatically in accord-
ance with outside light level.
All lamps turn off automatically
when the ignition switch is
turned to “OFF” position.Position, tail, licence plate and
instrument panel lamps onHeadlamps and other lamps go
on
NOTE
l If the front fog lamps (if so equipped) turn
on when they are supposed to with the
switch in the “AUTO” position, the lamps
turn off automatically with the engine switch
off.
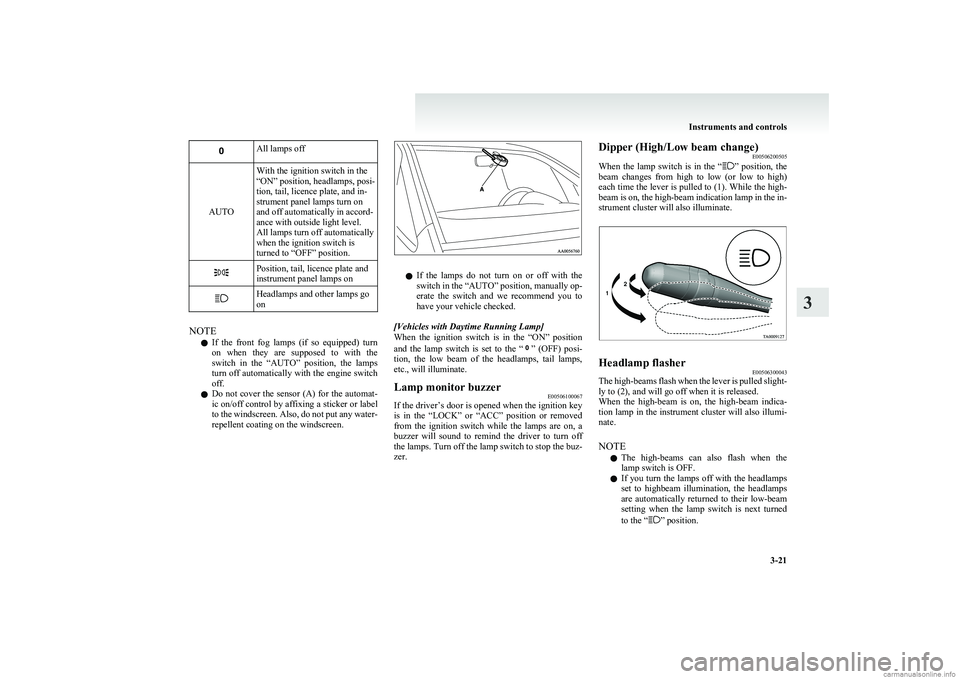
l Do not cover the sensor (A) for the automat-
ic on/off control by affixing a sticker or label
to the windscreen. Also, do not put any water-
repellent coating on the windscreen.
l If the lamps do not turn on or off with the
switch in the “AUTO” position, manually op-
erate the switch and we recommend you to
have your vehicle checked.
[Vehicles with Daytime Running Lamp]
When the ignition switch is in the “ON” position
and the lamp switch is set to the “
” (OFF) posi-
tion, the low beam of the headlamps, tail lamps,
etc., will illuminate.
Lamp monitor buzzer E00506100067
If the driver’s door is opened when the ignition key
is in the “LOCK” or “ACC” position or removed
from the ignition switch while the lamps are on, a
buzzer will sound to remind the driver to turn off
the lamps. Turn off the lamp switch to stop the buz-
zer.
Dipper (High/Low beam change) E00506200505
When the lamp switch is in the “
” position, the
beam changes from high to low (or low to high)
each time the lever is pulled to (1). While the high-
beam is on, the high-beam indication lamp in the in-
strument cluster will also illuminate.
Headlamp flasher E00506300043
The high-beams flash when the lever is pulled slight-
ly to (2), and will go off when it is released.
When the high-beam is on, the high-beam indica-
tion lamp in the instrument cluster will also illumi-
nate.
NOTE l The high-beams can also flash when the
lamp switch is OFF.
l If you turn the lamps off with the headlamps
set to highbeam illumination, the headlamps
are automatically returned to their low-beam
setting when the lamp switch is next turned
to the “
” position.
Instruments and controls
3-21
3 ������
������
������
������
������
������
������
������
Page 96 of 274
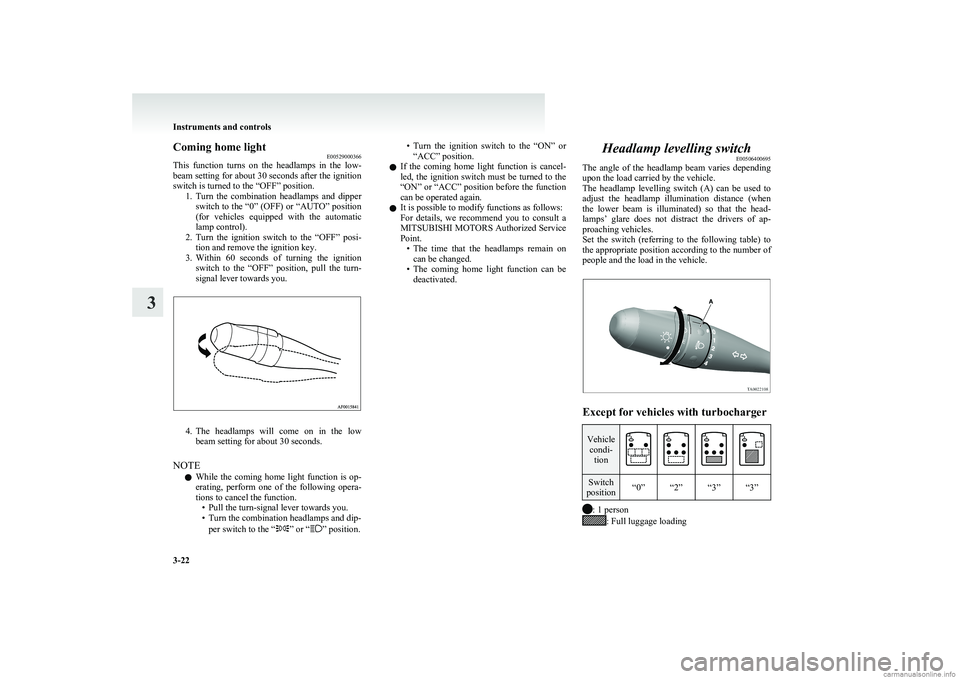
Coming home lightE00529000366
This function turns on the headlamps in the low-
beam setting for about 30 seconds after the ignition
switch is turned to the “OFF” position. 1.Turn the combination headlamps and dipper
switch to the “0” (OFF) or “AUTO” position
(for vehicles equipped with the automatic
lamp control).
2. Turn the ignition switch to the “OFF” posi-
tion and remove the ignition key.
3. Within 60 seconds of turning the ignition
switch to the “OFF” position, pull the turn-
signal lever towards you.
4. The headlamps will come on in the low
beam setting for about 30 seconds.
NOTE l While the coming home light function is op-
erating, perform one of the following opera-
tions to cancel the function. • Pull the turn-signal lever towards you.
• Turn the combination headlamps and dip-
per switch to the “
” or “” position.
•Turn the ignition switch to the “ON” or
“ACC” position.
l If the coming home light function is cancel-
led, the ignition switch must be turned to the
“ON” or “ACC” position before the function
can be operated again.
l It is possible to modify functions as follows:
For details, we recommend you to consult a
MITSUBISHI MOTORS Authorized Service
Point. •The time that the headlamps remain on
can be changed.
• The coming home light function can be
deactivated.Headlamp levelling switch E00506400695
The angle of the headlamp beam varies depending
upon the load carried by the vehicle.
The headlamp levelling switch (A) can be used to
adjust the headlamp illumination distance (when
the lower beam is illuminated) so that the head-
lamps’ glare does not distract the drivers of ap-
proaching vehicles.
Set the switch (referring to the following table) to
the appropriate position according to the number of
people and the load in the vehicle.
Except for vehicles with turbocharger
Vehicle condi- tionSwitch
position“0”“2”“3”“3”
: 1 person: Full luggage loading
Instruments and controls
3-22
3
Page 97 of 274
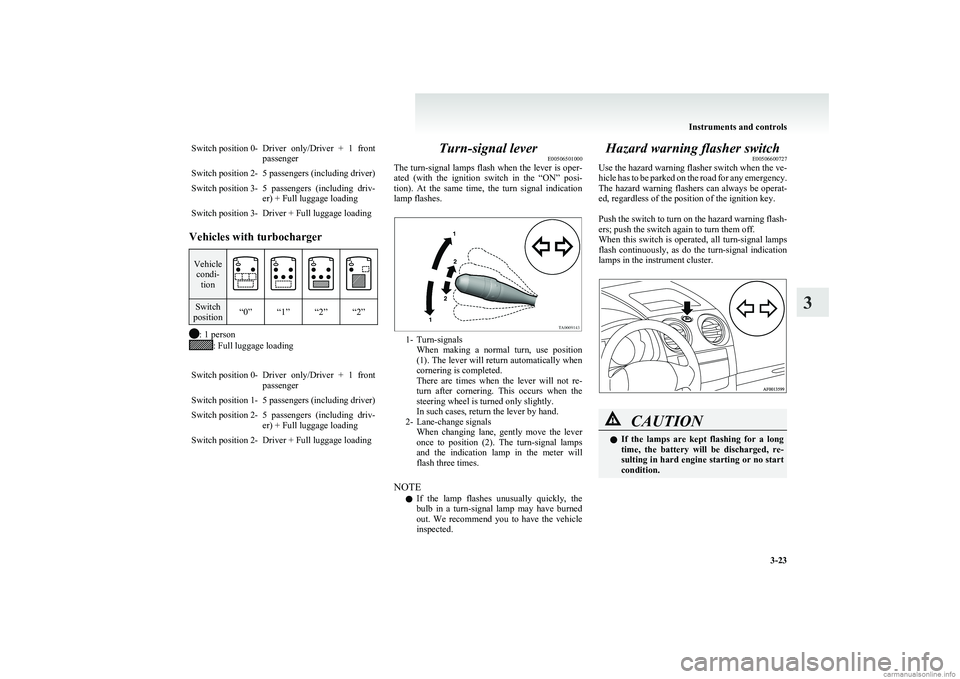
Switch position 0-Driver only/Driver + 1 front
passengerSwitch position 2-5 passengers (including driver)Switch position 3-5 passengers (including driv-
er) + Full luggage loadingSwitch position 3-Driver + Full luggage loading
Vehicles with turbocharger
Vehicle condi- tionSwitch
position“0”“1”“2”“2”
: 1 person: Full luggage loading
Switch position 0-Driver only/Driver + 1 front
passengerSwitch position 1-5 passengers (including driver)Switch position 2-5 passengers (including driv-
er) + Full luggage loadingSwitch position 2-Driver + Full luggage loadingTurn-signal lever E00506501000
The turn-signal lamps flash when the lever is oper-
ated (with the ignition switch in the “ON” posi-
tion). At the same time, the turn signal indication
lamp flashes.
1- Turn-signals When making a normal turn, use position
(1). The lever will return automatically when
cornering is completed.
There are times when the lever will not re-
turn after cornering. This occurs when the
steering wheel is turned only slightly.
In such cases, return the lever by hand.
2- Lane-change signals When changing lane, gently move the lever
once to position (2). The turn-signal lamps
and the indication lamp in the meter will
flash three times.
NOTE l If the lamp flashes unusually quickly, the
bulb in a turn-signal lamp may have burned
out. We recommend you to have the vehicle
inspected.
Hazard warning flasher switch E00506600727
Use the hazard warning flasher switch when the ve-
hicle has to be parked on the road for any emergency.
The hazard warning flashers can always be operat-
ed, regardless of the position of the ignition key.
Push the switch to turn on the hazard warning flash-
ers; push the switch again to turn them off.
When this switch is operated, all turn-signal lamps
flash continuously, as do the turn-signal indication
lamps in the instrument cluster.CAUTIONl If the lamps are kept flashing for a long
time, the battery will be discharged, re-
sulting in hard engine starting or no start
condition.
Instruments and controls
3-23
3
Page 98 of 274
NOTEl While the hazard warning lamps are blinking
due to having manually pushed the switch,
the Emergency stop signal does not operate.
Refer to “Emergency stop signal system” on
page 4-26.Front fog lamp switch* E00506800820
The front fog lamps illuminate only when the head-
lamps or tail lamps turn on. Push the switch to turn
on the front fog lamps, and push the switch again
to turn them off.
The indication lamp in the instrument cluster will
illuminate while the front fog lamps are on.
NOTE
l The front fog lamps are automatically turned
off when the headlamps and tail lamps turn
off. To turn on the front fog lamps again,
push the switch again when the headlamps or
tail lamps turn on.
l In case of vehicles with Daytime Running
Lamp, the front fog lamp can be operated
even if the lamp switch is set to the “
”
(OFF) position, because the low beam of the
headlamps, tail lamps, etc. illuminate when
the ignition key is at the “ON” position.
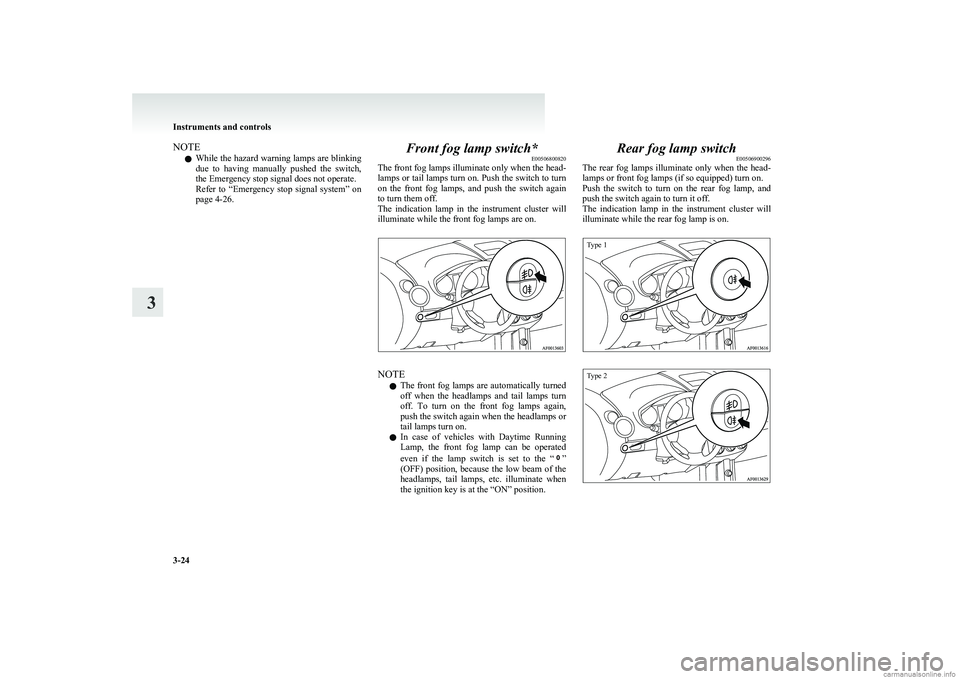
Rear fog lamp switch E00506900296
The rear fog lamps illuminate only when the head-
lamps or front fog lamps (if so equipped) turn on.
Push the switch to turn on the rear fog lamp, and
push the switch again to turn it off.
The indication lamp in the instrument cluster will
illuminate while the rear fog lamp is on.
Type 1Type 2
Instruments and controls
3-24
3
Page 99 of 274
NOTEl The rear fog lamp is automatically turned off
when the headlamps and front fog lamps (if
so equipped) turned off. To turn on the rear
fog lamp again, push the switch again when
the headlamps or front fog lamps (if so equip-
ped) turn on.
l In case of vehicles with Daytime Running
Lamp, the rear fog lamp can be operated
even if the lamp switch is set to the “
”
(OFF) position, because the low beam of the
headlamps, tail lamps, etc. illuminate when
the ignition key is at the “ON” position.
Wiper and washer switch E00507101191CAUTIONlIf the washer is used in cold weather, the
washer fluid sprayed against the glass
may freeze, which may hinder visibility.
Warm the glass with the defroster or rear
window demister switch before using the
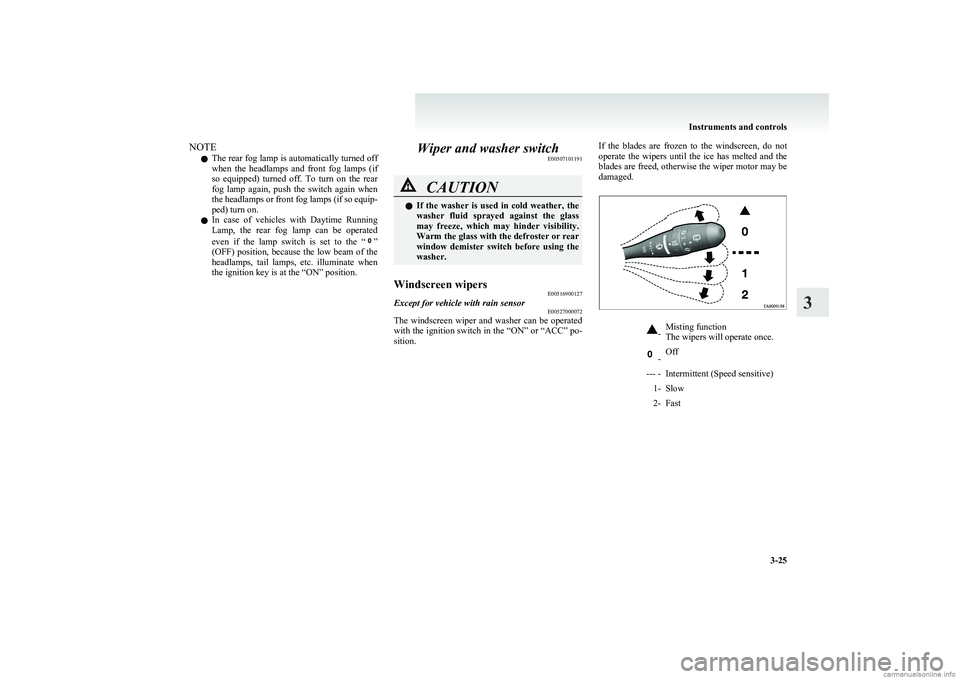
washer.Windscreen wipers E00516900127Except for vehicle with rain sensorE00527000072
The windscreen wiper and washer can be operated
with the ignition switch in the “ON” or “ACC” po-
sition.
If the blades are frozen to the windscreen, do not
operate the wipers until the ice has melted and the
blades are freed, otherwise the wiper motor may be
damaged.-Misting function
The wipers will operate once. -Off--- -Intermittent (Speed sensitive)1-Slow2-Fast
Instruments and controls
3-25
3
Page 100 of 274
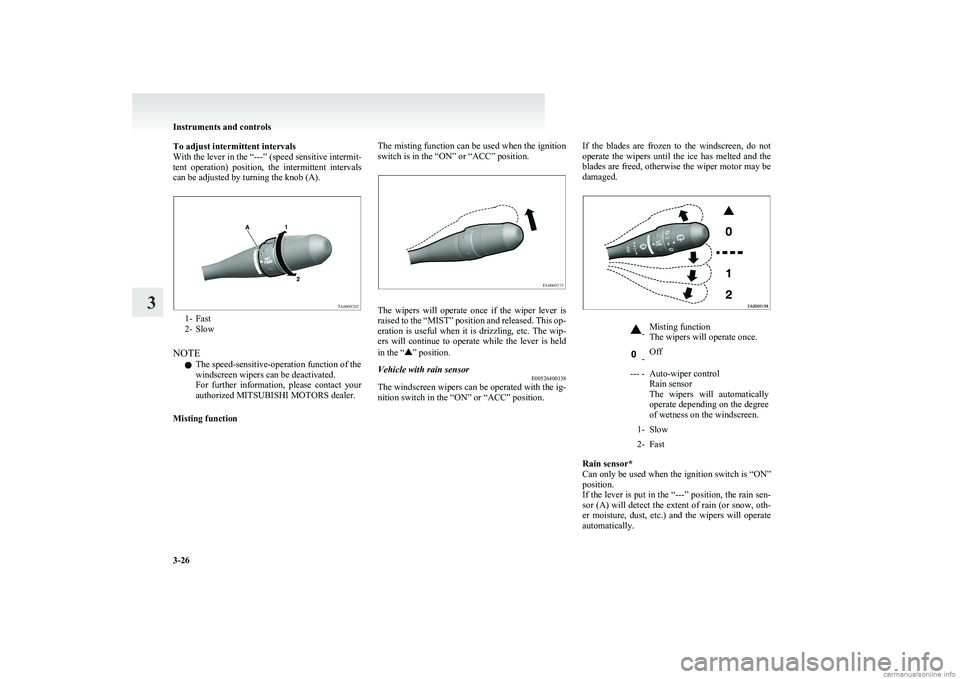
To adjust intermittent intervals
With the lever in the “---” (speed sensitive intermit-
tent operation) position, the intermittent intervals
can be adjusted by turning the knob (A).
1- Fast
2- Slow
NOTE l The speed-sensitive-operation function of the
windscreen wipers can be deactivated.
For further information, please contact your
authorized MITSUBISHI MOTORS dealer.
Misting function
The misting function can be used when the ignition
switch is in the “ON” or “ACC” position.
The wipers will operate once if the wiper lever is
raised to the “MIST” position and released. This op-
eration is useful when it is drizzling, etc. The wip-
ers will continue to operate while the lever is held
in the “
” position.
Vehicle with rain sensor E00526400138
The windscreen wipers can be operated with the ig-
nition switch in the “ON” or “ACC” position.
If the blades are frozen to the windscreen, do not
operate the wipers until the ice has melted and the
blades are freed, otherwise the wiper motor may be
damaged.-Misting function
The wipers will operate once. -Off--- -Auto-wiper control
Rain sensor
The wipers will automatically
operate depending on the degree
of wetness on the windscreen.1-Slow2-Fast
Rain sensor*
Can only be used when the ignition switch is “ON”
position.
If the lever is put in the “---” position, the rain sen-
sor (A) will detect the extent of rain (or snow, oth-
er moisture, dust, etc.) and the wipers will operate
automatically.
Instruments and controls
3-26
3