window MITSUBISHI COLT 2011 (in English) Owner's Guide
[x] Cancel search | Manufacturer: MITSUBISHI, Model Year: 2011, Model line: COLT, Model: MITSUBISHI COLT 2011Pages: 274, PDF Size: 17.88 MB
Page 65 of 274
How the Supplemental Restraint Sys-
tem works E00407301583
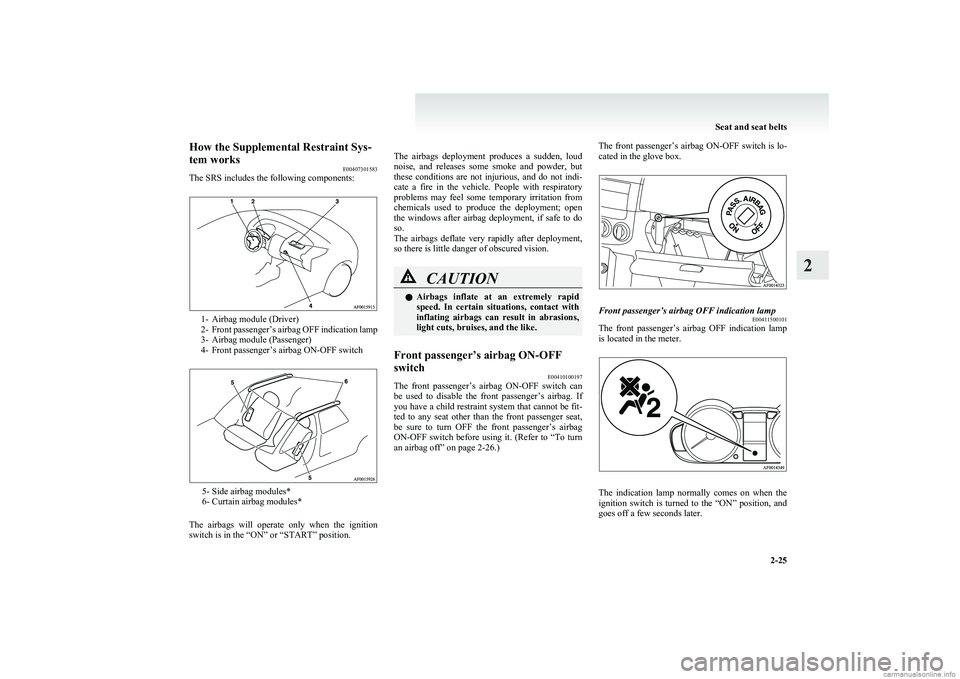
The SRS includes the following components:
1- Airbag module (Driver)
2- Front passenger’s airbag OFF indication lamp
3- Airbag module (Passenger)
4- Front passenger’s airbag ON-OFF switch
5- Side airbag modules*
6- Curtain airbag modules*
The airbags will operate only when the ignition
switch is in the “ON” or “START” position.
The airbags deployment produces a sudden, loud
noise, and releases some smoke and powder, but
these conditions are not injurious, and do not indi-
cate a fire in the vehicle. People with respiratory
problems may feel some temporary irritation from
chemicals used to produce the deployment; open
the windows after airbag deployment, if safe to do
so.
The airbags deflate very rapidly after deployment,
so there is little danger of obscured vision.CAUTIONl Airbags inflate at an extremely rapid
speed. In certain situations, contact with
inflating airbags can result in abrasions,
light cuts, bruises, and the like.Front passenger’s airbag ON-OFF
switch E00410100197
The front passenger’s airbag ON-OFF switch can
be used to disable the front passenger’s airbag. If
you have a child restraint system that cannot be fit-
ted to any seat other than the front passenger seat,
be sure to turn OFF the front passenger’s airbag
ON-OFF switch before using it. (Refer to “To turn
an airbag off” on page 2-26.)
The front passenger’s airbag ON-OFF switch is lo-
cated in the glove box.Front passenger’s airbag OFF indication lamp E00411500101
The front passenger’s airbag OFF indication lamp
is located in the meter.
The indication lamp normally comes on when the
ignition switch is turned to the “ON” position, and
goes off a few seconds later.
Seat and seat belts
2-25
2
Page 72 of 274
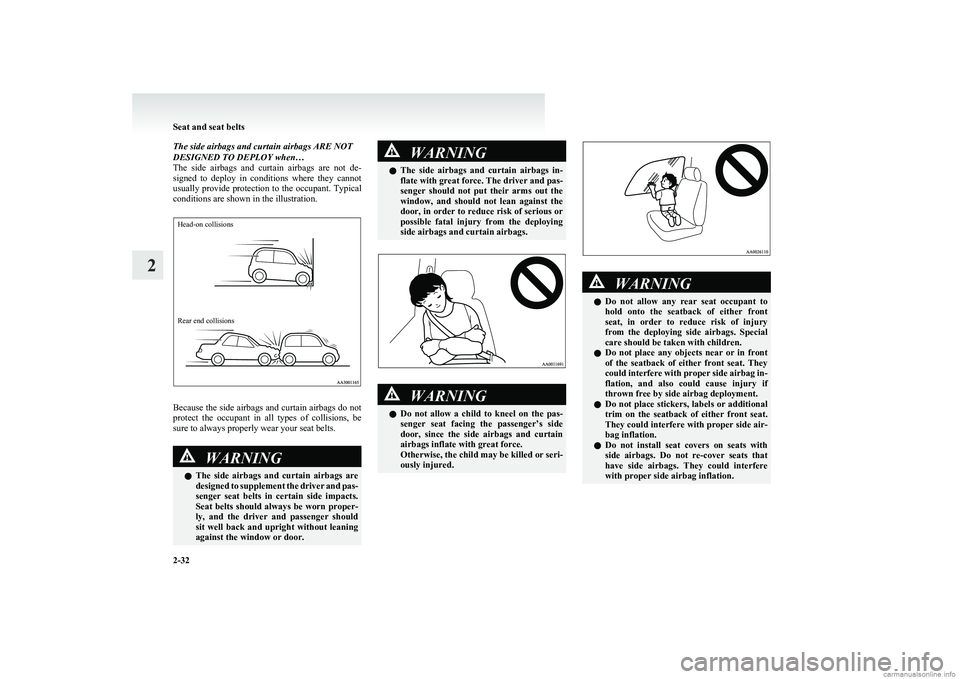
The side airbags and curtain airbags ARE NOT
DESIGNED TO DEPLOY when…
The side airbags and curtain airbags are not de-
signed to deploy in conditions where they cannot
usually provide protection to the occupant. Typical
conditions are shown in the illustration.Head-on collisionsRear end collisions
Because the side airbags and curtain airbags do not
protect the occupant in all types of collisions, be
sure to always properly wear your seat belts.
WARNINGl The side airbags and curtain airbags are
designed to supplement the driver and pas-
senger seat belts in certain side impacts.
Seat belts should always be worn proper-
ly, and the driver and passenger should
sit well back and upright without leaning
against the window or door.WARNINGl The side airbags and curtain airbags in-
flate with great force. The driver and pas-
senger should not put their arms out the
window, and should not lean against the
door, in order to reduce risk of serious or
possible fatal injury from the deploying
side airbags and curtain airbags.WARNINGl Do not allow a child to kneel on the pas-
senger seat facing the passenger’s side
door, since the side airbags and curtain
airbags inflate with great force.
Otherwise, the child may be killed or seri-
ously injured.WARNINGl Do not allow any rear seat occupant to
hold onto the seatback of either front
seat, in order to reduce risk of injury
from the deploying side airbags. Special
care should be taken with children.
l Do not place any objects near or in front
of the seatback of either front seat. They
could interfere with proper side airbag in-
flation, and also could cause injury if
thrown free by side airbag deployment.
l Do not place stickers, labels or additional
trim on the seatback of either front seat.
They could interfere with proper side air-
bag inflation.
l Do not install seat covers on seats with
side airbags. Do not re-cover seats that
have side airbags. They could interfere
with proper side airbag inflation.
Seat and seat belts
2-32
2
Page 75 of 274
Instruments................................................................................... 3-02
Multi-information display.............................................................3-04
Indication and warning lamps.......................................................3-16
Indication lamps ........................................................................... 3-17
Warning lamps .............................................................................. 3-17
Combination headlamps and dipper switch ..................................3-20
Headlamp levelling switch ........................................................... 3-22
Turn-signal lever...........................................................................3-23
Hazard warning flasher switch ..................................................... 3-23
Front fog lamp switch* ................................................................. 3-24
Rear fog lamp switch .................................................................... 3-24
Wiper and washer switch .............................................................. 3-25
Rear window demister switch.......................................................3-29
Horn switch...................................................................................3-30Instruments and controls3
Page 94 of 274
CAUTIONlBefore moving your vehicle,
check that the warning lamp is
OFF.Combination headlamps and
dipper switch E00506000923
Headlamps
NOTE l Do not leave the headlamps and other lamps
on for a long time while the engine is station-
ary (not running). A rundown battery could
result.
l When it rains, or when the vehicle has been
washed, the inside of the lens sometimes be-
comes foggy. This is the same phenomenon
as when window glass mists up on a humid
day, and does not indicate a functional prob-
lem. When the lamp is switched on, the heat
will remove the fog. However, if water gath-
ers inside the lamp, we recommend you to
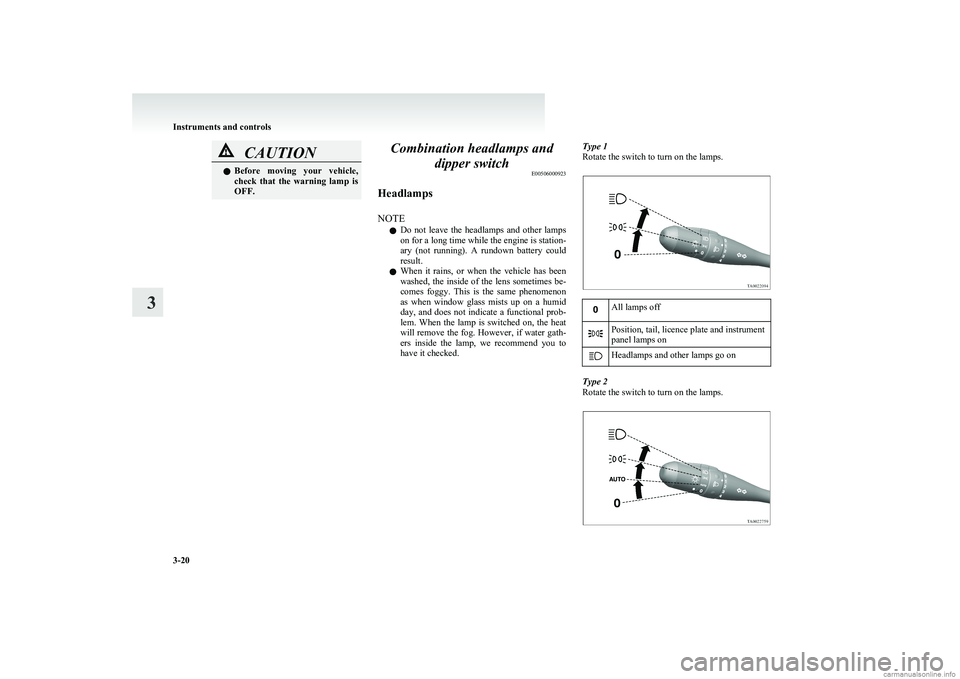
have it checked.Type 1
Rotate the switch to turn on the lamps.All lamps offPosition, tail, licence plate and instrument
panel lamps onHeadlamps and other lamps go on
Type 2
Rotate the switch to turn on the lamps.
Instruments and controls
3-20
3
Page 99 of 274
NOTEl The rear fog lamp is automatically turned off
when the headlamps and front fog lamps (if
so equipped) turned off. To turn on the rear
fog lamp again, push the switch again when
the headlamps or front fog lamps (if so equip-
ped) turn on.
l In case of vehicles with Daytime Running
Lamp, the rear fog lamp can be operated
even if the lamp switch is set to the “
”
(OFF) position, because the low beam of the
headlamps, tail lamps, etc. illuminate when
the ignition key is at the “ON” position.
Wiper and washer switch E00507101191CAUTIONlIf the washer is used in cold weather, the
washer fluid sprayed against the glass
may freeze, which may hinder visibility.
Warm the glass with the defroster or rear
window demister switch before using the
washer.Windscreen wipers E00516900127Except for vehicle with rain sensorE00527000072
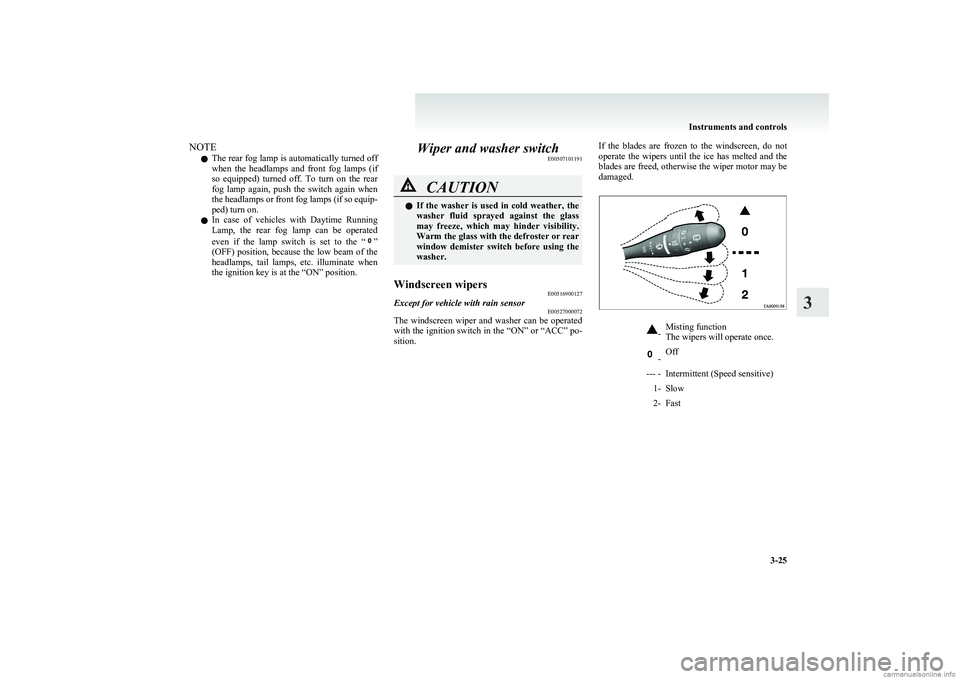
The windscreen wiper and washer can be operated
with the ignition switch in the “ON” or “ACC” po-
sition.
If the blades are frozen to the windscreen, do not
operate the wipers until the ice has melted and the
blades are freed, otherwise the wiper motor may be
damaged.-Misting function
The wipers will operate once. -Off--- -Intermittent (Speed sensitive)1-Slow2-Fast
Instruments and controls
3-25
3
Page 103 of 274
Rear window wiper and washerE00507300532
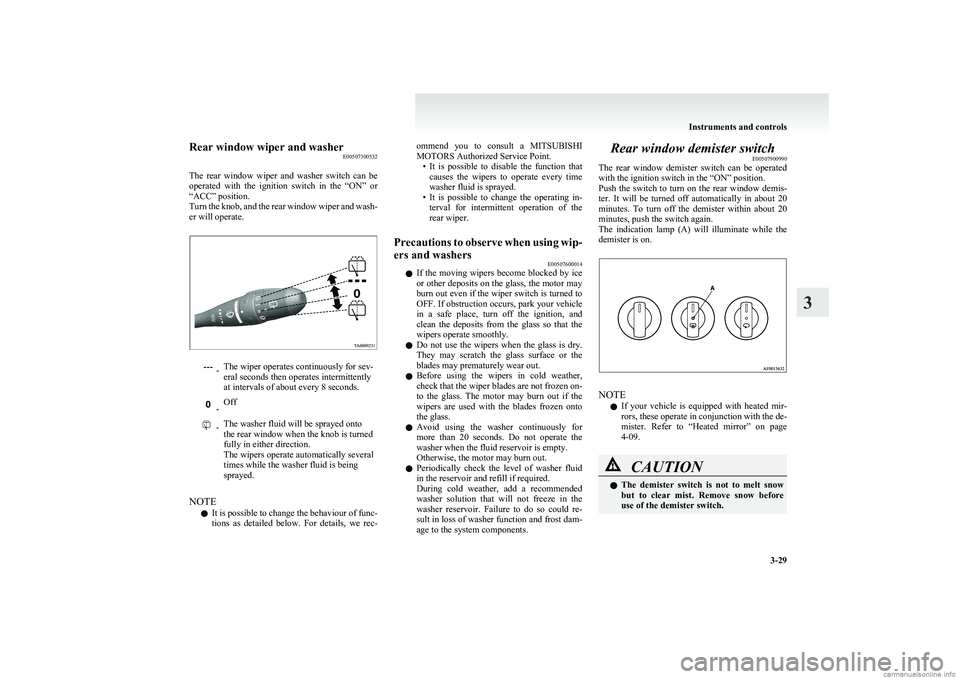
The rear window wiper and washer switch can be
operated with the ignition switch in the “ON” or
“ACC” position.
Turn the knob, and the rear window wiper and wash-
er will operate. -The wiper operates continuously for sev-
eral seconds then operates intermittently
at intervals of about every 8 seconds. -Off -The washer fluid will be sprayed onto
the rear window when the knob is turned
fully in either direction.
The wipers operate automatically several
times while the washer fluid is being
sprayed.
NOTE
l It is possible to change the behaviour of func-
tions as detailed below. For details, we rec-
ommend you to consult a MITSUBISHI
MOTORS Authorized Service Point. •It is possible to disable the function that
causes the wipers to operate every time
washer fluid is sprayed.
• It is possible to change the operating in-
terval for intermittent operation of the
rear wiper.Precautions to observe when using wip-
ers and washers E00507600014
lIf the moving wipers become blocked by ice
or other deposits on the glass, the motor may
burn out even if the wiper switch is turned to
OFF. If obstruction occurs, park your vehicle
in a safe place, turn off the ignition, and
clean the deposits from the glass so that the
wipers operate smoothly.
l Do not use the wipers when the glass is dry.
They may scratch the glass surface or the
blades may prematurely wear out.
l Before using the wipers in cold weather,
check that the wiper blades are not frozen on-
to the glass. The motor may burn out if the
wipers are used with the blades frozen onto
the glass.
l Avoid using the washer continuously for
more than 20 seconds. Do not operate the
washer when the fluid reservoir is empty.
Otherwise, the motor may burn out.
l Periodically check the level of washer fluid
in the reservoir and refill if required.
During cold weather, add a recommended
washer solution that will not freeze in the
washer reservoir. Failure to do so could re-
sult in loss of washer function and frost dam-
age to the system components.
Rear window demister switch E00507900990
The rear window demister switch can be operated
with the ignition switch in the “ON” position.
Push the switch to turn on the rear window demis-
ter. It will be turned off automatically in about 20
minutes. To turn off the demister within about 20
minutes, push the switch again.
The indication lamp (A) will illuminate while the
demister is on.
NOTE
l If your vehicle is equipped with heated mir-
rors, these operate in conjunction with the de-
mister. Refer to “Heated mirror” on page
4-09.
CAUTIONl The demister switch is not to melt snow
but to clear mist. Remove snow before
use of the demister switch.
Instruments and controls
3-29
3
Page 104 of 274
CAUTIONlTo avoid unnecessary discharge of the bat-
tery, do not use the rear window demister
during starting of the engine or when the
engine is not running. Turn the demister
off immediately after the window is clear.
l When cleaning the inside of the rear win-
dow, use a soft cloth and wipe gently
along the heater wires, being careful not
to damage the wires.
l Do not allow objects to touch the inside of
the rear window glass, damaged or bro-
ken wires may result.Horn switch E00508000581
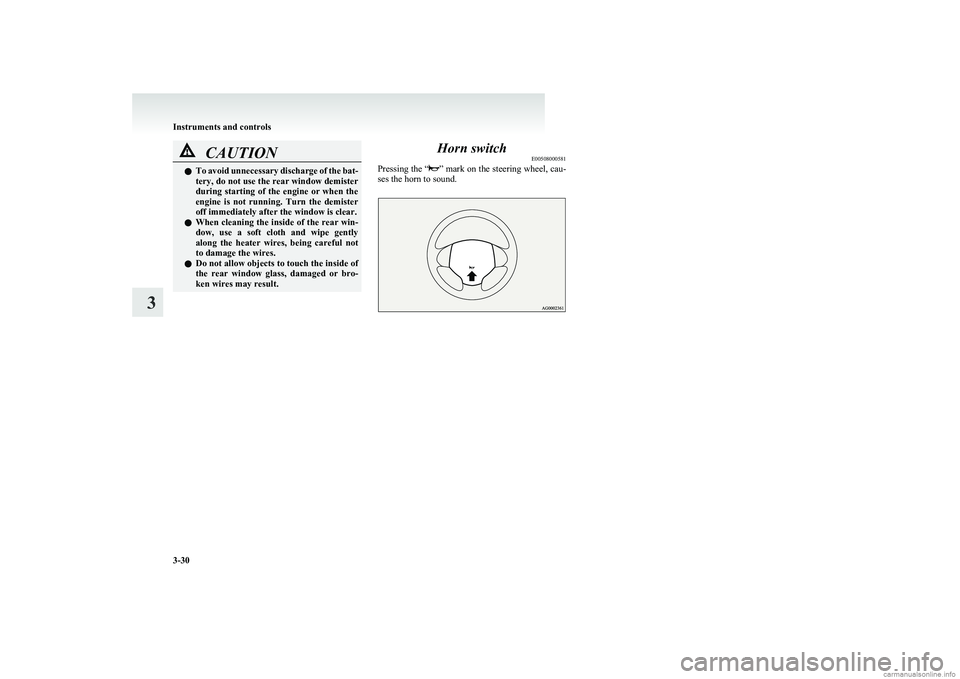
Pressing the “
” mark on the steering wheel, cau-
ses the horn to sound.Instruments and controls
3-30
3
Page 113 of 274
Manual remote-controlled outside rear-view mir-
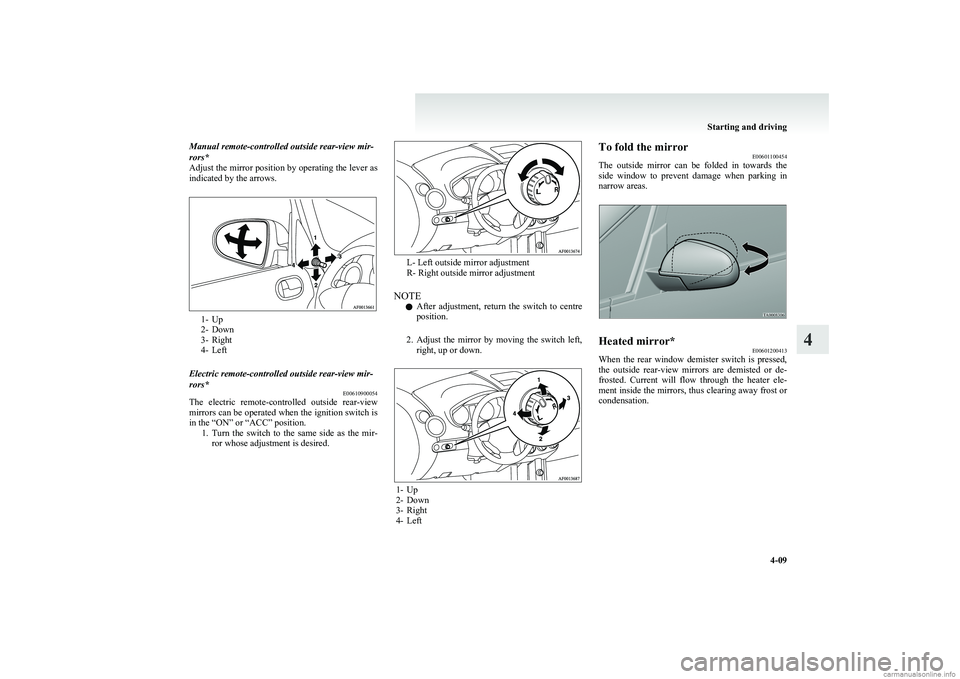
rors*
Adjust the mirror position by operating the lever as
indicated by the arrows.
1- Up
2- Down
3- Right
4- Left
Electric remote-controlled outside rear-view mir-
rors* E00610900054
The electric remote-controlled outside rear-view
mirrors can be operated when the ignition switch is
in the “ON” or “ACC” position. 1.Turn the switch to the same side as the mir-
ror whose adjustment is desired.
L- Left outside mirror adjustment
R- Right outside mirror adjustment
NOTE l After adjustment, return the switch to centre
position.
2. Adjust the mirror by moving the switch left,
right, up or down.
1- Up
2- Down
3- Right
4- Left
To fold the mirror E00601100454
The outside mirror can be folded in towards the
side window to prevent damage when parking in
narrow areas.Heated mirror* E00601200413
When the rear window demister switch is pressed,
the outside rear-view mirrors are demisted or de-
frosted. Current will flow through the heater ele-
ment inside the mirrors, thus clearing away frost or
condensation.
Starting and driving
4-09
4
Page 118 of 274
NOTEl Under normal conditions, the “
”
indication
lamp will also illuminate for a few seconds
when the ignition switch is turned to the
“ON” position.
l The brake booster becomes inoperative and
the pedal effort will increase when the en-
gine is stopped automatically.
If the vehicle is moving, press down the
brake pedal harder than usual.CAUTIONl Observe the following precautions when
the engine is stopped automatically. Oth-
erwise, an unexpected accident might oc-
cur when the engine restarts automatical-
ly. •Do not depress the accelerator pedal
to race the engine while the vehicle is
stopped (regardless of whether the en-
gine is running or stopped).
Otherwise, an unexpected accident
might occur when the engine restarts
automatically.CAUTION• Do not leave the driver’s seat or open
the bonnet.
If the driver’s seat belt is unfastened
or if the bonnet is opened, the “
” in-
dication lamp will blink to inform the
driver. If this occurs, the engine will
not restart automatically even if the
clutch pedal is depressed, the seat belt
is refastened, and the bonnet is closed.
While depressing the brake pedal,
fully depress the clutch pedal and
turn the ignition switch to the
“START” position to start the engine.
For details, refer to “Starting the en-
gine” on page 4-12.
• Do not move the gearshift lever to a po-
sition other than the “N” (Neutral) po-
sition.
If the gearshift lever is moved to a po-
sition other than the “N” (Neutral) po-
sition, the “
” indication lamp blinks
and the buzzer sounds.
If the gearshift lever is returned to the
“N” (Neutral) position, the lamp stops
blinking and the buzzer stops sound-
ing. The engine will not restart if the
gearshift lever is in a position other
than the “N” (Neutral) position.
NOTE
l In the following cases, the Auto Stop & Go
(AS&G) system will not operate and the en-
gine will not stop automatically even if the ve-
hicle is stopped. • Driver’s seat belt is not fastened
• Bonnet is open
• After the engine restarts automatically,
the vehicle speed has not exceeded ap-
proximately 5 km/h (3 mph)
• Brake booster vacuum pressure is low be- cause the brake pedal is depressed repeat-
edly or depressed harder than usual
• After the ignition switch is turned from
the “LOCK” position to the “START” po-
sition, approximately 3 minutes or more
have not elapsed
• After the ignition switch is turned from
the “ON” position to the “START” posi-
tion, approximately 30 seconds or more
have not elapsed.
• After the engine restarts automatically,
the vehicle stops again within 10 seconds
• Engine coolant temperature is low
• Ambient temperature is lower than ap-
proximately 3°C
• Air conditioner is operating and passen-
ger compartment has not sufficiently
cooled (for vehicles with automatic air
conditioning)
• Mode selection dial is set to the demister
position (for vehicles with automatic air
conditioning)
Refer to “For quick demisting” on page
5-10.
• Electric power consumption is high, such
as when the rear window demister or oth-
er electrical components are operating or
the blower speed is set to a high setting
• Battery voltage or battery performance is
low
• Check engine warning lamp is illumina-
ted or the “
” indication lamp is blinking
[For vehicles with automatic air conditioning]
Starting and driving
4-14
4
Page 119 of 274
lIf the Auto Stop & Go (AS&G) system oper-
ates while the air conditioner is operating,
both the engine and the air conditioning com-
pressor will stop. Therefore, only the blower
will operate.
l If air is flowing from the demister and the en-
gine is stopped automatically, it is recommen-
ded to set the mode selection dial to the De-
mister/Face or Foot/Demister position.
Refer to “Changing the mode selection” on
pages 5-02, 5-02.
l If the air conditioner is operating, set the tem-
perature control dial to 22°C or higher to
lengthen the time that the engine is stopped
automatically.
l If the air conditioner is operating when the
ambient temperature is high, such as during
the summer, change the air selection from out-
side air to recirculated air to lengthen the
time that the engine is stopped automatically.Automatically restarting the engine E00627600066
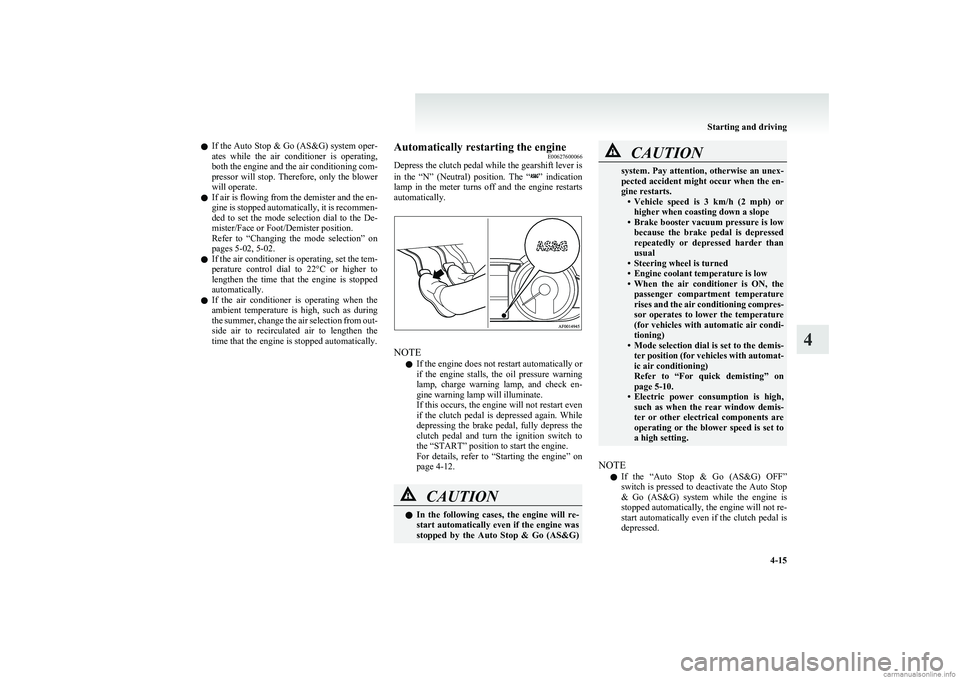
Depress the clutch pedal while the gearshift lever is
in the “N” (Neutral) position. The “
” indication
lamp in the meter turns off and the engine restarts
automatically.
NOTE
l If the engine does not restart automatically or
if the engine stalls, the oil pressure warning
lamp, charge warning lamp, and check en-
gine warning lamp will illuminate.
If this occurs, the engine will not restart even
if the clutch pedal is depressed again. While
depressing the brake pedal, fully depress the
clutch pedal and turn the ignition switch to
the “START” position to start the engine.
For details, refer to “Starting the engine” on
page 4-12.
CAUTIONl In the following cases, the engine will re-
start automatically even if the engine was
stopped by the Auto Stop & Go (AS&G)CAUTIONsystem. Pay attention, otherwise an unex-
pected accident might occur when the en-
gine restarts. •Vehicle speed is 3 km/h (2 mph) or
higher when coasting down a slope
• Brake booster vacuum pressure is low
because the brake pedal is depressed
repeatedly or depressed harder than
usual
• Steering wheel is turned
• Engine coolant temperature is low
• When the air conditioner is ON, the
passenger compartment temperature
rises and the air conditioning compres-
sor operates to lower the temperature
(for vehicles with automatic air condi-
tioning)
• Mode selection dial is set to the demis-
ter position (for vehicles with automat-
ic air conditioning)
Refer to “For quick demisting” on
page 5-10.
• Electric power consumption is high,
such as when the rear window demis-
ter or other electrical components are
operating or the blower speed is set to
a high setting.
NOTE
l If the “Auto Stop & Go (AS&G) OFF”
switch is pressed to deactivate the Auto Stop
& Go (AS&G) system while the engine is
stopped automatically, the engine will not re-
start automatically even if the clutch pedal is
depressed.
Starting and driving
4-15
4