fuel MITSUBISHI ECLIPSE CROSS 2020 (in English) User Guide
[x] Cancel search | Manufacturer: MITSUBISHI, Model Year: 2020, Model line: ECLIPSE CROSS, Model: MITSUBISHI ECLIPSE CROSS 2020Pages: 427, PDF Size: 78.05 MB
Page 35 of 427

Event Data Recording 3-14 General information
3
However, you can add to the future perfor- mance and economy of your vehicle by observing the follow
ing precautions during
the first 300 miles (500 km).Drive your vehicle at moderate speeds during the break-in period. Avoid revving the engine. Avoid rough driving such as sudden starts, sudden acceleration, prolonged high- speed driving and sudden braking. These actions would have a detrimental effect onthe engine and lead to increased fuel andoil consumption; this could ultimately result in the malfunction of engine com- ponents. Be particularly careful to avoidfull acceleration while in low shift posi- tion (low gears). Do not overload the vehicle. Stay within the seating capacity. Refer to “Cargo load precautions” on page 6-10. Refrain from towing a trailer or other vehicle. Refer to “Trailer towing” on page 6-11.
N00302700059
This vehicle is equipped with an event datarecorder (EDR).The main purpose of an EDR is to record, in certain crash or near crash-like situations,
such as an airbag deployment or hitting a road obstacle, data that will assist in under- standing how a vehicle’s systems performed. The EDR is designed to record data related tovehicle dynamics and safety systems for a short period of time, typically 30 seconds or less. The EDR in this vehicle is designed to record such data as: How various systems in your vehicle were operating; Whether or not the driver and front pas- senger safety belts were buckled/fastened; How far (if at all) the driver was depress- ing the accelerator and/or brake pedal; and, How fast the vehicle was traveling.
These data can help provide a better under- standing of the circumstances in which crashes and injuries occur.
To read data recorded by an EDR, special equipment is required, and access to the vehi- cle or the EDR is needed. In addition to the vehicle manufacturer, other parties, such aslaw enforcement, that have the special equip- ment, can read the information if they have access to the vehicle or the EDR.
Event Data Recording
NOTE
EDR data are recorded by your vehicle only if a non-trivial crash situation occurs; no data are recorded by the EDR under normal driv- ing conditions and no personal data (e.g., name, gender, age, and crash location) arerecorded. However, other parties, such as law enforcement, could combine the EDR data with the type of personally identifyingdata routinely acquired during a crash inves- tigation.
BK0277700US.bo
ok 14 ページ 2019年3月8日 金曜日 午前9時23分
Page 105 of 427
Free-hand Advanced Security Transmitter (F.A.S.T.-key) (if so equipped) 5-24 Features and controls
5
N00514601416
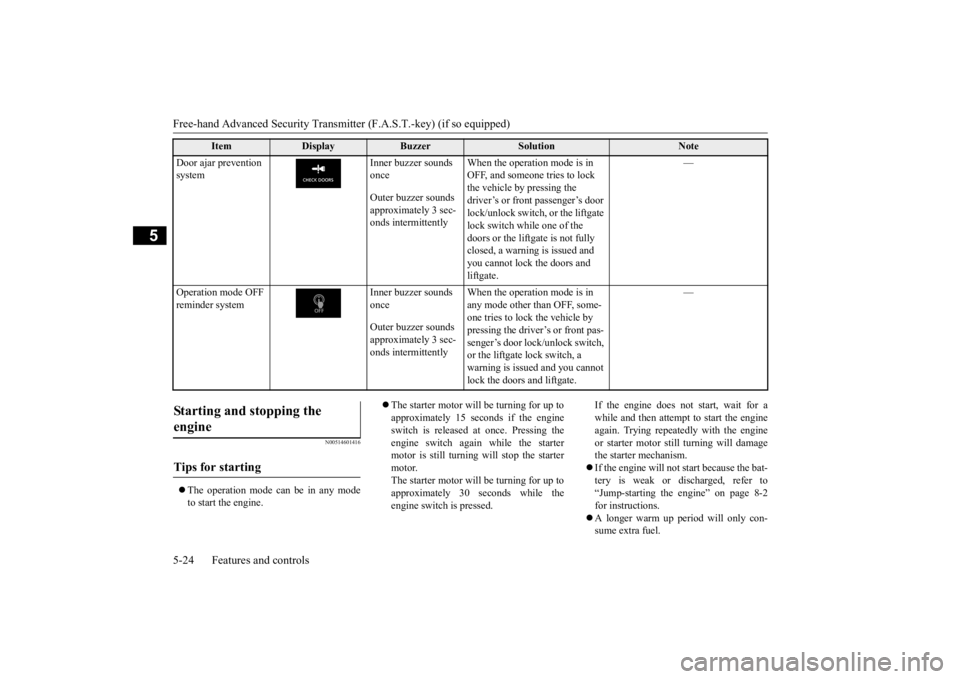
The operation mode can be in any mode to start the engine.
The starter motor will be turning for up to approximately 15 seconds if the engineswitch is released at once. Pressing the engine switch again while the starter motor is still turning will stop the startermotor. The starter motor will be turning for up to approximately 30 seconds while theengine switch is pressed.
If the engine does not start, wait for a while and then attempt to start the engineagain. Trying repeatedly with the engine or starter motor still turning will damage the starter mechanism. If the engine will not start because the bat- tery is weak or discharged, refer to “Jump-starting the engine” on page 8-2for instructions. A longer warm up period will only con- sume extra fuel.
Door ajar prevention system
Inner buzzer sounds once Outer buzzer sounds approximately 3 sec-onds intermittently
When the operation mode is in OFF, and someone tries to lock the vehicle by pressing the driver’s or front passenger’s door lock/unlock switch, or the liftgate lock switch while one of the doors or the liftgate is not fully closed, a warning is issued and you cannot lock the doors and liftgate.
—
Operation mode OFF reminder system
Inner buzzer sounds once Outer buzzer sounds approximately 3 sec-onds intermittently
When the operation mode is in any mode other than OFF, some- one tries to lock the vehicle by pressing the driver’s or front pas- senger’s door lock/unlock switch, or the liftgate lock switch, a warning is issued and you cannot lock the doors and liftgate.
—
Item
Display
Buzzer
Solution
Note
Starting and stopping the engine
Tips for starting
BK0277700US.bo
ok 24 ページ 2019年3月8日 金曜日 午前9時23分
Page 106 of 427
Free-hand Advanced Security Transmit
ter (F.A.S.T.-key) (if so equipped)
Features and controls 5-25
5
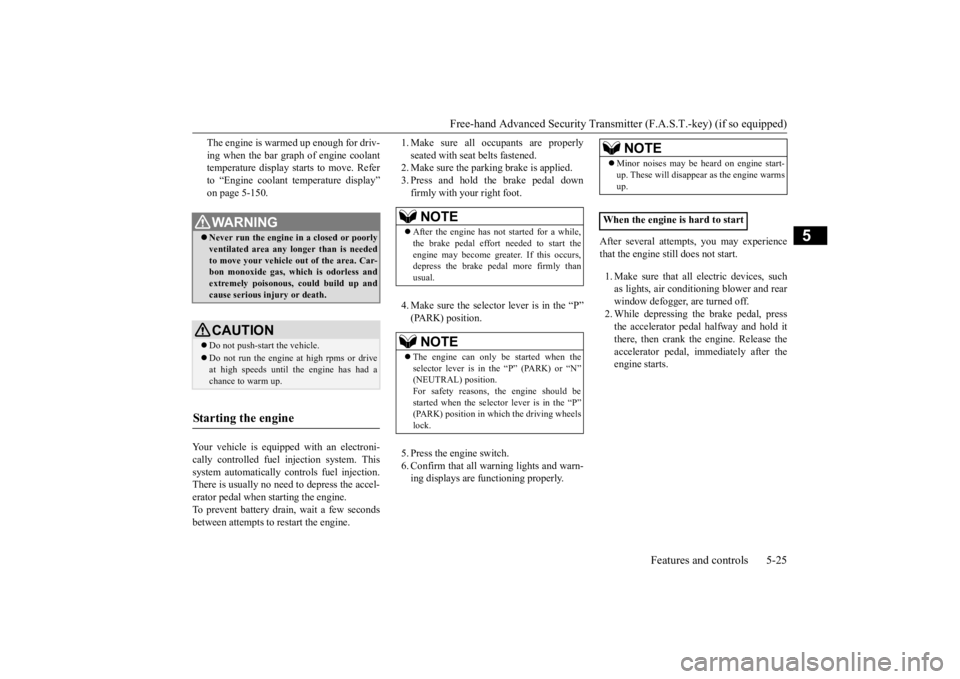
The engine is warmed up enough for driv- ing when the bar graph of engine coolant temperature display starts to move. Refer to “Engine coolant temperature display”on page 5-150.
Your vehicle is equipped with an electroni- cally controlled fuel injection system. This system automatically controls fuel injection.There is usually no need to depress the accel- erator pedal when starting the engine. To prevent battery drain, wait a few secondsbetween attempts to restart the engine.
1. Make sure all occupants are properly seated with seat belts fastened. 2. Make sure the parking brake is applied. 3. Press and hold the brake pedal downfirmly with your right foot. 4. Make sure the selector lever is in the “P” (PARK) position. 5. Press the engine switch. 6. Confirm that all warning lights and warn- ing displays are functioning properly.
After several attempts, you may experience that the engine still does not start. 1. Make sure that all electric devices, such as lights, air conditioning blower and rearwindow defogger, are turned off. 2. While depressing the brake pedal, press the accelerator pedal halfway and hold itthere, then crank the engine. Release the accelerator pedal, immediately after the engine starts.
WA R N I N G Never run the engine in a closed or poorly ventilated area any longer than is needed to move your vehicle out of the area. Car-bon monoxide gas, which is odorless and extremely poisonous, could build up and cause serious injury or death.CAUTION Do not push-start the vehicle.Do not run the engine at high rpms or drive at high speeds until the engine has had a chance to warm up.
Starting the engine
NOTE
After the engine has not started for a while, the brake pedal effort needed to start theengine may become greater. If this occurs, depress the brake pedal more firmly than usual.NOTE
The engine can only be started when the selector lever is in the “P” (PARK) or “N”(NEUTRAL) position. For safety reasons, the engine should be started when the selector lever is in the “P”(PARK) position in which the driving wheels lock.
NOTE
Minor noises may be heard on engine start- up. These will disappear as the engine warms up.
When the engine is hard to start
BK0277700US.bo
ok 25 ページ 2019年3月8日 金曜日 午前9時23分
Page 142 of 427
Starting the engine
Features and controls 5-61
5
N00550901253
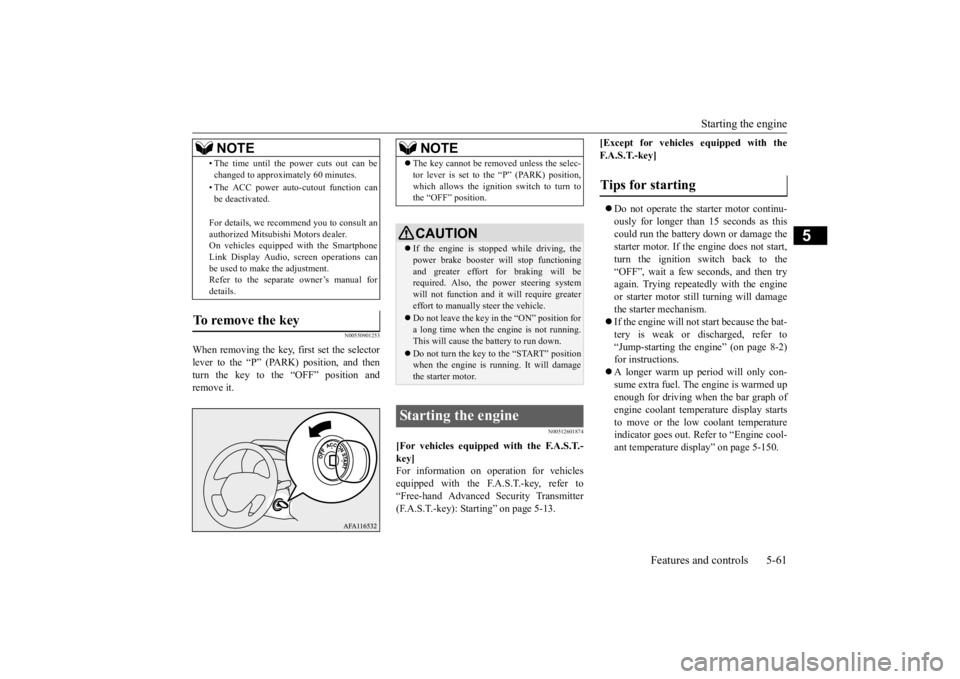
When removing the key,
first set the selector
lever to the “P” (PARK) position, and thenturn the key to the “OFF” position and remove it.
N00512601874
[For vehicles equipped with the F.A.S.T.- key]For information on operation for vehicles equipped with the F.A.S.T.-key, refer to “Free-hand Advanced Security Transmitter(F.A.S.T.-key): Starting” on page 5-13.
[Except for vehicles equipped with the F. A . S . T. - k e y ] Do not operate the starter motor continu- ously for longer than 15 seconds as thiscould run the battery down or damage the starter motor. If the engine does not start, turn the ignition switch back to the“OFF”, wait a few seconds, and then tryagain. Trying repeatedly with the engine or starter motor still
turning will damage
the starter mechanism. If the engine will not start because the bat- tery is weak or discharged, refer to “Jump-starting the engine” (on page 8-2)for instructions. A longer warm up period will only con- sume extra fuel. The engine is warmed upenough for driving when the bar graph of engine coolant temperature display starts to move or the low coolant temperatureindicator goes out. Refer to “Engine cool- ant temperature display” on page 5-150.
• The time until the power cuts out can be changed to approximately 60 minutes. • The ACC power auto-cutout function can be deactivated. For details, we recommend you to consult an authorized Mitsubishi Motors dealer. On vehicles equipped with the Smartphone Link Display Audio, screen operations canbe used to make the adjustment. Refer to the separate owner’s manual for details.
To remove the key
NOTE
NOTE
The key cannot be removed unless the selec- tor lever is set to the “P” (PARK) position, which allows the ignition switch to turn to the “OFF” position.CAUTION If the engine is stopped while driving, the power brake booster will stop functioning and greater effort for braking will be required. Also, the power steering systemwill not function and it will require greater effort to manually steer the vehicle. Do not leave the key in the “ON” position for a long time when the engine is not running. This will cause the battery to run down. Do not turn the key to the “START” position when the engine is running. It will damagethe starter motor.
Starting the engine
Tips for starting
BK0277700US.bo
ok 61 ページ 2019年3月8日 金曜日 午前9時23分
Page 143 of 427
Starting the engine 5-62 Features and controls
5
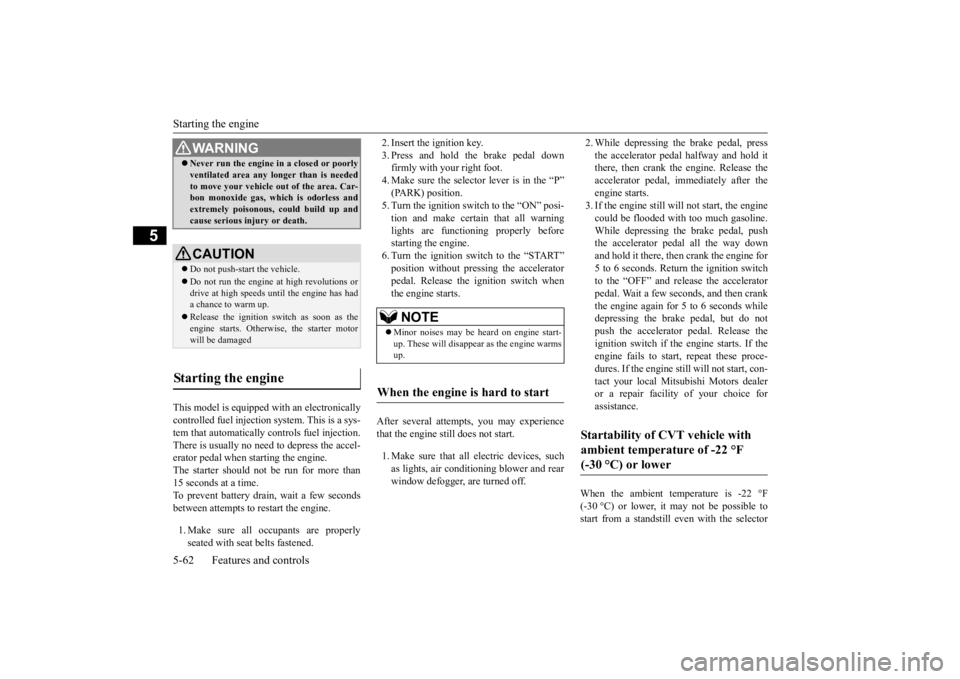
This model is equipped with an electronically controlled fuel injection system. This is a sys- tem that automatically controls fuel injection.There is usually no need to depress the accel- erator pedal when starting the engine. The starter should not be run for more than15 seconds at a time. To prevent battery drain, wait a few seconds between attempts to restart the engine. 1. Make sure all occupants are properly seated with seat belts fastened.
2. Insert the ignition key. 3. Press and hold the brake pedal down firmly with your right foot. 4. Make sure the selector lever is in the “P”(PARK) position. 5. Turn the ignition switch to the “ON” posi- tion and make certain that all warninglights are functioning properly before starting the engine. 6. Turn the ignition switch to the “START”position without pressing the acceleratorpedal. Release the ignition switch when the engine starts.
After several attempts, you may experience that the engine still does not start. 1. Make sure that all electric devices, such as lights, air conditioning blower and rearwindow defogger, are turned off.
2. While depressing the brake pedal, press the accelerator pedal halfway and hold it there, then crank the engine. Release the accelerator pedal, immediately after theengine starts. 3. If the engine still will not start, the engine could be flooded with too much gasoline.While depressing the brake pedal, push the accelerator pedal all the way down and hold it there, then crank the engine for5 to 6 seconds. Return the ignition switchto the “OFF” and release the accelerator pedal. Wait a few seconds, and then crank the engine again for 5 to 6 seconds whiledepressing the brake pedal, but do not push the accelerator pedal. Release the ignition switch if the engine starts. If theengine fails to start, repeat these proce- dures. If the engine st
ill will not start, con-
tact your local Mitsubishi Motors dealeror a repair facility of your choice for assistance.
When the ambient temperature is -22 °F (-30 °C) or lower, it may not be possible tostart from a standstill even with the selector
WA R N I N G Never run the engine in a closed or poorly ventilated area any longer than is needed to move your vehicle out of the area. Car- bon monoxide gas, which is odorless and extremely poisonous, could build up andcause serious injury or death.CAUTION Do not push-start the vehicle.Do not run the engine at high revolutions or drive at high speeds until the engine has hada chance to warm up. Release the ignition switch as soon as the engine starts. Otherwise, the starter motor will be damaged
Starting the engine
NOTE
Minor noises may be heard on engine start- up. These will disappear as the engine warms up.
When the engine is hard to start
Startability of CVT vehicle with ambient temperature of -22 °F (-30 °C) or lower
BK0277700US.bo
ok 62 ページ 2019年3月8日 金曜日 午前9時23分
Page 144 of 427
Turbocharger operation
Features and controls 5-63
5
lever in the “D” (DRIVE) or “R” (REVERSE) position. This occurs because the transaxle has not warmed up sufficiently; it does not indicate aproblem. If this occurs, place the selector lever in the “P” (PARK) position and let the engine idle for at least 10 minutes.The transaxle will warm up, and you will be able to start normally. Do not leave the vehicle during warm-upoperation.
N00537301090
N00560201103
The CVT will automatically and continuously change its gear ratio depending on road anddriving conditions. This helps achieve smooth driving and excellent fuel efficiency. Also you can manually shift the transmissionup and down. Refer to “Sports mode” on page 5-67. The transmission prevents unnecessary upshifts even when the accelerator pedal is released and ensures smooth driving. According to the condi
tions, the transmission
will automatically shift to a lower gear ratio to achieve stronger engine braking. This mayhelp reduce your need to use the service brake.
N00560301104
As an additional safe
ty precaution, models
equipped with a CVT have a shift-lock device
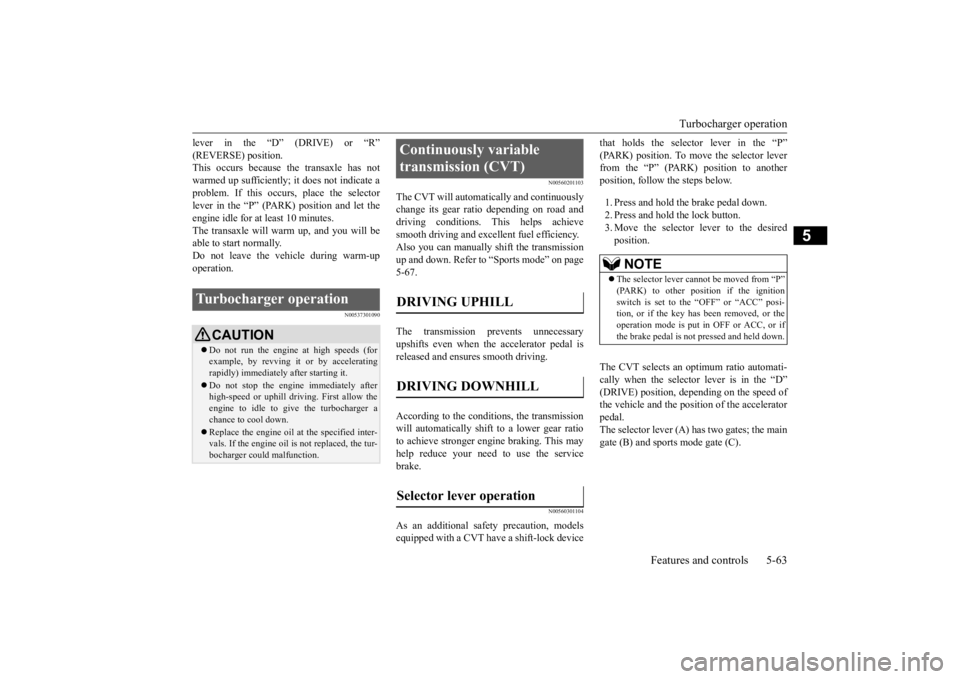
that holds the selector lever in the “P” (PARK) position. To move the selector lever from the “P” (PARK) position to another position, follow the steps below. 1. Press and hold the brake pedal down. 2. Press and hold the lock button. 3. Move the selector lever to the desired position.
The CVT selects an optimum ratio automati- cally when the selector lever is in the “D”(DRIVE) position, depending on the speed of the vehicle and the position of the accelerator pedal.The selector lever (A) has two gates; the main gate (B) and sports mode gate (C).
Turbocharger operation
CAUTION Do not run the engine at high speeds (for example, by revving it or by acceleratingrapidly) immediately after starting it. Do not stop the engine immediately after high-speed or uphill driving. First allow the engine to idle to give the turbocharger a chance to cool down. Replace the engine oil at the specified inter- vals. If the engine oil is not replaced, the tur-bocharger could malfunction.
Continuously variable transmission (CVT) DRIVING UPHILL DRIVING DOWNHILL Selector lever operation
NOTE
The selector lever cannot be moved from “P” (PARK) to other position if the ignition switch is set to the “OFF” or “ACC” posi- tion, or if the key has been removed, or theoperation mode is put in OFF or ACC, or if the brake pedal is not
pressed and held down.
BK0277700US.bo
ok 63 ページ 2019年3月8日 金曜日 午前9時23分
Page 152 of 427
S-AWC (Super-All Wheel Control) (if so equipped)
Features and controls 5-71
5
N00583000068
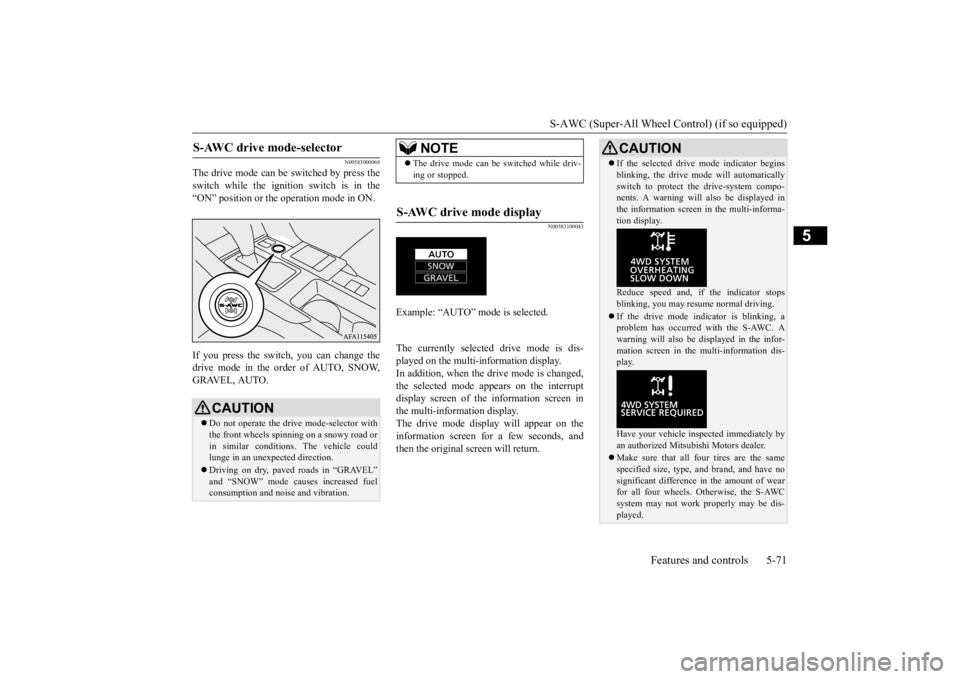
The drive mode can be switched by press the switch while the ignition switch is in the“ON” position or the operation mode in ON. If you press the switch, you can change the drive mode in the order of AUTO, SNOW,GRAVEL, AUTO.
N00583100043
The currently selected drive mode is dis-played on the multi-information display.In addition, when the drive mode is changed, the selected mode appears on the interrupt display screen of the information screen inthe multi-information display. The drive mode display will appear on the information screen for a few seconds, andthen the original screen will return.
S-AWC drive mode-selector
CAUTION Do not operate the drive mode-selector with the front wheels spinning on a snowy road or in similar conditions. The vehicle couldlunge in an unexpected direction. Driving on dry, paved roads in “GRAVEL” and “SNOW” mode causes increased fuel consumption and noise and vibration.
NOTE
The drive mode can be switched while driv- ing or stopped.
S-AWC drive mode display
Example: “AUTO” mode is selected.
CAUTION If the selected drive mode indicator begins blinking, the drive mode will automatically switch to protect the drive-system compo- nents. A warning will also be displayed in the information screen in the multi-informa-tion display. Reduce speed and, if the indicator stops blinking, you may resume normal driving. If the drive mode indicator is blinking, a problem has occurred with the S-AWC. A warning will also be displayed in the infor-mation screen in the multi-information dis- play. Have your vehicle inspected immediately by an authorized Mitsubishi Motors dealer. Make sure that all four tires are the same specified size, type, and brand, and have no significant difference in the amount of wear for all four wheels. Otherwise, the S-AWCsystem may not work properly may be dis- played.
BK0277700US.bo
ok 71 ページ 2019年3月8日 金曜日 午前9時23分
Page 154 of 427
4-wheel drive operation
Features and controls 5-73
5
When turning a sharp corner in “GRAVEL” position at low speed, a slight difference in steering may be experienced similar to feel- ing as if the brakes were applied. This iscalled tight corner braking and results from each of the four tires being at a different dis- tance from the corner. The phenomenon istypical of 4-wheel drive vehicles. If this occurs, either straighten out the steering wheel or change to another mode. Set the drive mode-selector to “SNOW” in accordance with the road conditions, and thengradually depress the accelerator pedal for a smooth start.
Set the drive mode-selector to “GRAVEL” and then gradually depress the accelerator pedal for a smooth start. Keep the pressure onthe accelerator pedal as constant as possible, and drive at low speed.
NOTE
Driving on rough roads can be hard on a vehicle. Before you leave the pavement, be sure all scheduled maintenance and service has been done, and that you have inspected your vehicle. Pay special attention to thecondition of the tires, and check the tire pres- sures. Mitsubishi Motors is not responsible to the operator for any damage or injury caused or liability incurred by improper and negligentoperation of a vehicle. All techniques of vehicle operation depend on the skill and experience of the operator and other partici-pating parties. Any deviation from the rec- ommended operating instructions above is at their own risk. Note that the stopping distance required of the 4-wheel drive vehicle differs very littlefrom that of the front-wheel drive vehicle. When driving on a snow-covered road or a slippery, muddy surface, make sure that youkeep a sufficient distance between your vehi- cle and the one ahead of you. The driving posture should be more upright; adjust the seat to a good position for easy steering and pedal operation. Be sure to wearthe seat belt. After driving on rough roads, check each part of the vehicle and wash it thoroughly with water. Refer to the “Inspection andmaintenance following rough road opera- tion” section and “Vehicle care and Mainte- nance” sections.
CAUTION Setting the drive mode-selector to “GRAVEL” and “SNOW” position to drive on dry paved road will increase fuel con- sumption, with possible noise and vibration generation.
Turning sharp corners On snowy or icy roads
NOTE
The use of snow tires is recommended.
Maintain a safe distance between vehicles, avoid sudden braking, and use engine brak- ing (downshifting).CAUTION Avoid sudden braking, sudden acceleration and sharp turning. Skidding occurs and con- trol of the vehicle could be lost.
Driving on sandy or muddy roads
CAUTION Do not force the vehicle or drive recklessly on sandy surfaces. In comparison with nor- mal road surfaces, the engine and other drive-system components are put underexcessive strain when driving on such a sur- face. This could lead to accidents. If any of the following conditions occur while the vehicle is being driven, immedi- ately park your vehicle in a safe place andfollow these procedures:NOTE
BK0277700US.bo
ok 73 ページ 2019年3月8日 金曜日 午前9時23分
Page 209 of 427
Tire pressure monitoring system (TPMS) 5-128 Features and controls
5
Each tire, including the spare (if provided), should be checked monthly when cold andinflated to the inflation pressure recom- mended by the vehicle manufacturer on the vehicle placard or tire inflation pressure label.(If your vehicle has tires of a different size than the size indicated on the vehicle placard or tire inflation pressure label, you shoulddetermine the proper tire inflation pressure for those tires.) As an added safety feature, your vehicle hasbeen equipped with a tire pressure monitoring system (TPMS) that illuminates a low tire pressure telltale when one or more of yourtires is significantly under-inflated. Accordingly, when the low tire pressure tell- tale illuminates, you should stop and checkyour tires as soon as possible, and inflate them to the proper pressure. Driving on a sig- nificantly under-inflated tire causes the tire tooverheat and can lead to tire failure.
Under-inflation also reduces fuel efficiency and tire tread life, and may affect the vehi- cle’s handling and stopping ability. Please note that the TPMS is not a substitute forproper tire maintenance, and it is the driver’s responsibility to maintain correct tire pres- sure, even if under-inflation has not reachedthe level to trigger illumination of the TPMS low tire pressure telltale. Your vehicle has also been equipped with a TPMS malfunction indicator to indicate whenthe system is not operating properly. TheTPMS malfunction indicator is combined with the low tire pressure telltale. When the system detects a malfunction, thetelltale will flash for approximately 1 minute and then remain continuously illuminated. This sequence will continue upon subsequentvehicle start-ups as long as the malfunction exists. When the malfunction indicator is illumi-nated, the system may not be able to detect or signal low tire pressure as intended. TPMS malfunctions may occur for a varietyof reasons, including the installation of replacement or alternate tires or wheels on the vehicle that prevent the TPMS from function-ing properly. Always check the TPMS mal- function telltale after replacing one or more tires or wheels on your vehicle to ensure thatthe replacement or alternate tires and wheels
CAUTION If the tire pressure monitoring system warn- ing light does not illuminate when the igni- tion switch is turned to the “ON” position or the operation mode is put in ON, it means that the tire pressure monitoring system isnot working properly. Have the system inspected by an authorized Mitsubishi Motors dealer.In such situations, a malfunctioning of the system may be preventing the monitoring of the tire pressure. Avoid sudden braking,sharp turning and high-speed driving. If a malfunction is detected in the tire pres- sure monitoring system, the tire pressure monitoring system warning light will blink for approximately 1 minute and then remaincontinuously illuminated. The warning light will issue further warnings each time the engine is restarted as long as the malfunctionexists. Check to see whether the warning light goes off after few minutes driving.If it then goes off during driving, there is no problem. However, if the warning light does not gooff, or if it blinks again when the engine is restarted, have the vehicle inspected by an authorized Mitsubishi Motors dealer. In such situations, a malfunctioning of the system may be preventing the monitoring ofthe tire pressure. For safety reasons, when the warning light appears while driving, avoid sudden braking, sharp turning andhigh-speed driving.
NOTE
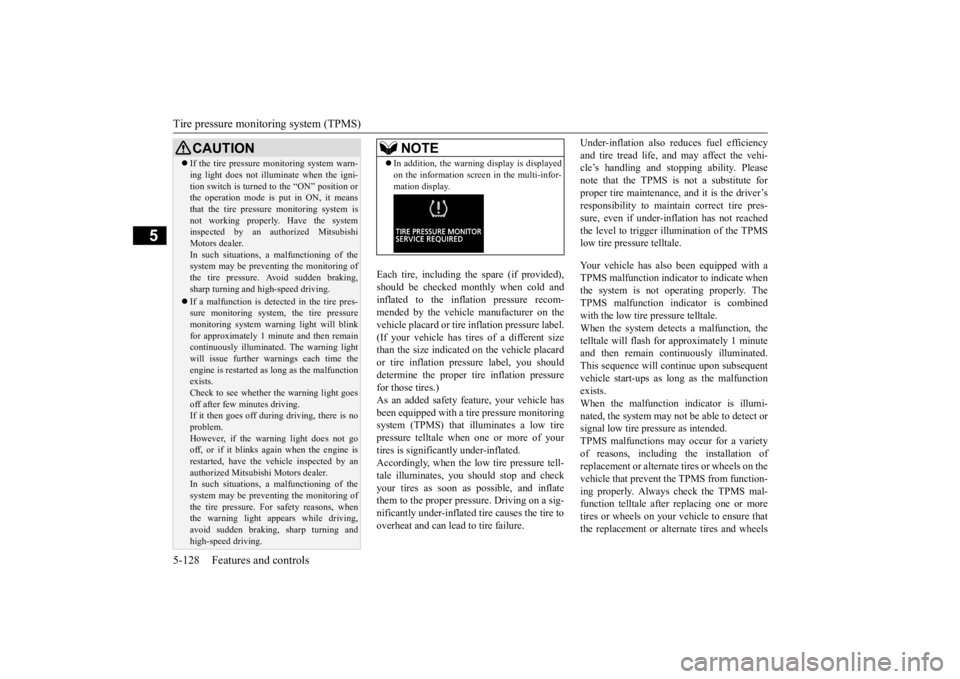
In addition, the warning display is displayed on the information screen in the multi-infor- mation display.
BK0277700US.book
128 ページ 2019年3月8日 金曜日 午前9時23分
Page 225 of 427
Multi-information display 5-144 Features and controls
5
N00555001480
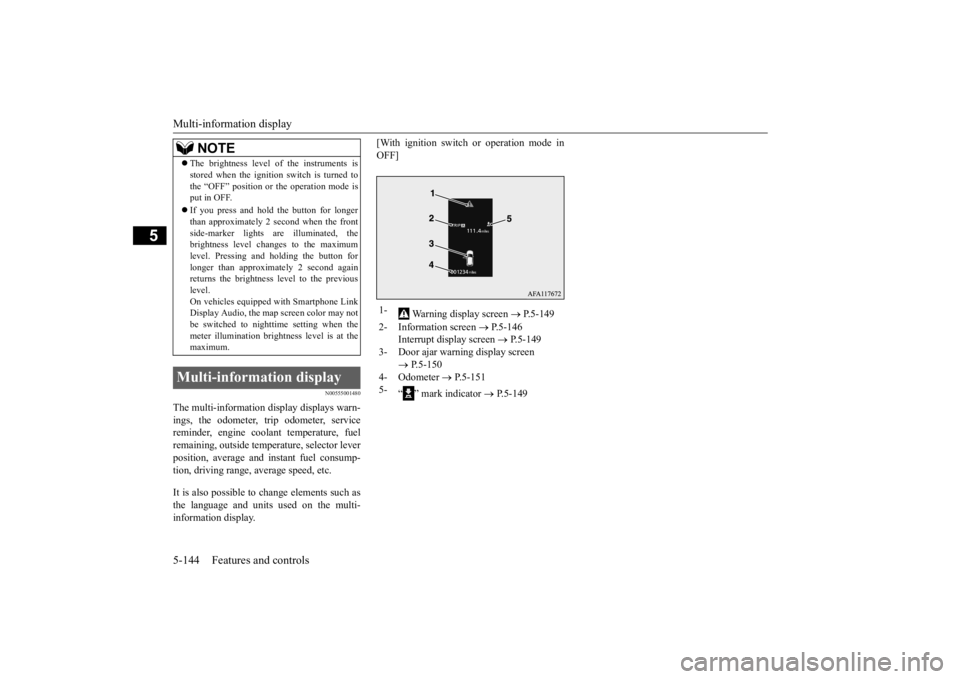
The multi-information display displays warn- ings, the odometer, trip odometer, service reminder, engine coolant temperature, fuelremaining, outside temperature, selector lever position, average and instant fuel consump- tion, driving range, average speed, etc. It is also possible to change elements such as the language and units used on the multi- information display.
[With ignition switch or operation mode in OFF]
The brightness level of the instruments is stored when the ignition switch is turned to the “OFF” position or the operation mode is put in OFF. If you press and hold the button for longer than approximately 2 second when the front side-marker lights are illuminated, thebrightness level changes to the maximum level. Pressing and holding the button for longer than approximately 2 second againreturns the brightness level to the previous level. On vehicles equipped with Smartphone LinkDisplay Audio, the map screen color may not be switched to nighttime setting when the meter illumination brightness level is at themaximum.
Multi-information display
NOTE
1-
Warning display screen
P.5-149
2- Information screen
P.5-146
Interrupt display screen
P.5-149
3- Door ajar warning display screen
P.5-150
4- Odometer
P.5-151
5-
“ ” mark indicator
P.5-149
BK0277700US.book
144 ページ 2019年3月8日 金曜日 午前9時23分