radio MITSUBISHI ECLIPSE CROSS 2020 (in English) User Guide
[x] Cancel search | Manufacturer: MITSUBISHI, Model Year: 2020, Model line: ECLIPSE CROSS, Model: MITSUBISHI ECLIPSE CROSS 2020Pages: 427, PDF Size: 78.05 MB
Page 245 of 427

Indicator light, warning light, an
d information screen display list
5-164 Features and controls
5
N00557901122
When there is information to be announced, such as light reminder,
the tone sounds and the screen switches to the displays show
n below.
Refer to the appropriate page and take the necessary measures. When the cause of the warning display is eliminated, the warning display goes out automatically.Refer to Warning display list on page 5-165. Refer to Other interrupt displays on page 5-180. 17- Supplemental Restraint System (SRS)
warning light
P. 4-36
18- Engine malfunction indicator (“SER-
VICE ENGINE SOON” or “Check engine light”)
P.5-185
19- Seat belt reminder/warning light
P.4-18
20- Tire pressure monitoring system warn-
ing light
P.5-127
21- Brake auto hold indicator (if so
equipped)
P.5-77
22- Brake warning light
P.5-184
Information screen display
NOTE
In the following cases, a warning may be displayed on the inform
ation screen and the buzzer may
sound for a few seconds, at tim
es.
This is caused by the system picking up interference such as stro
ng electromagnetic waves or nois
e, and is not a functional pro
blem.
• An extremely strong electromagnetic wave is received from a source
such as an illegal radio set,
a spark from a wire, or a rad
ar station.
• Abnormal voltage or a static electricity discharge is genera
ted by the operation of your vehicle’s electronics (including afte
r-market parts).
If the warning display has occurred a number of times, take your vehicle to an authorized Mitsubishi Motors dealer or a repair
facility of your choice and
have the system checked.
BK0277700US.book
164 ページ 2019年3月8日 金曜日 午前9時23分
Page 293 of 427
HomeLink® Wireless Control System (if so equipped) 5-212 Features and controls
5
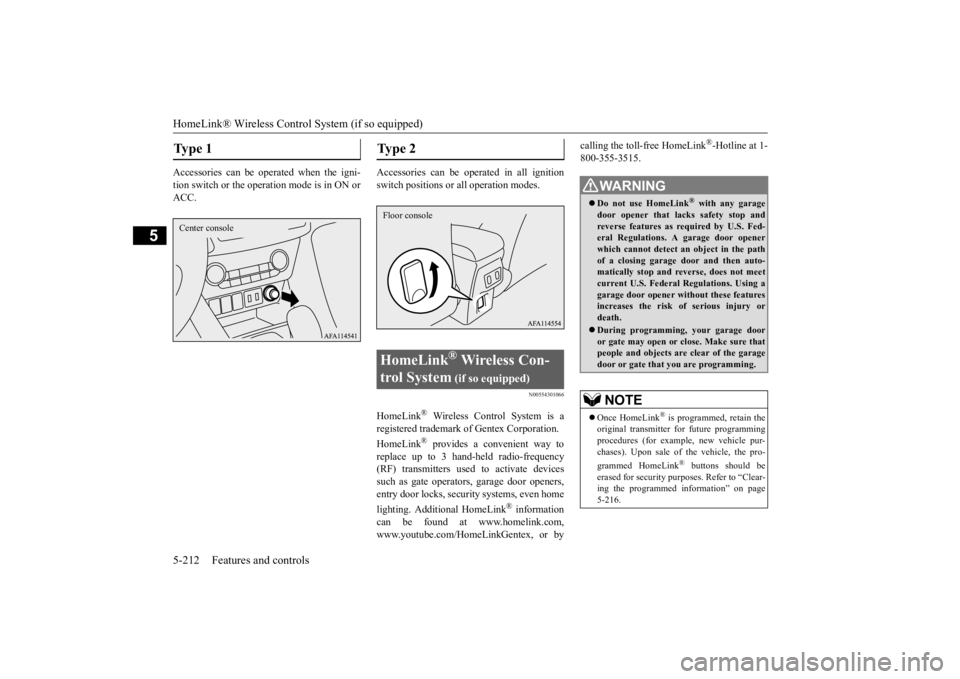
Accessories can be operated when the igni- tion switch or the operation mode is in ON or ACC.
Accessories can be operated in all ignition switch positions or all operation modes.
N00554301066
HomeLink
® Wireless Control System is a
registered trademark of Gentex Corporation. HomeLink
® provides a convenient way to
replace up to 3 hand-held radio-frequency (RF) transmitters used
to activate devices
such as gate operators, garage door openers,entry door locks, security systems, even home lighting. Additional HomeLink
® information
can be found at www.homelink.com,www.youtube.com/HomeLinkGentex, or by
calling the toll-free HomeLink
®-Hotline at 1-
800-355-3515.
Type 1 Center console
Type 2 HomeLink
® Wireless Con-
trol System
(if so equipped)
Floor console
WA R N I N G Do not use HomeLink
® with any garage
door opener that lacks safety stop and reverse features as required by U.S. Fed-eral Regulations. A garage door opener which cannot detect an object in the path of a closing garage door and then auto-matically stop and reverse, does not meet current U.S. Federal Regulations. Using a garage door opener without these featuresincreases the risk of serious injury or death. During programming, your garage door or gate may open or close. Make sure that people and objects are clear of the garagedoor or gate that you are programming.NOTE
Once HomeLink
® is programmed, retain the
original transmitter for future programming procedures (for example, new vehicle pur- chases). Upon sale of
the vehicle, the pro-
grammed HomeLink
® buttons should be
erased for security purposes. Refer to “Clear-ing the programmed information” on page 5-216.
BK0277700US.book
212 ページ 2019年3月8日 金曜日 午前9時23分
Page 294 of 427
HomeLink® Wireless Control System (if so equipped)
Features and controls 5-213
5
N00584600029
Some garage door openers manufactured after 1995 have “rolling code protection”. To program a garage door opener equipped with “rolling code protection”;you will need to access the garage door opener motor to press the motor’s “Learn” or “Smart” buttons. For convenience, usea ladder and another person to assist you. It is recommended that a new battery be placed in the hand-held transmitter of the device being programmed to HomeLink
®
for quicker training and accurate trans- mission of the radio-frequency signal.
N00584700046
To program HomeLink
® to operate a garage
door, gate, entry door opener, home or officelighting, you need to be at the same location as the device. 1. Press the HomeLink
® button that you
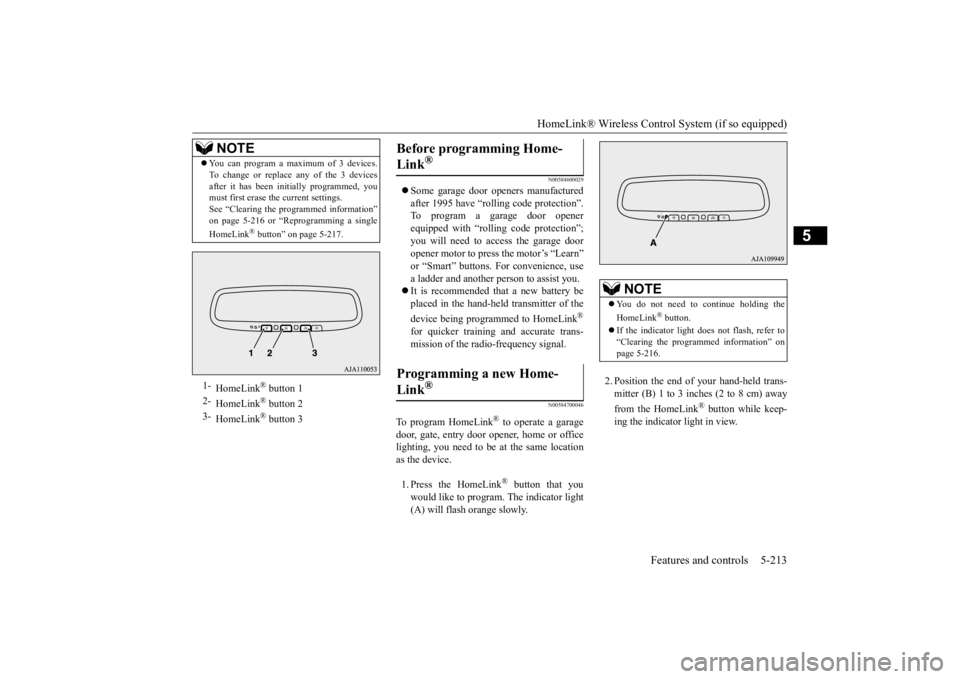
would like to program. The indicator light(A) will flash orange slowly.
2. Position the end of your hand-held trans- mitter (B) 1 to 3 inches (2 to 8 cm) away from the HomeLink
® button while keep-
ing the indicator light in view.
You can program a maximum of 3 devices. To change or replace any of the 3 devices after it has been initially programmed, you must first erase the current settings. See “Clearing the programmed information”on page 5-216 or “Reprogramming a single HomeLink
® button” on page 5-217.
1-
HomeLink
® button 1
2-
HomeLink
® button 2
3-
HomeLink
® button 3
NOTE
Before programming Home- Link
®
Programming a new Home-Link
®
NOTE
You do not need to continue holding the HomeLink
® button.
If the indicator light
does not flash, refer to
“Clearing the programmed information” on page 5-216.
BK0277700US.book
213 ページ 2019年3月8日 金曜日 午前9時23分
Page 296 of 427
HomeLink® Wireless Control System (if so equipped)
Features and controls 5-215
5
N00584800021
Canadian radio-frequency laws require trans- mitter signals to “time-out” (or quit) after several seconds of transmission - which may not be long enough for HomeLink
® to pick
up the signal during programming. Similar tothis Canadian law, some U.S. gate operators are designed to “time-out” in the same man- ner.The indicator LED on the hand-held transmit- ter will go off when the device times out indi- cating that it has finished transmitting.If you live in Canada
or you are having diffi-
culties programming a gate operator or garage door opener by using the “Program-ming” procedures, replace “Programming a new HomeLink
®” step 3 with the following:
3. Press and release - every 2 seconds (“cycle”) your hand-held transmitter until the HomeLink
® indicator light changes from
slowly flashing orange to either rapidly flash-ing green (rolling code) or continuously lit green (fixed code). Now you may release the hand-held transmitter button.Proceed with “Programming a new Home- Link
®” step 4 to complete.
N00584900022
The HomeLink
® has the capability of receiv-
ing garage door status from compatible garage door opener systems. Check your garage door opener manual for the available feature and HomeLink
® compatibility. Also
for a listing of compatible systems contact HomeLink
® at: www.homelink.com
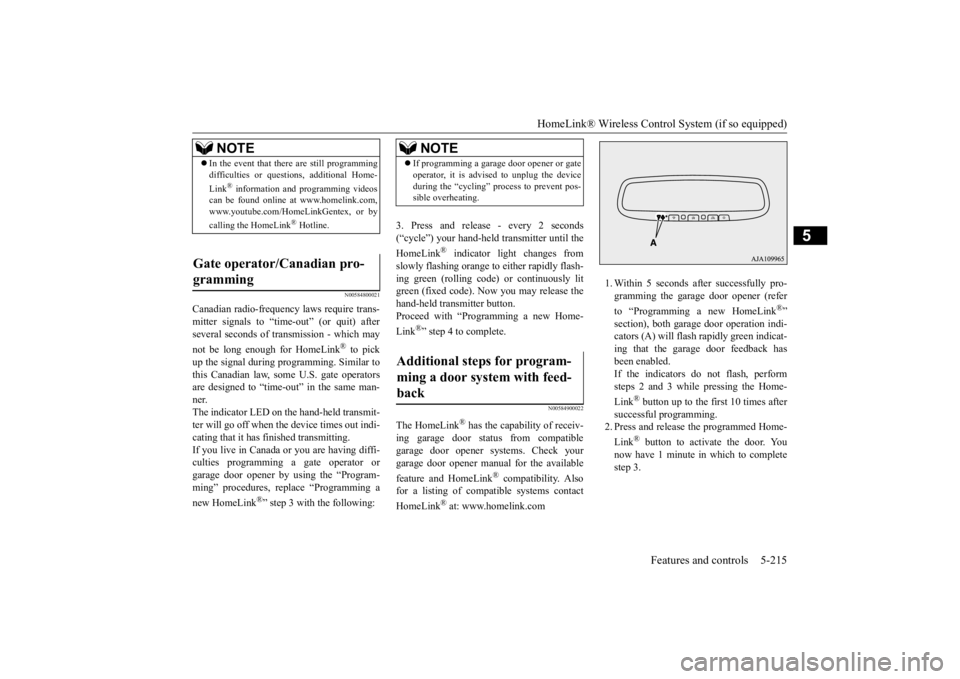
1. Within 5 seconds after successfully pro- gramming the garage door opener (refer to “Programming a new HomeLink
®”
section), both garage door operation indi- cators (A) will flash rapidly green indicat- ing that the garage door feedback hasbeen enabled. If the indicators do not flash, perform steps 2 and 3 while pressing the Home- Link
® button up to the first 10 times after
successful programming. 2. Press and release the programmed Home- Link
® button to activate the door. You
now have 1 minute in which to complete step 3.
NOTE
In the event that there are still programming difficulties or questions, additional Home- Link
® information and programming videos
can be found online at www.homelink.com, www.youtube.com/HomeLinkGentex, or by calling the HomeLink
® Hotline.
Gate operator/Canadian pro- gramming
NOTE
If programming a garage door opener or gate operator, it is advised to unplug the device during the “cycling” process to prevent pos- sible overheating.
Additional steps for program- ming a door system with feed-back
BK0277700US.book
215 ページ 2019年3月8日 金曜日 午前9時23分
Page 298 of 427
HomeLink® Wireless Control System (if so equipped)
Features and controls 5-217
5
1. Press and hold the 2 outer HomeLink
®
buttons for at least
10 seconds. The indi-
cator will change from continuous yellow to rapidly flashing green.2. Release both buttons. 3. HomeLink
® is now in the training (or
learning) mode and can be programmed at any time beginning with “Programming a new HomeLink
®” step 1.
N00585400024
To reprogram a HomeLink
® button, complete
the following. 1. Press and hold the desired HomeLink
®
button. Do not release the button. 2. The indicator light will begin to slowlyflash orange after 20 seconds. The Home- Link
® button can be released at this point.
Proceed with “Programming a new HomeLink
®” step 2.
N00585600042
Your HomeLink
® system operates on a radio
frequency subject to Federal Communica- tions Commission (FCC) Rules (For vehiclessold in U.S.A.) and Industry Canada Rules (For vehicles sold in Canada). This device complies with Part 15 of the FCC Rules andRSS-210 of the Industry Canada Rules. Oper- ation is subject to the following two condi- tions. This device may not cause harmful inter- ference. This device must accept any interference that may be received, including interfer-ence that may cause undesired operation.
This equipment complies with FCC radiation exposure limits set forth for an uncontrolledenvironment. End Users must follow the spe-cific operating instructions for satisfying RF exposure compliance. This transmitter must be at least 8 inches (20 cm) from the user andmust not be co-located or operating in con- junction with any other antenna or transmit- ter.The term “IC:” before the certification/regis- tration number only signifies that Industry Canada technical specifications were met.
NOTE
Do not hold for longer than 20 seconds.
Reprogramming a single HomeLink
® button
NOTE
If you do not complete the programming of a new device to the button,
it will revert to the
previously stored programming. For questions or comments, visit www.homelink.com,www.youtube.com/HomeLinkGentex, or by calling the HomeLink
® Hotline.
General information
CAUTION The transmitter has been tested and complies with FCC and IC rules. Changes or modifications not expressly approved by the party responsible for com- pliance could void the user’s authority tooperate the device.
BK0277700US.book
217 ページ 2019年3月8日 金曜日 午前9時23分
Page 316 of 427
Loading information Driving safety 6-7
6
Vehicle maximum load on the tire: load on an individual tire that is determined by distributing to each axle its share of the maximum loaded vehicle weight anddividing by two. Vehicle normal load on the tire: load on an individual tire that is determined by dis-tributing to each axle its share of the curb weight, accessory weight, and normal occupant weight and dividing by two. Maximum loaded vehicle weight: the sum of - (a) Curb weight; (b) Accessory weight;(c) Vehicle capacity weight; and (d) Production options weight. Curb weight: the weight of a motor vehi- cle with standard equipment including the maximum capacity of fuel, oil, and cool- ant. Accessory weight: the combined weight (in excess of those standard items which may be replaced) of automatic transaxle,power steering, power brakes, power win- dows, power seats, radio, and heater, to the extent that these items are available asfactory-installed equipment (whether installed or not). Vehicle capacity weight: the rated cargo and luggage load plus 150 lbs (68 kg) * times the vehicle’s designated seating capacity.
Production options weight: the combined weight of those installed regular produc- tion options weighing over 5 lbs (2.3 kg) in excess of those standard items whichthey replace, not previously considered in curb weight or accessory weight, includ- ing heavy duty brakes, ride levelers, roofrack, heavy duty battery, and special trim. Normal occupant weight: 150 lbs (68 kg) * times the number of specified occupants (3 in the case of your vehicle) Occupant distribution: Occupant distribu- tion within the passenger compartment (In your vehicle the distribution is 2 in front,1 in rear seat)
N00630101423
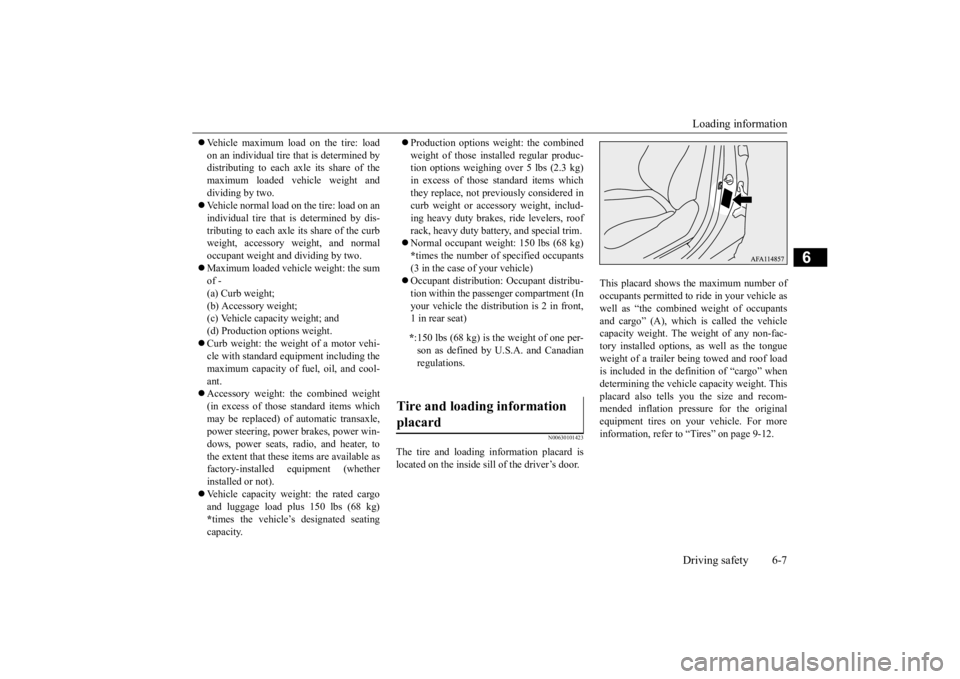
The tire and loading information placard is located on the inside sill of the driver’s door.
This placard shows the maximum number of occupants permitted to ride in your vehicle aswell as “the combined weight of occupants and cargo” (A), which is called the vehicle capacity weight. The weight of any non-fac-tory installed options, as well as the tongue weight of a trailer being towed and roof load is included in the definition of “cargo” whendetermining the vehicle capacity weight. Thisplacard also tells you the size and recom- mended inflation pressure for the original equipment tires on your vehicle. For moreinformation, refer to “Tires” on page 9-12.
* :150 lbs (68 kg) is the weight of one per- son as defined by U.S.A. and Canadianregulations.
Tire and loading information placard
BK0277700US.bo
ok 7 ページ 2019年3月8日 金曜日 午前9時23分
Page 326 of 427
7
Comfort controlsImportant air conditioning op
eration tips ........................................7-2
Vents .........................................
.......................................................7-2
Automatic air conditioning (if so equipped).....................................7-6 Dual-zone automatic climate control air conditioning (if so equipped) .
.................................................
........................7-15
Air purifier ......................
...............................................................7-23
General information about
your radio ...........................................7-23
BK0277700US.bo
ok 1 ページ 2019年3月8日 金曜日 午前9時23分
Page 348 of 427
Air purifier
Comfort controls 7-23
7
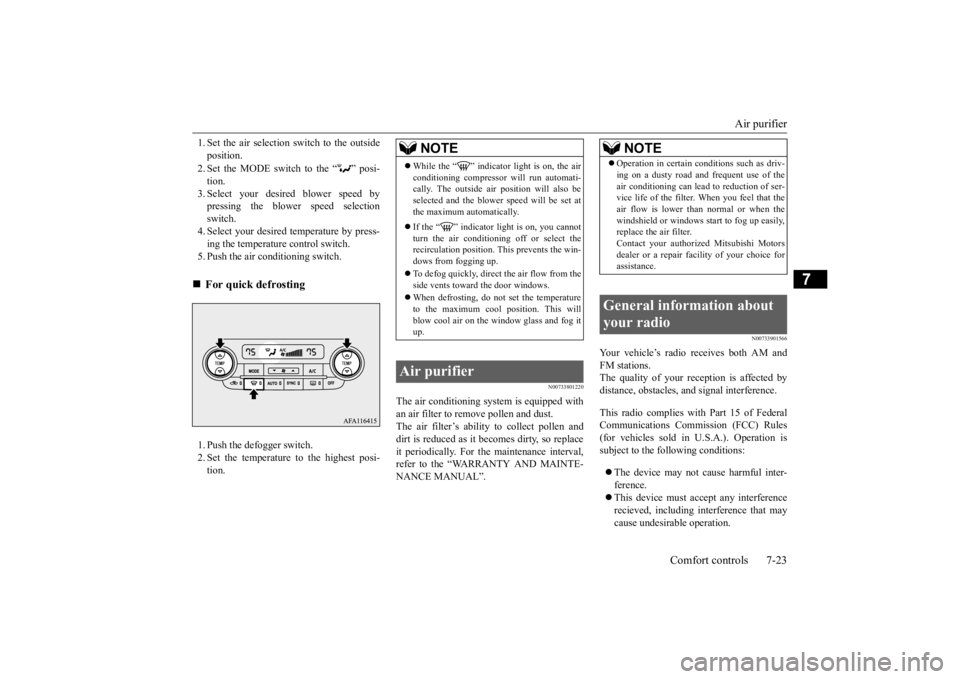
1. Set the air selection switch to the outside position. 2. Set the MODE switch to the “ ” posi- tion.3. Select your desired blower speed by pressing the blower speed selection switch.4. Select your desired temperature by press- ing the temperature control switch. 5. Push the air conditioning switch. 1. Push the defogger switch. 2. Set the temperature to the highest posi-tion.
N00733801220
The air conditioning system is equipped withan air filter to remove pollen and dust.The air filter’s ability to collect pollen and dirt is reduced as it becomes dirty, so replace it periodically. For the maintenance interval,refer to the “WARRANTY AND MAINTE- NANCE MANUAL”.
N00733901566
Your vehicle’s radio receives both AM andFM stations. The quality of your reception is affected bydistance, obstacles, and signal interference. This radio complies with Part 15 of Federal Communications Commission (FCC) Rules (for vehicles sold in U.S.A.). Operation issubject to the following conditions: The device may not cause harmful inter- ference. This device must accept any interference recieved, including interference that may cause undesirable operation.
For quick defrosting
NOTE
While the “ ” indicator light is on, the air conditioning compressor will run automati- cally. The outside air position will also be selected and the blower speed will be set atthe maximum automatically. If the “ ” indicator light is on, you cannot turn the air conditioning off or select therecirculation position. This prevents the win- dows from fogging up. To defog quickly, direct
the air flow from the
side vents toward the door windows. When defrosting, do not set the temperature to the maximum cool position. This will blow cool air on the window glass and fog itup.
Air purifier
NOTE
Operation in certain conditions such as driv- ing on a dusty road and frequent use of the air conditioning can lead to reduction of ser- vice life of the filter.
When you feel that the
air flow is lower than normal or when thewindshield or windows start to fog up easily, replace the air filter. Contact your authorized Mitsubishi Motorsdealer or a repair facility of your choice for assistance.
General information about your radio
BK0277700US.bo
ok 23 ページ 2019年3月8日 金曜日 午前9時23分
Page 349 of 427
General information about your radio 7-24 Comfort controls
7
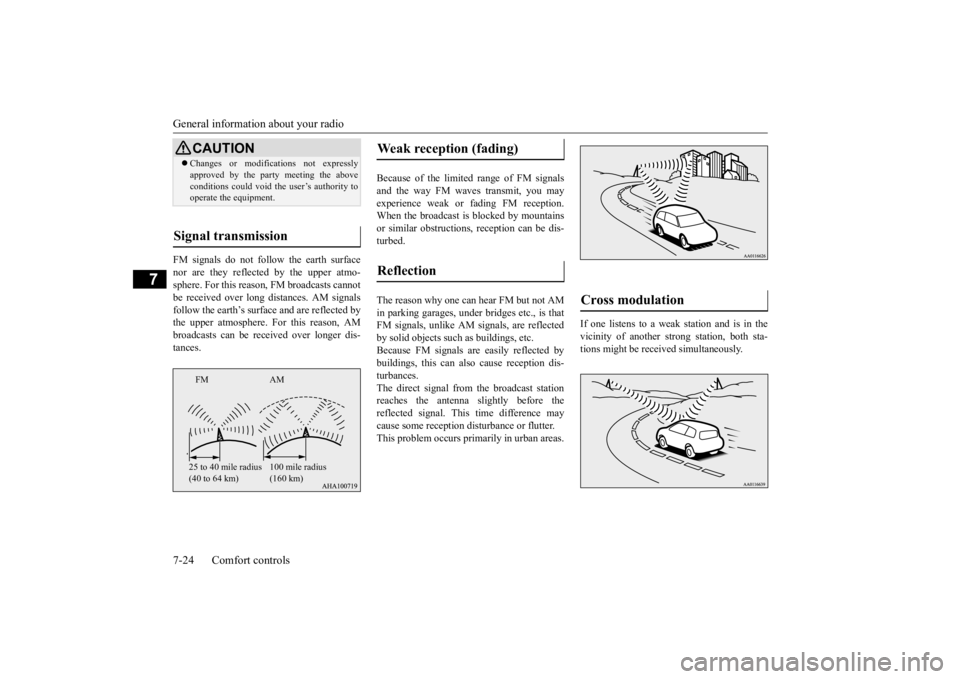
FM signals do not follow the earth surface nor are they reflected by the upper atmo- sphere. For this reason, FM broadcasts cannot be received over long distances. AM signalsfollow the earth’s surface and are reflected by the upper atmosphere. For this reason, AM broadcasts can be received over longer dis-tances.
Because of the limited
range of FM signals
and the way FM waves transmit, you mayexperience weak or fading FM reception. When the broadcast is blocked by mountains or similar obstructions, reception can be dis-turbed. The reason why one can hear FM but not AM in parking garages, under bridges etc., is thatFM signals, unlike AM signals, are reflected by solid objects such as buildings, etc. Because FM signals are easily reflected bybuildings, this can also cause reception dis- turbances. The direct signal from the broadcast stationreaches the antenna slightly before the reflected signal. This time difference may cause some reception disturbance or flutter.This problem occurs primarily in urban areas.
If one listens to a weak station and is in the vicinity of another strong station, both sta- tions might be received simultaneously.
CAUTION Changes or modifications not expressly approved by the party meeting the above conditions could void the user’s authority to operate the equipment.
Signal transmission
FM AM 25 to 40 mile radius (40 to 64 km)
100 mile radius (160 km)
Weak reception (fading) Reflection
Cross modulation
BK0277700US.bo
ok 24 ページ 2019年3月8日 金曜日 午前9時23分
Page 350 of 427
General information about your radio
Comfort controls 7-25
7
Stereo reception requires a high quality broadcast signal. This means that types ofdisturbances mentioned previously become more marked and the reception range is somewhat diminished during stereo recep-tion.
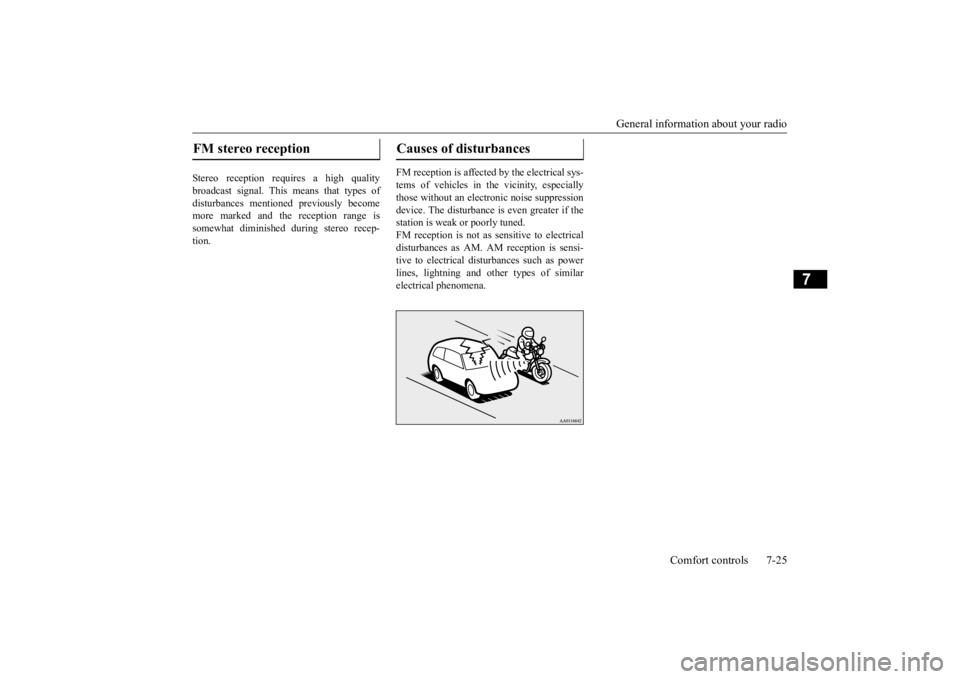
FM reception is affected by the electrical sys- tems of vehicles in the vicinity, especially those without an electronic noise suppressiondevice. The disturbance is even greater if the station is weak or poorly tuned. FM reception is not as sensitive to electricaldisturbances as AM. AM reception is sensi- tive to electrical disturbances such as power lines, lightning and other types of similarelectrical phenomena.
FM stereo reception
Causes of disturbances
BK0277700US.bo
ok 25 ページ 2019年3月8日 金曜日 午前9時23分