MITSUBISHI ENDEAVOR 2004 Service Repair Manual
ENDEAVOR 2004
MITSUBISHI
MITSUBISHI
https://www.carmanualsonline.info/img/19/57105/w960_57105-0.png
MITSUBISHI ENDEAVOR 2004 Service Repair Manual
Page 1287 of 3870
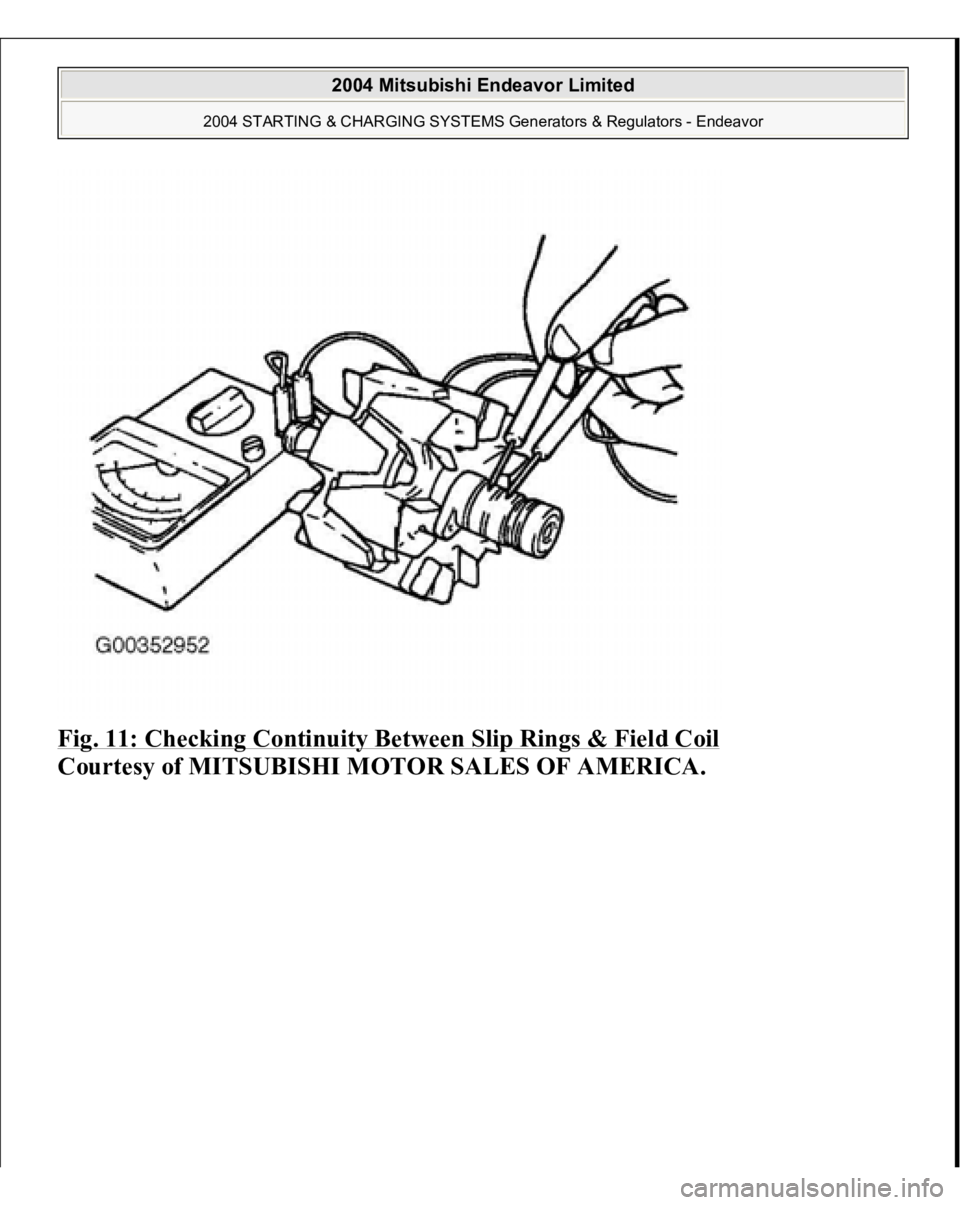
Fig. 11: Checking Continuity Between Slip Rings & Field Coil
Courtesy of MITSUBISHI MOTOR SALES OF AMERICA.
2004 Mitsubishi Endeavor Limited
2004 STARTING & CHARGING SYSTEMS Generators & Regulators - Endeavor
Page 1288 of 3870
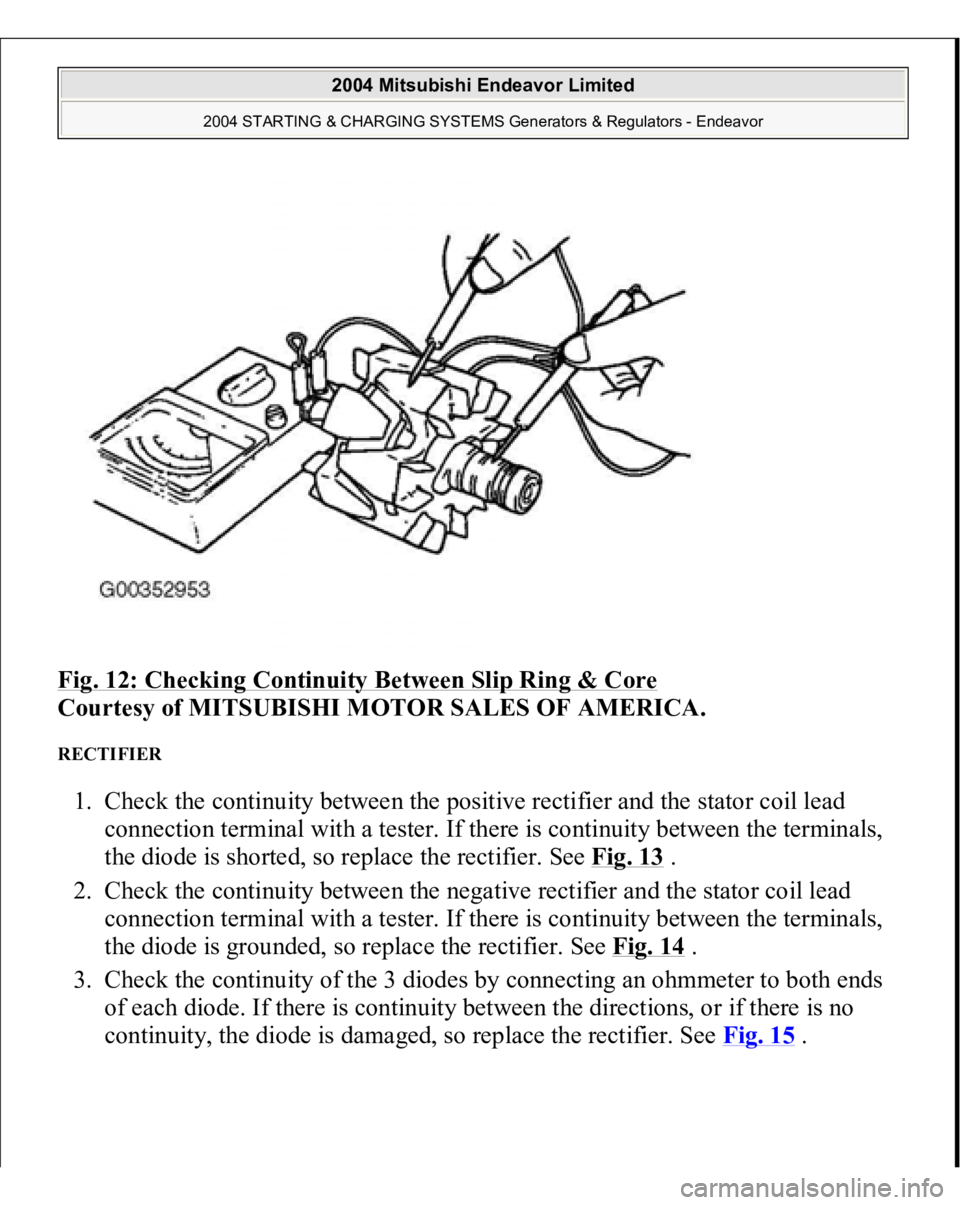
Fig. 12: Checking Continuity Between Slip Ring & Core
Courtesy of MITSUBISHI MOTOR SALES OF AMERICA.
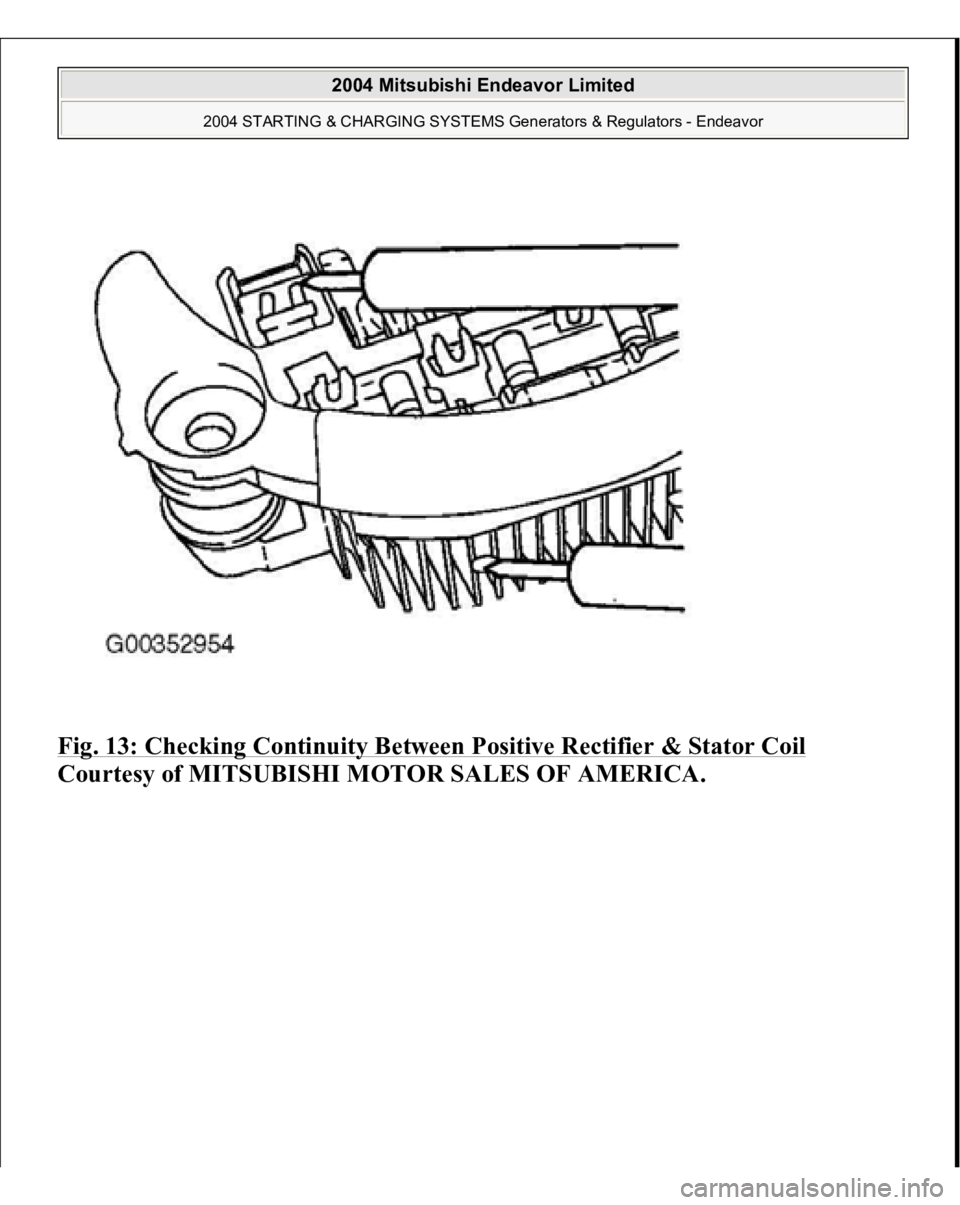
RECTIFIER 1. Check the continuity between the positive rectifier and the stator coil lead
connection terminal with a tester. If there is continuity between the terminals,
the diode is shorted, so replace the rectifier. See Fig. 13
.
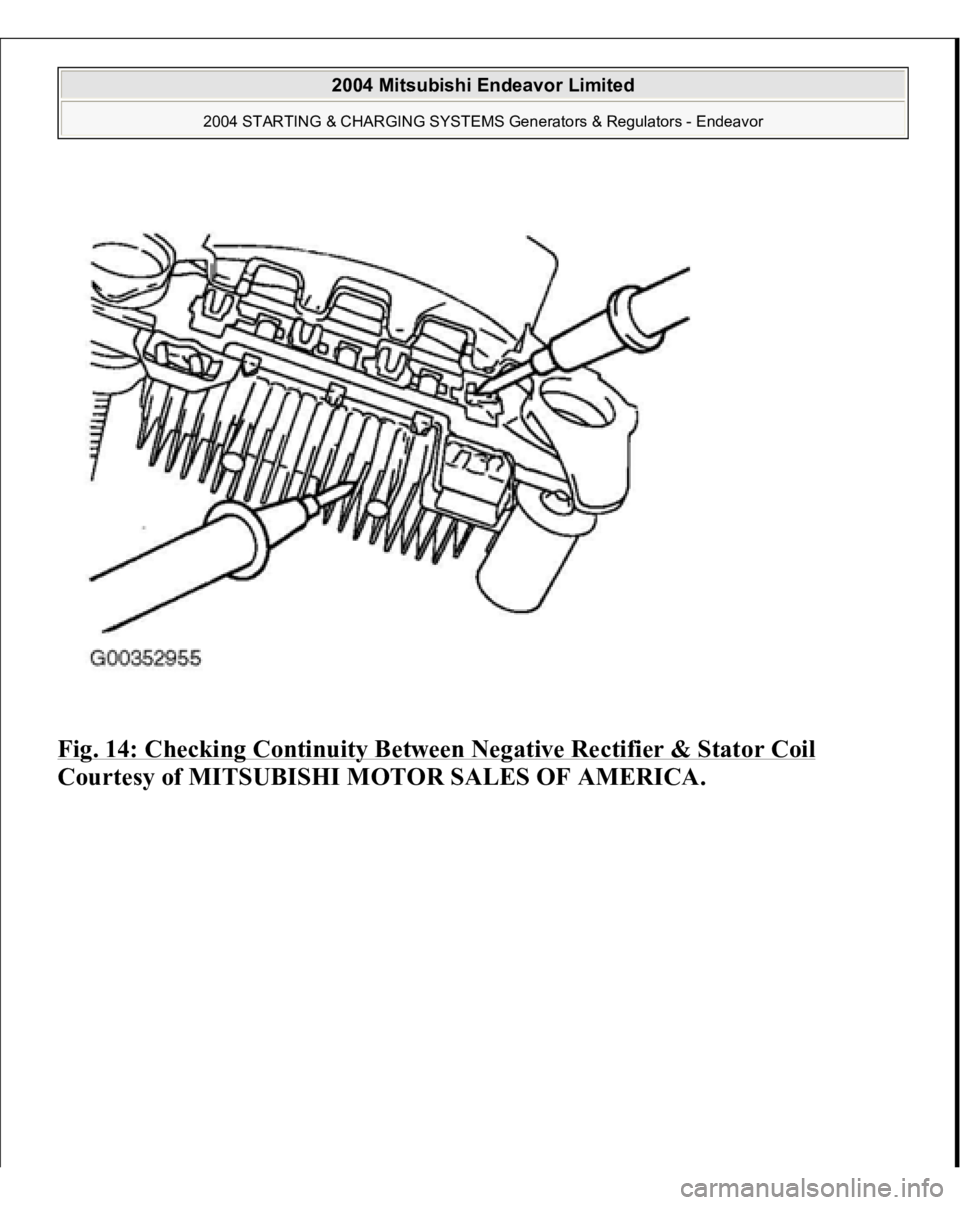
2. Check the continuity between the negative rectifier and the stator coil lead
connection terminal with a tester. If there is continuity between the terminals,
the diode is grounded, so replace the rectifier. See Fig. 14 .
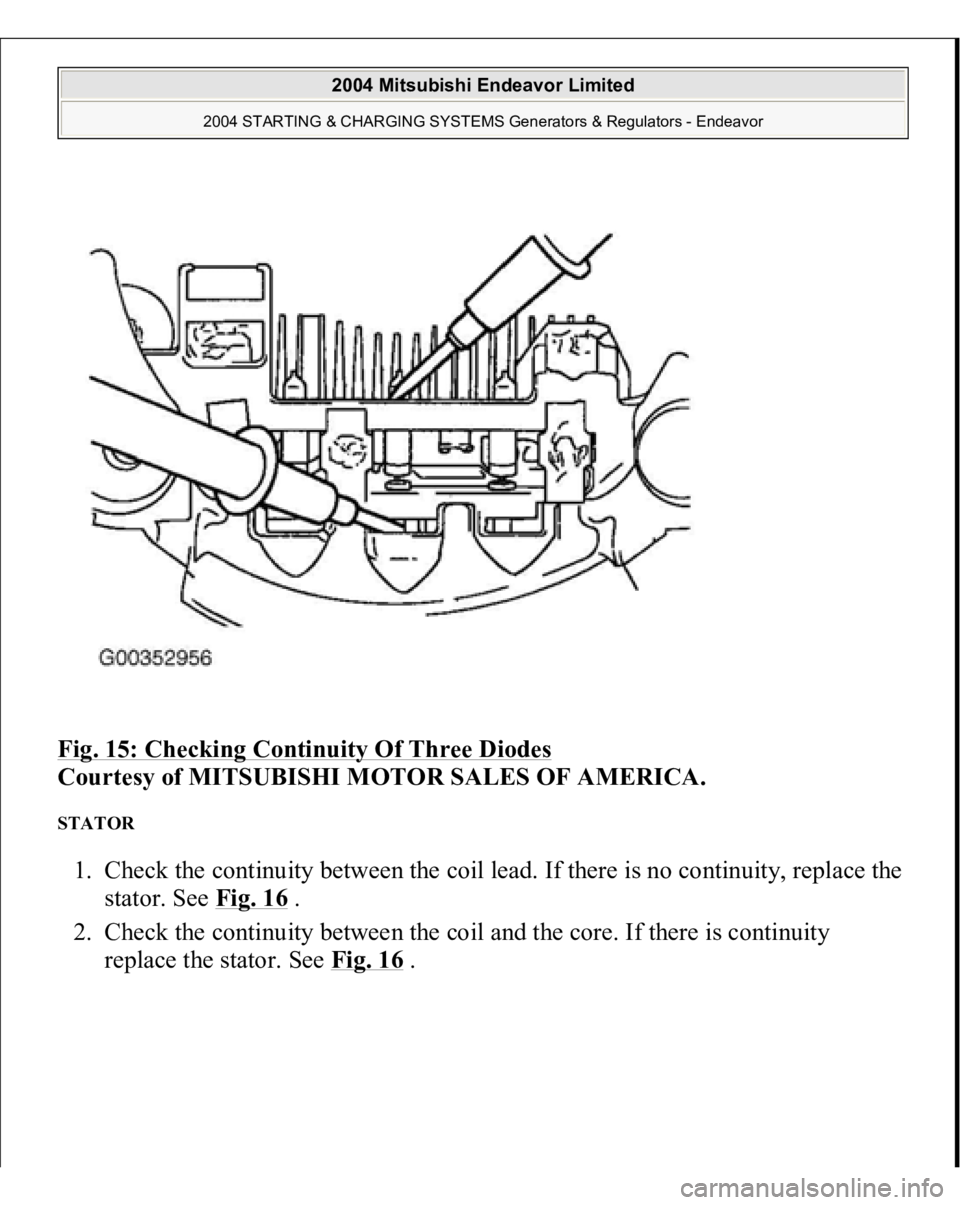
3. Check the continuity of the 3 diodes by connecting an ohmmeter to both ends
of each diode. If there is continuity between the directions, or if there is no
continuit
y, the diode is dama
ged, so re
place the rectifier. See Fi
g. 15
.
2004 Mitsubishi Endeavor Limited
2004 STARTING & CHARGING SYSTEMS Generators & Regulators - Endeavor
Page 1289 of 3870
Fig. 13: Checking Continuity Between Positive Rectifier & Stator Coil
Courtesy of MITSUBISHI MOTOR SALES OF AMERICA.
2004 Mitsubishi Endeavor Limited
2004 STARTING & CHARGING SYSTEMS Generators & Regulators - Endeavor
Page 1290 of 3870
Fig. 14: Checking Continuity Between Negative Rectifier & Stator Coil
Courtesy of MITSUBISHI MOTOR SALES OF AMERICA.
2004 Mitsubishi Endeavor Limited
2004 STARTING & CHARGING SYSTEMS Generators & Regulators - Endeavor
Page 1291 of 3870
Fig. 15: Checking Continuity Of Three Diodes
Courtesy of MITSUBISHI MOTOR SALES OF AMERICA.
STATOR 1. Check the continuity between the coil lead. If there is no continuity, replace the
stator. See Fig. 16
.
2. Check the continuity between the coil and the core. If there is continuity
re
place the stator. See Fig. 16
.
2004 Mitsubishi Endeavor Limited
2004 STARTING & CHARGING SYSTEMS Generators & Regulators - Endeavor
Page 1303 of 3870
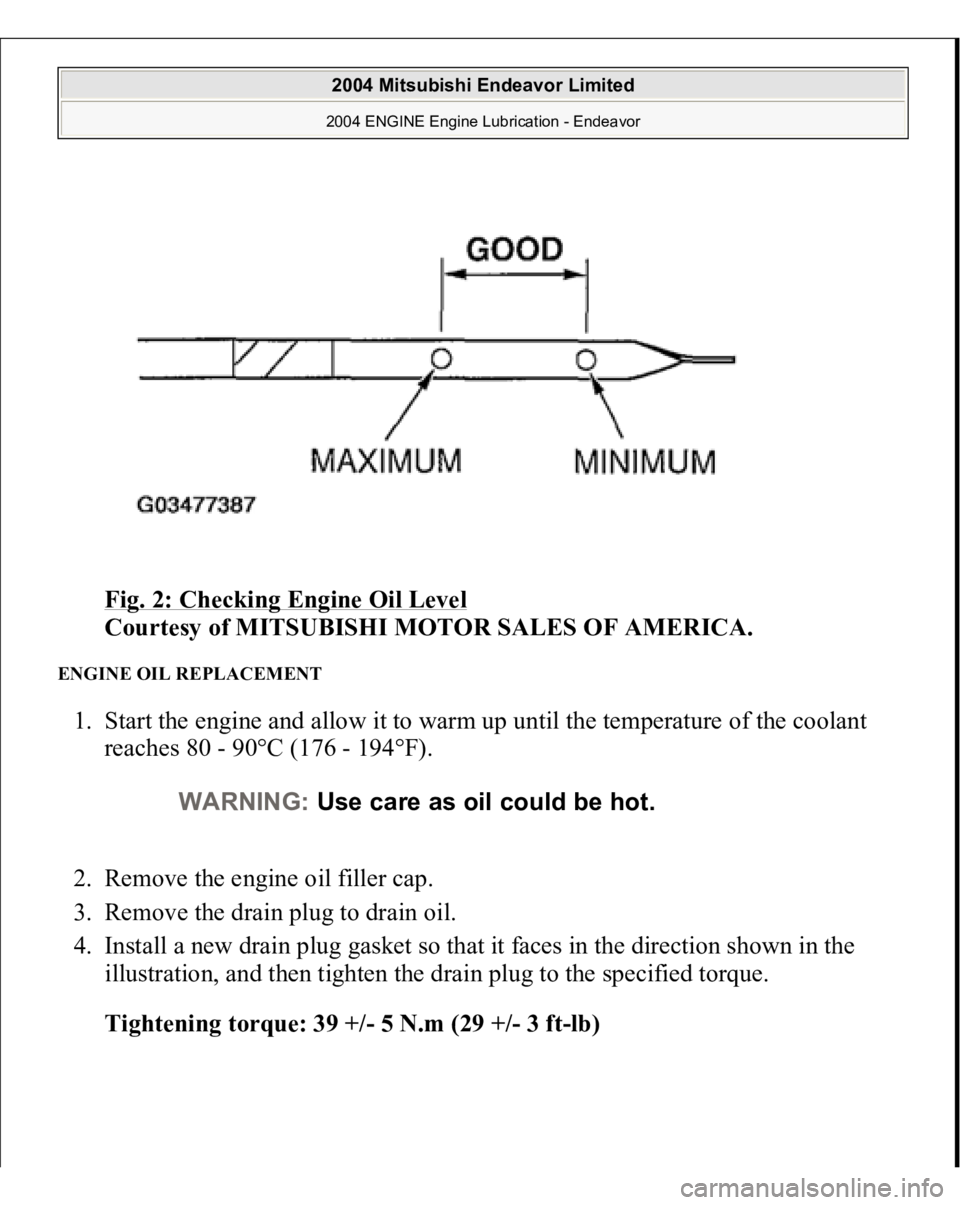
Fig. 2: Checking Engine Oil Level
Courtesy of MITSUBISHI MOTOR SALES OF AMERICA.
ENGINE OIL REPLACEMENT 1. Start the engine and allow it to warm up until the temperature of the coolant
reaches 80 - 90°C (176 - 194°F).
2. Remove the engine oil filler cap.
3. Remove the drain plug to drain oil.
4. Install a new drain plug gasket so that it faces in the direction shown in the
illustration, and then tighten the drain plug to the specified torque.
Tightening torque: 39 +/- 5 N.m (29 +/- 3 ft-lb)
WARNING:Use care as oil could be hot.
2004 Mitsubishi Endeavor Limited 2004 ENGINE Engine Lubrication - Endeavor
Page 1359 of 3870
AUT
O-TENSIONE
R
1. Check for oil leaks. If oil leaks are evident, replace the auto-tensioner.
2. Check the rod end for wear or damage and replace the auto-tensioner if
necessary.
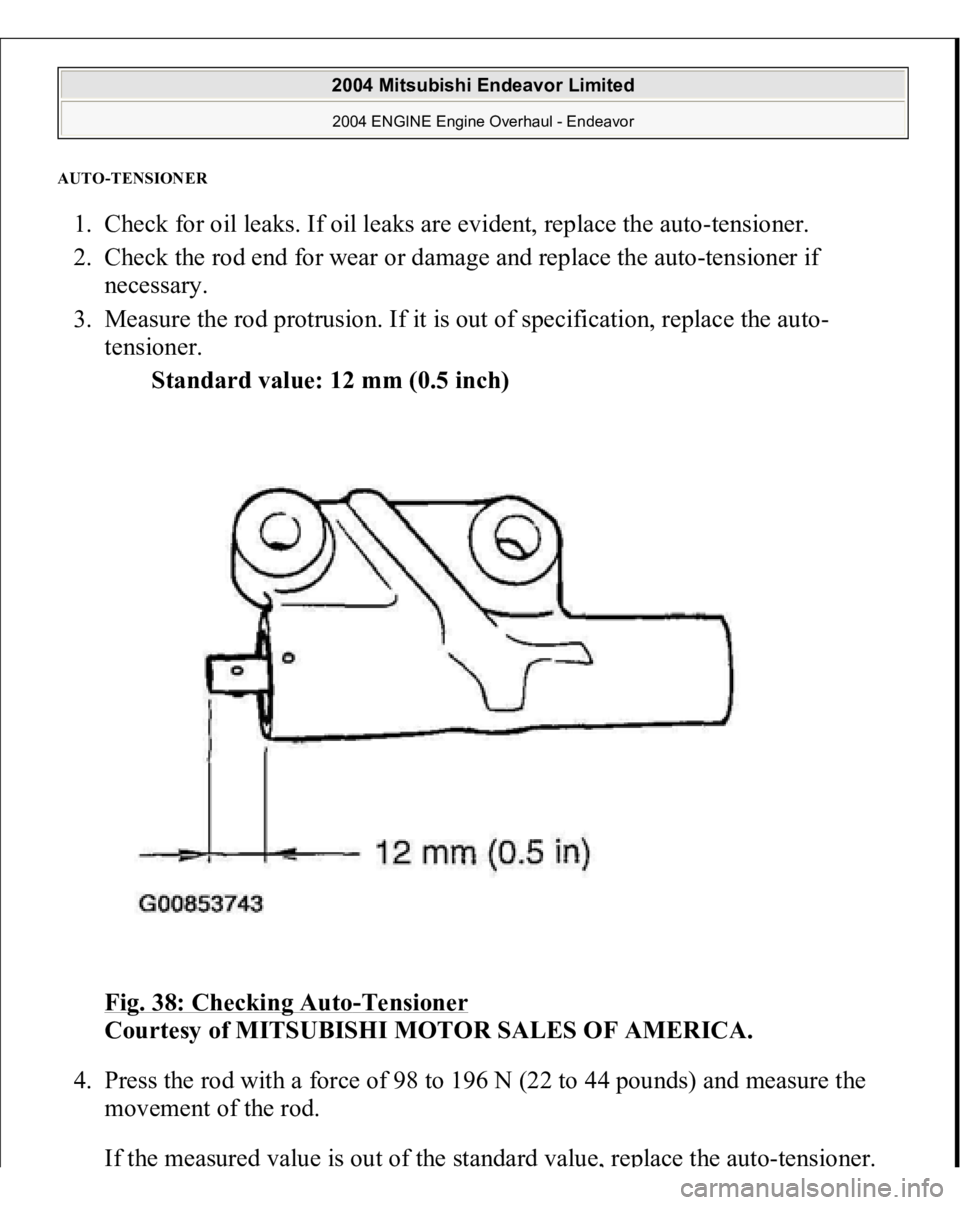
3. Measure the rod protrusion. If it is out of specification, replace the auto-
tensioner.
Standard value: 12 mm (0.5 inch)
Fig. 38: Checking Auto
-Tensioner
Courtesy of MITSUBISHI MOTOR SALES OF AMERICA.
4. Press the rod with a force of 98 to 196 N (22 to 44 pounds) and measure the
movement of the rod.
If the measured value is out of the standard value
, re
place the auto-tensioner.
2004 Mitsubishi Endeavor Limited 2004 ENGINE Engine Overhaul - Endeavor
Page 1365 of 3870
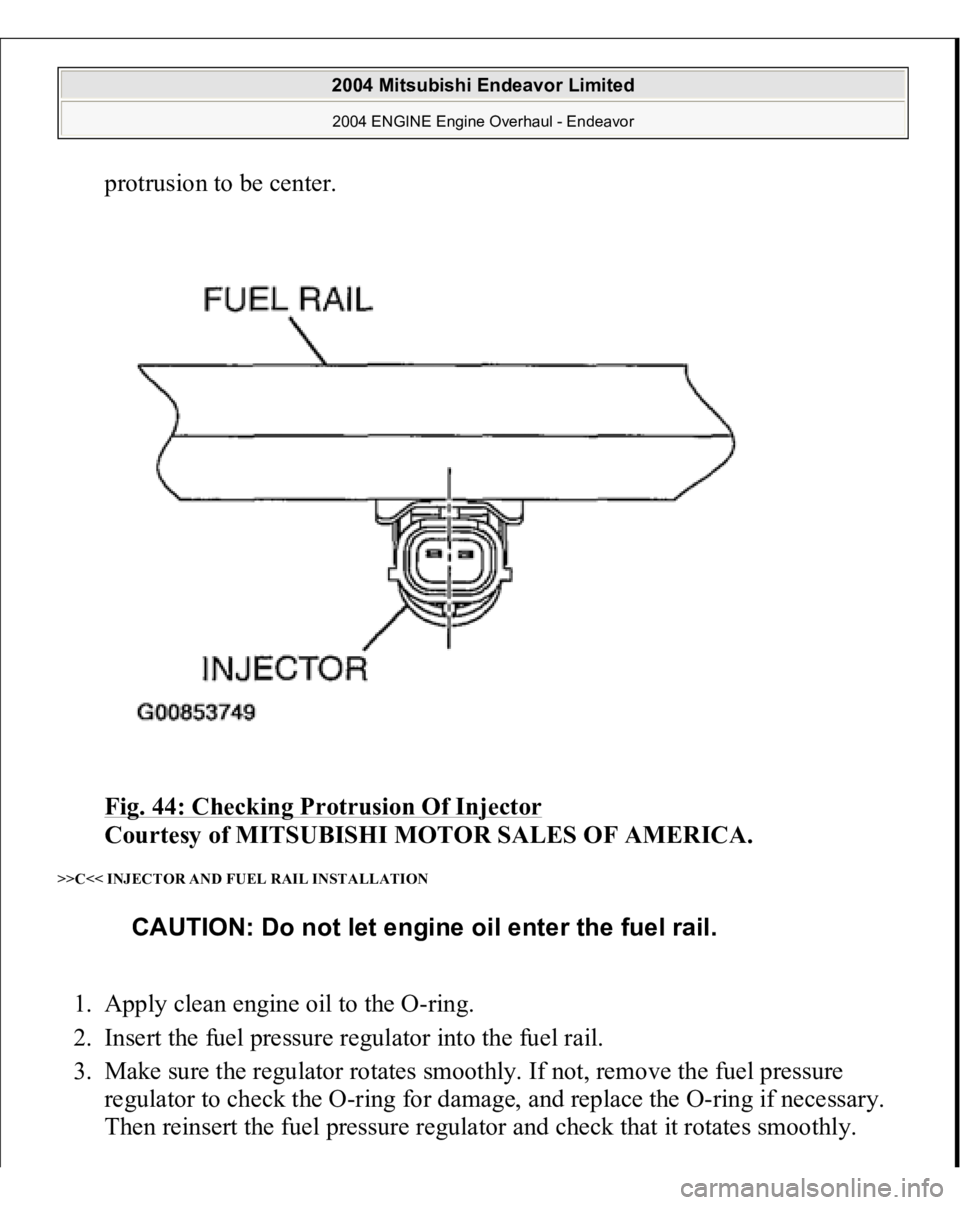
protrusion to be center.
Fig. 44: Checking Protrusion Of Injector
Courtesy of MITSUBISHI MOTOR SALES OF AMERICA.
>>C<< INJECTOR AND FUEL RAIL INSTALLATION 1. Apply clean engine oil to the O-ring.
2. Insert the fuel pressure regulator into the fuel rail.
3. Make sure the regulator rotates smoothly. If not, remove the fuel pressure
regulator to check the O-ring for damage, and replace the O-ring if necessary.
Then reinsert the fuel pressure regulator and chec
k that it rotates smoothly.
CAUTION: Do not let engine oil enter the fuel rail.
2004 Mitsubishi Endeavor Limited 2004 ENGINE Engine Overhaul - Endeavor
Page 1383 of 3870
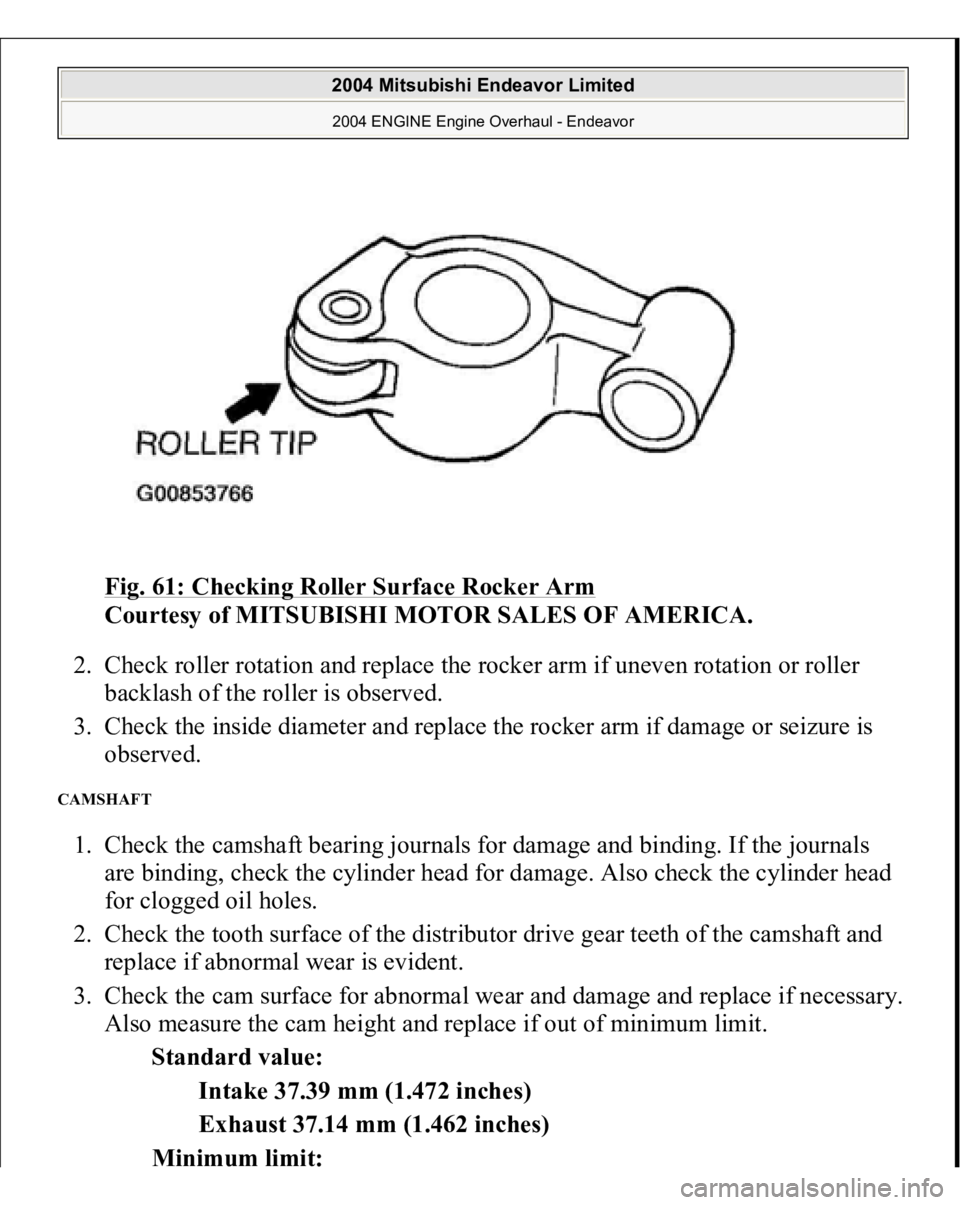
Fig. 61: Checking Roller Surface Rocker Arm
Courtesy of MITSUBISHI MOTOR SALES OF AMERICA.
2. Check roller rotation and replace the rocker arm if uneven rotation or roller
backlash of the roller is observed.
3. Check the inside diameter and replace the rocker arm if damage or seizure is
observed.
CAMSHAFT 1. Check the camshaft bearing journals for damage and binding. If the journals
are binding, check the cylinder head for damage. Also check the cylinder head
for clogged oil holes.
2. Check the tooth surface of the distributor drive gear teeth of the camshaft and
replace if abnormal wear is evident.
3. Check the cam surface for abnormal wear and damage and replace if necessary.
Also measure the cam height and replace if out of minimum limit.
Standard value:
Intake 37.39 mm (1.472 inches)
Exhaust 37.14 mm (1.462 inches)
Minimum limit:
2004 Mitsubishi Endeavor Limited 2004 ENGINE Engine Overhaul - Endeavor
Page 1436 of 3870
Fig. 108: Installing Drain Plug Gaske
t
Courtesy of MITSUBISHI MOTOR SALES OF AMERICA.
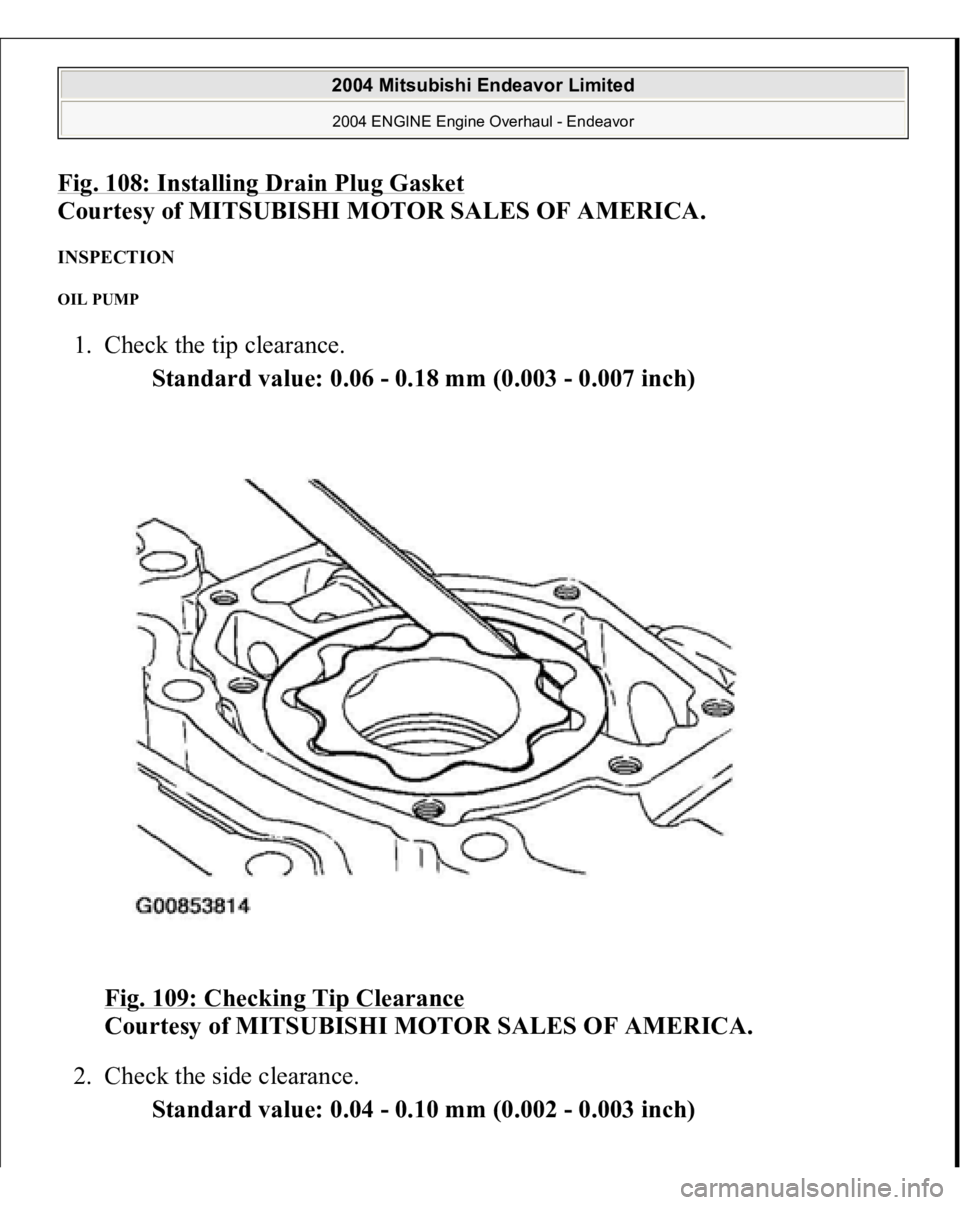
INSPECTION OIL PUMP 1. Check the tip clearance.
Standard value: 0.06 - 0.18 mm (0.003 - 0.007 inch)
Fig. 109: Checking Tip Clearance
Courtesy of MITSUBISHI MOTOR SALES OF AMERICA.
2. Check the side clearance.
Standard value: 0.04 - 0.10 mm (0.002 - 0.003 inch)
2004 Mitsubishi Endeavor Limited 2004 ENGINE Engine Overhaul - Endeavor
