MITSUBISHI ENDEAVOR 2004 Service Repair Manual
ENDEAVOR 2004
MITSUBISHI
MITSUBISHI
https://www.carmanualsonline.info/img/19/57105/w960_57105-0.png
MITSUBISHI ENDEAVOR 2004 Service Repair Manual
Page 471 of 3870
Courtesy of MITSUBISHI MOTOR SALES OF AMERICA
.
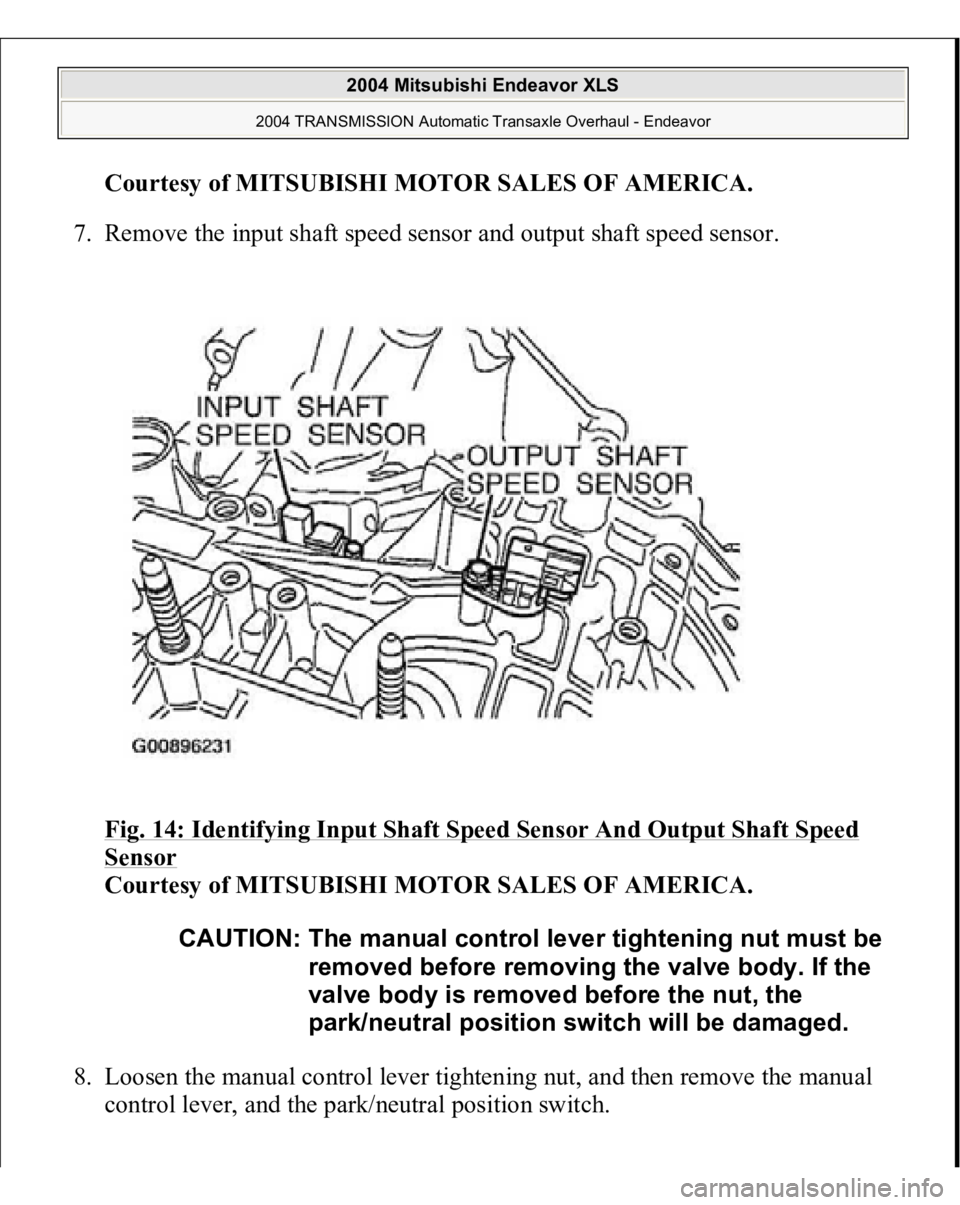
7. Remove the input shaft speed sensor and output shaft speed sensor.
Fig. 14: Identifying Input Shaft Speed Sensor And Output Shaft Speed
Sensor
Courtesy of MITSUBISHI MOTOR SALES OF AMERICA.
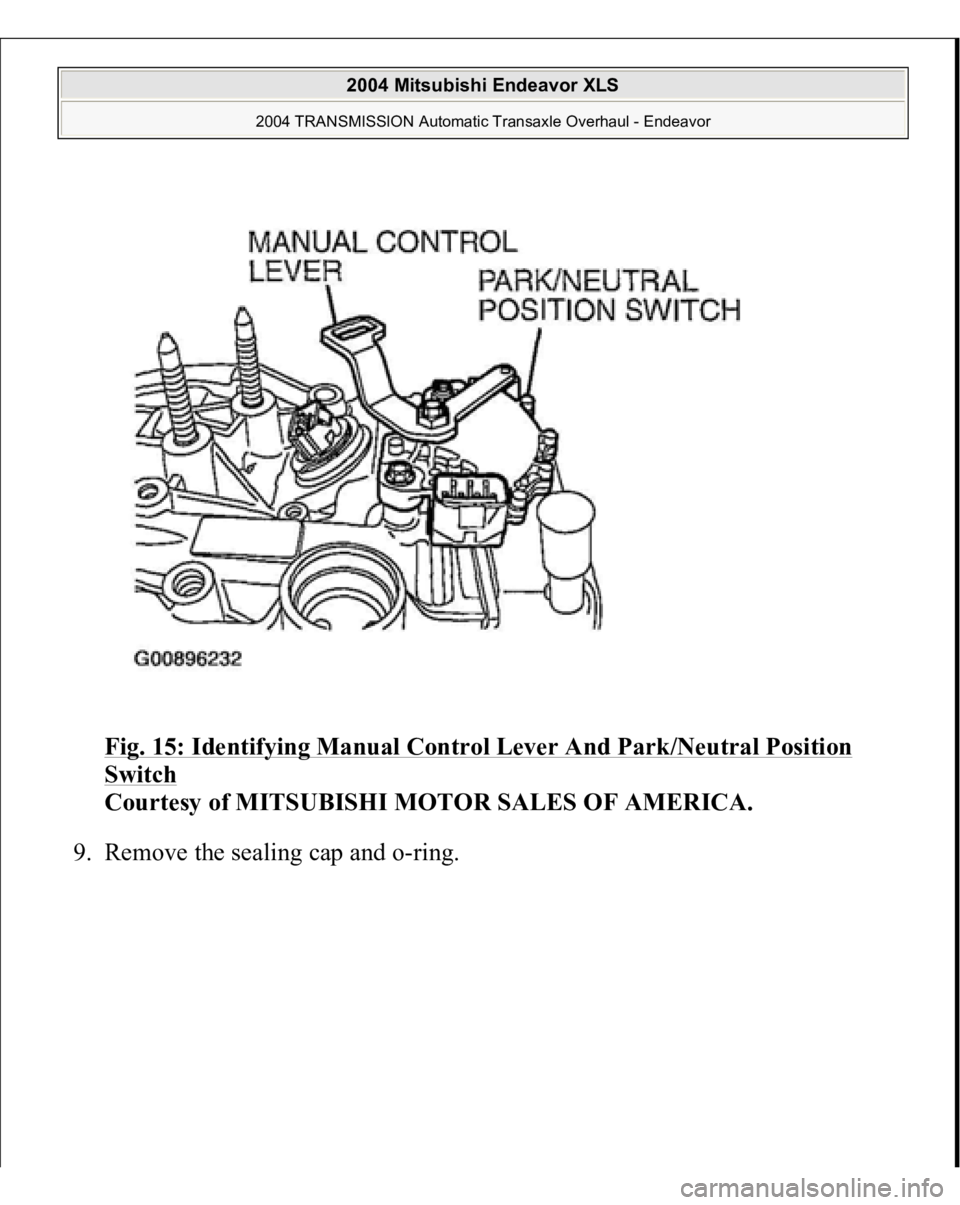
8. Loosen the manual control lever tightening nut, and then remove the manual
control lever, and the park/neutral position switch. CAUTION: The manual control lever tightening nut must be
removed before removing the valve body. If the
valve body is removed before the nut, the
park/neutral position switch will be damaged.
2004 Mitsubishi Endeavor XLS
2004 TRANSMISSION Automatic Transaxle Overhaul - Endeavor
Page 472 of 3870
Fig. 15: Identifying Manual Control Lever And Park/Neutral Position Switch
Courtesy of MITSUBISHI MOTOR SALES OF AMERICA.
9. Remove the sealing cap and o-ring.
2004 Mitsubishi Endeavor XLS
2004 TRANSMISSION Automatic Transaxle Overhaul - Endeavor
Page 474 of 3870
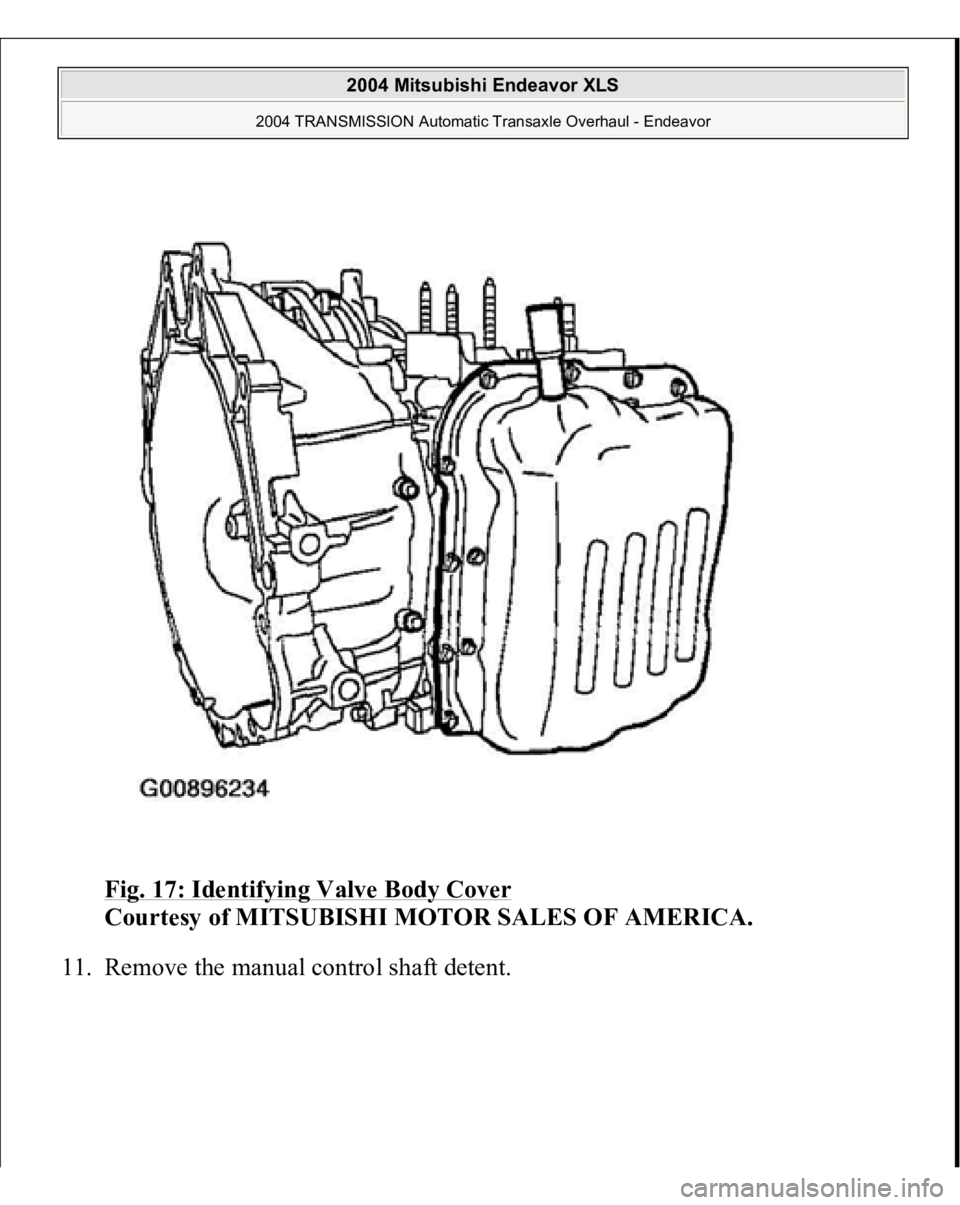
Fig. 17: Identifying Valve Body Cover
Courtesy of MITSUBISHI MOTOR SALES OF AMERICA.
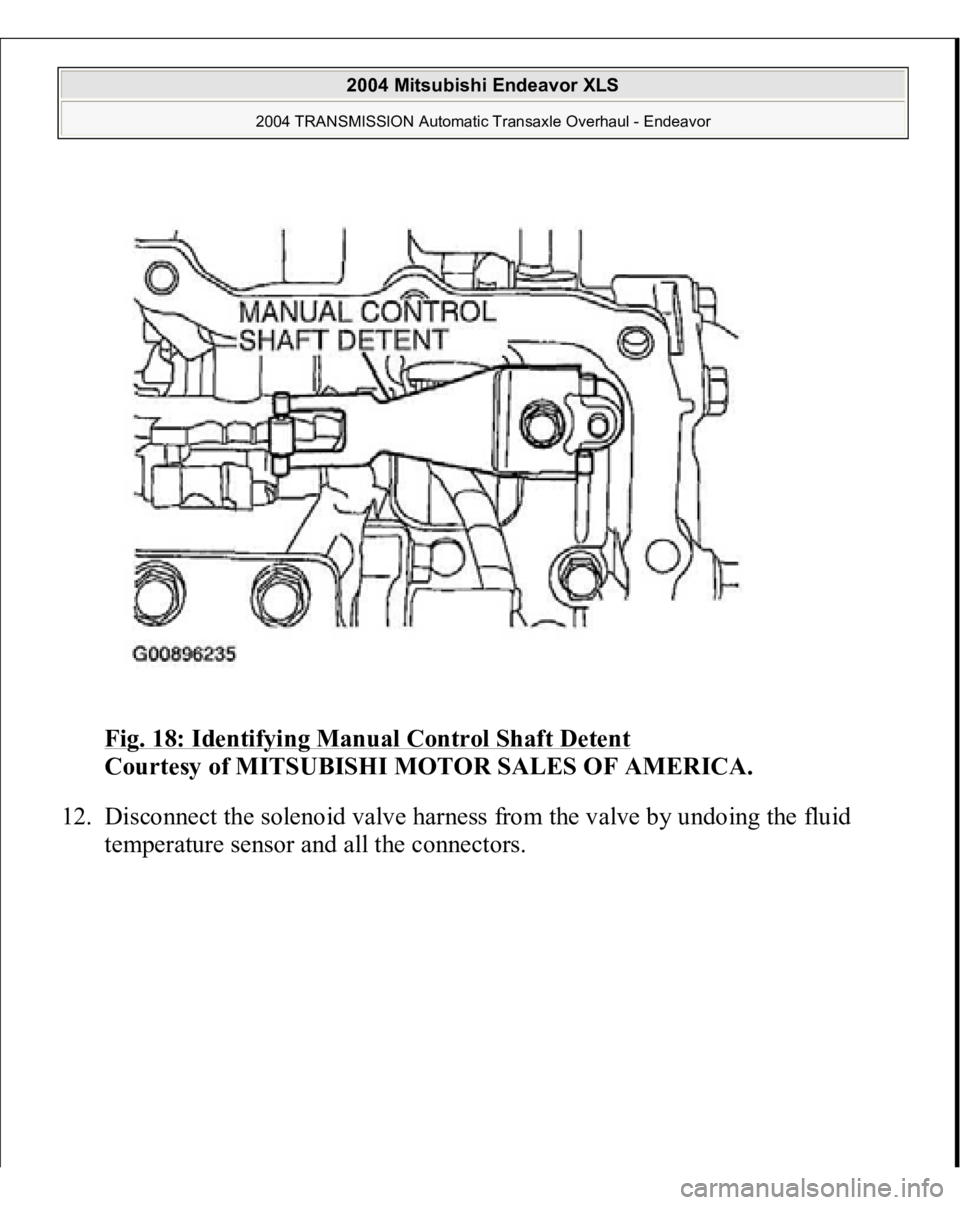
11. Remove the manual control shaft detent.
2004 Mitsubishi Endeavor XLS
2004 TRANSMISSION Automatic Transaxle Overhaul - Endeavor
Page 475 of 3870
Fig. 18: Identifying Manual Control Shaft Detent
Courtesy of MITSUBISHI MOTOR SALES OF AMERICA.
12. Disconnect the solenoid valve harness from the valve by undoing the fluid
tem
perature sensor and all the connectors.
2004 Mitsubishi Endeavor XLS
2004 TRANSMISSION Automatic Transaxle Overhaul - Endeavor
Page 476 of 3870
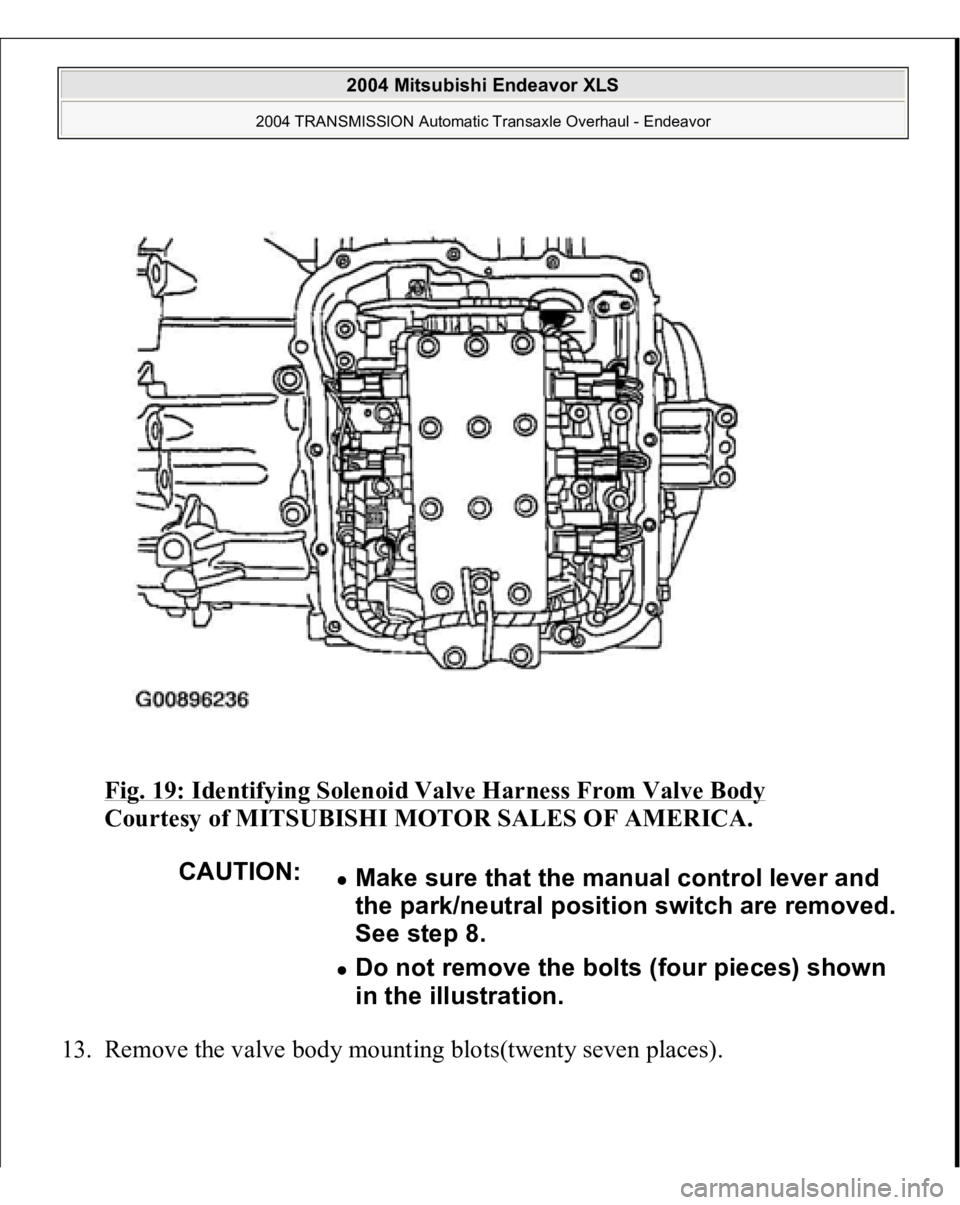
Fig. 19: Identifying Solenoid Valve Harness From Valve Body
Courtesy of MITSUBISHI MOTOR SALES OF AMERICA.
13. Remove the valve bod
y mountin
g blots
(twent
y seven
places
).
CAUTION:
Make sure that the manual control lever and
the park/neutral position switch are removed.
See step 8. Do not remove the bolts (four pieces) shown
in the illustration.
2004 Mitsubishi Endeavor XLS
2004 TRANSMISSION Automatic Transaxle Overhaul - Endeavor
Page 481 of 3870
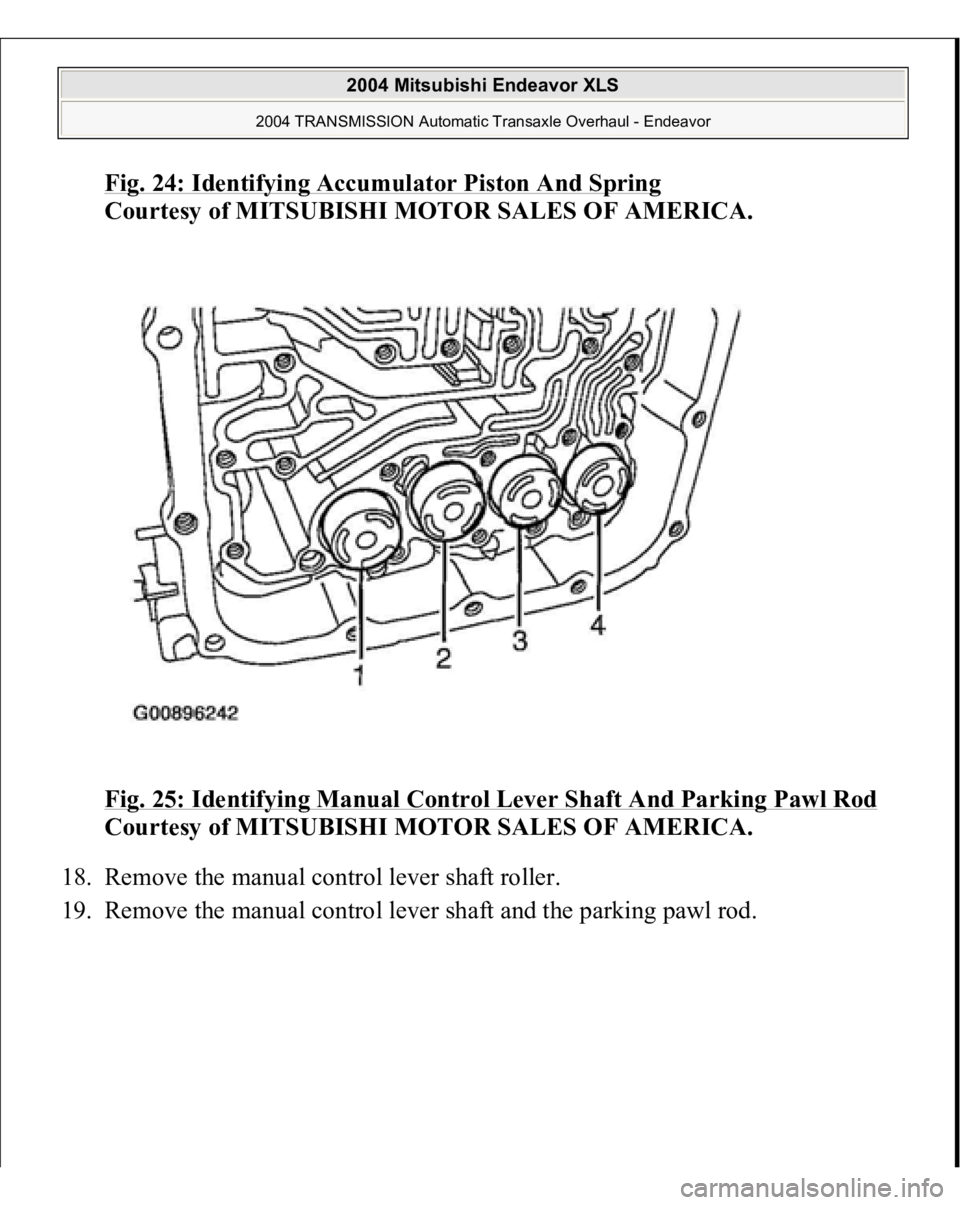
Fig. 24: Identifying Accumulator Piston And Spring
Courtesy of MITSUBISHI MOTOR SALES OF AMERICA.
Fig. 25: Identifying Manual Control Lever Shaft And Parking Pawl Rod
Courtesy of MITSUBISHI MOTOR SALES OF AMERICA.
18. Remove the manual control lever shaft roller.
19. Remove the manual control lever shaft and the
parkin
g pawl rod.
2004 Mitsubishi Endeavor XLS
2004 TRANSMISSION Automatic Transaxle Overhaul - Endeavor
Page 583 of 3870
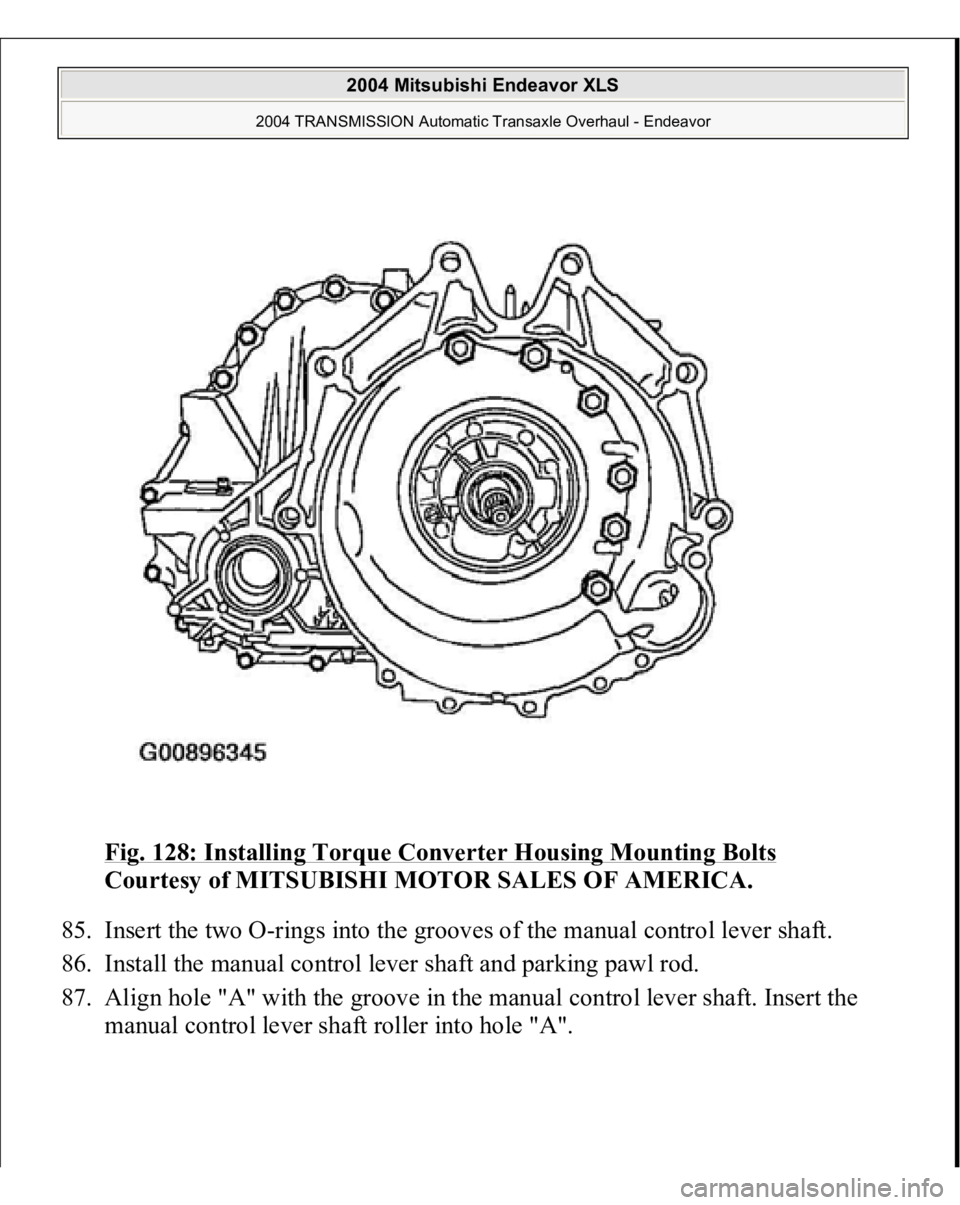
Fig. 128: Installing Torque Converter Housing Mounting Bolts
Courtesy of MITSUBISHI MOTOR SALES OF AMERICA.
85. Insert the two O-rings into the grooves of the manual control lever shaft.
86. Install the manual control lever shaft and parking pawl rod.
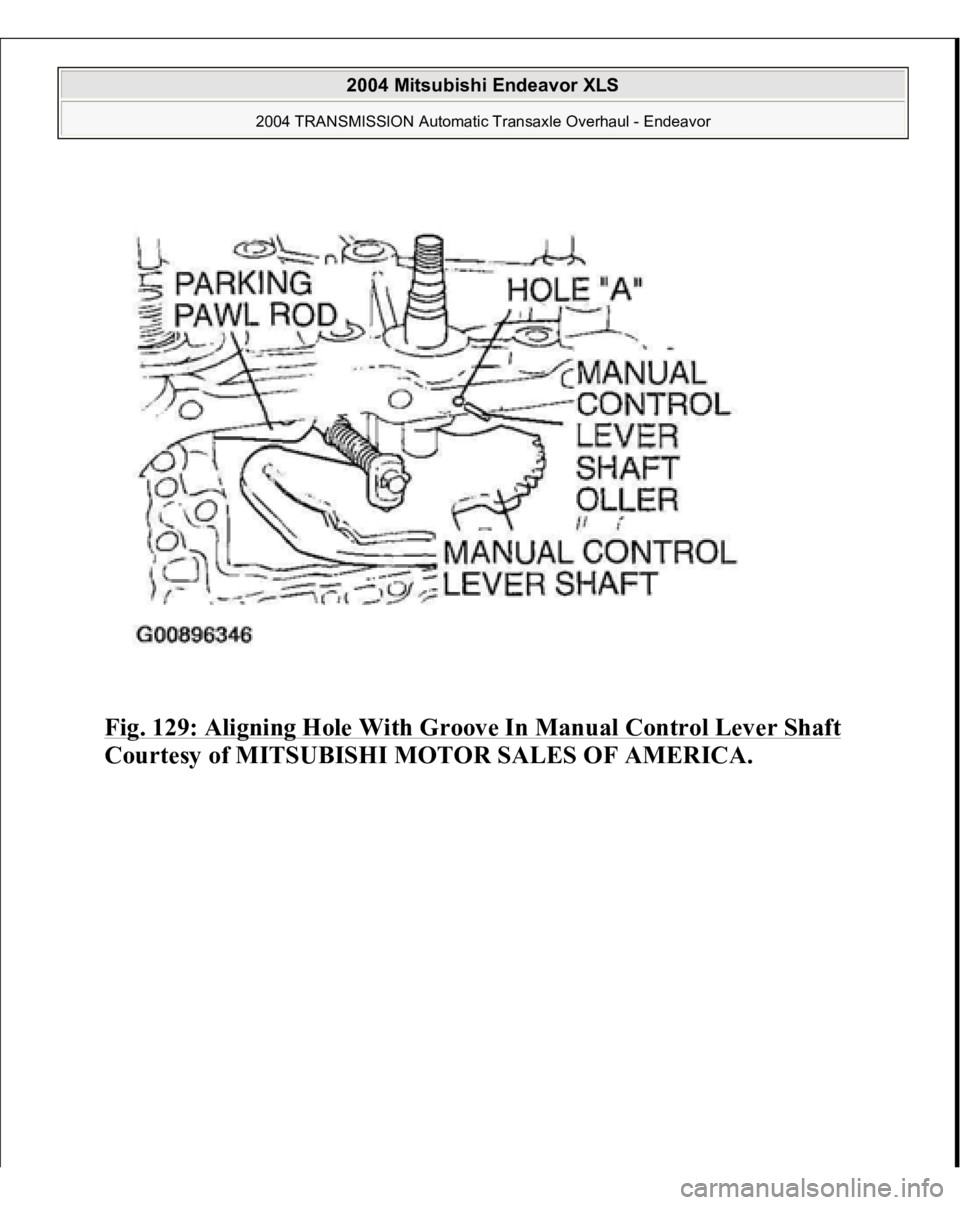
87. Align hole "A" with the groove in the manual control lever shaft. Insert the
manual control lever shaft roller into hole "A".
2004 Mitsubishi Endeavor XLS
2004 TRANSMISSION Automatic Transaxle Overhaul - Endeavor
Page 584 of 3870
Fig. 129: Aligning Hole With Groove In Manual Control Lever Shaft
Courtesy of MITSUBISHI MOTOR SALES OF AMERICA.
2004 Mitsubishi Endeavor XLS
2004 TRANSMISSION Automatic Transaxle Overhaul - Endeavor
Page 588 of 3870
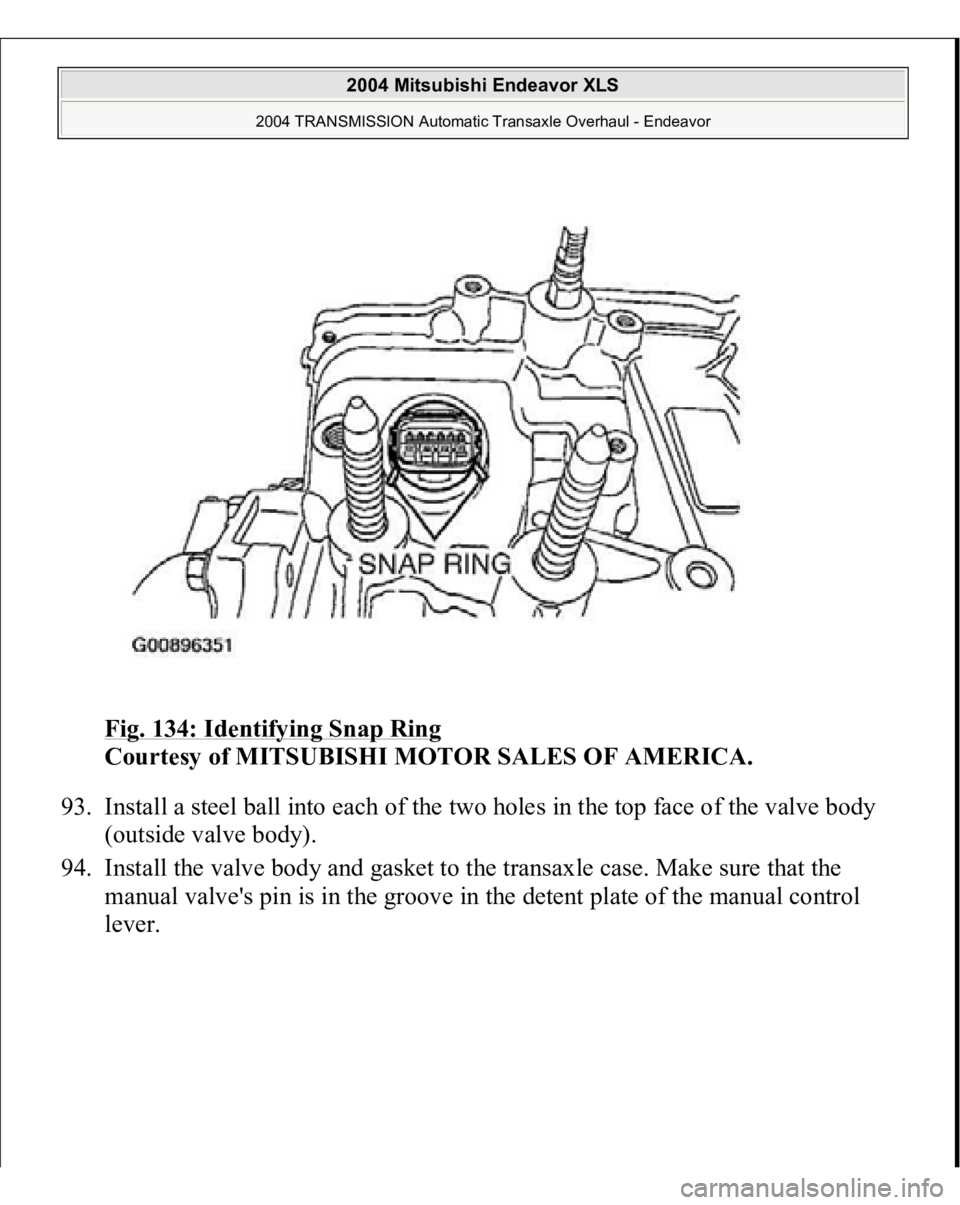
Fig. 134: Identifying Snap Ring
Courtesy of MITSUBISHI MOTOR SALES OF AMERICA.
93. Install a steel ball into each of the two holes in the top face of the valve body
(outside valve body).
94. Install the valve body and gasket to the transaxle case. Make sure that the
manual valve's pin is in the groove in the detent plate of the manual control
lever.
2004 Mitsubishi Endeavor XLS
2004 TRANSMISSION Automatic Transaxle Overhaul - Endeavor
Page 592 of 3870
Fig. 138: Solenoid Valve Harness Cable Color Identification Table
Courtesy of MITSUBISHI MOTOR SALES OF AMERICA.
97. Install the manual control shaft detent and tighten the bolt to the specified
torque.
Tightening torque: 6.0 +/- 1.0 N.m (52 +/- 8 in-lb)
2004 Mitsubishi Endeavor XLS
2004 TRANSMISSION Automatic Transaxle Overhaul - Endeavor