automatic transmission MITSUBISHI GRANDIS 2008 Owner's Manual (in English)
[x] Cancel search | Manufacturer: MITSUBISHI, Model Year: 2008, Model line: GRANDIS, Model: MITSUBISHI GRANDIS 2008Pages: 458, PDF Size: 18.52 MB
Page 2 of 458
OXPE08E1
(9290B529)
BL070680
© 2007 Mitsubishi Motors Corporation
Mitsubishi Motors Europe B.V.
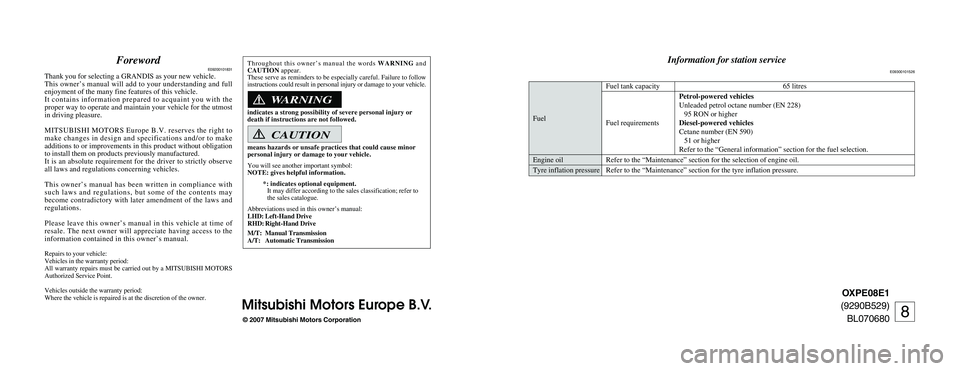
ForewordE09200101831
Thank you for selecting a GRANDIS as your new vehicle.
This owner’s manual will add to your understanding and full
enjoyment of the many fine features of this vehicle.
It contains information prepared to acquaint you with the
proper way to operate and maintain your vehicle for the utmost
in driving pleasure.
MITSUBISHI MOTORS Europe B.V. reserves the right to
make changes in design and specifications and/or to make
additions to or improvements in this product without obligation
to install them on products previously manufactured.
It is an absolute requirement for the driver to strictly observe
all laws and regulations concerning vehicles.
This owner’s manual has been written in compliance with
such laws and regulations, but some of the contents may
become contradictory with later amendment of the laws and
regulations.
Please leave this owner’s manual in this vehicle at time of
resale. The next owner will appreciate having access to the
information contained in this owner’s manual.
Repairs to your vehicle:
Vehicles in the warranty period:
All warranty repairs must be carried out by a MITSUBISHI MOTORS
Authorized Service Point.
Vehicles outside the warranty period:
Where the vehicle is repaired is at the discretion of the owner.Throughout this owner’s manual the words WARNINGand
CAUTIONappear.
These serve as reminders to be especially careful. Failure to follow
instructions could result in personal injury or damage to your vehicle.
indicates a strong possibility of severe personal injury or
death if instructions are not followed.
means hazards or unsafe practices that could cause minor
personal injury or damage to your vehicle.
You will see another important symbol:
NOTE: gives helpful information.
*: indicates optional equipment.
It may differ according to the sales classification; refer to
the sales catalogue.
Abbreviations used in this owner’s manual:
LHD: Left-Hand Drive
RHD: Right-Hand Drive
M/T: Manual Transmission
A/T: Automatic Transmission
WARNING
CAUTION
Information for station service
E09300101526
Fuel tank capacity 65 litres
Petrol-powered vehicles
Unleaded petrol octane number (EN 228)
Fuel95 RON or higher
Fuel requirementsDiesel-powered vehicles
Cetane number (EN 590)
51 or higher
Refer to the “General information” section for the fuel selection.
Engine oil Refer to the “Maintenance” section for the selection of engine oil.
Tyre inflation pressure Refer to the “Maintenance” section for the tyre inflation pressure.
8
eng270680_XP08_cv 05-07-2007 12:31 Page 2
Page 137 of 458
Instruments and controls
3-11
3
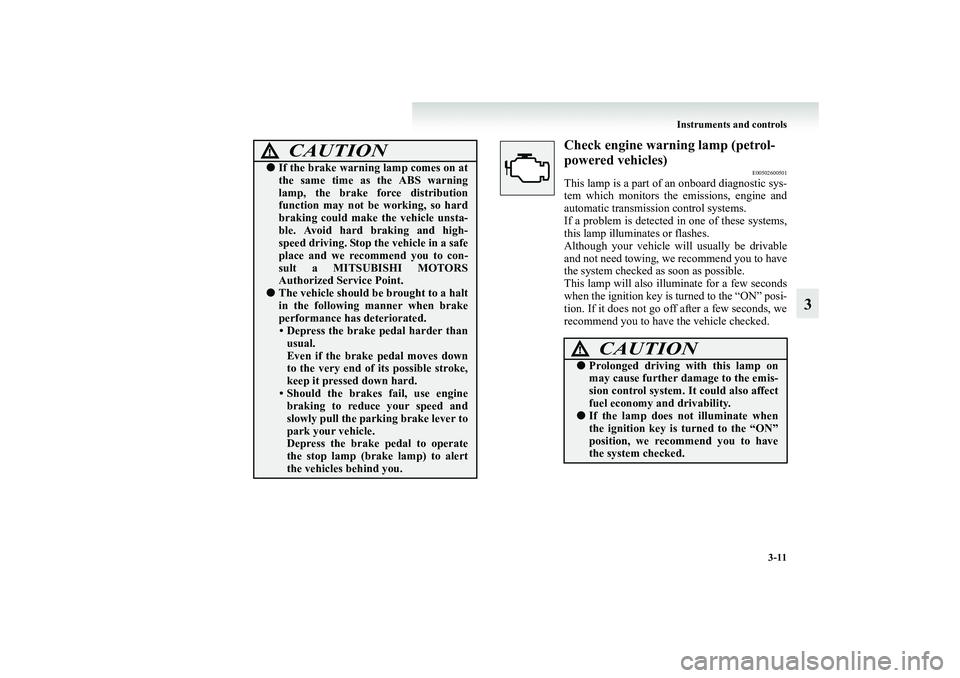
Check engine warning lamp (petrol-
powered vehicles)
E00502600501
This lamp is a part of an onboard diagnostic sys-
tem which monitors the emissions, engine and
automatic transmission control systems.
If a problem is detected in one of these systems,
this lamp illuminates or flashes.
Although your vehicle will usually be drivable
and not need towing, we recommend you to have
the system checked as soon as possible.
This lamp will also illuminate for a few seconds
when the ignition key is turned to the “ON” posi-
tion. If it does not go off after a few seconds, we
recommend you to have the vehicle checked.
●If the brake warning lamp comes on at
the same time as the ABS warning
lamp, the brake force distribution
function may not be working, so hard
braking could make the vehicle unsta-
ble. Avoid hard braking and high-
speed driving. Stop the vehicle in a safe
place and we recommend you to con-
sult a MITSUBISHI MOTORS
Authorized Service Point.●The vehicle should be brought to a halt
in the following manner when brake
performance has deteriorated.
• Depress the brake pedal harder than
usual.
Even if the brake pedal moves down
to the very end of its possible stroke,
keep it pressed down hard.
• Should the brakes fail, use engine
braking to reduce your speed and
slowly pull the parking brake lever to
park your vehicle.
Depress the brake pedal to operate
the stop lamp (brake lamp) to alert
the vehicles behind you.CAUTION
!
CAUTION
!●Prolonged driving with this lamp on
may cause further damage to the emis-
sion control system. It could also affect
fuel economy and drivability.●If the lamp does not illuminate when
the ignition key is turned to the “ON”
position, we recommend you to have
the system checked.
BK-XP08E1ENUK.en-uk.book Page 11 Monday, August 13, 2007 2:20 PM
Page 173 of 458
4
Starting and driving
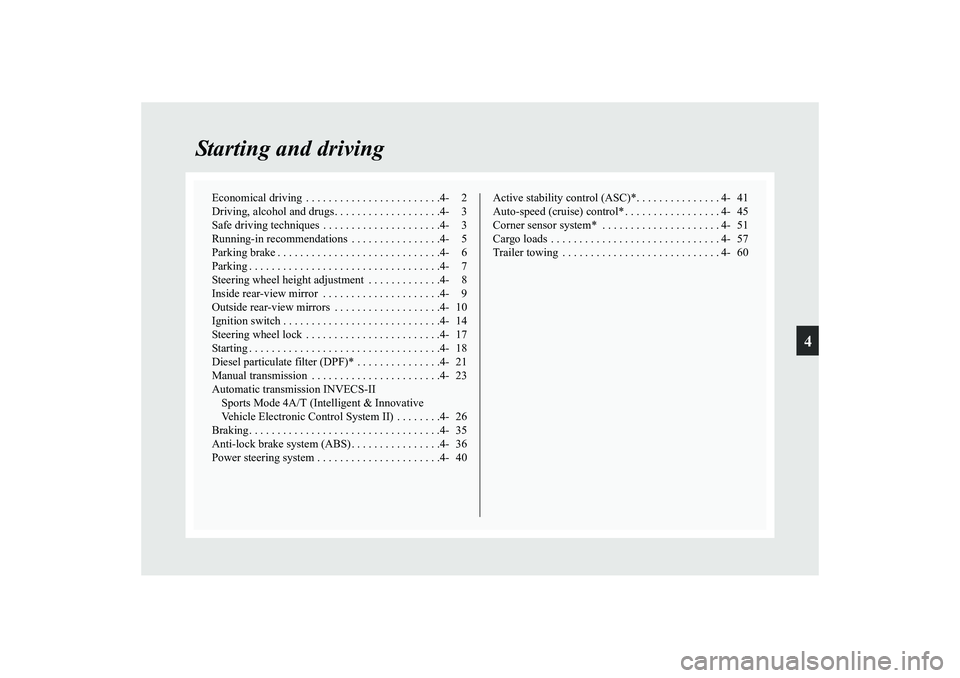
Economical driving . . . . . . . . . . . . . . . . . . . . . . . .4- 2
Driving, alcohol and drugs. . . . . . . . . . . . . . . . . . .4- 3
Safe driving techniques . . . . . . . . . . . . . . . . . . . . .4- 3
Running-in recommendations . . . . . . . . . . . . . . . .4- 5
Parking brake . . . . . . . . . . . . . . . . . . . . . . . . . . . . .4- 6
Parking . . . . . . . . . . . . . . . . . . . . . . . . . . . . . . . . . .4- 7
Steering wheel height adjustment . . . . . . . . . . . . .4- 8
Inside rear-view mirror . . . . . . . . . . . . . . . . . . . . .4- 9
Outside rear-view mirrors . . . . . . . . . . . . . . . . . . .4- 10
Ignition switch . . . . . . . . . . . . . . . . . . . . . . . . . . . .4- 14
Steering wheel lock . . . . . . . . . . . . . . . . . . . . . . . .4- 17
Starting . . . . . . . . . . . . . . . . . . . . . . . . . . . . . . . . . .4- 18
Diesel particulate filter (DPF)* . . . . . . . . . . . . . . .4- 21
Manual transmission . . . . . . . . . . . . . . . . . . . . . . .4- 23
Automatic transmission INVECS-II
Sports Mode 4A/T (Intelligent & Innovative
Vehicle Electronic Control System II) . . . . . . . .4- 26
Braking. . . . . . . . . . . . . . . . . . . . . . . . . . . . . . . . . .4- 35
Anti-lock brake system (ABS) . . . . . . . . . . . . . . . .4- 36
Power steering system . . . . . . . . . . . . . . . . . . . . . .4- 40Active stability control (ASC)*. . . . . . . . . . . . . . . 4- 41
Auto-speed (cruise) control* . . . . . . . . . . . . . . . . . 4- 45
Corner sensor system* . . . . . . . . . . . . . . . . . . . . . 4- 51
Cargo loads . . . . . . . . . . . . . . . . . . . . . . . . . . . . . . 4- 57
Trailer towing . . . . . . . . . . . . . . . . . . . . . . . . . . . . 4- 60
BK-XP08E1ENUK.en-uk.book Page 1 Monday, August 13, 2007 2:20 PM
Page 198 of 458
4-26 Starting and driving
4Automatic transmission INVECS-II Sports
Mode 4A/T (Intelligent & Innovative
Vehicle Electronic Control System II)
E00603200068
Designed for optimum control and equipped with adaptive con-
trol capabilities, the electronically controlled transmission opti-
mally matches gear shifts to almost all driving and road
conditions.NOTE●During running-in period or immediately after reconnec-
tion of the battery cable, there may be a case where gear
shifts are not made smoothly. This does not indicate a
faulty transmission.
Gear shifts will become smooth after the transmission has
been shifted several times by the electronic control sys-
tem.
Selector lever operation
E00603300131
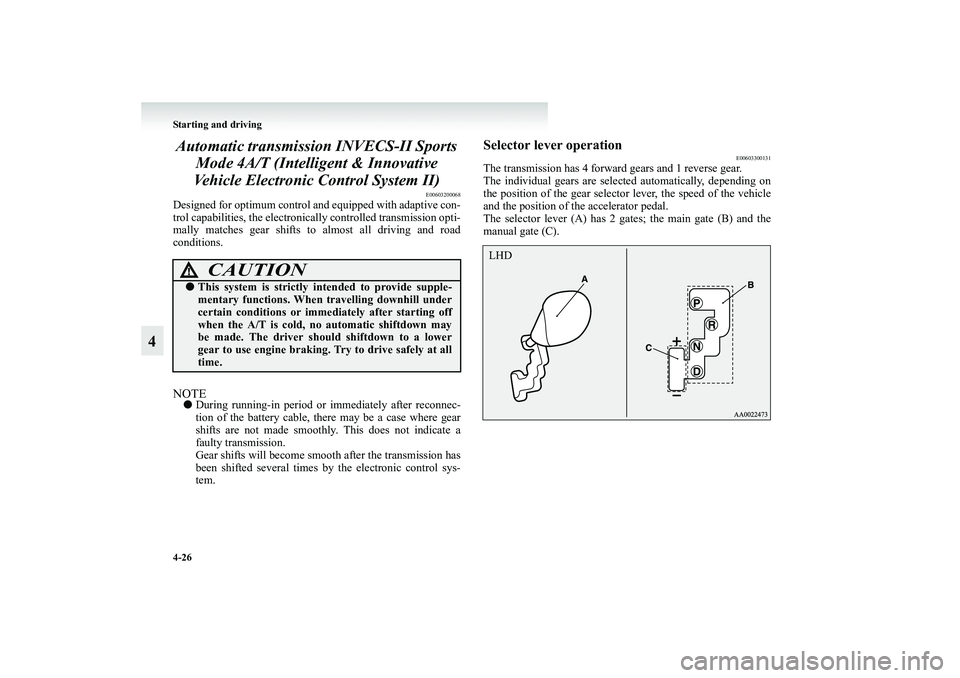
The transmission has 4 forward gears and 1 reverse gear.
The individual gears are selected automatically, depending on
the position of the gear selector lever, the speed of the vehicle
and the position of the accelerator pedal.
The selector lever (A) has 2 gates; the main gate (B) and the
manual gate (C).
CAUTION
!●This system is strictly intended to provide supple-
mentary functions. When travelling downhill under
certain conditions or immediately after starting off
when the A/T is cold, no automatic shiftdown may
be made. The driver should shiftdown to a lower
gear to use engine braking. Try to drive safely at all
time.
LHD
BK-XP08E1ENUK.en-uk.book Page 26 Monday, August 13, 2007 2:20 PM
Page 201 of 458
Starting and driving
4-29
4
Selector lever positions (Main gate)
E00603800077
“P” PARKThis position locks the transmission to prevent the vehicle
from moving. The engine can be started in this position.“R” REVERSEMove the lever to this position only after the vehicle has come
to a complete stop.“N” NEUTRALAt this position the transmission is disengaged. It is the same as
the neutral position on a M/T, and should be used when the
vehicle is stationary for an extended length of time during driv-
ing, such as in a traffic jam.
CAUTION
!●If a malfunction occurs in the A/T while driving, the
“N” indication lamp will blink.
In this case, immediately park your vehicle in a safe
place and follow these procedure:
(The “N” indication lamp warning function does not
operate with the selector lever in the “P” (PARK),
“R” (REVERSE) or “N” (NEUTRAL) position.)
[The “N” indication lamp blinks rapidly (twice per
second)]
The automatic transmission fluid is overheating.
Park your vehicle in a safe place but do not turn off
the engine. Move the selector lever to the
“P” (PARK) position and open the bonnet. Keep the
engine idling.
After a while, move the selector lever to the
“D” (DRIVE) position and confirm that the
“N” indication lamp stops blinking. It is safe to con-
tinue driving if the “N” indication lamp no longer
blinks.
If the “N” indication lamp continues blinking or
blinks intermittently, we recommend you to have
your vehicle inspected.
[The “N” indication lamp blinks slowly (once per
second)]
The A/T safety device may be operating due to a
malfunction.
We recommend you to have your vehicle inspected
as soon as possible.
CAUTION
!●Never shift into the “P” (PARK) or “R”
(REVERSE) position while the vehicle is in motion.
If the lever is shifted into the “P” (PARK) or “R”
(REVERSE) position while the vehicle is in motion,
the transmission may be damaged.
WARNING
!●Never move the selector lever to the “N” (NEU-
TRAL) position while driving. A serious accident
could occur since you could accidentally move the
lever into the “P” (PARK) or “R” (REVERSE) posi-
tion or you will lose engine braking.
BK-XP08E1ENUK.en-uk.book Page 29 Monday, August 13, 2007 2:20 PM
Page 202 of 458
4-30 Starting and driving
4
“D” DRIVEThis position is for normal driving. The transmission automati-
cally selects a suitable gear for your speed and acceleration.
Engine braking is automatically applied when necessary,
depending on road conditions.
Please refer to “Uphill/downhill driving” on page 4-33.
Sports mode
E00603900775
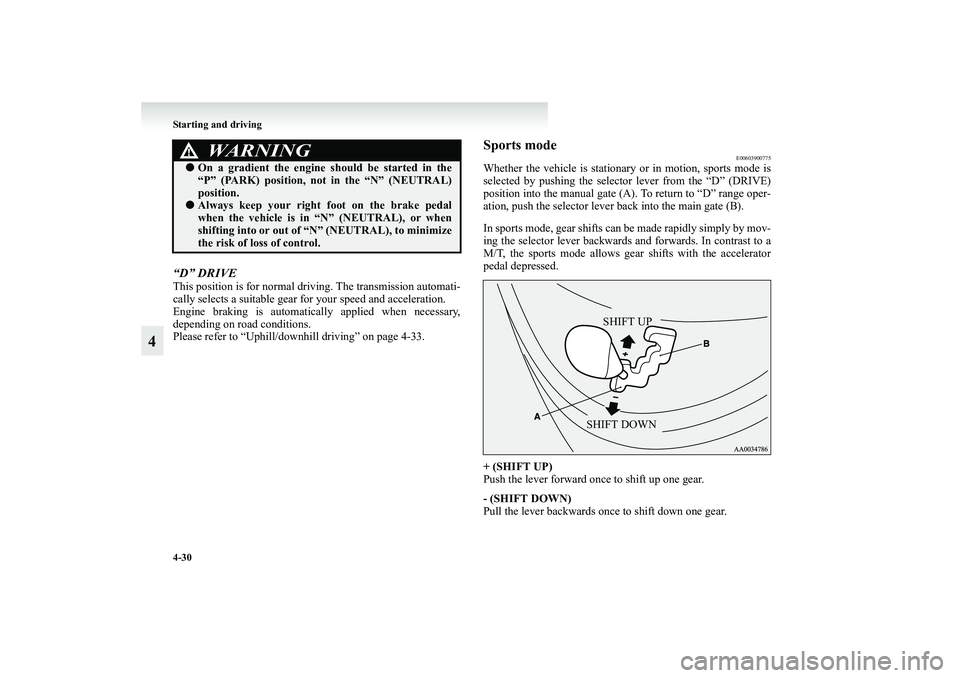
Whether the vehicle is stationary or in motion, sports mode is
selected by pushing the selector lever from the “D” (DRIVE)
position into the manual gate (A). To return to “D” range oper-
ation, push the selector lever back into the main gate (B).
In sports mode, gear shifts can be made rapidly simply by mov-
ing the selector lever backwards and forwards. In contrast to a
M/T, the sports mode allows gear shifts with the accelerator
pedal depressed.
+ (SHIFT UP)
Push the lever forward once to shift up one gear.
- (SHIFT DOWN)
Pull the lever backwards once to shift down one gear.
●On a gradient the engine should be started in the
“P” (PARK) position, not in the “N” (NEUTRAL)
position.●Always keep your right foot on the brake pedal
when the vehicle is in “N” (NEUTRAL), or when
shifting into or out of “N” (NEUTRAL), to minimize
the risk of loss of control.
WARNING
!
SHIFT UP
SHIFT DOWN
BK-XP08E1ENUK.en-uk.book Page 30 Monday, August 13, 2007 2:20 PM
Page 203 of 458
Starting and driving
4-31
4
NOTE●In sports mode, only the 4 forward gears can be selected.
To reverse or park the vehicle, move the selector lever to
the “R” (REVERSE) or “P” (PARK) position as required.
●To maintain good running performance, the transmission
may refuse to perform an upshift when the selector lever
is moved to the “+ (SHIFT UP)” position at certain vehi-
cle speeds. Also, to prevent over-revving of the engine,
the transmission may refuse to perform a downshift when
the lever is moved to the “– (SHIFT DOWN)” position at
certain vehicle speeds.
●In sports mode, downward shifts are made automatically
when the vehicle slows down. When the vehicle stops,
1st gear is automatically selected.
●When driving away on a slippery road, push the selector
lever forward into the “+ (SHIFT UP)” position. This
causes the transmission to shift into the 2nd gear which is
better for smooth driving away on a slippery road. Push
the selector lever to the “– (SHIFT DOWN)” side to shift
back to the 1st gear.
●Move the selector lever gently between the manual and
main gates and between positions in the manual gate.
Undue force could damage the selector lever.
CAUTION
!●In sports mode, the upward shift from the 1st to 2nd
gear is made automatically while the upward shifts
to the 3rd and 4th gears are made by the driver. The
driver must execute upward shifts in accordance
with prevailing road conditions, taking care to keep
the engine speed below the red zone.●By rapidly moving the selector lever backwards
(SHIFT DOWN) twice, it is possible to skip one gear,
i.e., 3rd to 1st or 4th to 2nd. Since sudden engine
braking and/or rapid acceleration can cause loss of
traction, however, downshifts must be made care-
fully in accordance with the vehicle’s speed.
BK-XP08E1ENUK.en-uk.book Page 31 Monday, August 13, 2007 2:20 PM
Page 205 of 458
Starting and driving
4-33
4
Passing acceleration
E00604500055
To gain extra acceleration in “D” (DRIVE) position (when
passing another vehicle) push the accelerator to the floor. The
A/T will automatically downshift.NOTE●In sports mode, downshifts do not take place when the
accelerator is depressed all the way to the floor.Uphill/downhill driving
E00610500018
DRIVING UPHILL
The transmission may not upshift to a higher gear if the com-
puter determines the current speed cannot be maintained once a
higher gear is engaged.
For smoother vehicle performance, if you release the throttle
while climbing a steep grade, the transmission may not upshift.
This is normal, as the computer is temporarily preventing shift-
ing. After reaching the top of the hill, normal gear shift func-
tion will resume.
DRIVING DOWNHILL
When travelling down steep grades, the computer may auto-
matically select a lower gear. This function assists engine brak-
ing efforts, reducing the need for using the brakes.
Waiting
E00604600069
For short waiting periods, such as at traffic signals the vehicle
can be left in gear and held stationary with the service brake.
For longer waiting periods with the engine running, the selec-
tor lever should be placed in the “N” (NEUTRAL) position.
CAUTION
!●Never hold the vehicle stationary while in gear on a
hill with the accelerator, always apply the parking
brake and/or service brake.●Unexpected acceleration may occur if the selector
lever is in a position other than “P” (PARK) or
“N” (NEUTRAL).
Prior to moving off after having stopped the vehicle,
make sure that the selector lever is in “D” (DRIVE)
or “Sports mode” position.
BK-XP08E1ENUK.en-uk.book Page 33 Monday, August 13, 2007 2:20 PM
Page 315 of 458
For emergencies
6-3
6
2. You could be injured if the vehicles move. Set the parking
brake firmly on each vehicle. Put an automatic transmis-
sion in “P” (PARK) or a manual transmission in “N”
(Neutral). Turn off the ignition switch.NOTE●Turn off all lamps, heater and other electrical loads. This
will avoid sparks and help save both batteries.
3. Make sure battery electrolyte is at the proper level.
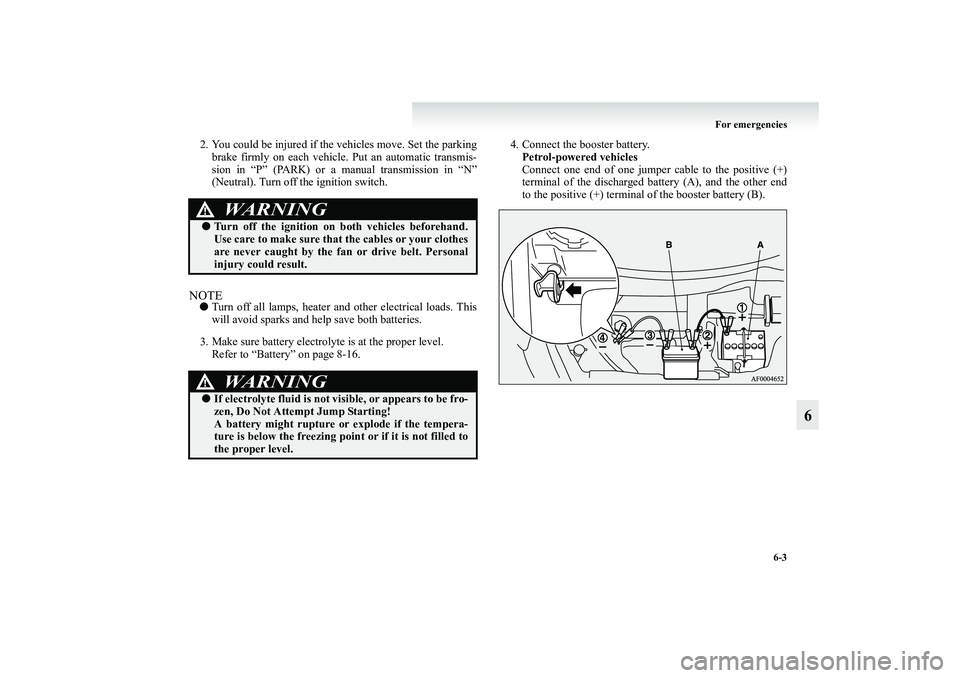
Refer to “Battery” on page 8-16.4. Connect the booster battery.
Petrol-powered vehicles
Connect one end of one jumper cable to the positive (+)
terminal of the discharged battery (A), and the other end
to the positive (+) terminal of the booster battery (B).
WARNING
!●Turn off the ignition on both vehicles beforehand.
Use care to make sure that the cables or your clothes
are never caught by the fan or drive belt. Personal
injury could result.
WARNING
!●If electrolyte fluid is not visible, or appears to be fro-
zen, Do Not Attempt Jump Starting!
A battery might rupture or explode if the tempera-
ture is below the freezing point or if it is not filled to
the proper level.
BK-XP08E1ENUK.en-uk.book Page 3 Monday, August 13, 2007 2:20 PM
Page 325 of 458
For emergencies
6-13
6 Jacking up the vehicle
E00801000992
1. Park the vehicle on level and stable ground.
2. Set the parking brake firmly.
3. On vehicles with manual transmission, turn the ignition
key to the “LOCK” position, move the gearshift lever to
the “R” (Reverse) position.
On vehicles with automatic transmission, move the selec-
tor lever to the “P” (PARK) position, turn the ignition key
to the “LOCK” position.
4. Turn on the hazard flashers and set up a warning triangle,
flashing signal lamp, etc., at an adequate distance from the
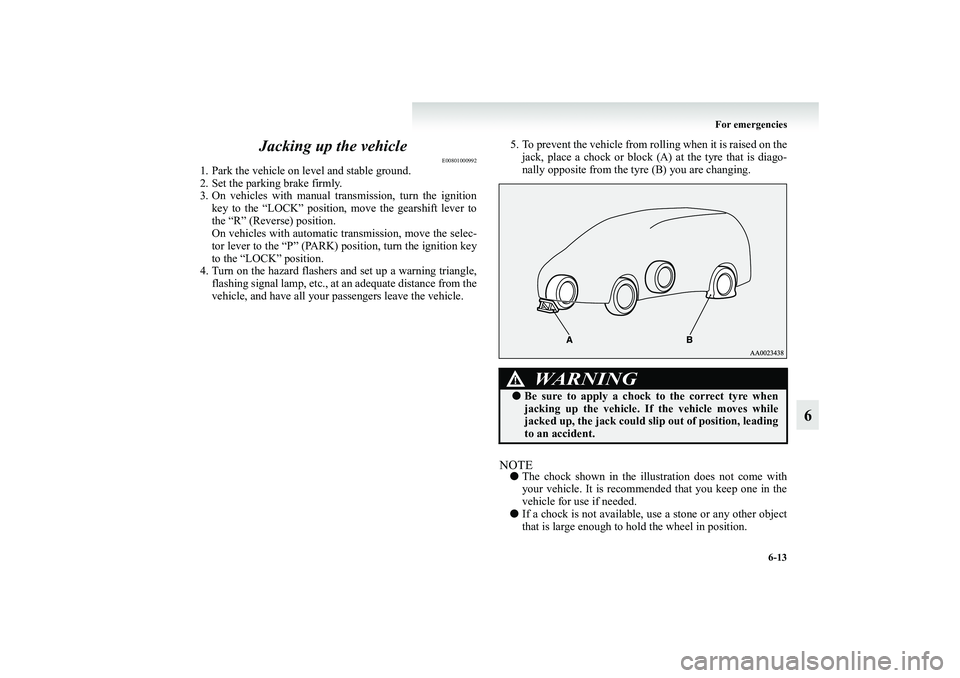
vehicle, and have all your passengers leave the vehicle.5. To prevent the vehicle from rolling when it is raised on the
jack, place a chock or block (A) at the tyre that is diago-
nally opposite from the tyre (B) you are changing.
NOTE●The chock shown in the illustration does not come with
your vehicle. It is recommended that you keep one in the
vehicle for use if needed.
●If a chock is not available, use a stone or any other object
that is large enough to hold the wheel in position.
WARNING
!●Be sure to apply a chock to the correct tyre when
jacking up the vehicle. If the vehicle moves while
jacked up, the jack could slip out of position, leading
to an accident.
BK-XP08E1ENUK.en-uk.book Page 13 Monday, August 13, 2007 2:20 PM