change time MITSUBISHI GRANDIS 2008 Owner's Manual (in English)
[x] Cancel search | Manufacturer: MITSUBISHI, Model Year: 2008, Model line: GRANDIS, Model: MITSUBISHI GRANDIS 2008Pages: 458, PDF Size: 18.52 MB
Page 2 of 458
OXPE08E1
(9290B529)
BL070680
© 2007 Mitsubishi Motors Corporation
Mitsubishi Motors Europe B.V.
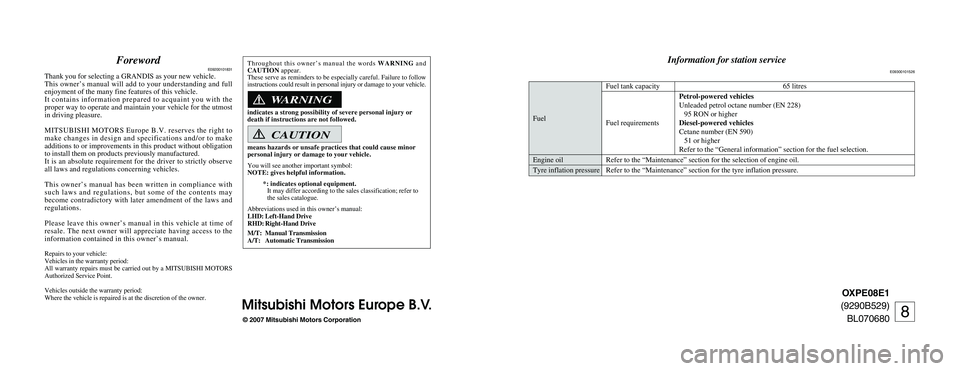
ForewordE09200101831
Thank you for selecting a GRANDIS as your new vehicle.
This owner’s manual will add to your understanding and full
enjoyment of the many fine features of this vehicle.
It contains information prepared to acquaint you with the
proper way to operate and maintain your vehicle for the utmost
in driving pleasure.
MITSUBISHI MOTORS Europe B.V. reserves the right to
make changes in design and specifications and/or to make
additions to or improvements in this product without obligation
to install them on products previously manufactured.
It is an absolute requirement for the driver to strictly observe
all laws and regulations concerning vehicles.
This owner’s manual has been written in compliance with
such laws and regulations, but some of the contents may
become contradictory with later amendment of the laws and
regulations.
Please leave this owner’s manual in this vehicle at time of
resale. The next owner will appreciate having access to the
information contained in this owner’s manual.
Repairs to your vehicle:
Vehicles in the warranty period:
All warranty repairs must be carried out by a MITSUBISHI MOTORS
Authorized Service Point.
Vehicles outside the warranty period:
Where the vehicle is repaired is at the discretion of the owner.Throughout this owner’s manual the words WARNINGand
CAUTIONappear.
These serve as reminders to be especially careful. Failure to follow
instructions could result in personal injury or damage to your vehicle.
indicates a strong possibility of severe personal injury or
death if instructions are not followed.
means hazards or unsafe practices that could cause minor
personal injury or damage to your vehicle.
You will see another important symbol:
NOTE: gives helpful information.
*: indicates optional equipment.
It may differ according to the sales classification; refer to
the sales catalogue.
Abbreviations used in this owner’s manual:
LHD: Left-Hand Drive
RHD: Right-Hand Drive
M/T: Manual Transmission
A/T: Automatic Transmission
WARNING
CAUTION
Information for station service
E09300101526
Fuel tank capacity 65 litres
Petrol-powered vehicles
Unleaded petrol octane number (EN 228)
Fuel95 RON or higher
Fuel requirementsDiesel-powered vehicles
Cetane number (EN 590)
51 or higher
Refer to the “General information” section for the fuel selection.
Engine oil Refer to the “Maintenance” section for the selection of engine oil.
Tyre inflation pressure Refer to the “Maintenance” section for the tyre inflation pressure.
8
eng270680_XP08_cv 05-07-2007 12:31 Page 2
Page 27 of 458
Locking and unlocking
1-5
1 Keyless entry system
*
E00300301440
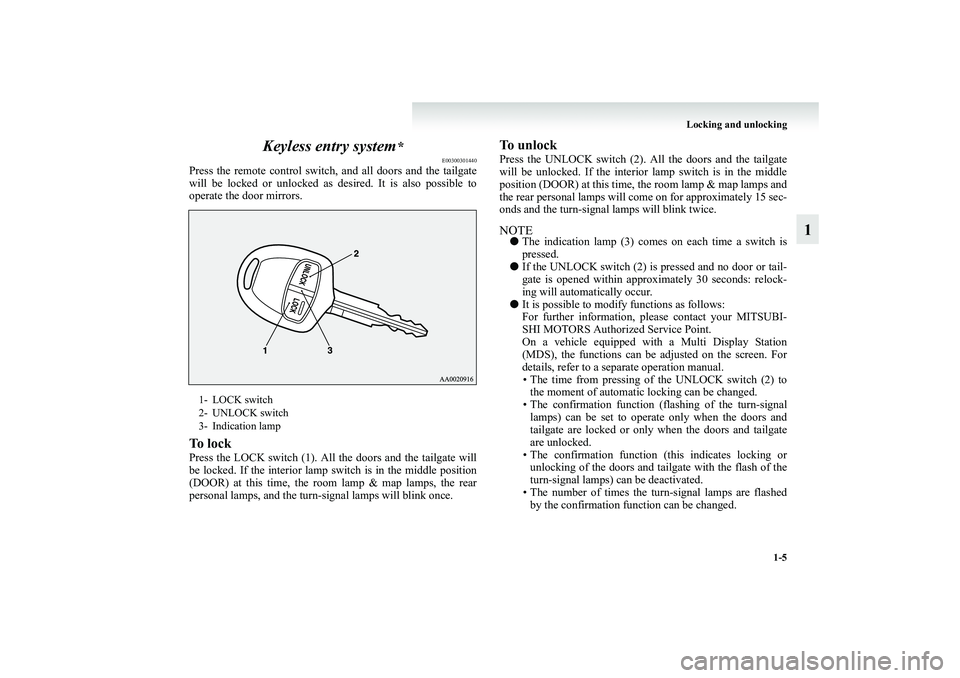
Press the remote control switch, and all doors and the tailgate
will be locked or unlocked as desired. It is also possible to
operate the door mirrors.To l o c kPress the LOCK switch (1). All the doors and the tailgate will
be locked. If the interior lamp switch is in the middle position
(DOOR) at this time, the room lamp & map lamps, the rear
personal lamps, and the turn-signal lamps will blink once.
To unlockPress the UNLOCK switch (2). All the doors and the tailgate
will be unlocked. If the interior lamp switch is in the middle
position (DOOR) at this time, the room lamp & map lamps and
the rear personal lamps will come on for approximately 15 sec-
onds and the turn-signal lamps will blink twice.NOTE●The indication lamp (3) comes on each time a switch is
pressed.
●If the UNLOCK switch (2) is pressed and no door or tail-
gate is opened within approximately 30 seconds: relock-
ing will automatically occur.
●It is possible to modify functions as follows:
For further information, please contact your MITSUBI-
SHI MOTORS Authorized Service Point.
On a vehicle equipped with a Multi Display Station
(MDS), the functions can be adjusted on the screen. For
details, refer to a separate operation manual.
• The time from pressing of the UNLOCK switch (2) to
the moment of automatic locking can be changed.
• The confirmation function (flashing of the turn-signal
lamps) can be set to operate only when the doors and
tailgate are locked or only when the doors and tailgate
are unlocked.
• The confirmation function (this indicates locking or
unlocking of the doors and tailgate with the flash of the
turn-signal lamps) can be deactivated.
• The number of times the turn-signal lamps are flashed
by the confirmation function can be changed.
1- LOCK switch
2- UNLOCK switch
3- Indication lamp
BK-XP08E1ENUK.en-uk.book Page 5 Monday, August 13, 2007 2:20 PM
Page 130 of 458
3-4 Instruments and controls
3
Odometer/Tripmeter
E00500600897
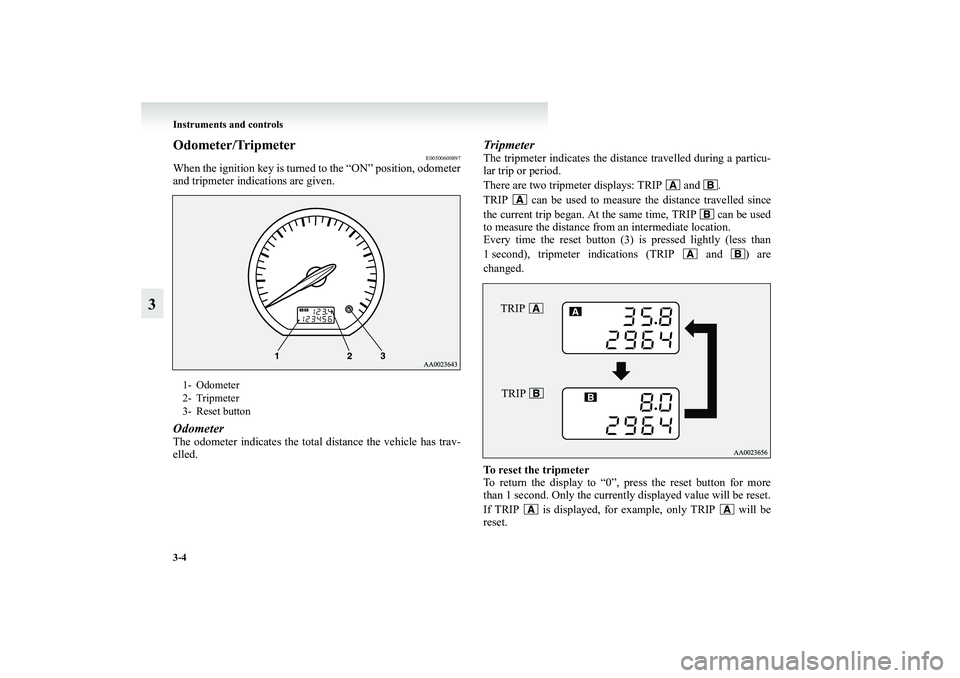
When the ignition key is turned to the “ON” position, odometer
and tripmeter indications are given.Odometer The odometer indicates the total distance the vehicle has trav-
elled.
TripmeterThe tripmeter indicates the distance travelled during a particu-
lar trip or period.
There are two tripmeter displays: TRIP and .
TRIP can be used to measure the distance travelled since
the current trip began. At the same time, TRIP can be used
to measure the distance from an intermediate location.
Every time the reset button (3) is pressed lightly (less than
1 second), tripmeter indications (TRIP and ) are
changed.
To reset the tripmeter
To return the display to “0”, press the reset button for more
than 1 second. Only the currently displayed value will be reset.
If TRIP is displayed, for example, only TRIP will be
reset.
1- Odometer
2- Tripmeter
3- Reset button
TRIP TRIP
BK-XP08E1ENUK.en-uk.book Page 4 Monday, August 13, 2007 2:20 PM
Page 133 of 458
Instruments and controls
3-7
3
Daytime dipper button
E00508800026
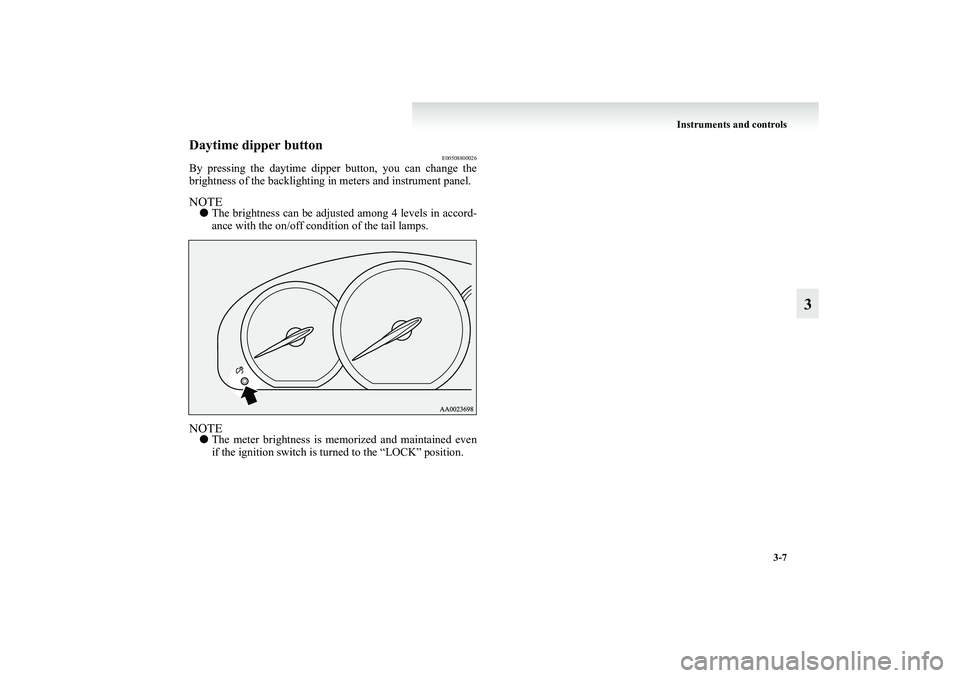
By pressing the daytime dipper button, you can change the
brightness of the backlighting in meters and instrument panel.NOTE●The brightness can be adjusted among 4 levels in accord-
ance with the on/off condition of the tail lamps.NOTE●The meter brightness is memorized and maintained even
if the ignition switch is turned to the “LOCK” position.
BK-XP08E1ENUK.en-uk.book Page 7 Monday, August 13, 2007 2:20 PM
Page 140 of 458
3-14 Instruments and controls
3
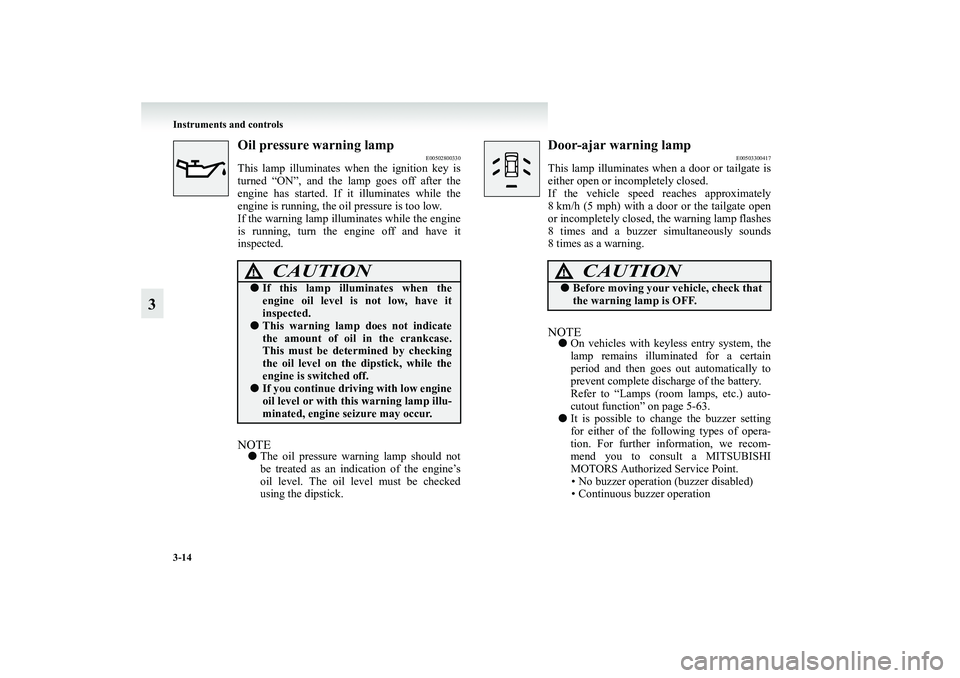
Oil pressure warning lamp
E00502800330
This lamp illuminates when the ignition key is
turned “ON”, and the lamp goes off after the
engine has started. If it illuminates while the
engine is running, the oil pressure is too low.
If the warning lamp illuminates while the engine
is running, turn the engine off and have it
inspected.NOTE●The oil pressure warning lamp should not
be treated as an indication of the engine’s
oil level. The oil level must be checked
using the dipstick.
Door-ajar warning lamp
E00503300417
This lamp illuminates when a door or tailgate is
either open or incompletely closed.
If the vehicle speed reaches approximately
8 km/h (5 mph) with a door or the tailgate open
or incompletely closed, the warning lamp flashes
8 times and a buzzer simultaneously sounds
8 times as a warning.NOTE●On vehicles with keyless entry system, the
lamp remains illuminated for a certain
period and then goes out automatically to
prevent complete discharge of the battery.
Refer to “Lamps (room lamps, etc.) auto-
cutout function” on page 5-63.
●It is possible to change the buzzer setting
for either of the following types of opera-
tion. For further information, we recom-
mend you to consult a MITSUBISHI
MOTORS Authorized Service Point.
• No buzzer operation (buzzer disabled)
• Continuous buzzer operation
CAUTION
!●If this lamp illuminates when the
engine oil level is not low, have it
inspected.●This warning lamp does not indicate
the amount of oil in the crankcase.
This must be determined by checking
the oil level on the dipstick, while the
engine is switched off.●If you continue driving with low engine
oil level or with this warning lamp illu-
minated, engine seizure may occur.
CAUTION
!●Before moving your vehicle, check that
the warning lamp is OFF.
BK-XP08E1ENUK.en-uk.book Page 14 Monday, August 13, 2007 2:20 PM
Page 146 of 458
3-20 Instruments and controls
3
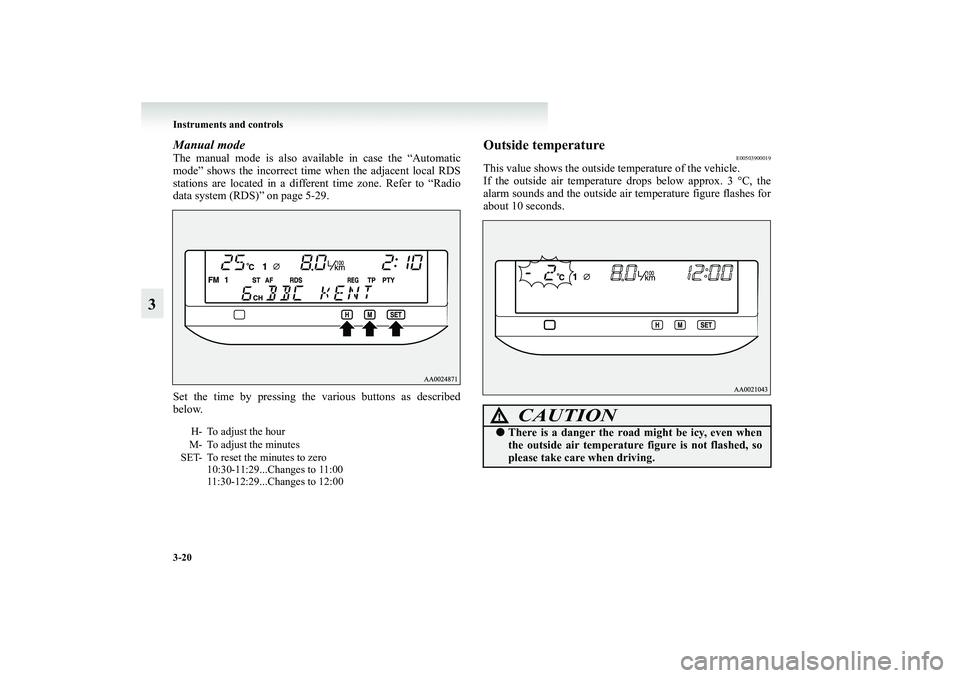
Manual modeThe manual mode is also available in case the “Automatic
mode” shows the incorrect time when the adjacent local RDS
stations are located in a different time zone. Refer to “Radio
data system (RDS)” on page 5-29.
Set the time by pressing the various buttons as described
below.
Outside temperature
E00503900019
This value shows the outside temperature of the vehicle.
If the outside air temperature drops below approx. 3 °C, the
alarm sounds and the outside air temperature figure flashes for
about 10 seconds.
H- To adjust the hour
M- To adjust the minutes
SET- To reset the minutes to zero
10:30-11:29...Changes to 11:00
11:30-12:29...Changes to 12:00
CAUTION
!●There is a danger the road might be icy, even when
the outside air temperature figure is not flashed, so
please take care when driving.
BK-XP08E1ENUK.en-uk.book Page 20 Monday, August 13, 2007 2:20 PM
Page 148 of 458
3-22 Instruments and controls
3
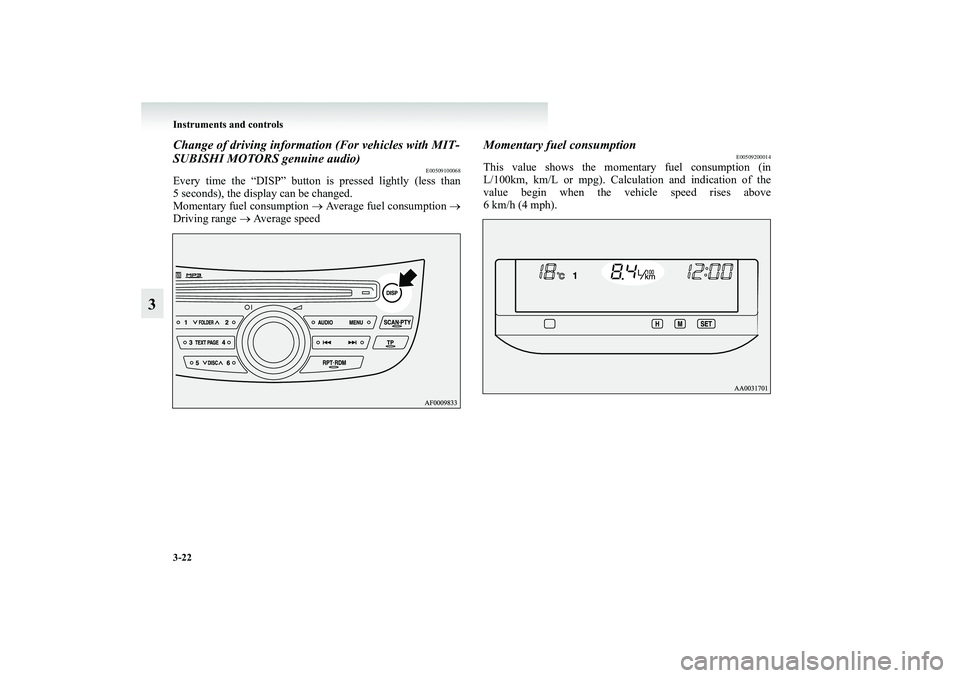
Change of driving information (For vehicles with MIT-
SUBISHI MOTORS genuine audio)
E00509100068
Every time the “DISP” button is pressed lightly (less than
5 seconds), the display can be changed.
Momentary fuel consumption → Average fuel consumption →
Driving range → Average speed
Momentary fuel consumption
E00509200014
This value shows the momentary fuel consumption (in
L/100km, km/L or mpg). Calculation and indication of the
value begin when the vehicle speed rises above
6km/h(4mph).
BK-XP08E1ENUK.en-uk.book Page 22 Monday, August 13, 2007 2:20 PM
Page 155 of 458
Instruments and controls
3-29
3
Display unit selection
E00509700051
It is possible to change the units in which distance, fuel con-
sumption, and time are displayed.NOTE●Except for vehicles with MITSUBISHI MOTORS genu-
ine audio, only the unit of momentary fuel consumption
can be changed to km or miles.
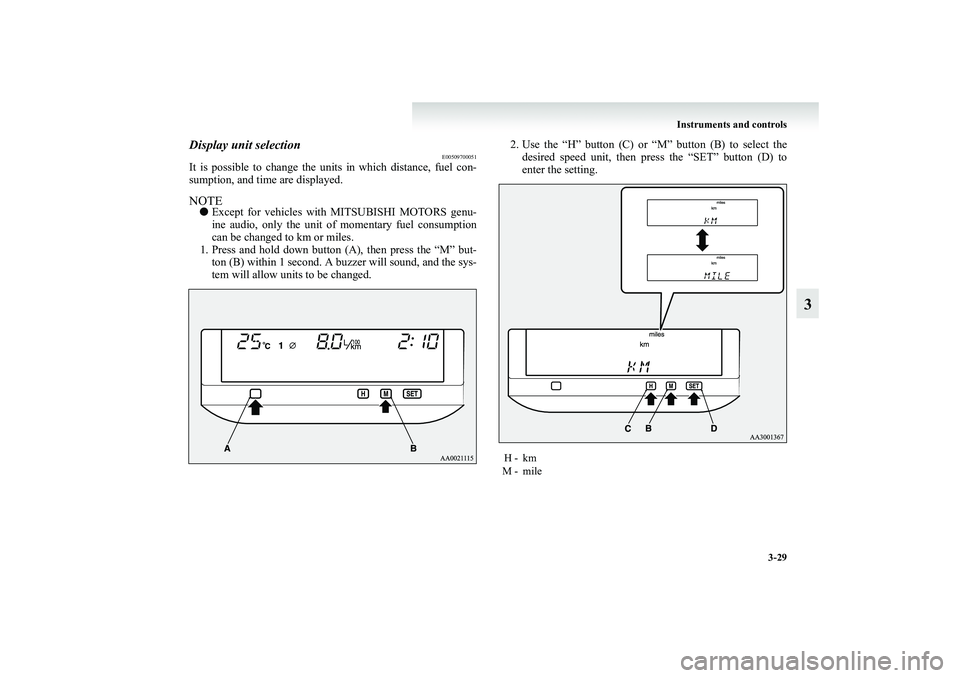
1. Press and hold down button (A), then press the “M” but-
ton (B) within 1 second. A buzzer will sound, and the sys-
tem will allow units to be changed.2. Use the “H” button (C) or “M” button (B) to select the
desired speed unit, then press the “SET” button (D) to
enter the setting.
H - km
M - mile
BK-XP08E1ENUK.en-uk.book Page 29 Monday, August 13, 2007 2:20 PM
Page 160 of 458
3-34 Instruments and controls
3
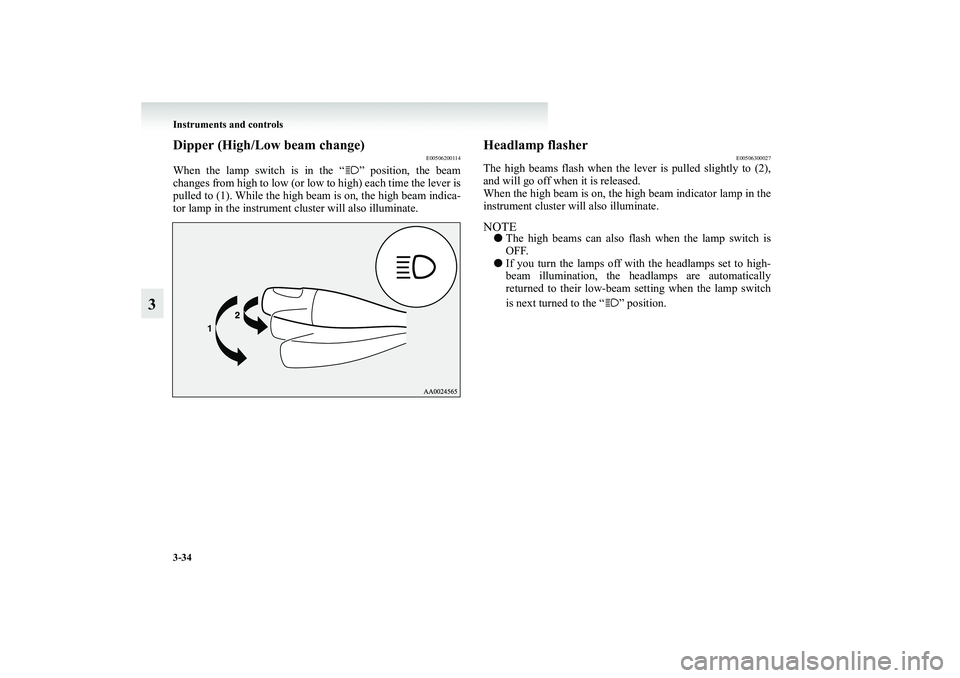
Dipper (High/Low beam change)
E00506200114
When the lamp switch is in the “ ” position, the beam
changes from high to low (or low to high) each time the lever is
pulled to (1). While the high beam is on, the high beam indica-
tor lamp in the instrument cluster will also illuminate.
Headlamp flasher
E00506300027
The high beams flash when the lever is pulled slightly to (2),
and will go off when it is released.
When the high beam is on, the high beam indicator lamp in the
instrument cluster will also illuminate.NOTE●The high beams can also flash when the lamp switch is
OFF.
●If you turn the lamps off with the headlamps set to high-
beam illumination, the headlamps are automatically
returned to their low-beam setting when the lamp switch
is next turned to the “ ” position.
BK-XP08E1ENUK.en-uk.book Page 34 Monday, August 13, 2007 2:20 PM
Page 163 of 458
Instruments and controls
3-37
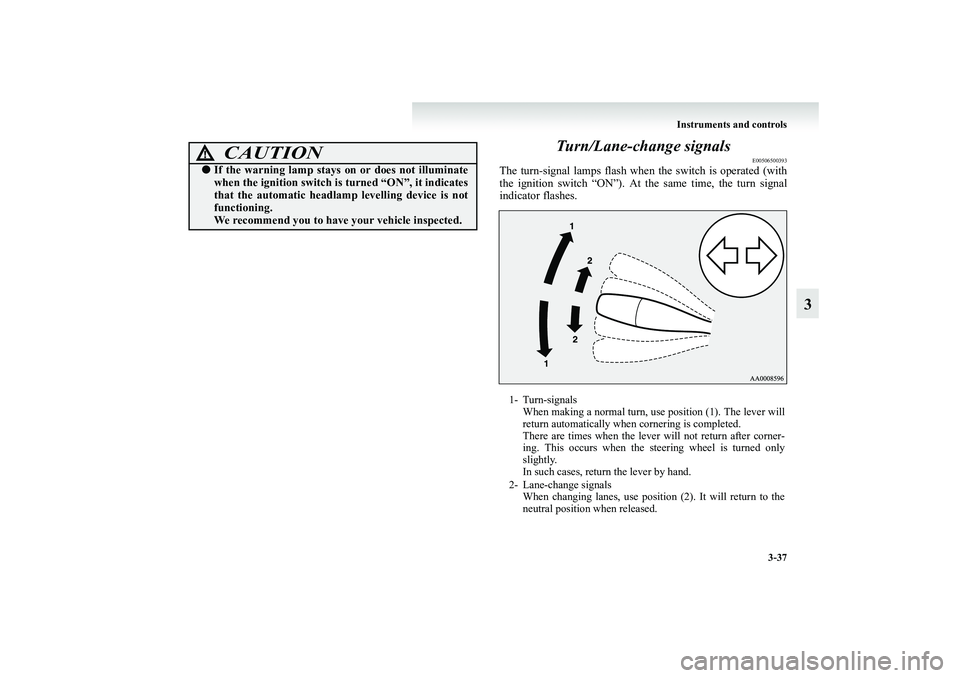
3 Turn/Lane-change signals
E00506500393
The turn-signal lamps flash when the switch is operated (with
the ignition switch “ON”). At the same time, the turn signal
indicator flashes.
CAUTION
!●If the warning lamp stays on or does not illuminate
when the ignition switch is turned “ON”, it indicates
that the automatic headlamp levelling device is not
functioning.
We recommend you to have your vehicle inspected.
1- Turn-signals
When making a normal turn, use position (1). The lever will
return automatically when cornering is completed.
There are times when the lever will not return after corner-
ing. This occurs when the steering wheel is turned only
slightly.
In such cases, return the lever by hand.
2- Lane-change signals
When changing lanes, use position (2). It will return to the
neutral position when released.
BK-XP08E1ENUK.en-uk.book Page 37 Monday, August 13, 2007 2:20 PM