ignition MITSUBISHI GRANDIS 2008 Owner's Manual (in English)
[x] Cancel search | Manufacturer: MITSUBISHI, Model Year: 2008, Model line: GRANDIS, Model: MITSUBISHI GRANDIS 2008Pages: 458, PDF Size: 18.52 MB
Page 4 of 458
Overview
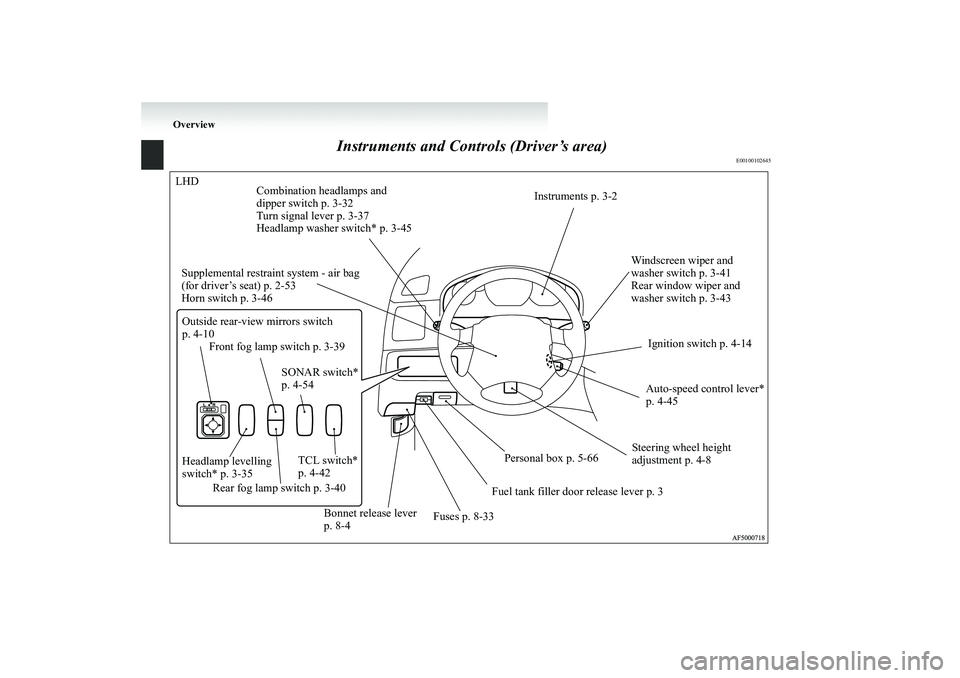
Instruments and Controls (Driver’s area)
E00100102645
LHD
Instruments p. 3-2
Windscreen wiper and
washer switch p. 3-41
Rear window wiper and
washer switch p. 3-43 Supplemental restraint system - air bag
(for driver’s seat) p. 2-53
Horn switch p. 3-46Combination headlamps and
dipper switch p. 3-32
Turn signal lever p. 3-37
Headlamp washer switch* p. 3-45
Ignition switch p. 4-14
Personal box p. 5-66
Bonnet release lever
p. 8-4 Outside rear-view mirrors switch
p. 4-10
Front fog lamp switch p. 3-39
Fuses p. 8-33Fuel tank filler door release lever p. 3 Headlamp levelling
switch* p. 3-35TCL switch*
p. 4-42
Rear fog lamp switch p. 3-40Auto-speed control lever*
p. 4-45 SONAR switch*
p. 4-54
Steering wheel height
adjustment p. 4-8BK-XP08E1ENUK.en-uk.book Page 1 Monday, August 13, 2007 2:20 PM
Page 5 of 458
Overview
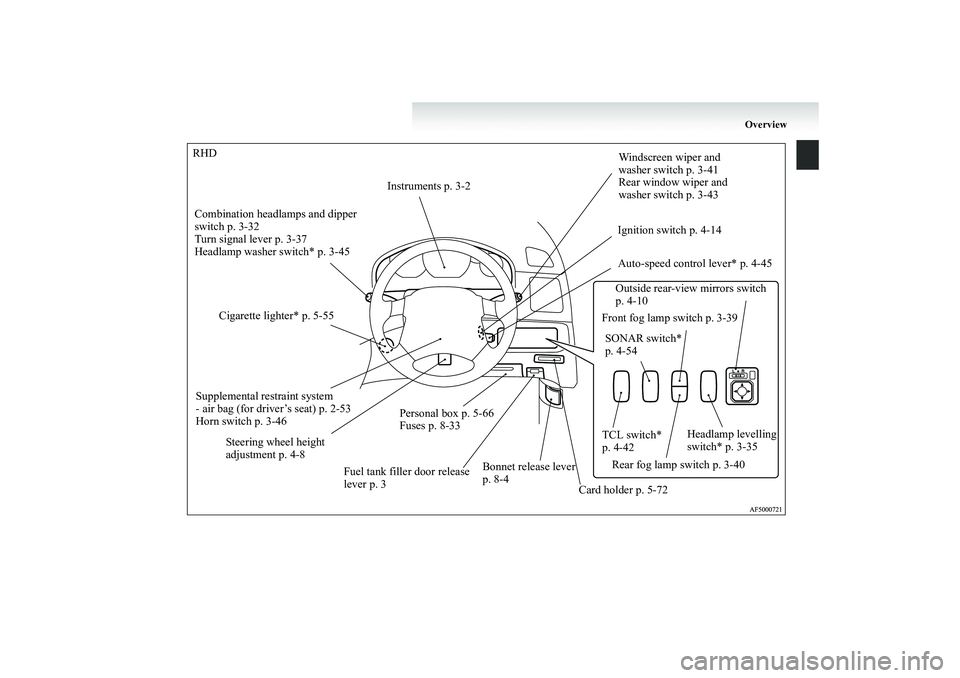
RHD
Instruments p. 3-2Windscreen wiper and
washer switch p. 3-41
Rear window wiper and
washer switch p. 3-43
Supplemental restraint system
- air bag (for driver’s seat) p. 2-53
Horn switch p. 3-46 Combination headlamps and dipper
switch p. 3-32
Turn signal lever p. 3-37
Headlamp washer switch* p. 3-45Ignition switch p. 4-14
Personal box p. 5-66
Fuses p. 8-33
Bonnet release lever
p. 8-4Outside rear-view mirrors switch
p. 4-10
Front fog lamp switch p. 3-39
Steering wheel height
adjustment p. 4-8
Fuel tank filler door release
lever p. 3 Cigarette lighter* p. 5-55
Card holder p. 5-72Headlamp levelling
switch* p. 3-35 TCL switch*
p. 4-42
Rear fog lamp switch p. 3-40Auto-speed control lever* p. 4-45
SONAR switch*
p. 4-54
BK-XP08E1ENUK.en-uk.book Page 2 Monday, August 13, 2007 2:20 PM
Page 34 of 458
1-12 Locking and unlocking
1
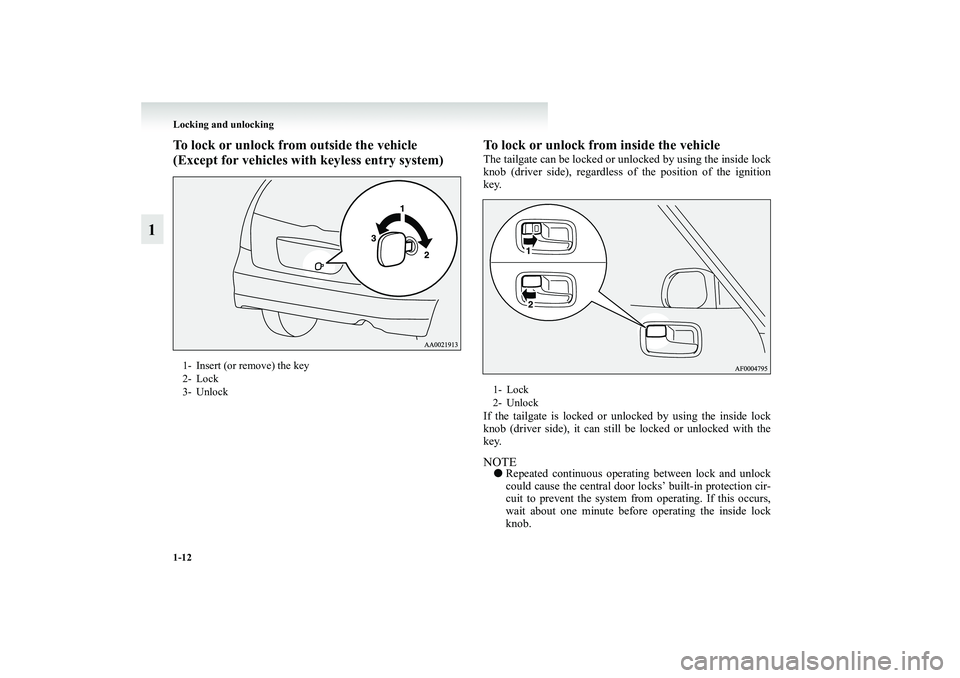
To lock or unlock from outside the vehicle
(Except for vehicles with keyless entry system)To lock or unlock from inside the vehicle
The tailgate can be locked or unlocked by using the inside lock
knob (driver side), regardless of the position of the ignition
key.
If the tailgate is locked or unlocked by using the inside lock
knob (driver side), it can still be locked or unlocked with the
key.NOTE●Repeated continuous operating between lock and unlock
could cause the central door locks’ built-in protection cir-
cuit to prevent the system from operating. If this occurs,
wait about one minute before operating the inside lock
knob.
1- Insert (or remove) the key
2- Lock
3- Unlock
1- Lock
2- Unlock
BK-XP08E1ENUK.en-uk.book Page 12 Monday, August 13, 2007 2:20 PM
Page 38 of 458
1-16 Locking and unlocking
1
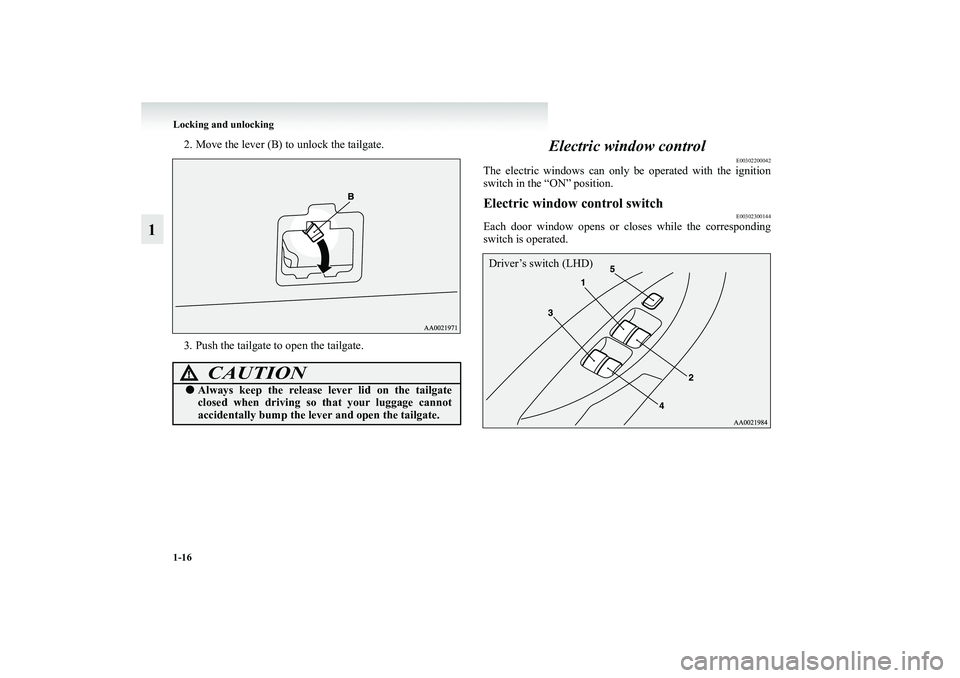
2. Move the lever (B) to unlock the tailgate.
3. Push the tailgate to open the tailgate.
Electric window control
E00302200042
The electric windows can only be operated with the ignition
switch in the “ON” position.Electric window control switch
E00302300144
Each door window opens or closes while the corresponding
switch is operated.
CAUTION
!●Always keep the release lever lid on the tailgate
closed when driving so that your luggage cannot
accidentally bump the lever and open the tailgate.
Driver’s switch (LHD)
BK-XP08E1ENUK.en-uk.book Page 16 Monday, August 13, 2007 2:20 PM
Page 41 of 458
Locking and unlocking
1-19
1
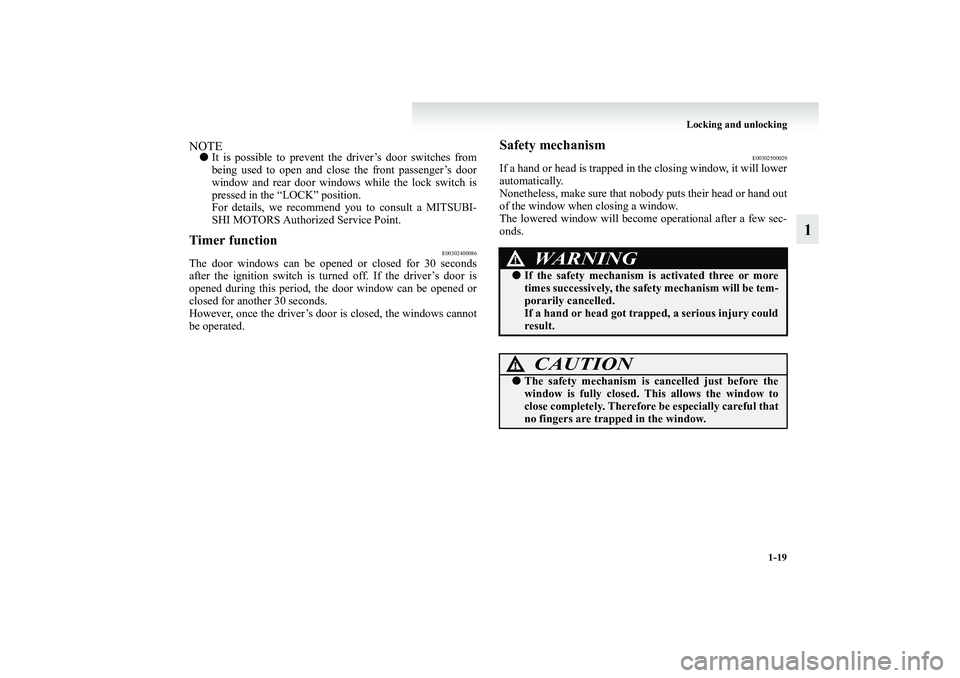
NOTE●It is possible to prevent the driver’s door switches from
being used to open and close the front passenger’s door
window and rear door windows while the lock switch is
pressed in the “LOCK” position.
For details, we recommend you to consult a MITSUBI-
SHI MOTORS Authorized Service Point.Timer function
E00302400086
The door windows can be opened or closed for 30 seconds
after the ignition switch is turned off. If the driver’s door is
opened during this period, the door window can be opened or
closed for another 30 seconds.
However, once the driver’s door is closed, the windows cannot
be operated.
Safety mechanism
E00302500029
If a hand or head is trapped in the closing window, it will lower
automatically.
Nonetheless, make sure that nobody puts their head or hand out
of the window when closing a window.
The lowered window will become operational after a few sec-
onds.
WARNING
!●If the safety mechanism is activated three or more
times successively, the safety mechanism will be tem-
porarily cancelled.
If a hand or head got trapped, a serious injury could
result.
CAUTION
!●The safety mechanism is cancelled just before the
window is fully closed. This allows the window to
close completely. Therefore be especially careful that
no fingers are trapped in the window.
BK-XP08E1ENUK.en-uk.book Page 19 Monday, August 13, 2007 2:20 PM
Page 44 of 458
1-22 Locking and unlocking
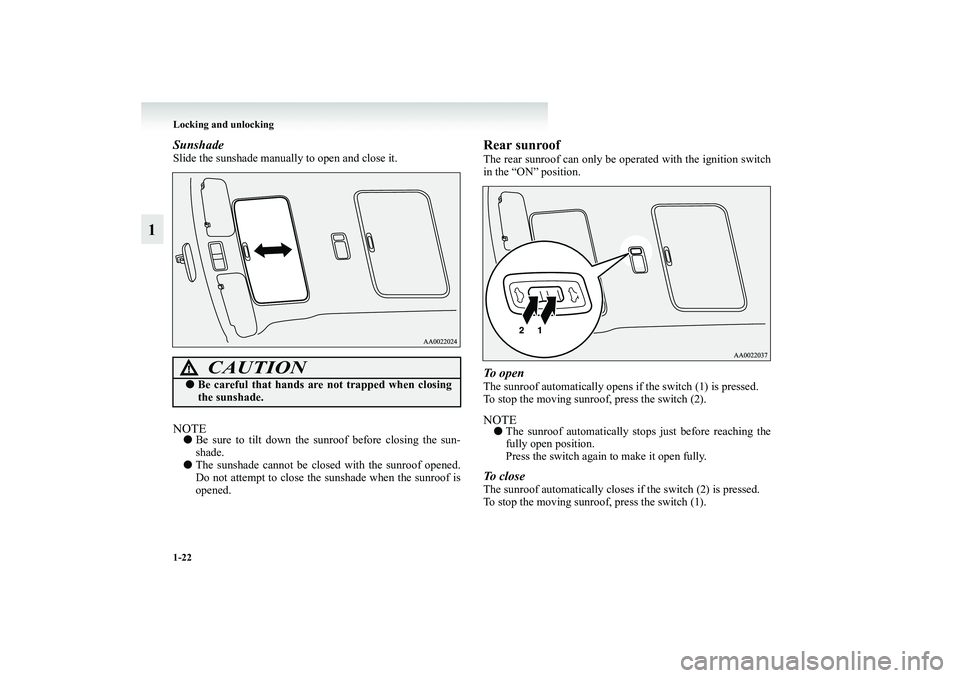
1
SunshadeSlide the sunshade manually to open and close it.NOTE●Be sure to tilt down the sunroof before closing the sun-
shade.
●The sunshade cannot be closed with the sunroof opened.
Do not attempt to close the sunshade when the sunroof is
opened.
Rear sunroofThe rear sunroof can only be operated with the ignition switch
in the “ON” position.To o p e nThe sunroof automatically opens if the switch (1) is pressed.
To stop the moving sunroof, press the switch (2).NOTE●The sunroof automatically stops just before reaching the
fully open position.
Press the switch again to make it open fully.To c l o s eThe sunroof automatically closes if the switch (2) is pressed.
To stop the moving sunroof, press the switch (1).
CAUTION
!●Be careful that hands are not trapped when closing
the sunshade.
BK-XP08E1ENUK.en-uk.book Page 22 Monday, August 13, 2007 2:20 PM
Page 46 of 458
1-24 Locking and unlocking
1
NOTE●The sunroof stops just before reaching the fully open posi-
tion.
If the vehicle is driven with the sunroof in this position,
wind throbs is lower than with the sunroof fully open.
●When leaving the vehicle unattended, make sure you
close the sunroof and remove the ignition key.
●Do not try to operate the sunroof if it is frozen closed
(after snow fall or during extreme cold).
●Do not sit or place heavy luggage on the sunroof or roof
opening edge.●Release the switch as soon as the sunroof reaches the fully
open or fully closed position.
●If the sunroof does not operate when the sunroof switch is
operated, release the switch and check whether something
is trapped by the sunroof. If nothing is trapped, we recom-
mend you to have the sunroof checked.
●Depending on the models of ski carriers or roof carriers,
the sunroof may contact with the carrier when the sunroof
is tilted up. Be careful when tilting up the sunroof if such
a ski carrier or a roof carrier is installed.
●Be sure to close the sunroof completely when washing the
vehicle or when leaving the vehicle.
●Be careful, not to put any wax on the weatherstrip (black
rubber) around the sunroof opening. If stained with wax,
the weatherstrip cannot maintain a weatherproof seal with
the sunroof.
●After washing the vehicle or after it has rained, wipe off
any water that is on the sunroof before operating it.
●Operating the sunroof repeatedly with the engine station-
ary will run down the battery. Operate the sunroof while
the engine is running.
WARNING
!●Do not put head, hands or anything else out of the
sunroof opening while driving the vehicle.●Never leave a child (or other person who might not
be capable of safe operation of the sunroof switch) in
the vehicle alone.●Before operating the sunroof, make sure that noth-
ing is capable of being trapped (head, hand, finger,
etc.).
CAUTION
!●The safety mechanism is cancelled just before the
sunroof is fully closed. This allows the sunroof to
close completely.
Therefore be especially careful that no fingers are
trapped in the sunroof.
BK-XP08E1ENUK.en-uk.book Page 24 Monday, August 13, 2007 2:20 PM
Page 56 of 458
2-8 Seat and seat belts
2
Heated seats*
E00401100205
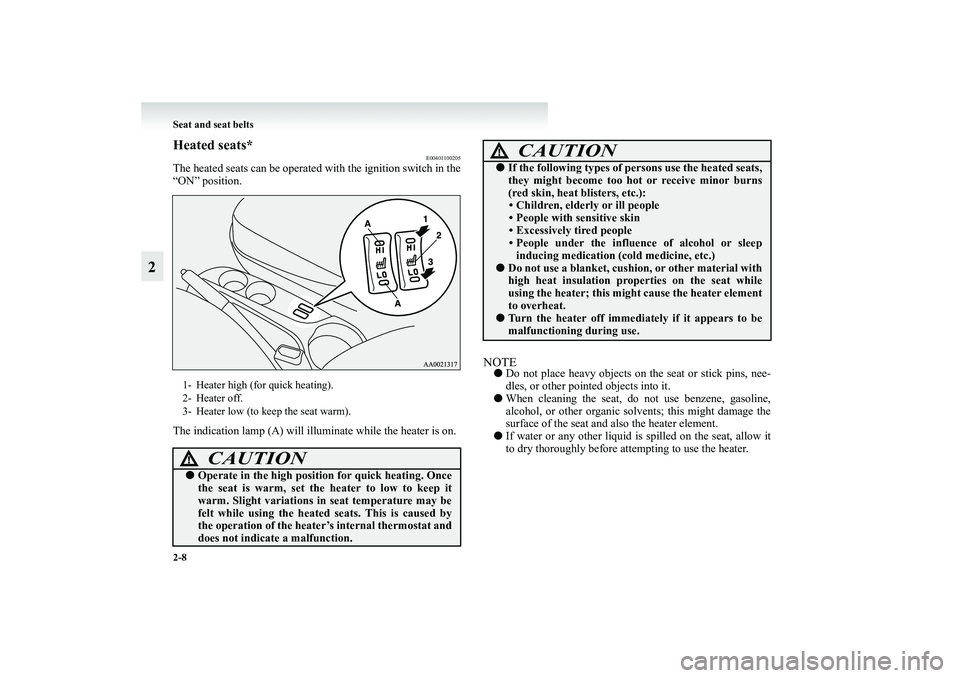
The heated seats can be operated with the ignition switch in the
“ON” position.
The indication lamp (A) will illuminate while the heater is on.
NOTE●Do not place heavy objects on the seat or stick pins, nee-
dles, or other pointed objects into it.
●When cleaning the seat, do not use benzene, gasoline,
alcohol, or other organic solvents; this might damage the
surface of the seat and also the heater element.
●If water or any other liquid is spilled on the seat, allow it
to dry thoroughly before attempting to use the heater.
1- Heater high (for quick heating).
2- Heater off.
3- Heater low (to keep the seat warm).
CAUTION
!●Operate in the high position for quick heating. Once
the seat is warm, set the heater to low to keep it
warm. Slight variations in seat temperature may be
felt while using the heated seats. This is caused by
the operation of the heater’s internal thermostat and
does not indicate a malfunction.
●If the following types of persons use the heated seats,
they might become too hot or receive minor burns
(red skin, heat blisters, etc.):
• Children, elderly or ill people
• People with sensitive skin
• Excessively tired people
• People under the influence of alcohol or sleep
inducing medication (cold medicine, etc.)
●Do not use a blanket, cushion, or other material with
high heat insulation properties on the seat while
using the heater; this might cause the heater element
to overheat.●Turn the heater off immediately if it appears to be
malfunctioning during use.
CAUTION
!
BK-XP08E1ENUK.en-uk.book Page 8 Monday, August 13, 2007 2:20 PM
Page 84 of 458
2-36 Seat and seat belts
2
When the ignition key is turned to the “ON” position, the warn-
ing lamp will come on and a tone will sound for about 6 sec-
onds. If the front seat belt remains unfastened approximately
1 minute later, the warning lamp will flash and the tone sound
intermittently (each 12 seconds) when the vehicle is driven. If
the passenger subsequently unfastens the seat belt while driv-
ing, the warning lamp and tone will issue further warnings.
And if the seat belt remains unfastened, the warning lamp and
tone will issue further warnings each time the vehicle starts
moving from a stop. When the seat belt is fastened, the warn-
ings will stop. NOTE●When luggage is placed on the front passenger seat, a sen-
sor in the seat cushion may, depending on the weight and
position of the luggage, cause the warning tone to sound
and the warning lamp to come on.
Adjustable seat belt anchor (front seats)
E00405000433
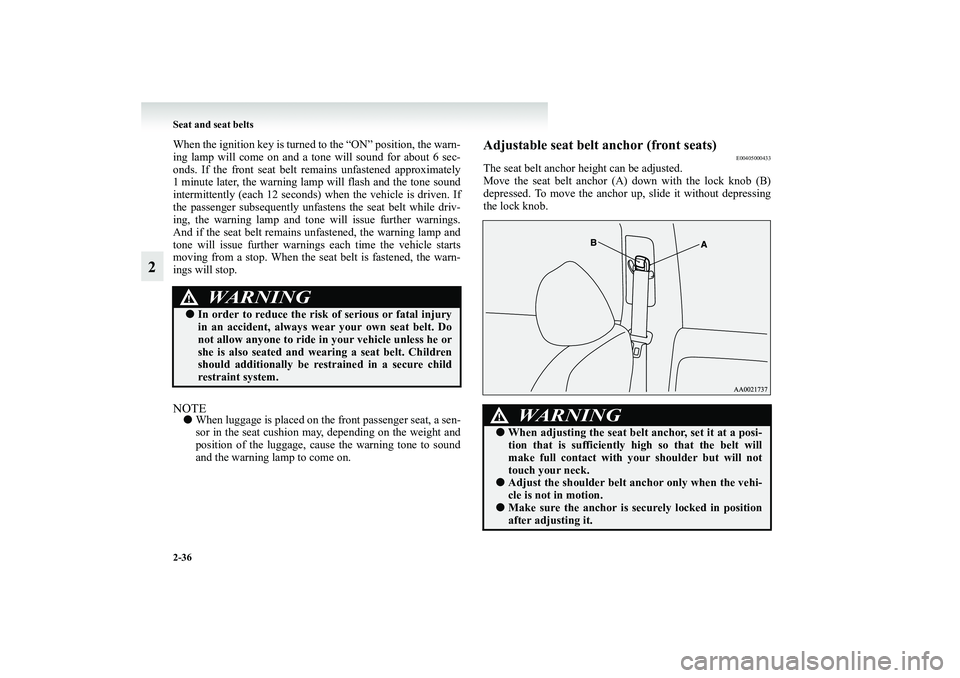
The seat belt anchor height can be adjusted.
Move the seat belt anchor (A) down with the lock knob (B)
depressed. To move the anchor up, slide it without depressing
the lock knob.
WARNING
!●In order to reduce the risk of serious or fatal injury
in an accident, always wear your own seat belt. Do
not allow anyone to ride in your vehicle unless he or
she is also seated and wearing a seat belt. Children
should additionally be restrained in a secure child
restraint system.
WARNING
!●When adjusting the seat belt anchor, set it at a posi-
tion that is sufficiently high so that the belt will
make full contact with your shoulder but will not
touch your neck.●Adjust the shoulder belt anchor only when the vehi-
cle is not in motion.●Make sure the anchor is securely locked in position
after adjusting it.
BK-XP08E1ENUK.en-uk.book Page 36 Monday, August 13, 2007 2:20 PM
Page 87 of 458
Seat and seat belts
2-39
2 Seat belt pre-tensioner system and force
limiter system
E00405700052
The driver’s seat and front passenger’s seat each have a seat
belt equipped with a pre-tensioner system.Pre-tensioner system
E00405800923
The pre-tensioner system will retract their respective seat belts
instantaneously, thus maximizing the seat belt’s effectiveness,
if there is a frontal impact severe enough to injure the driver
and/or front passenger and the ignition switch is in the “ON” or
“START” position.
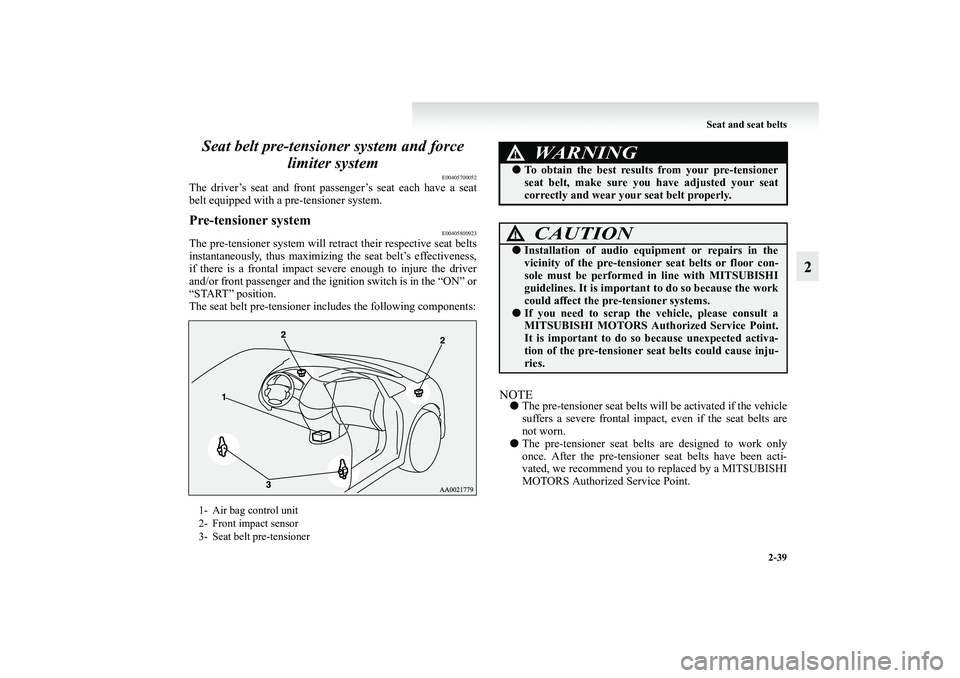
The seat belt pre-tensioner includes the following components:
NOTE●The pre-tensioner seat belts will be activated if the vehicle
suffers a severe frontal impact, even if the seat belts are
not worn.
●The pre-tensioner seat belts are designed to work only
once. After the pre-tensioner seat belts have been acti-
vated, we recommend you to replaced by a MITSUBISHI
MOTORS Authorized Service Point.
1- Air bag control unit
2- Front impact sensor
3- Seat belt pre-tensioner
WARNING
!●To obtain the best results from your pre-tensioner
seat belt, make sure you have adjusted your seat
correctly and wear your seat belt properly.
CAUTION
!●Installation of audio equipment or repairs in the
vicinity of the pre-tensioner seat belts or floor con-
sole must be performed in line with MITSUBISHI
guidelines. It is important to do so because the work
could affect the pre-tensioner systems.●If you need to scrap the vehicle, please consult a
MITSUBISHI MOTORS Authorized Service Point.
It is important to do so because unexpected activa-
tion of the pre-tensioner seat belts could cause inju-
ries.
BK-XP08E1ENUK.en-uk.book Page 39 Monday, August 13, 2007 2:20 PM