stop start MITSUBISHI iMiEV 2013 (in English) Owner's Guide
[x] Cancel search | Manufacturer: MITSUBISHI, Model Year: 2013, Model line: iMiEV, Model: MITSUBISHI iMiEV 2013Pages: 258, PDF Size: 13 MB
Page 197 of 258
On a snow-covered or frozen road
l When
driving on a snow-covered or frozen
road, it is recommended that you use snow
tyres or tyre chains.
Refer to the “Snow tyres” and “Tyre chains”
sections.
l Avoid high-speed driving, sudden accelera-
tion, sudden braking, and sharp turns.
l Depressing the brake pedal during travel on
snowy or icy roads may cause tyre slippage
and skidding. Tyres may slip if the ability of
the tyres to grip the road surface lessens.
This may make it more difficult to stop the
vehicle with normal braking operations. For
vehicles with an anti-lock brake system
(ABS), firmly depress and hold down the
brake pedal.
l Allow extra distance between your vehicle
and the vehicle in front of you, and avoid sud-
den braking.
l Accumulation of ice on the braking system
can cause the wheels to lock. Pull away from
a standstill slowly after confirming safety
around the vehicle. CAUTION
l
Do
not press the accelerator pedal rapid-
ly. If the wheels break free of the ice, the
vehicle could suddenly start moving and
possibly cause an accident.
On a bumpy or rutted road
Drive
as slow as possible when driving on bumpy
or rutted roads. CAUTION
l
The
impact on tyres and/or wheels when
driving on a bumpy or rutted road can
damage the tyre and/or wheel.
l The vehicle’s body, bumper, muffler and
other parts may be damaged if the vehi-
cle is:
• driven over a step (for example, at theentrance or exit of a parking lot);
• parked too closely against a kerb or parking block, or by the side of a road
with kerbstones;
• driven on a steep slope; For emergencies
7-13 7
OHAE13E1
Page 211 of 258
Checking auxiliary battery electrolyte
level
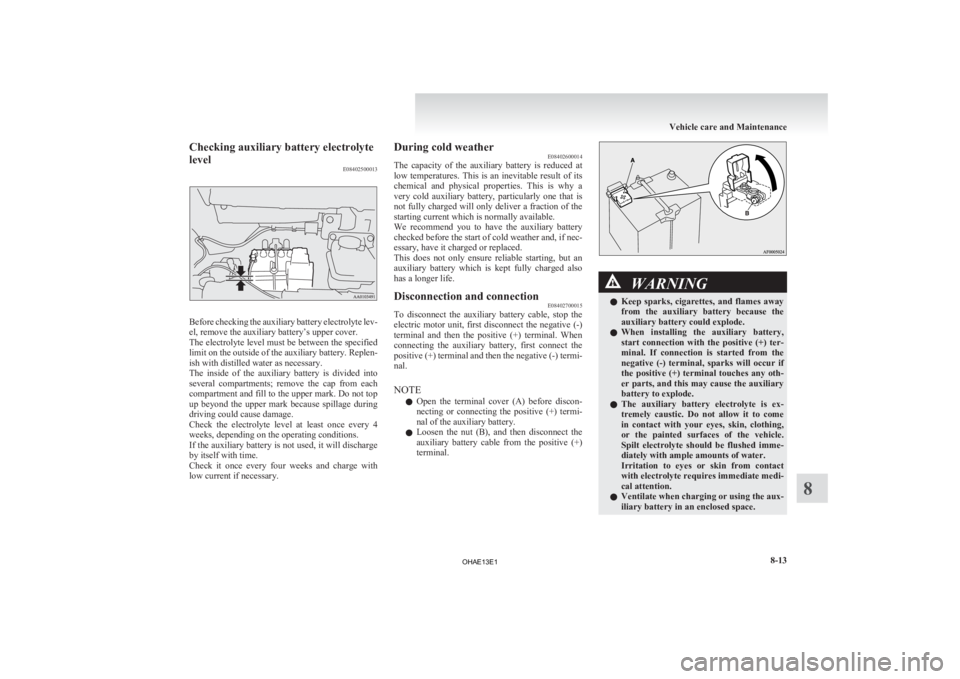
E08402500013Before checking the auxiliary battery electrolyte lev-
el, remove the auxiliary battery’s upper cover.
The
electrolyte level must be between the specified
limit on the outside of the auxiliary battery. Replen-
ish with distilled water as necessary.
The inside of the auxiliary battery is divided into
several compartments; remove the cap from each
compartment and fill to the upper mark. Do not top
up beyond the upper mark because spillage during
driving could cause damage.
Check the electrolyte level at least once every 4
weeks, depending on the operating conditions.
If the auxiliary battery is not used, it will discharge
by itself with time.
Check it once every four weeks and charge with
low current if necessary. During cold weather
E08402600014
The
capacity of the auxiliary battery is reduced at
low temperatures. This is an inevitable result of its
chemical and physical properties. This is why a
very cold auxiliary battery, particularly one that is
not fully charged will only deliver a fraction of the
starting current which is normally available.
We recommend you to have the auxiliary battery
checked before the start of cold weather and, if nec-
essary, have it charged or replaced.
This does not only ensure reliable starting, but an
auxiliary battery which is kept fully charged also
has a longer life.
Disconnection and connection E08402700015
To disconnect the auxiliary battery cable, stop the
electric
motor unit, first disconnect the negative (-)
terminal and then the positive (+) terminal. When
connecting the auxiliary battery, first connect the
positive (+) terminal and then the negative (-) termi-
nal.
NOTE
l Open the terminal cover (A) before discon-
necting or connecting the positive (+) termi-
nal of the auxiliary battery.
l Loosen the nut (B), and then disconnect the
auxiliary battery cable from the positive (+)
terminal. WARNING
l Keep sparks, cigarettes, and flames away
from the auxiliary battery because the
auxiliary battery could explode.
l When installing the auxiliary battery,
start connection with the positive (+) ter-
minal. If connection is started from the
negative (-) terminal, sparks will occur if
the positive (+) terminal touches any oth-
er parts, and this may cause the auxiliary
battery to explode.
l The auxiliary battery electrolyte is ex-
tremely caustic. Do not allow it to come
in contact with your eyes, skin, clothing,
or the painted surfaces of the vehicle.
Spilt electrolyte should be flushed imme-
diately with ample amounts of water.
Irritation to eyes or skin from contact
with electrolyte requires immediate medi-
cal attention.
l Ventilate when charging or using the aux-
iliary battery in an enclosed space. Vehicle care and Maintenance
8-13 8
OHAE13E1
Page 216 of 258
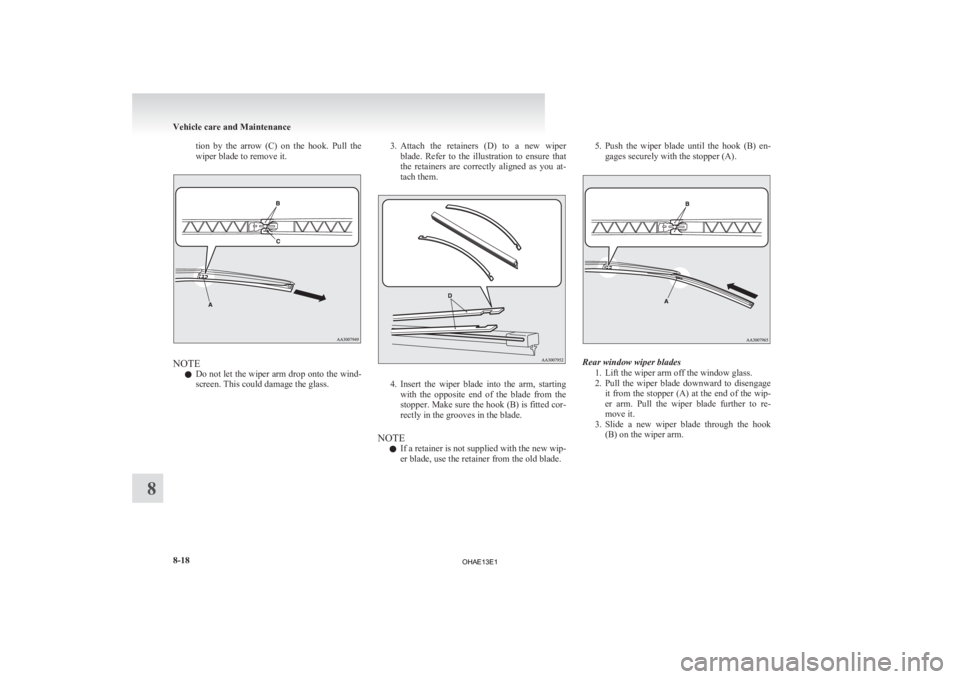
tion by the arrow (C) on the hook. Pull the
wiper blade to remove it.
NOTE
l Do
not let the wiper arm drop onto the wind-
screen. This could damage the glass. 3. Attach
the retainers (D) to a new wiper
blade. Refer to the illustration to ensure that
the retainers are correctly aligned as you at-
tach them. 4. Insert
the wiper blade into the arm, starting
with the opposite end of the blade from the
stopper. Make sure the hook (B) is fitted cor-
rectly in the grooves in the blade.
NOTE l If a retainer is not supplied with the new wip-
er blade, use the retainer from the old blade. 5. Push
the wiper blade until the hook (B) en-
gages securely with the stopper (A). Rear window wiper blades
1.
Lift the wiper arm off the window glass.
2. Pull the wiper blade downward to disengage it from the stopper (A) at the end of the wip-
er arm. Pull the wiper blade further to re-
move it.
3. Slide a new wiper blade through the hook (B) on the wiper arm. Vehicle care and Maintenance
8-18
8
OHAE13E1
Page 246 of 258
Hot water heater fluid 8-09,9-08
Washer fluid 8-11,9-08
For cold and snowy weather 8-20
Front fog lamps Bulb capacity
8-24
Indication lamp 4-09
Replacement 8-31
Switch 4-15
Front room lamp Bulb capacity 8-24
Front seat 3-03
Front turn-signal lamps Bulb capacity 8-24
Replacement 8-30
Fuel Modification/alterations to the electrical sys-
tems 05
Fuses 8-20
Fusible links 8-20
GGauges 4-02,4-08
General maintenance
8-19
General vehicle data 9-03
Genuine parts 05
Glove box 6-39
HHandling of compact discs 6-29
Hazard warning flasher switch 4-15
Hazard warning indication lamps
4-09
Head restraints 3-07
Headlamp levelling switch 4-13
Headlamps Bulb capacity 8-24
Headlamp flasher 4-13
Replacement 8-24,8-28,8-29 Switch 4-11
Heat Cautions and actions to deal with intense
heat 06
Heated mirror 5-07
Heated seats 3-04
High-beam indication lamp
4-09
High-mounted stop lamp Bulb capacity 8-24
Replacement 8-34
Hinges and latches lubrication 8-19
Horn switch 4-19
Hot water heater fluid 8-09,9-08
I i-MiEV 02
Cruising range 03
Main features 02
Traction battery
02
If the vehicle breaks down 7-02
Indication and warning lamps 4-08
Indication lamps 4-09
Inside rear-view mirror 5-05
Inspection and maintenance following rough road
operation 5-12
Instruments 4-02
Intense cold Cautions and actions 08
Intense heat Cautions and actions 06
Interior lamps 6-37
J Jump starting (Emergency starting) 7-02 K Keyless entry system 2-03
Keys 2-02
L Labeling 9-02
Lamp monitor buzzer
4-12
Lamps (headlamps, fog lamp, etc.) auto-cutout func-
tion 4-12
Licence plate lamps Bulb capacity 8-24
Replacement 8-34
Link System 6-33
Low voltage electrical system 9-05
Lubricants 9-08
LW/MW/FM electronic tuning radio with CD play-
er 6-10
M Map lamps 6-37,6-38
Bulb capacity
8-24
Meter illumination control 4-03,4-06
Mirror Inside rear-view mirror 5-05
Outside rear-view mirrors 5-05
Modification/alterations to the electrical sys-
tems 05
O Odometer 4-03,4-04
Oil
Transmission oil 9-08
Operation under adverse driving conditions
7-12
Outside rear-view mirrors 5-05 Alphabetical index
2
OHAE13E1
Page 247 of 258
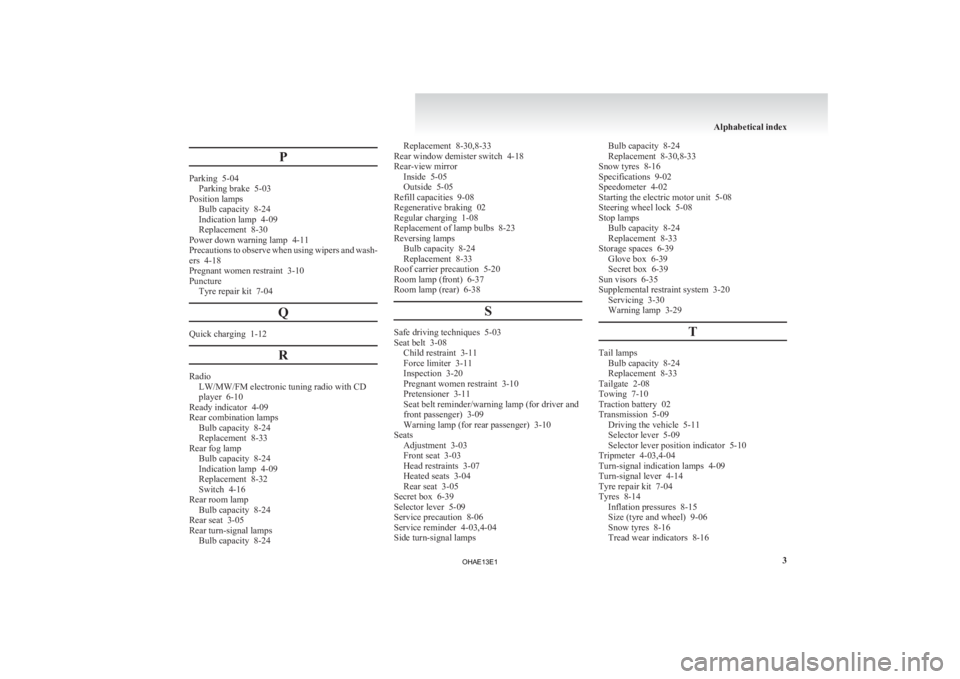
P
Parking 5-04
Parking brake 5-03
Position lamps Bulb capacity
8-24
Indication lamp 4-09
Replacement 8-30
Power down warning lamp 4-11
Precautions to observe when using wipers and wash-
ers 4-18
Pregnant women restraint 3-10
Puncture Tyre repair kit 7-04
QQuick charging 1-12
RRadio
LW/MW/FM electronic tuning radio with CD
player 6-10
Ready indicator
4-09
Rear combination lamps Bulb capacity 8-24
Replacement 8-33
Rear fog lamp Bulb capacity 8-24
Indication lamp 4-09
Replacement 8-32
Switch 4-16
Rear room lamp Bulb capacity 8-24
Rear seat 3-05
Rear turn-signal lamps Bulb capacity 8-24 Replacement 8-30,8-33
Rear window demister switch 4-18
Rear-view mirror Inside 5-05
Outside 5-05
Refill capacities
9-08
Regenerative braking 02
Regular charging 1-08
Replacement of lamp bulbs 8-23
Reversing lamps Bulb capacity 8-24
Replacement 8-33
Roof carrier precaution 5-20
Room lamp (front) 6-37
Room lamp (rear) 6-38
S Safe driving techniques 5-03
Seat belt 3-08
Child restraint 3-11
Force limiter
3-11
Inspection 3-20
Pregnant women restraint 3-10
Pretensioner 3-11
Seat belt reminder/warning lamp (for driver and
front passenger) 3-09
Warning lamp (for rear passenger) 3-10
Seats Adjustment 3-03
Front seat 3-03
Head restraints 3-07
Heated seats 3-04
Rear seat 3-05
Secret box 6-39
Selector lever 5-09
Service precaution 8-06
Service reminder 4-03,4-04
Side turn-signal lamps Bulb capacity 8-24
Replacement
8-30,8-33
Snow tyres 8-16
Specifications 9-02
Speedometer 4-02
Starting the electric motor unit 5-08
Steering wheel lock 5-08
Stop lamps Bulb capacity 8-24
Replacement 8-33
Storage spaces 6-39 Glove box 6-39
Secret box 6-39
Sun visors 6-35
Supplemental restraint system 3-20 Servicing 3-30
Warning lamp 3-29
T Tail lamps
Bulb capacity
8-24
Replacement 8-33
Tailgate 2-08
Towing 7-10
Traction battery 02
Transmission 5-09 Driving the vehicle 5-11
Selector lever 5-09
Selector lever position indicator 5-10
Tripmeter 4-03,4-04
Turn-signal indication lamps 4-09
Turn-signal lever 4-14
Tyre repair kit 7-04
Tyres 8-14 Inflation pressures 8-15
Size (tyre and wheel) 9-06
Snow tyres 8-16
Tread wear indicators 8-16 Alphabetical index
3
OHAE13E1