stop start MITSUBISHI iMiEV 2014 1.G User Guide
[x] Cancel search | Manufacturer: MITSUBISHI, Model Year: 2014, Model line: iMiEV, Model: MITSUBISHI iMiEV 2014 1.GPages: 262, PDF Size: 26.84 MB
Page 44 of 262
Charging troubleshooting guide
General information/Charging 3-29
3
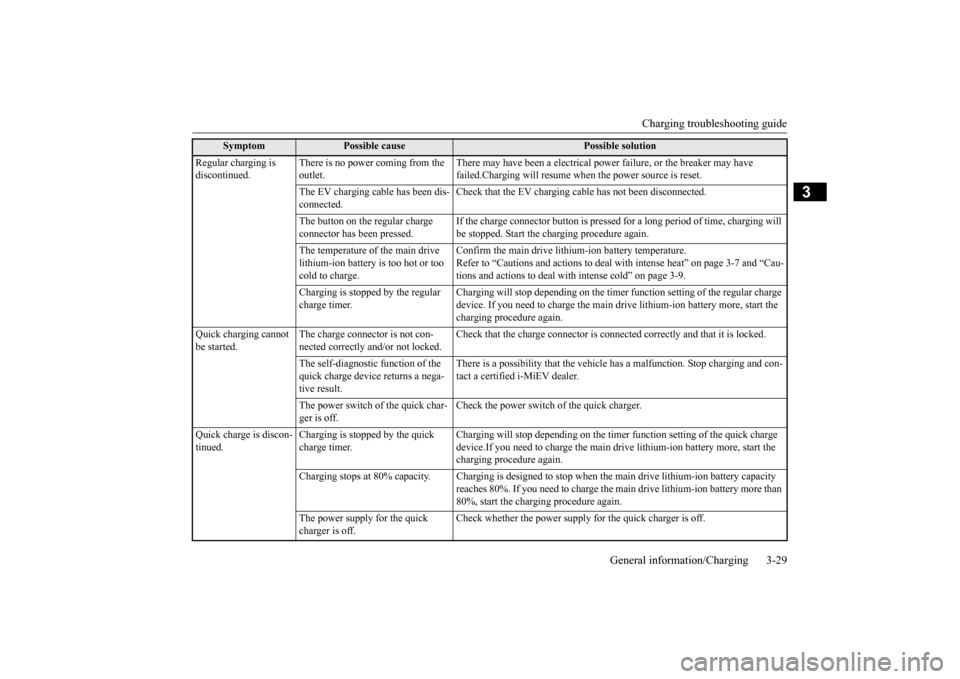
Regular charging is discontinued.
There is no power coming from the outlet.
There may have been a electrical power
failure, or the
breaker may have
failed.Charging will resume when
the power source is reset.
The EV charging cable has been dis- connected.
Check that the EV charging ca
ble has not been disconnected.
The button on the regular charge connector has been pressed.
If the charge connector button is pressed
for a long period of time, charging will
be stopped. Start the charging procedure again.
The temperature of the main drive lithium-ion battery is too hot or too cold to charge.
Confirm the main drive lithium-ion battery temperature. Refer to “Cautions and actions to deal
with intense heat” on page 3-7 and “Cau-
tions and actions to deal w
ith intense cold” on page 3-9.
Charging is stopped by the regular charge timer.
Charging will stop depending on
the timer function settin
g of the regular charge
device. If you need to charge the main
drive lithium-ion battery more, start the
charging procedure again.
Quick charging cannot be started.
The charge connector is not con- nected correctly and/or not locked.
Check that the charge connector is conn
ected correctly and that it is locked.
The self-diagnostic function of the quick charge device returns a nega- tive result.
There is a possibility that the vehicle ha
s a malfunction. Stop charging and con-
tact a certified i-MiEV dealer.
The power switch of the quick char- ger is off.
Check the power switch of the quick charger.
Quick charge is discon- tinued.
Charging is stopped by the quick charge timer.
Charging will stop depending on the time
r function setting of the quick charge
device.If you need to charge
the main drive lithium-ion battery more, start the
charging procedure again.
Charging stops at 80% capacity. Charg
ing is designed to stop when the ma
in drive lithium-ion battery capacity
reaches 80%. If you need to charge the ma
in drive lithium-ion battery more than
80%, start the charging procedure again.
The power supply for the quick charger is off.
Check whether the power supply for the quick charger is off.
Symptom
Possible cause
Possible solution
BK0209800US.book 29 ページ 2014年1月14日 火曜日 午前9時26分
Page 45 of 262
High-Voltage components 3-30 General information/Charging
3
N01205700027
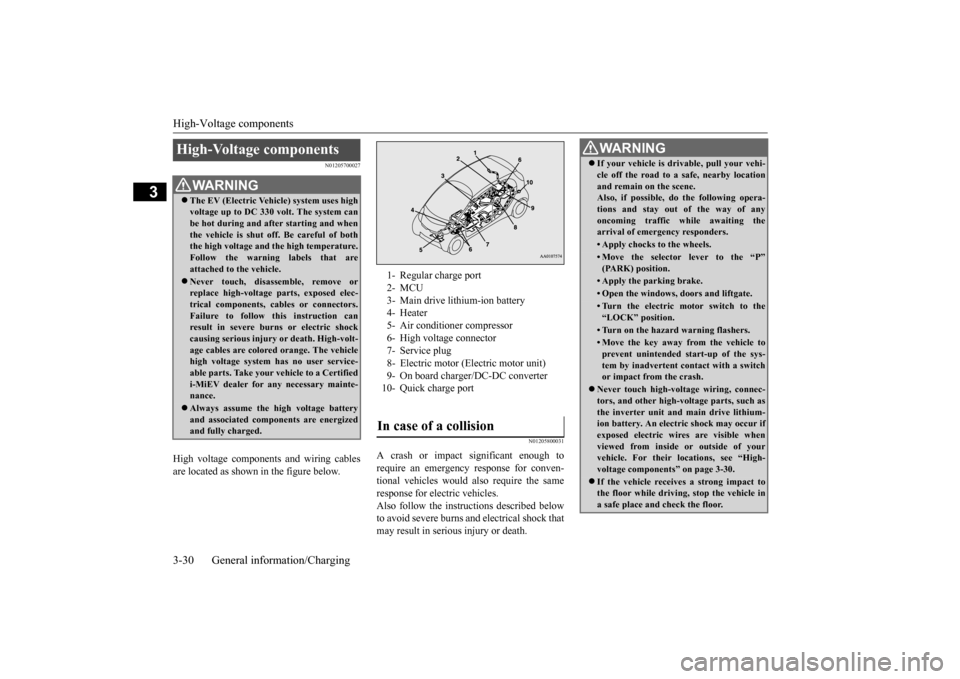
High voltage components and wiring cables are located as shown in the figure below.
N01205800031
A crash or impact significant enough to require an emergency response for conven- tional vehicles would
also require the same
response for electric vehicles. Also follow the instruct
ions described below
to avoid severe burns a
nd electrical shock that
may result in serious injury or death.
High-Voltage components
WA R N I N G The EV (Electric Vehicle) system uses high voltage up to DC 330 volt. The system canbe hot during and after starting and when the vehicle is shut off. Be careful of both the high voltage and
the high temperature.
Follow the warning labels that are attached to the vehicle. Never touch, disassemble, remove or replace high-voltage parts, exposed elec- trical components, cables or connectors.Failure to follow this instruction can result in severe burns
or electric shock
causing serious injury
or death. High-volt-
age cables are colore
d orange. Th
e vehicle
high voltage system has no user service- able parts. Take your
vehicle to a Certified
i-MiEV dealer for an
y necessary mainte-
nance. Always assume the hi
gh voltage battery
and associated compon
ents are energized
and fully charged.
1- Regular charge port 2- MCU 3- Main drive lithium-ion battery 4- Heater5- Air conditioner compressor 6- High voltage connector 7- Service plug8- Electric motor (Electric motor unit) 9- On board charger/DC-DC converter 10- Quick charge portIn case of a collision
WA R N I N G If your vehicle is dr
ivable, pull your vehi-
cle off the road to a safe, nearby locationand remain on the scene.Also, if possible, do
the follow
ing opera-
tions and stay out of the way of any oncoming traffic while awaiting thearrival of emergency responders.• Apply chocks to the wheels.• Move the selector
lever to the “P”
(PARK) position.• Apply the parking brake.• Open the windows,
doors and liftgate.
• Turn the electric motor switch to the “LOCK” position.• Turn on the hazard warning flashers.• Move the key away fr
om the vehicle to
prevent unintended start-up of the sys-tem by inadvertent contact with a switch or impact from the crash.
Never touch high-vol
tage wiring, connec-
tors, and other high-vol
tage parts, such as
the inverter unit and main drive lithium-ion battery. An electric shock may occur if exposed electric wires are visible when viewed from inside
or outside of your
vehicle. For their locations, see “High- voltage components” on page 3-30. If the vehicle receives a strong impact to the floor while driving, stop the vehicle in a safe place and check the floor.
BK0209800US.book 30 ページ 2014年1月14日 火曜日 午前9時26分
Page 52 of 262
MiEV Remote System
General information/Charging 3-37
3
N01205001030
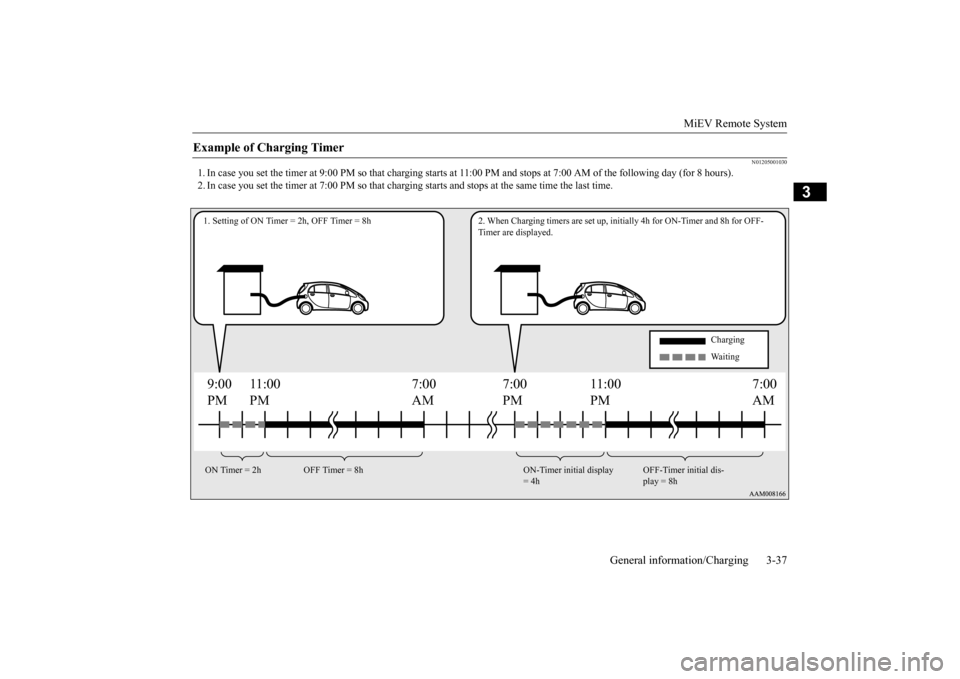
1. In case you set the timer at 9:00 PM so that charging starts
at 11:00 PM and stops at 7:00 AM of the following day (for 8 hou
rs).
2. In case you set the timer at 7:00 PM so that charging starts and stops at the same time the last time.Example of Charging Timer
9:00 PM
7:00 PM
7:00 AM
11:00 PM
11:00 PM
7:00AM
1. Setting of ON Timer = 2h, OFF Timer = 8h 2. When Charging
timers are set up, initially 4h
for ON-Timer and 8h for OFF-
Timer are displayed.
Charging Waiting
ON Timer = 2h OFF Timer = 8h ON-Timer initial display
= 4h
OFF-Timer initial dis- play = 8h
BK0209800US.book 37 ページ 2014年1月14日 火曜日 午前9時26分
Page 57 of 262
MiEV Remote System 3-42 General information/Charging
3
N01203901022
There are two methods to cancel Charging Timer. By using the MiEV Remote By operating the electric motor switch on the vehicle
A. By using the MiEV Remote
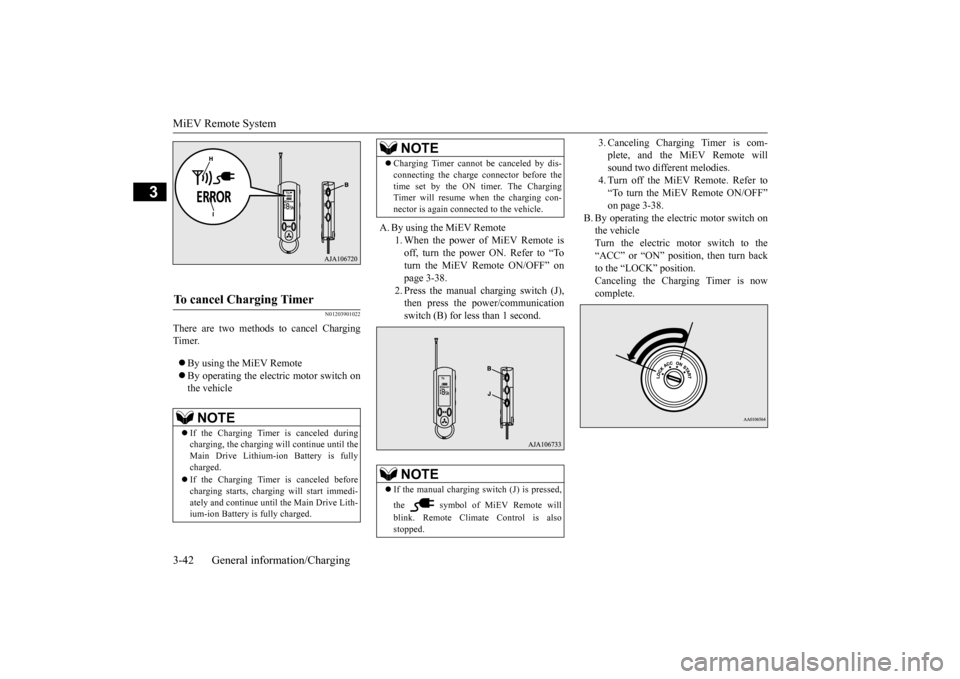
1. When the power of MiEV Remote is off, turn the power ON. Refer to “To turn the MiEV Remote ON/OFF” onpage 3-38. 2. Press the manual charging switch (J), then press the power/communicationswitch (B) for less than 1 second.
3. Canceling Charging Timer is com- plete, and the MiEV Remote willsound two different melodies. 4. Turn off the MiEV Remote. Refer to “To turn the MiEV Remote ON/OFF”on page 3-38.
B. By operating the electric motor switch on the vehicleTurn the electric motor switch to the “ACC” or “ON” position, then turn back to the “LOCK” position. Canceling the Charging Timer is now complete.
To cancel Charging Timer
NOTE
If the Charging Timer is canceled during charging, the charging wi
ll continue until the
Main Drive Lithium-ion Battery is fullycharged. If the Charging Timer is canceled before charging starts, charging
will start immedi-
ately and continue until the Main Drive Lith- ium-ion Battery is fully charged.
Charging Timer cannot be canceled by dis- connecting the charge
connector before the
time set by the ON timer. The ChargingTimer will resume when the charging con- nector is again connected to the vehicle.NOTE
If the manual charging sw
itch (J) is pressed,
the symbol of MiEV Remote will blink. Remote Climate Control is also stopped.NOTE
BK0209800US.book 42 ページ 2014年1月14日 火曜日 午前9時26分
Page 58 of 262
MiEV Remote System
General information/Charging 3-43
3
N01204201035
N01204301036
The following conditions must be met to operate the Remote Climate Control. Selector lever:
P (PARK) position.
Electric motor switch: LOCK position. EV charging cable (re
gular charger): Con-
nected. Quick charging: Not used. Main Drive Lithium-ion Battery Level Indicator: Shows one bar or more. Refer to “Main Drive Lithium-ion Battery LevelIndicator” on page 3-45. All doors and the liftgate: Closed. 1. Start charging. Refer to “Regular charging (charging method with rated AC 120 V outlet)” on page 3-15.
Remote Climate Control
WA R N I N G The Remote Climate Control, even when set, cannot be relied upon to maintain safevehicle cabin temperatures while the vehi- cle is stopped or park
ed. Never leave chil-
dren or persons requiringsupervision/nursing unattended inside the vehicle. Temperature inside the vehicle could become extremely high or lowresulting in a risk of
heat stroke or hyper-
thermia that could result in death. In addition, children
can activate switches
and controls, resulting in an injury or fatal accident. While the Remote Climate Control is acti- vated, keep away from
the cooling fan
under the front hood,
since the cooling fan
may automatically operate even if the electric motor switch is in the “LOCK” position.NOTE
The Remote Climate Control works regard- less the position of the air conditioningswitch or dial on the vehicle. While the Remote Climate Control is activated, the air conditioning switch or di
al on the vehicle
will not affect operation
of the cooler, heater
or defroster.
The Remote Climate Control will automati- cally stop 30 minutes after the Remote Cli-mate Control has been set. The Remote Climate Control is operated by electric power s
upplied through the EV
charging cable (regular charger). Under the following c
onditions, the effect of
the Remote Climate Control can be decreased. • When the outside temperature is very high. • When the sunlight is strong.• When the outside temperature is very low. When Remote Climate Control is activated while charging the Main Drive Lithium-ion Battery, the time required to fully charge theMain Drive Lithium-ion Battery will become longer or the amount of charge may decrease if the OFF timer has been set. If the Main Drive Lithium-ion Battery Warming System is operated while theRemote Climate Control is activated, the Remote Climate Control will stop. When the Main Drive Lithium-ion Battery WarmingSystem stops, the Remote Climate Control will resume. Refer to “Main Drive Lithium- ion Battery Warming System” on page 3-20. While the Remote Climate Control is acti- vated, if a heated seat switch is ON, theheated seat will operate.NOTE
To operate the Remote Climate Control
WA R N I N G Improper charging can result in a fire, property damage, and serious injury ordeath. Carefully read and fo
llow instructions in
“Precaution during Charging the MainDrive Lithium-ion Battery” on page 3-14 and “Regular chargi
ng (charging method
with rated AC 120 V ou
tlet)” on page 3-15.
BK0209800US.book 43 ページ 2014年1月14日 火曜日 午前9時26分
Page 60 of 262
MiEV Remote System
General information/Charging 3-45
3
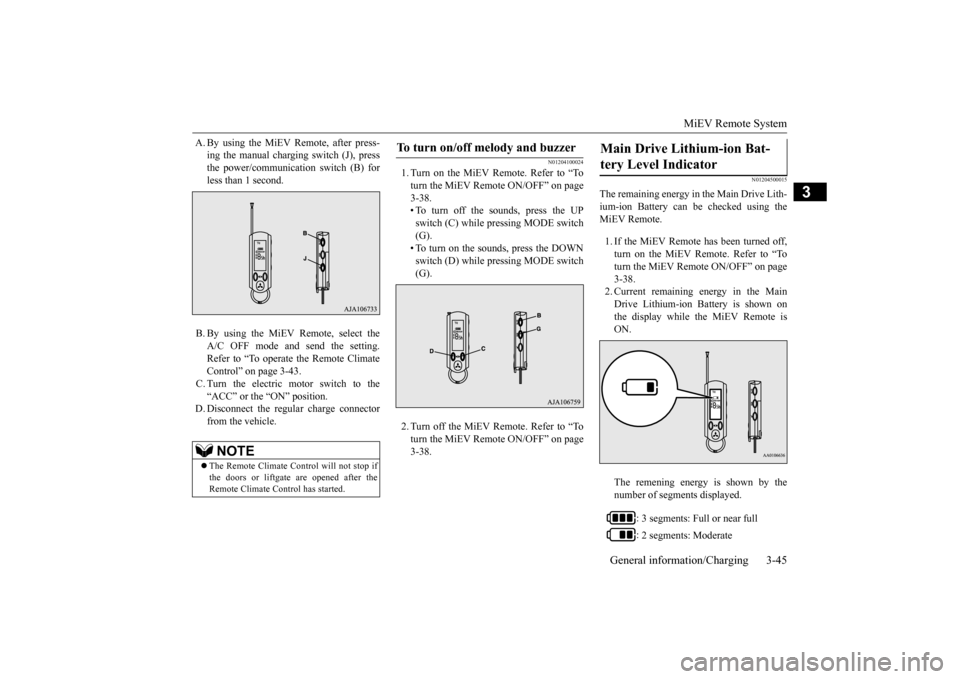
A. By using the MiEV Remote, after press-
ing the manual charging switch (J), pressthe power/communica
tion switch (B) for
less than 1 second. B. By using the MiEV Remote, select the A/C OFF mode and send the setting. Refer to “To operate the Remote Climate Control” on page 3-43.C. Turn the electric motor switch to the “ACC” or the “ON” position.
D. Disconnect the regul
ar charge connector
from the vehicle.
N01204100024
1. Turn on the MiEV Remote. Refer to “To turn the MiEV Remote ON/OFF” on page 3-38.• To turn off the sounds, press the UP switch (C) while pressing MODE switch (G).• To turn on the sounds, press the DOWN switch (D) while pressing MODE switch (G).
2. Turn off the MiEV Remote. Refer to “To turn the MiEV Remote ON/OFF” on page 3-38.
N01204500015
The remaining energy in the Main Drive Lith-ium-ion Battery can be
checked using the
MiEV Remote. 1. If the MiEV Remote has been turned off, turn on the MiEV Remote. Refer to “To turn the MiEV Remote ON/OFF” on page 3-38. 2. Current remaining energy in the MainDrive Lithium-ion Battery is shown on the display while the MiEV Remote is ON. The remening energy is shown by the number of segments displayed.
NOTE
The Remote Climate Control will not stop if the doors or liftgate are opened after the Remote Climate Control has started.
To turn on/off melody and buzzer
Main Drive Lithium-ion Bat- tery Level Indicator
: 3 segments: Full or near full : 2 segments: Moderate
BK0209800US.book 45 ページ 2014年1月14日 火曜日 午前9時26分
Page 80 of 262
Seat belts
Seat and restraint systems 4-11
4
If the electric motor switch is turned to the “ON” position without the driver’s seat beltbeing fastened, a warning light will come on, and a tone will sound for approximately 6 seconds to remind you to fasten your seatbelt. If the seat belt remains unfastened approxi- mately 1 minute later, the warning light willflash and the tone wi
ll sound intermittently
for approximately 90 seconds when the vehi- cle is driven.If the seat belt subse
quently remains unfas-
tened, the warning light
and tone will issue
further warnings each time the vehicle startsmoving from a stop. And if the driver unfas- tens the seat belt while driving, the warning will operate in the same way. When the seatbelt is fastened, the warnings will stop.
N00418300224
The front passenger seat
belt warning light is
located in the instrument panel. When the electric motor switch is turned to the “ON” position, this indicator normally comes on and goes off a few seconds later.
The light comes on when a person sits on the front passenger seat bu
t does not fasten the
seat belt. It goes off when the seat belt is subsequently fastened.
N00406300328
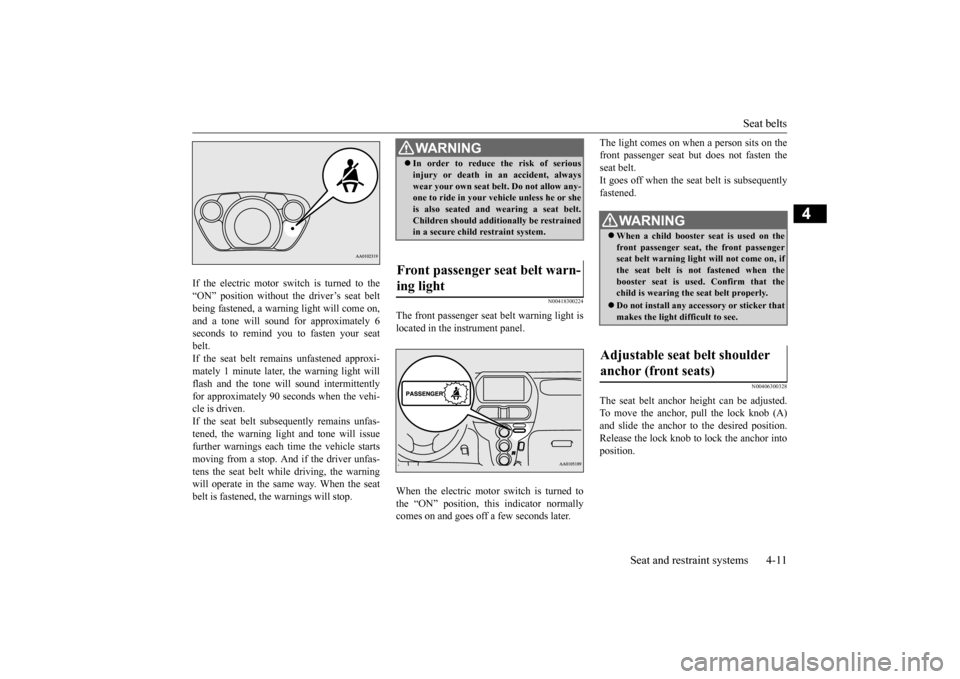
The seat belt anchor height can be adjusted.To move the anchor, pull the lock knob (A) and slide the anchor to the desired position. Release the lock knob to lock the anchor intoposition.
WA R N I N G In order to reduce the risk of serious injury or death in
an accident, always
wear your own seat belt. Do not allow any-one to ride in your ve
hicle unless he or she
is also seated and
wearing a seat belt.
Children should additi
onally be restrained
in a secure child restraint system.
Front passenger seat belt warn- ing light
WA R N I N G When a child booster se
at is used on the
front passenger seat, the front passenger seat belt warning ligh
t will not come on, if
the seat belt is not fastened when thebooster seat is used
. Confirm that the
child is wearing the
seat belt properly.
Do not install any acce
ssory or sticker that
makes the light difficult to see.
Adjustable seat belt shoulder anchor (front seats)
BK0209800US.book 11 ページ 2014年1月14日 火曜日 午前9時26分
Page 119 of 262
Power window control 5-14 Features and controls
5
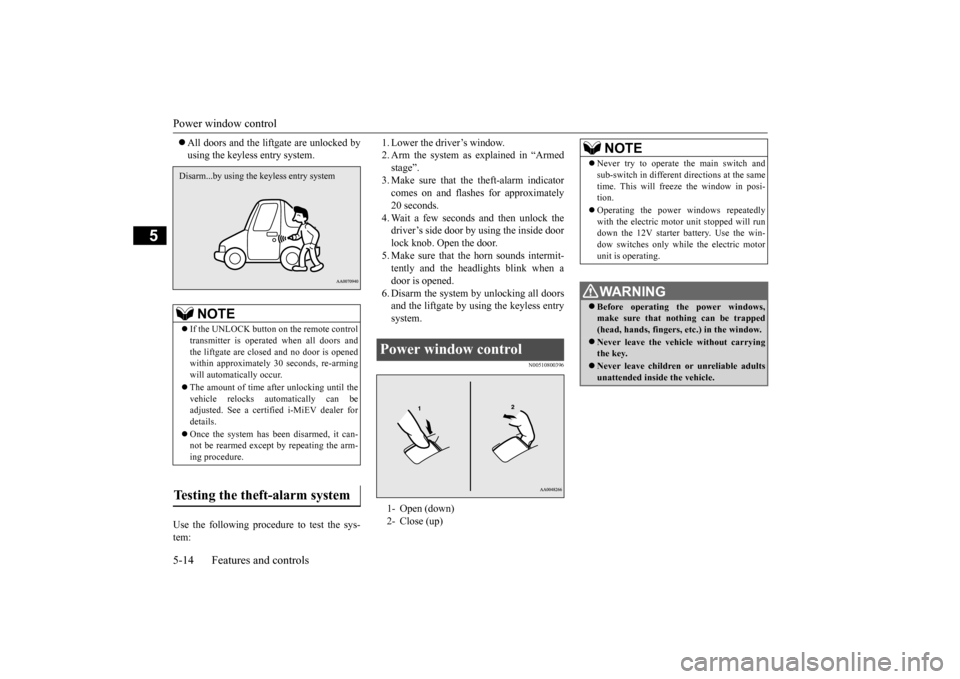
All doors and the lift
gate are unlocked by
using the keyless entry system.
Use the following proce
dure to test the sys-
tem:
1. Lower the driver’s window. 2. Arm the system as explained in “Armedstage”. 3. Make sure that the theft-alarm indicator comes on and flashe
s for approximately
20 seconds. 4. Wait a few seconds and then unlock the driver’s side door by using the inside doorlock knob. Open the door. 5. Make sure that the horn sounds intermit- tently and the headlights blink when a door is opened. 6. Disarm the system by unlocking all doorsand the liftgate by using the keyless entry system.
N00510800396
NOTE
If the UNLOCK button on the remote control transmitter is operated when all doors and the liftgate are closed and no door is opened within approximately 30 seconds, re-armingwill automatically occur. The amount of time afte
r unlocking until the
vehicle relocks automatically can be adjusted. See a certified i-MiEV dealer for details. Once the system has been disarmed, it can- not be rearmed except
by repeating the arm-
ing procedure.
Testing the theft-alarm system Disarm...by using the keyless entry system
Power window control 1- Open (down) 2- Close (up)
NOTE
Never try to operate the main switch and sub-switch in different
directions at the same
time. This will free
ze the window in posi-
tion. Operating the power windows repeatedly with the electr
ic motor unit stopped will run
down the 12V starter battery. Use the win- dow switches only while the electric motorunit is operating.WA R N I N G Before operating the power windows, make sure that nothing can be trapped (head, hands, fingers, etc.) in the window. Never leave the vehi
cle without carrying
the key. Never leave children
or unreliable adults
unattended inside the vehicle.
BK0209800US.book 14 ページ 2014年1月14日 火曜日 午前9時26分
Page 124 of 262
Electric motor switch
Features and controls 5-19
5
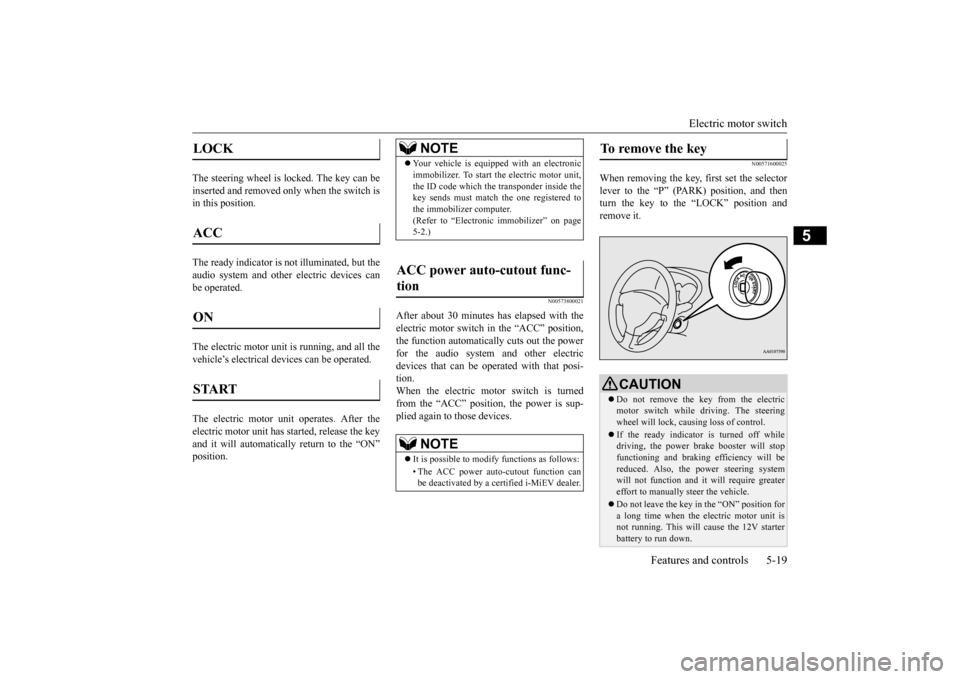
The steering wheel is locked. The key can be inserted and removed only when the switch is in this position. The ready indicator is
not illuminated, but the
audio system and other
electric devices can
be operated. The electric motor unit
is running, and all the
vehicle’s electrical de
vices can be operated.
The electric motor unit operates. After the electric motor unit has started, release the key and it will automatically return to the “ON”position.
N00573800021
After about 30 minutes
has elapsed with the
electric motor switch in the “ACC” position, the function automatically cuts out the powerfor the audio system and other electric devices that can be ope
rated with that posi-
tion.When the electric motor switch is turned from the “ACC” position, the power is sup- plied again to those devices.
N00571600025
When removing the key, first set the selector lever to the “P” (PARK) position, and then turn the key to the “LOCK” position andremove it.
LOCK ACC ON START
NOTE
Your vehicle is equippe
d with an electronic
immobilizer. To start the electric motor unit,the ID code which the transponder inside thekey sends must match
the one registered to
the immobilizer computer. (Refer to “Electroni
c immobilizer” on page
5-2.)
ACC power auto-cutout func- tion
NOTE
It is possible to modify functions as follows: • The ACC power auto
-cutout function can
be deactivated by a certified i-MiEV dealer.
To remove the key
CAUTION Do not remove the key from the electric motor switch while driving. The steering wheel will lock, caus
ing loss of control.
If the ready indicator is turned off while driving, the power br
ake booster will stop
functioning and braking efficiency will bereduced. Also, the power steering system will not function and it
will require greater
effort to manually steer the vehicle. Do not leave the key in
the “ON” position for
a long time when the electric motor unit isnot running. This will
cause the 12V starter
battery to run down.
BK0209800US.book 19 ページ 2014年1月14日 火曜日 午前9時26分
Page 131 of 262
Anti-lock braking system 5-26 Features and controls
5
When using the anti-lock brakes (sudden braking), steering is
slightly different
from normal driving conditions. Use the steering wheel carefully. Always keep a safe distance from the vehicle in front of you. Even if your vehi- cle is equipped with
the anti-lock braking
system, leave a greater braking distance when: • Driving on gravel or snow-covered roads. • Driving on uneven road surfaces. Operation of anti-lock braking system is not restricted to situations where brakes are applied suddenly. This system mayalso prevent the wheels from locking when you drive over manholes, steel roadwork plates, road markings, or anyuneven road surface. When the anti-lock braking system is in use, you may feel the brake pedal vibrat-ing and hear a unique sound. You may also feel as if the pedal resists being pressed.In this situation, simply hold the brake pedal down firmly. Do not pump the brake, which will result in reducedbraking performance.
An operation noise may be emitted from under the hood in the following situations.The sound is associated with checking the operations of the anti-lock braking sys- tem.At this time, you may feel a shock from the brake pedal if you depress it. These do not indicate a malfunction.• When the electric motor switch is set to the “ON” position. • When the vehicle is driven for a while after the electric motor is turned on.
The ABS can be used after the vehicle has reached a speed over approximately 6 mph (10 km/h). It stops working when the vehicle slows below approximately 3 mph(5 km/h).
N00531600661
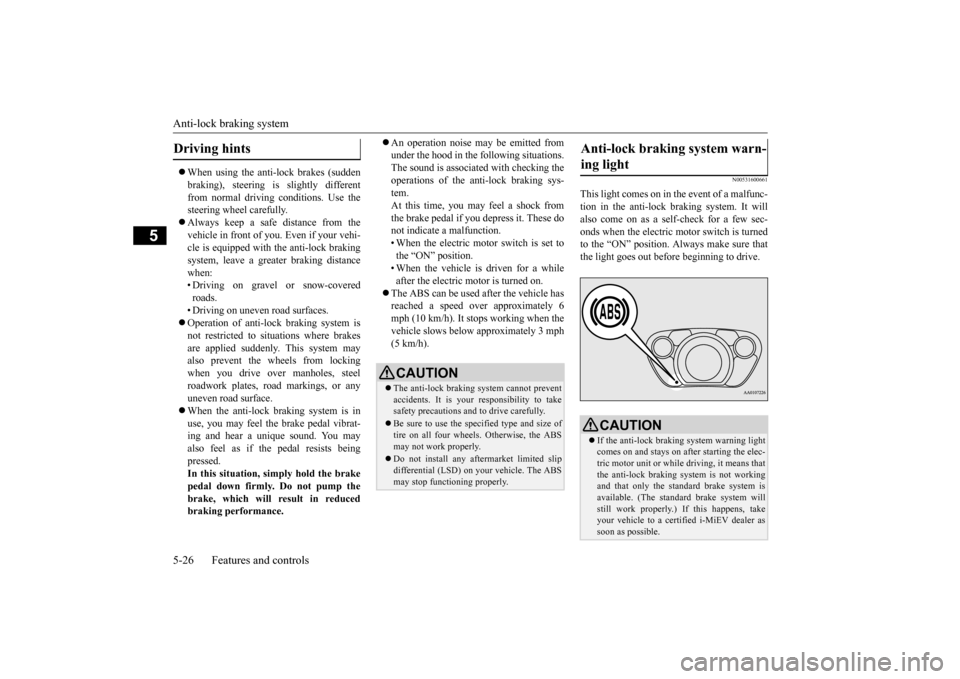
This light comes on in the event of a malfunc-tion in the anti-lock braking system. It willalso come on as a self-check for a few sec- onds when the electric motor switch is turned to the “ON” position.
Always make sure that
the light goes out befo
re beginning to drive.
Driving hints
CAUTIONThe anti-lock braking system cannot prevent accidents. It is your
responsibility to take
safety precautions and to drive carefully. Be sure to use the spec
ified type and size of
tire on all four wheels. Otherwise, the ABS may not work properly. Do not install any aftermarket limited slip differential (LSD) on your vehicle. The ABSmay stop functioning properly.
Anti-lock braking system warn- ing light
CAUTION If the anti-lock braking system warning light comes on and stays on af
ter starting the elec-
tric motor unit or while driving, it means that the anti-lock braking system is not workingand that only the standard brake system is available. (The standard brake system will still work properly.) If this happens, takeyour vehicle to a certif
ied i-MiEV dealer as
soon as possible.
BK0209800US.book 26 ページ 2014年1月14日 火曜日 午前9時26分