MITSUBISHI L200 2004 (in English) Manual PDF
Manufacturer: MITSUBISHI, Model Year: 2004, Model line: L200, Model: MITSUBISHI L200 2004Pages: 264, PDF Size: 4.14 MB
Page 71 of 264
INSTRUMENTS AND CONTROLS
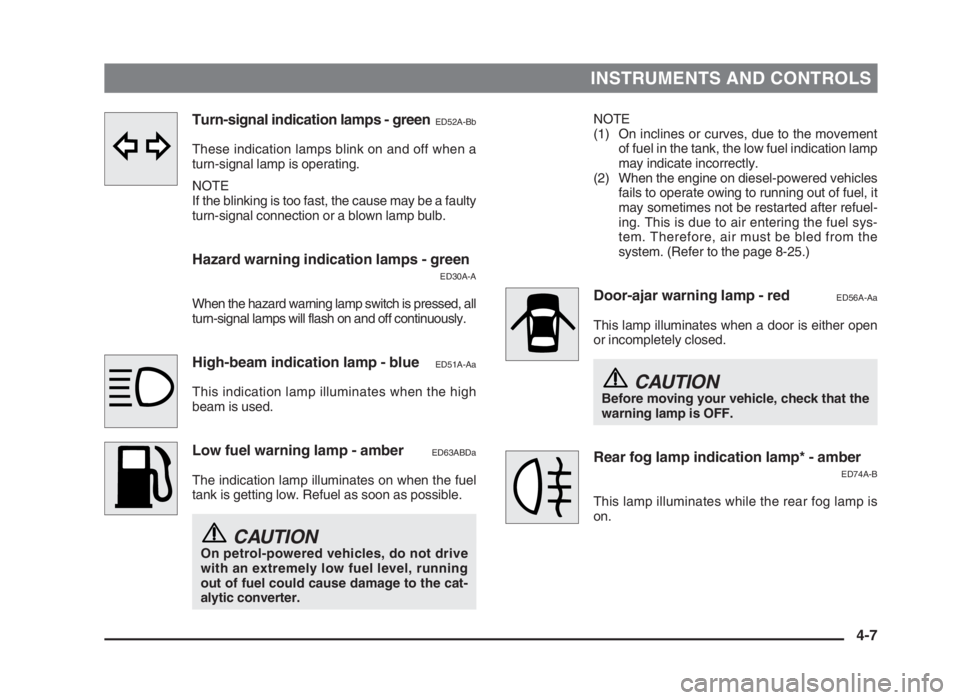
Turn-signal indication lamps - greenED52A-Bb
These indication lamps blink on and off when a
turn-signal lamp is operating.
NOTE
If the blinking is too fast, the cause may be a faulty
turn-signal connection or a blown lamp bulb.
Hazard warning indication lamps - green
ED30A-A
When the hazard warning lamp switch is pressed, all
turn-signal lamps will flash on and off continuously.
High-beam indication lamp - blueED51A-Aa
This indication lamp illuminates when the high
beam is used.
Low fuel warning lamp - amberED63ABDa
The indication lamp illuminates on when the fuel
tank is getting low. Refuel as soon as possible.
CAUTIONOn petrol-powered vehicles, do not drive
with an extremely low fuel level, running
out of fuel could cause damage to the cat-
alytic converter.
NOTE
(1) On inclines or curves, due to the movement
of fuel in the tank, the low fuel indication lamp
may indicate incorrectly.
(2) When the engine on diesel-powered vehicles
fails to operate owing to running out of fuel, it
may sometimes not be restarted after refuel-
ing. This is due to air entering the fuel sys-
tem. Therefore, air must be bled from the
system. (Refer to the page 8-25.)
Door-ajar warning lamp - redED56A-Aa
This lamp illuminates when a door is either open
or incompletely closed.
CAUTIONBefore moving your vehicle, check that the
warning lamp is OFF.
Rear fog lamp indication lamp* - amber
ED74A-B
This lamp illuminates while the rear fog lamp is
on.
4-7
04engL2_240082_4 22-01-2004 13:19 Page 4-7
Page 72 of 264
INSTRUMENTS AND CONTROLS
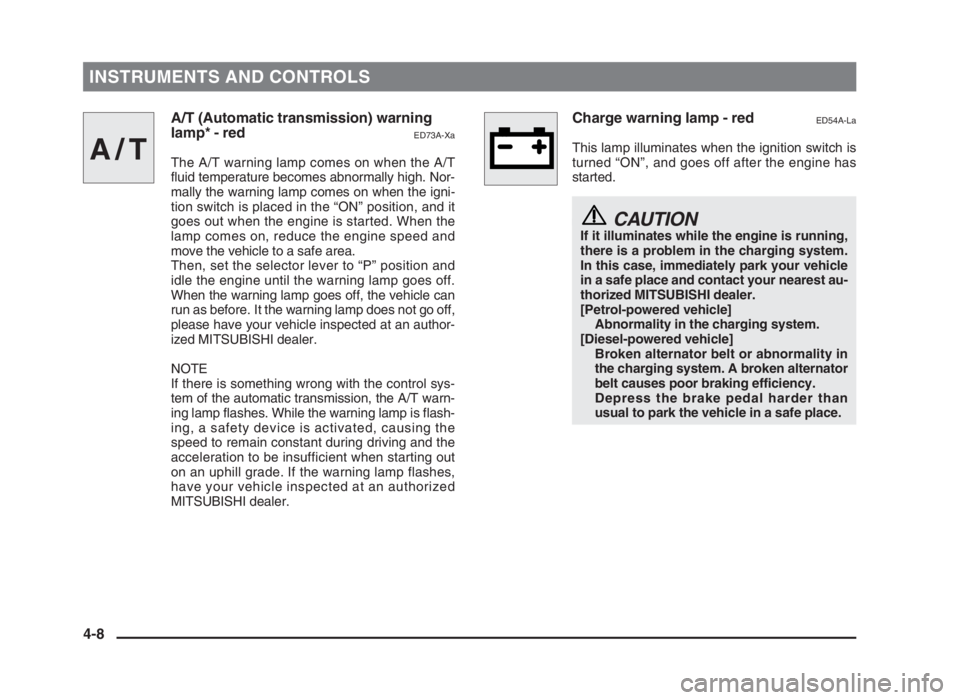
A/T (Automatic transmission) warning
lamp* - red
ED73A-Xa
The A/T warning lamp comes on when the A/T
fluid temperature becomes abnormally high. Nor-
mally the warning lamp comes on when the igni-
tion switch is placed in the “ON” position, and it
goes out when the engine is started. When the
lamp comes on, reduce the engine speed and
move the vehicle to a safe area.
Then, set the selector lever to “P” position and
idle the engine until the warning lamp goes off.
When the warning lamp goes off, the vehicle can
run as before. It the warning lamp does not go off,
please have your vehicle inspected at an author-
ized MITSUBISHI dealer.
NOTE
If there is something wrong with the control sys-
tem of the automatic transmission, the A/T warn-
ing lamp flashes. While the warning lamp is flash-
ing, a safety device is activated, causing the
speed to remain constant during driving and the
acceleration to be insufficient when starting out
on an uphill grade. If the warning lamp flashes,
have your vehicle inspected at an authorized
MITSUBISHI dealer.
Charge warning lamp - redED54A-La
This lamp illuminates when the ignition switch is
turned “ON”, and goes off after the engine has
started.
CAUTIONIf it illuminates while the engine is running,
there is a problem in the charging system.
In this case, immediately park your vehicle
in a safe place and contact your nearest au-
thorized MITSUBISHI dealer.
[Petrol-powered vehicle]
Abnormality in the charging system.
[Diesel-powered vehicle]
Broken alternator belt or abnormality in
the charging system. A broken alternator
belt causes poor braking efficiency.
Depress the brake pedal harder than
usual to park the vehicle in a safe place.
4-8
A/T
04engL2_240082_4 22-01-2004 13:19 Page 4-8
Page 73 of 264
INSTRUMENTS AND CONTROLS
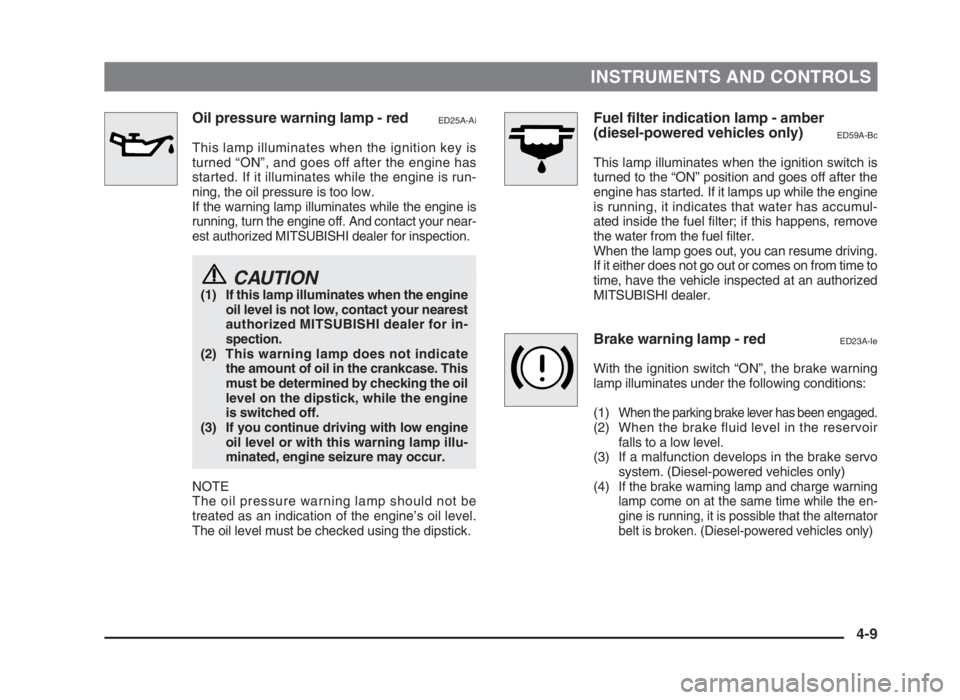
Oil pressure warning lamp - redED25A-Ai
This lamp illuminates when the ignition key is
turned “ON”, and goes off after the engine has
started. If it illuminates while the engine is run-
ning, the oil pressure is too low.
If the warning lamp illuminates while the engine is
running, turn the engine off. And contact your near-
est authorized MITSUBISHI dealer for inspection.
CAUTION(1) If this lamp illuminates when the engine
oil level is not low, contact your nearest
authorized MITSUBISHI dealer for in-
spection.
(2) This warning lamp does not indicate
the amount of oil in the crankcase. This
must be determined by checking the oil
level on the dipstick, while the engine
is switched off.
(3) If you continue driving with low engine
oil level or with this warning lamp illu-
minated, engine seizure may occur.
NOTE
The oil pressure warning lamp should not be
treated as an indication of the engine’s oil level.
The oil level must be checked using the dipstick.
Fuel filter indication lamp - amber
(diesel-powered vehicles only)
ED59A-Bc
This lamp illuminates when the ignition switch is
turned to the “ON” position and goes off after the
engine has started. If it lamps up while the engine
is running, it indicates that water has accumul-
ated inside the fuel filter; if this happens, remove
the water from the fuel filter.
When the lamp goes out, you can resume driving.
If it either does not go out or comes on from time to
time, have the vehicle inspected at an authorized
MITSUBISHI dealer.
Brake warning lamp - redED23A-Ie
With the ignition switch “ON”, the brake warning
lamp illuminates under the following conditions:
(1)
When the parking brake lever has been engaged.(2) When the brake fluid level in the reservoir
falls to a low level.
(3) If a malfunction develops in the brake servo
system. (Diesel-powered vehicles only)
(4)
If the brake warning lamp and charge warning
lamp come on at the same time while the en-
gine is running, it is possible that the alternator
belt is broken. (Diesel-powered vehicles only)
4-9
04engL2_240082_4 22-01-2004 13:19 Page 4-9
Page 74 of 264
INSTRUMENTS AND CONTROLS
CAUTIONIf the brake warning lamp does not illumi-
nate when you pull the parking brake lever,
or if it does not go out when you release
the lever, contact your nearest authorized
MITSUBISHI dealer immediately.
If the brake warning lamp illuminates while driv-
ing, it could mean braking system deterioration.
Park your vehicle in a safe place and follow these
procedures:
1.
If, when pressing the brake pedal, braking is poor,
press your foot harder against the brake pedal.
2. Should the brakes fail, use engine braking to
reduce your speed and slowly pull the park-
ing brake lever to park your vehicle.
Depress the brake pedal to operate the stop
lamp (brake lamp) to alert the vehicles be-
hind you.
CAUTIONSudden application of the parking brake is
dangerous and can lock the rear wheels.
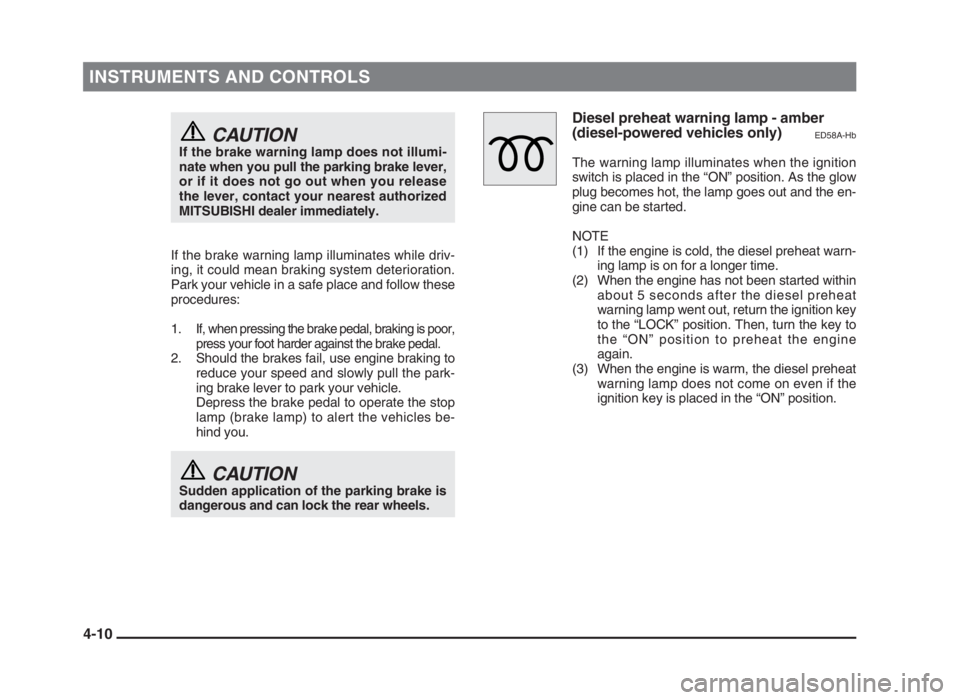
Diesel preheat warning lamp - amber
(diesel-powered vehicles only)
ED58A-Hb
The warning lamp illuminates when the ignition
switch is placed in the “ON” position. As the glow
plug becomes hot, the lamp goes out and the en-
gine can be started.
NOTE
(1) If the engine is cold, the diesel preheat warn-
ing lamp is on for a longer time.
(2) When the engine has not been started within
about 5 seconds after the diesel preheat
warning lamp went out, return the ignition key
to the “LOCK” position. Then, turn the key to
the “ON” position to preheat the engine
again.
(3) When the engine is warm, the diesel preheat
warning lamp does not come on even if the
ignition key is placed in the “ON” position.
4-10
04engL2_240082_4 22-01-2004 13:19 Page 4-10
Page 75 of 264
INSTRUMENTS AND CONTROLS
4-11 Check engine indication lamp - amber*
ED85AAH
This lamp is a part of an onboard diagnostic sys-
tem which monitors the emissions, engine sys-
tems.
If a problem is detected in one of these systems,
this lamp illuminates. Although your vehicle will
usually be drivable and not need towing, have the
system checked as soon as possible at an autho-
rized MITSUBISHI dealer. This lamp will also illu-
minate for a few seconds when the ignition key is
turned to the “ON” position. If it does not go off af-
ter a few seconds, take the vehicle to an autho-
rized MITSUBISHI dealer.
CAUTION(1) Prolonged driving with this lamp illumi-
nated can cause further damage to the
emission control system. It could also
affect fuel economy and drivability.
(2) If the lamp does not illuminate when
the ignition key is turned to the “ON”
position, have the system checked at
an authorized MITSUBISHI dealer.
CAUTION(3) If the lamp illuminates while the engine
is running, avoid driving at high speeds.
During vehicle operation with the lamp
illuminated, the vehicle may not accel-
erate when you depress the accelerator
pedal. When the vehicle is stationary
with the lamp illuminated you must de-
press the brake pedal more firmly than
usual since the engine idling speed is
higher than usual and the vehicle with
an automatic transmission has a
stronger tendency to creep forward.
NOTE
The engine electronic control module accommo-
dating the onboard diagnostic system has various
fault data (especially about the exhaust emission)
stored.
This data will be erased if a battery cable is dis-
connected, which will make a diagnosis more dif-
ficult. Do not disconnect a battery cable when the
check engine indication lamp is ON.
04engL2_240082_4 22-01-2004 13:20 Page 4-11
Page 76 of 264
INSTRUMENTS AND CONTROLS
4-12
Combination headlamps,
dipper and turn signal
switch
EE11AAMb
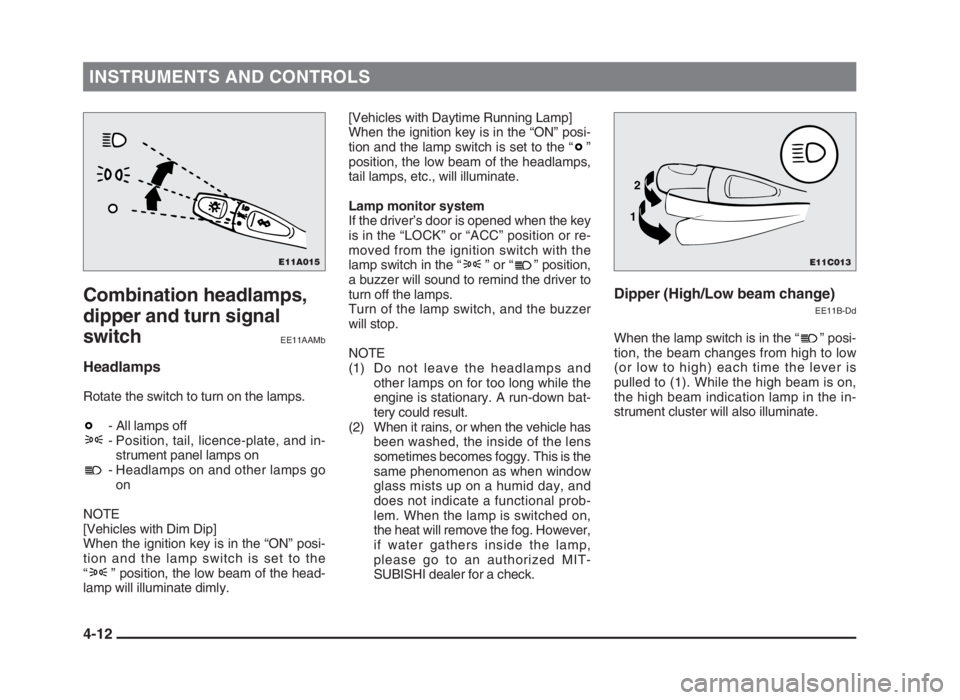
Headlamps
Rotate the switch to turn on the lamps.
- All lamps off
- Position, tail, licence-plate, and in-
strument panel lamps on
- Headlamps on and other lamps go
on
NOTE
[Vehicles with Dim Dip]
When the ignition key is in the “ON” posi-
tion and the lamp switch is set to the
“ ” position, the low beam of the head-
lamp will illuminate dimly.
Dipper (High/Low beam change)
EE11B-Dd
When the lamp switch is in the “ ” posi-
tion, the beam changes from high to low
(or low to high) each time the lever is
pulled to (1). While the high beam is on,
the high beam indication lamp in the in-
strument cluster will also illuminate.
[Vehicles with Daytime Running Lamp]
When the ignition key is in the “ON” posi-
tion and the lamp switch is set to the “ ”
position, the low beam of the headlamps,
tail lamps, etc., will illuminate.
Lamp monitor system
If the driver’s door is opened when the key
is in the “LOCK” or “ACC” position or re-
moved from the ignition switch with the
lamp switch in the “ ” or “ ” position,
a buzzer will sound to remind the driver to
turn off the lamps.
Turn of the lamp switch, and the buzzer
will stop.
NOTE
(1) Do not leave the headlamps and
other lamps on for too long while the
engine is stationary. A run-down bat-
tery could result.
(2) When it rains, or when the vehicle has
been washed, the inside of the lens
sometimes becomes foggy. This is the
same phenomenon as when window
glass mists up on a humid day, and
does not indicate a functional prob-
lem. When the lamp is switched on,
the heat will remove the fog. However,
if water gathers inside the lamp,
please go to an authorized MIT-
SUBISHI dealer for a check.
E11A015E11C013
12
04engL2_240082_4 22-01-2004 13:20 Page 4-12
Page 77 of 264
INSTRUMENTS AND CONTROLS
4-13 Headlamp flasher
EE11C-Fb
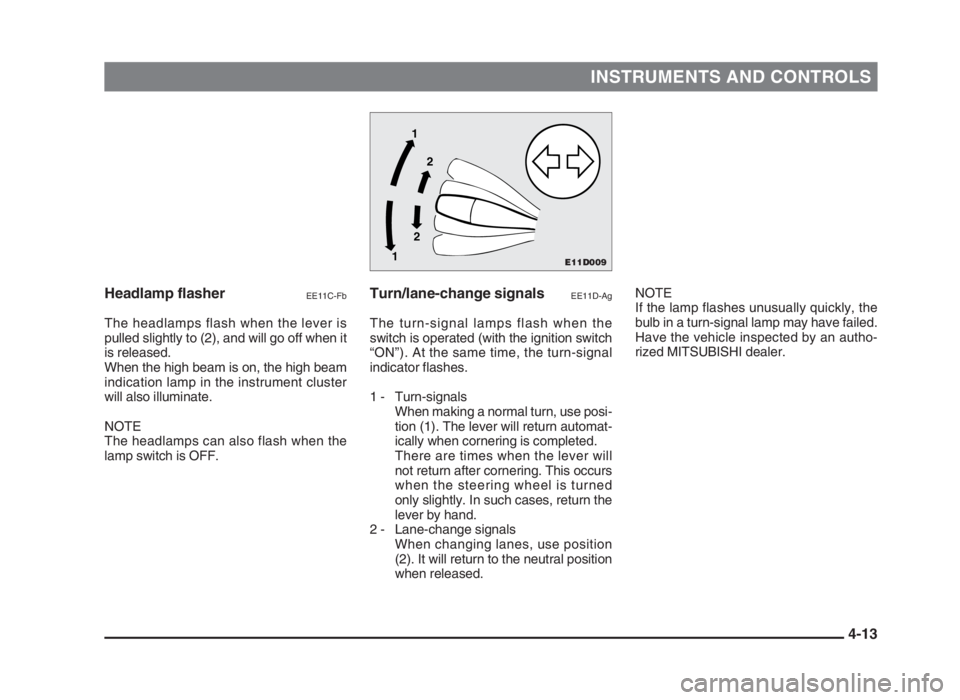
The headlamps flash when the lever is
pulled slightly to (2), and will go off when it
is released.
When the high beam is on, the high beam
indication lamp in the instrument cluster
will also illuminate.
NOTE
The headlamps can also flash when the
lamp switch is OFF.
Turn/lane-change signalsEE11D-Ag
The turn-signal lamps flash when the
switch is operated (with the ignition switch
“ON”). At the same time, the turn-signal
indicator flashes.
1 - Turn-signals
When making a normal turn, use posi-
tion (1). The lever will return automat-
ically when cornering is completed.
There are times when the lever will
not return after cornering. This occurs
when the steering wheel is turned
only slightly. In such cases, return the
lever by hand.
2 - Lane-change signals
When changing lanes, use position
(2). It will return to the neutral position
when released.NOTE
If the lamp flashes unusually quickly, the
bulb in a turn-signal lamp may have failed.
Have the vehicle inspected by an autho-
rized MITSUBISHI dealer.
E11D009
1
2
2
1
04engL2_240082_4 22-01-2004 13:20 Page 4-13
Page 78 of 264
INSTRUMENTS AND CONTROLS
4-14
Club cab
*
1: Vehicles with heavy duty suspension
*2: GLS models
●: 1 person : Full luggage loading
Switch position 0-Driver only
Switch position 1-Driver + full luggage loading
Switch position 2-Driver + full luggage loading
Switch position 3-Driver + full luggage loading
Switch position 4-Driver + full luggage loading
Headlamp levelling switch*
EE01GPDc
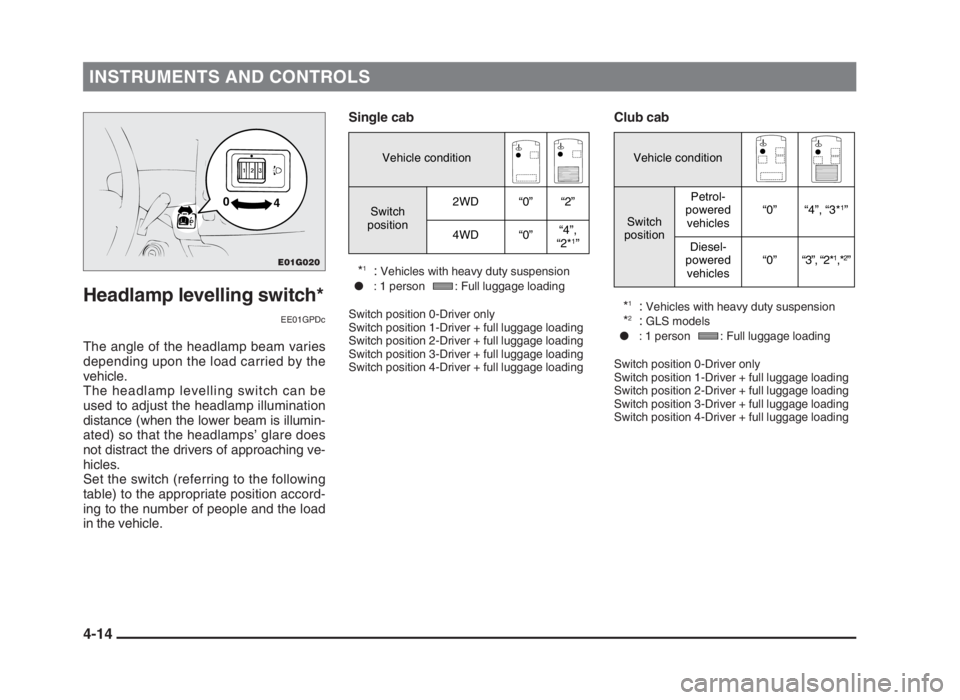
The angle of the headlamp beam varies
depending upon the load carried by the
vehicle.
The headlamp levelling switch can be
used to adjust the headlamp illumination
distance (when the lower beam is illumin-
ated) so that the headlamps’ glare does
not distract the drivers of approaching ve-
hicles.
Set the switch (referring to the following
table) to the appropriate position accord-
ing to the number of people and the load
in the vehicle.Single cab
*
1: Vehicles with heavy duty suspension
●: 1 person : Full luggage loading
Switch position 0-Driver only
Switch position 1-Driver + full luggage loading
Switch position 2-Driver + full luggage loading
Switch position 3-Driver + full luggage loading
Switch position 4-Driver + full luggage loading
Vehicle condition
Switch
position2WD “0” “2”
4WD “0”“4”,
“2*
1
”
Vehicle condition
Switch
positionPetrol-
powered
vehicles“0” “4”, “3*
1
”
Diesel-
powered
vehicles“0” “3”, “2*
1
,*
2
”
E01G020
0
4
04engL2_240082_4 22-01-2004 13:20 Page 4-14
Page 79 of 264
INSTRUMENTS AND CONTROLS
4-15
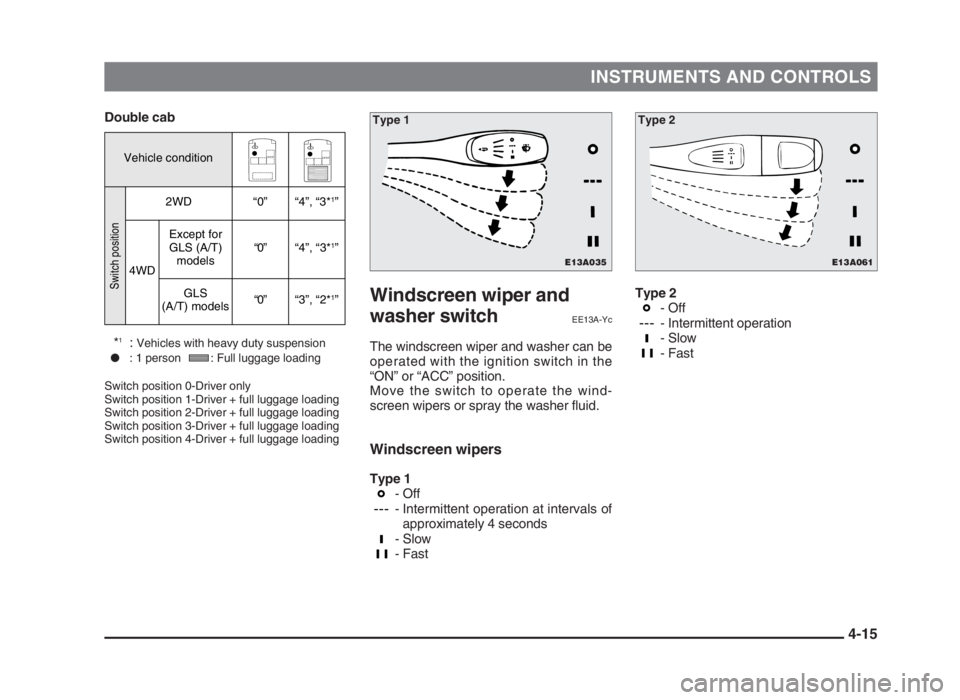
Double cab
*
1: Vehicles with heavy duty suspension
●: 1 person : Full luggage loading
Switch position 0-Driver only
Switch position 1-Driver + full luggage loading
Switch position 2-Driver + full luggage loading
Switch position 3-Driver + full luggage loading
Switch position 4-Driver + full luggage loading
Windscreen wiper and
washer switch
EE13A-Yc
The windscreen wiper and washer can be
operated with the ignition switch in the
“ON” or “ACC” position.
Move the switch to operate the wind-
screen wipers or spray the washer fluid.
Windscreen wipers
Type 1
- Off
- Intermittent operation at intervals of
approximately 4 seconds
- Slow
- Fast
Type 2
- Off
- Intermittent operation
- Slow
- Fast
E13A035
Type 1
E13A061
Type 2
Vehicle condition
Switch position
2WD “0” “4”, “3*
1
”
4WDExcept for
GLS (A/T)
models“0” “4”, “3*
1
”
GLS
(A/T) models“0” “3”, “2*
1
”
04engL2_240082_4 22-01-2004 13:20 Page 4-15
Page 80 of 264
INSTRUMENTS AND CONTROLS
4-16
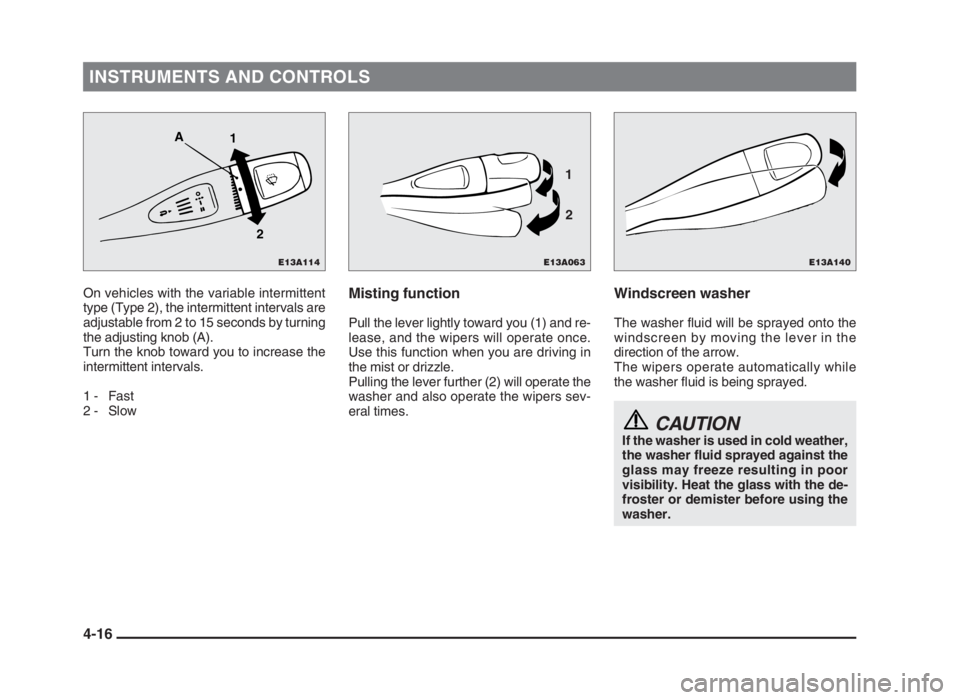
On vehicles with the variable intermittent
type (Type 2), the intermittent intervals are
adjustable from 2 to 15 seconds by turning
the adjusting knob (A).
Turn the knob toward you to increase the
intermittent intervals.
1 - Fast
2 - SlowWindscreen washer
The washer fluid will be sprayed onto the
windscreen by moving the lever in the
direction of the arrow.
The wipers operate automatically while
the washer fluid is being sprayed.
CAUTIONIf the washer is used in cold weather,
the washer fluid sprayed against the
glass may freeze resulting in poor
visibility. Heat the glass with the de-
froster or demister before using the
washer.
Misting function
Pull the lever lightly toward you (1) and re-
lease, and the wipers will operate once.
Use this function when you are driving in
the mist or drizzle.
Pulling the lever further (2) will operate the
washer and also operate the wipers sev-
eral times.
E13A063
1
2
E13A140E13A114
A
2 1
04engL2_240082_4 22-01-2004 13:20 Page 4-16