MITSUBISHI L200 2015 Owner's Manual (in English)
Manufacturer: MITSUBISHI, Model Year: 2015, Model line: L200, Model: MITSUBISHI L200 2015Pages: 418, PDF Size: 25.8 MB
Page 101 of 418
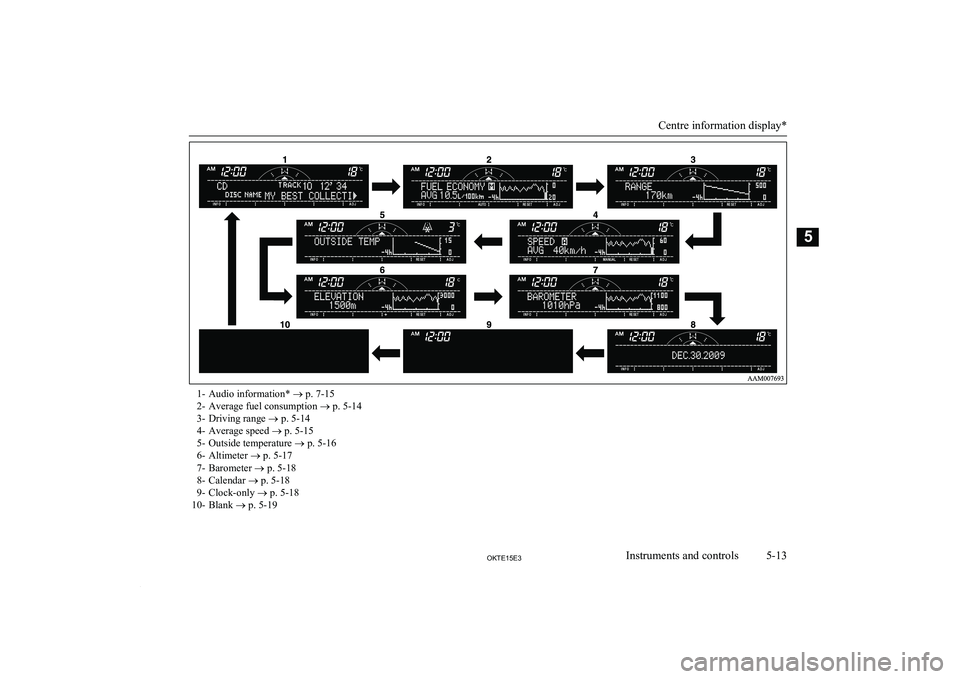
1- Audio information* ® p. 7-15
2- Average fuel consumption ® p. 5-14
3- Driving range ® p. 5-14
4- Average speed ® p. 5-15
5- Outside temperature ® p. 5-16
6- Altimeter ® p. 5-17
7- Barometer ® p. 5-18
8- Calendar ® p. 5-18
9- Clock-only ® p. 5-18
10- Blank ® p. 5-19
Centre information display*
5-13OKTE15E3Instruments and controls5
Page 102 of 418
Average fuel consumption
E00518200267
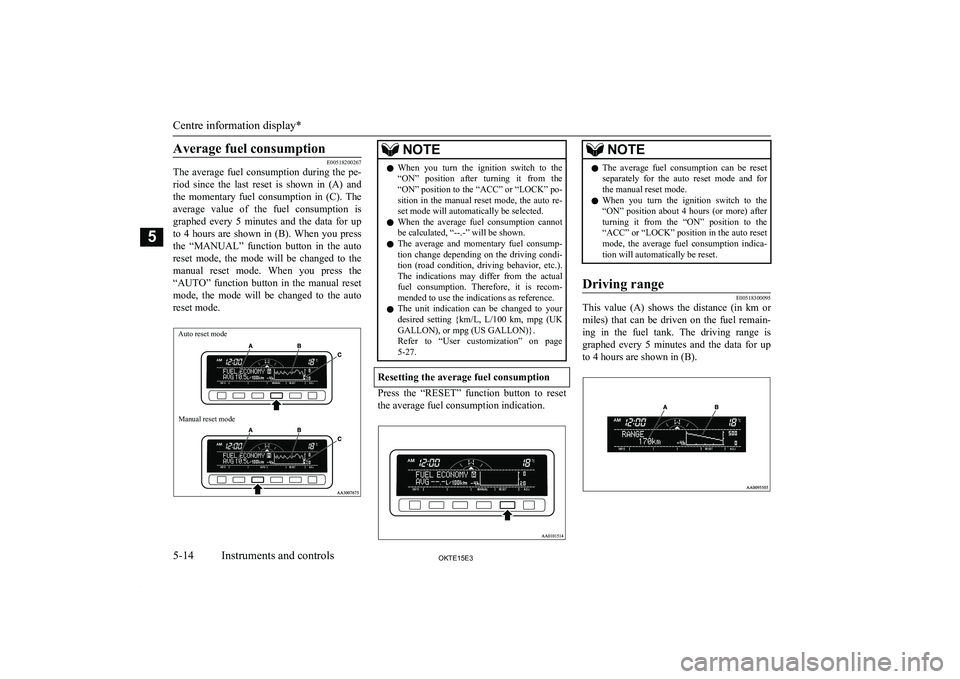
The average fuel consumption during the pe-
riod since the last reset is shown in (A) and
the momentary fuel consumption in (C). The average value of the fuel consumption is
graphed every 5 minutes and the data for up
to 4 hours are shown in (B). When you press
the “MANUAL” function button in the auto reset mode, the mode will be changed to the manual reset mode. When you press the
“AUTO” function button in the manual reset
mode, the mode will be changed to the auto reset mode.
Auto reset modeManual reset mode
NOTEl When you turn the ignition switch to the
“ON” position after turning it from the “ON” position to the “ACC” or “LOCK” po-
sition in the manual reset mode, the auto re- set mode will automatically be selected.
l When the average fuel consumption cannot
be calculated, “--.-” will be shown.
l The average and momentary fuel consump-
tion change depending on the driving condi- tion (road condition, driving behavior, etc.). The indications may differ from the actual
fuel consumption. Therefore, it is recom- mended to use the indications as reference.
l The unit indication can be changed to your
desired setting {km/L, L/100 km, mpg (UK
GALLON), or mpg (US GALLON)}. Refer to “User customization” on page 5-27.
Resetting the average fuel consumption
Press the “RESET” function button to reset
the average fuel consumption indication.
NOTEl The average fuel consumption can be reset
separately for the auto reset mode and forthe manual reset mode.
l When you turn the ignition switch to the
“ON” position about 4 hours (or more) after turning it from the “ON” position to the
“ACC” or “LOCK” position in the auto reset
mode, the average fuel consumption indica-
tion will automatically be reset.Driving range
E00518300095
This value (A) shows the distance (in km or
miles) that can be driven on the fuel remain- ing in the fuel tank. The driving range is
graphed every 5 minutes and the data for up
to 4 hours are shown in (B).
Centre information display*
5-14OKTE15E3Instruments and controls5
Page 103 of 418
NOTElWhen the driving range is 50 km (30 miles)
or less, the display shows “----”.
When it is 3,000 km (2,000 miles) or more,
“3,000 km” or “2,000 miles” will be shown.
l When the driving range cannot be measured,
the display shows “----”.
l The driving range is shown based on the ac-
cumulated fuel consumption data, however,
may be changed depending on the driving condition (road condition, driving behavior, etc.). If the battery terminals are disconnec-
ted, the accumulated fuel consumption data will be erased. It is recommended to use the indication as reference.
l When the vehicle is fueled, the driving range
will be updated. However, if the amount of
fueling is small, the indication may not be
correct. Therefore, fill up the tank as much as possible in case of fueling.
l When the vehicle is stopped on a steep
slope, the value of the driving range may in-
crease. This is caused by the fuel movement inside the tank on the slope and is not
deemed as a failure.Resetting the driving range
Press the “RESET” function button to reset
the driving range plotted in graph.
NOTEl Pressing the “RESET” function button will
not reset the indication (C).
l It is possible to set the display unit to km or
miles.
Refer to “User customization” on page 5-27.Average speed
E00518400126
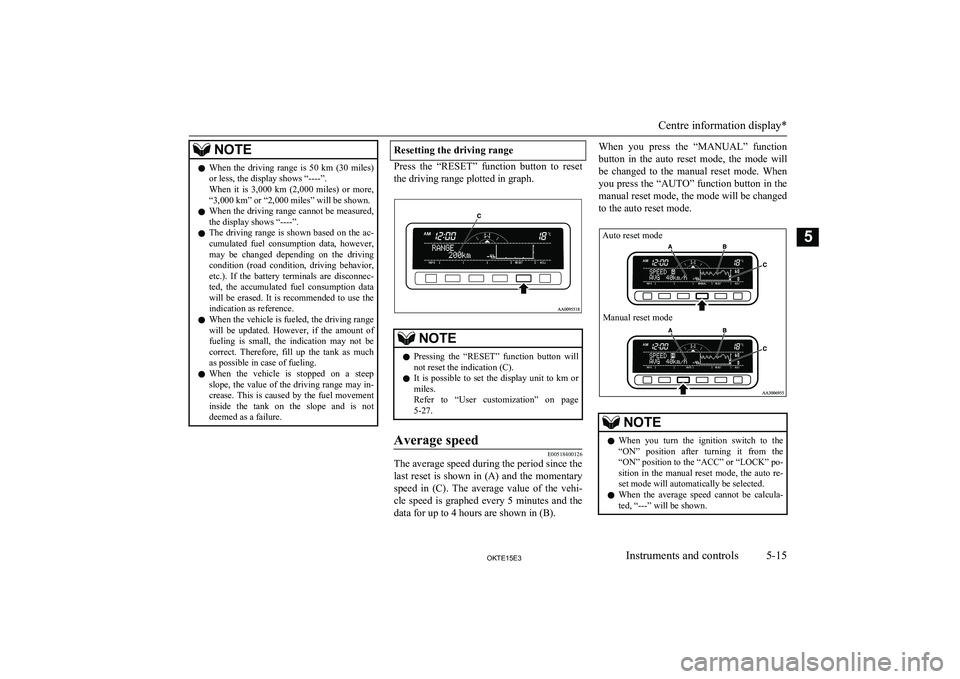
The average speed during the period since the
last reset is shown in (A) and the momentary speed in (C). The average value of the vehi-cle speed is graphed every 5 minutes and the
data for up to 4 hours are shown in (B).
When you press the “MANUAL” function
button in the auto reset mode, the mode will
be changed to the manual reset mode. When you press the “AUTO” function button in themanual reset mode, the mode will be changed
to the auto reset mode.NOTEl When you turn the ignition switch to the
“ON” position after turning it from the “ON” position to the “ACC” or “LOCK” po-
sition in the manual reset mode, the auto re- set mode will automatically be selected.
l When the average speed cannot be calcula-
ted, “---” will be shown.
Centre information display*
5-15OKTE15E3Instruments and controls5 Auto reset modeManual reset mode
Page 104 of 418
NOTElThe average and momentary speed change
depending on the driving condition (road
condition, driving behavior, etc.). The indi- cations may differ from the actual speed.
Therefore, it is recommended to use the indi-
cations as reference.
l The unit indication can be changed to your
desired setting (km/h or mph).
Refer to “User customization” on page 5-27.
Resetting the average speed
Press the “RESET” function button to reset
the average vehicle speed.
NOTEl The average speed can be reset separately
for the auto reset mode and for the manualreset mode.NOTEl When you turn the ignition switch to the
“ON” position about 4 hours (or more) after turning it from the “ON” position to the
“ACC” or “LOCK” position in the auto reset mode, the average speed indication will au-
tomatically be reset.Outside temperature
E00518501108
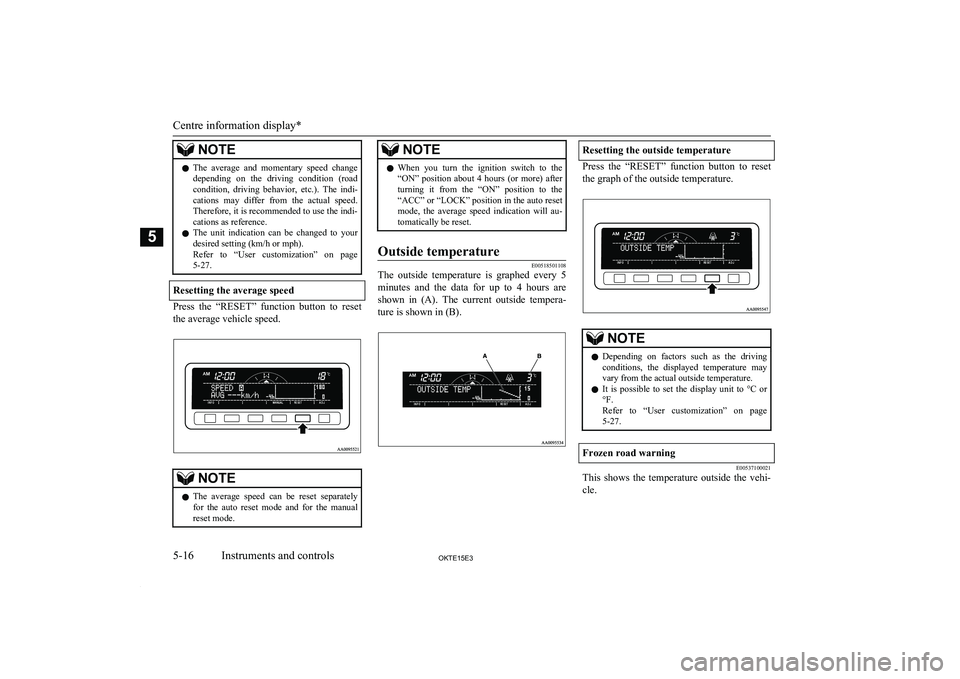
The outside temperature is graphed every 5
minutes and the data for up to 4 hours are shown in (A). The current outside tempera-ture is shown in (B).
Resetting the outside temperature
Press the “RESET” function button to reset
the graph of the outside temperature.
NOTEl Depending on factors such as the driving
conditions, the displayed temperature may vary from the actual outside temperature.
l It is possible to set the display unit to °C or
°F.
Refer to “User customization” on page 5-27.Frozen road warning
E00537100021
This shows the temperature outside the vehi-
cle.
Centre information display*
5-16OKTE15E3Instruments and controls5
Page 105 of 418
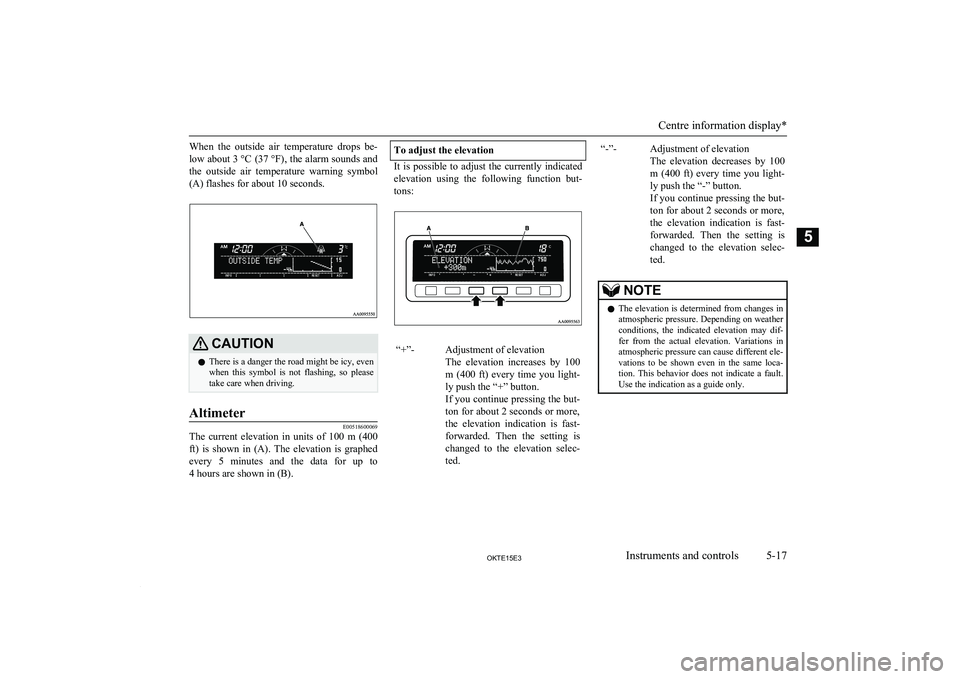
When the outside air temperature drops be-low about 3 °C (37 °F) , the alarm sounds and
the outside air temperature warning symbol (A) flashes for about 10 seconds.CAUTIONl There is a danger the road might be icy, even
when this symbol is not flashing, so please take care when driving.Altimeter
E00518600069
The current elevation in units of 100 m (400
ft) is shown in (A). The elevation is graphed every 5 minutes and the data for up to 4 hours are shown in (B).
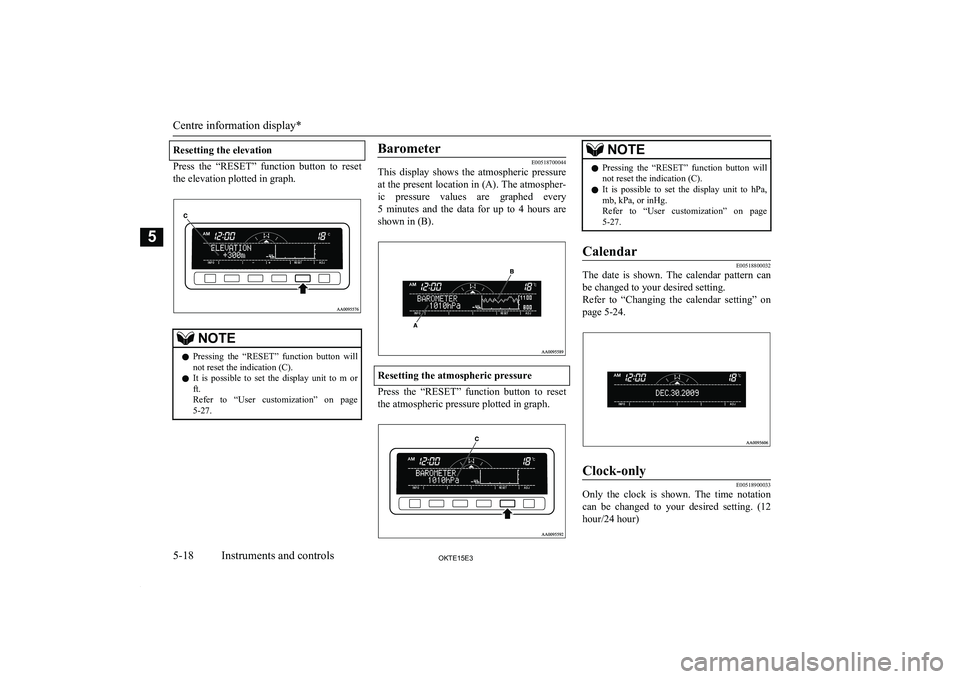
To adjust the elevation
It is possible to adjust the currently indicated
elevation using the following function but-
tons:
“+”-Adjustment of elevation
The elevation increases by 100
m (400 ft) every time you light- ly push the “+” button.
If you continue pressing the but- ton for about 2 seconds or more,
the elevation indication is fast-
forwarded. Then the setting is changed to the elevation selec-
ted.“-”-Adjustment of elevation
The elevation decreases by 100
m (400 ft) every time you light- ly push the “-” button.
If you continue pressing the but- ton for about 2 seconds or more,
the elevation indication is fast- forwarded. Then the setting is
changed to the elevation selec- ted.NOTEl The elevation is determined from changes in
atmospheric pressure. Depending on weather
conditions, the indicated elevation may dif- fer from the actual elevation. Variations in
atmospheric pressure can cause different ele- vations to be shown even in the same loca-
tion. This behavior does not indicate a fault.
Use the indication as a guide only.
Centre information display*
5-17OKTE15E3Instruments and controls5
Page 106 of 418
Resetting the elevation
Press the “RESET” function button to reset
the elevation plotted in graph.
NOTEl Pressing the “RESET” function button will
not reset the indication (C).
l It is possible to set the display unit to m or
ft.
Refer to “User customization” on page 5-27.Barometer
E00518700044
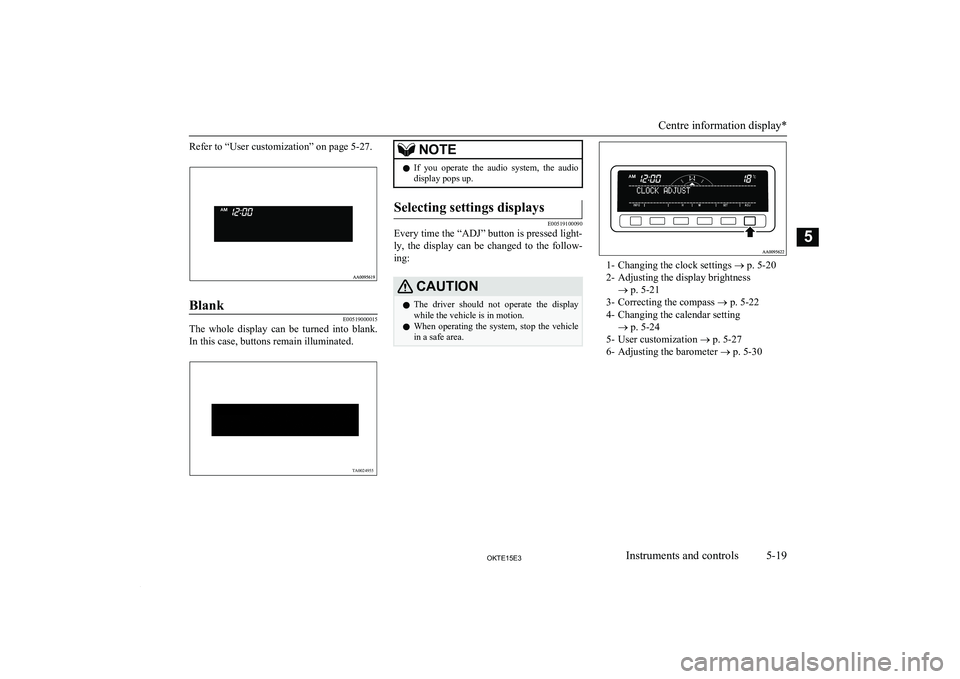
This display shows the atmospheric pressure
at the present location in (A). The atmospher- ic pressure values are graphed every5 minutes and the data for up to 4 hours are
shown in (B).
Resetting the atmospheric pressure
Press the “RESET” function button to reset
the atmospheric pressure plotted in graph.
NOTEl Pressing the “RESET” function button will
not reset the indication (C).
l It is possible to set the display unit to hPa,
mb, kPa, or inHg.
Refer to “User customization” on page 5-27.Calendar
E00518800032
The date is shown. The calendar pattern can
be changed to your desired setting.
Refer to “Changing the calendar setting” on page 5-24.
Clock-only
E00518900033
Only the clock is shown. The time notation
can be changed to your desired setting. (12 hour/24 hour)
Centre information display*
5-18OKTE15E3Instruments and controls5
Page 107 of 418
Refer to “User customization” on page 5-27.Blank
E00519000015
The whole display can be turned into blank.
In this case, buttons remain illuminated.
NOTEl If you operate the audio system, the audio
display pops up.Selecting settings displays
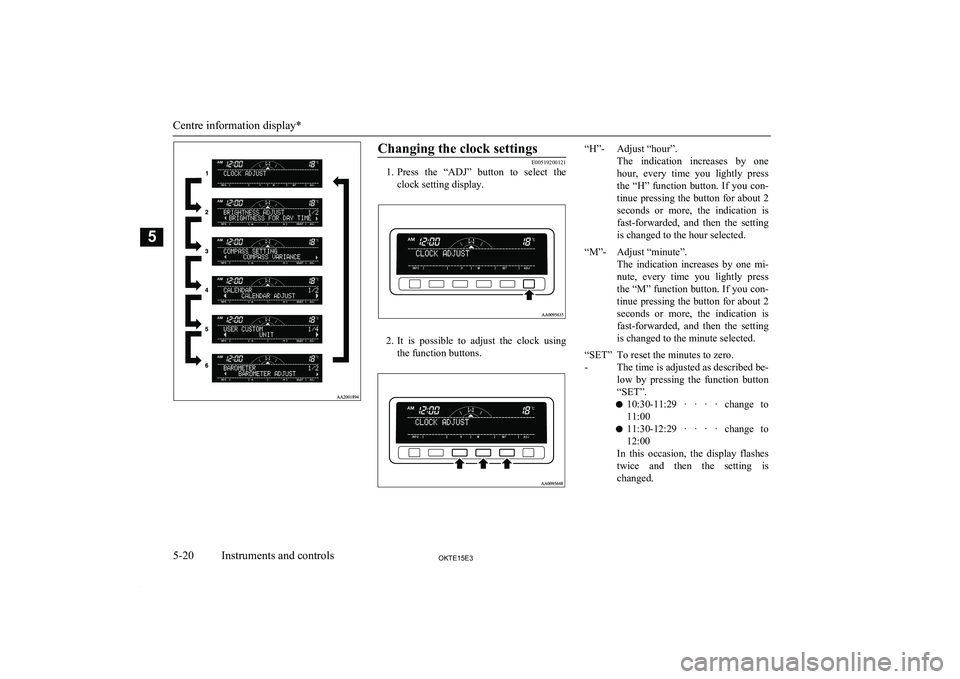
E00519100090
Every time the “ADJ” button is pressed light-
ly, the display can be changed to the follow-ing:
CAUTIONl The driver should not operate the display
while the vehicle is in motion.
l When operating the system, stop the vehicle
in a safe area.
1- Changing the clock settings ® p. 5-20
2- Adjusting the display brightness ® p. 5-21
3- Correcting the compass ® p. 5-22
4- Changing the calendar setting ® p. 5-24
5- User customization ® p. 5-27
6- Adjusting the barometer ® p. 5-30
Centre information display*
5-19OKTE15E3Instruments and controls5 TA0024955
Page 108 of 418
Changing the clock settings
E00519200121
1. Press the “ADJ” button to select the
clock setting display.
2. It is possible to adjust the clock using
the function buttons.
“H”-Adjust “hour”.
The indication increases by one
hour, every time you lightly press the “H” function button. If you con-tinue pressing the button for about 2 seconds or more, the indication is fast-forwarded, and then the settingis changed to the hour selected.“M”-Adjust “minute”.
The indication increases by one mi-
nute, every time you lightly press
the “M” function button. If you con- tinue pressing the button for about 2 seconds or more, the indication is fast-forwarded, and then the settingis changed to the minute selected.“SET”
-To reset the minutes to zero.
The time is adjusted as described be-
low by pressing the function button
“SET”.
l 10:30-11:29 · · · · change to
11:00
l 11:30-12:29 · · · · change to
12:00
In this occasion, the display flashes twice and then the setting is changed.
Centre information display*
5-20OKTE15E3Instruments and controls5
Page 109 of 418
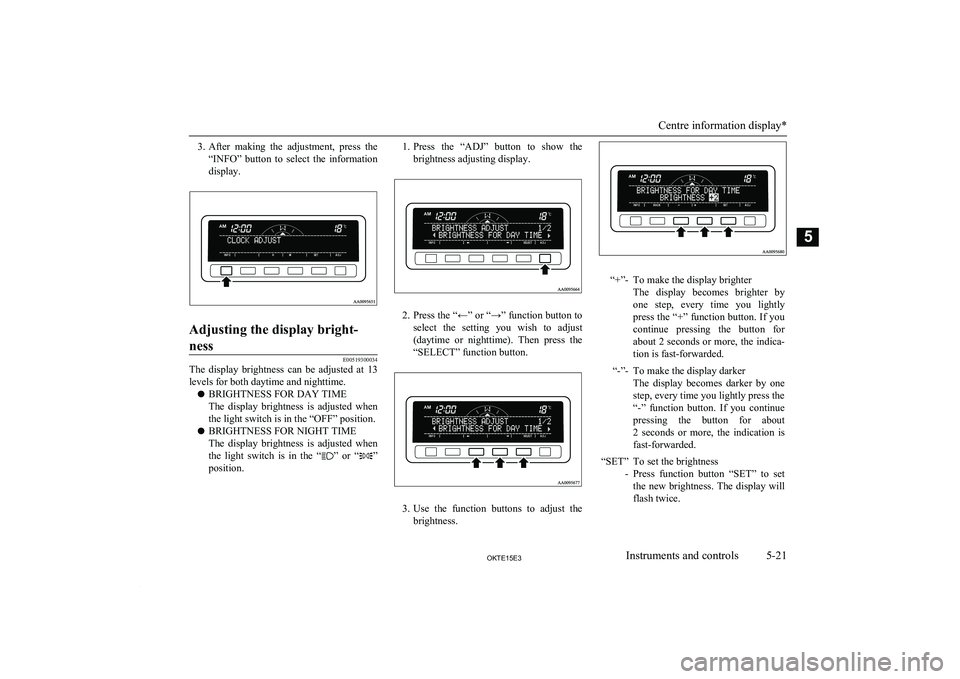
3.After making the adjustment, press the
“INFO” button to select the information display.Adjusting the display bright-
ness
E00519300034
The display brightness can be adjusted at 13
levels for both daytime and nighttime.
l BRIGHTNESS FOR DAY TIME
The display brightness is adjusted when the light switch is in the “OFF” position.
l BRIGHTNESS FOR NIGHT TIME
The display brightness is adjusted when the light switch is in the “
” or “”
position.
1. Press the “ADJ” button to show the
brightness adjusting display.
2. Press the “←” or “→” function button to
select the setting you wish to adjust (daytime or nighttime). Then press the
“SELECT” function button.
3. Use the function buttons to adjust the
brightness.
“+”-To make the display brighter
The display becomes brighter by one step, every time you lightly
press the “+” function button. If you
continue pressing the button for
about 2 seconds or more, the indica- tion is fast-forwarded.“-”-To make the display darker
The display becomes darker by one step, every time you lightly press the
“-” function button. If you continue pressing the button for about
2 seconds or more, the indication is fast-forwarded.“SET” -To set the brightness
Press function button “SET” to set
the new brightness. The display will flash twice.
Centre information display*
5-21OKTE15E3Instruments and controls5
Page 110 of 418
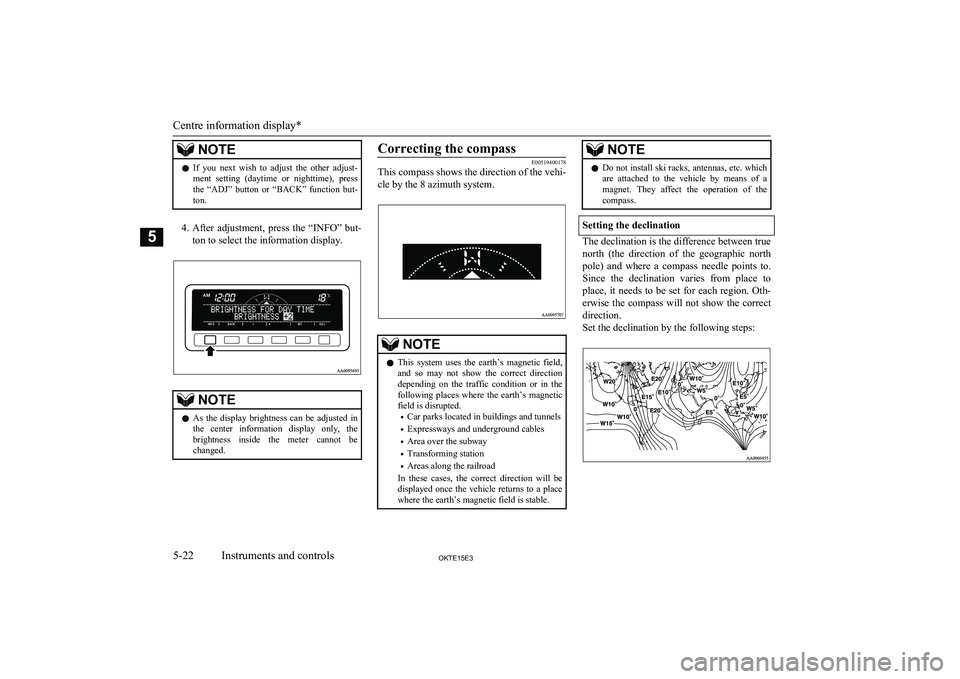
NOTElIf you next wish to adjust the other adjust-
ment setting (daytime or nighttime), press
the “ADJ” button or “BACK” function but- ton.
4. After adjustment, press the “INFO” but-
ton to select the information display.
NOTEl As the display brightness can be adjusted in
the center information display only, the
brightness inside the meter cannot be changed.Correcting the compass
E00519400178
This compass shows the direction of the vehi-
cle by the 8 azimuth system.NOTEl This system uses the earth’s magnetic field,
and so may not show the correct direction
depending on the traffic condition or in the following places where the earth’s magnetic
field is disrupted.
• Car parks located in buildings and tunnels
• Expressways and underground cables
• Area over the subway
• Transforming station
• Areas along the railroad
In these cases, the correct direction will be displayed once the vehicle returns to a place
where the earth’s magnetic field is stable.NOTEl Do not install ski racks, antennas, etc. which
are attached to the vehicle by means of a
magnet. They affect the operation of the
compass.
Setting the declination
The declination is the difference between true
north (the direction of the geographic north pole) and where a compass needle points to.
Since the declination varies from place to place, it needs to be set for each region. Oth-erwise the compass will not show the correct
direction.
Set the declination by the following steps:
Centre information display*
5-22OKTE15E3Instruments and controls5