radio MITSUBISHI L200 2015 (in English) Owner's Guide
[x] Cancel search | Manufacturer: MITSUBISHI, Model Year: 2015, Model line: L200, Model: MITSUBISHI L200 2015Pages: 418, PDF Size: 25.8 MB
Page 227 of 418
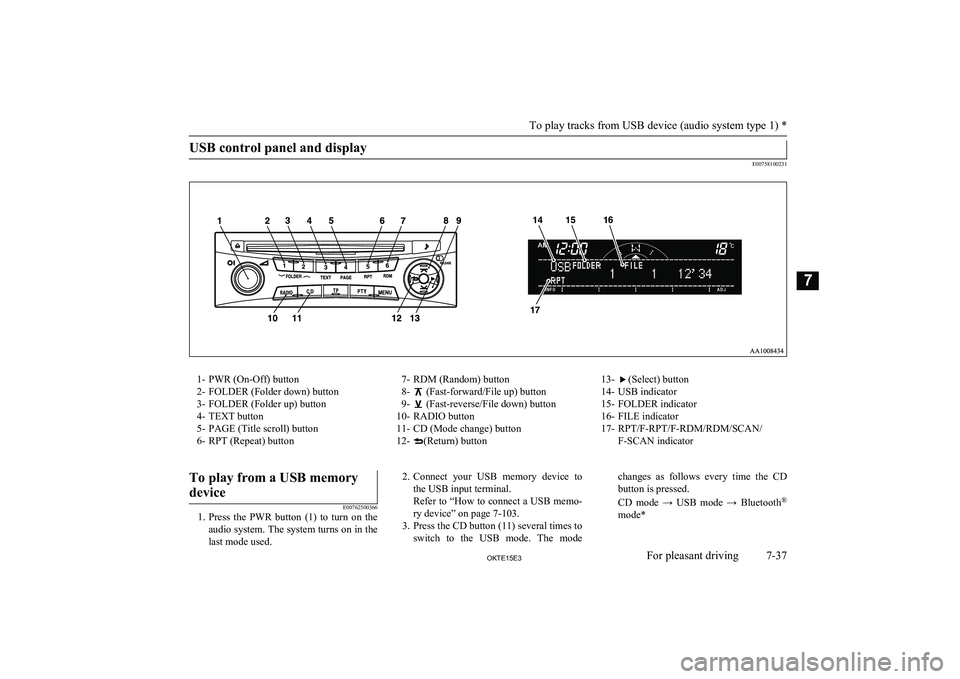
USB control panel and display
E00758100231
1- PWR (On-Off) button
2- FOLDER (Folder down) button
3- FOLDER (Folder up) button
4- TEXT button
5- PAGE (Title scroll) button
6- RPT (Repeat) button7- RDM (Random) button
8-
(Fast-forward/File up) button
9-
(Fast-reverse/File down) button
10- RADIO button
11- CD (Mode change) button
12-
(Return) button
13-(Select) button
14- USB indicator
15- FOLDER indicator
16- FILE indicator
17- RPT/F-RPT/F-RDM/RDM/SCAN/ F-SCAN indicator
To play from a USB memory
device
E00762500366
1. Press the PWR button (1) to turn on the
audio system. The system turns on in the last mode used.
2. Connect your USB memory device to
the USB input terminal.
Refer to “How to connect a USB memo- ry device” on page 7-103.
3. Press the CD button (11) several times to switch to the USB mode. The modechanges as follows every time the CD
button is pressed.
CD mode → USB mode → Bluetooth ®
mode*
To play tracks from USB device (audio system type 1) *
7-37OKTE15E3For pleasant driving7
Page 234 of 418
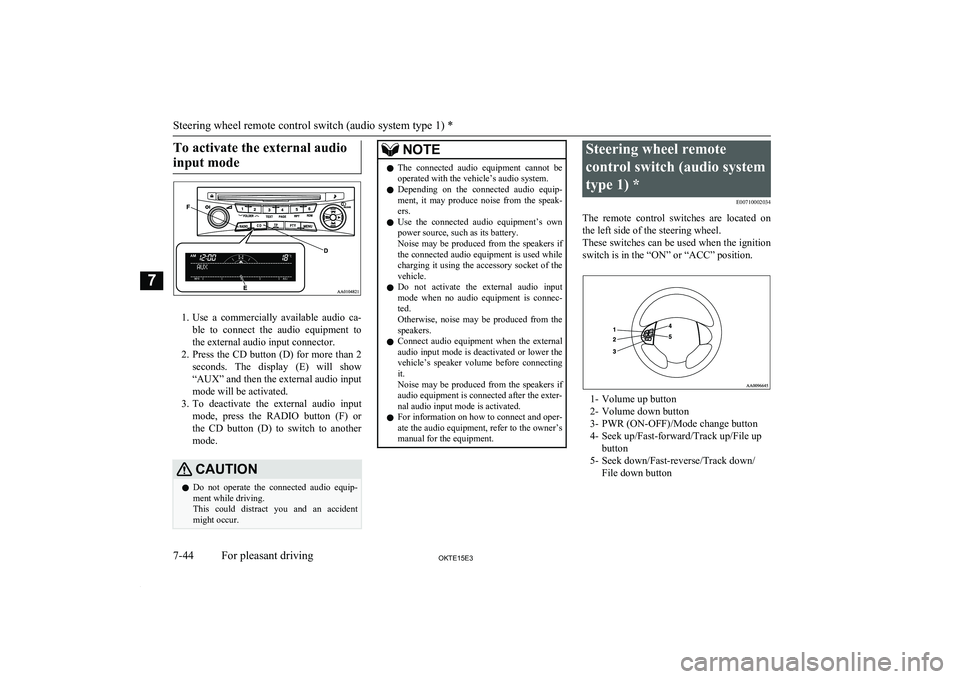
To activate the external audioinput mode
1. Use a commercially available audio ca-
ble to connect the audio equipment to
the external audio input connector.
2. Press the CD button (D) for more than 2
seconds. The display (E) will show
“AUX” and then the external audio input
mode will be activated.
3. To deactivate the external audio input
mode, press the RADIO button (F) orthe CD button (D) to switch to another
mode.
CAUTIONl Do not operate the connected audio equip-
ment while driving.
This could distract you and an accident might occur.NOTEl The connected audio equipment cannot be
operated with the vehicle’s audio system.
l Depending on the connected audio equip-
ment, it may produce noise from the speak- ers.
l Use the connected audio equipment’s own
power source, such as its battery.
Noise may be produced from the speakers if the connected audio equipment is used while
charging it using the accessory socket of the vehicle.
l Do not activate the external audio input
mode when no audio equipment is connec-
ted.
Otherwise, noise may be produced from the
speakers.
l Connect audio equipment when the external
audio input mode is deactivated or lower the
vehicle’s speaker volume before connecting it.
Noise may be produced from the speakers if
audio equipment is connected after the exter-
nal audio input mode is activated.
l For information on how to connect and oper-
ate the audio equipment, refer to the owner’s manual for the equipment.Steering wheel remote
control switch (audio system type 1) * E00710002034
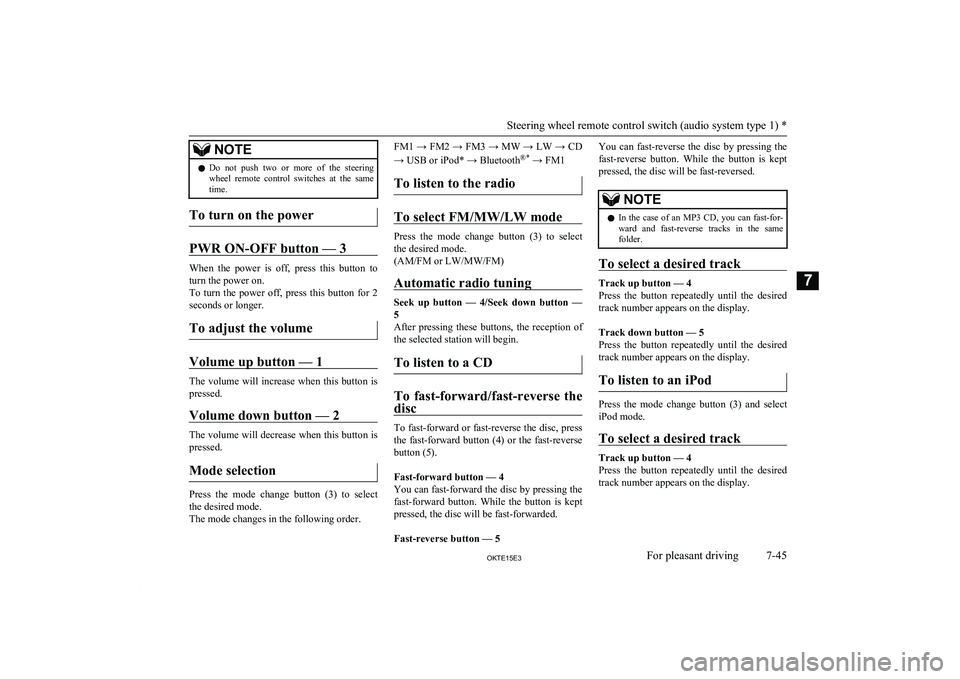
The remote control switches are located on the left side of the steering wheel.
These switches can be used when the ignition
switch is in the “ON” or “ACC” position.
1- Volume up button
2- Volume down button
3- PWR (ON-OFF)/Mode change button
4- Seek up/Fast-forward/Track up/File up button
5- Seek down/Fast-reverse/Track down/ File down button
Steering wheel remote control switch (audio system type 1) *
7-44OKTE15E3For pleasant driving7
Page 235 of 418
NOTElDo not push two or more of the steering
wheel remote control switches at the same
time.
To turn on the power
PWR ON-OFF button — 3
When the power is off, press this button to
turn the power on.
To turn the power off, press this button for 2
seconds or longer.
To adjust the volume
Volume up button — 1
The volume will increase when this button is
pressed.
Volume down button — 2
The volume will decrease when this button is
pressed.
Mode selection
Press the mode change button (3) to select the desired mode.
The mode changes in the following order.
FM1 → FM2 → FM3 → MW → LW → CD
→ USB or iPod* → Bluetooth ®*
→ FM1
To listen to the radio
To select FM/MW/LW mode
Press the mode change button (3) to select the desired mode.
(AM/FM or LW/MW/FM)
Automatic radio tuning
Seek up button — 4/Seek down button — 5
After pressing these buttons, the reception of the selected station will begin.
To listen to a CD
To fast-forward/fast-reverse the
disc
To fast-forward or fast-reverse the disc, press
the fast-forward button (4) or the fast-reverse button (5).
Fast-forward button — 4
You can fast-forward the disc by pressing the
fast-forward button. While the button is kept
pressed, the disc will be fast-forwarded.
Fast-reverse button — 5
You can fast-reverse the disc by pressing the
fast-reverse button. While the button is kept pressed, the disc will be fast-reversed.NOTEl In the case of an MP3 CD, you can fast-for-
ward and fast-reverse tracks in the same
folder.
To select a desired track
Track up button — 4
Press the button repeatedly until the desired track number appears on the display.
Track down button — 5
Press the button repeatedly until the desired track number appears on the display.
To listen to an iPod
Press the mode change button (3) and select
iPod mode.
To select a desired track
Track up button — 4
Press the button repeatedly until the desired track number appears on the display.
Steering wheel remote control switch (audio system type 1) *
7-45OKTE15E3For pleasant driving7
Page 241 of 418
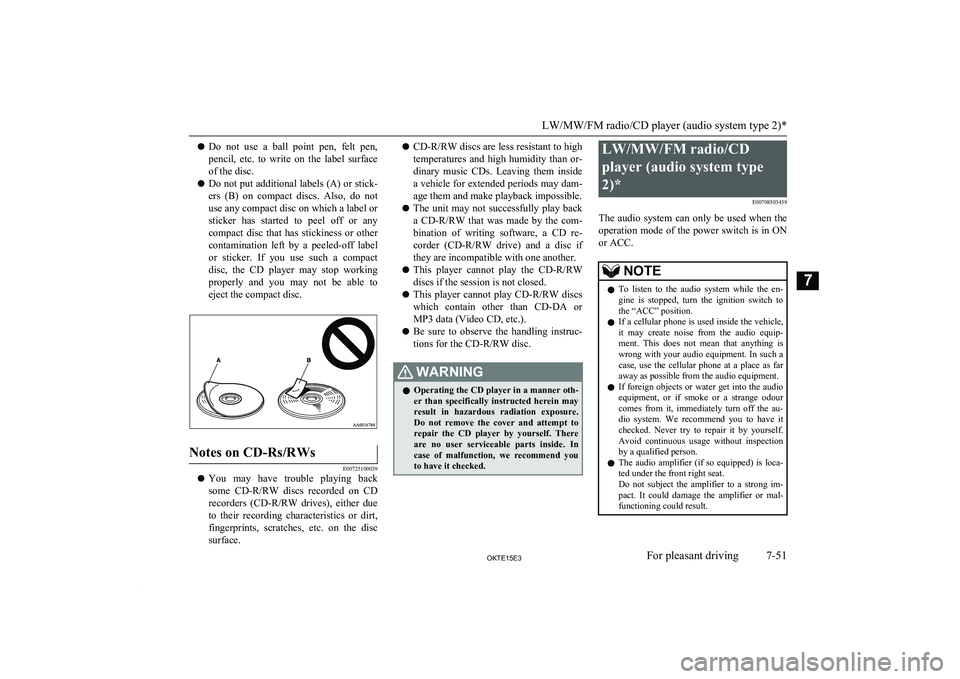
lDo not use a ball point pen, felt pen,
pencil, etc. to write on the label surface
of the disc.
l Do not put additional labels (A) or stick-
ers (B) on compact discs. Also, do not
use any compact disc on which a label or
sticker has started to peel off or any compact disc that has stickiness or othercontamination left by a peeled-off label or sticker. If you use such a compact
disc, the CD player may stop working properly and you may not be able to eject the compact disc.Notes on CD-Rs/RWs
E00725100039
l You may have trouble playing back
some CD-R/RW discs recorded on CD
recorders ( CD-R/RW drives), either due
to their recording characteristics or dirt, fingerprints, scratches, etc. on the disc
surface.
l CD-R/RW
discs are less resistant to high
temperatures and high humidity than or- dinary music CDs. Leaving them inside
a vehicle for extended periods may dam- age them and make playback impossible.
l The unit may not successfully play back
a CD-R/RW that was made by the com-
bination of writing software, a CD re-
corder ( CD-R/RW drive) and a disc if
they are incompatible with one another.
l This player cannot play the
CD-R/RW
discs if the session is not closed.
l This player cannot play
CD-R/RW discs
which contain other than CD-DA or
MP3 data (Video CD, etc.).
l Be sure to observe the handling instruc-
tions for the CD-R/RW disc.WARNINGl Operating the CD player in a manner oth-
er than specifically instructed herein mayresult in hazardous radiation exposure.
Do not remove the cover and attempt to repair the CD player by yourself. There
are no user serviceable parts inside. In case of malfunction, we recommend you
to have it checked.LW/MW/FM radio/CD
player (audio system type
2)* E00708503459
The audio system can only be used when the operation mode of the power switch is in ON
or ACC.NOTEl To listen to the audio system while the en-
gine is stopped, turn the ignition switch to
the “ACC” position.
l If a cellular phone is used inside the vehicle,
it may create noise from the audio equip-
ment. This does not mean that anything is wrong with your audio equipment. In such acase, use the cellular phone at a place as far
away as possible from the audio equipment.
l If foreign objects or water get into the audio
equipment, or if smoke or a strange odour
comes from it, immediately turn off the au-
dio system. We recommend you to have it checked. Never try to repair it by yourself.
Avoid continuous usage without inspection by a qualified person.
l The audio amplifier (if so equipped) is loca-
ted under the front right seat.
Do not subject the amplifier to a strong im-
pact. It could damage the amplifier or mal- functioning could result.
LW/MW/FM radio/CD player (audio system type 2)*
7-51OKTE15E3For pleasant driving7
Page 242 of 418
Important Points on Usage
E00735500023
iPod/iPhone Playback Func- tion*
l This product supports audio playback
from iPod/iPhone devices, however dif-fering versions mean that playback can-not be guaranteed.
l Please be aware that depending on the
iPod/iPhone model or version, operation
may differ.
How to Clean
E00735700025
l If the product becomes dirty, wipe with
a soft cloth.
l If very dirty, use a soft cloth dipped in
neutral detergent diluted in water, and then wrung out. Do not use benzene,
thinners, or other chemical wipes. This
may harm the surface.
Trademarks
E00735801108
l Product names and other proper names
are the trademarks or registered trade- marks of their respective owners.
l Furthermore, even if there is no specific
denotation of trademarks or registered
trademarks, these are to be observed in
their entirety.
“Made for iPod”, “Made for iPhone”
mean that an electronic accessory has
been designed to connect specifically to iPod or iPhone, respectively, and has
been certified by the developer to meet Apple performance standards.
iPhone, iPod, iPod classic, iPod nano,
and iPod touch are trademarks of Apple
Inc., registered in the U.S. and other countries.
Apple is not responsible for the opera- tion of this device or its compliance with
safety and regulatory standards.NOTEl iPod and iTunes licensing allows individual
users to privately reproduce and play back
non- copyrighted material as well as material
that may be legally copied and reproduced.
Infringement of copyright is prohibited.
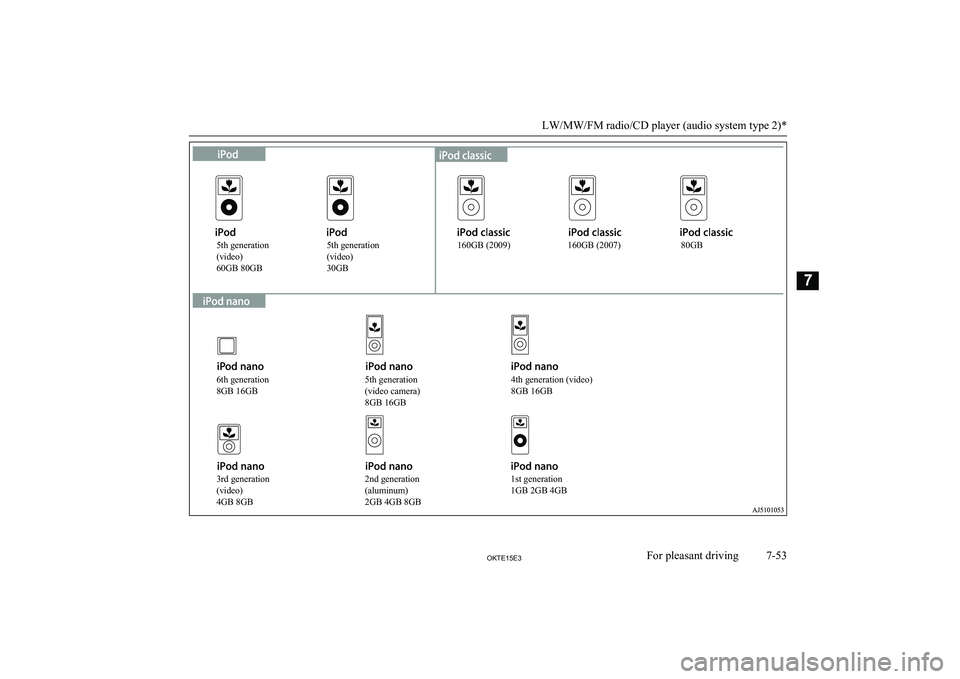
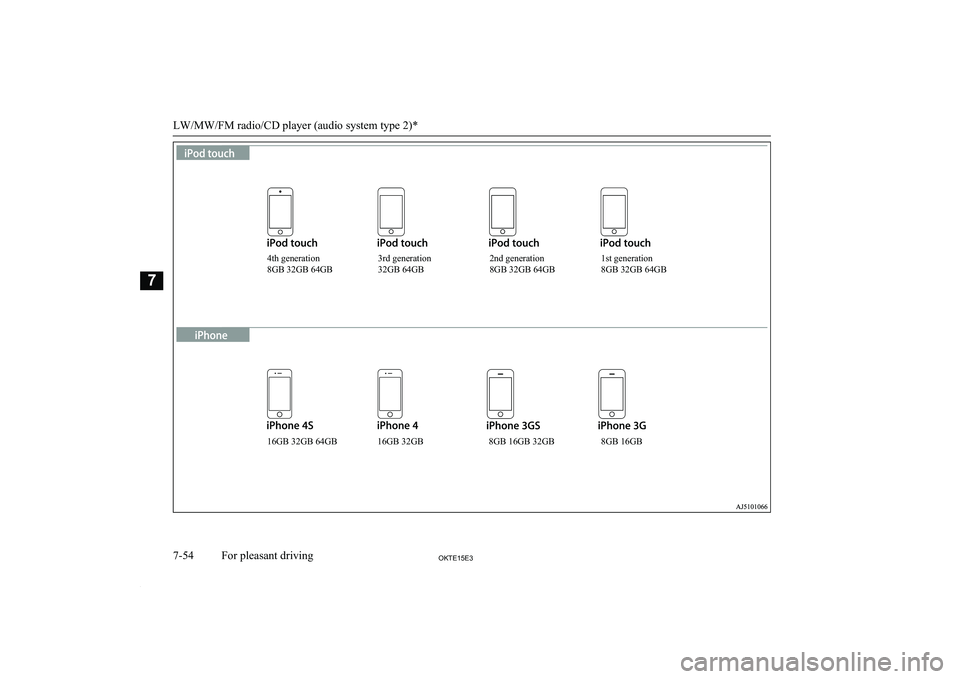
l Supported models for equipment by type
(vehicles with a Bluetooth 2.0 ®
interface)
will vary. For details, see the Johnson Con- trols, Inc. website.
LW/MW/FM radio/CD player (audio system type 2)*
7-52OKTE15E3For pleasant driving7
Page 243 of 418
LW/MW/FM radio/CD player (audio system type 2)*
7-53OKTE15E3For pleasant driving76th generation
8GB 16GB
3rd generation
(video)
4GB 8GB2nd generation
(aluminum)
2GB 4GB 8GB1st generation
1GB 2GB 4GB
5th generation
(video camera)
8GB 16GB
4th generation (video)
8GB 16GB
5th generation
(video)
30GB
5th generation
(video)
60GB 80GB 160GB (2009) 160GB (2007) 80GB
Page 244 of 418
LW/MW/FM radio/CD player (audio system type 2)*
7-54OKTE15E3For pleasant driving74th generation
8GB 32GB 64GB3rd generation
32GB 64GB 2nd generation
8GB 32GB 64GB 1st generation
8GB 32GB 64GB
16GB 32GB 64GB 16GB 32GB 8GB 16GB 32GB 8GB 16GB
Page 252 of 418
Explanation of Buttons
E00737501066
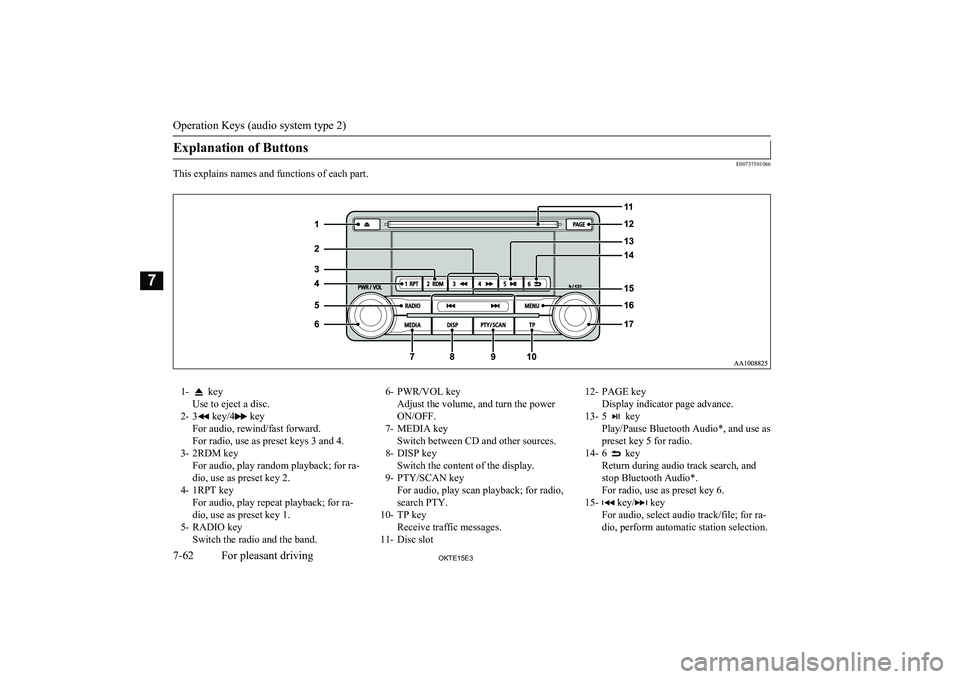
This explains names and functions of each part.
1- key
Use to eject a disc.
2- 3
key/4 key
For audio, rewind/fast forward.
For radio, use as preset keys 3 and 4.
3- 2RDM key For audio, play random playback; for ra-
dio, use as preset key 2.
4- 1RPT key For audio, play repeat playback; for ra-dio, use as preset key 1.
5- RADIO key Switch the radio and the band.
6- PWR/VOL key
Adjust the volume, and turn the power
ON/OFF.
7- MEDIA key Switch between CD and other sources.
8- DISP key Switch the content of the display.
9- PTY/SCAN key For audio, play scan playback; for radio,
search PTY.
10- TP key Receive traffic messages.
11- Disc slot12- PAGE key
Display indicator page advance.
13- 5
key
Play/Pause Bluetooth Audio*, and use as preset key 5 for radio.
14- 6
key
Return during audio track search, and stop Bluetooth Audio*.
For radio, use as preset key 6.
15-
key/ key
For audio, select audio track/file; for ra-
dio, perform automatic station selection.
Operation Keys (audio system type 2)
7-62OKTE15E3For pleasant driving7
Page 253 of 418
16- MENU keySwitch to Menu mode.17-/SEL key
Adjust audio quality and select items.
For radio, manually select stations.*:Requires a separately-purchased Bluetooth-capable audio device in equipment by type.
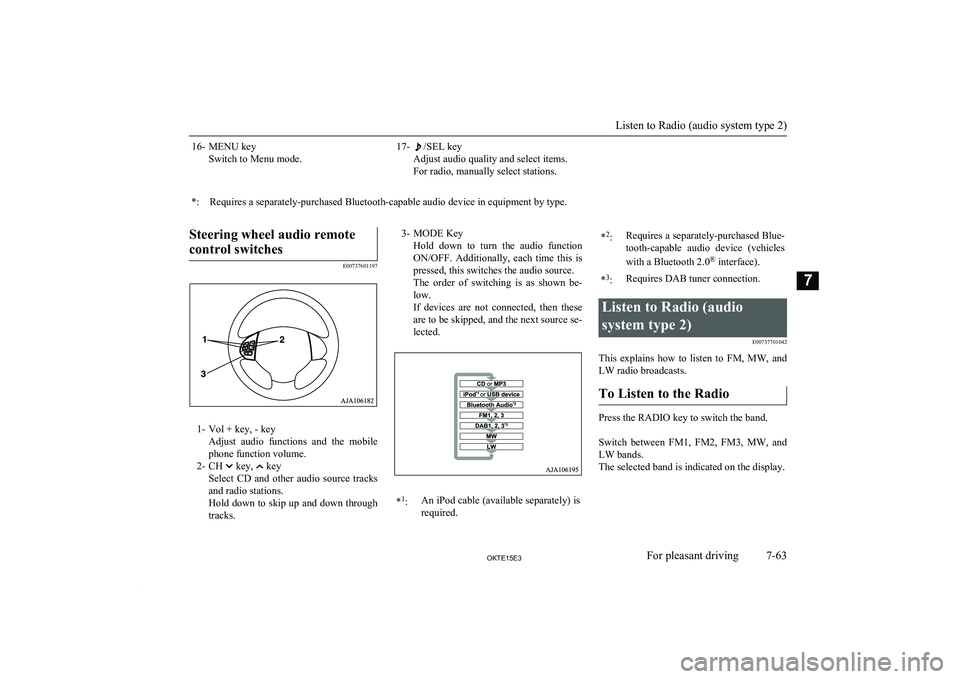
Steering wheel audio remote
control switches
E00737601197
1- Vol + key, - key Adjust audio functions and the mobile
phone function volume.
2- CH
key, key
Select CD and other audio source tracks
and radio stations.
Hold down to skip up and down through tracks.
3- MODE Key
Hold down to turn the audio functionON/OFF. Additionally, each time this is
pressed, this switches the audio source.
The order of switching is as shown be- low.
If devices are not connected, then these are to be skipped, and the next source se-lected.* 1
:An iPod cable (available separately) is
required.* 2
:Requires a separately-purchased Blue-
tooth-capable audio device (vehicles
with a Bluetooth 2.0 ®
interface).*3
:Requires DAB tuner connection.Listen to Radio (audio
system type 2) E00737701042
This explains how to listen to FM, MW, and
LW radio broadcasts.
To Listen to the Radio
Press the RADIO key to switch the band.
Switch between FM1, FM2, FM3, MW, and LW bands.
The selected band is indicated on the display.
Listen to Radio (audio system type 2)
7-63OKTE15E3For pleasant driving7
Page 254 of 418
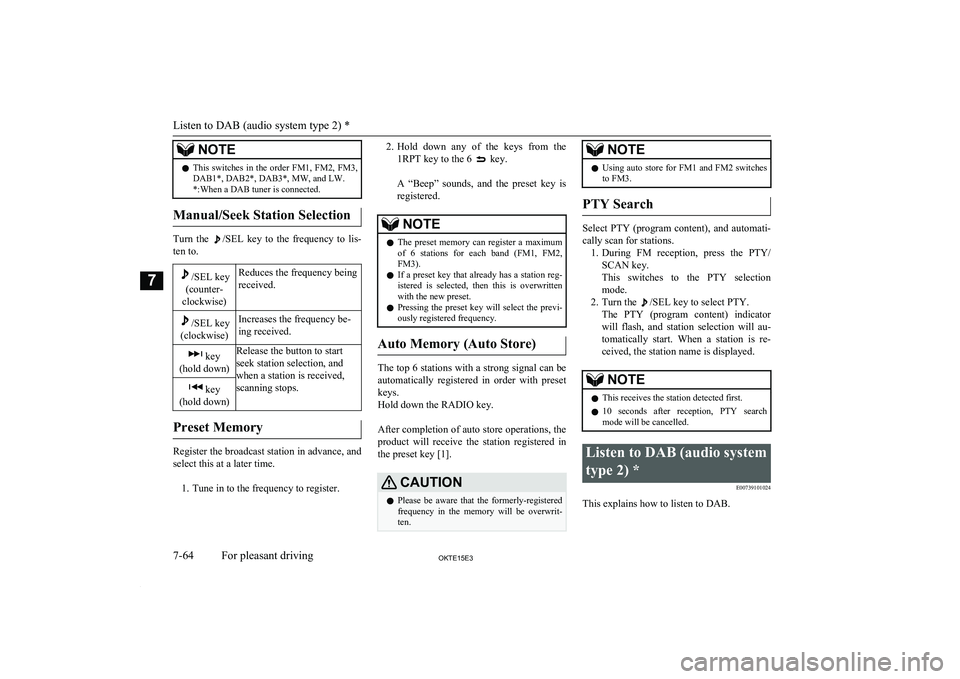
NOTElThis switches in the order FM1, FM2, FM3,
DAB1*, DAB2*, DAB3*, MW, and LW. *:When a DAB tuner is connected.
Manual/Seek Station Selection
Turn the /SEL key to the frequency to lis-
ten to.
/SEL key
(counter-
clockwise)Reduces the frequency being
received./SEL key
(clockwise)Increases the frequency be-
ing received. key
(hold down)Release the button to start
seek station selection, and
when a station is received,
scanning stops. key
(hold down)
Preset Memory
Register the broadcast station in advance, and select this at a later time.
1. Tune in to the frequency to register.
2. Hold down any of the keys from the
1RPT key to the 6
key.
A “Beep” sounds, and the preset key is registered.NOTEl The preset memory can register a maximum
of 6 stations for each band (FM1, FM2,
FM3).
l If a preset key that already has a station reg-
istered is selected, then this is overwritten with the new preset.
l Pressing the preset key will select the previ-
ously registered frequency.
Auto Memory (Auto Store)
The top 6 stations with a strong signal can be
automatically registered in order with preset keys.
Hold down the RADIO key.
After completion of auto store operations, the
product will receive the station registered in
the preset key [1].
CAUTIONl Please be aware that the formerly-registered
frequency in the memory will be overwrit- ten.NOTEl Using auto store for FM1 and FM2 switches
to FM3.
PTY Search
Select PTY (program content), and automati-
cally scan for stations. 1. During FM reception, press the PTY/
SCAN key.
This switches to the PTY selection mode.
2. Turn the
/SEL key to select PTY.
The PTY (program content) indicator
will flash, and station selection will au- tomatically start. When a station is re-
ceived, the station name is displayed.
NOTEl This receives the station detected first.
l 10 seconds after reception, PTY search
mode will be cancelled.Listen to DAB (audio system
type 2) * E00739101024
This explains how to listen to DAB.
Listen to DAB (audio system type 2) *
7-64OKTE15E3For pleasant driving7