ECU MITSUBISHI L200 2015 (in English) Owner's Guide
[x] Cancel search | Manufacturer: MITSUBISHI, Model Year: 2015, Model line: L200, Model: MITSUBISHI L200 2015Pages: 418, PDF Size: 25.8 MB
Page 329 of 418
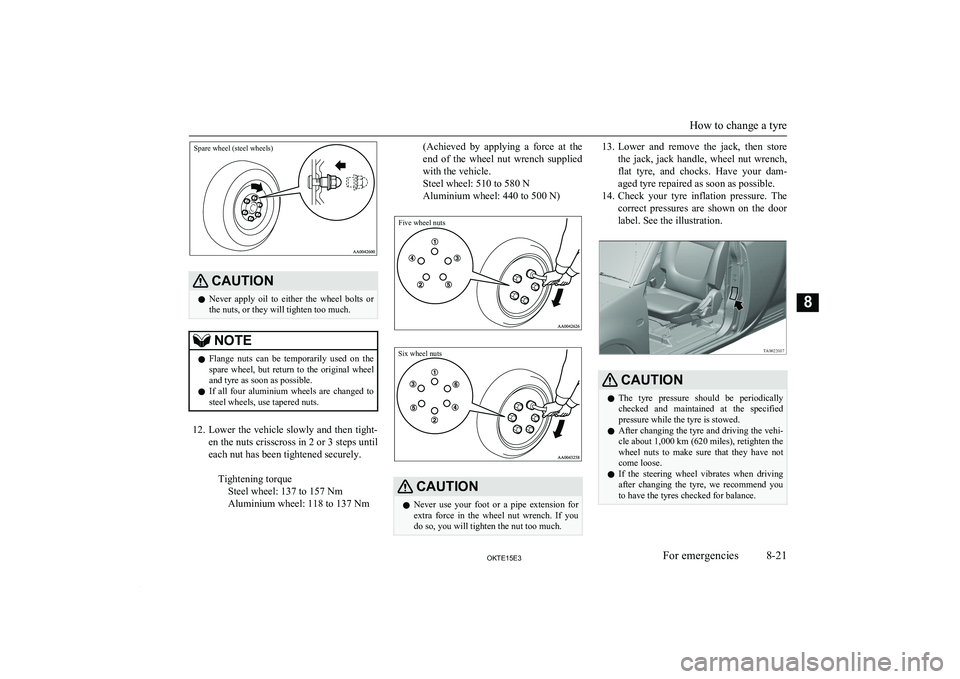
Spare wheel (steel wheels)
CAUTIONlNever apply oil to either the wheel bolts or
the nuts, or they will tighten too much.NOTEl Flange nuts can be temporarily used on the
spare wheel, but return to the original wheel and tyre as soon as possible.
l If all four aluminium wheels are changed to
steel wheels, use tapered nuts.
12. Lower the vehicle slowly and then tight-
en the nuts crisscross in 2 or 3 steps until
each nut has been tightened securely.
Tightening torqueSteel wheel: 137 to 157 Nm
Aluminium wheel: 118 to 137 Nm
(Achieved by applying a force at the
end of the wheel nut wrench supplied with the vehicle.
Steel wheel: 510 to 580 N
Aluminium wheel: 440 to 500 N)Five wheel nutsSix wheel nuts
CAUTIONl Never use your foot or a pipe extension for
extra force in the wheel nut wrench. If you
do so, you will tighten the nut too much.13. Lower and remove the jack, then store
the jack, jack handle, wheel nut wrench, flat tyre, and chocks. Have your dam-
aged tyre repaired as soon as possible.
14. Check your tyre inflation pressure. The
correct pressures are shown on the door label. See the illustration.CAUTIONl The tyre pressure should be periodically
checked and maintained at the specified pressure while the tyre is stowed.
l After changing the tyre and driving the vehi-
cle about 1,000 km (620 miles), retighten the
wheel nuts to make sure that they have not come loose.
l If the steering wheel vibrates when driving
after changing the tyre, we recommend you to have the tyres checked for balance.
How to change a tyre
8-21OKTE15E3For emergencies8
Page 331 of 418
CAUTIONlOn 2WD vehicles, if the transmission is mal-
functioning or damaged, transport the vehi- cle with the driving wheels on a carriage (Type C, D or E) as illustrated.
l If you tow a vehicle with automatic trans-
mission with the driving wheels on the
ground (Type B) as illustrated, make sure
that the towing speed and distance given be- low are never exceeded, causing damage to the transmission.
Towing speed: 50 km/h (30 mph)
Towing distance: 50 km (30 miles)
For the towing speed and the towing dis- tance, follow the local driving laws and reg-
ulations.
Towing with front wheels off
the ground (Type B)
Place the gearshift lever in the “N” (Neutral) position (manual transmission) or the selector
lever in the “N” (NEUTRAL) position (auto- matic transmission).
Release the parking brake.
CAUTIONl Never tow an automatic transmission vehicle
with the front wheels up (and the rear wheels
on the ground) (Type B) when the automatic transmission fluid level is low. This may
cause serious and expensive damage to the
transmission.
Towing with rear wheels off the
ground (Type C)
Place the gearshift lever in the “N” (Neutral)
position (manual transmission) or the selector
lever in the “N” (NEUTRAL) position (auto- matic transmission). Turn the ignition key to
the “ACC” position and secure the steering wheel in a straight ahead position with a rope
or tie-down strap. Never place the ignition switch in the “LOCK” position when towing.
Emergency towing
If towing service is not available in an emer- gency, your vehicle may be temporarily tow-ed by a cable or chain secured to the towinghook.
If your vehicle is to be towed by another ve-
hicle, pay careful attention to the following
points.
If your vehicle is to be towed by
another vehicle
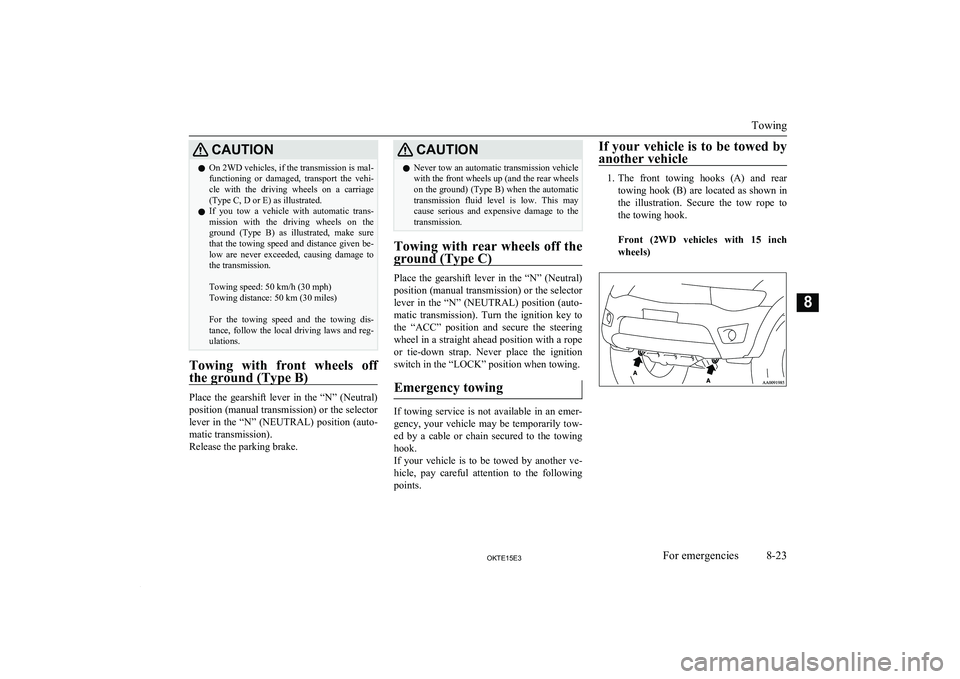
1. The front towing hooks (A) and rear
towing hook (B) are located as shown inthe illustration. Secure the tow rope to
the towing hook.
Front (2WD vehicles with 15 inch wheels)Towing
8-23OKTE15E3For emergencies8
Page 332 of 418
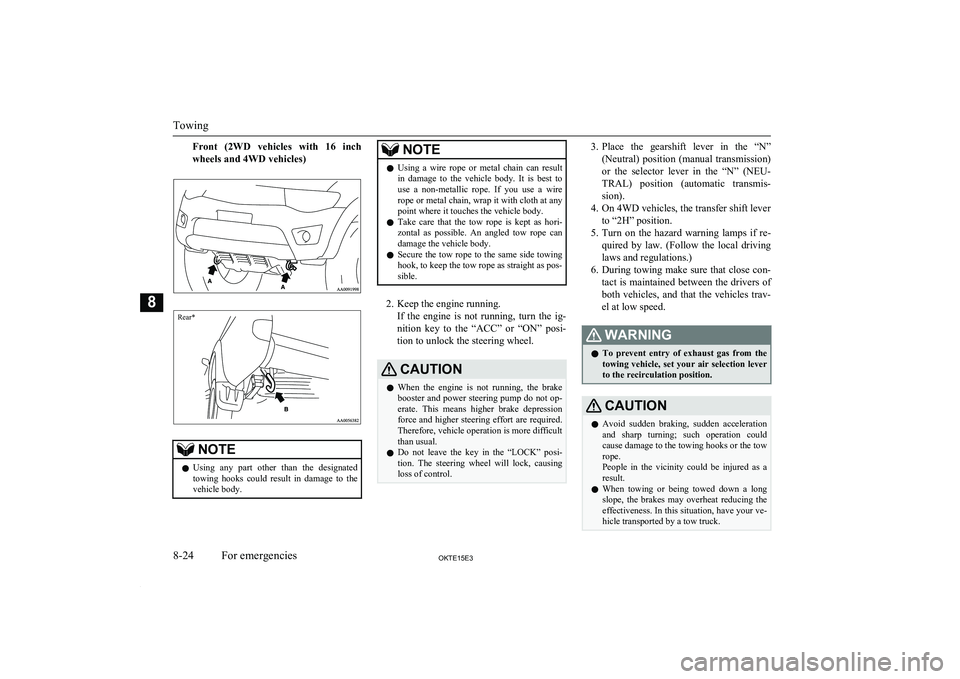
Front (2WD vehicles with 16 inchwheels and 4WD vehicles)Rear*
NOTEl Using any part other than the designated
towing hooks could result in damage to the
vehicle body.NOTEl Using a wire rope or metal chain can result
in damage to the vehicle body. It is best to use a non-metallic rope. If you use a wire
rope or metal chain, wrap it with cloth at any
point where it touches the vehicle body.
l Take care that the tow rope is kept as hori-
zontal as possible. An angled tow rope can
damage the vehicle body.
l Secure the tow rope to the same side towing
hook, to keep the tow rope as straight as pos-
sible.
2. Keep the engine running.
If the engine is not running, turn the ig-
nition key to the “ACC” or “ON” posi- tion to unlock the steering wheel.
CAUTIONl When the engine is not running, the brake
booster and power steering pump do not op- erate. This means higher brake depression
force and higher steering effort are required.
Therefore, vehicle operation is more difficult than usual.
l Do not leave the key in the “LOCK” posi-
tion. The steering wheel will lock, causing loss of control.3. Place the gearshift lever in the “N”
(Neutral) position (manual transmission) or the selector lever in the “N” (NEU-
TRAL) position (automatic transmis-
sion).
4. On 4WD vehicles, the transfer shift lever to “2H” position.
5. Turn on the hazard warning lamps if re-
quired by law. (Follow the local driving laws and regulations.)
6. During towing make sure that close con-
tact is maintained between the drivers of both vehicles, and that the vehicles trav-
el at low speed.WARNINGl To prevent entry of exhaust gas from the
towing vehicle, set your air selection lever to the recirculation position.CAUTIONl Avoid sudden braking, sudden acceleration
and sharp turning; such operation could
cause damage to the towing hooks or the tow
rope.
People in the vicinity could be injured as a
result.
l When towing or being towed down a long
slope, the brakes may overheat reducing the effectiveness. In this situation, have your ve-hicle transported by a tow truck.
Towing
8-24OKTE15E3For emergencies8
Page 333 of 418

CAUTIONlWhen the vehicle with automatic transmis-
sion is to be towed by another vehicle with
all the wheels on the ground, make sure that the towing speed and distance given below
are never exceeded, causing damage to the transmission.
Towing speed: 50 km/h (30 mph)
Towing distance: 50 km (30 miles)
For the towing speed and the towing dis-
tance, follow the local driving laws and reg- ulations.
If your vehicle tows another ve-
hicle (vehicles with rear towing hook only)
The rear towing hook is located as shown inthe illustration. Secure the tow rope to the
rear towing hook.
NOTEl Using any part other than the designated
towing hook could result in damage to thevehicle body.CAUTIONl On vehicles with super select 4WD, when
you are going to tow another vehicle, movethe transfer shift lever to “4H” position.
Selecting “2H” drive may increase the dif-
ferential oil temperature, resulting in possi-
ble damage to the driving system.
Further, the drive train will be subjected to excessive loading possibly leading to oilleakage, component seizure, or other serious faults.NOTEl Your vehicle should only be used to tow an-
other vehicle if the weight of the other vehi-
cle is less than the weight of your vehicle.NOTEOperation under adverse
driving conditions E00801702762
If your vehicle becomes stuck
in sand, mud or snow
If the vehicle becomes stuck in snow, sand,
or mud, it can often be moved with a rocking
motion. Move the selector lever alternately
between the Sport Mode and “R” (RE- VERSE) position (with manual transmission,
between 1 st
and Reverse), while applying
slight pressure to the accelerator pedal.
Operation under adverse driving conditions
8-25OKTE15E3For emergencies8
Page 346 of 418

Support the bonnet by inserting the supportbar in its slot.CAUTIONl Note that the support bar may disengage the
bonnet if the open bonnet is lifted by astrong wind.
l Always insert the support bar into the hole
provided specifically for this purpose. Sup- porting the bonnet at any other location
could result in the support bar slipping out
and lead to an accident.
To close
Unlatch the support bar and clip it in its hold-
er.
Slowly lower the bonnet to a position about
20 cm above the closed position, then let it drop.NOTEl If this does not close the bonnet, release it
from a slightly higher position.
l Do not press down the bonnet hard with a
hand as it may damage the bonnet.CAUTIONl Be careful that hands or fingers are not trap-
ped when closing the bonnet.
l Before driving, make sure that the bonnet is
securely locked. An incompletely locked bonnet can suddenly open while driving.
This can be extremely dangerous.Engine oil
E01000402820
To check and refill engine oil
A- Minimum level B- Maximum level
C- Oil replacement indication mark
Type 1Type 2
The engine oil used has a significant effect on the engine’s performance, service life and
startability. Be sure to use oil of the recom- mended quality and appropriate viscosity.
All engines consume a certain amount of oil during normal operation. Therefore, it is im-portant to check the oil level at regular inter-
vals or before starting a long trip. 1. Park the car on a horizontal surface.
2. Switch off the engine.
3. Wait a few minutes.
Engine oil
10-04OKTE15E3Maintenance10
Page 347 of 418

4.Remove the dipstick and wipe it with a
clean cloth.
5. Reinsert the dipstick as far as it goes.
6. Remove the dipstick and read the oil lev- el, which should always be within the
range indicated.
7. If the oil level is below the specified
limit, remove the cap located on the cyl-inder head cover and add enough oil to
raise the level to within the specified
range. Do not overfill to avoid engine
damage. Be sure to use the specified en-
gine oil and do not mix various types of
oil.
8. After adding oil, close the cap securely.
9. Confirm the oil level by repeating step 4
to 6.
Use only the recommended oils with an ACEA or API classification as specified inthis manual.NOTEl Check or refill the oil according to the fol-
lowing manner.
• When the oil level is checked in step 6
above, check it on a low side of the dip-
stick because it is different in appearance
of oil level in the two sides of the dip-
stick.NOTE• On vehicles without diesel particulate fil-
ter (DPF), the oil level should be within the range (A) to (B) on the dipstick.
• On vehicles with DPF, the oil level should
be within the range (A) to (C) (oil re- placement indication mark) on the dip-
stick.
If the oil level is beyond the oil replace-
ment indication mark (C), replace the oil as soon as possible.
Then, the oil should be refilled to the
maximum level (B).
• On vehicles with DPF, the engine oil will
increase due to a little fuel getting mixed in the engine oil when the DPF regener-
ates to burn away the PM (particulate
matter). However, it does not indicate a malfunction.
l The engine oil will deteriorate rapidly if the
vehicle is subjected to severe conditions, re-
quiring earlier oil replacement. Please refer to the maintenance schedule.
l For handling of used engine oils, refer to
page 2-05.Selection of engine oil
Vehicles without diesel particu-
late filter (DPF)
l Select engine oil of the proper SAE vis-
cosity number according to the atmos-pheric temperature.
l Use engine oil conforming to the follow-
ing classification: • ACEA classification: “For service A1/ B1, A3/B3, A3/B4,
A5/B5”
• API classification: “For service CF-4”
Engine oil
10-05OKTE15E3Maintenance10
Page 351 of 418

The fluid level falls slightly with wear of thebrake pads, but this does not indicate any ab-
normality.
If the brake fluid level falls markedly in a
short length of time, it indicates leaks from the brake system.
If this occurs, we recommend you to have the
vehicle checked.
Fluid type
Use brake fluid conforming to DOT3 or DOT4. The brake fluid is hygroscopic. Too
much moisture in the brake fluid will ad- versely affect the brake system, reducing the
brake performance.
In addition, the brake fluid reservoir is equip- ped with a special cap to prevent the entrance
of air, and this cap should not be removed.
CAUTIONl Take care in handling brake fluid as it is
harmful to the eyes, may irritate your skin
and also damage painted surfaces.
l Use only the specified brake fluid.
Do not mix or add different brands of brake fluid to prevent chemical reactions.
Do not let any petroleum-based fluid touch, mix with, or get into the brake fluid.
This will damage the seals.CAUTIONl Keep the reservoir tank cap closed to pre-
vent the brake fluid from deteriorating ex- cept maintenance.
l Clean the filler cap before removing and
close the cap securely after maintenance.Clutch fluid*
E01001001435
To check the fluid level
The clutch fluid in the master cylinder should
be checked when performing other under- hood service. In addition, the system shouldbe checked for leakage at the same time.
Check to make certain that the clutch fluid level is always between the “MAX” and
“MIN” level markings on the fluid reservoir.
A rapid fluid loss indicates a leak in the
clutch system which should be inspected by a
MITSUBISHI MOTORS Authorized Service
Point or another specialist and repaired im- mediately.
Fluid type
Brake fluid conforming to DOT 3 or DOT 4 should be used.
The reservoir cap must be fully tightened to avoid contamination from foreign matter or
moisture.
DO NOT ALLOW PETROLEUM-BASED FLUID TO CONTACT, MIX WITH, OR
OTHERWISE CONTAMINATE THE BRAKE FLUID. SEAL DAMAGE WILLRESULT.
Clutch fluid*
10-09OKTE15E3Maintenance10 LHD RHD
Page 354 of 418
CAUTIONlDo not bring the nearby parts, the plastic
parts and so on into contact with sulphuric acid (battery electrolyte) which may crack,
stain or discolour them.
If they are in contact, wipe off with soft cloth, chamois or the like and an aqueous
solution of neutral detergent then immedi-
ately rinse the affected parts with plenty of water.NOTEl Keep the terminals clean. After the battery is
connected, apply terminal protection grease.
To clean the terminals, use lukewarm water.
l Check to see if the battery is securely instal-
led and cannot be moved during travel. Also check each terminal for tightness.
l When the vehicle is to be left unused for a
long period of time, remove the battery and
store it in a place where the battery fluid will not freeze. The battery should be stored only in a fully charged condition.Tyres
E01001300239WARNINGlDriving with tyres that are worn, dam-
aged or improperly inflated can lead to a
loss of control or blow out of the tyres which can result in a collision with serious
or fatal injury.Tyre inflation pressures
E01001402423Tyre sizeUP TO 3 PASSENGERSMAX. LOAD OR TRAILER TOWINGFrontRearFrontRear195R15C 106/104R 8PR,
215/70R15C 109/107R *2.2 bar
(220 kPa) {32 psi}2.2 bar
(220 kPa) {32 psi}2.2 bar
(220 kPa) {32 psi}4.5 bar
(450 kPa) {65 psi}
205R16C 110/108R 8PR
2.4 bar
(240 kPa) {35 psi}2.4 bar
(240 kPa) {35 psi}2.4 bar
(240 kPa) {35 psi}4.5 bar
(450 kPa) {65 psi}
205/80R16 104S RF
2.2 bar
(220 kPa) {32 psi}2.2 bar
(220 kPa) {32 psi}2.2 bar
(220 kPa) {32 psi}2.9 bar
(290 kPa) {42 psi}* : On vehicles with 195 size tyres, this size of snow tyres can also be used instead.
Tyres
10-12OKTE15E3Maintenance10
Page 358 of 418
The speed limit for tyre chain is 50 km/h(30 mph) and remove the tyre chains as soon as possible on snow free roads.WARNINGl DO NOT use a jack when fitting the
chains, as in thsee conditions, the tyres
may slip on the icy road causing the vehi- cle to slip off the jack.CAUTIONl Practice fitting the chains before you need
them.
Don’t expect help from other people in the
cold.
l Choose a clear straight stretch of road where
you can pull over and still be seen while you are fitting the chains.
l Do not fit chains before you need them. This
will wear out your tyres and the road sur-
face.
l After driving around 100-300 metres, stop
and retighten the chains.
l Drive carefully and do not exceed 50 km/h
(30 mph). Remember, fitting chains is notgoing to stop accidents from happening.
l When tyre chains are installed, take care that
they do not damage the disc wheel or body.
l An aluminium wheel can be damaged by a
tyre chain while driving. When fitting a tyre
chain on an aluminium wheel, take care that any part of the chain and fitting cannot be
brought into contact with the wheel.CAUTIONl When installing or removing the tyre chains,
take care that hands and other parts of your
body are not injured by the sharp edges of
the vehicle body.
l Install the chains only on the rear tyres and
tighten them as tightly as possible with the
ends securely fastened.NOTEl The laws and regulations concerning the use
of tyre chains vary. Find out and follow the laws and regulations of the area you’re driv-
ing in.
In most countries, it is prohibited by law to
use tyre chains on roads without snow.Clutch pedal free play*
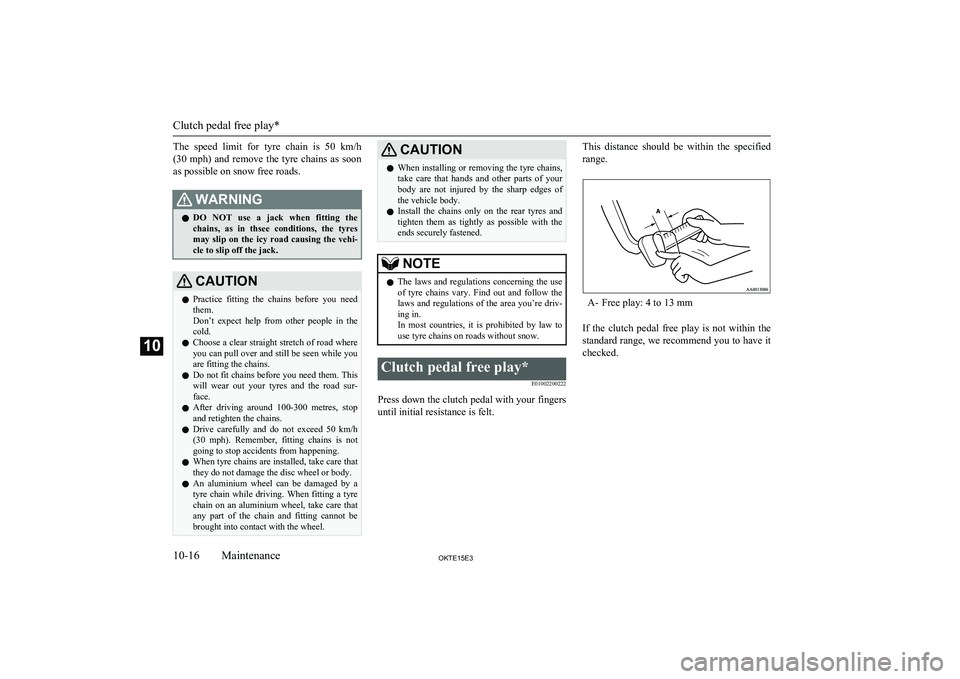
E01002200222
Press down the clutch pedal with your fingers
until initial resistance is felt.
This distance should be within the specified
range.
A- Free play: 4 to 13 mm
If the clutch pedal free play is not within the
standard range, we recommend you to have it checked.
Clutch pedal free play*
10-16OKTE15E3Maintenance10
Page 361 of 418

5.Push the wiper blade until the hook (B)
engages securely with the stopper (A).
Passenger’s side
1. Lift the wiper arm off the windscreen.
2. Pull the wiper blade until its stopper (A)
disengages from the hook (B). Then, pull the wiper blade further to remove it.
NOTEl Do not allow the wiper arm to fall onto the
windscreen; it could damage the glass.
3. Attach the retainers (C) to a new wiper
blade.
Refer to the illustration to ensure that the
retainers are correctly aligned as you at- tach them.
4. Insert the wiper blade into the arm, start-
ing with the opposite end of the blade from the stopper. Make sure the hook(B) is fitted correctly in the grooves inthe blade.
NOTEl If retainers are not supplied with the new
wiper blade, use the retainers from the old
blade.
5. Push the wiper blade until the hook (B)
engages securely with the stopper (A).
General maintenance
E01002700113
Fuel, engine coolant, oil and ex-
haust gas leakage
Look under the body of your vehicle to check
for fuel, engine coolant, oil and exhaust gas
leaks.
General maintenance
10-19OKTE15E3Maintenance10