tow MITSUBISHI L200 2015 Owner's Manual (in English)
[x] Cancel search | Manufacturer: MITSUBISHI, Model Year: 2015, Model line: L200, Model: MITSUBISHI L200 2015Pages: 418, PDF Size: 25.8 MB
Page 36 of 418
8.Place the remote control transmitter in
the remote control switch case, then se- curely close the remote control switch
case.
9. Attach the screw (A) removed in step 2.
10. Check the keyless entry system to see
that it works.NOTEl You may purchase a replacement battery at
an electric appliance store.
l A
MITSUBISHI MOTORS Authorized
Service Point can replace the battery for you
if you prefer.CAUTIONl When the remote control switch case is
opened, be careful to keep water, dust, etc. out. Also, do not touch the internal compo-
nents.Doors
E00300401584CAUTIONlMake sure the doors are closed: driving with
doors not completely closed is dangerous.
l Never leave children in the vehicle unatten-
ded.CAUTIONl Be careful not to lock the doors while the
key is inside the vehicle.NOTEl To prevent the key from being locked inside
the vehicle, neither the lock knob on the
driver’s door nor the key can be used to lock the driver’s door when it is open.
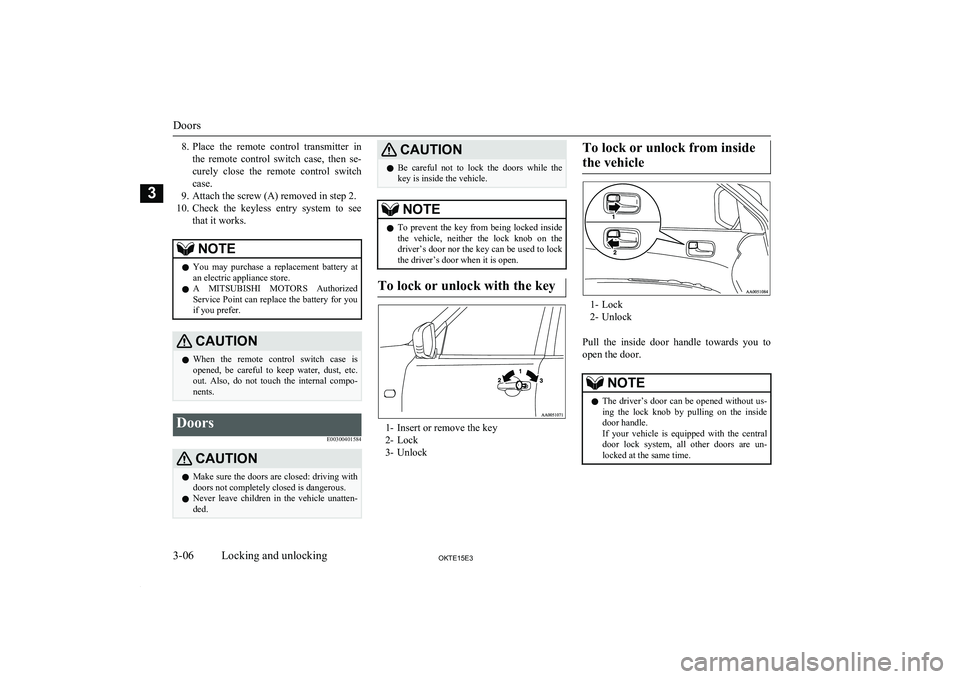
To lock or unlock with the key
1- Insert or remove the key
2- Lock
3- Unlock
To lock or unlock from inside
the vehicle
1- Lock
2- Unlock
Pull the inside door handle towards you to open the door.
NOTEl The driver’s door can be opened without us-
ing the lock knob by pulling on the inside
door handle.
If your vehicle is equipped with the central door lock system, all other doors are un-
locked at the same time.
Doors
3-06OKTE15E3Locking and unlocking3
Page 37 of 418
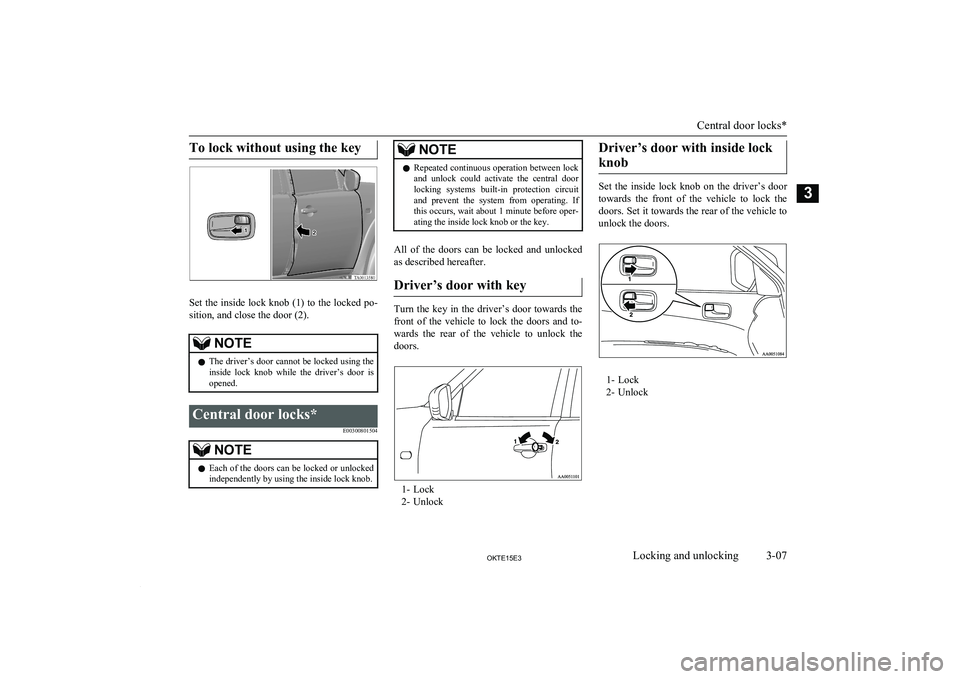
To lock without using the key
Set the inside lock knob (1) to the locked po-
sition, and close the door (2).
NOTEl The driver’s door cannot be locked using the
inside lock knob while the driver’s door is
opened.Central door locks*
E00300801504NOTElEach of the doors can be locked or unlocked
independently by using the inside lock knob.NOTEl Repeated continuous operation between lock
and unlock could activate the central door
locking systems built-in protection circuit
and prevent the system from operating. If
this occurs, wait about 1 minute before oper- ating the inside lock knob or the key.
All of the doors can be locked and unlocked
as described hereafter.
Driver’s door with key
Turn the key in the driver’s door towards the front of the vehicle to lock the doors and to-
wards the rear of the vehicle to unlock the doors.
1- Lock
2- Unlock
Driver’s door with inside lock
knob
Set the inside lock knob on the driver’s door towards the front of the vehicle to lock thedoors. Set it towards the rear of the vehicle to
unlock the doors.
1- Lock
2- Unlock
Central door locks*
3-07OKTE15E3Locking and unlocking3
Page 40 of 418
Rear retractable power window
switch (Double cab)*
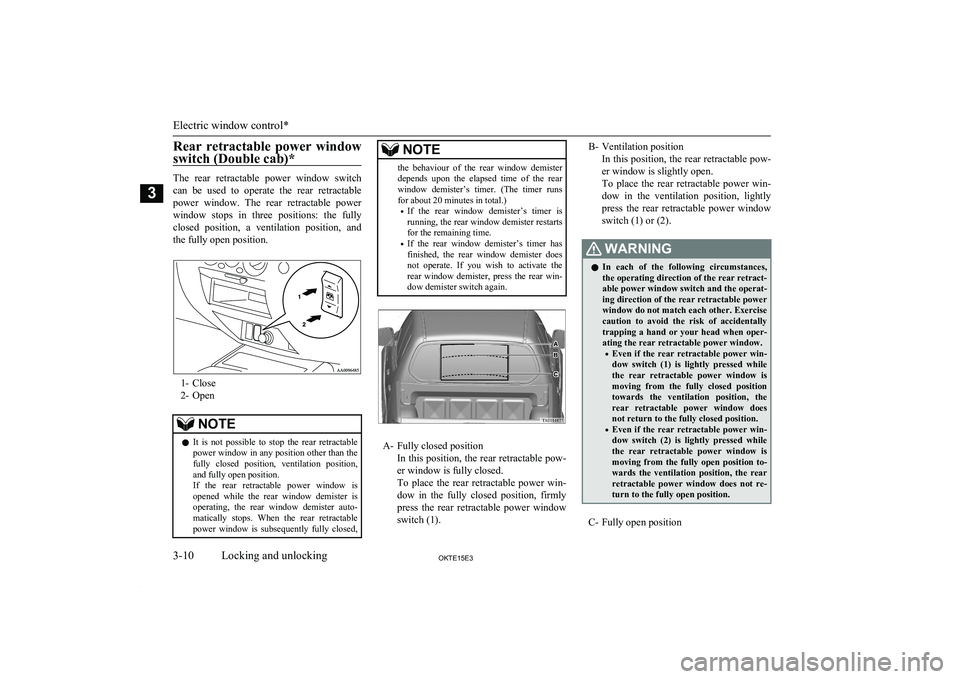
The rear retractable power window switch
can be used to operate the rear retractable
power window. The rear retractable power window stops in three positions: the fullyclosed position, a ventilation position, and the fully open position.
1- Close
2- Open
NOTEl It is not possible to stop the rear retractable
power window in any position other than thefully closed position, ventilation position,
and fully open position.
If the rear retractable power window is
opened while the rear window demister is operating, the rear window demister auto-matically stops. When the rear retractable
power window is subsequently fully closed,NOTEthe behaviour of the rear window demister
depends upon the elapsed time of the rear window demister’s timer. (The timer runs
for about 20 minutes in total.)
• If the rear window demister’s timer is
running, the rear window demister restarts for the remaining time.
• If the rear window demister’s timer has
finished, the rear window demister does not operate. If you wish to activate the
rear window demister, press the rear win- dow demister switch again.
A- Fully closed position
In this position, the rear retractable pow-er window is fully closed.
To place the rear retractable power win-
dow in the fully closed position, firmly
press the rear retractable power window switch (1).
B- Ventilation position
In this position, the rear retractable pow-er window is slightly open.
To place the rear retractable power win-
dow in the ventilation position, lightly press the rear retractable power window
switch (1) or (2).WARNINGl In each of the following circumstances,
the operating direction of the rear retract-
able power window switch and the operat-
ing direction of the rear retractable power
window do not match each other. Exercise caution to avoid the risk of accidentally
trapping a hand or your head when oper- ating the rear retractable power window.
• Even if the rear retractable power win-
dow switch (1) is lightly pressed while
the rear retractable power window is
moving from the fully closed position towards the ventilation position, the
rear retractable power window does
not return to the fully closed position.
• Even if the rear retractable power win-
dow switch (2) is lightly pressed while
the rear retractable power window is moving from the fully open position to-
wards the ventilation position, the rear
retractable power window does not re- turn to the fully open position.
C- Fully open position
Electric window control*
3-10OKTE15E3Locking and unlocking3
Page 41 of 418
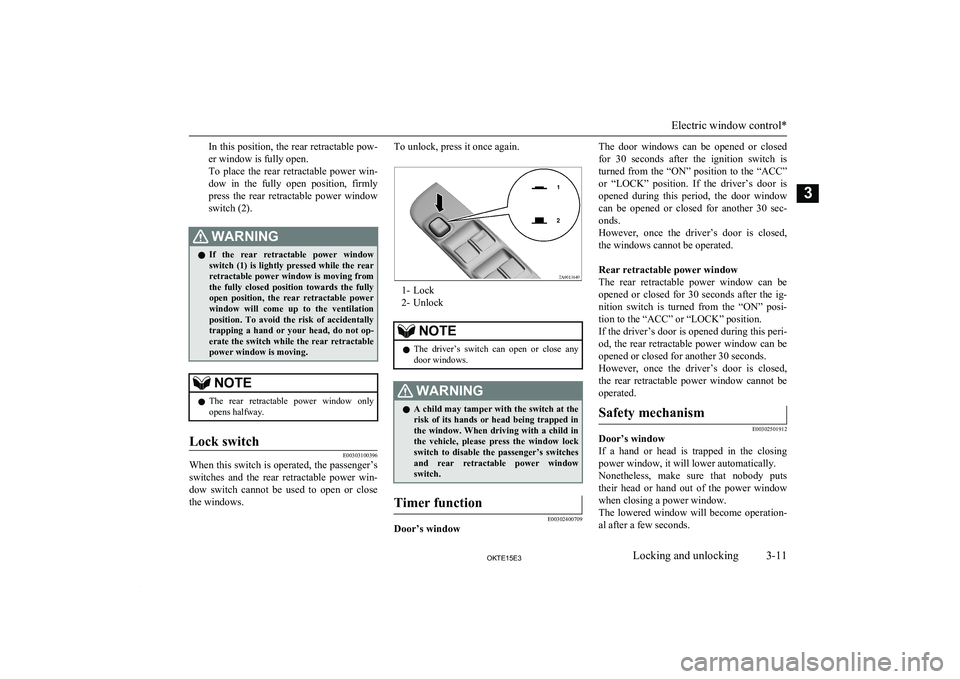
In this position, the rear retractable pow-er window is fully open.
To place the rear retractable power win-
dow in the fully open position, firmly
press the rear retractable power window switch (2).WARNINGl If the rear retractable power window
switch (1) is lightly pressed while the rear
retractable power window is moving from the fully closed position towards the fullyopen position, the rear retractable power
window will come up to the ventilation position. To avoid the risk of accidentally
trapping a hand or your head, do not op-
erate the switch while the rear retractable power window is moving.NOTEl The rear retractable power window only
opens halfway.Lock switch
E00303100396
When this switch is operated, the passenger’s
switches and the rear retractable power win-
dow switch cannot be used to open or close
the windows.
To unlock, press it once again.
1- Lock
2- Unlock
NOTEl The driver’s switch can open or close any
door windows.WARNINGl A child may tamper with the switch at the
risk of its hands or head being trapped in
the window. When driving with a child in the vehicle, please press the window lockswitch to disable the passenger’s switches
and rear retractable power window switch.Timer function
E00302400709
Door’s window
The door windows can be opened or closed
for 30 seconds after the ignition switch is turned from the “ON” position to the “ACC” or “LOCK” position. If the driver’s door is
opened during this period, the door window
can be opened or closed for another 30 sec- onds.
However, once the driver’s door is closed,
the windows cannot be operated.
Rear retractable power window
The rear retractable power window can be
opened or closed for 30 seconds after the ig-
nition switch is turned from the “ON” posi-tion to the “ACC” or “LOCK” position.If the driver’s door is opened during this peri- od, the rear retractable power window can be
opened or closed for another 30 seconds.
However, once the driver’s door is closed,
the rear retractable power window cannot be
operated.Safety mechanism
E00302501912
Door’s window
If a hand or head is trapped in the closing power window, it will lower automatically.
Nonetheless, make sure that nobody puts
their head or hand out of the power window
when closing a power window.
The lowered window will become operation-
al after a few seconds.
Electric window control*
3-11OKTE15E3Locking and unlocking3
Page 43 of 418
NOTElIf the safety mechanism is activated three or
more times in a row, the safety mechanism
will be cancelled and the rear retractable power window will not close correctly.
In such a case, the following procedure
should be implemented to rectify this situa-
tion. Repeatedly press the rear retractable
power window switch (1) until that rear re- tractable power window has been fully closed.
Following this, release the switch, press the
switch once again and hold it in this condi- tion for at least 1 second, then release it.
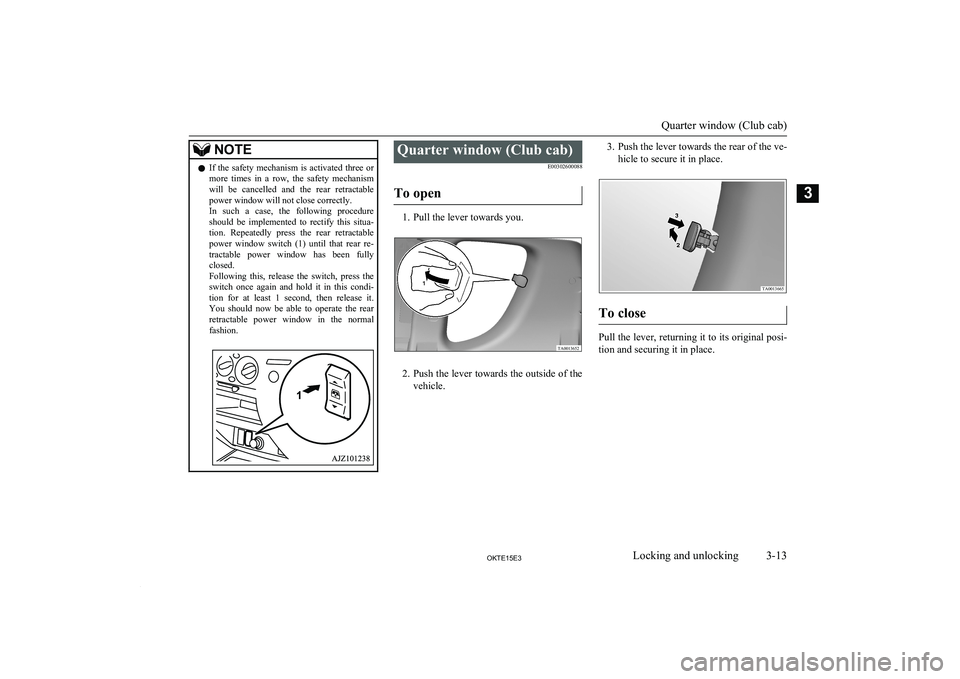
You should now be able to operate the rear retractable power window in the normalfashion.Quarter window (Club cab)
E00302600088
To open
1. Pull the lever towards you.
2. Push the lever towards the outside of the
vehicle.
3. Push the lever towards the rear of the ve-
hicle to secure it in place.
To close
Pull the lever, returning it to its original posi- tion and securing it in place.
Quarter window (Club cab)
3-13OKTE15E3Locking and unlocking3 TA0013652 TA0013665
Page 57 of 418
WARNINGlNever wear the lap portion of the belt
across your abdomen. During accidents it
can press sharply against the abdomen and increase the risk of injury.
l The seat belts must not be twisted when
worn.
3. Pull the belt slightly to adjust slackness
as desired.
To unfasten
Hold the latch plate and push the button on
the buckle.
NOTEl As the belt retracts automatically, keep hold-
ing the latch plate while retracting so that the
belt stows slowly. Failure to do this could damage the vehicle.Seat belt reminder/warning
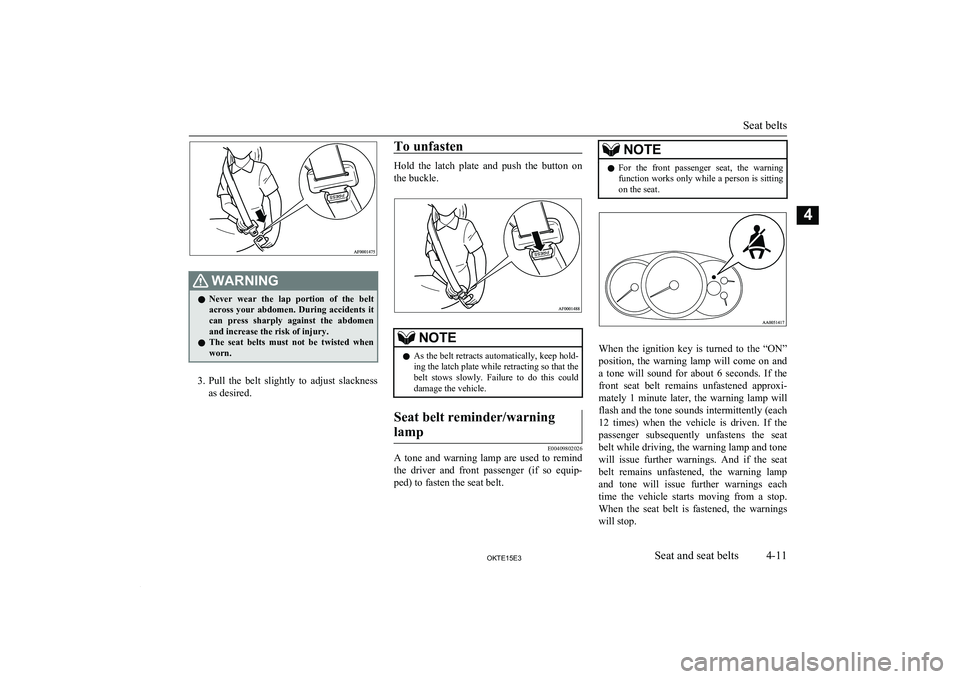
lamp
E00409802026
A tone and warning lamp are used to remind the driver and front passenger (if so equip-ped) to fasten the seat belt.
NOTEl For the front passenger seat, the warning
function works only while a person is sitting on the seat.
When the ignition key is turned to the “ON”
position, the warning lamp will come on and
a tone will sound for about 6 seconds. If the
front seat belt remains unfastened approxi-
mately 1 minute later, the warning lamp will flash and the tone sounds intermittently (each 12 times) when the vehicle is driven. If the
passenger subsequently unfastens the seat
belt while driving, the warning lamp and tone will issue further warnings. And if the seat
belt remains unfastened, the warning lamp and tone will issue further warnings each
time the vehicle starts moving from a stop. When the seat belt is fastened, the warnings
will stop.
Seat belts
4-11OKTE15E3Seat and seat belts4
Page 71 of 418
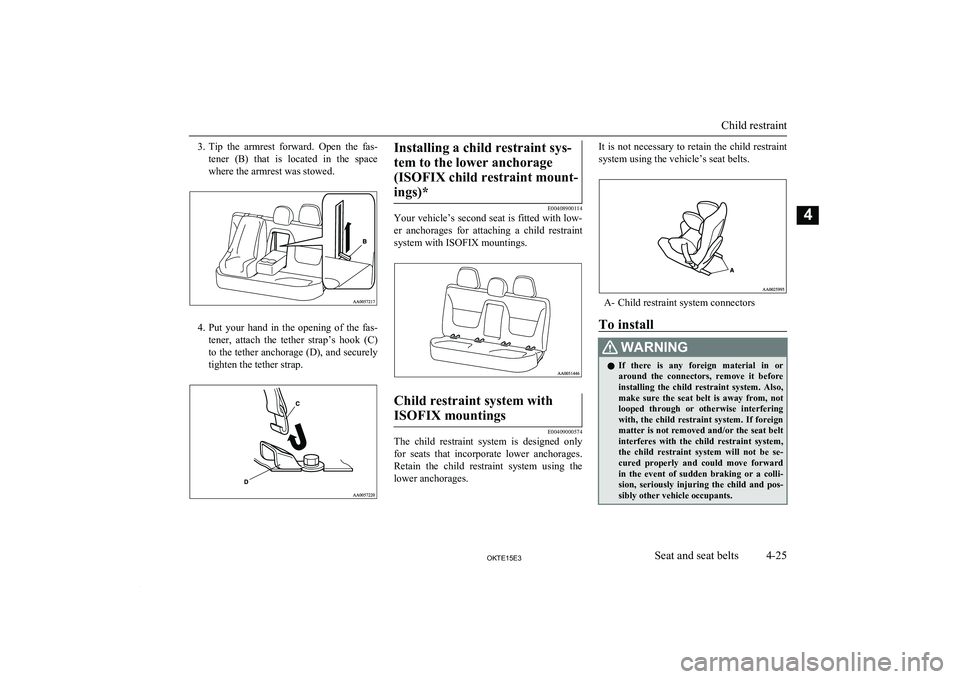
3.Tip the armrest forward. Open the fas-
tener (B) that is located in the space where the armrest was stowed.
4. Put your hand in the opening of the fas-
tener, attach the tether strap’s hook (C)
to the tether anchorage (D), and securely tighten the tether strap.
Installing a child restraint sys-
tem to the lower anchorage (ISOFIX child restraint mount-ings)*
E00408900114
Your vehicle’s second seat is fitted with low-
er anchorages for attaching a child restraint
system with ISOFIX mountings.
Child restraint system with
ISOFIX mountings
E00409000574
The child restraint system is designed only
for seats that incorporate lower anchorages. Retain the child restraint system using the
lower anchorages.
It is not necessary to retain the child restraint
system using the vehicle’s seat belts.
A- Child restraint system connectors
To install
WARNINGl If there is any foreign material in or
around the connectors, remove it before
installing the child restraint system. Also, make sure the seat belt is away from, not
looped through or otherwise interfering
with, the child restraint system. If foreign matter is not removed and/or the seat belt interferes with the child restraint system,
the child restraint system will not be se-
cured properly and could move forward in the event of sudden braking or a colli-sion, seriously injuring the child and pos-
sibly other vehicle occupants.
Child restraint
4-25OKTE15E3Seat and seat belts4
Page 72 of 418
WARNINGlWhen the vehicle is moving do not adjust
the seat where the child restraint system
is installed.
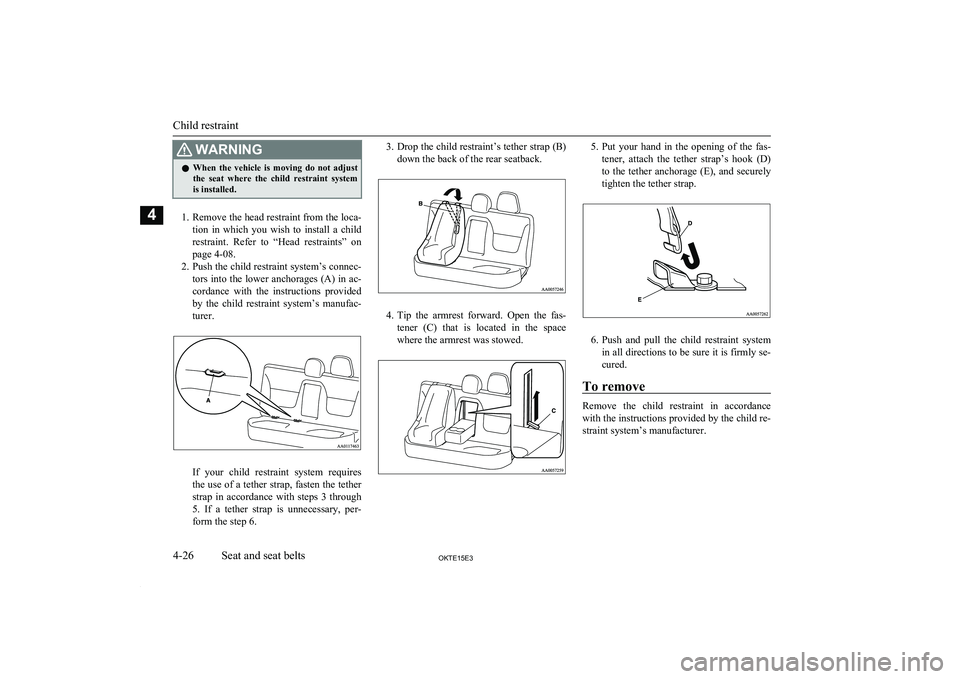
1. Remove the head restraint from the loca-
tion in which you wish to install a child
restraint. Refer to “Head restraints” on
page 4-08.
2. Push the child restraint system’s connec-
tors into the lower anchorages (A) in ac-
cordance with the instructions provided
by the child restraint system’s manufac-
turer.
If your child restraint system requires
the use of a tether strap, fasten the tether strap in accordance with steps 3 through
5. If a tether strap is unnecessary, per- form the step 6.
3. Drop the child restraint’s tether strap (B)
down the back of the rear seatback.
4. Tip the armrest forward. Open the fas-
tener (C) that is located in the space where the armrest was stowed.
5. Put your hand in the opening of the fas-
tener, attach the tether strap’s hook (D)
to the tether anchorage (E), and securely
tighten the tether strap.
6. Push and pull the child restraint system
in all directions to be sure it is firmly se- cured.
To remove
Remove the child restraint in accordance
with the instructions provided by the child re-
straint system’s manufacturer.
Child restraint
4-26OKTE15E3Seat and seat belts4
Page 96 of 418
Fuel filter indication lamp
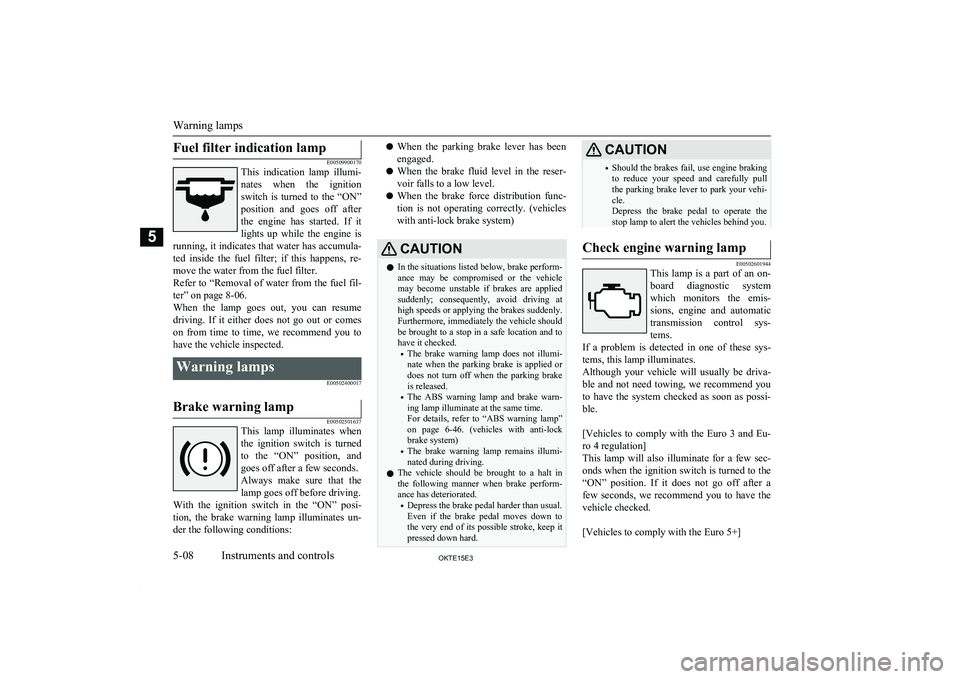
E00509900170
This indication lamp illumi-
nates when the ignition switch is turned to the “ON”
position and goes off after the engine has started. If itlights up while the engine is
running, it indicates that water has accumula- ted inside the fuel filter; if this happens, re-
move the water from the fuel filter.
Refer to “Removal of water from the fuel fil- ter” on page 8-06.When the lamp goes out, you can resume
driving. If it either does not go out or comes on from time to time, we recommend you to
have the vehicle inspected.Warning lamps
E00502400017Brake warning lamp
E00502501637
This lamp illuminates whenthe ignition switch is turnedto the “ON” position, and goes off after a few seconds.
Always make sure that the
lamp goes off before driving.
With the ignition switch in the “ON” posi-
tion, the brake warning lamp illuminates un- der the following conditions:
l When the parking brake lever has been
engaged.
l When the brake fluid level in the reser-
voir falls to a low level.
l When the brake force distribution func-
tion is not operating correctly. (vehicles
with anti-lock brake system)CAUTIONl In the situations listed below, brake perform-
ance may be compromised or the vehicle
may become unstable if brakes are applied
suddenly; consequently, avoid driving at high speeds or applying the brakes suddenly.
Furthermore, immediately the vehicle should be brought to a stop in a safe location and to have it checked.
• The brake warning lamp does not illumi-
nate when the parking brake is applied ordoes not turn off when the parking brake is released.
• The ABS warning lamp and brake warn-
ing lamp illuminate at the same time.
For details, refer to “ABS warning lamp”
on page 6-46. (vehicles with anti-lock
brake system)
• The brake warning lamp remains illumi-
nated during driving.
l The vehicle should be brought to a halt in
the following manner when brake perform-
ance has deteriorated.
• Depress the brake pedal harder than usual.
Even if the brake pedal moves down to
the very end of its possible stroke, keep it
pressed down hard.CAUTION• Should the brakes fail, use engine braking
to reduce your speed and carefully pull the parking brake lever to park your vehi-
cle.
Depress the brake pedal to operate the
stop lamp to alert the vehicles behind you.Check engine warning lamp
E00502601944
This lamp is a part of an on-
board diagnostic system
which monitors the emis-
sions, engine and automatic transmission control sys-tems.
If a problem is detected in one of these sys- tems, this lamp illuminates.
Although your vehicle will usually be driva-
ble and not need towing, we recommend you
to have the system checked as soon as possi-
ble.
[Vehicles to comply with the Euro 3 and Eu-
ro 4 regulation]
This lamp will also illuminate for a few sec- onds when the ignition switch is turned to the “ON” position. If it does not go off after a
few seconds, we recommend you to have the vehicle checked.
[Vehicles to comply with the Euro 5+]
Warning lamps
5-08OKTE15E3Instruments and controls5
Page 130 of 418
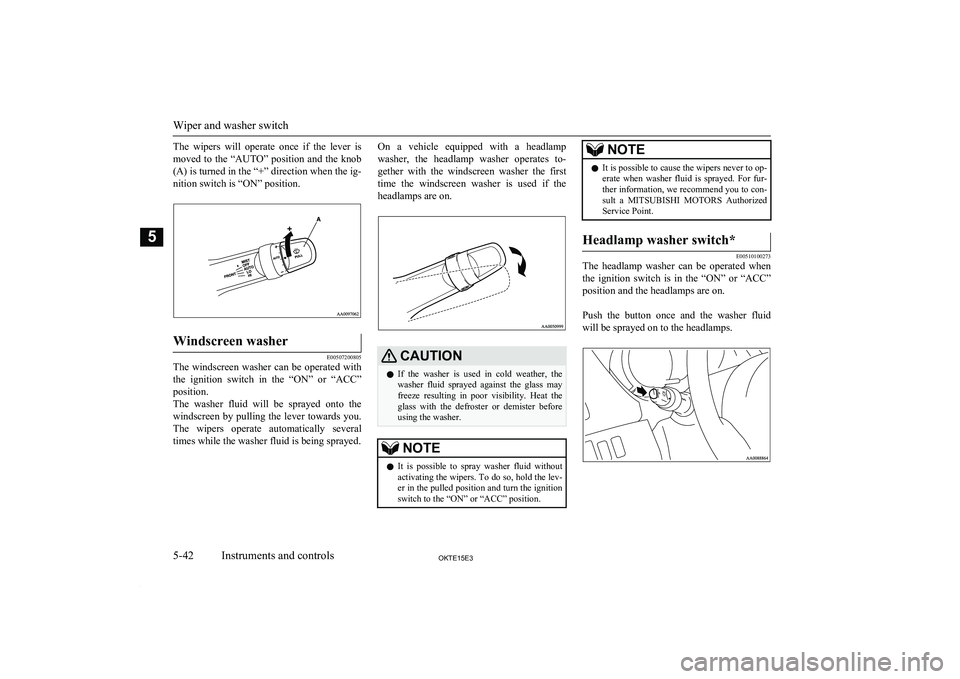
The wipers will operate once if the lever ismoved to the “AUTO” position and the knob
(A) is turned in the “+” direction when the ig-
nition switch is “ON” position.Windscreen washer
E00507200805
The windscreen washer can be operated with the ignition switch in the “ON” or “ACC”
position.
The washer fluid will be sprayed onto the windscreen by pulling the lever towards you.The wipers operate automatically several
times while the washer fluid is being sprayed.
On a vehicle equipped with a headlamp
washer, the headlamp washer operates to-
gether with the windscreen washer the first time the windscreen washer is used if the headlamps are on.CAUTIONl If the washer is used in cold weather, the
washer fluid sprayed against the glass may
freeze resulting in poor visibility. Heat the
glass with the defroster or demister before using the washer.NOTEl It is possible to spray washer fluid without
activating the wipers. To do so, hold the lev- er in the pulled position and turn the ignition
switch to the “ON” or “ACC” position.NOTEl It is possible to cause the wipers never to op-
erate when washer fluid is sprayed. For fur-
ther information, we recommend you to con- sult a MITSUBISHI MOTORS Authorized
Service Point.Headlamp washer switch*
E00510100273
The headlamp washer can be operated when
the ignition switch is in the “ON” or “ACC” position and the headlamps are on.
Push the button once and the washer fluid will be sprayed on to the headlamps.
Wiper and washer switch
5-42OKTE15E3Instruments and controls5