lock MITSUBISHI LANCER 2014 8.G Repair Manual
[x] Cancel search | Manufacturer: MITSUBISHI, Model Year: 2014, Model line: LANCER, Model: MITSUBISHI LANCER 2014 8.GPages: 434, PDF Size: 57.5 MB
Page 109 of 434
Inside emergency trunk lid release 5-42 Features and controls
5
N00509800165
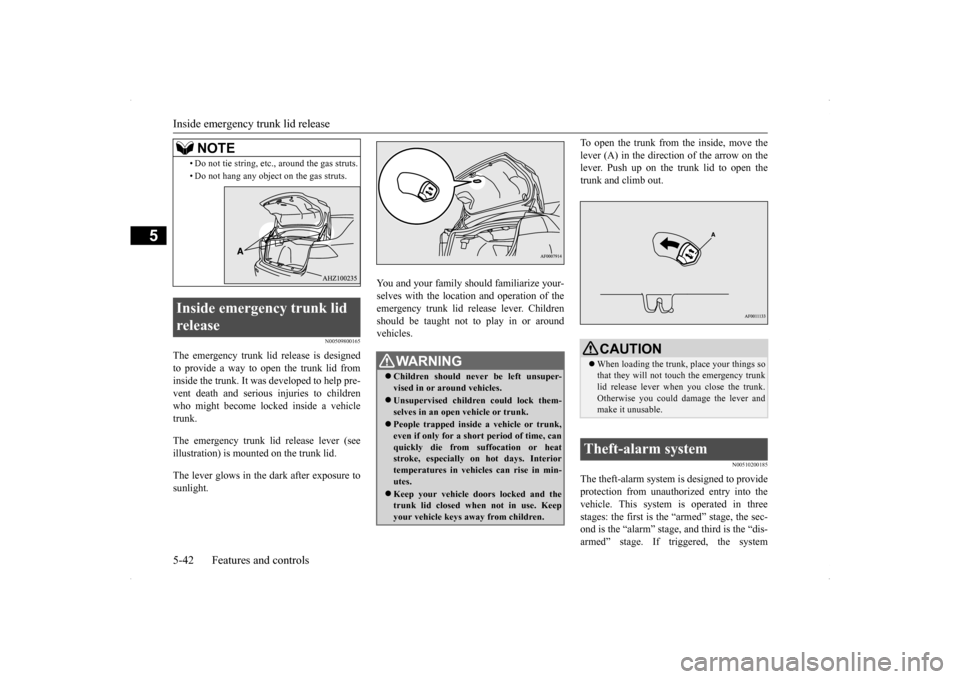
The emergency trunk lid release is designed to provide a way to open the trunk lid from inside the trunk. It was developed to help pre-vent death and serious injuries to children who might become locked inside a vehicle trunk. The emergency trunk lid release lever (see illustration) is mounted on the trunk lid. The lever glows in the dark after exposure to sunlight.
You and your family should familiarize your- selves with the location and operation of theemergency trunk lid release lever. Children should be taught not to play in or around vehicles.
To open the trunk from the inside, move the lever (A) in the direction of the arrow on the lever. Push up on the trunk lid to open the trunk and climb out.
N00510200185
The theft-alarm system is designed to provideprotection from unauthorized entry into thevehicle. This system is operated in three stages: the first is the “armed” stage, the sec- ond is the “alarm” stage, and third is the “dis-armed” stage. If triggered, the system
• Do not tie string, etc., around the gas struts. • Do not hang any object on the gas struts.
Inside emergency trunk lid release
NOTE
WA R N I N G Children should never be left unsuper- vised in or around vehicles. Unsupervised children could lock them- selves in an open vehicle or trunk. People trapped inside a vehicle or trunk, even if only for a short period of time, canquickly die from suffocation or heat stroke, especially on hot days. Interior temperatures in vehicles can rise in min-utes. Keep your vehicle doors locked and the trunk lid closed when not in use. Keep your vehicle keys away from children.
CAUTION When loading the trunk, place your things so that they will not touch the emergency trunk lid release lever when you close the trunk. Otherwise you could damage the lever andmake it unusable.
Theft-alarm system
Page 110 of 434
Theft-alarm system
Features and controls 5-43
5
provides both audible and visual alarm sig- nals.
N00510301183
Park the vehicle and st
op the engine. Arm the
system as described below. 1. Turn the ignition switch to the “LOCK” position. Also, if a key was used to start the engine,remove the key from the ignition switch. 2. Make sure that the trunk lid and engine hood are closed.
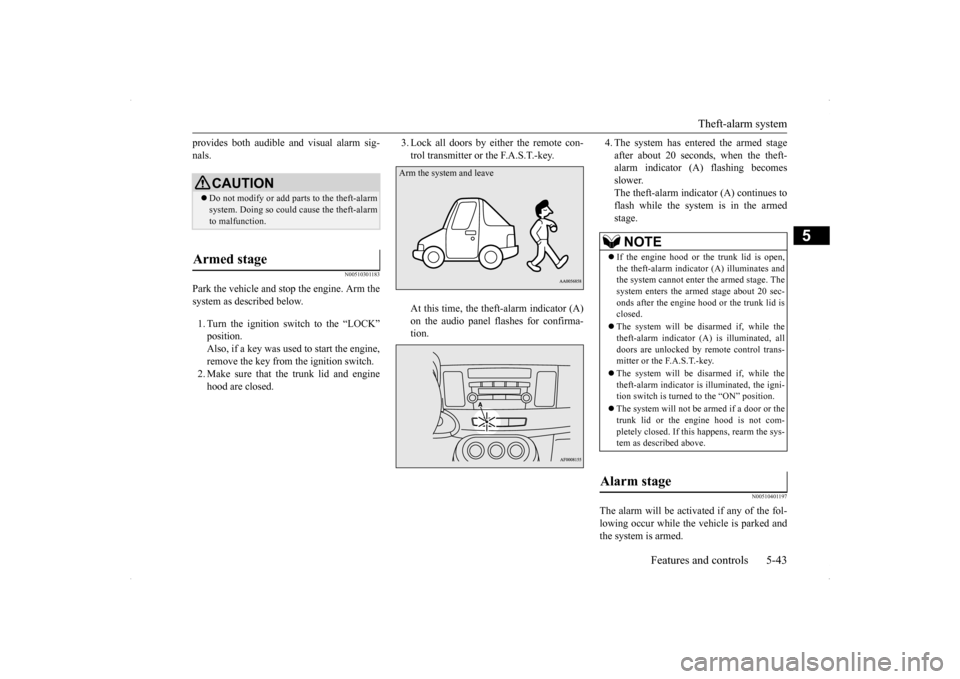
3. Lock all doors by either the remote con- trol transmitter or the F.A.S.T.-key. At this time, the theft-alarm indicator (A) on the audio panel flashes for confirma- tion.
4. The system has entered the armed stage after about 20 seconds, when the theft- alarm indicator (A) flashing becomes slower.The theft-alarm indicator (A) continues to flash while the system is in the armed stage.
N00510401197
The alarm will be activated if any of the fol-lowing occur while the vehicle is parked andthe system is armed.
CAUTION Do not modify or add parts to the theft-alarm system. Doing so could cause the theft-alarm to malfunction.
Armed stage
Arm the system and leave
NOTE
If the engine hood or the trunk lid is open, the theft-alarm indicator (A) illuminates and the system cannot enter
the armed stage. The
system enters the armed stage about 20 sec-onds after the engine hood or the trunk lid is closed. The system will be disarmed if, while the theft-alarm indicator (A) is illuminated, all doors are unlocked by remote control trans-mitter or the F.A.S.T.-key. The system will be disarmed if, while the theft-alarm indicator is illuminated, the igni- tion switch is turned to the “ON” position. The system will not be
armed if a door or the
trunk lid or the engine hood is not com- pletely closed. If this happens, rearm the sys-tem as described above.
Alarm stage
Page 111 of 434
Theft-alarm system 5-44 Features and controls
5
One of the doors is opened without using the remote control transmitter or the F. A . S . T. - k e y. The engine hood or the trunk lid is opened.
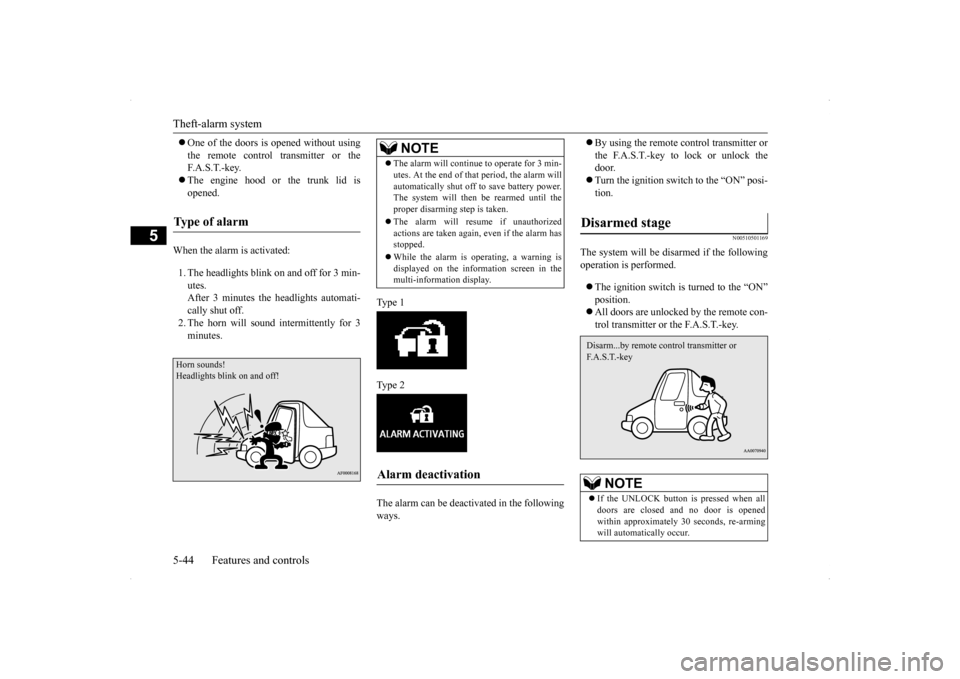
When the alarm is activated: 1. The headlights blink on and off for 3 min- utes.After 3 minutes the headlights automati- cally shut off. 2. The horn will sound intermittently for 3minutes.
Ty p e 1 Ty p e 2 The alarm can be deactivated in the following ways.
By using the remote control transmitter or the F.A.S.T.-key to lock or unlock the door. Turn the ignition switch to the “ON” posi- tion.
N00510501169
The system will be disarmed if the followingoperation is performed. The ignition switch is turned to the “ON” position. All doors are unlocked by the remote con- trol transmitter or the F.A.S.T.-key.
Type of alarm Horn sounds! Headlights blink on and off!
NOTE
The alarm will continue to operate for 3 min- utes. At the end of that period, the alarm will automatically shut off to save battery power. The system will then be rearmed until the proper disarming step is taken. The alarm will resume if unauthorized actions are taken again, even if the alarm hasstopped. While the alarm is operating, a warning is displayed on the information screen in the multi-information display.
Alarm deactivation
Disarmed stage
NOTE
If the UNLOCK button is pressed when all doors are closed and no door is openedwithin approximately 30 seconds, re-arming will automatically occur.Disarm...by remote control transmitter or F. A . S . T. - k e y
Page 112 of 434
Power windows
Features and controls 5-45
5
N00510601128
Use the following procedure to test the sys- tem: 1. Lower the driver’s window. 2. Arm the system as explained in “Armed stage”. 3. Make sure that the theft-alarm indicatorcomes on and flashes for approximately 20 seconds. 4. Wait a few seconds and then unlock thedriver’s side door by using the inside door lock knob and open the door. 5. Check to be sure that the horn soundsintermittently and the headlights blink on and off when a door is opened. 6. Disarm the system by unlocking all doorsby the remote control transmitter or the F. A . S . T. - k e y.
N00510800367
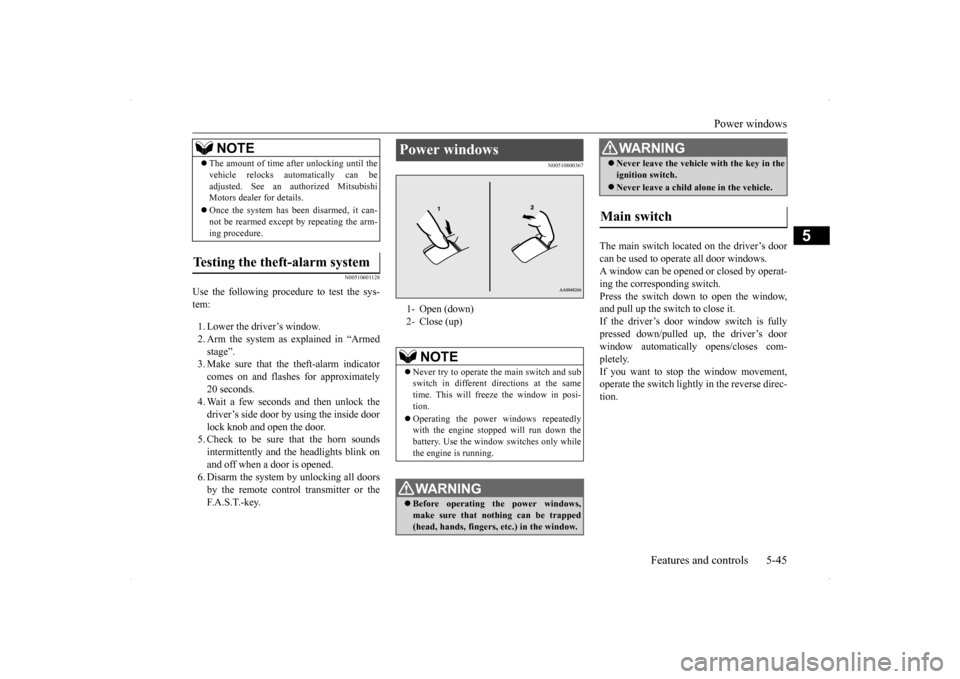
The main switch located on the driver’s doorcan be used to operate all door windows. A window can be opened or closed by operat-ing the corresponding switch.Press the switch down to open the window, and pull up the switch to close it. If the driver’s door window switch is fullypressed down/pulled up, the driver’s door window automatically opens/closes com- pletely.If you want to stop the window movement, operate the switch lightly in the reverse direc- tion.
The amount of time after unlocking until the vehicle relocks automatically can be adjusted. See an authorized Mitsubishi Motors dealer for details. Once the system has been disarmed, it can- not be rearmed except by repeating the arm- ing procedure.
Testing the theft-alarm system
NOTE
Power windows 1- Open (down) 2- Close (up)
NOTE
Never try to operate the main switch and sub switch in different directions at the sametime. This will freeze the window in posi- tion. Operating the power windows repeatedly with the engine stopped will run down the battery. Use the window switches only whilethe engine is running. WA R N I N G Before operating the power windows, make sure that nothing can be trapped(head, hands, fingers, etc.) in the window.
Never leave the vehicle with the key in the ignition switch. Never leave a child alone in the vehicle.
Main switch
WA R N I N G
Page 113 of 434
Power windows 5-46 Features and controls
5
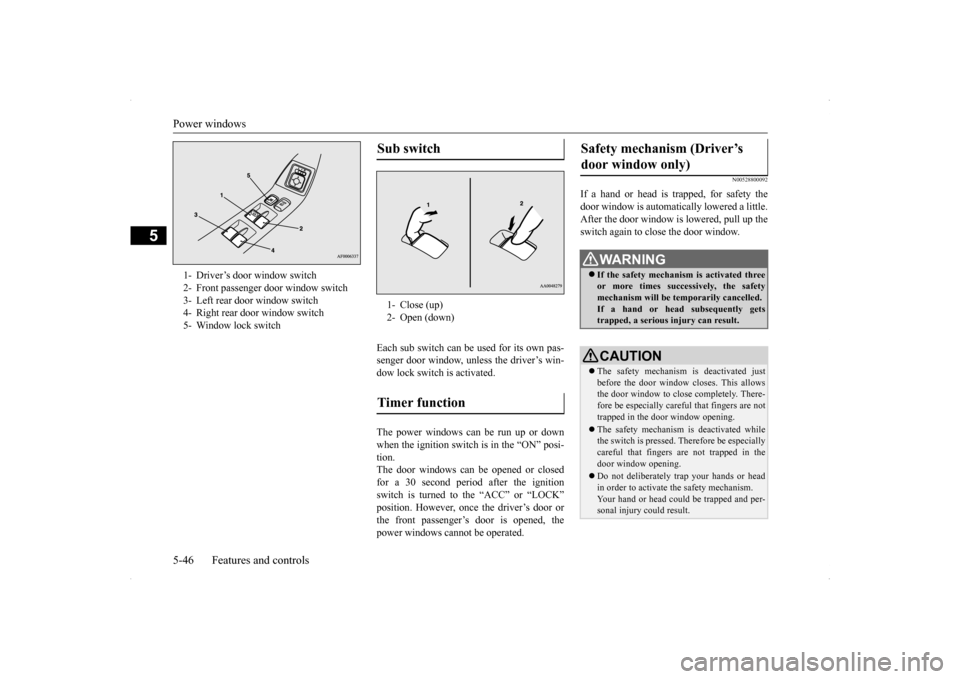
Each sub switch can be used for its own pas- senger door window, unless the driver’s win-dow lock switch is activated. The power windows can be run up or down when the ignition switch is in the “ON” posi- tion. The door windows can be opened or closedfor a 30 second period after the ignition switch is turned to the “ACC” or “LOCK” position. However, once the driver’s door orthe front passenger’s door is opened, the power windows cannot be operated.
N00528800092
If a hand or head is trapped, for safety the door window is automatically lowered a little. After the door window is lowered, pull up the switch again to close the door window.
1- Driver’s door window switch 2- Front passenger door window switch 3- Left rear door window switch 4- Right rear door window switch 5- Window lock switch
Sub switch 1- Close (up)2- Open (down)Timer function
Safety mechanism (Driver’s door window only)
WA R N I N G If the safety mechanism is activated three or more times successively, the safetymechanism will be temporarily cancelled. If a hand or head subsequently gets trapped, a serious injury can result.CAUTION The safety mechanism is deactivated just before the door window closes. This allows the door window to close completely. There-fore be especially careful that fingers are not trapped in the door window opening. The safety mechanism is deactivated while the switch is pressed. Therefore be especially careful that fingers ar
e not trapped in the
door window opening. Do not deliberately trap your hands or head in order to activate the safety mechanism. Your hand or head could be trapped and per-sonal injury could result.
Page 114 of 434
Sunroof (if so equipped)
Features and controls 5-47
5
N00549000127
When this switch is in the lock mode, the main switch for passenger door window and the sub switch cannot be used to open orclose the door window, and the main switch
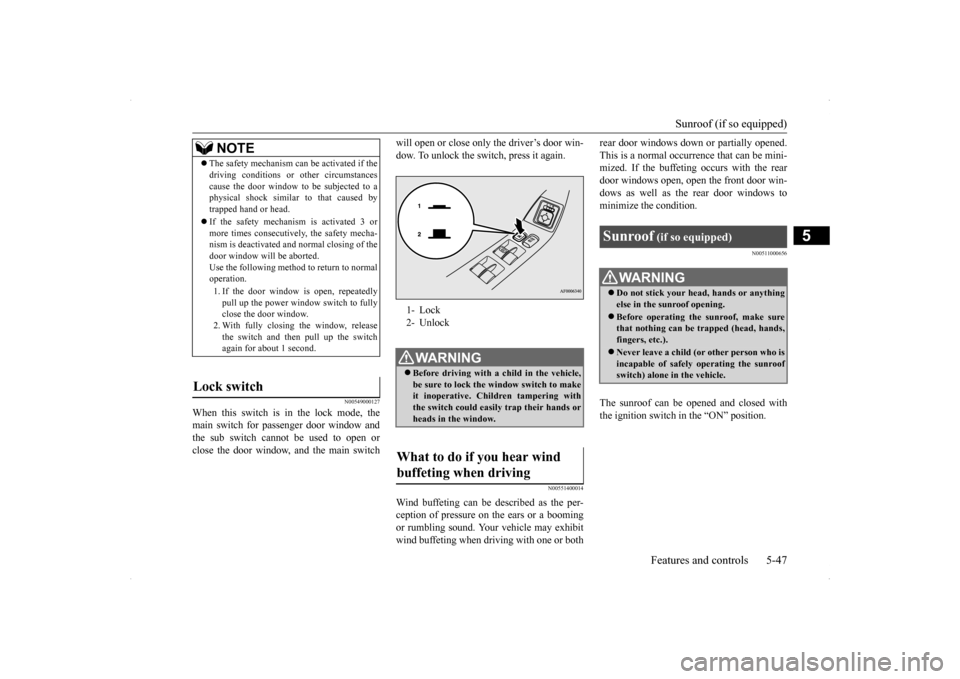
will open or close only the driver’s door win- dow. To unlock the switch, press it again.
N00551400014
Wind buffeting can be described as the per- ception of pressure on
the ears or a booming
or rumbling sound. Your vehicle may exhibitwind buffeting when driving with one or both
rear door windows down or partially opened. This is a normal occurrence that can be mini- mized. If the buffeting occurs with the rear door windows open, open the front door win-dows as well as the rear door windows to minimize the condition.
N00511000656
The sunroof can be opened and closed with the ignition switch in the “ON” position.
NOTE
The safety mechanism can be activated if the driving conditions or other circumstances cause the door window to be subjected to a physical shock similar to that caused by trapped hand or head. If the safety mechanism is activated 3 or more times consecutively, the safety mecha-nism is deactivated and normal closing of the door window will be aborted. Use the following method to return to normaloperation. 1. If the door window is open, repeatedly pull up the power window switch to fully close the door window. 2. With fully closing the window, releasethe switch and then pull up the switch again for about 1 second.
Lock switch
1- Lock 2- UnlockWA R N I N G Before driving with a child in the vehicle, be sure to lock the window switch to makeit inoperative. Children tampering with the switch could easily trap their hands or heads in the window.
What to do if you hear wind buffeting when driving
Sunroof
(if so equipped)
WA R N I N G Do not stick your head, hands or anything else in the sunroof opening. Before operating the sunroof, make sure that nothing can be trapped (head, hands, fingers, etc.). Never leave a child (or other person who is incapable of safely operating the sunroof switch) alone in the vehicle.
Page 115 of 434
Sunroof (if so equipped) 5-48 Features and controls
5
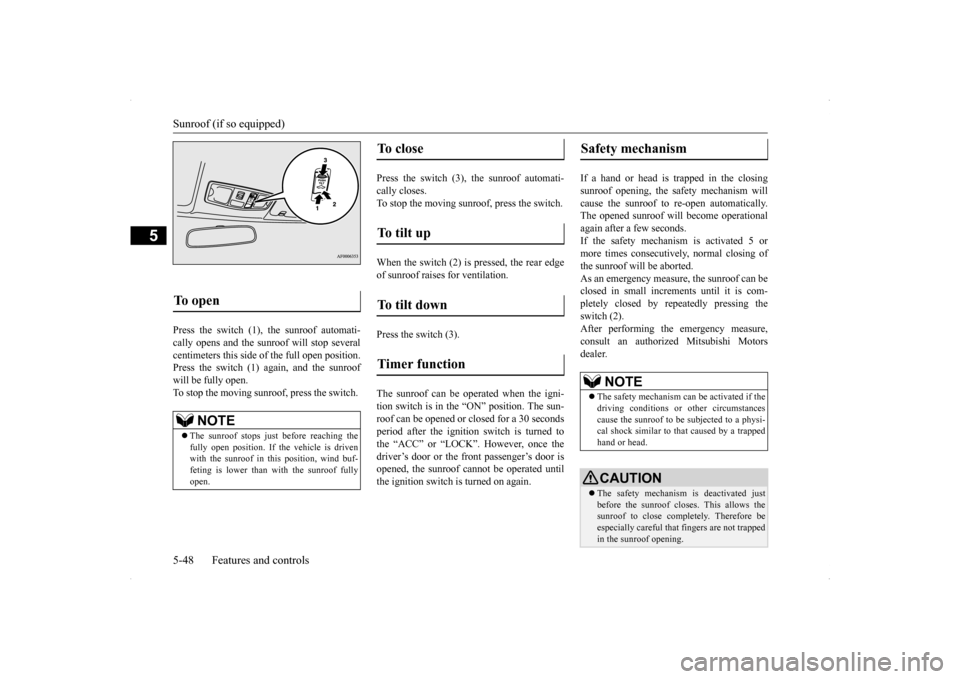
Press the switch (1), the sunroof automati- cally opens and the sunroof will stop several centimeters this side of
the full open position.
Press the switch (1) again, and the sunroofwill be fully open.To stop the moving sunroo
f, press the switch.
Press the switch (3), the sunroof automati- cally closes.To stop the moving sunroof, press the switch. When the switch (2) is pressed, the rear edge of sunroof raises for ventilation. Press the switch (3). The sunroof can be operated when the igni- tion switch is in the “ON” position. The sun- roof can be opened or closed for a 30 secondsperiod after the ignition switch is turned to the “ACC” or “LOCK”. However, once the driver’s door or the front passenger’s door isopened, the sunroof cannot be operated until the ignition switch is turned on again.
If a hand or head is trapped in the closing sunroof opening, the safety mechanism willcause the sunroof to re-open automatically. The opened sunroof will become operational again after a few seconds.If the safety mechanism is activated 5 or more times consecutively, normal closing of the sunroof will be aborted.As an emergency measure, the sunroof can beclosed in small increments until it is com- pletely closed by repeatedly pressing the switch (2).After performing the emergency measure, consult an authorized Mitsubishi Motors dealer.
To open
NOTE
The sunroof stops just before reaching the fully open position. If the vehicle is driven with the sunroof in this position, wind buf- feting is lower than with the sunroof fullyopen.
To close
To tilt up
To tilt down
Timer function
Safety mechanism
NOTE
The safety mechanism can be activated if the driving conditions or other circumstances cause the sunroof to be subjected to a physi-cal shock similar to that caused by a trapped hand or head.CAUTION The safety mechanism is deactivated just before the sunroof closes. This allows the sunroof to close completely. Therefore beespecially careful that fingers are not trapped in the sunroof opening.
Page 118 of 434
Steering wheel tilt lock lever Features and controls 5-51
5
N00511500215
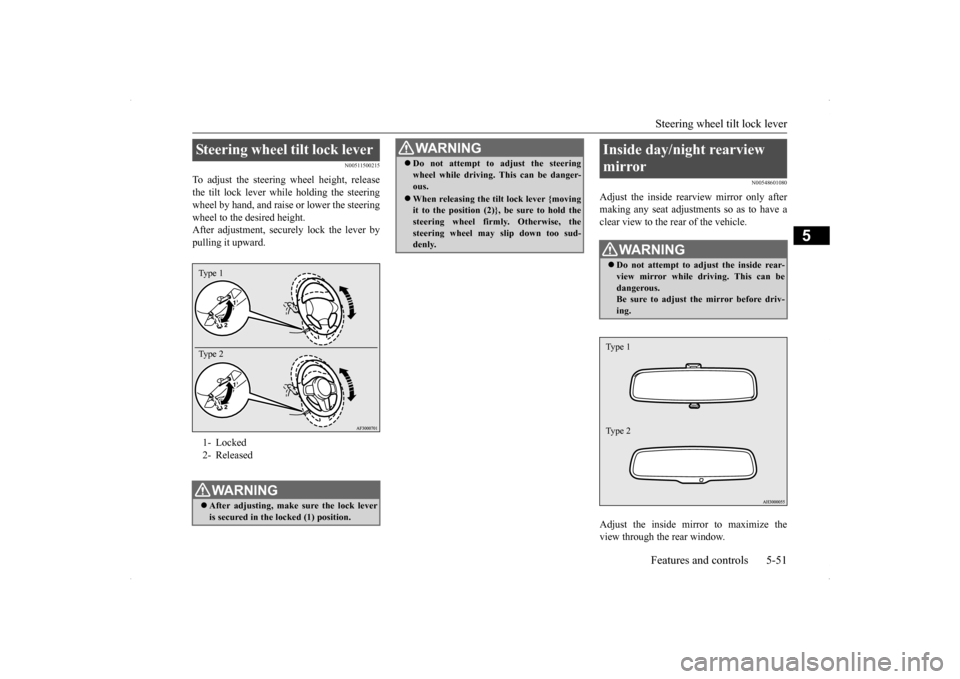
To adjust the steering wheel height, release the tilt lock lever while holding the steeringwheel by hand, and raise or lower the steering wheel to the desired height. After adjustment, securely lock the lever bypulling it upward.
N00548601080
Adjust the inside rearview mirror only aftermaking any seat adjustments so as to have aclear view to the rear of the vehicle. Adjust the inside mirror to maximize the view through the rear window.
Steering wheel tilt lock lever 1- Locked2- ReleasedWA R N I N G After adjusting, make sure the lock lever is secured in the locked (1) position. Type 1 Type 2
Do not attempt to adjust the steering wheel while driving. This can be danger- ous. When releasing the tilt lock lever {moving it to the position (2)}, be sure to hold the steering wheel firmly. Otherwise, the steering wheel may slip down too sud-denly. WA R N I N G
Inside day/night rearview mirror
WA R N I N G Do not attempt to adjust the inside rear- view mirror while driving. This can be dangerous.Be sure to adjust the mirror before driv- ing.Type 1 Type 2
Page 121 of 434
Ignition switch 5-54 Features and controls
5
The outside mirror can be folded in toward the side window to prevent damage whenparking in tight locations.
N00549300175
When the rear window defogger switch is pressed with the engine running, the outside rearview mirrors are defogged or defrosted.Current will flow through the heater element inside the mirrors, thus clearing away frost or condensation.
The indicator light (A) will illuminate while the defogger is on. The heater will be turned off automatically in about 20 minutes.
N00512400615
[For vehicles equipped with the F.A.S.T.-key] For information on operations for vehicles equipped with the F.A.S.T.-key, refer to“F.A.S.T.-key: Ignition switch” on page 5-16. [Except for vehicles equipped with the F. A . S . T. - k e y ]
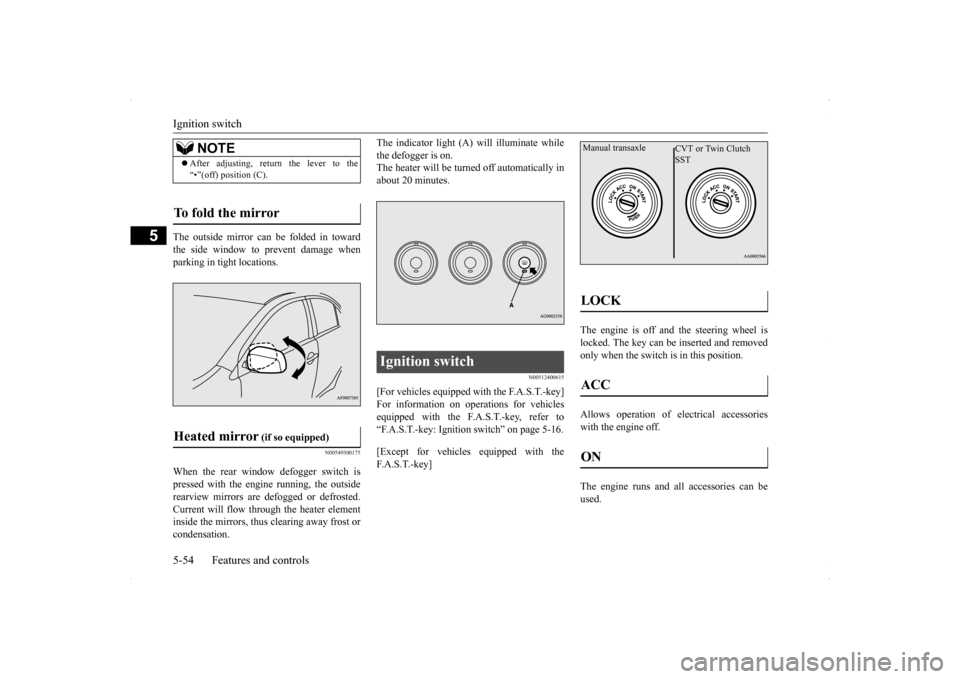
The engine is off and the steering wheel is locked. The key can be inserted and removedonly when the switch is in this position. Allows operation of electrical accessories with the engine off. The engine runs and all accessories can be used.
NOTE
After adjusting, return the lever to the “•”(off) position (C).
To fold the mirror Heated mirror
(if so equipped)
Ignition switch
LOCK ACC ON Manual transaxle
CVT or Twin Clutch SST
Page 122 of 434
Ignition switch
Features and controls 5-55
5
Engages the starter. After the engine starts, release the key and it will return automati-cally to the “ON” position.
N00539601097
After about 30 minutes has elapsed with theignition switch in the “ACC” position, the function automatically cuts out the power for the audio system and other electric devicesthat can be operated with that position. When the ignition switch is turned from the “ACC” position, the power is supplied againto those devices.
N00550900184
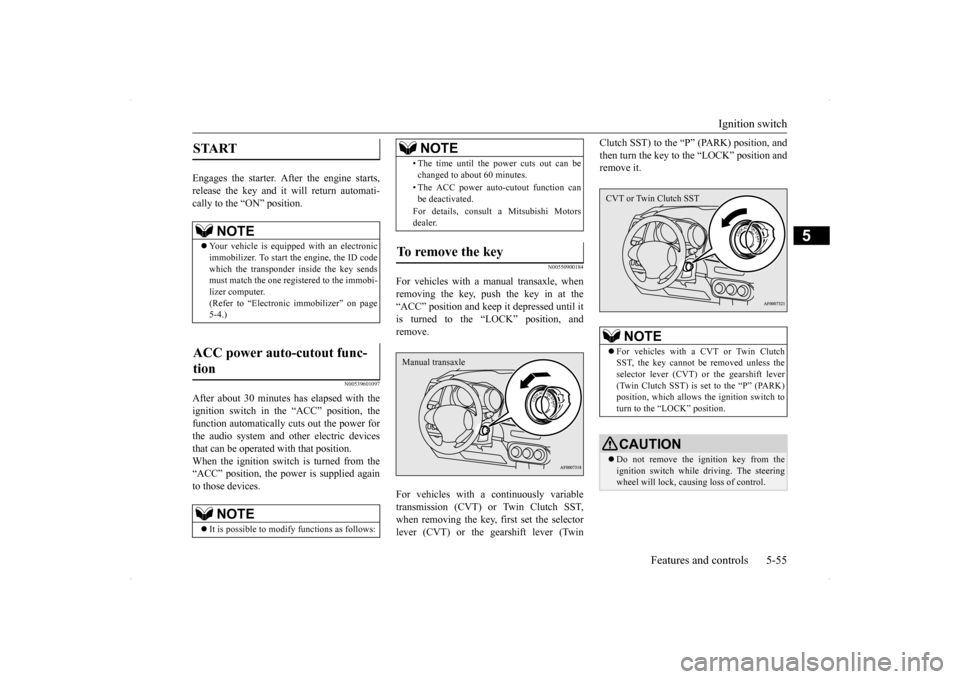
For vehicles with a manual transaxle, whenremoving the key, push the key in at the“ACC” position and keep it depressed until it is turned to the “LOCK” position, and remove. For vehicles with a continuously variable transmission (CVT) or Twin Clutch SST,when removing the key, first set the selector lever (CVT) or the gearshift lever (Twin
Clutch SST) to the “P
” (PARK) position, and
then turn the key to the “LOCK” position and remove it.
START
NOTE
Your vehicle is equipped with an electronic immobilizer. To start the engine, the ID code which the transponder inside the key sendsmust match the one registered to the immobi- lizer computer. (Refer to “Electronic immobilizer” on page5-4.)
ACC power auto-cutout func- tion
NOTE
It is possible to modify functions as follows:
• The time until the power cuts out can be changed to about 60 minutes. • The ACC power auto-cutout function can be deactivated. For details, consult a Mitsubishi Motors dealer.
To remove the key
NOTE
Manual transaxle
NOTE
For vehicles with a CVT or Twin Clutch SST, the key cannot be removed unless the selector lever (CVT) or the gearshift lever(Twin Clutch SST) is set to the “P” (PARK) position, which allows the ignition switch to turn to the “LOCK” position.CAUTION Do not remove the ignition key from the ignition switch while driving. The steering wheel will lock, causing loss of control.CVT or Twin Clutch SST