stop start MITSUBISHI LANCER 2017 8.G Owner's Manual
[x] Cancel search | Manufacturer: MITSUBISHI, Model Year: 2017, Model line: LANCER, Model: MITSUBISHI LANCER 2017 8.GPages: 385, PDF Size: 14.34 MB
Page 203 of 385
Electric rear window defogger switch 5-138 Features and controls
5
By releasing the lever soon after pulling it toward you, the washer fluid will be sprayed several times while the wipers are operating several times.Intelligent washer will stop operating with any operation of the lever.
N00523501293
N00523700315
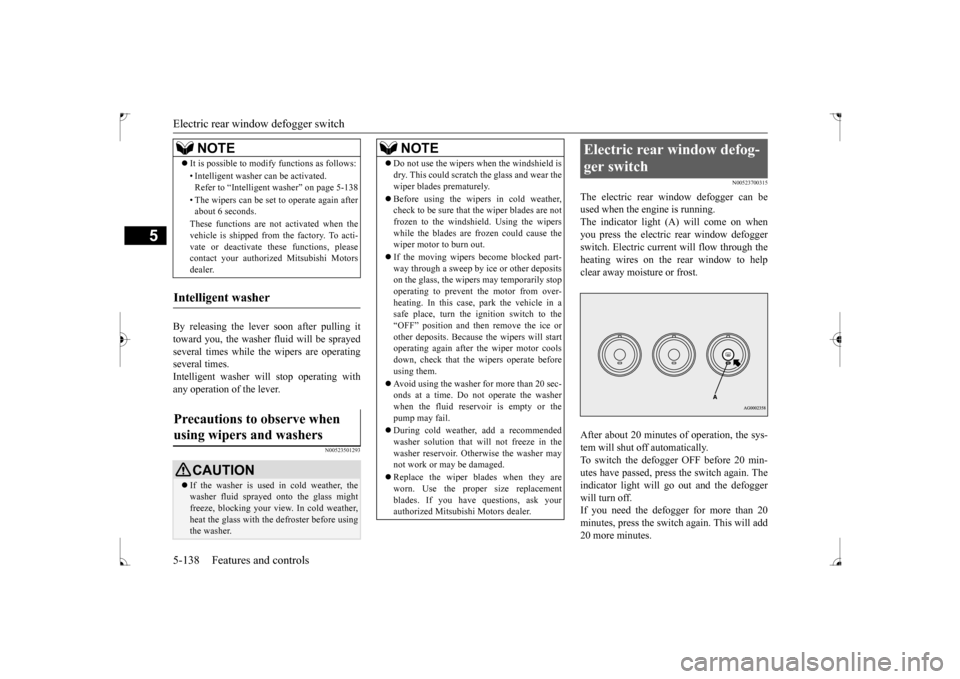
The electric rear window defogger can be used when the engine is running.The indicator light (A) will come on when you press the electric rear window defogger switch. Electric current will flow through theheating wires on the rear window to help clear away moisture or frost. After about 20 minutes of operation, the sys- tem will shut off automatically.To switch the defogger OFF before 20 min- utes have passed, press the switch again. The indicator light will go out and the defoggerwill turn off. If you need the defogger for more than 20 minutes, press the switch again. This will add20 more minutes.
It is possible to modify functions as follows: • Intelligent washer can be activated. Refer to “Intelligent washer” on page 5-138 • The wipers can be set to operate again after about 6 seconds. These functions are not activated when the vehicle is shipped from the factory. To acti- vate or deactivate these functions, pleasecontact your authorized Mitsubishi Motors dealer.
Intelligent washer Precautions to observe when using wipers and washers
CAUTION If the washer is used in cold weather, the washer fluid sprayed onto the glass might freeze, blocking your view. In cold weather, heat the glass with the defroster before usingthe washer.NOTE
NOTE
Do not use the wipers when the windshield is dry. This could scratch the glass and wear the wiper blades prematurely. Before using the wipers in cold weather, check to be sure that the wiper blades are not frozen to the windshield. Using the wipers while the blades are frozen could cause thewiper motor to burn out. If the moving wipers become blocked part- way through a sweep by ice or other deposits on the glass, the wipers may temporarily stop operating to prevent the motor from over-heating. In this case, park the vehicle in a safe place, turn the ignition switch to the “OFF” position and then remove the ice orother deposits. Because the wipers will start operating again after the wiper motor cools down, check that the wipers operate beforeusing them. Avoid using the washer for more than 20 sec- onds at a time. Do not operate the washer when the fluid reservoir is empty or the pump may fail. During cold weather, add a recommended washer solution that will not freeze in thewasher reservoir. Otherwise the washer may not work or may be damaged. Replace the wiper blades when they are worn. Use the proper size replacementblades. If you have questions, ask your authorized Mitsubishi Motors dealer.
Electric rear window defog- ger switch
BK0237700US.book
138 ページ 2016年4月15日 金曜日 午前11時28分
Page 209 of 385
Bluetooth® 2.0 interface (if so equipped) 5-144 Features and controls
5
If a passcode has been set and the security function is enabled, the voice guide will say “Hands-free system is locked. State the pass- code to continue” when the SPEECH buttonis pressed to enter voice recognition mode. Say the 4-digit passcode number to enter the passcode. If the entered passcode is wrong, the voice guide will say “<4-digit passcode>, Incorrect passcode. Please try again.” Enter the correct passcode.
Use the following procedure to turn off the security function by disabling the passcode. 1. Press the SPEECH button. 2. Say “Setup.”3. Say “Passcode.” 4. The voice guide will say “Passcode is enabled. Would you like to disable it?”Answer “Yes.” Answer “No” to cancel the disabling of the passcode and return to the main menu. 5. When the disabling of the passcode is completed, the voice guide will say “Pass- code is disabled” and the system willreturn to the main menu.
N00564700011
The Bluetooth
® 2.0 interface can use the
speaker enrollment function to create a voicemodel for one person per language. This makes it easier for the Bluetooth
® 2.0
interface to recognise voice commands saidby you. You can turn a voice model registered with the speaker enrollment function on and offwhenever you want.
N00564801178
It takes about 2 to 3 minutes to complete thespeaker enrollment process.To ensure the best results, run through the process while in the driver’s seat, in an envi- ronment that is as quiet as possible (whenthere is no rain or strong winds and the vehi- cle windows are closed). Please turn off your phone while in speaker enrollment to preventinterruption of the process. Use the following procedure for speaker enrollment.
NOTE
Passcode will be required to access the sys- tem after the next ignition cycle. It is required for a little time after engine stop that the entered passcode is actuallyrecorded in the system. If the ignition switch is made to “ACC” or “ON” or the engine is started immediately after engine stop, thereis a case when the entered passcode is not recorded in the system. At this time, please try to enter the passcode again.
Entering the passcode
NOTE
You can reenter the passcode as many times as you want.
If you have forgotten your passcode, say “Cancel” to quit the voice input mode and then check with an authorized Mitsubishi Motors dealer.
Disabling the passcode
NOTE
System must be unlocked to disable the pass- code.NOTE
Speaker enrollment function
Speaker enrollment
BK0237700US.book
144 ページ 2016年4月15日 金曜日 午前11時28分
Page 210 of 385
Bluetooth® 2.0 interface (if so equipped)
Features and controls 5-145
5
1. Stop your vehicle in a safe area, put the shift lever (manual transaxle) in the “N” (Neutral) position, or the selector lever {continuously variable transmission(CVT)} in the “P”(PARK) position, and then pull the parking brake lever. 2. Press the SPEECH button. 3. Say “Voice training.” 4. The voice guide will say “This operation must be performed in a quiet environmentwhile the vehicle is stopped. See the owner’s manual for the list of required training phrases. Press and release theSPEECH button when you are ready to begin. Press the HANG-UP button to can- cel at any time.”Press the SPEECH button to start the speaker enrollment process.
5. The voice guide will prompt for phrase 1. Repeat the corresponding phrase listed in table “Enrollment commands” on page5-160. The system will register your voice and then move on to the registration of thenext command. Continue the process until all phrases have been registered. 6. When all enrollment commands have been read out, the voice guide will say “Speaker enrollment is complete.” The system will then end the speaker enroll-ment process and return to the main menu.
N0056490
1111
You can turn a voice model registered with the speaker enrollment function on and offwhenever you want. You can also retrain the system. Use the following procedure to perform theseactions. 1. Press the SPEECH button. 2. Say “Voice training.” 3. If you have completed a speaker enroll-ment process once already, the voice guide will say either “Enrollment is enabled. Would you like to disable orretrain?” or “Enrollment is disabled. Would you like to enable or retrain?” 4. When enrollment is “enabled,” the voicemodel is on; when enrollment is “dis- abled,” the voice model is off. Say the command that fits your needs.
NOTE
Speaker enrollment is not possible unless the vehicle is parked. Make sure you park the vehicle in a safe area before attemptingspeaker enrollment.
NOTE
If you do not start the speaker enrollment process within 3 minutes after pressing the SPEECH button, the speaker enrollment function will time out. The voice guide will say “Speaker enroll-ment has timed out.” The system will then beep and the voice recognition mode will be deactivated. NOTE
To repeat the most recent voice training com- mand, press and release the SPEECH button. If you press the HANG-UP button anytime during the process, the system will beep and stop the speaker enrollment process.
NOTE
Completing the speaker enrollment process will turn on the voice model automatically. The commands “Help” and “Cancel” will not work in this mode.
Enabling and disabling the voice model and retraining
BK0237700US.book
145 ページ 2016年4月15日 金曜日 午前11時28分
Page 211 of 385
Bluetooth® 2.0 interface (if so equipped) 5-146 Features and controls
5
Say “Retrain” to start the speaker enroll- ment process and recreate a new voice model. (Refer to “Speaker enrollment” on page 5-144.)
N00565001379
Before you can make or receive hands-free calls or play music using the Bluetooth
® 2.0
interface function, you must pair the Blue- tooth
® device and Bluetooth
® 2.0 interface.
Up to 7 Bluetooth
® devices can be paired
with the Bluetooth
® 2.0 interface.
If multiple paired Bluetooth
® devices are
available in the vehicle, the cellular phone or music player most recently connected is auto- matically connected to the Bluetooth
® 2.0
interface.
You can also change a Bluetooth
® device to
be connected. To pair a Bluetooth
® device with the Blue-
tooth
® 2.0 interface, follow the steps below.
1. Stop your vehicle in a safe area, put the shift lever (manual transaxle) in the “N” (Neutral) position, or the selector lever{continuously variable transmission(CVT)} in the “P” (PARK) position and pull the parking brake lever. 2. Press the SPEECH button. 3. Say “Pair Device.”
4. The voice guide will say “Start pairing procedure on the device. See the device manual for instructions.” and then willsay “The pairing code is
Connecting the Bluetooth
® 2.0
interface and Bluetooth
® device
NOTE
Pairing is required only when the device is used for the first time. Once the device has been paired with the Bluetooth
® 2.0 inter-
face, all you need is
to bring the device into
the vehicle next time and the device will connect to the Bluetooth
® 2.0 interface auto-
matically (if supported by the device).
To p a i r
NOTE
You cannot pair any Bluetooth
® device with
the Bluetooth
® 2.0 interface unless the vehi-
cle is parked. Before pairing a Bluetooth
®
device with the Bluetooth
® 2.0 interface,
confirm that the vehicle is parked in a safelocation.
NOTE
The following procedure ( to ) can also be used instead of saying “Pair Device.” Replace this step 3 with the following proce- dure if you prefer. Say “Setup.” Say “Pairing Options.” The voice guide will say “Select one of the following: pair, edit, delete, list or set code.”Say “Pair.” voice guide will say “Maximum devices paired” and then the system will end the pairing process. To register a new device, delete one device and then repeat the pairing process.(Refer to “Selecting a device: Deleting a device” on page 5-148.)NOTE
Some Bluetooth
® devices require a specific
pairing code. Please refer to the device man- ual for pairing code requirements and read the next section “If your device requires aspecific pairing code” on page 5-147 to set the pairing code.
BK0237700US.book
146 ページ 2016年4月15日 金曜日 午前11時28分
Page 231 of 385
Storage spaces 5-166 Features and controls
5
N00526301465
If any of the interior lights are left on with the ignition switch in the “LOCK” position, the lights go off automatically after about 30 minutes.The lights come on again if the ignition switch is turned to the “ON” or “ACC” posi- tion, any door or the trunk lid is opened andclosed, or the keyless entry system or F.A.S.T.-key is operated.
N00526401570
N00551501302
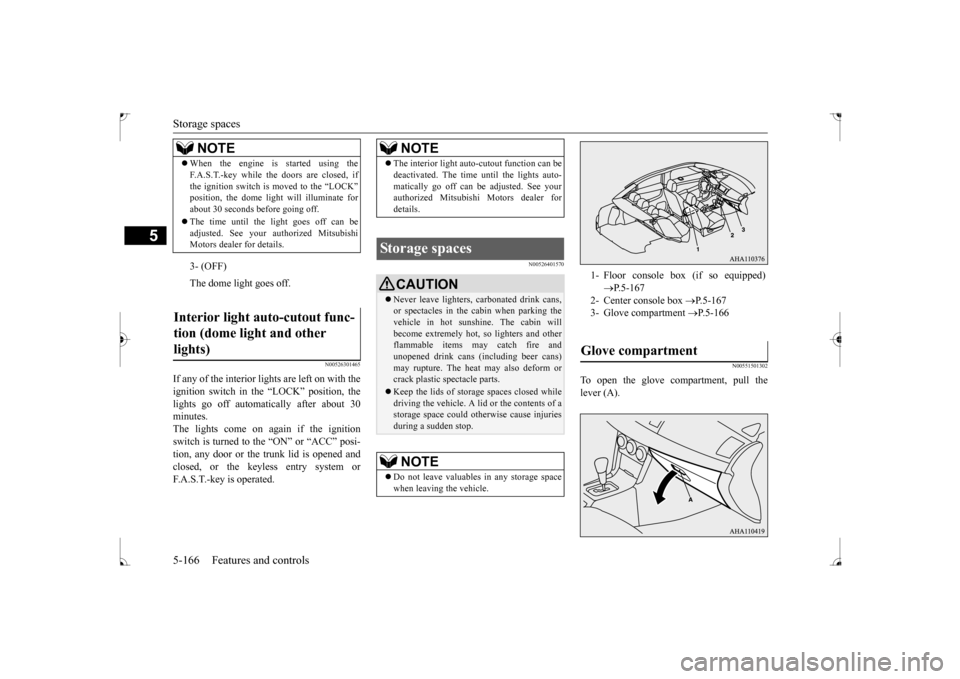
To open the glove compartment, pull the lever (A).
When the engine is started using the F.A.S.T.-key while the doors are closed, if the ignition switch is moved to the “LOCK” position, the dome light will illuminate for about 30 seconds before going off. The time until the light goes off can be adjusted. See your au
thorized Mitsubishi
Motors dealer for details.3- (OFF) The dome light goes off.
Interior light auto-cutout func- tion (dome light and other lights)
NOTE
NOTE
The interior light auto-cutout function can be deactivated. The time until the lights auto- matically go off can be adjusted. See your authorized Mitsubishi Motors dealer for details.
Storage spaces
CAUTION Never leave lighters, carbonated drink cans, or spectacles in the cabin when parking the vehicle in hot sunshine. The cabin willbecome extremely hot, so lighters and other flammable items may catch fire and unopened drink cans (including beer cans)may rupture. The heat may also deform or crack plastic spectacle parts. Keep the lids of storage spaces closed while driving the vehicle. A lid or the contents of a storage space could otherwise cause injuriesduring a sudden stop.NOTE
Do not leave valuables in any storage space when leaving the vehicle.
1- Floor console box (if so equipped)
P.5-167
2- Center console box
P.5-167
3- Glove compartment
P.5-166
Glove compartment
BK0237700US.book
166 ページ 2016年4月15日 金曜日 午前11時28分
Page 238 of 385
Vehicle preparation before driving
Driving safety 6-3
6
N00629001796
For a safer and more enjoyable trip, always observe the following: Before starting the vehicle, make certain that you and all passengers are seated and wearing their seat belts properly (with children in the rear seat, in appropriaterestraints), and that all the doors are locked.
Move the driver’s seat as far backward as possible, while still keeping good visibil- ity, and good control of the steering wheel, brakes, accelerator, and controls.Check the instrument panel indicators and multi-information display for any possible problem. Move the front passenger seat as far back as possible. Make sure that infants and small children are properly restrained in accordance withall laws and regulations.
Check these by selecting the defroster mode, and set the blower switch on high. You should be able to feel the air blowing against the windshield. (Refer to “Defrosting or defogging the wind- shield and door windows” on page 7-8, 7-13.) Check all the tires for heavy tread wear or uneven wear patterns. Look for stones, nails, glass, or other objects stuck in the tread. Lookfor any tread cuts or sidewall cracks. Check the wheel nuts for tightness, and the tires (including spare tire) for proper pressures.
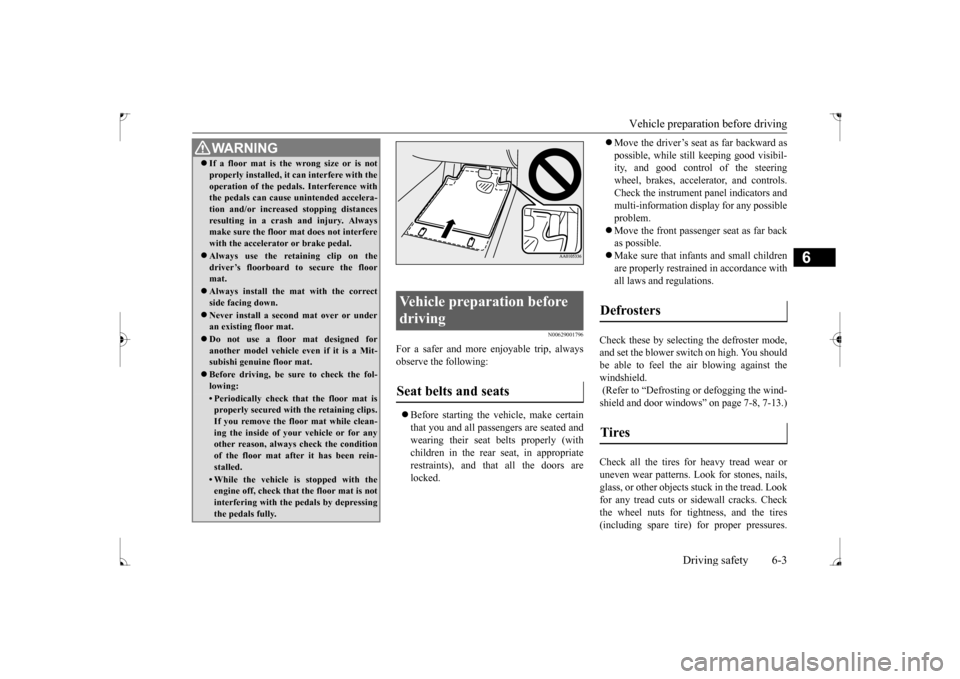
WA R N I N G If a floor mat is the wrong size or is not properly installed, it can interfere with the operation of the pedals. Interference with the pedals can cause unintended accelera- tion and/or increased stopping distancesresulting in a crash and injury. Always make sure the floor mat does not interfere with the accelerator or brake pedal. Always use the retaining clip on the driver’s floorboard to secure the floormat. Always install the mat with the correct side facing down. Never install a second mat over or under an existing floor mat. Do not use a floor mat designed for another model vehicle ev
en if it is a Mit-
subishi genuine floor mat. Before driving, be sure to check the fol- lowing:• Periodically check that the floor mat isproperly secured with the retaining clips. If you remove the floor mat while clean-ing the inside of your vehicle or for any other reason, always check the condition of the floor mat after it has been rein-stalled.• While the vehicle is stopped with the engine off, check that the floor mat is not interfering with the pedals by depressingthe pedals fully.
Vehicle preparation before driving Seat belts and seats
Defrosters Tires
BK0237700US.bo
ok 3 ページ 2016年4月15日 金曜日 午前11時28分
Page 239 of 385
Safe driving techniques 6-4 Driving safety
6
Replace your tires before they are heavily worn out. As your vehicle is equipped with a tire pres- sure monitoring system, there is a risk ofdamage to the tire inflation pressure sensors when the tire is replaced on the rim. Tire replacement should, therefore, be performedonly by an authorized Mitsubishi Motors dealer. Have someone watch while you turn all the exterior lights on and off. Also check the turn signal indicators and high-beam indicators on the instrument panel. Check the ground under the vehicle after parking overnight, for fuel, water, oil, orother leaks. Make sure all the fluid levels are correct. Also, if you can smell fuel, you need to find out why immediately and have itfixed.
N00629200111
Even this vehicle’s safety equipment, andyour safest driving, cannot guarantee that you
can avoid an accident or injury. However, if you give extra attention to the following areas, you can better protect yourself and your passengers: Drive defensively. Be aware of traffic, road and weather conditions. Leave plenty of stopping distance between your vehicle and the vehicle ahead. Before changing lanes, check your mir- rors and use your turn signal light. While driving, watch the behavior of other drivers, bicyclists, and pedestrians. Always obey applicable laws and regula- tions. Be a polite and alert driver. Always leave room for unexpected events, such assudden braking. If you plan to drive in another country, obey their vehicle registration laws andmake sure you will be able to get the right fuel.
N00629401497
Check the battery, including terminals and cables. During extremely cold weather, the battery will not be as strong. Also, thebattery power level may drop because more power is used for cold starting and driving.
Before driving the vehicle, check to see if the engine runs at the proper speed and if the headlights are as bright as normally. Charge or replace the battery if necessary.During extreme cold weather, it is possi- ble that a very low battery could freeze. Warm the engine sufficiently. After start- ing the engine, allow a short warm-up time to distribute oil to all cylinders. Thendrive your vehicle slowly. Stay at low speeds at first so that the transaxle, transfer case and rear axle oilhave time to spread to all the lubrication points. Manual transaxle can be harder to shift in cold weather conditions. This is normal and shifting will get easier as the transaxle warms up. Check the engine antifreeze. If there is not enough coolant because of a leak or from engine overheating, add Mit-subishi Motors Genuine Super Long Life Coolant Premium or equivalent.
Lights Fluid leaks Safe driving techniques
Driving during cold weather
WA R N I N G The battery gives off explosive hydrogen gas. Any spark or flame can cause the bat- tery to explode, which could cause seriousinjury or death. Always wear protective clothes and a face mask when working with your battery, orlet a skilled mechanic do it.
BK0237700US.bo
ok 4 ページ 2016年4月15日 金曜日 午前11時28分
Page 272 of 385
Operation Keys
Comfort controls 7-25
7
Turn the power on, and resume playback from the previous status. 2. Press the PWR/VOL key.Turn the power OFF.
N00716500023
1. Turn the PWR/VOL key to adjust the vol-ume.
Turn the PWR/VOL key clockwise to increase, and counter- clockwise to decrease the volume.
N00716600024
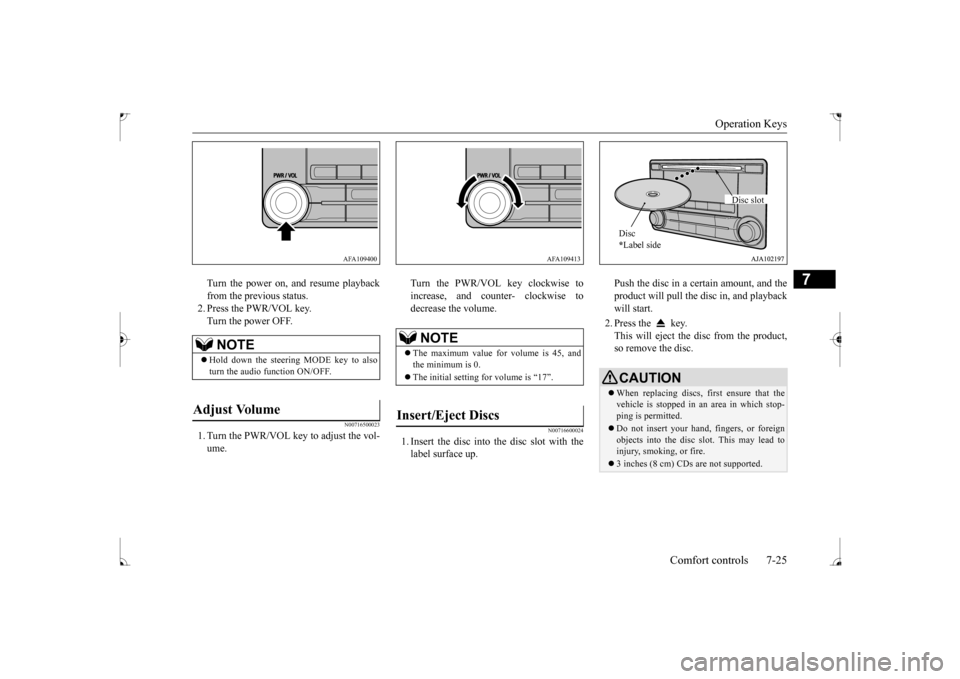
1. Insert the disc into the disc slot with the label surface up.
Push the disc in a certain amount, and the product will pull the disc in, and playback will start. 2. Press the key. This will eject the disc from the product, so remove the disc.
NOTE
Hold down the steering MODE key to also turn the audio function ON/OFF.
Adjust Volume
AFA109400
NOTE
The maximum value for volume is 45, and the minimum is 0. The initial setting for volume is “17”.
Insert/Eject Discs
AFA109413
CAUTIONWhen replacing discs, first ensure that the vehicle is stopped in an area in which stop- ping is permitted. Do not insert your hand, fingers, or foreign objects into the disc slot. This may lead to injury, smoking, or fire. 3 inches (8 cm) CDs are not supported.Disc * Label side
Disc slot
BK0237700US.bo
ok 25 ページ 2016年4月15日 金曜日 午前11時28分
Page 275 of 385
Listen to Radio 7-28 Comfort controls
7
N00716900072
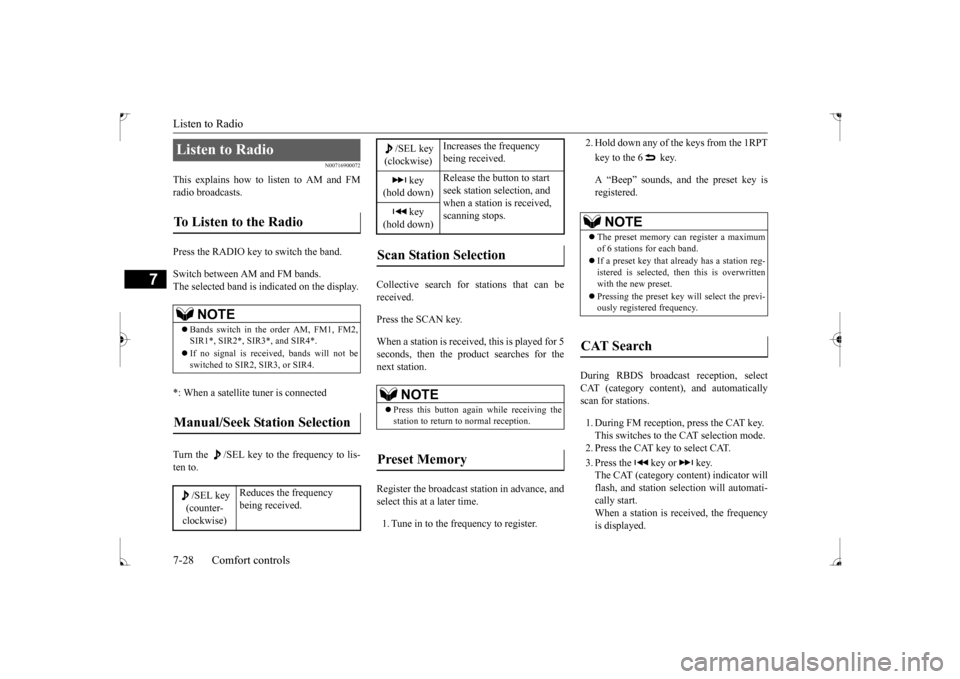
This explains how to listen to AM and FM radio broadcasts. Press the RADIO key to switch the band. Switch between AM and FM bands. The selected band is indicated on the display. *: When a satellite tuner is connected Turn the /SEL key to the frequency to lis- ten to.
Collective search for stations that can be received. Press the SCAN key.When a station is received, this is played for 5 seconds, then the product searches for the next station. Register the broadcast station in advance, and select this at a later time. 1. Tune in to the frequency to register.
2. Hold down any of the keys from the 1RPT key to the 6 key. A “Beep” sounds, and the preset key is registered.
During RBDS broadcast reception, select CAT (category content), and automatically scan for stations. 1. During FM reception, press the CAT key. This switches to the CAT selection mode.2. Press the CAT key to select CAT. 3. Press the key or key. The CAT (category content) indicator will flash, and station selection will automati-cally start. When a station is received, the frequency is displayed.
Listen to Radio To Listen to the Radio
NOTE
Bands switch in the order AM, FM1, FM2, SIR1*, SIR2*, SIR3*, and SIR4*. If no signal is received, bands will not be switched to SIR2, SIR3, or SIR4.
Manual/Seek Station Selection
/SEL key (counter- clockwise)
Reduces the frequency being received.
/SEL key(clockwise)
Increases the frequency being received.
key
(hold down)
Release the button to start seek station selection, and when a station is received, scanning stops.
key
(hold down)Scan Station Selection
NOTE
Press this button again while receiving the station to return to normal reception.
Preset Memory
NOTE
The preset memory can register a maximum of 6 stations for each band. If a preset key that already has a station reg- istered is selected, then this is overwritten with the new preset. Pressing the preset key will select the previ- ously registered frequency.
CAT Search
BK0237700US.bo
ok 28 ページ 2016年4月15日 金曜日 午前11時28分
Page 281 of 385
Listen to an iPod 7-34 Comfort controls
7
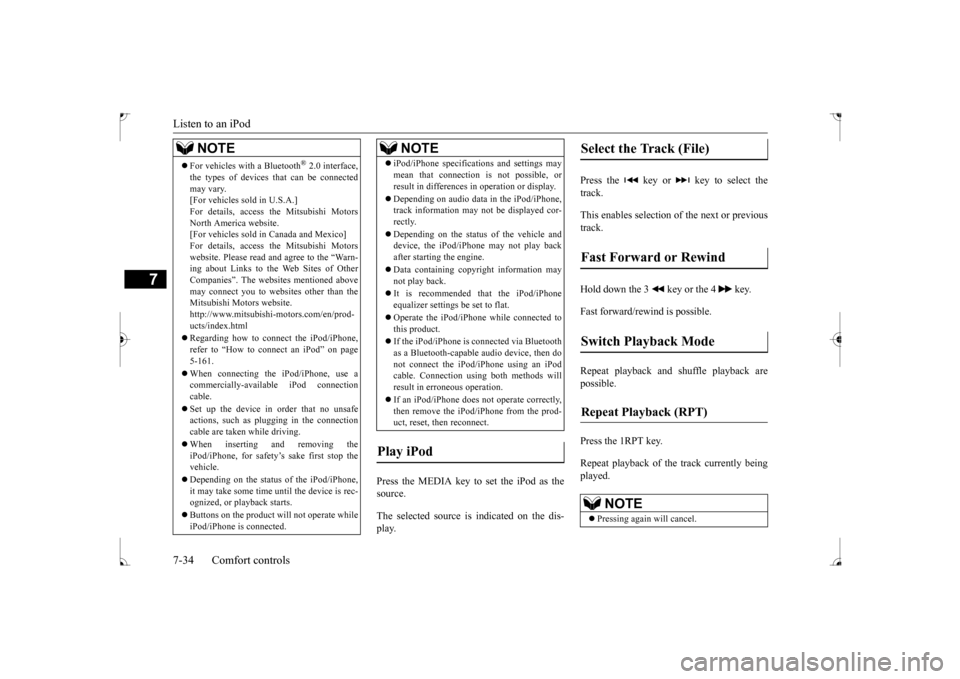
Press the MEDIA key to set the iPod as the source. The selected source is indicated on the dis- play.
Press the key or key to select the track. This enables selection of the next or previous track. Hold down the 3 key or the 4 key. Fast forward/rewind is possible. Repeat playback and shuffle playback are possible. Press the 1RPT key. Repeat playback of th
e track currently being
played.
For vehicles with a Bluetooth
® 2.0 interface,
the types of devices that can be connectedmay vary. [For vehicles sold in U.S.A.] For details, access the Mitsubishi MotorsNorth America website. [For vehicles sold in Canada and Mexico] For details, access the Mitsubishi Motorswebsite. Please read and agree to the “Warn- ing about Links to the Web Sites of Other Companies”. The websites mentioned abovemay connect you to websites other than the Mitsubishi Motors website. http://www.mitsubishi-motors.com/en/prod-ucts/index.html Regarding how to connect the iPod/iPhone, refer to “How to connect an iPod” on page 5-161. When connecting the iPod/iPhone, use a commercially-available iPod connectioncable. Set up the device in order that no unsafe actions, such as plugging in the connection cable are taken while driving. When inserting and removing the iPod/iPhone, for safety’s sake first stop the vehicle. Depending on the status of the iPod/iPhone, it may take some time until the device is rec-ognized, or playback starts. Buttons on the product will not operate while iPod/iPhone is connected.NOTE
iPod/iPhone specifications and settings may mean that connection is not possible, or result in differences in operation or display. Depending on audio data in the iPod/iPhone, track information may not be displayed cor- rectly. Depending on the status of the vehicle and device, the iPod/iPhone may not play back after starting the engine. Data containing copyright information may not play back. It is recommended that the iPod/iPhone equalizer settings be set to flat. Operate the iPod/iPhone while connected to this product. If the iPod/iPhone is connected via Bluetooth as a Bluetooth-capable audio device, then donot connect the iPod/iPhone using an iPod cable. Connection using both methods will result in erroneous operation. If an iPod/iPhone does not operate correctly, then remove the iPod/iPhone from the prod-uct, reset, then reconnect.
Play iPod
NOTE
Select the Track (File) Fast Forward or Rewind Switch Playback Mode Repeat Playback (RPT)
NOTE
Pressing again will cancel.
BK0237700US.bo
ok 34 ページ 2016年4月15日 金曜日 午前11時28分