MITSUBISHI LANCER SE AWC 2014 8.G MMCS Manual
Manufacturer: MITSUBISHI, Model Year: 2014, Model line: LANCER SE AWC, Model: MITSUBISHI LANCER SE AWC 2014 8.GPages: 226, PDF Size: 31.21 MB
Page 141 of 226
GPS Information 141
INFO/SETTINGS INFO
GPS Information
You can check the name of the current
location, its latitude/longitude, the number
of GPS satellites being received, and a map
of satellite locations.
Displaying
1Press the INFO key.
This displays the info menu.
2Touch GPS Information. .
▼
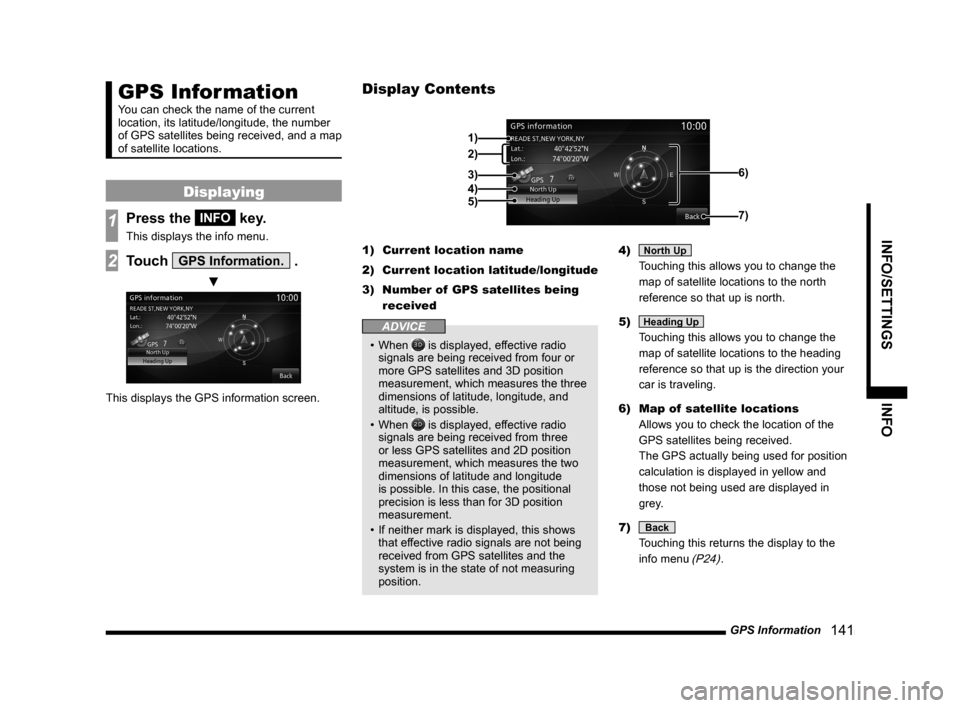
This displays the GPS information screen. 1)
Current location name
2) Current location latitude/longitude
3) Number of GPS satellites being
received
ADVICE
• When is displayed, effective radio
signals are being received from four or
more GPS satellites and 3D position
measurement, which measures the three
dimensions of latitude, longitude, and
altitude, is possible.
• When
is displayed, effective radio
signals are being received from three
or less GPS satellites and 2D position
measurement, which measures the two
dimensions of latitude and longitude
is possible. In this case, the positional
precision is less than for 3D position
measurement.
• If neither mark is displayed, this shows
that effective radio signals are not being
received from GPS satellites and the
system is in the state of not measuring
position. 4)
North Up
Touching this allows you to change the
map of satellite locations to the north
reference so that up is north.
5)
Heading Up
Touching this allows you to change the
map of satellite locations to the heading
reference so that up is the direction your
car is traveling.
6) Map of satellite locations
Allows you to check the location of the
GPS satellites being received.
The GPS actually being used for position
calculation is displayed in yellow and
those not being used are displayed in
grey.
7)
Back
Touching this returns the display to the
info menu
(P24).
Display Contents
2)
3)
4)
5)
1)
6)
7)
Page 142 of 226
![MITSUBISHI LANCER SE AWC 2014 8.G MMCS Manual 142 GPS Information
P side P Display Screen
This section explains the screens displayed
when selecting the [GPSInfo] in the P side P
display information
(P36).
7)8)
3)
2)
4)5)
1)6)
1) Current lo MITSUBISHI LANCER SE AWC 2014 8.G MMCS Manual 142 GPS Information
P side P Display Screen
This section explains the screens displayed
when selecting the [GPSInfo] in the P side P
display information
(P36).
7)8)
3)
2)
4)5)
1)6)
1) Current lo](/img/19/7496/w960_7496-141.png)
142 GPS Information
P side P Display Screen
This section explains the screens displayed
when selecting the [GPSInfo] in the P side P
display information
(P36).
7)8)
3)
2)
4)5)
1)6)
1) Current location name
2) Current location latitude/longitude
3) Number of GPS satellites being
received
4)
North Up
Touching this allows you to change the
map of satellite locations to the north
reference so that up is north. 5)
Heading Up
Touching this allows you to change the
map of satellite locations to the heading
reference so that up is the direction your
car is traveling.
6) Map of satellite locations
Allows you to check the location of the
GPS satellites being received.
The GPS actually being used for position
calculation is displayed in yellow and
those not being used are displayed in
grey.
7)
▲
Touching this displays the submenu. (P32)
8) PsideP
Change the information displayed on the
P side P sub-screen.
Page 143 of 226
Mobile Phone 143
INFO/SETTINGS INFO
Equipment by type
(Vehicles with a Bluetooth® 2.0 interface).
Mobile Phone
Connecting your mobile phone to this
product with Bluetooth lets you use the
hands-free function.
WARNING
• The driver should not hold the mobile
phone in their hand while driving.
• Do not leave your mobile phone
unattended in the vehicle. If your mobile
phone rolls underfoot when you stop
the vehicle or when you go around a
curve and it get under the brake pedal,
it can interfere with driving and cause an
accident.
Connect Your Mobile Phone
This product and your mobile phone use the
Bluetooth function to connect.
For details on how to connect, refer to
“Bluetooth Setting”(P209).
Operation methods below describe situations
once connection has been completed.
NOTE
• This requires a mobile phone that can be
connected to the Bluetooth.
• For the equipment supported, refer to the
vehicle's user manual.
• Cancel functions such as the mobile
phone “dial lock”, and connect while on
the standby screen.
• Some equipment cannot be connected.
Display the Phonebook
There is the vehicle phonebook registered in
this product and the mobile phonebook that
can draw on the data in your mobile phone.
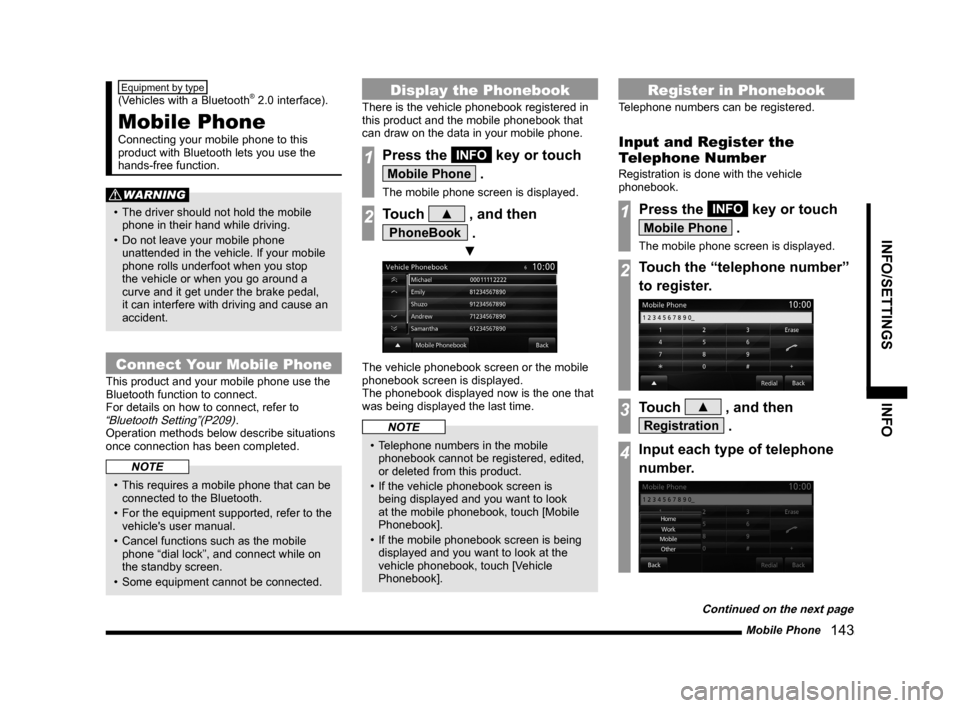
1Press the INFO key or touch
Mobile Phone .
The mobile phone screen is displayed.
2Touch ▲ , and then
PhoneBook .
▼
The vehicle phonebook screen or the mobile
phonebook screen is displayed.
The phonebook displayed now is the one that
was being displayed the last time.
NOTE
• Telephone numbers in the mobile
phonebook cannot be registered, edited,
or deleted from this product.
• If the vehicle phonebook screen is
being displayed and you want to look
at the mobile phonebook, touch [Mobile
Phonebook].
• If the mobile phonebook screen is being
displayed and you want to look at the
vehicle phonebook, touch [Vehicle
Phonebook].
Register in Phonebook
Telephone numbers can be registered.
Input and Register the
Telephone Number
Registration is done with the vehicle
phonebook.
1Press the INFO key or touch
Mobile Phone .
The mobile phone screen is displayed.
2Touch the “telephone number”
to register.
3Touch ▲ , and then
Registration .
4Input each type of telephone
number.
Continued on the next page
Page 144 of 226
144 Mobile Phone
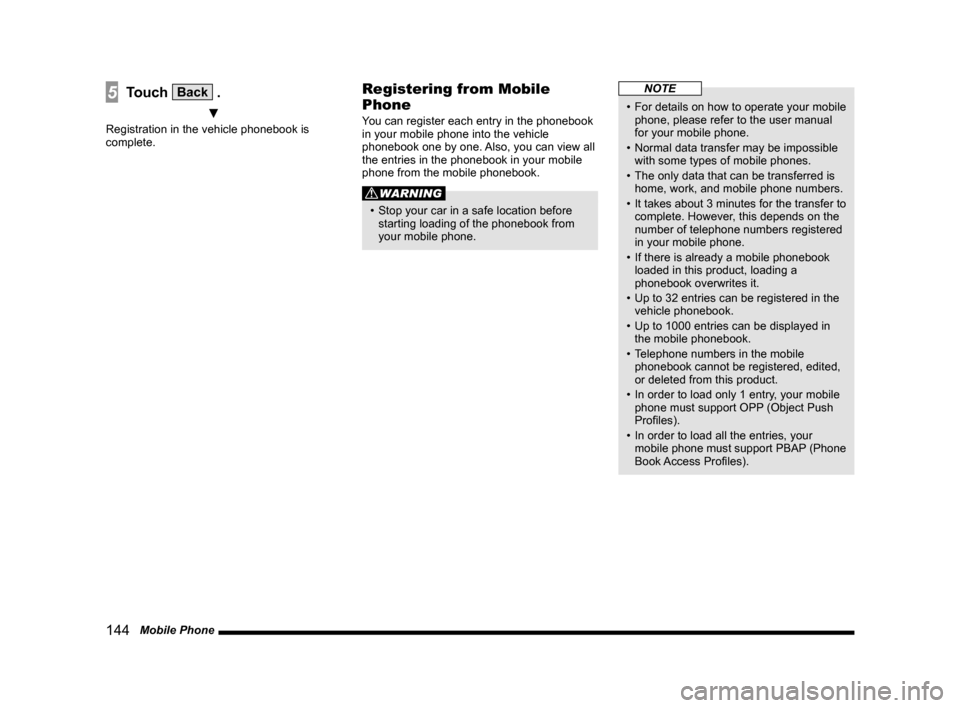
5Touch Back .
▼
Registration in the vehicle phonebook is
complete.
Registering from Mobile
Phone
You can register each entry in the phonebook
in your mobile phone into the vehicle
phonebook one by one. Also, you can view all
the entries in the phonebook in your mobile
phone from the mobile phonebook.
WARNING
• Stop your car in a safe location before
starting loading of the phonebook from
your mobile phone.
NOTE
• For details on how to operate your mobile
phone, please refer to the user manual
for your mobile phone.
• Normal data transfer may be impossible
with some types of mobile phones.
• The only data that can be transferred is
home, work, and mobile phone numbers.
• It takes about 3 minutes for the transfer to
complete. However, this depends on the
number of telephone numbers registered
in your mobile phone.
• If there is already a mobile phonebook
loaded in this product, loading a
phonebook overwrites it.
• Up to 32 entries can be registered in the
vehicle phonebook.
• Up to 1000 entries can be displayed in
the mobile phonebook.
• Telephone numbers in the mobile
phonebook cannot be registered, edited,
or deleted from this product.
• In order to load only 1 entry, your mobile
phone must support OPP (Object Push
Profiles).
• In order to load all the entries, your
mobile phone must support PBAP (Phone
Book Access Profiles).
Page 145 of 226
Mobile Phone 145
INFO/SETTINGS INFO
Reading in one Entr y
1Display the vehicle phonebook
screen.
→“Display the Phonebook”(P143)
2Touch ▲ , and then
Register .
3Touch
Register from Mobile Phone .
4Touch Ye s .
Do this while the message “Import one
phonebook entry?” is displayed.
5Select a telephone number.
It is necessary to operate your mobile
phone to select the telephone numbers to
be transferred.
For details, refer to the user manual for
your mobile phone.
▼
When the loading to the vehicle phonebook is
complete, the message “Import successful.” is
displayed. Reading in All Entries
1Display the mobile phonebook
screen.
→“Display the Phonebook”(P143)
2Touch ▲ , and then Import .
3Touch Ye s .
Do this while the message “Import entire
phonebook from this phone?” is displayed.
▼
When the loading to the mobile phonebook is
complete, the message “Import successful.” is
displayed.
Edit a Phonebook
You can edit a phonebook that has been
registered.
1Display the vehicle phonebook
screen.
→“Display the Phonebook”(P143)
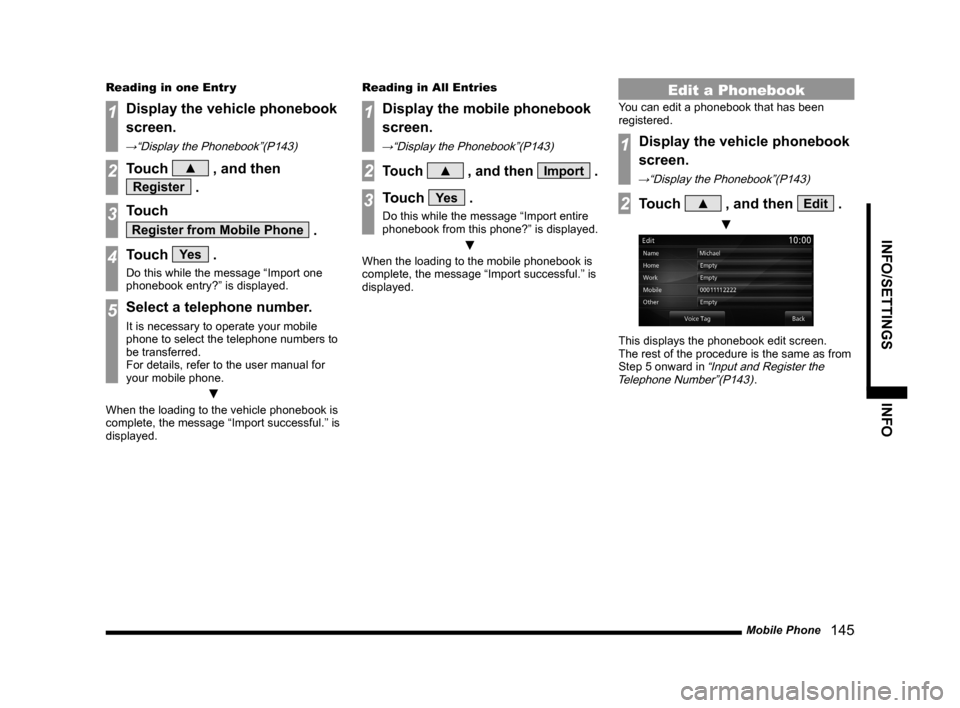
2Touch ▲ , and then Edit .
▼
This displays the phonebook edit screen.
The rest of the procedure is the same as from
Step 5 onward in
“Input and Register the
Telephone Number”(P143).
Page 146 of 226
146 Mobile Phone
Deleting a Phonebook
You can delete a phonebook that has been
registered.
1Display the vehicle phonebook
screen.
→“Display the Phonebook”(P143)
2Touch ▲ , and then Delete .
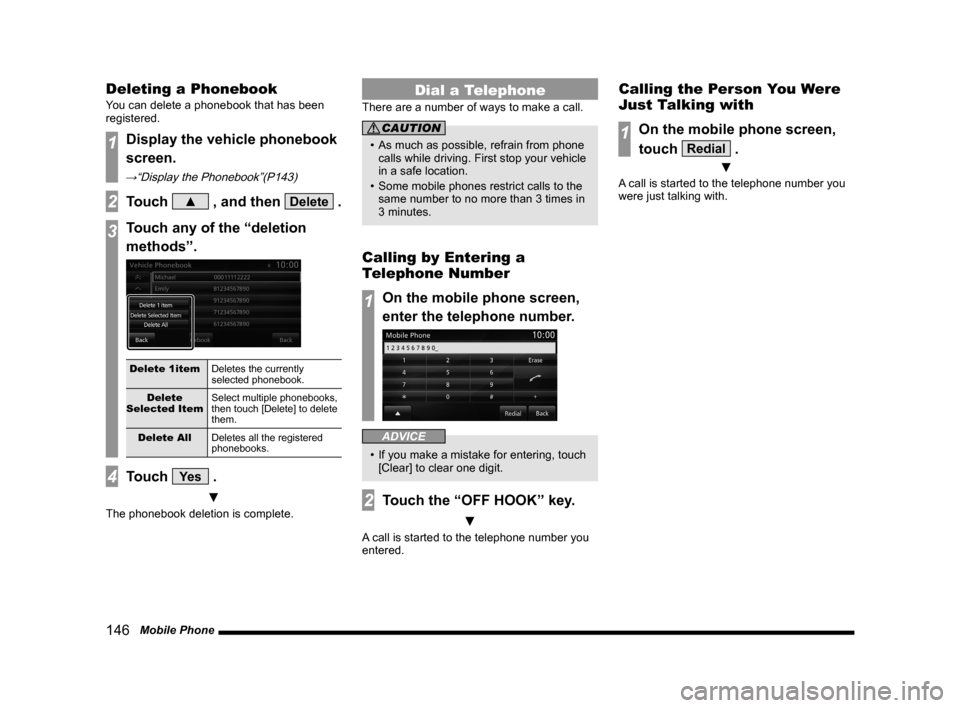
3Touch any of the “deletion
methods”.
Delete 1item Deletes the currently
selected phonebook.
Delete
Selected Item Select multiple phonebooks,
then touch [Delete] to delete
them.
Delete All Deletes all the registered
phonebooks.
4Touch Ye s .
▼
The phonebook deletion is complete.
Dial a Telephone
There are a number of ways to make a call.
CAUTION
• As much as possible, refrain from phone
calls while driving. First stop your vehicle
in a safe location.
• Some mobile phones restrict calls to the
same number to no more than 3 times in
3 minutes.
Calling by Entering a
Telephone Number
1On the mobile phone screen,
enter the telephone number.
ADVICE
• If you make a mistake for entering, touch
[Clear] to clear one digit.
2Touch the “OFF HOOK” key.
▼
A call is started to the telephone number you
entered.
Calling the Person You Were
Just Talking with
1On the mobile phone screen,
touch
Redial .
▼
A call is started to the telephone number you
were just talking with.
Page 147 of 226
Mobile Phone 147
INFO/SETTINGS INFO
Making a Call from a
Phonebook
1Display the vehicle phonebook
screen or the mobile
phonebook screen.
→“Display the Phonebook”(P143)
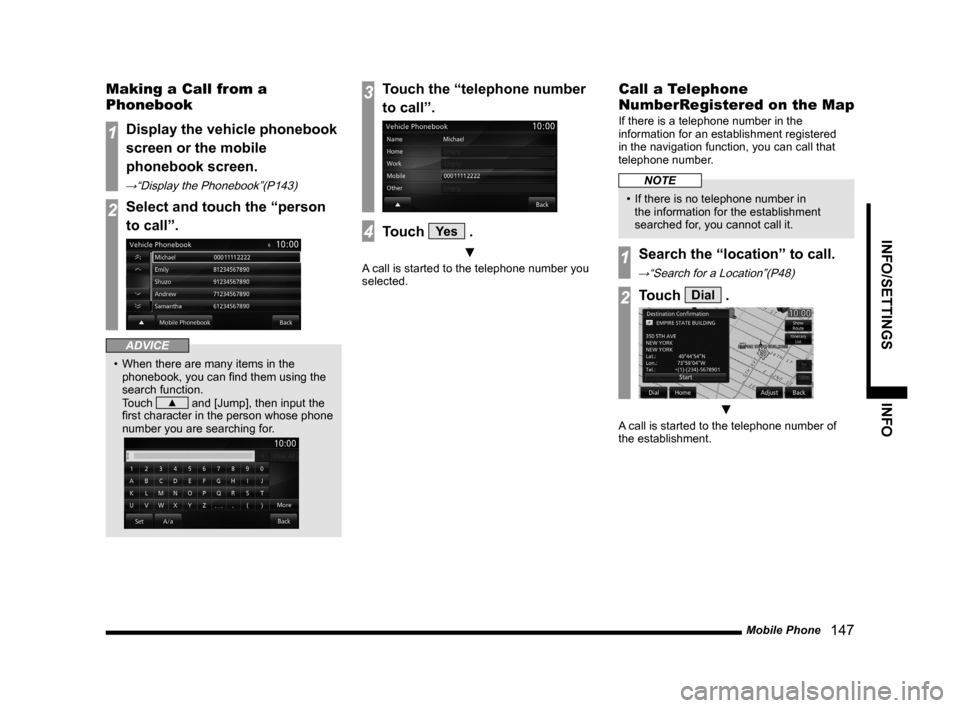
2Select and touch the “person
to call”.
ADVICE
• When there are many items in the
phonebook, you can find them using the
search function.
Touch
▲ and [Jump], then input the
first character in the person whose phone
number you are searching for.
3Touch the “telephone number
to call”.
4Touch Ye s .
▼
A call is started to the telephone number you
selected.
Call a Telephone
NumberRegistered on the Map
If there is a telephone number in the
information for an establishment registered
in the navigation function, you can call that
telephone number.
NOTE
• If there is no telephone number in
the information for the establishment
searched for, you cannot call it.
1Search the “location” to call.
→“Search for a Location”(P48)
2Touch Dial .
▼
A call is started to the telephone number of
the establishment.
Page 148 of 226
![MITSUBISHI LANCER SE AWC 2014 8.G MMCS Manual 148 Mobile Phone
Incoming Calls
The incoming call ring is sounded and the
incoming call screen is displayed.
ADVICE
• Touching [Mute On] switches OFF the
mic connected to this product. Touching MITSUBISHI LANCER SE AWC 2014 8.G MMCS Manual 148 Mobile Phone
Incoming Calls
The incoming call ring is sounded and the
incoming call screen is displayed.
ADVICE
• Touching [Mute On] switches OFF the
mic connected to this product. Touching](/img/19/7496/w960_7496-147.png)
148 Mobile Phone
Incoming Calls
The incoming call ring is sounded and the
incoming call screen is displayed.
ADVICE
• Touching [Mute On] switches OFF the
mic connected to this product. Touching
[Mute Off] switches ON the mic function.
• Touching [Transfer Call] switches the
speaker and mic functions to the mobile
phone side. Touching [Transfer Call]
again switches the speaker and mic
functions to this product.
• The incoming call screen will disappear
after approximately four seconds.
To display that screen again, touch [TEL].
Answering an Incoming Call
1Press the “OFF HOOK” key on
the steering wheel.
→“Steering Remote Control Switch
Operation”(P82)
▼
You can now talk with the calling party.
Ending a Telephone Call
1Press the “ON HOOK” key on
the steering wheel.
→“Steering Remote Control Switch Operation”(P82)
▼
This ends the incoming call.
Page 149 of 226
Mobile Phone 149
INFO/SETTINGS INFO
Setting Passcode
You can lock the telephone function with a
passcode to prevent any third party from using
the telephone function without your approval.
1On the mobile phone screen,
touch
▲ then Lock .
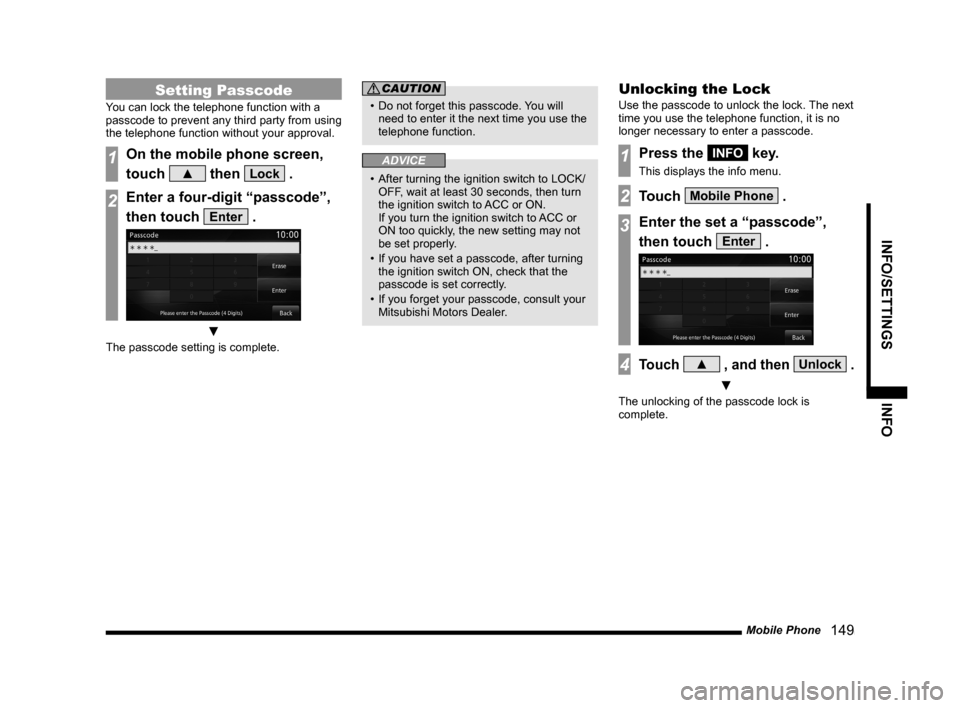
2Enter a four-digit “passcode”,
then touch
Enter .
▼
The passcode setting is complete.
CAUTION
• Do not forget this passcode. You will
need to enter it the next time you use the
telephone function.
ADVICE
• After turning the ignition switch to LOCK/
OFF, wait at least 30 seconds, then turn
the ignition switch to ACC or ON.
If you turn the ignition switch to ACC or
ON too quickly, the new setting may not
be set properly.
• If you have set a passcode, after turning
the ignition switch ON, check that the
passcode is set correctly.
• If you forget your passcode, consult your
Mitsubishi Motors Dealer.
Unlocking the Lock
Use the passcode to unlock the lock. The next
time you use the telephone function, it is no
longer necessary to enter a passcode.
1Press the INFO key.
This displays the info menu.
2Touch Mobile Phone .
3Enter the set a “passcode”,
then touch
Enter .
4Touch ▲ , and then Unlock .
▼
The unlocking of the passcode lock is
complete.
Page 150 of 226
150 Camera
Equipment by type
Camera
When a rear view camera, available
separately, is connected, the picture from
this rear view camera can be displayed on
the display.
For details, refer to the user manual for the
vehicle.
WARNING
• The camera picture does not
exempt the driver from the
obligation to pay attention or
reduce that obligation.
Drive checking the safety of the
surroundings with your own eyes the
same way that you do when there is no
camera.
CAUTION
• If mud, snow, or the like sticks to a
camera, do not strike it off with a stiff rod
or the like. Rather use water or warm
water, then wipe it off with a soft cloth.
• Depending on the number of people in
the car and how much it is loaded, the
camera picture and guide lines may be
out of line.
• On sloped roads and when the car is
otherwise tilted, the camera picture and
guide lines may be out of line.
Displaying
Display Pictures from the
Rear View Camera
1Move the gear shift position to
“R”.
▼
This displays the picture from the rear view
camera.