clutch MITSUBISHI LANCER SPORTBACK 2014 8.G Workshop Manual
[x] Cancel search | Manufacturer: MITSUBISHI, Model Year: 2014, Model line: LANCER SPORTBACK, Model: MITSUBISHI LANCER SPORTBACK 2014 8.GPages: 422, PDF Size: 55.11 MB
Page 232 of 422
Bluetooth® 2.0 interface (if so equipped)
Features and controls 5-165
5
N00564901065
You can turn a voice model registered with the speaker enrollment function on and off whenever you want.You can also retrain the system. Use the following procedure to perform these actions. 1. Press the SPEECH button (except for vehicles with Mitsubishi Multi-Commu-nication System) or PICK-UP button (for vehicles with Mitsubishi Multi-Commu- nication System).2. Say “Voice training.” 3. If you have completed a speaker enroll- ment process once already, the voiceguide will say either “Enrollment is enabled. Would you like to disable or retrain?” or “Enrollment is disabled.Would you like to enable or retrain?” 4. When enrollment is “enabled,” the voice model is on; when enrollment is “dis-abled,” the voice model is off. Say the command that fits your needs. Say “Retrain” to start the speaker enroll-ment process and recreate a new voice model. (Refer to “Speaker enrollment” on page 5-163.)
N00565001207
Before you can make or receive hands-free calls or play music using the Bluetooth
® 2.0
interface function, you must pair the Blue- tooth
® device and Bluetooth
® 2.0 interface.
Up to 7 Bluetooth
® devices can be paired
with the Bluetooth
® 2.0 interface.
If multiple paired Bluetooth
® devices are
available in the vehicle, the cellular phone or music player most recently connected is auto- matically connected to the Bluetooth
® 2.0
interface. You can also change a Bluetooth
® device to
be connected.
To pair a Bluetooth
® device with the Blue-
tooth
® 2.0 interface, follow the steps below.
1. Stop your vehicle in a safe area, put the gearshift lever (manual transaxle) in the “N” (Neutral) position, or the selector lever {continuously variable transmission(CVT)} or gearshift lever (Twin Clutch SST) in the “P” (PARK) position, and then pull the parking brake lever. 2. Press the SPEECH button (except for vehicles with Mitsubishi Multi-Commu- nication System) or PICK-UP button (forvehicles with Mitsubishi Multi-Commu-nication System). 3. Say “Setup.” 4. Say “Pairing Options.”
Enabling and disabling the voice model and retraining
Connecting the Bluetooth
® 2.0
interface and Bluetooth
® device
NOTE
Pairing is required only when the device is used for the first time. Once the device has been paired with the Bluetooth
® 2.0 inter-
face, all you need is to bring the device into the vehicle next time and the device will connect to the Bluetooth
® 2.0 interface auto-
matically (if supported by the device).
To p a i r
NOTE
You cannot pair any Bluetooth
® device with
the Bluetooth
® 2.0 interface unless the vehi-
cle is parked. Before pairing a Bluetooth
®
device with the Bluetooth
® 2.0 interface,
confirm that the vehicle is parked in a safe location.
BK0200700US.book
165 ページ 2013年2月15日 金曜日 午後12時17分
Page 265 of 422

Parking 6-6 Driving safety
6
N00629600261
When parking on a hill, set the parking brake, and turn the front wheels toward the curb on adownhill, or away from the curb on an uphill. If necessary, apply chocks to wheels. Place the gearshift lever into the “R” (Reverse) position when parking on a down-hill slope, into the 1s
t position when parking
on an uphill slope. Be sure that the parking brake is firmly set when parked and that the selector lever(CVT) or gearshift lever (Twin Clutch SST) is in the “P” (PARK) position. When parking on a hill, it is important to setthe parking brake before moving the selector lever (CVT) or gearshift lever (Twin Clutch
SST) to the “P” (PARK) position. This pre- vents loading the parking brake against the transaxle. When this happens, it is difficult to move the selector lever (CVT) or gearshiftlever (Twin Clutch SST) out of the “P” (PARK) position. Never leave the engi
ne running while you
take a short sleep/rest. Also, never leave the engine running in a closed or poorly venti-lated place. Your front bumper can be damaged if you scrape it over curbs or parking stop blocks. Be careful when traveling up or down steepslopes where your bumper can scrape the road.
When leaving the vehicle unattended, always carry the key and lock all doors and the rear hatch.Always try to park your vehicle in a well lit area.
N00629900323
It is very important to know how muchweight your vehicle can carry. This weight is called the vehicle capacity weight andincludes the weight of all occupants, cargo and non-factory-installed options. The tire and loading information placard located onthe driver’s door sill of your vehicle will show how much weight it may properly carry.
Parking Parking on a hill For vehicles equipped with man- ual transaxle For vehicles equipped with contin- uously variable transmission (CVT) or Twin Clutch SST
Parking with the engine run- ning
WA R N I N G Leaving the engine running risks injury or death from accidentally moving the gear- shift lever (manual transaxle or Twin Clutch SST) or the selector lever (CVT) orfrom the accumulation of toxic exhaust fumes in the passenger compartment.
Where you park
WA R N I N G Do not park your vehicle in areas where combustible materials such as dry grass or leaves can come in contact with a hot exhaust, since a fire could occur.
When leaving the vehicle Loading information
BK0200700US.bo
ok 6 ページ 2013年2月15日 金曜日 午後12時17分
Page 288 of 422

Automatic air conditioning with
Fahrenheit scale (if so equipped)
Comfort controls 7-17
7
N00760000063
You can change the following functions to match your preference. Enable automatic air control: When the mode selection dial or theblower speed selection dial is set to the “AUTO” position, the air selection switch will also be automatically controlled.
Disable automatic air control: Even when the mode selection dial or the blower speed selection dial is set to the “AUTO” position, the air selection switchwill not be automatically controlled. Changing the settings: Press the air selection switch for about 10seconds or longer. When the setting has changed, the system will beep and the indicator light will flash.• When the setting has changed fromenabled to disabled, the system will beep three times and the indicator will flash three times.• When the setting has changed from dis- abled to enabled, the system will beep two times and theindicator light will flash three times.
N00737300314
Push the switch, and the air conditioningcompressor will turn on. The air conditioningindicator light (A) will come on. A sound will be made every time you push the switch. Push the switch again and the air condition- ing compressor will stop and the indicator light (A) goes off.
CAUTION Using recirculated air for a long time may cause the windows to fog up.NOTE
If the mode selection dial is set between “ ” and “ ”, you cannot turn the air con- ditioning off or select the recirculation posi- tion.This prevents the windows from fogging up. When the mode selection dial or the blower speed selection dial is set to the “AUTO” position again after manual operation, the air selection switch will also be automaticallycontrolled.
Personalizing the air selection (Changing the function setting)
NOTE
The factory setting is “Enable automatic air control”. While the mode selection dial is set between “ ” and “ ” position, the air selection will automatically change to the outside air position, even if the sy
stem is set to “Disable
automatic air control”, in order to preventwindows from fogging up.
Air conditioning switch
CAUTION When using the air conditioning, the idling speed may slightly increase as the air condi-tioning compressor is switched on/off auto- matically. Especially for vehicles equipped with a continuously variable transmission(CVT) or Twin Clutch SST while the vehicle is stationary, fully depress the brake pedal to prevent the vehicle from creeping.
BK0200700US.bo
ok 17 ページ 2013年2月15日 金曜日 午後12時17分
Page 294 of 422
Automatic air conditioning with
Celsius scale (if so equipped)
Comfort controls 7-23
7
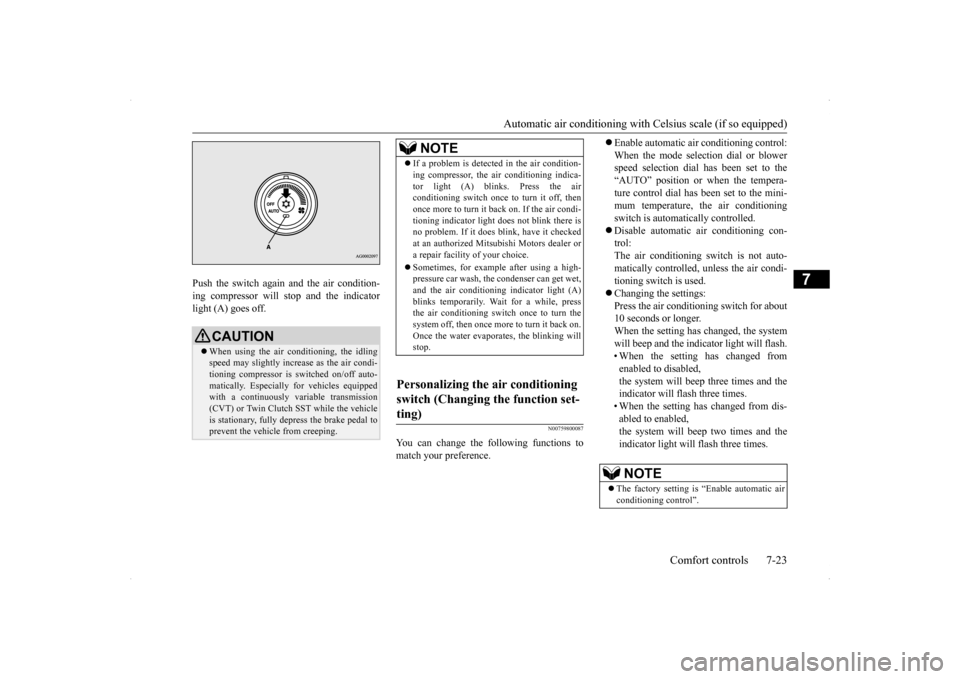
Push the switch again and the air condition- ing compressor will stop and the indicator light (A) goes off.
N00759800087
You can change the following functions tomatch your preference.
Enable automatic air conditioning control: When the mode selection dial or blower speed selection dial has been set to the “AUTO” position or when the tempera-ture control dial has been set to the mini- mum temperature, the air conditioning switch is automatically controlled. Disable automatic air conditioning con- trol: The air conditioning switch is not auto-matically controlled, unless the air condi-tioning switch is used. Changing the settings: Press the air conditioning switch for about10 seconds or longer. When the setting has changed, the system will beep and the indicator light will flash.• When the setting has changed from enabled to disabled, the system will beep three times and theindicator will flash three times. • When the setting has changed from dis- abled to enabled,the system will beep two times and the indicator light will flash three times.
CAUTION When using the air conditioning, the idling speed may slightly increase as the air condi-tioning compressor is switched on/off auto- matically. Especially for vehicles equipped with a continuously variable transmission(CVT) or Twin Clutch SST while the vehicle is stationary, fully depress the brake pedal to prevent the vehicle from creeping.
NOTE
If a problem is detect
ed in the air condition-
ing compressor, the air conditioning indica- tor light (A) blinks. Press the air conditioning switch once to turn it off, then once more to turn it back on. If the air condi-tioning indicator light
does not blink there is
no problem. If it does blink, have it checked at an authorized Mitsubishi Motors dealer ora repair facility of your choice. Sometimes, for example after using a high- pressure car wash, the condenser can get wet, and the air conditioning indicator light (A) blinks temporarily. Wait for a while, pressthe air conditioning switch once to turn the system off, then once more to turn it back on. Once the water evaporates, the blinking willstop.
Personalizing the air conditioning switch (Changing the function set- ting)
NOTE
The factory setting is “Enable automatic air conditioning control”.
BK0200700US.bo
ok 23 ページ 2013年2月15日 金曜日 午後12時17分
Page 335 of 422
If the vehicle breaks down 8-2 For emergencies
8
N00836300204
If your vehicle breaks down on the road, move to the shoulder and turn on the hazardwarning flashers. If there is no shoulder, or the shoulder is not safe, drive in the right lane slowly, with the hazard lights flashing, untilyou come to a safe stopping place. Keep the flashers flashing. If the engine stops, there will be no power assist to the steering and brakes, making these difficult to use. The brake booster will not work, so the brakes will not grip well. The brake pedalwill be harder to press than usual. Since there is no power steering assist, the steering wheel will be hard to turn.
Get help from your passengers, bystanders, etc. to push the vehicl
e and move it to a safe
zone.
N00836400654
If the engine cannot be started because the battery is weak or dead, you can start it withthe battery from another vehicle using jumper cables. 1. Take off any metal jewelry such as watch bands or bracelets that might make an accidental electrical contact.
2. Position the vehicles close enough together so that the jumper cables can reach, but be sure the vehicles aren’t touching each other. 3. You could be injured if the vehicles move. Set the parking brake firmly on each vehi- cle. Put an automatic transaxle, CVT or Twin Clutch SST in “P” (PARK) or amanual transaxle in “N” (Neutral). Turn the ignition switch to the “LOCK” posi- tion.
If the vehicle breaks down If the engine stops/fails When the engine fails at the intersection
Jump-starting the engine
WA R N I N G When using jumper cables to start a vehi- cle, follow the procedures and be very cau- tious. CAUTION Do not try to start your vehicle by pushing or towing. Vehicles equipped with continuously variable transmission (CVT) or Twin Clutch SST cannot be started this way. Pushing ortowing a vehicle that has a manual transaxle may overheat and damage the catalytic con- verter. Also, there is more risk of an accidentwhen a vehicle is being pushed or towed.
CAUTION Check the other vehicle. It must have a 12- volt battery. If the other system isn’t 12-volt, both systems can be damaged.WA R N I N G Turn the ignition switch to the “LOCK” position on both vehicles. Make sure thatthe cables or your clothes cannot be caught by the fan or drive belt. Personal injury could result. NOTE
Turn off all lights, heater, and other electrical loads. This will avoid sparks and help saveboth batteries.
BK0200700US.bo
ok 2 ページ 2013年2月15日 金曜日 午後12時17分
Page 339 of 422
How to change a tire 8-6 For emergencies
8
N00832600124 N00832700242
Before removing the jack, lift up the board.
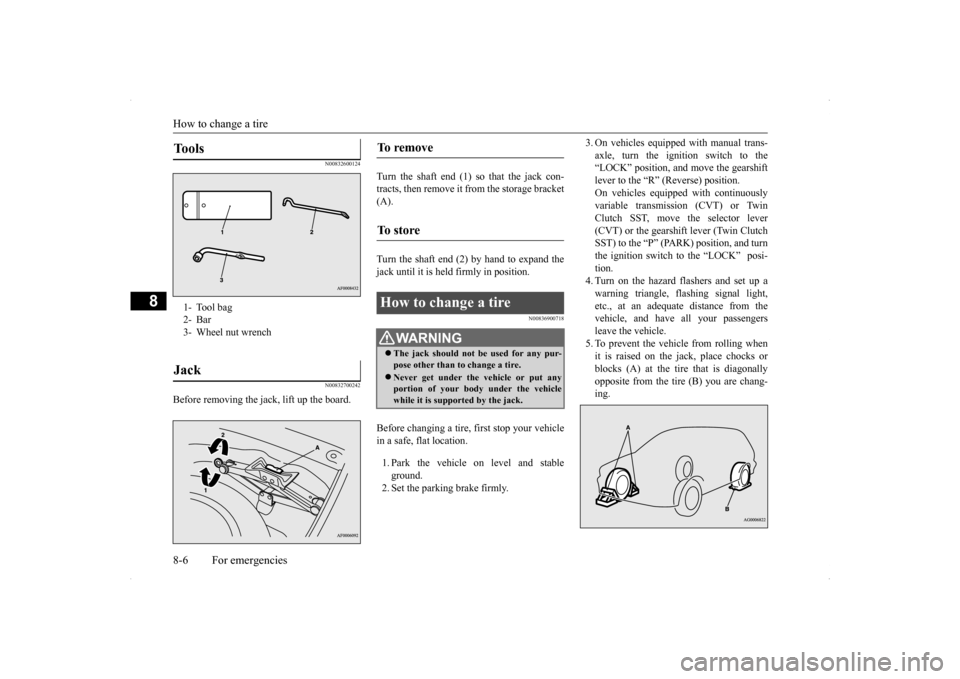
Turn the shaft end (1) so that the jack con- tracts, then remove it from the storage bracket(A). Turn the shaft end (2) by hand to expand the jack until it is held firmly in position.
N00836900718
Before changing a tire, first stop your vehicle in a safe, flat location. 1. Park the vehicle on level and stable ground.2. Set the parking brake firmly.
3. On vehicles equipped with manual trans- axle, turn the ignition switch to the “LOCK” position, and move the gearshift lever to the “R” (Reverse) position.On vehicles equipped with continuously variable transmission (CVT) or Twin Clutch SST, move the selector lever(CVT) or the gearshift lever (Twin Clutch SST) to the “P” (PARK) position, and turn the ignition switch to the “LOCK” posi-tion.4. Turn on the hazard flashers and set up a warning triangle, flashing signal light, etc., at an adequate distance from thevehicle, and have all your passengers leave the vehicle. 5. To prevent the vehicle from rolling whenit is raised on the jack, place chocks or blocks (A) at the tire that is diagonally opposite from the tire (B) you are chang-ing.
Tools 1- Tool bag2- Bar3- Wheel nut wrenchJack
To remove To s t o r e How to change a tire
WA R N I N G The jack should not be used for any pur- pose other than to change a tire. Never get under the vehicle or put any portion of your body under the vehiclewhile it is supported by the jack.
BK0200700US.bo
ok 6 ページ 2013年2月15日 金曜日 午後12時17分
Page 350 of 422
9
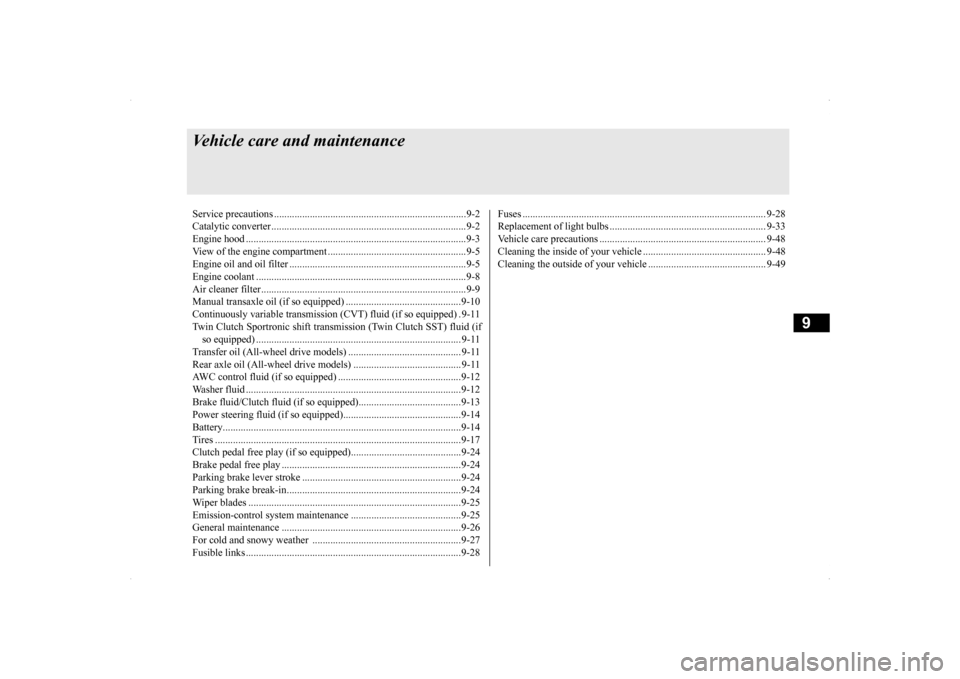
Vehicle care and maintenanceService precautions ..........
.................................................................9-2
Catalytic converter .
.................................................
..........................9-2
Engine hood ...............................
.......................................................9-3
View of the engine co
mpartment ......................................................9-5
Engine oil and oil filt
er ...........................................
..........................9-5
Engine coolant .................
.................................................................9-8
Air cleaner filter.....
.................................................
..........................9-9
Manual transaxle oil (if so
equipped) .............................................9-10
Continuously variable transmission
(CVT) fluid (if so equipped) . 9-11
Twin Clutch Sportronic shift trans
mission (Twin Clutch SST) fluid (if
so equipped) ...........................
..................................................... 9-11
Transfer oil (All-wheel dr
ive models) ............................................ 9-11
Rear axle oil (All-wheel dr
ive models) .......................................... 9-11
AWC control fluid (if so
equipped) ................................................9-12
Washer fluid .....................
...............................................................9-12
Brake fluid/Clutch fluid (if
so equipped)........................................9-13
Power steering fluid (if so equipped)..............................................9-14 Battery........................................
.....................................................9-14
Tires ...........................................
.....................................................9-17
Clutch pedal free play (if so equipped)...........................................9-24 Brake pedal free play
..............................................
........................9-24
Parking brake lever stroke ..............................................................9-24Parking brake break-in
............................................
........................9-24
Wiper blades ..............................
.....................................................9-25
Emission-control system maintenance ...........................................9-25 General maintenance
..............................................
........................9-26
For cold and snowy weat
her ..........................................................9-27
Fusible links .....................
...............................................................9-28
Fuses ...................................................
............................................ 9-28
Replacement of light bul
bs ....................................
......................... 9-33
Vehicle care precautions
........................................
......................... 9-48
Cleaning the inside of you
r vehicle ................................................ 9-48
Cleaning the outside of your
vehicle .............................................. 9-49
BK0200700US.bo
ok 1 ページ 2013年2月15日 金曜日 午後12時17分
Page 354 of 422
View of the engine compartment
Vehicle care and maintenance 9-5
9
Unlatch the prop from the engine hood and put it back in its retainer. Slowly lower the engine hood about 8 inches (20 cm), then let it drop from its own weight.
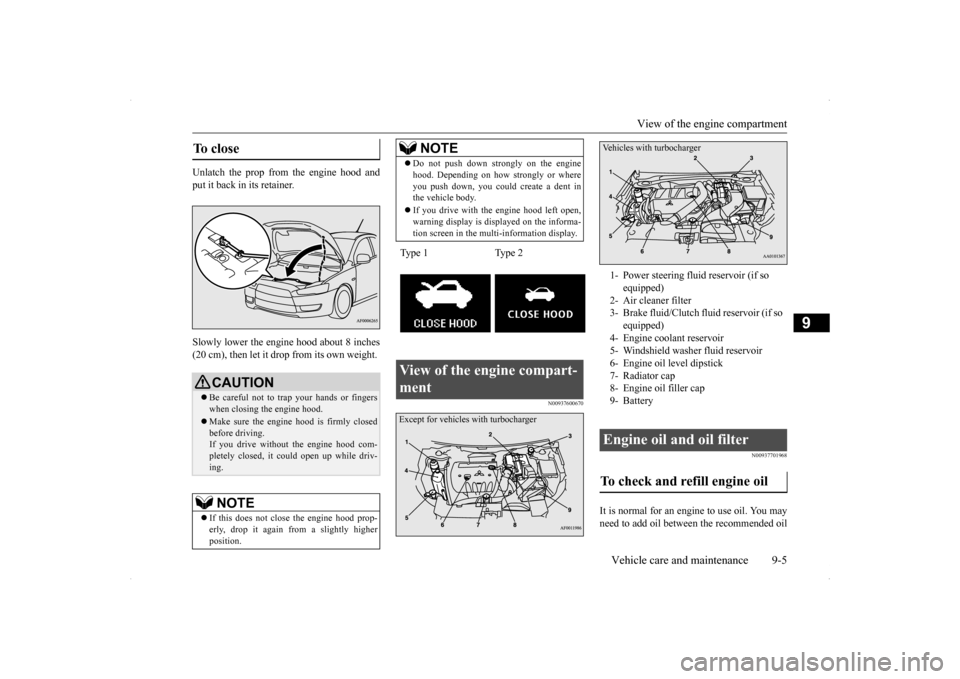
N00937600670
N00937701968
It is normal for an engi
ne to use oil. You may
need to add oil between the recommended oil
To close
CAUTION Be careful not to trap your hands or fingers when closing the engine hood. Make sure the engine hood is firmly closed before driving. If you drive without the engine hood com-pletely closed, it could open up while driv- ing.NOTE
If this does not close the engine hood prop- erly, drop it again from a slightly higher position.
Do not push down strongly on the engine hood. Depending on how strongly or where you push down, you could create a dent in the vehicle body. If you drive with the engine hood left open, warning display is displayed on the informa- tion screen in the multi-information display.
Type 1 Type 2View of the engine compart- ment
NOTE
Except for vehicles with turbocharger
1- Power steering fluid reservoir (if so
equipped)
2- Air cleaner filter 3- Brake fluid/Clutch fluid reservoir (if so
equipped)
4- Engine coolant reservoir 5- Windshield washer fluid reservoir6- Engine oil level dipstick7- Radiator cap 8- Engine oil filler cap 9- Battery Engine oil and oil filter To check and refill engine oil Vehicles with turbocharger
BK0200700US.bo
ok 5 ページ 2013年2月15日 金曜日 午後12時17分
Page 360 of 422

Continuously variable transmissi
on (CVT) fluid (if so equipped)
Vehicle care and maintenance 9-11
9
N00938100063
The continuously variable transmission (CVT) should be maintained and serviced by an authorized Mitsubishi Motors dealer or a repair facility of your choice to obtain thebest performance and longest life. It is impor-tant that the transmission fluid is kept at the correct level. Use only “Mitsubishi Motors Genuine CVTF-J4” transmission fluid to ensure opti- mum transmission performance. Mitsubishi Motors Corporation does not rec- ommend the addition of any fluid additives tothe transmission.
N00938300049
The Twin Clutch Sportronic shift transmis-sion (Twin Clutch SST) should be maintained and serviced by an authorized Mitsubishi Motors dealer or a repair facility of yourchoice to obtain the best performance andlongest life. It is impor
tant that the transmis-
sion fluid is kept at the correct level. Use only Mitsubishi Motors Genuine SSTF-I to ensure optimum transmission performance. Mitsubishi Motors Corporation does not rec- ommend the addition of any fluid additives to the transmission.
N00938400242
Whenever the transfer oil level is checked, add oil as necessary to maintain the properlevel. Fill or change the oil according the table.
N00915200230
Whenever the oil level is checked, add oil as necessary to maintain the proper level.Fill or change oil according to the table.
Viscosity range
SAE 75W-80
Continuously variable transmission (CVT) fluid
(if
so equipped)Fluid type
Special additives
Twin Clutch Sportronic shift transmission (Twin Clutch SST) fluid
(if so equipped)
Fluid type
CAUTION Using the improper transmission fluid may damage the transaxle.
Special additives
Transfer oil (All-wheel drive models) Oil type Lubricant
Mitsubishi Motors Genuine LSD gear oil or equivalent
Rear axle oil (All-wheel drive models) Oil type Lubricant
Mitsubishi Motors Genuine LSD gear oil or equivalent
BK0200700US.bo
ok 11 ページ 2013年2月15日 金曜日 午後12時17分
Page 362 of 422
Brake fluid/Clutch fluid (if so equipped) Vehicle care and maintenance 9-13
9
Check the washer fluid level at regular inter- vals and add washer fluid to reservoir if nec- essary. Open the reservoir cap and check the fluidlevel with the dipstick. When freezing weather is anticipated, flush out the water in the reservoir by operating thepump. Fill the reservoir with windshield anti- freeze (not radiator antifreeze), and operate the system for a few seconds to flush out theresidual water.
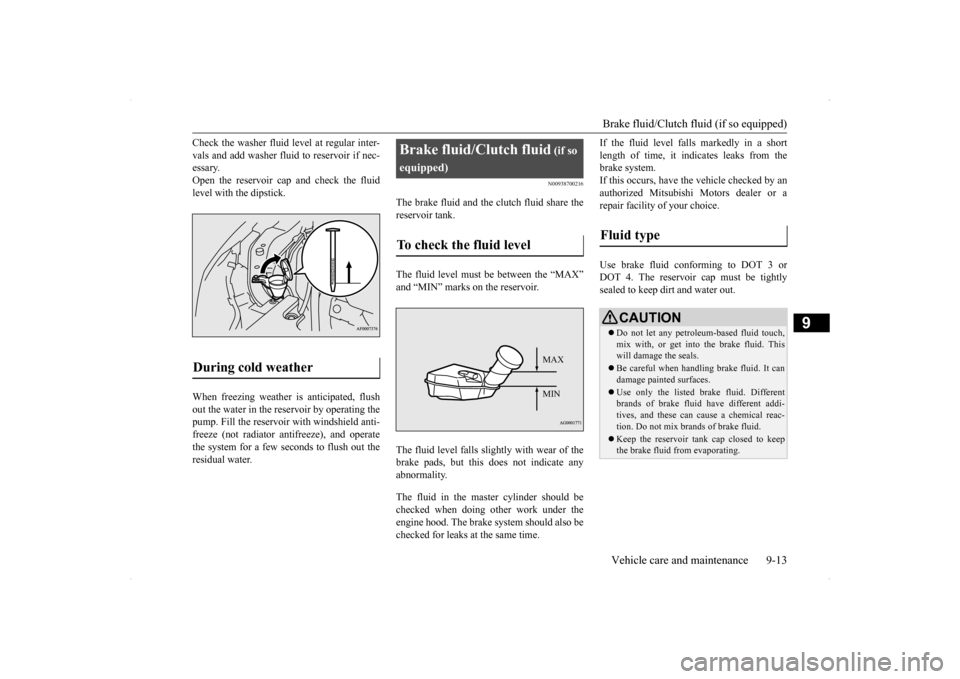
N00938700216
The brake fluid and the clutch fluid share thereservoir tank. The fluid level must be between the “MAX” and “MIN” marks on the reservoir. The fluid level falls slightly with wear of the brake pads, but this does not indicate any abnormality. The fluid in the master cylinder should be checked when doing other work under the engine hood. The brake
system should also be
checked for leaks at the same time.
If the fluid level falls markedly in a short length of time, it indicates leaks from the brake system. If this occurs, have the vehicle checked by anauthorized Mitsubishi Motors dealer or a repair facility of your choice. Use brake fluid conforming to DOT 3 or DOT 4. The reservoir cap must be tightly sealed to keep dirt and water out.
During cold weather
Brake fluid/Clutch fluid
(if so
equipped)To check the fluid level
MAX MIN
Fluid type
CAUTION Do not let any petroleum-based fluid touch, mix with, or get into
the brake fluid. This
will damage the seals. Be careful when handling brake fluid. It can damage painted surfaces. Use only the listed brake fluid. Different brands of brake fluid have different addi- tives, and these can cause a chemical reac- tion. Do not mix bra
nds of brake fluid.
Keep the reservoir tank cap closed to keep the brake fluid from evaporating.
BK0200700US.bo
ok 13 ページ 2013年2月15日 金曜日 午後12時17分