window MITSUBISHI MIRAGE 2015 6.G Owner's Manual
[x] Cancel search | Manufacturer: MITSUBISHI, Model Year: 2015, Model line: MIRAGE, Model: MITSUBISHI MIRAGE 2015 6.GPages: 300, PDF Size: 43.44 MB
Page 141 of 300
Electric rear window defogger switch 5-80 Features and controls
5
N00523700403
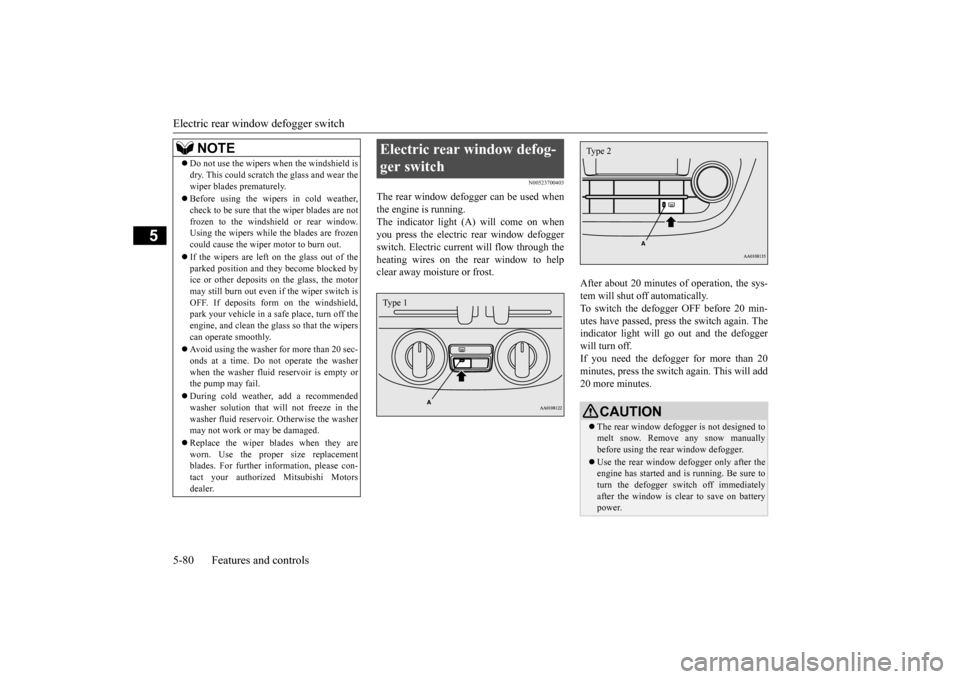
The rear window defogger can be used when the engine is running. The indicator light (A) will come on whenyou press the electric rear window defogger switch. Electric current will flow through the heating wires on the rear window to helpclear away moisture or frost.
After about 20 minutes of operation, the sys- tem will shut off automatically.To switch the defogger OFF before 20 min- utes have passed, press the switch again. The indicator light will go
out and the defogger
will turn off. If you need the defogger for more than 20 minutes, press th
e switch again. This will add
20 more minutes.
NOTE
Do not use the wipers when the windshield is dry. This could scratch the glass and wear thewiper blades prematurely. Before using the wipers in cold weather, check to be sure that the wiper blades are notfrozen to the windshield or rear window. Using the wipers while the blades are frozen could cause the wiper motor to burn out. If the wipers are left on the glass out of the parked position and th
ey become blocked by
ice or other deposits on the glass, the motor may still burn out even
if the wiper switch is
OFF. If deposits form on the windshield,park your vehicle in a safe place, turn off the engine, and clean the glass so that the wipers can operate smoothly. Avoid using the washer for more than 20 sec- onds at a time. Do not
operate the washer
when the washer fluid reservoir is empty or the pump may fail. During cold weather, add a recommended washer solution that will not freeze in the washer fluid reservoir. Otherwise the washermay not work or may be damaged. Replace the wiper blades when they are worn. Use the proper size replacement blades. For further info
rmation, please con-
tact your authorized
Mitsubishi Motors
dealer.
Electric rear window defog- ger switch Type 1
CAUTION The rear window defogge
r is not designed to
melt snow. Remove any snow manually before using the rear window defogger. Use the rear window defogger only after the engine has started and
is running. Be sure to
turn the defogger switch off immediatelyafter the window is clea
r to save on battery
power.Type 2
BK0212400US.book 80 ページ 2014年4月1日 火曜日 午後2時21分
Page 142 of 300
Horn switch
Features and controls 5-81
5
N00523800185
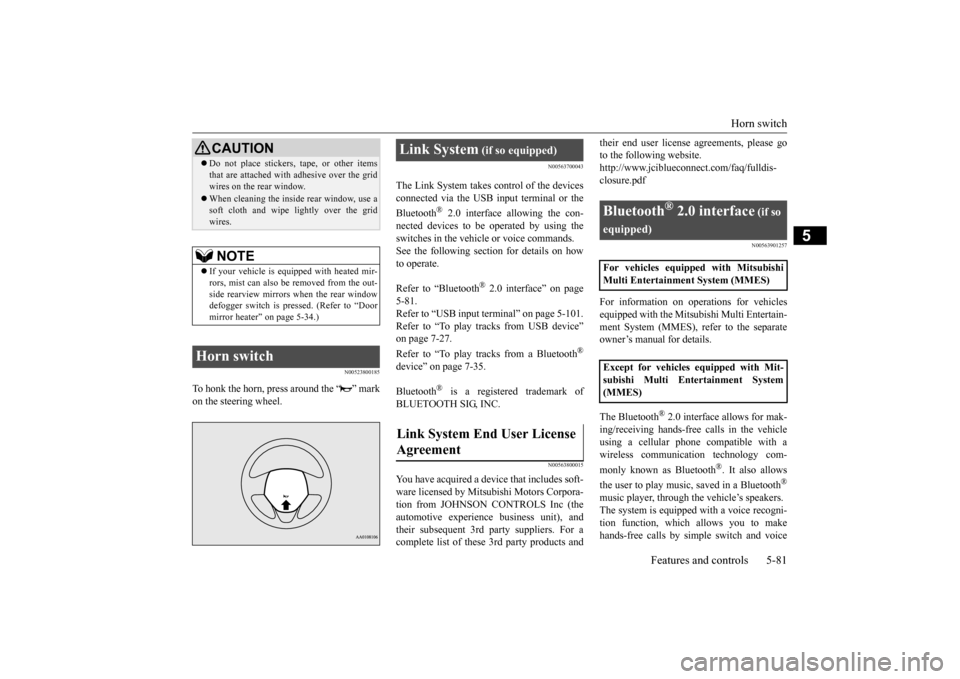
To honk the horn, press around the “ ” mark on the steering wheel.
N00563700043
The Link System takes co
ntrol of the devices
connected via the USB input terminal or the Bluetooth
® 2.0 interface allowing the con-
nected devices to be operated by using the switches in the vehicl
e or voice commands.
See the following sect
ion for details on how
to operate. Refer to “Bluetooth
® 2.0 interface” on page
5-81. Refer to “USB input terminal” on page 5-101. Refer to “To play tracks from USB device”on page 7-27. Refer to “To play tracks from a Bluetooth
®
device” on page 7-35. Bluetooth
® is a registered trademark of
BLUETOOTH SIG, INC.
N00563800015
You have acquired a device
that includes soft-
ware licensed by Mits
ubishi Motors Corpora-
tion from JOHNSON CONTROLS Inc (theautomotive experience business unit), and their subsequent 3rd party suppliers. For a complete list of these
3rd party products and
their end user license
agreements, please go
to the following website.http://www.jciblueconne
ct.com/faq/fulldis-
closure.pdf
N00563901257
For information on operations for vehicles equipped with the Mits
ubishi Multi Entertain-
ment System (MMES),
refer to the separate
owner’s manual for details. The Bluetooth
® 2.0 interface allows for mak-
ing/receiving ha
nds-free calls in the vehicle
using a cellular phone compatible with a wireless communicat
ion technology com-
monly known as Bluetooth
®. It also allows
the user to play music, saved in a Bluetooth
®
music player, through the vehicle’s speakers. The system is equipped with a voice recogni-tion function, which allows you to make hands-free calls by simple switch and voice
Do not place stickers,
tape, or other items
that are attached with adhesive over the gridwires on the rear window. When cleaning the inside
rear window, use a
soft cloth and wipe lightly over the gridwires.NOTE
If your vehicle is equi
pped with heated mir-
rors, mist can also be removed from the out- side rearview mirrors when the rear window defogger switch is pressed. (Refer to “Doormirror heater” on page 5-34.)
Horn switch
CAUTION
Link System
(if so equipped)
Link System End User License Agreement
Bluetooth
® 2.0 interface
(if so
equipped)For vehicles equipped with Mitsubishi Multi Entertainment System (MMES) Except for vehicles equipped with Mit- subishi Multi Entertainment System (MMES)
BK0212400US.book 81 ページ 2014年4月1日 火曜日 午後2時21分
Page 145 of 300

Bluetooth® 2.0 interface (if so equipped) 5-84 Features and controls
5
Your voice will be re
cognized by a micro-
phone in the overhead console, allowing you to make hands-free ca
lls with voice com-
mands.
N00564100086
The Bluetooth
® 2.0 interface is equipped
with a voice recognition function. Simply say voice commands and you can per- form various operations
and make or receive
hands-free calls. With the Bluetooth
® 2.0 interface, voice rec-
ognition is possible for
US English, North
American Spanish, Canadian French and Jap- anese. The factory se
tting is “English.”
1. Press the SPEECH button. 2. Say “Setup.” 3. Say “Language.”
4. The voice guide wi
ll say “Select a lan-
guage: English, Spanish, French or Japa-nese.” Say the desired language. (Example: “English”) 5. The voice guide wi
ll say “English (Span-
ish, French or Japanese) selected. Is this correct?” Say “Yes.” If you say “No,” the system will return toStep 4. 6. When the voice guide says “English (Spanish, French or Japanese) selected,” the language change process will be com-pleted and the system will return to the main menu.
Call waiting and three-
way calls can be used
by the Bluetooth
® 2.0 interface, only if it is
possible to use those services with your cel- lular phone.
Microphone
NOTE
If a cellular phone is
within close proximity
of the microphone, it may distort the sound quality. In this case,
place the cellular phone
as far as possible from the microphone.
Voice recognition function
NOTE
NOTE
If the voice command
that you say differs
from the predefined command or cannot be recognised due to ambient noise or some other reason, the Bluetooth
® 2.0 interface
will ask you for the voice command again upto 3 times. For best performance and further reduction of ambient noise, the vehicle windows should be closed, lower the blower speed and refrain from conversation with your passen-gers while engaging
the voice recognition
function. Some voice commands have alternative commands. Depending on the sele
cted language, some
functions may not
be available.
Language can be change
d by using the audio
control panel besides
the following proce-
dure. For details, refer to “To change the language (vehicles with Bluetooth
® 2.0 interface)” on
page 7-25.
Selecting the language
NOTE
The voice guide will repeat the same mes- sage twice. The first message is in the cur- rent language, and th
e second message is in
the selected
language.
If many entries are regist
ered in the vehicle
phonebook, changing the language will takea longer time. Changing the language
deletes the mobile
phonebook imported to the Bluetooth
® 2.0
interface. If you wish to use it, you will haveto import it again.
BK0212400US.book 84 ページ 2014年4月1日 火曜日 午後2時21分
Page 147 of 300

Bluetooth® 2.0 interface (if so equipped) 5-86 Features and controls
5
If a passcode has been set and the security function is enabled, the voice guide will say“Hands-free system is lo
cked. State the pass-
code to continue” when the SPEECH button is pressed to enter voice recognition mode.Say the 4-digit passcode number to enter the passcode. If the entered passcode
is wrong, the voice
guide will say “<4-digi
t passcode>, Incorrect
passcode. Please try again.” Enter the correct passcode.
Use the following procedure to turn off the security function by di
sabling the passcode.
1. Press the SPEECH button. 2. Say “Setup.” 3. Say “Passcode.”4. The voice guide w
ill say “Passcode is
enabled. Would you like to disable it?” Answer “Yes.”Answer “No” to cancel the disabling of the passcode and return to the main menu. 5. When the disabling of the passcode iscompleted, the voice
guide will say “Pass-
code is disabled” and the system will return to the main menu.
N00564700011
The Bluetooth
® 2.0 interface can use the
speaker enrollment function to create a voicemodel for one person per language. This makes it easier for the Bluetooth
® 2.0
interface to recognise
voice commands said
by you.
You can turn a voice model registered with the speaker enrollment function on and offwhenever you want.
N00564800038
It takes about 2 to 3 minutes to complete thespeaker enrollment process. To ensure the best results, run through the process while in the driver’s seat, in an envi- ronment that is as qu
iet as possible (when
there is no rain or strong winds and the vehi-cle windows are closed). Please turn off your phone while in speaker enrollment to prevent interruption of the process.Use the following procedure for speaker enrollment. 1. Stop your vehicle in a safe area, put the gearshift lever in the “N” (Neutral) posi-tion (manual transaxle), or the selector lever in the “P” (PARK) position (contin- uously variable transmission (CVT)), andpull the parking brake lever. 2. Press the SPEECH button.
It is required for a little time after engine stop that the entered passcode is actuallyrecorded in the system.If the ignition switch
or the operation mode
is made to ACC or ON or the engine is started immediately afte
r engine stop, there
is a case when the entered passcode is not recorded in the system. At this time, please try to enter the passcode again.
Entering the passcode
NOTE
You can reenter the passcode as many times as you want. If you have forgotten your passcode, say “Cancel” to quit the voice input mode and then check with an authorized Mitsubishi Motors dealer.NOTE
Disabling the passcode
NOTE
System must be unlocke
d to disable the pass-
code.
Speaker enrollment function
Speaker enrollment
NOTE
Speaker enrollment is not possible unless the vehicle is parked. Make sure you park the vehicle in a safe area before attemptingspeaker enrollment.
BK0212400US.book 86 ページ 2014年4月1日 火曜日 午後2時21分
Page 174 of 300
Vehicle preparatio
n before driving
Driving safety 6-3
6
N00629000702
For a safer and more enjoyable trip, always check for the following: Before starting the vehicle, make certain that you and all passengers are seated andwearing their seat
belts properly (with
children in the rear seat, in appropriate restraints), and that
all the doors and the
liftgate are locked.
Move the driver’s seat as far backward as possible, while keeping good visibility,and good control of the steering wheel, brakes, accelerator, and controls. Check the instrument panel indicators and multi-information display for any possible prob- lem. Similarly, the front
passenger seat should
also be moved as fa
r back as possible.
Make sure that infants and small children are properly restrained in accordance with all laws and regulations.
Check these by selectin
g the defroster mode,
and set the blower switch on high. You should be able to feel the air blowing against thewindshield. Refer to “Defrosti
ng or defogging (wind-
shield, door windows)” on page 7-10, 7-16. Check all the tires for heavy tread wear or uneven wear patterns. Look for stones, nails,glass, or other objects
stuck in the tread. Look
for any tread cuts or
sidewall cracks. Check
the wheel nuts for tightness, and the tires(including spare tire) for proper pressure.
WA R N I N G If a floor mat is the
wrong size or is not
properly installed, it can interfere with theoperation of the pedals. Interference withthe pedals can cause unintended accelera- tion and/or increase
d stopping distances
resulting in a cras
h and injury. Always
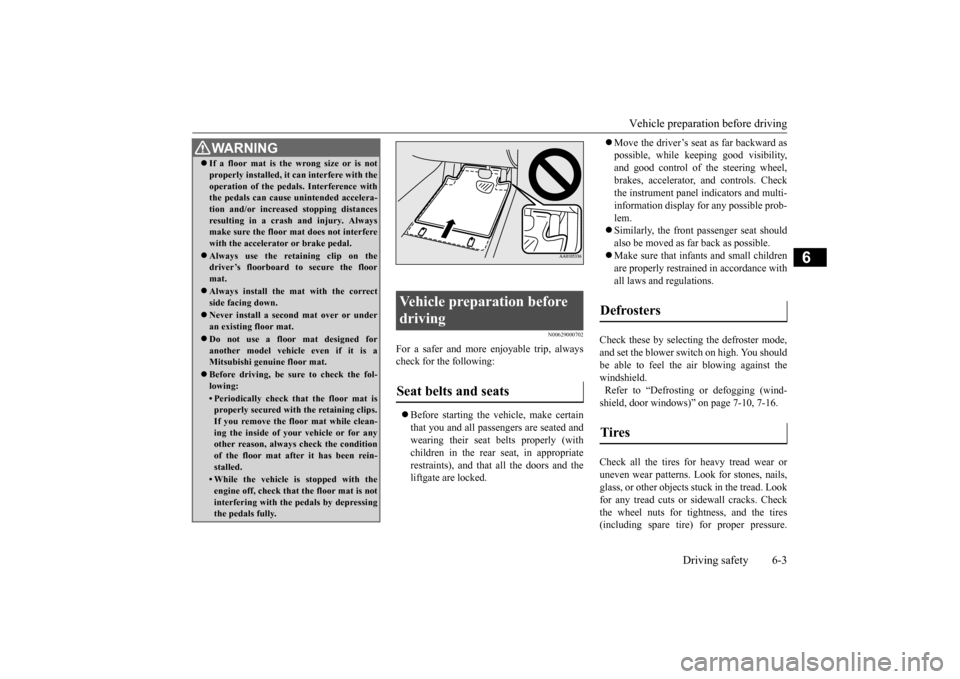
make sure the floor mat does not interfere with the accelerator or brake pedal. Always use the retaining clip on the driver’s floorboard to secure the floor mat. Always install the mat with the correct side facing down. Never install a second mat over or under an existing floor mat. Do not use a floor mat designed for another model vehicle even if it is aMitsubishi genu
ine floor mat.
Before driving, be sure to check the fol- lowing:• Periodically check that the floor mat isproperly secured with the retaining clips. If you remove the fl
oor mat while clean-
ing the inside of you
r vehicle or for any
other reason, always
check the condition
of the floor mat afte
r it has been rein-
stalled.• While the vehicle is stopped with theengine off, check that
the floor mat is not
interfering with the pedals by depressing the pedals fully.
Vehicle preparation before driving Seat belts and seats
Defrosters Tires
BK0212400US.book 3 ページ 2014年4月1日 火曜日 午後2時21分
Page 177 of 300
Loading information 6-6 Driving safety
6
Your front bumper can be damaged if you scrape it over curbs or parking stop blocks. Be careful when traveling up or down steepslopes where your bumper can scrape the road. More effort could be required to turn the steering wheel. Refer to “Electric power steering system(EPS)” on page 5-48.
Always carry the key and lock all doors and the liftgate when leaving the vehicle unat- tended.Always try to park your vehicle in a well lit area.
N00629900424
It is very importa
nt to know how much
weight your vehicle can carry. This weight iscalled the vehicle capacity weight and includes the weight of
all occupants, cargo,
non-factory-installed options, if any, beingtowed. The tire and load
ing information plac-
ard located on the driver’s door sill of your vehicle will show how
much weight it may
properly carry. It is important to fami
liarize yourself with the
following terms before loading your vehicle:
Vehicle maximum load on the tire: load on an individual tire th
at is determined by
distributing to each ax
le its share of the
maximum loaded vehicle weight and dividing by two. Vehicle normal load on the tire: load on an individual tire that is
determined by dis-
tributing to each axle its share of the curbweight, accessory
weight, and normal
occupant weight and dividing by two. Maximum loaded vehicle weight: the sum of - (a) Curb weight;(b) Accessory weight; (c) Vehicle capacity weight; and (d) Production options weight. Curb weight: the weight of a motor vehi- cle with standard equipment including the maximum capacity of
fuel, oil, and cool-
ant. Accessory weight: the combined weight (in excess of those standard items whichmay be replaced) of automatic transmis- sion, power steering
, power brakes, power
windows, power seats,
radio, and heater,
to the extent that these items are available as factory- installe
d equipment (whether
installed or not). Vehicle capacity weight: the rated cargo and luggage load plus 150 lbs (68 kg)
*
times the vehicle’s designated seatingcapacity.
WA R N I N G Leaving the engine ru
nning risks injury or
death from accidentally moving the gear-shift lever (manual transaxle) or the selec-tor lever (CVT) or from the accumulation of toxic exhaust fumes in the passenger compartment.
Where you park
WA R N I N G Do not park your vehicle in areas where combustible materials such as dry grass orleaves can come in
contact with a hot
exhaust, since a fire could occur.
Do not keep the steering wheel fully turned for a long time
When leaving the vehicle Loading information
WA R N I N G Never overload your ve
hicle. Overloading
can damage your vehicl
e, adversely affect
vehicle performance, including handling and braking, cause tire failure, and resultin an accident.
BK0212400US.book 6 ページ 2014年4月1日 火曜日 午後2時21分
Page 184 of 300
Vents
Comfort controls 7-3
7
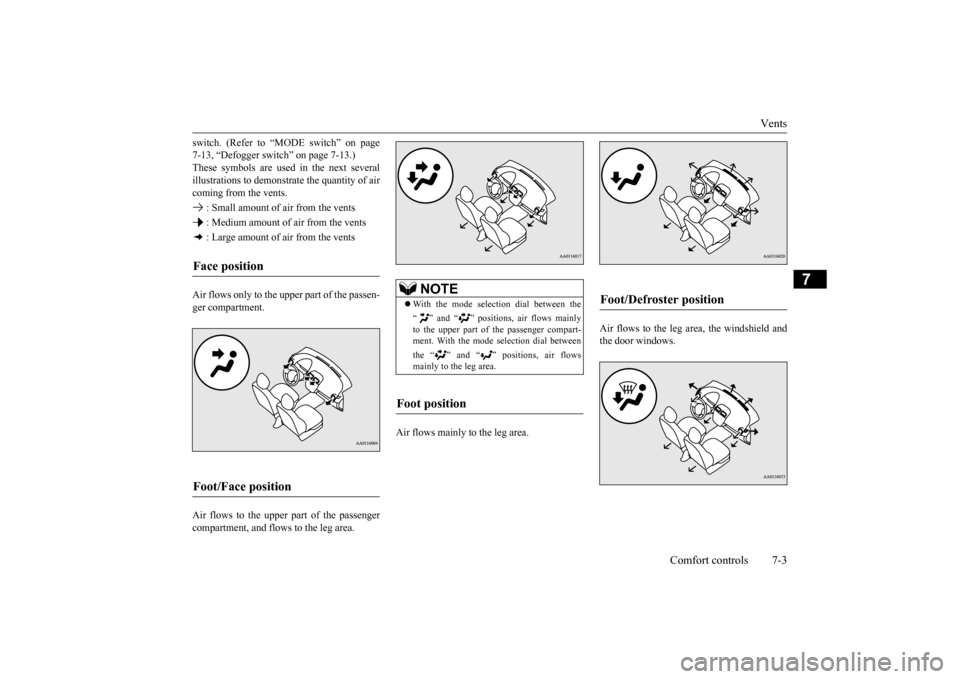
switch. (Refer to “MODE switch” on page 7-13, “Defogger switch” on page 7-13.)These symbols are used in the next several illustrations to demonstr
ate the quantity of air
coming from the vents. : Small amount of air from the vents : Medium amount of air from the vents : Large amount of air from the vents Air flows only to the upper part of the passen- ger compartment. Air flows to the upper part of the passenger compartment, and flows to the leg area.
Air flows mainly to the leg area.
Air flows to the leg area, the windshield and the door windows.
Face position Foot/Face position
NOTE
With the mode select
ion dial between the
“ ” and “ ” positions, air flows mainly to the upper part of the passenger compart-ment. With the mode se
lection dial between
the “ ” and “ ” positions, air flows mainly to the leg area.
Foot position
Foot/Defroster position
BK0212400US.book 3 ページ 2014年4月1日 火曜日 午後2時21分
Page 185 of 300
Heater without air conditioning function (if so equipped) 7-4 Comfort controls
7
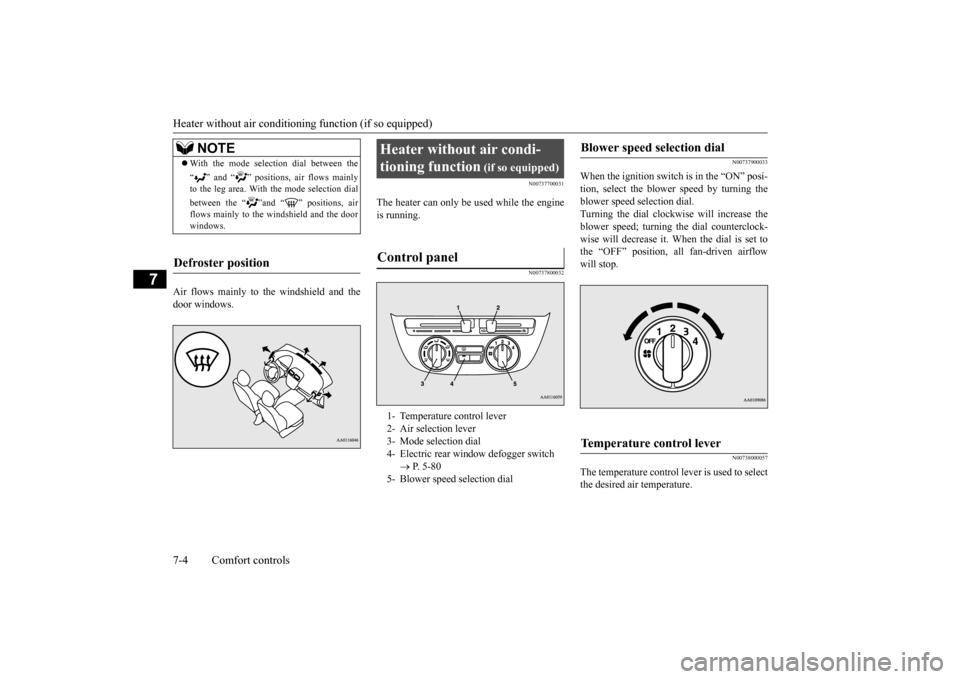
Air flows mainly to the windshield and the door windows.
N00737700031
The heater can only be used while the engineis running.
N00737800032
N00737900033
When the ignition switch is in the “ON” posi- tion, select the blower speed by turning the blower speed selection dial.Turning the dial clockwise will increase the blower speed; turning
the dial counterclock-
wise will decrease it. When the dial is set tothe “OFF” position, all fan-driven airflow will stop.
N00738000057
The temperature control lever is used to select the desired air temperature.
NOTE
With the mode selec
tion dial between the
“ ” and “ ” positions, air flows mainly to the leg area. With the mode selection dial between the “ ”and “ ” positions, air flows mainly to the windshield and the door windows.
Defroster position
Heater without air condi- tioning function
(if so equipped)
Control panel
1- Temperature control lever 2- Air selection lever 3- Mode selection dial4- Electric rear win
dow defogger switch
P. 5-80
5- Blower speed selection dial
Blower speed selection dial
Temperature control lever
BK0212400US.book 4 ページ 2014年4月1日 火曜日 午後2時21分
Page 186 of 300
Heater without air conditioning function (if so equipped)
Comfort controls 7-5
7
N00738100061
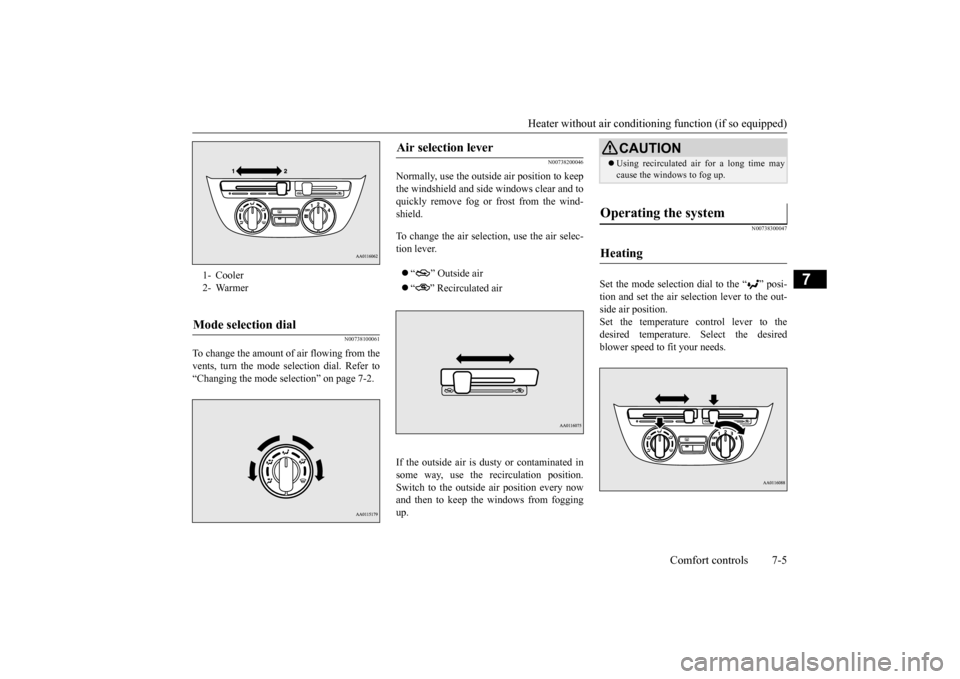
To change the amount of air flowing from the vents, turn the mode
selection dial. Refer to
“Changing the mode se
lection” on page 7-2.
N00738200046
Normally, use the outside air position to keep the windshield and side
windows clear and to
quickly remove fog or frost from the wind-shield. To change the air selection, use the air selec- tion lever. “ ” Outside air “ ” Recirculated air
If the outside air is dusty or contaminated in some way, use the
recirculat
ion position.
Switch to the outside air position every now and then to keep the windows from foggingup.
N00738300047
Set the mode selection
dial to the “ ” posi-
tion and set the air selection lever to the out- side air position.Set the temperature control lever to the desired temperature.
Select the desired
blower speed to fit your needs.
1- Cooler 2- WarmerMode selection dial
Air selection lever
CAUTION Using recirculated ai
r for a long time may
cause the windows to fog up.
Operating the system
Heating
BK0212400US.book 5 ページ 2014年4月1日 火曜日 午後2時21分
Page 187 of 300
Heater without air conditioning function (if so equipped) 7-6 Comfort controls
7
N00738400035
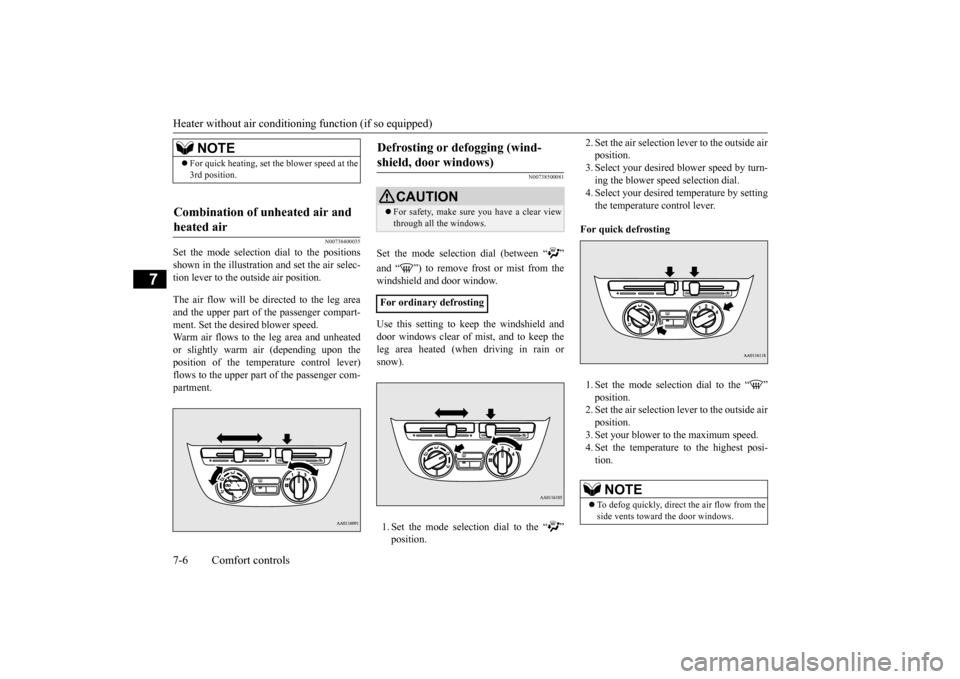
Set the mode selection dial to the positions shown in the illustrati
on and set the air selec-
tion lever to the out
side air position.
The air flow will be directed to the leg area and the upper part of the passenger compart- ment. Set the desired blower speed. Warm air flows to the leg area and unheatedor slightly warm air (depending upon the position of the temper
ature control lever)
flows to the upper part of the passenger com-partment.
N00738500081
Set the mode selection dial (between “ ” and “ ”) to remove frost or mist from the windshield and door window. Use this setting to ke
ep the windshield and
door windows clear of mist, and to keep the leg area heated (when driving in rain or snow). 1. Set the mode selection dial to the “ ” position.
2. Set the air selection lever to the outside air position.3. Select your desired blower speed by turn- ing the blower speed selection dial. 4. Select your desired temperature by settingthe temperature control lever.
For quick defrosting 1. Set the mode selection dial to the “ ” position. 2. Set the air selection lever to the outside airposition. 3. Set your blower to the maximum speed. 4. Set the temperature to the highest posi-tion.
NOTE
For quick heating, set the blower speed at the 3rd position.
Combination of unheated air and heated air
Defrosting or defogging (wind- shield, door windows)
CAUTION For safety, make sure
you have a clear view
through all the windows.
For ordinary defrosting
NOTE
To defog quickly, direct the air flow from the side vents toward the door windows.
BK0212400US.book 6 ページ 2014年4月1日 火曜日 午後2時21分