lock MITSUBISHI OUTLANDER 2016 3.G Owners Manual
[x] Cancel search | Manufacturer: MITSUBISHI, Model Year: 2016, Model line: OUTLANDER, Model: MITSUBISHI OUTLANDER 2016 3.GPages: 464, PDF Size: 60.77 MB
Page 243 of 464
Indicator light, warning light, and information screen display list (multi information display - Type 1)
Features and controls 5-167
5
N00558201308
The operation status of each syst
em is displayed on the informat
ion screen. For furthe
r details, refer to
the appropriate page
for each system.
Other interrupt displays
Screen
System operation status
Reference
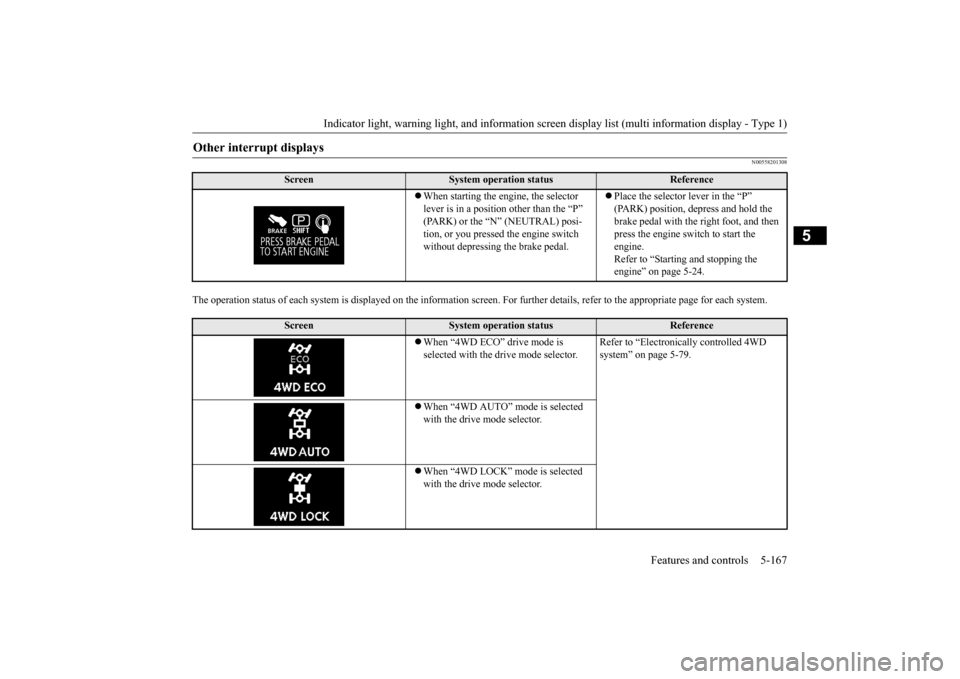
When starting the engine, the selector lever is in a positi
on other than the “P”
(PARK) or the “N” (NEUTRAL) posi-tion, or you pressed the engine switch without depressing the brake pedal.
Place the selector lever in the “P” (PARK) position, depress and hold the brake pedal with the right foot, and then press the engine switch to start the engine. Refer to “Starting and stopping the engine” on page 5-24.
Screen
System operation status
Reference
When “4WD ECO” drive mode is selected with the drive mode selector.
Refer to “Electronica
lly controlled 4WD
system” on page 5-79.
When “4WD AUTO” mode is selected with the drive mode selector. When “4WD LOCK” mode is selected with the drive mode selector.
BK0223400US.book 167 ページ 2015年2月13日 金曜日 午後12時15分
Page 244 of 464
Indicator light, warning light, and information screen display list (multi information display - Type 1) 5-168 Features and controls
5
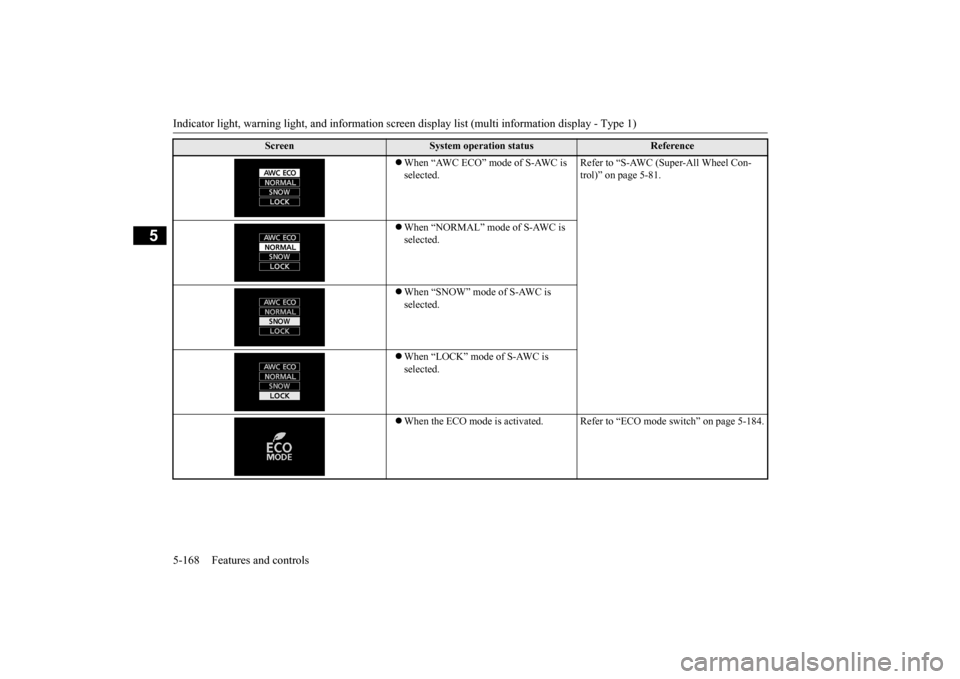
When “AWC ECO” mode of S-AWC is selected.
Refer to “S-AWC (Super-All Wheel Con- trol)” on page 5-81.
When “NORMAL” mode of S-AWC is selected. When “SNOW” mode of S-AWC is selected. When “LOCK” mode of S-AWC is selected. When the ECO mode is ac
tivated. Refer to “ECO m
ode switch” on page 5-184.
Screen
System operation status
Reference
BK0223400US.book 168 ページ 2015年2月13日 金曜日 午後12時15分
Page 246 of 464
Indicator light, warning light, and information screen display list (multi information display - Type 1) 5-170 Features and controls
5
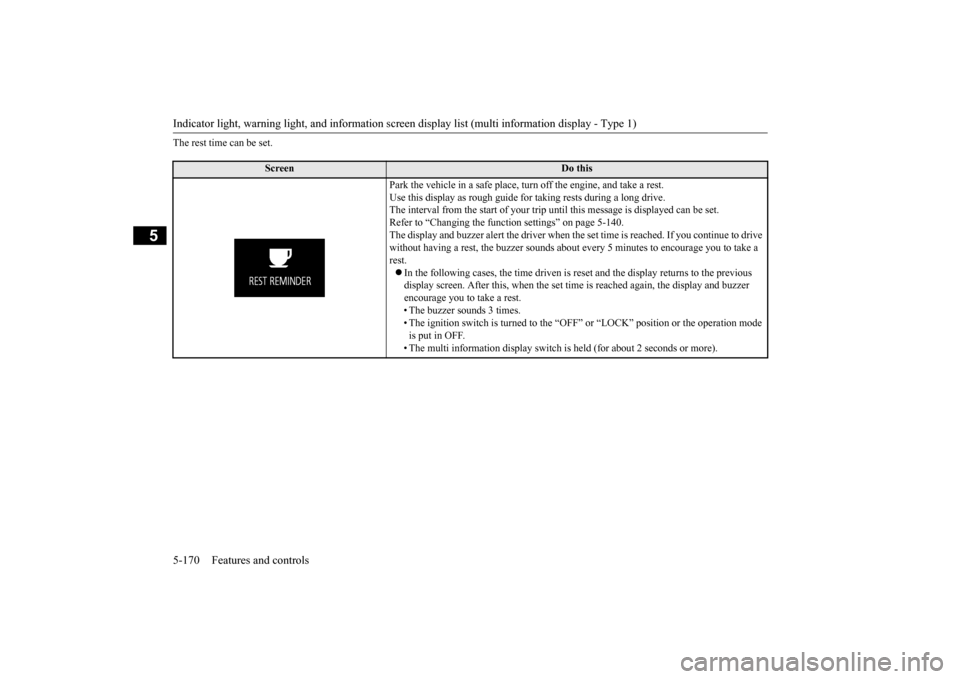
The rest time can be set.
Screen
Do this
Park the vehicle in a safe place, tu
rn off the engine,
and take a rest.
Use this display as rough guide
for taking rests during a long drive.
The interval from the start of your trip
until this message is
displayed can be set.
Refer to “Changing the function settings” on page 5-140. The display and buzzer alert the driver when th
e set time is reached.
If you continue to drive
without having a rest, the buzzer sounds about
every 5 minutes to encourage you to take a
rest. In the following cases, the time driven is reset and the display returns to the previous display screen. After this, when the set time
is reached again,
the display and buzzer
encourage you to take a rest. • The buzzer sounds 3 times.• The ignition switch is turned to the “OFF”
or “LOCK” position or the operation mode
is put in OFF. • The multi information display switch is
held (for about 2 seconds or more).
BK0223400US.book 170 ページ 2015年2月13日 金曜日 午後12時15分
Page 247 of 464
Indicator and warning light package (multi information display - Type 2)
Features and controls 5-171
5
N00519801891
Indicator and warning light package (mu
lti information display - Type 2)
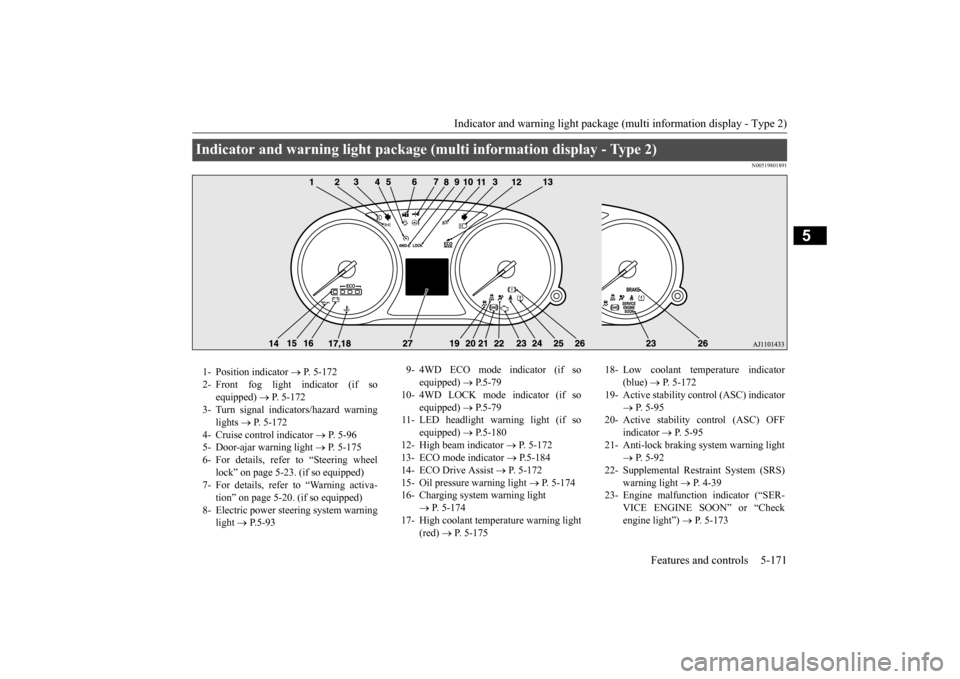
1- Position indicator
P. 5-172
2- Front fog light indicator (if so
equipped)
P. 5-172
3- Turn signal indicators/hazard warning
lights
P. 5-172
4- Cruise control indicator
P. 5-96
5- Door-ajar warning light
P. 5-175
6- For details, refer to “Steering wheel
lock” on page 5-23. (if so equipped)
7- For details, refer to “Warning activa-
tion” on page 5-20. (if so equipped)
8- Electric power stee
ring system warning
light
P. 5 - 9 3
9- 4WD ECO mode indicator (if so
equipped)
P.5-79
10- 4WD LOCK mode indicator (if so
equipped)
P.5-79
11- LED headlight warning light (if so
equipped)
P.5-180
12- High beam indicator
P. 5-172
13- ECO mode indicator
P.5-184
14- ECO Drive Assist
P. 5-172
15- Oil pressure warning light
P. 5-174
16- Charging system warning light
P. 5-174
17- High coolant temperature warning light
(red)
P. 5-175
18- Low coolant temp
erature indicator
(blue)
P. 5-172
19- Active stability control (ASC) indicator
P. 5-95
20- Active stability control (ASC) OFF
indicator
P. 5-95
21- Anti-lock braking system warning light
P. 5-92
22- Supplemental Restra
int System (SRS)
warning light
P. 4 - 3 9
23- Engine malfuncti
on indicator (“SER-
VICE ENGINE SOON” or “Check engine light”)
P. 5-173
BK0223400US.book 171 ページ 2015年2月13日 金曜日 午後12時15分
Page 249 of 464
Warning lights
Features and controls 5-173
5
N00520300147 N00520401536
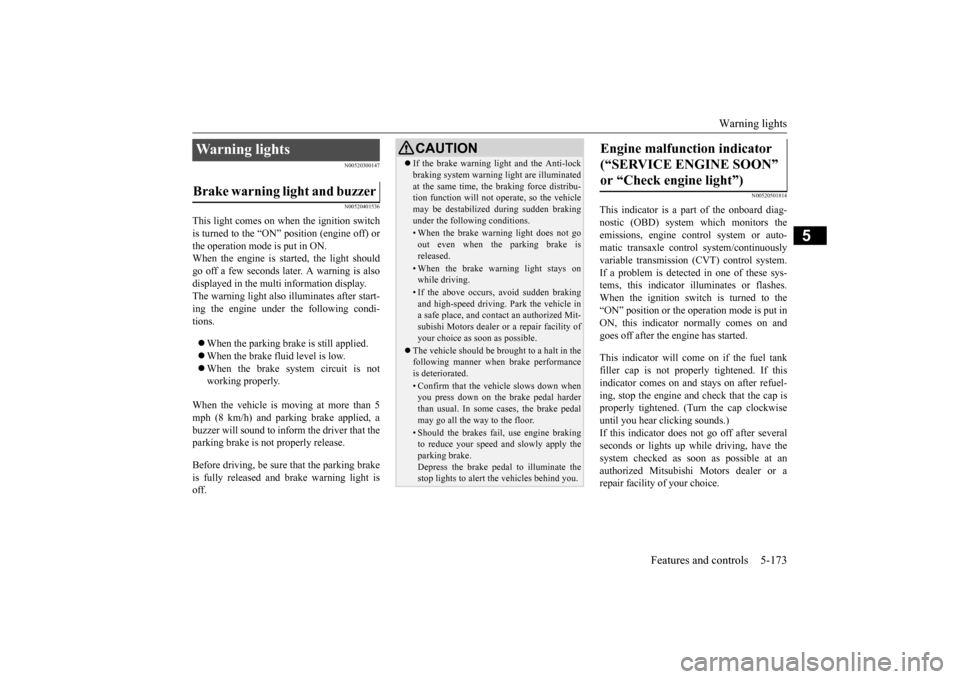
This light comes on when the ignition switch is turned to the “ON” position (engine off) or the operation mode is put in ON.When the engine is started, the light should go off a few seconds later. A warning is also displayed in the multi information display. The warning light also illuminates after start- ing the engine under the following condi-tions. When the parking brake is still applied. When the brake fluid level is low. When the brake system circuit is not working properly.
When the vehicle is moving at more than 5 mph (8 km/h) and parking brake applied, a buzzer will sound to inform the driver that theparking brake is not properly release. Before driving, be sure
that the parking brake
is fully released and
brake warning light is
off.
N00520501814
This indicator is a part
of the onboard diag-
nostic (OBD) system which monitors the emissions, engine control system or auto- matic transaxle cont
rol system/continuously
variable transmission
(CVT) control system.
If a problem is detected in one of these sys- tems, this indicator illuminates or flashes. When the ignition switch is turned to the “ON” position or the operation mode is put inON, this indicator
normally comes on and
goes off after the engine has started. This indicator will come on if the fuel tank filler cap is not properly tightened. If thisindicator comes on and stays on after refuel- ing, stop the engine and check that the cap is properly tightened. (Turn the cap clockwiseuntil you hear clicking sounds.) If this indicator does not go off after several seconds or lights up while driving, have thesystem checked as soon as possible at an authorized Mitsubishi Motors dealer or a repair facility
of your choice.
Warning lights Brake warning light and buzzer
CAUTIONIf the brake warning light and the Anti-lock braking system warning
light are illuminated
at the same time, the braking force distribu-tion function will not ope
rate, so the vehicle
may be destabilized during sudden braking under the following conditions.• When the brake warning light does not goout even when the parking brake isreleased.• When the brake warning light stays onwhile driving.• If the above occurs, avoid sudden brakingand high-speed driving. Park the vehicle in a safe place, and contact an authorized Mit- subishi Motors dealer or a repair facility ofyour choice as soon as possible.
The vehicle should be brought to a halt in the following manner when brake performance is deteriorated.• Confirm that the vehicle slows down whenyou press down on the brake pedal harder than usual. In some cases, the brake pedalmay go all the way to the floor.• Should the brakes fail, use engine brakingto reduce your speed and slowly apply the parking brake. Depress the brake peda
l to illuminate the
stop lights to alert
the vehicles
behind you.
Engine malfunction indicator (“SERVICE ENGINE SOON” or “Check engine light”)
BK0223400US.book 173 ページ 2015年2月13日 金曜日 午後12時15分
Page 252 of 464
Information screen display (Vehicle equipped with the multi information display - Type 1) 5-176 Features and controls
5
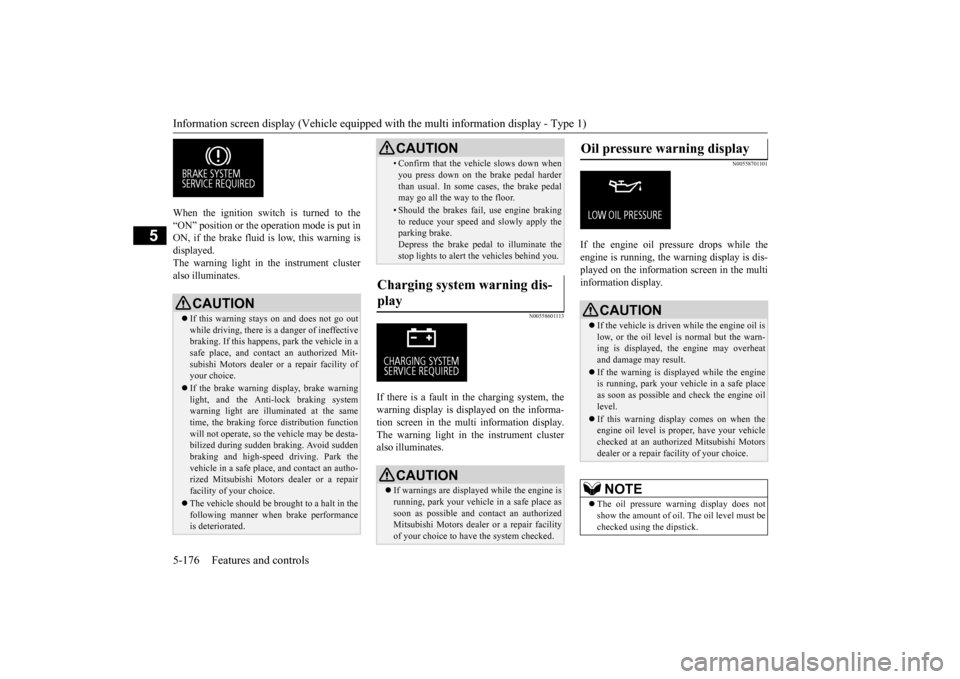
When the ignition switch is turned to the “ON” position or the ope
ration mode is put in
ON, if the brake fluid is
low, this warning is
displayed. The warning light in the instrument cluster also illuminates.
N00558601113
If there is a fault in the charging system, the warning display is di
splayed on the informa-
tion screen in the multi information display. The warning light in th
e instrument cluster
also illuminates.
N00558701101
If the engine oil pressure drops while the engine is running, the
warning display is dis-
played on the information screen in the multi information display.
CAUTION If this warning stays on and does not go out while driving, there is
a danger of ineffective
braking. If this happens
, park the vehicle in a
safe place, and contac
t an authorized Mit-
subishi Motors dealer or a repair facility ofyour choice. If the brake warning display, brake warning light, and the Anti-lock braking system warning light are illu
minated at the same
time, the braking forc
e distribution function
will not operate, so th
e vehicle may be desta-
bilized during sudden br
aking. Avoid sudden
braking and high-speed driving. Park thevehicle in a safe place,
and contact an autho-
rized Mitsubishi Motors
dealer or a repair
facility of your choice. The vehicle should be brought to a halt in the following manner when
brake performance
is deteriorated.
• Confirm that the vehicle slows down whenyou press down on the brake pedal harderthan usual. In some cases, the brake pedalmay go all the way to the floor.• Should the brakes fail, use engine brakingto reduce your speed and slowly apply the parking brake. Depress the brake pedal to illuminate thestop lights to alert th
e vehicles behind you.
Charging system warning dis- play
CAUTION If warnings are displa
yed while the engine is
running, park your vehicl
e in a safe place as
soon as possible and c
ontact an authorized
Mitsubishi Motors dealer
or a repair facility
of your choice to have the system checked.CAUTION
Oil pressure warning display
CAUTION If the vehicle is driven while the engine oil is low, or the oil level is normal but the warn-ing is displayed, th
e engine may overheat
and damage may result. If the warning is displayed while the engine is running, park your ve
hicle in a safe place
as soon as possible and check the engine oillevel. If this warning display comes on when the engine oil level is pr
oper, have your vehicle
checked at an authorized Mitsubishi Motors dealer or a repair fa
cility of your choice.
NOTE
The oil pressure wa
rning display does not
show the amount of oil. The oil level must bechecked using the dipstick.
BK0223400US.book 176 ページ 2015年2月13日 金曜日 午後12時15分
Page 256 of 464
Combination headlights and dimmer switch 5-180 Features and controls
5
If the combination headlights and dimmer switch is turned to the “ ” or “ ” posi- tion again after the engine is turned off, the about 3-minute auto-cutout function described above will not
work. The lights (the
parking lights, tail li
ghts and license plate
lights) will stay on and will not turn off auto- matically.
N00584500028
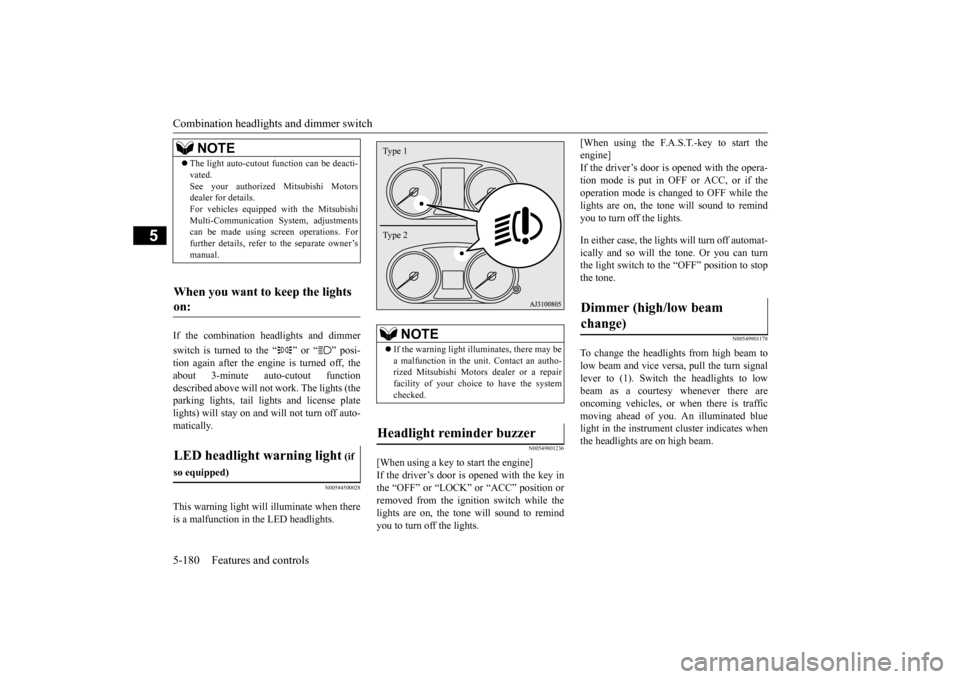
This warning light will illuminate when there is a malfunction in the LED headlights.
N00549801236
[When using a key to start the engine] If the driver’s door is opened with the key in the “OFF” or “LOCK” or “ACC” position or removed from the ignition switch while thelights are on, the tone will sound to remind you to turn off the lights.
[When using the F.A.S.T.-key to start the engine]If the driver’s door is opened with the opera- tion mode is put in OFF or ACC, or if the operation mode is changed to OFF while thelights are on, the tone
will sound to remind
you to turn off the lights. In either case, the lights will turn off automat- ically and so will the tone. Or you can turnthe light switch to the “OFF” position to stop the tone.
N00549901178
To change the headlights from high beam to low beam and vice vers
a, pull the turn signal
lever to (1). Switch the headlights to low beam as a courtesy whenever there areoncoming vehicles, or when there is traffic moving ahead of you. An illuminated blue light in the instrument
cluster indicates when
the headlights are on high beam.
NOTE
The light auto-cutout
function can be deacti-
vated.See your authorized Mitsubishi Motorsdealer for details. For vehicles equipped
with the Mitsubishi
Multi-Communication System, adjustmentscan be made using sc
reen operations. For
further details, refer to the separate owner’s manual.
When you want to keep the lights on: LED headlight warning light
(if
so equipped)
NOTE
If the warning light il
luminates, there may be
a malfunction in the unit. Contact an autho- rized Mitsubishi Motors dealer or a repairfacility of your choice to have the systemchecked.
Headlight reminder buzzer Type 1 Type 2
Dimmer (high/low beam change)
BK0223400US.book 180 ページ 2015年2月13日 金曜日 午後12時15分
Page 257 of 464
Combination headlights and dimmer switch
Features and controls 5-181
5
N00550001209
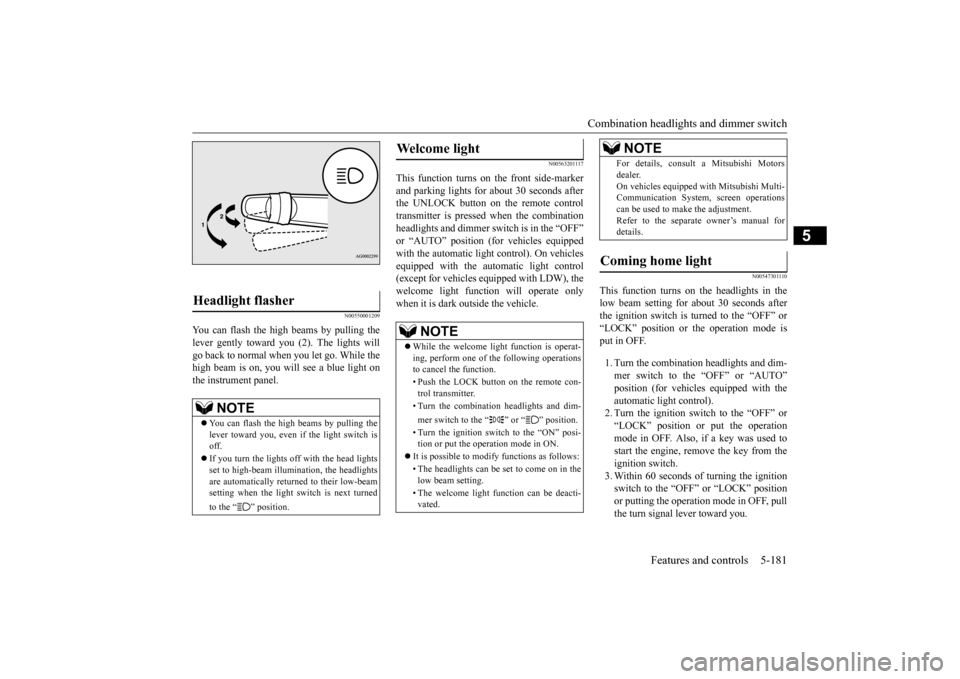
You can flash the high beams by pulling the lever gently toward you (2). The lights will go back to normal when you let go. While the high beam is on, you will see a blue light onthe instrument panel.
N00563201117
This function turns on the front side-marker and parking lights for about 30 seconds after the UNLOCK button on the remote controltransmitter is pressed when the combination headlights and dimmer swit
ch is in the “OFF”
or “AUTO” position (fo
r vehicles equipped
with the automatic light control). On vehicles equipped with the automatic light control (except for vehicles equipped with LDW), the welcome light functi
on will operate only
when it is dark outside the vehicle.
N00547301110
This function turns on the headlights in thelow beam setting for about 30 seconds afterthe ignition switch is turned to the “OFF” or “LOCK” position or the operation mode is put in OFF. 1. Turn the combination headlights and dim- mer switch to the “OFF” or “AUTO” position (for vehicles
equipped with the
automatic light control).2. Turn the ignition switch to the “OFF” or “LOCK” position or put the operation mode in OFF. Also, if a key was used tostart the engine, rem
ove the key from the
ignition switch. 3. Within 60 seconds of turning the ignitionswitch to the “OFF” or “LOCK” position or putting the operation mode in OFF, pull the turn signal lever toward you.
Headlight flasher
NOTE
You can flash the high beams by pulling the lever toward you, even if the light switch is off. If you turn the lights off with the head lights set to high-beam illumi
nation, the headlights
are automatically returned to their low-beamsetting when the light
switch is next turned
to the “ ” position.
Welcome light
NOTE
While the welcome light function is operat- ing, perform one of
the following operations
to cancel the function. • Push the LOCK button on the remote con- trol transmitter. • Turn the combination headlights and dim- mer switch to the “ ” or “ ” position. • Turn the ignition switch to the “ON” posi- tion or put the operation mode in ON.
It is possible to modify functions as follows: • The headlights can be set to come on in the low beam setting. • The welcome light f
unction can be deacti-
vated.
For details, consult a Mitsubishi Motorsdealer.On vehicles equipped
with Mitsubishi Multi-
Communication System
, screen operations
can be used to make the adjustment. Refer to the separate owner’s manual fordetails.
Coming home light
NOTE
BK0223400US.book 181 ページ 2015年2月13日 金曜日 午後12時15分
Page 258 of 464
Headlight leveling swit
ch (if so equipped)
5-182 Features and controls
5
4. The headlights will come on in the low beam setting for about
30 seconds. After
the headlights go off, the headlights canbe turned on again in the low beam setting for about 30 seconds by pulling the turn signal lever toward you within 60 secondsof turning the ignition switch to the “OFF” or “LOCK” pos
ition or putting the
operation mode in OFF. To turn on the headlights again after 60 seconds of turn- ing the ignition switch to the “OFF” or“LOCK” position or putting the operation mode in OFF, repeat the process from step 1.
N00537101115
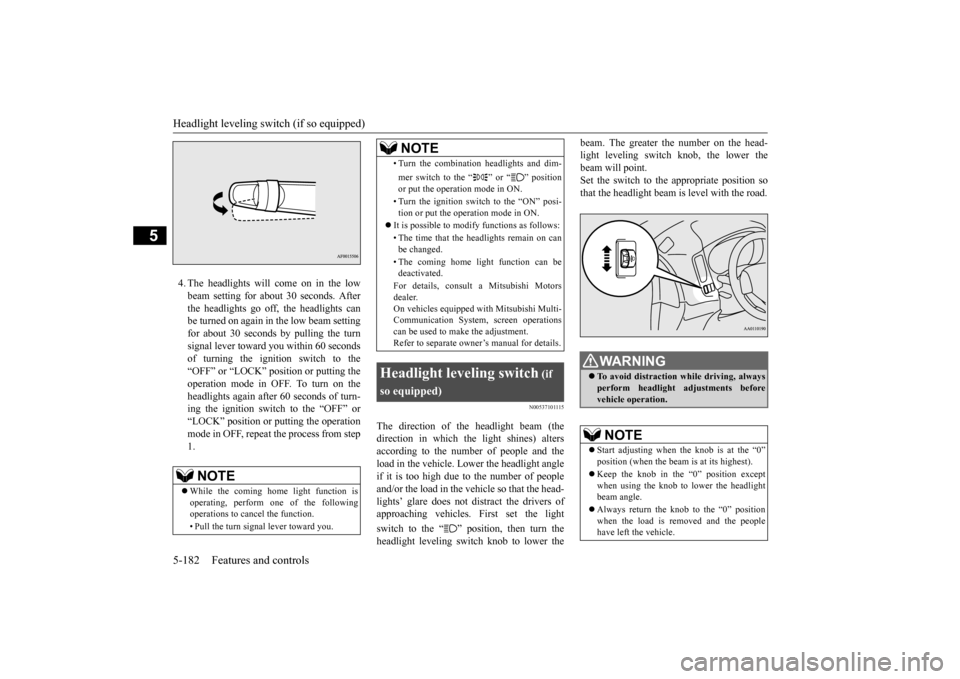
The direction of the headlight beam (thedirection in which th
e light shines) alters
according to the number of people and the load in the vehicle. Lo
wer the headlight angle
if it is too high due to the number of peopleand/or the load in the vehicle so that the head- lights’ glare does not distract the drivers of approaching vehicles
. First set the light
switch to the “ ” position, then turn the headlight leveling switch knob to lower the
beam. The greater the number on the head- light leveling switch knob, the lower thebeam will point. Set the switch to the appropriate position so that the headlight beam is level with the road.
NOTE
While the coming home light function is operating, perform one of the following operations to cancel the function. • Pull the turn signal lever toward you.
• Turn the combination headlights and dim- mer switch to the “ ” or “ ” position or put the operation mode in ON. • Turn the ignition switch to the “ON” posi- tion or put the opera
tion mode in ON.
It is possible to modify functions as follows: • The time that the headlights remain on can be changed. • The coming home light function can be deactivated. For details, consult a Mitsubishi Motors dealer. On vehicles equipped
with Mitsubishi Multi-
Communication System,
screen operations
can be used to make the adjustment. Refer to separate owne
r’s manual for details.
Headlight leveling switch
(if
so equipped)
NOTE
WA R N I N G To avoid distraction wh
ile driving, always
perform headlight adjustments before vehicle operation.NOTE
Start adjusting when the knob is at the “0” position (when the beam
is at its highest).
Keep the knob in the “0” position except when using the knob to lower the headlightbeam angle. Always return the knob to the “0” position when the load is removed and the people have left the vehicle.
BK0223400US.book 182 ページ 2015年2月13日 金曜日 午後12時15分
Page 263 of 464
Wiper and washer switch
Features and controls 5-187
5
Wiper operation under th
ese conditions can
scratch the windshield and damage the wip-ers.
If your hands get trapped, you could suffer injuries or the wipers
could malfunction. Be
sure to turn the ignition switch to the “OFF” or “LOCK” position or put the operation mode in OFF, or move the lever to the “OFF”position to deactivate
the rain sensor.
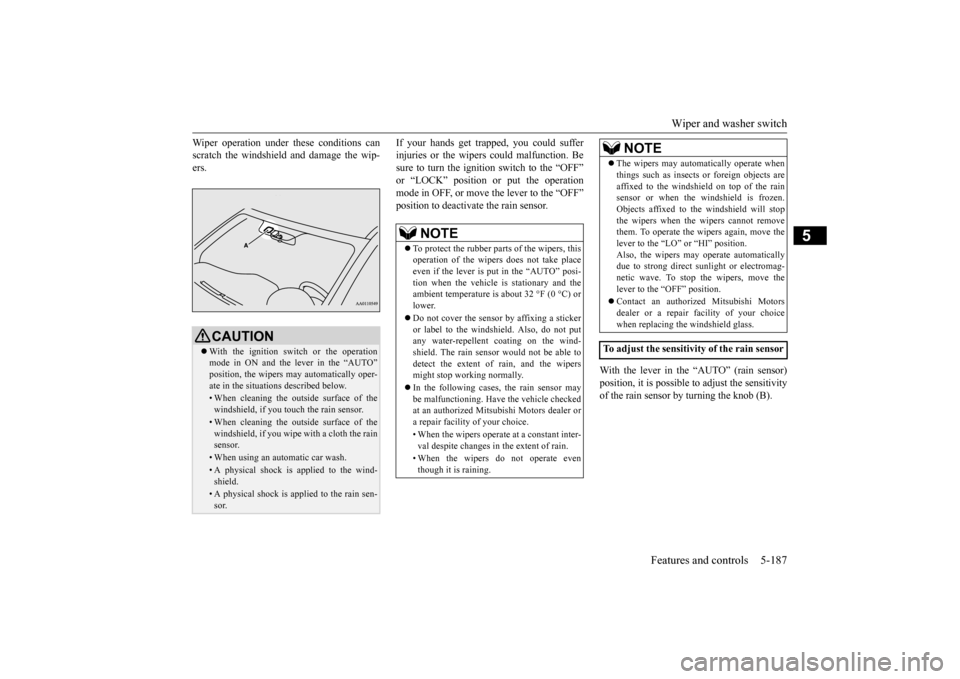
With the lever in the “AUTO” (rain sensor) position, it is possible to adjust the sensitivity of the rain sensor by turning the knob (B).
CAUTION With the ignition switch or the operation mode in ON and the lever in the “AUTO” position, the wipers ma
y automatically oper-
ate in the situati
ons described below.
• When cleaning the outsi
de surface of the
windshield, if you touch the rain sensor.• When cleaning the outsi
de surface of the
windshield, if you wipe with a cloth the rainsensor.• When using an automatic car wash.• A physical shock is
applied to the wind-
shield.• A physical shock is applied to the rain sen-sor.
NOTE
To protect the rubber parts of the wipers, this operation of the wipers
does not take place
even if the lever is put in the “AUTO” posi- tion when the vehicle is
stationary and the
ambient temperature is
about 32 °F (0 °C) or
lower. Do not cover the sensor by affixing a sticker or label to the windshield. Also, do not put any water-repellent
coating on the wind-
shield. The rain sensor would not be able todetect the extent of rain, and the wipers might stop working normally. In the following cases, the rain sensor may be malfunctioning. Have
the vehicle checked
at an authorized Mitsubishi Motors dealer ora repair facility of your choice. • When the wipers operate
at a constant inter-
val despite changes in the extent of rain. • When the wipers do not operate even though it is raining.
The wipers may automatically operate when things such as insects
or foreign objects are
affixed to the windshield on top of the rainsensor or when the windshield is frozen. Objects affixed to th
e windshield
will stop
the wipers when the wipers cannot removethem. To operate the wipers again, move the lever to the “LO”
or “HI” position.
Also, the wipers may operate automaticallydue to strong direct s
unlight or electromag-
netic wave. To stop the wipers, move the lever to the “OFF” position. Contact an authoriz
ed Mitsubishi Motors
dealer or a repair fa
cility of your choice
when replacing th
e windshield glass.
To adjust the sensitivity of the rain sensor
NOTE
BK0223400US.book 187 ページ 2015年2月13日 金曜日 午後12時15分