lock MITSUBISHI OUTLANDER 2016 3.G Owners Manual
[x] Cancel search | Manufacturer: MITSUBISHI, Model Year: 2016, Model line: OUTLANDER, Model: MITSUBISHI OUTLANDER 2016 3.GPages: 464, PDF Size: 60.77 MB
Page 388 of 464
How to change a tire 8-6 For emergencies
8
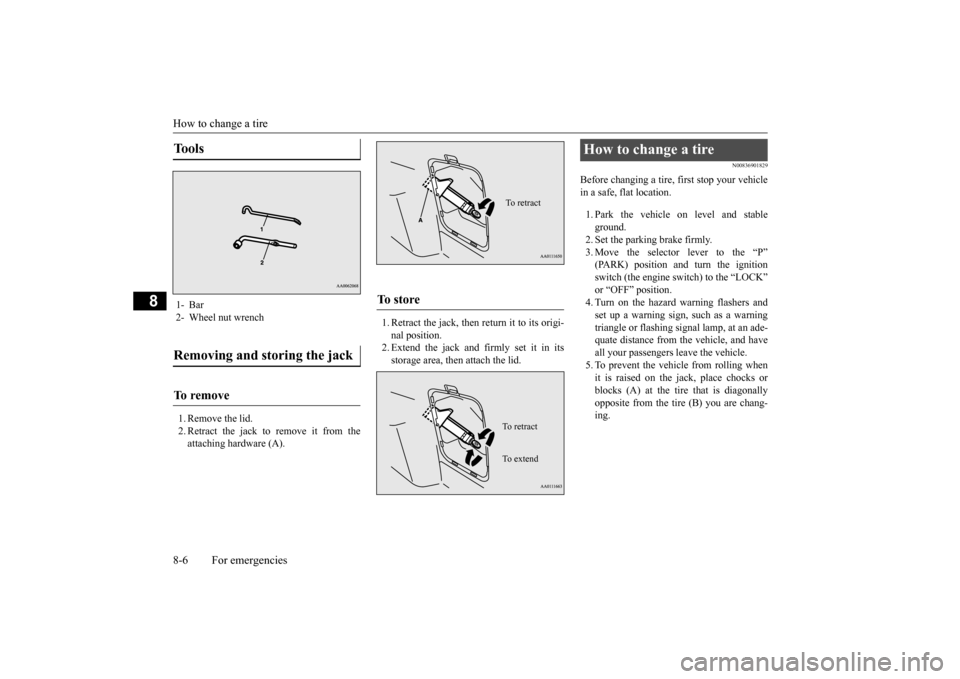
1. Remove the lid. 2. Retract the jack to remove it from theattaching hardware (A).
1. Retract the jack, then return it to its origi- nal position.2. Extend the jack and firmly set it in its storage area, then attach the lid.
N00836901829
Before changing a tire, first stop your vehiclein a safe, flat location. 1. Park the vehicle on level and stable ground.2. Set the parking brake firmly. 3. Move the selector
lever to the “P”
(PARK) position and turn the ignition switch (the engine switch) to the “LOCK” or “OFF” position.4. Turn on the hazard warning flashers and set up a warning sign, such as a warning triangle or flashing signal lamp, at an ade-quate distance from the vehicle, and have all your passengers leave the vehicle. 5. To prevent the vehicle from rolling whenit is raised on the jack, place chocks or blocks (A) at the ti
re that is diagonally
opposite from the tire (B) you are chang-ing.
Tools 1- Bar 2- Wheel nut wrenchRemoving and storing the jack To r e m o v e
To s t o r e
To retractTo r e t r a c t To e x t e n d
How to change a tire
BK0223400US.book 6 ページ 2015年2月13日 金曜日 午後12時15分
Page 389 of 464
How to change a tire
For emergencies 8-7
8
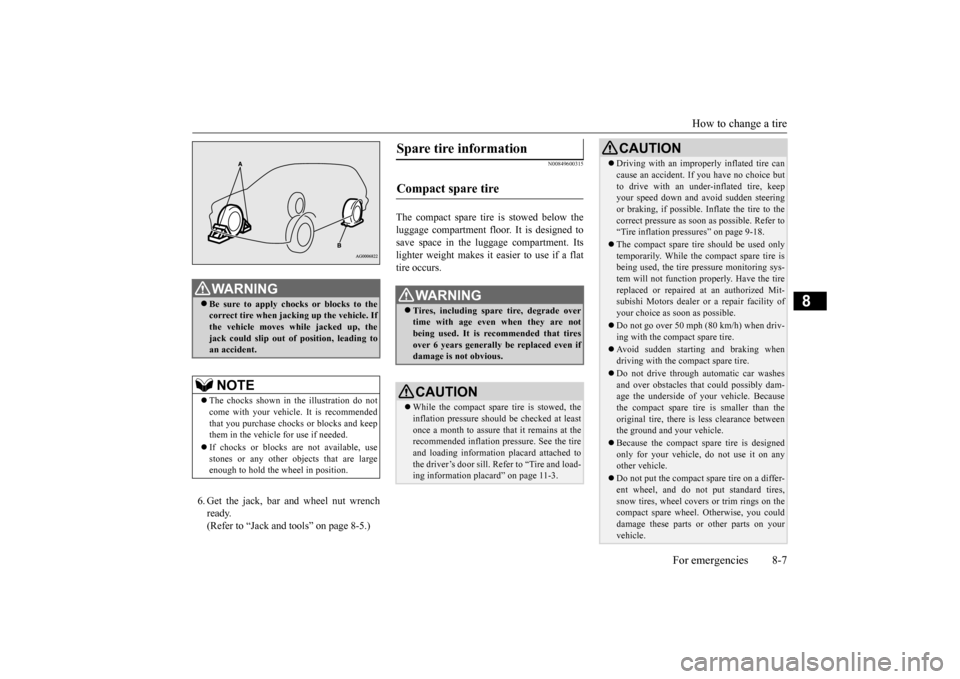
6. Get the jack, bar and wheel nut wrench ready.(Refer to “Jack and t
ools” on page 8-5.)
N00849600315
The compact spare tire is stowed below the luggage compartment fl
oor. It is designed to
save space in the luggage compartment. Itslighter weight makes it easier to use if a flat tire occurs.
WA R N I N G Be sure to apply choc
ks or blocks to the
correct tire when jacking up the vehicle. Ifthe vehicle moves while jacked up, the jack could slip out of
position, leading to
an accident.NOTE
The chocks shown in the illustration do not come with your vehicl
e. It is recommended
that you purchase chocks or blocks and keep them in the vehicle for use if needed. If chocks or blocks
are not available, use
stones or any other obj
ects that are large
enough to hold the wheel in position.
Spare tire information Compact spare tire
WA R N I N G Tires, including spar
e tire, degrade over
time with age even when they are not being used. It is recommended that tiresover 6 years generally
be replaced even if
damage is not obvious.CAUTION While the compact spare tire is stowed, the inflation pressure shoul
d be checked at least
once a month to assure that it remains at the recommended inflation pressure. See the tire and loading informati
on placard attached to
the driver’s door sill. Refer to “Tire and load-ing information placard” on page 11-3.
Driving with an imprope
rly inflated tire can
cause an accident. If
you have no choice but
to drive with an under-inflated tire, keepyour speed down and avoid sudden steering or braking, if possible. Inflate the tire to the correct pressure as s
oon as possible. Refer to
“Tire inflation pressures” on page 9-18. The compact spare tire should be used only temporarily. While the compact spare tire is being used, the tire pr
essure monitoring sys-
tem will not function pr
operly. Have the tire
replaced or repaired at an authorized Mit- subishi Motors dealer or
a repair facility of
your choice as soon as possible. Do not go over 50 mph (80 km/h) when driv- ing with the compact spare tire. Avoid sudden starting and braking when driving with the compact spare tire. Do not drive through automatic car washes and over obstacles that
could possibly dam-
age the underside of your vehicle. Because the compact spare tire is smaller than the original tire, there is less clearance betweenthe ground and your vehicle. Because the compact spare tire is designed only for your vehicle, do not use it on any other vehicle. Do not put the compact spare tire on a differ- ent wheel, and do not put standard tires, snow tires, wheel covers
or trim rings on the
compact spare wheel. Otherwise, you could damage these parts or other parts on your vehicle.CAUTION
BK0223400US.book 7 ページ 2015年2月13日 金曜日 午後12時15分
Page 390 of 464
How to change a tire 8-8 For emergencies
8
N00849701296
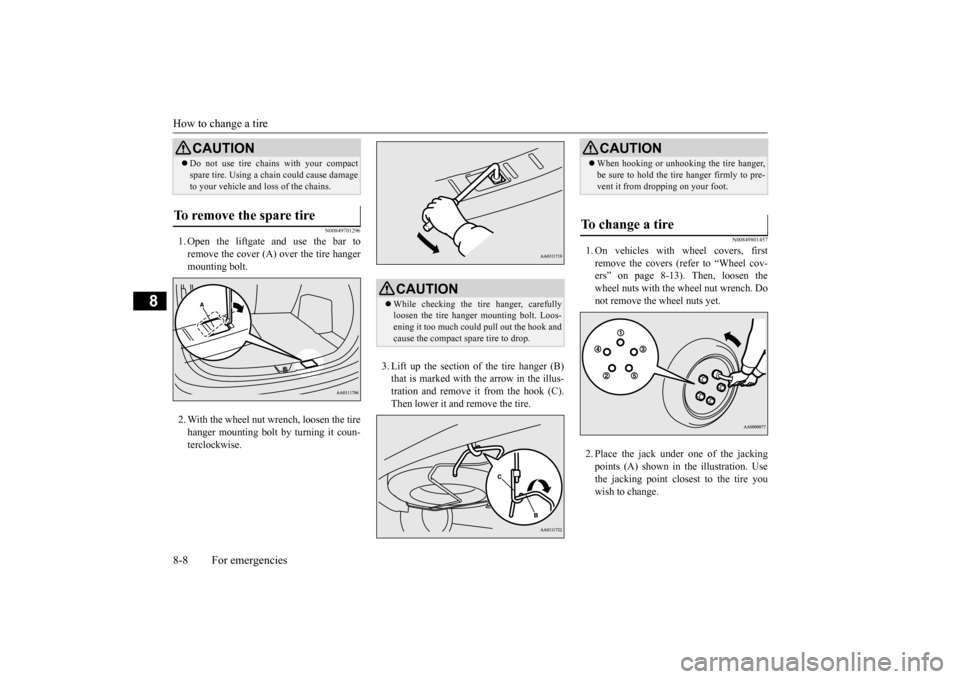
1. Open the liftgate and use the bar to remove the cover (A)
over the tire hanger
mounting bolt. 2. With the wheel nut wrench, loosen the tire hanger mounting bolt by turning it coun- terclockwise.
3. Lift up the section of the tire hanger (B) that is marked with the arrow in the illus-tration and remove it from the hook (C). Then lower it and remove the tire.
N00849801457
1. On vehicles with
wheel covers, first
remove the covers (re
fer to “Wheel cov-
ers” on page 8-13). Then, loosen thewheel nuts with the wheel nut wrench. Do not remove the wheel nuts yet. 2. Place the jack under one of the jacking points (A) shown in the illustration. Use the jacking point closest to the tire you wish to change.
Do not use tire chains with your compact spare tire. Using a ch
ain could cause damage
to your vehicle and loss of the chains.
To remove the spare tire
CAUTION
CAUTION While checking the tir
e hanger, carefully
loosen the tire hanger mounting bolt. Loos-ening it too much could pull out the hook and cause the compact spare tire to drop.
CAUTION When hooking or unhooking the tire hanger, be sure to hold the tire hanger firmly to pre-vent it from dropping on your foot.
To change a tire
BK0223400US.book 8 ページ 2015年2月13日 金曜日 午後12時15分
Page 392 of 464
How to change a tire 8-10 For emergencies
8
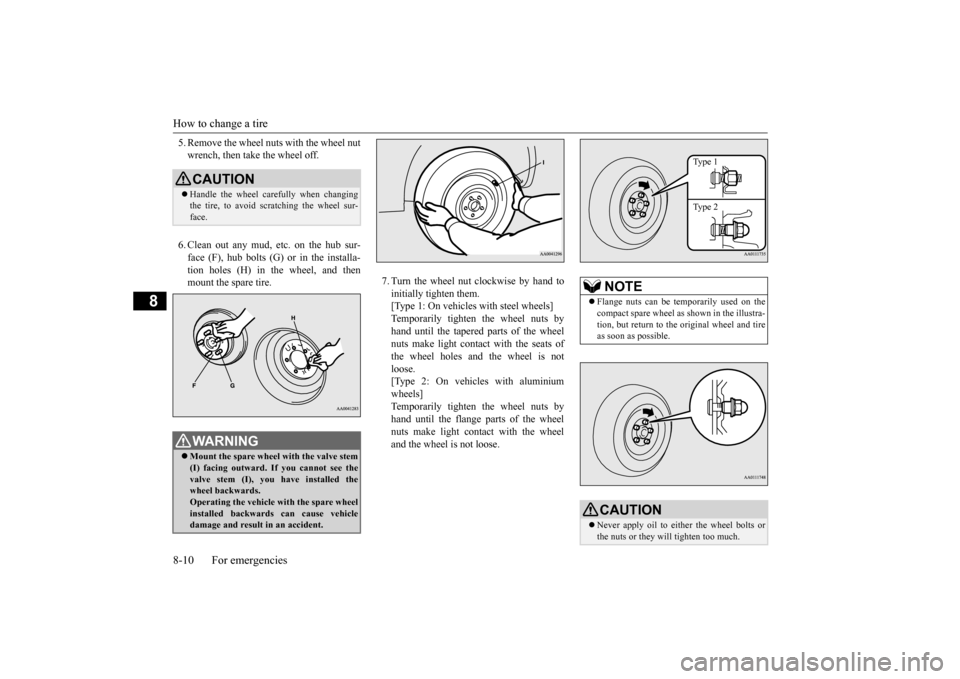
5. Remove the wheel nuts with the wheel nut wrench, then take the wheel off. 6. Clean out any mud, etc. on the hub sur- face (F), hub bolts (G)
or in the installa-
tion holes (H) in the wheel, and then mount the spare tire.
7. Turn the wheel nut clockwise by hand to initially tighten them. [Type 1: On vehicles
with steel wheels]
Temporarily tighten the wheel nuts by hand until the tapered parts of the wheel nuts make light contac
t with the seats of
the wheel holes and the wheel is not loose. [Type 2: On vehicles with aluminiumwheels] Temporarily tighten the wheel nuts by hand until the flange parts of the wheelnuts make light cont
act with the wheel
and the wheel is not loose.
CAUTION Handle the wheel carefully when changing the tire, to avoid scratching the wheel sur- face.WA R N I N G Mount the spare wheel with the valve stem (I) facing outward. If
you cannot see the
valve stem (I), you
have installed the
wheel backwards.Operating the vehicle with the spare wheel installed backwards can cause vehicle damage and result
in an ac
cident.
NOTE
Flange nuts can be te
mporarily used on the
compact spare wheel as shown in the illustra- tion, but return to the original wheel and tire as soon as possible.CAUTION Never apply oil to either the wheel bolts or the nuts or they will tighten too much.
Type 1 Type 2
BK0223400US.book 10 ページ 2015年2月13日 金曜日 午後12時15分
Page 393 of 464
How to change a tire
For emergencies 8-11
8
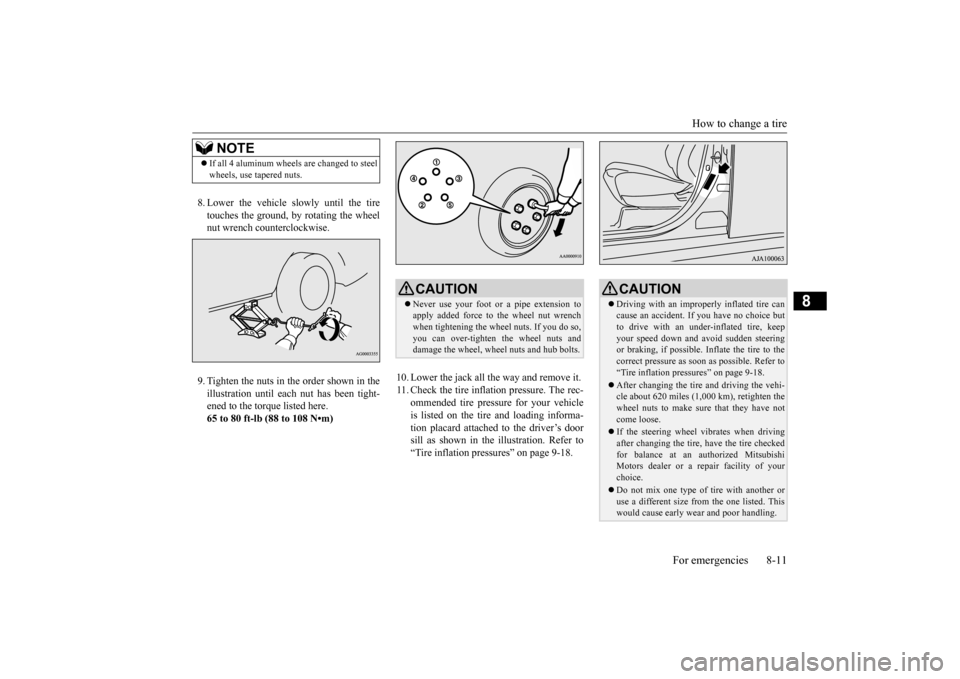
8. Lower the vehicle slowly until the tire touches the ground, by rotating the wheel nut wrench counterclockwise. 9. Tighten the nuts in the order shown in the illustration until each
nut has been tight-
ened to the torque listed here.65 to 80 ft-lb (88 to 108 N•m)
10. Lower the jack all the way and remove it. 11. Check the tire inflation pressure. The rec-
ommended tire pressure for your vehicleis listed on the tire
and loading informa-
tion placard attached to the driver’s door sill as shown in the illustration. Refer to“Tire inflation pressures” on page 9-18.
NOTE
If all 4 aluminum wheels are changed to steel wheels, use tapered nuts.
CAUTION Never use your foot or a pipe extension to apply added force to the wheel nut wrenchwhen tightening the wheel nuts. If you do so, you can over-tighten the wheel nuts and damage the wheel, wheel nuts and hub bolts.
CAUTION Driving with an imprope
rly inflated tire can
cause an accident. If
you have no choice but
to drive with an under-inflated tire, keep your speed down and avoid sudden steering or braking, if possible. Inflate the tire to thecorrect pressure as s
oon as possible. Refer to
“Tire inflation pressures” on page 9-18. After changing the tire
and driving the vehi-
cle about 620 miles (1,000 km), retighten the wheel nuts to make sure
that they have not
come loose. If the steering wheel vibrates when driving after changing the tire, have the tire checked for balance at an authorized Mitsubishi Motors dealer or a repair facility of yourchoice. Do not mix one type of tire with another or use a different size from the one listed. This would cause ea
rly wear and poor handling.
BK0223400US.book 11 ページ 2015年2月13日 金曜日 午後12時15分
Page 394 of 464
How to change a tire 8-12 For emergencies
8
N00832300020
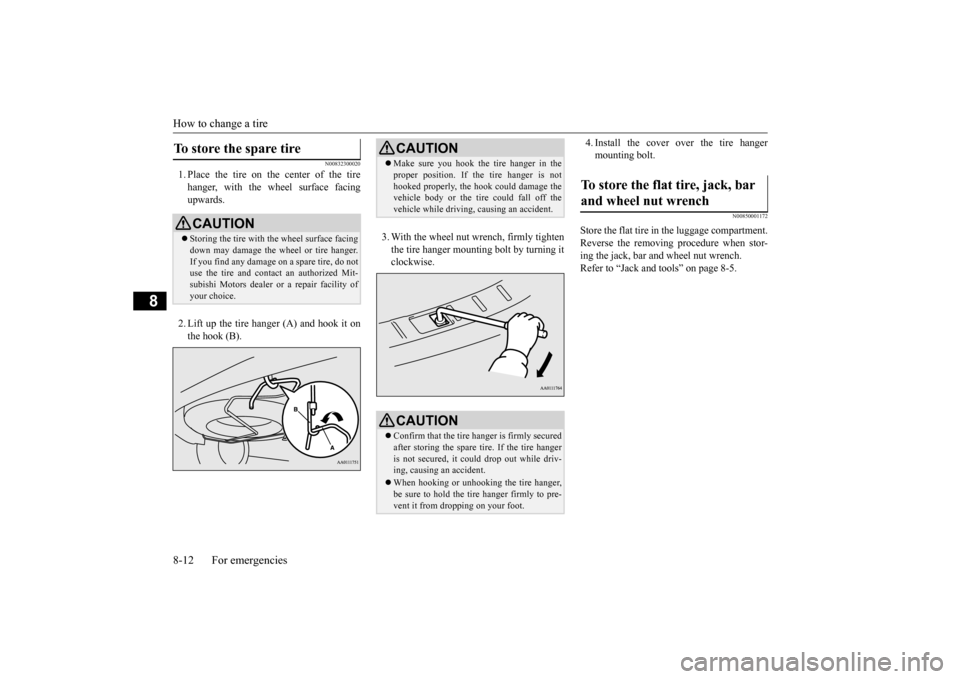
1. Place the tire on the center of the tire hanger, with the wheel surface facing upwards. 2. Lift up the tire hanger (A) and hook it on the hook (B).
3. With the wheel nut wrench, firmly tighten the tire hanger mounti
ng bolt by turning it
clockwise.
4. Install the cover over the tire hanger mounting bolt.
N00850001172
Store the flat tire in the luggage compartment.Reverse the removing procedure when stor- ing the jack, bar and wheel nut wrench. Refer to “Jack and t
ools” on page 8-5.
To store the spare tire
CAUTIONStoring the tire with the wheel surface facing down may damage the wheel or tire hanger. If you find any damage
on a spare tire, do not
use the tire and contact an authorized Mit- subishi Motors dealer or a repair facility of your choice.
CAUTION Make sure you hook the tire hanger in the proper position. If the tire hanger is nothooked properly, the hook
could damage the
vehicle body or the tire
could fall off the
vehicle while driving,
causing an accident.
CAUTIONConfirm that the tire hanger is firmly secured after storing the spare
tire. If the tire hanger
is not secured, it c
ould drop out while driv-
ing, causing
an accident.
When hooking or unhooking the tire hanger, be sure to hold the tire hanger firmly to pre-vent it from dropping on your foot.
To store the flat tire, jack, bar and wheel nut wrench
BK0223400US.book 12 ページ 2015年2月13日 金曜日 午後12時15分
Page 397 of 464
Operation under adverse driving conditions
For emergencies 8-15
8
Release the parking brake. Set the selector lever to the “N” (NEUTRAL) position.
N00837201760
If your vehicle becomes
stuck in snow, sand,
or mud, it can often be moved by a rocking motion. Rock your vehicle back and forth to free it.Do not rev the engine or spin the wheels. Constant efforts to free a stuck vehicle can cause overheating and tr
ansaxle failure. Let
the engine idle for a few minutes to cool the transaxle before trying again. If your vehicle is still
stuck after several rock-
ing attempts, call for a commercial tow truck service.
[For front-wheel driv
e vehicle equipped with
the active stability control (ASC)]If the vehicle is towed with the ignitionswitch in the “ON” pos
ition or the operation
mode in ON and only the front wheels raised off the ground (Type C), the ASC may oper-ate, resulting in an accident. When towing the vehicle with the front wheels raised, keep the ignition switch or
the operation mode as
follows. [Except for vehicles equipped with the F. A . S . T. - k e y ]The ignition switch is in “LOCK”, “OFF” or “ACC” position. [Vehicles equipped with the F.A.S.T.-key]The operation mode is in OFF or ACC.
Towing a front-wheel drive vehi- cle with front wheels off the ground (Type C)
CAUTION
Operation under adverse driving conditions If your vehicle becomes stuck in sand, mud or snow
WA R N I N G When trying to rock
your vehicle out of a
stuck position, make sure that there are nopeople nearby. The
rocking motion can
make your vehicle suddenly lurch forward or backward, and inju
re any bystanders.
On wet roads
CAUTIONAvoid flooded roads. Water is often deeper than it looks, and you could be seriously hurtby driving into flood water. When driving in rain, on water-covered roads, or through a car
wash, water could get
into the brake discs and make them fail tem- porarily. In such cases, lightly press thebrake pedal to see if they are working prop- erly. If they are not, press the pedal lightly several times while driving to dry the brakepads or linings, then check them again. When driving in rain, a layer of water may form between the tires and the road surface (hydroplaning). This loosens your tires’ grip on the road, making it difficult to steer orbrake properly. When driving on a wet road:• Drive your vehicle at a safe speed.• Do not drive on worn tires.• Always keep the tires at the correct infla- tion pressures.
BK0223400US.book 15 ページ 2015年2月13日 金曜日 午後12時15分
Page 398 of 464
Fuel Pump Shut-off System 8-16 For emergencies
8
When driving on a road covered with snow or ice, use s
now tires. Tire chains
cannot be used on your vehicle. There may be state or local regulations aboutusing snow tires. Al
ways check the regu-
lations in your local area before using them. Refer to “Snow tires” on page 9-21and “Tire chains” on page 9-21. Drive slowly. Do not make sudden starts or stops, sharp turns, or slam on the brakes. Allow extra distance
between your vehi-
cle and the vehicle in front of you, and avoid sudden braking. If a skid occurs when the accelerator pedal is depressed, take your foot off the pedal. Steer gently in the direction of the skid. Your vehicle is equipped with an anti-lock braking system (ABS). Hold the brake pedal down firmly and keep it depressed.Do not pump the brake pedal which will result in reduced braking performance. After parking on snowy or icy roads, it may be difficult to move your vehicle due to the brake being frozen. Depress the accelerator pedal little by little to movethe vehicle when safe to do so.
Drive as slow as pos
sible when driving on
bumpy, rutted roads or over potholes.
N00860600031
In the event of a collision causing frontal air-bag deployment, the fuel pump shut-off sys-tem will activate to st
op fuel supply to the
engine.
On snowy or icy roads
CAUTION Do not depress the acce
lerator pedal rapidly.
The vehicle could start moving when itbreaks free from the
ice, possibly resulting in
an accident.
On a bumpy or rutted road
CAUTION Driving on bumpy, rutted roads or over pot- holes can damage th
e tires and wheels.
Wheels with low-profiles tires or under-inflated tires are especially at risk for dam- age.
Fuel Pump Shut-off System
WA R N I N G Before attempting to restart the engine after a collision, alw
ays inspect the ground
under the vehicle for leaking fuel. If a fuelleak is found or a fuel
odor is detected, do
not restart the engine. Mitsubishi Motors recommends that your vehicle be inspected by
an author
ized Mit-
subishi Motors dealer
after any collision.
BK0223400US.book 16 ページ 2015年2月13日 金曜日 午後12時15分
Page 400 of 464
Service precautions 9-2 Vehicle care and maintenance
9
N00937301384
Taking regular care of your vehicle will pre- serve its value and appe
arance as long as pos-
sible. You can do some of the maintenance work yourself, and the rest should only be per- formed by an authorized Mitsubishi Motors dealer or a repair facility of your choice. If you discover a malfunction or other prob- lem, have it corrected by an authorized Mit-subishi Motors dealer or a repair facility of your choice. This section descri
bes the maintenance
inspections that you can do yourself, if you so desire. Follow the instructions and precau- tions for each procedure.
Have you purchased the Mitsubishi Motors Diamond Care Protection Plan? The Plansupplements your new
vehicle warranties.
See your authorized Mitsubishi Motors dealer for details.
N00937401457
The catalytic converter requires you to useunleaded fuel only. Leaded gasoline willdestroy the emission-control effectiveness of the converter. Normally, the
catalytic converter does not
require maintenance. Ho
wever, it is important
to keep the engine properly tuned for the con- verter to continue to work properly.
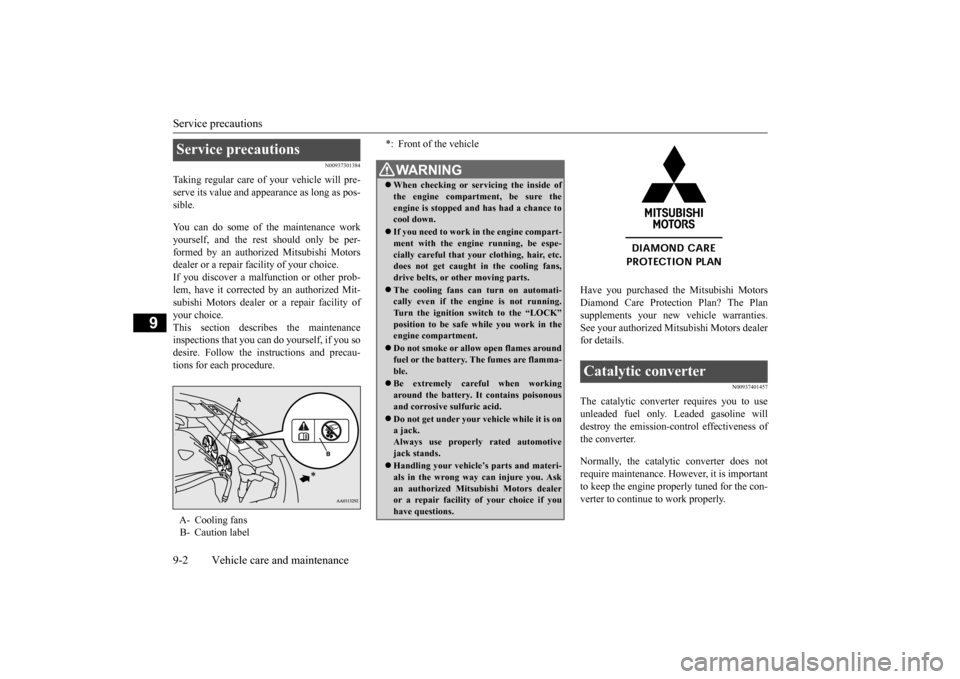
Service precautions A- Cooling fans B- Caution label
*: Front of the vehicleWA R N I N G When checking or servicing the inside of the engine compartment, be sure theengine is stopped and has had a chance to cool down. If you need to work
in the engine compart-
ment with the engine running, be espe- cially careful that your clothing, hair, etc.does not get caught in the cooling fans, drive belts, or other moving parts. The cooling fans can turn on automati- cally even if the engine is not running. Turn the ignition switch to the “LOCK”position to be safe while you work in the engine compartment. Do not smoke or allow open flames around fuel or the battery. The fumes are flamma- ble. Be extremely careful when working around the battery. It
contains poisonous
and corrosive sulfuric acid. Do not get under your ve
hicle while it is on
a jack. Always use properly rated automotive jack stands. Handling your vehicle’s parts and materi- als in the wrong way can injure you. Askan authorized Mitsub
ishi Motors dealer
or a repair facility of your choice if you have questions.
Catalytic converter
BK0223400US.book 2 ページ 2015年2月13日 金曜日 午後12時15分
Page 401 of 464
Engine hood
Vehicle care and maintenance 9-3
9
To reduce the possibili
ty of catalytic con-
verter damage: Use UNLEADED GASOLINE ONLY of the type of recommended in the “Fuel selection”. Do not drive with an extremely low fuel level. Running out of gas could damage the catalytic converter. Do not try to start the engine by pushing or towing the vehicle. If the battery is weak or run down, use jumper cables toproperly start the engine.
Do not idle the engine with any spark plug wires disconnected or removed, such aswhen performing
diagnosti
c tests.
Do not idle the engine
for a long time if it
is idling roughly or otherwise obviouslymalfunctioning. To prevent the catalytic converter from being damaged from unburned gas, do notrace the engine when turning off the igni- tion switch. Stop driving the vehicle if you think the performance is noticeably low, or the engine has a malfunction such as with theignition, etc. If you are not able to stop driving immediately,
slow down and drive
for only a short time. Have your vehiclechecked at an authorized Mitsubishi Motors dealer or a repair facility of your choice as soon
as possible.
In unusual situations involving major engine problems, a burning odor may indicate severe and abnormal catalyticconverter overheating.
If this occurs, stop
in a safe place, shut the engine off and let the vehicle cool. Once
the engine is cool,
immediately take your
vehicle to a dealer
or a repair facility of your choice for ser- vice.
N00937501588
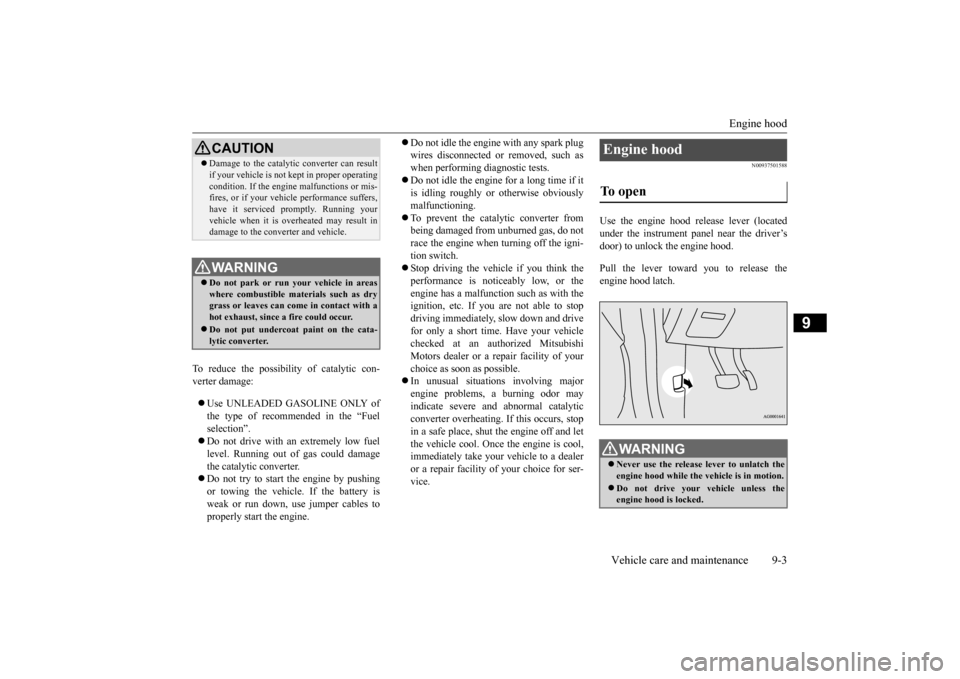
Use the engine hood release lever (located under the instrument panel near the driver’s door) to unlock the engine hood. Pull the lever toward you to release the engine hood latch.
CAUTION Damage to the catalyti
c converter can result
if your vehicle is not
kept in proper operating
condition. If the engine
malfunctions or mis-
fires, or if your vehi
cle performance suffers,
have it serviced promptly. Running your vehicle when it is
overheated may result in
damage to the converter and vehicle.WA R N I N G Do not park or run your vehicle in areas where combustible materials such as dry grass or leaves can come
in contact with a
hot exhaust, since a fire could occur. Do not put undercoat paint on the cata- lytic converter.
Engine hood To open
WA R N I N G Never use the release lever to unlatch the engine hood while the
vehicle is in motion.
Do not drive your vehicle unless the engine hood is locked.
BK0223400US.book 3 ページ 2015年2月13日 金曜日 午後12時15分