MITSUBISHI OUTLANDER 2016 3.G Owners Manual
Manufacturer: MITSUBISHI, Model Year: 2016, Model line: OUTLANDER, Model: MITSUBISHI OUTLANDER 2016 3.GPages: 464, PDF Size: 60.77 MB
Page 291 of 464
USB input terminal (if so equipped)
Features and controls 5-215
5
Connect the equipment into an outlet on a circuit different from that to which thereceiver is connected. Consult the dealer or an experienced radio/TV technician for help.
ICES Notice: This Class B digital apparatus complies with Canadian ICES-003.
N00566401080
N00566701100
You can connect your USB memory device or iPod
* to play music files stored in the USB
memory device or iPod. This section explains how to connect and remove a USB memory device or iPod.See the following sect
ion for details on how
to play music files. Refer to “Listen to an iPod” on page 7-33. Refer to “Listen to Audio Files on a USB Device” on page 7-35. Refer to “To play iPod/USB memory devicetracks via voice ope
ration” on page 7-38.
* : “iPod” is a registered trademark of Apple Inc. in the United Stat
es and other countries.
N00566801114
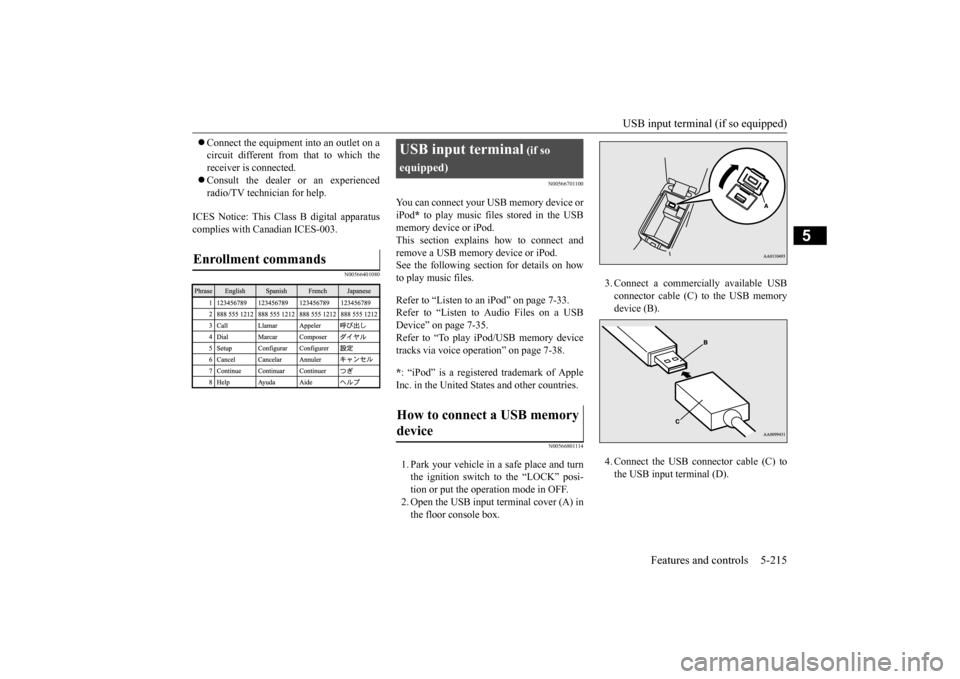
1. Park your vehicle in a safe place and turn the ignition switch to the “LOCK” posi- tion or put the operation mode in OFF. 2. Open the USB input terminal cover (A) inthe floor console box.
Enrollment commands
USB input terminal
(if so
equipped)How to connect a USB memory device
3. Connect a commercia
lly available USB
connector cable (C) to the USB memorydevice (B). 4. Connect the USB connector cable (C) to the USB input terminal (D).
BK0223400US.book 215 ページ 2015年2月13日 金曜日 午後12時15分
Page 292 of 464
USB input terminal (if so equipped) 5-216 Features and controls
5
5. To remove the USB connector cable, turn the ignition switch to the “LOCK” posi-tion or put the operation mode in OFF first and perform the installation steps in reverse.
N00566901102
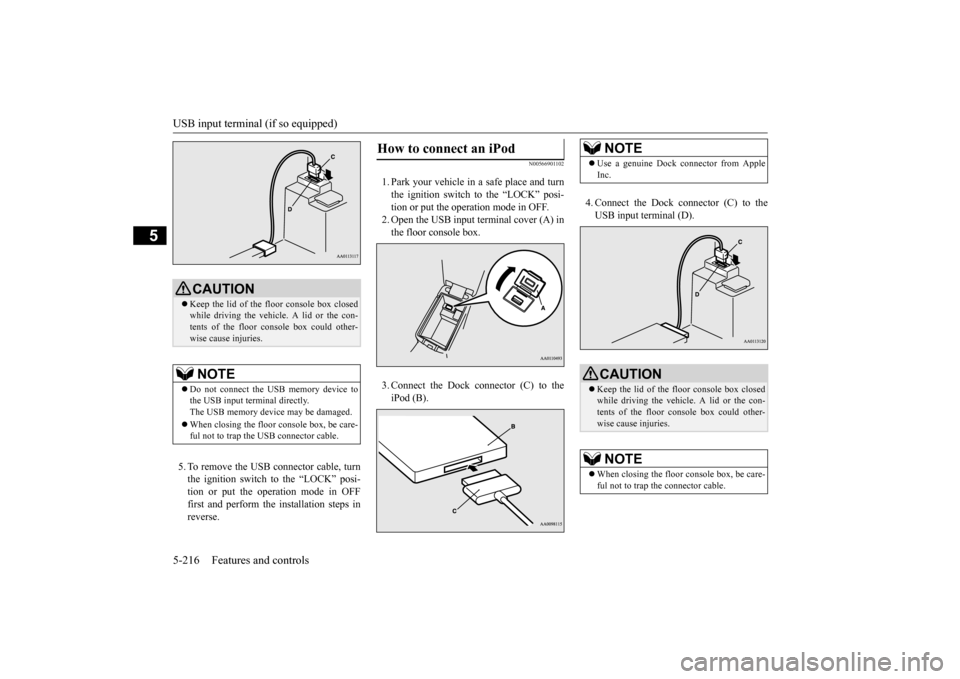
1. Park your vehicle in
a safe place and turn
the ignition switch to the “LOCK” posi-tion or put the operation mode in OFF. 2. Open the USB input terminal cover (A) in the floor console box. 3. Connect the Dock connector (C) to the iPod (B).
4. Connect the Dock connector (C) to the USB input terminal (D).
CAUTION Keep the lid of the floor console box closed while driving the vehicle. A lid or the con-tents of the floor console box could other- wise cause injuries.NOTE
Do not connect the US
B memory device to
the USB input term
inal directly.
The USB memory devi
ce may be damaged.
When closing the floor
console box, be care-
ful not to trap the USB connector cable.
How to connect an iPod
NOTE
Use a genuine Dock connector from Apple Inc.CAUTION Keep the lid of the floor console box closed while driving the vehicle. A lid or the con- tents of the floor console box could other-wise cause injuries.NOTE
When closing the floor
console box, be care-
ful not to trap the connector cable.
BK0223400US.book 216 ページ 2015年2月13日 金曜日 午後12時15分
Page 293 of 464
USB input terminal (if so equipped)
Features and controls 5-217
5
5. To remove the Dock connector, turn the ignition switch to the “LOCK” position orput the operation mode in OFF first and perform the installation steps in reverse.
N00567001041
For details about the
types of connectable
devices and supported fi
le specifications,
refer to the following pages and manuals. [For vehicles equipped with the AM/FM radio/CD player] Refer to “Listen to an iPod” on page 7-33, “Listen to Audio File
s on a USB Device” on
page 7-35 and “Audio Files (MP3/WMA/AAC)” on page 7-20. [For vehicles equipped with the Mitsubishi Multi-Communication
System (MMCS)]
Refer to the separate owner’s manual. [For vehicles equipped with the DISPLAY AUDIO] Refer to the separate owner’s manual.
For details about the types of connectable devices and supported fi
le specifications,
refer to the following section.
N00567101130
Devices of the follow
ing types can be con-
nected. For these connectable de
vice types, “iPod*,”
“iPod classic*,” “iPo
d nano*,” “iPod touch*”
and “iPhone*,” refer to the following web- site: [For vehicles sold in U.S.A.]You can access the Mitsubishi Motors North America website. [For vehicles sold in Canada and Mexico]
You can access the Mi
tsubishi Motors web-
site. Please read and agree to the “Warningabout Links to the Web Sites of Other Com- panies”. The websites
mentioned above may
connect you to websites
other than the Mit-
subishi Motors website. http://www.mitsubishi-
motors.com/en/prod-
ucts/index.html * : “iPod,” “iPod classi
c,” “iPod nano,” “iPod
touch,” and “iPhone” are registered trade- marks of Apple Inc. in the United States and other countries.
Types of connectable devices and supported file specifica-tions
Except for vehicles equipped with the Bluetooth
® 2.0 interface
For vehicles equipped with the Blue- tooth
® 2.0 interface
Device types
Model name
Condition
USB memory device
Storage capac- ity of 256 Mbytes or more
Models other than USB memory devices and iPods
Digital audio player support-ing mass stor- age class
NOTE
Depending on the type of the USB memory device or other devi
ce connected, the con-
nected device may not
function properly or
the available functi
ons may be limited.
It is recommended to use an iPod with firm- ware updated to th
e latest version.
You can charge your iP
od by connecting it to
the USB input terminal
when the ignition
switch or the operation mode is in ON or ACC. Do not keep your USB memory device or iPod in your vehicle. It is recommended that you back up the files in case of data damage.
BK0223400US.book 217 ページ 2015年2月13日 金曜日 午後12時15分
Page 294 of 464
Sun visors 5-218 Features and controls
5
N00567201056
You can play music files of the following specifications that are saved in a USB mem- ory device or other device supporting mass storage class. When you connect your iPod,playable file specifications depend on the connected iPod.
N00524601363
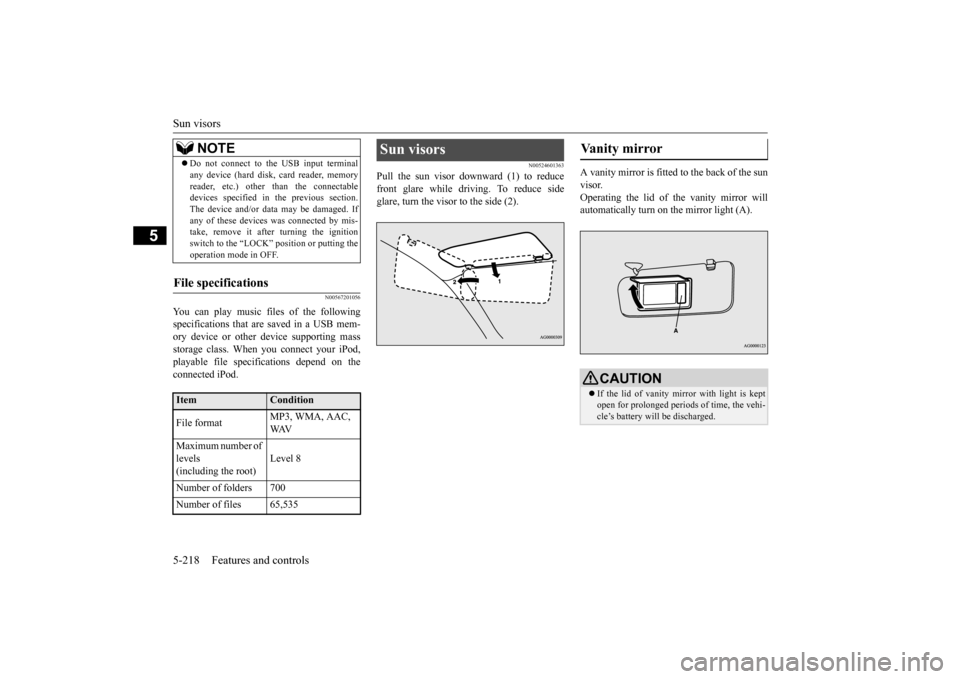
Pull the sun visor downward (1) to reducefront glare while driving. To reduce side glare, turn the visor to the side (2).
A vanity mirror is fitted to the back of the sun visor. Operating the lid of the vanity mirror will automatically turn on the mirror light (A).
Do not connect to the USB input terminal any device (hard disk, card reader, memoryreader, etc.) other than the connectabledevices specified in the previous section. The device and/or data
may be damaged. If
any of these devices
was connected by mis-
take, remove it afte
r turning the ignition
switch to the “LOCK”
position or putting the
operation mode in OFF.
File specifications
Item
Condition
File format
MP3, WMA, AAC, WAV
Maximum number of levels (including the root)
Level 8
Number of folders 700 Number of files 65,535
NOTE
Sun visors
Vanity mirror
CAUTION If the lid of vanity mirror with light is kept open for prolonged periods
of time, the vehi-
cle’s battery will be discharged.
BK0223400US.book 218 ページ 2015年2月13日 金曜日 午後12時15分
Page 295 of 464
12 V power outlets
Features and controls 5-219
5
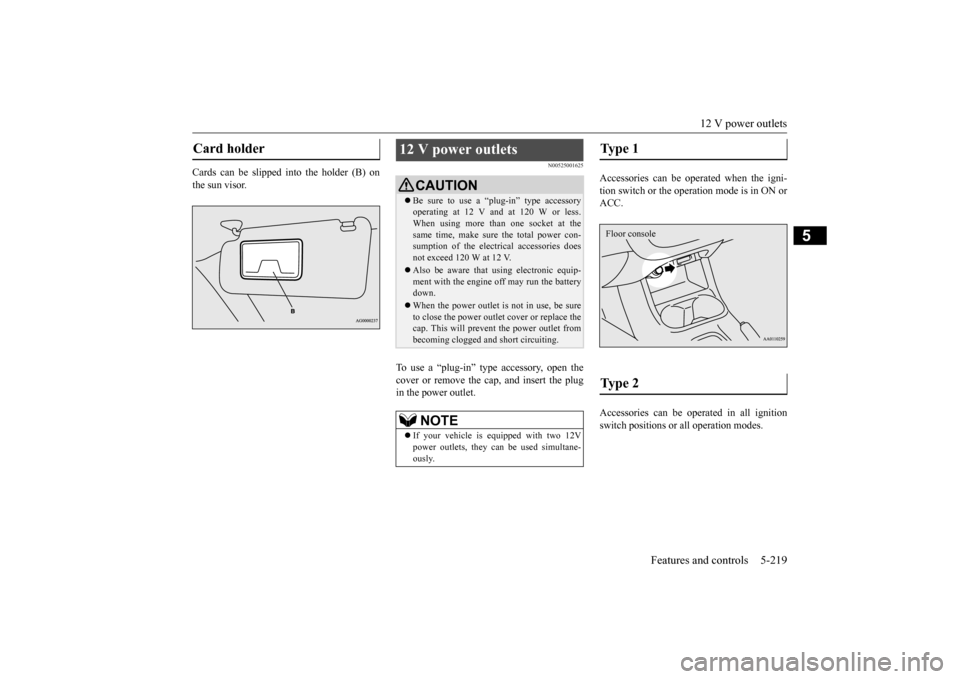
Cards can be slipped into the holder (B) on the sun visor.
N00525001625
To use a “plug-in” type accessory, open thecover or remove the cap, and insert the plugin the power outlet.
Accessories can be operated when the igni- tion switch or the operation mode is in ON or ACC. Accessories can be ope
rated in all ignition
switch positions or
all operation modes.
Card holder
12 V power outlets
CAUTIONBe sure to use a “plug-in” type accessory operating at 12 V and at 120 W or less.When using more than one socket at the same time, make sure
the total power con-
sumption of the electrical accessories doesnot exceed 120 W at 12 V. Also be aware that
using electronic equip-
ment with the engine
off may run the battery
down. When the power outlet is not in use, be sure to close the power outle
t cover or replace the
cap. This will prevent the power outlet frombecoming clogged and short circuiting.NOTE
If your vehicle is e
quipped with two 12V
power outlets, they ca
n be used simultane-
ously.
Type 1 Type 2 Floor console
BK0223400US.book 219 ページ 2015年2月13日 金曜日 午後12時15分
Page 296 of 464
HomeLink® Wireless Control System (if so equipped) 5-220 Features and controls
5
N00554301040
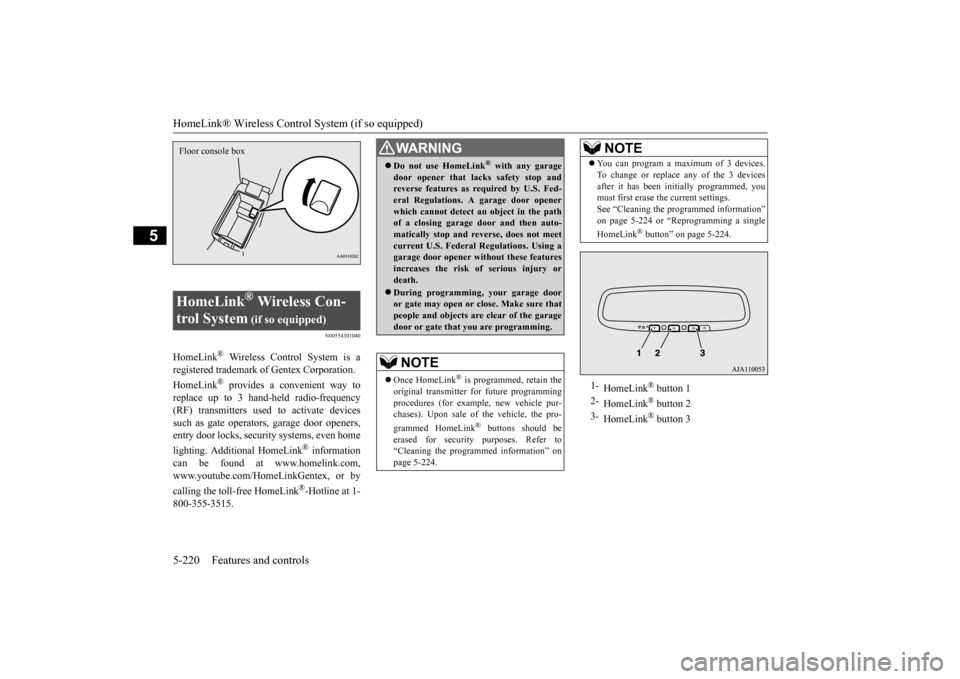
HomeLink
® Wireless Contro
l System is a
registered trademark of Gentex Corporation. HomeLink
® provides a convenient way to
replace up to 3 hand-held radio-frequency (RF) transmitters used to activate devices such as gate operators
, garage door openers,
entry door locks, security systems, even home lighting. Additional HomeLink
® information
can be found at www.homelink.com,www.youtube.com/HomeLinkGentex, or by calling the toll-free HomeLink
®-Hotline at 1-
800-355-3515.HomeLink
® Wireless Con-
trol System
(if so equipped)
Floor console box
WA R N I N G Do not use HomeLink
® with any garage
door opener that lacks safety stop and reverse features as required by U.S. Fed- eral Regulations.
A garage door opener
which cannot detect an object in the path of a closing garage d
oor and then auto-
matically stop and reverse, does not meetcurrent U.S. Federal Regulations. Using a garage door opener wi
thout these features
increases the risk of serious injury ordeath. During programming, your garage door or gate may open or close. Make sure that people and objects are clear of the garage door or gate that
you are programming.
NOTE
Once HomeLink
® is programmed, retain the
original transmitter for future programming procedures (for example, new vehicle pur- chases). Upon sale of the vehicle, the pro- grammed HomeLink
® buttons should be
erased for security purposes. Refer to “Cleaning the progra
mmed information” on
page 5-224.
You can program a maximum of 3 devices. To change or replace
any of the 3 devices
after it has been in
itially programmed, you
must first erase the current settings. See “Cleaning the programmed information” on page 5-224 or “Reprogramming a single HomeLink
® button” on page 5-224.
1-
HomeLink
® button 1
2-
HomeLink
® button 2
3-
HomeLink
® button 3
NOTE
BK0223400US.book 220 ページ 2015年2月13日 金曜日 午後12時15分
Page 297 of 464
HomeLink® Wireless Control System (if so equipped)
Features and controls 5-221
5
N00584600029
Some garage door openers manufactured after 1995 have “rolli
ng code protection”.
To program a garage door opener equipped with “rolli
ng code protection”;
you will need to access the garage dooropener motor to press the motor’s “Learn” or “Smart” buttons. For convenience, use a ladder and another person to assist you. It is recommended that a new battery be placed in the hand-held transmitter of the device being programmed to HomeLink
®
for quicker training and accurate trans- mission of the radio-frequency signal.
N00584700020
To program HomeLink
® to operate a garage
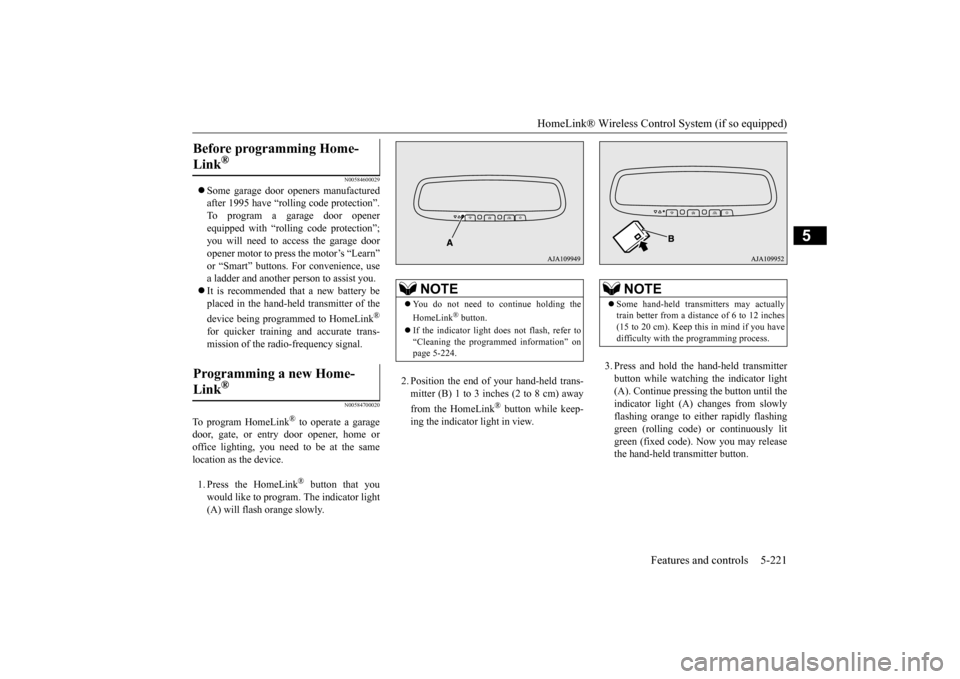
door, gate, or entry door opener, home or office lighting, you need to be at the same location as the device. 1. Press the HomeLink
® button that you
would like to program. The indicator light (A) will flash orange slowly.
2. Position the end of your hand-held trans- mitter (B) 1 to 3 inches (2 to 8 cm) away from the HomeLink
® button while keep-
ing the indicator light in view.
3. Press and hold the hand-held transmitter button while watching
the indicator light
(A). Continue pressing the button until the indicator light (A)
changes from slowly
flashing orange to either rapidly flashinggreen (rolling code) or continuously lit green (fixed code). Now you may release the hand-held transmitter button.
Before programming Home- Link
®
Programming a new Home-Link
®
NOTE
You do not need to continue holding the HomeLink
® button.
If the indicator light doe
s not flash, refer to
“Cleaning the programmed information” on page 5-224.
NOTE
Some hand-held transmitters may actually train better from a distance of 6 to 12 inches(15 to 20 cm). Keep this in mind if you have difficulty with th
e programming process.
BK0223400US.book 221 ページ 2015年2月13日 金曜日 午後12時15分
Page 298 of 464

HomeLink® Wireless Control System (if so equipped) 5-222 Features and controls
5
4. Press the HomeLink
® button that was just
programmed and observe the indicator light.• If the indicator light continuously illumi- nates green, programming is complete and your device shoul
d operate when the
HomeLink
® button is pressed and
released. • If the indicator light rapidly flashes green, firmly press, hold for 2 seconds and release the programmed HomeLink
®
button. Repeat the
“press/hold/release”
sequence a second tim
e, and, depending
on the brand of the garage door opener(or other rolling code equipped device), repeat this sequence a third time to com- plete the programming
process. At this
point if your device operates, program- ming is complete.
• If the device does not operate, continue with “Programming a new HomeLink
®”
steps 5 to 7 to complete the program- ming of a rolling code equipped device.
5. At the garage door opener receiver(motor-head unit) in the garage, locate the “Learn” or “Smart” but
ton. This can usu-
ally be found where the hanging antennawire is attached to the motor-head unit (see the garage
door opener manual to
identify the “Learn” button.) 6. Firmly press and release the “Learn” or “Smart” button. (The name and color ofthe button may vary by manufacturer.) There are typically 30 seconds to initiate step 7.7. Return to the vehicle and firmly press, hold for 2 seconds and release the pro- grammed HomeLink
® button. Repeat the
“press/hold/release”
sequence a second
time, and, depending
on the brand of the
garage door opener (or other rolling codeequipped device), repe
at this sequence a
third time to complete the programming process. HomeLink
® should now activate your
rolling code e
quipped device.
N00584800021
Canadian radio-frequenc
y laws require trans-
mitter signals to “time-out” (or quit) afterseveral seconds of tr
ansmission - which may
not be long enough for HomeLink
® to pick
up the signal during programming. Similar to this Canadian law, some U.S. gate operators are designed to “time-
out” in the same man-
ner. The indicator LED on the hand-held transmit- ter will go off when the device times out indi-cating that it has fi
nished transmitting.
If you live in Canada or you are having diffi- culties programming a gate operator orgarage door opener by using the “Program- ming” procedures, replace “Programming a new HomeLink
®” step 3 with the following:
NOTE
Some devices may requi
re you to replace this
“Programming a new HomeLink
®” step 3
with procedures noted in the “Gate operator / Canadian programming”
section. If the indi-
cator light does not ch
ange to rapidly flash-
ing green or continuously lit green after performing these step
s, contact HomeLink
®
at www.homelink.com
NOTE
In the event that there are still programming difficulties or questi
ons, additional Home-
Link
® information and programming videos
can be found online at www.homelink.com,www.youtube.com/HomeL
inkGentex, or by
calling the HomeLink
® Hotline.
Gate operator/Canadian pro- gramming
BK0223400US.book 222 ページ 2015年2月13日 金曜日 午後12時15分
Page 299 of 464
HomeLink® Wireless Control System (if so equipped)
Features and controls 5-223
5
3. Press and release - every 2 seconds (“cycle”) your hand-held transmitter until the HomeLink
® indicator light changes from
slowly flashing orange to either rapidly flash- ing green (rolling code
) or continuously lit
green (fixed code). Now you may release the hand-held transmitter button. Proceed with “Programming a new Home- Link
®” step 4 to complete.
N00584900022
The HomeLink
® has the capability of receiv-
ing garage door status from compatiblegarage door opener systems. Check your garage door opener manual for the available feature and HomeLink
® compatibility. Also
for a listing of compatible systems contact HomeLink
® at: www.homelink.com
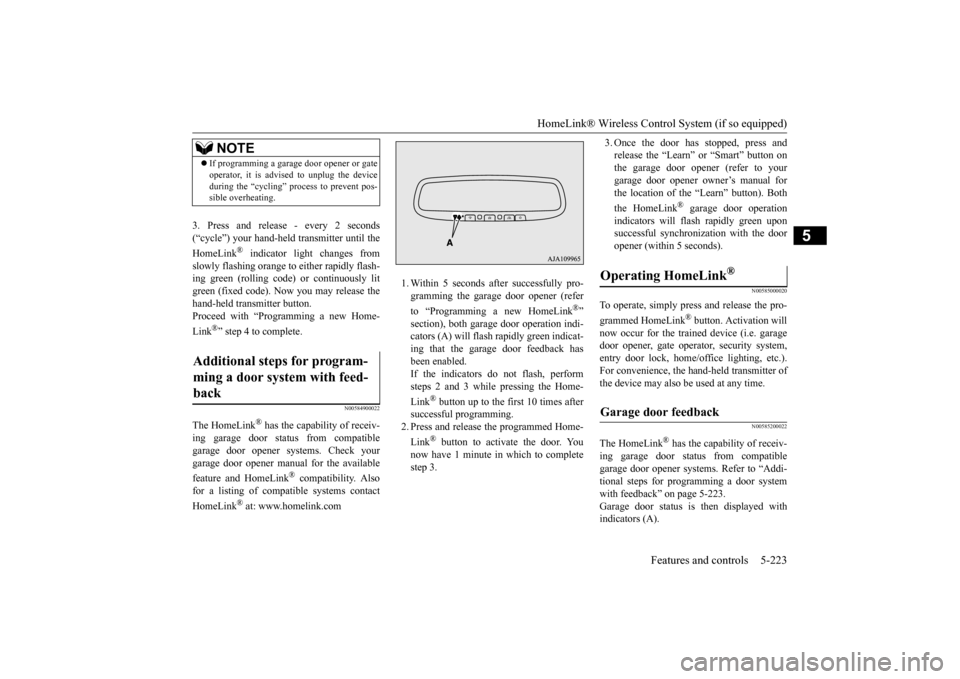
1. Within 5 seconds after successfully pro- gramming the garage door opener (refer to “Programming a new HomeLink
®”
section), both garage door operation indi- cators (A) will flash
rapidly green indicat-
ing that the garage door feedback has been enabled. If the indicators do not flash, performsteps 2 and 3 while pressing the Home- Link
® button up to the first 10 times after
successful programming.2. Press and release
the programmed Home-
Link
® button to activate the door. You
now have 1 minute in which to completestep 3.
3. Once the door has stopped, press and release the “Learn” or “Smart” button onthe garage door opener (refer to your garage door opener owner’s manual for the location of the “Learn” button). Both the HomeLink
® garage door operation
indicators will fl
ash rapidly green upon
successful synchroni
zation with the door
opener (within 5 seconds).
N00585000020
To operate, simply press and release the pro- grammed HomeLink
® button. Activation will
now occur for the trained device (i.e. garagedoor opener, gate opera
tor, security system,
entry door lock, home/office lighting, etc.). For convenience, the ha
nd-held transmitter of
the device may also be used at any time.
N00585200022
The HomeLink
® has the capab
ility of receiv-
ing garage door status from compatible garage door opener systems. Refer to “Addi- tional steps for programming a door systemwith feedback” on page 5-223. Garage door status is
then displayed with
indicators (A).
NOTE
If programming a garage door opener or gate operator, it is advise
d to unplug the device
during the “cycling” pr
ocess to prevent pos-
sible overheating.
Additional steps for program- ming a door system with feed- back
Operating HomeLink
®
Garage door feedback
BK0223400US.book 223 ページ 2015年2月13日 金曜日 午後12時15分
Page 300 of 464
HomeLink® Wireless Control System (if so equipped) 5-224 Features and controls
5
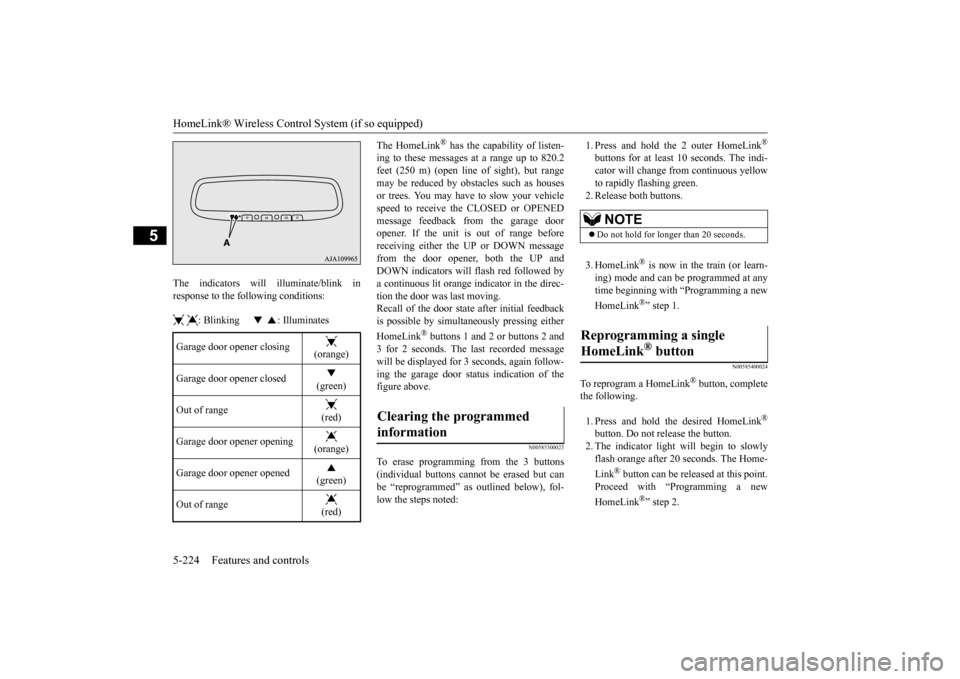
The indicators will illuminate/blink in response to the following conditions: : Blinking : Illuminates
The HomeLink
® has the capability of listen-
ing to these messages at a range up to 820.2feet (250 m) (open line
of sight), but range
may be reduced by obstacles such as houses or trees. You may have to slow your vehiclespeed to receive the CLOSED or OPENED message feedback from the garage door opener. If the unit is out of range beforereceiving either th
e UP or DOWN message
from the door opener, both the UP and DOWN indicators will fl
ash red followed by
a continuous lit orange
indicator in the direc-
tion the door was last moving.Recall of the door stat
e after initial feedback
is possible by simultane
ously pressing either
HomeLink
® buttons 1 and 2 or buttons 2 and
3 for 2 seconds. The last recorded message will be displayed for 3
seconds, again follow-
ing the garage door st
atus indication of the
figure above.
N00585300023
To erase programming from the 3 buttons (individual buttons cannot
be erased but can
be “reprogrammed” as
outlined below), fol-
low the steps noted:
1. Press and hold the 2 outer HomeLink
®
buttons for at least 10 seconds. The indi- cator will change
from continuous yellow
to rapidly flashing green. 2. Release both buttons. 3. HomeLink
® is now in the train (or learn-
ing) mode and can be programmed at anytime beginning with
“Programming a new
HomeLink
®” step 1.
N00585400024
To reprogram a HomeLink
® button, complete
the following. 1. Press and hold the desired HomeLink
®
button. Do not release the button. 2. The indicator light will begin to slowly flash orange after 20
seconds. The Home-
Link
® button can be released at this point.
Proceed with “P
rogramming a new
HomeLink
®” step 2.
Garage door opener closing
(orange)
Garage door opener closed
(green)
Out of range
(red)
Garage door opener opening
(orange)
Garage door opener opened
(green)
Out of range
(red)
Clearing the programmed information
NOTE
Do not hold for longer than 20 seconds.
Reprogramming a single HomeLink
® button
BK0223400US.book 224 ページ 2015年2月13日 金曜日 午後12時15分