MITSUBISHI OUTLANDER 2017 3.G Owners Manual
Manufacturer: MITSUBISHI, Model Year: 2017, Model line: OUTLANDER, Model: MITSUBISHI OUTLANDER 2017 3.GPages: 521, PDF Size: 14.91 MB
Page 301 of 521
Combination headlights and dimmer switch 5-220 Features and controls
5
N00558601113
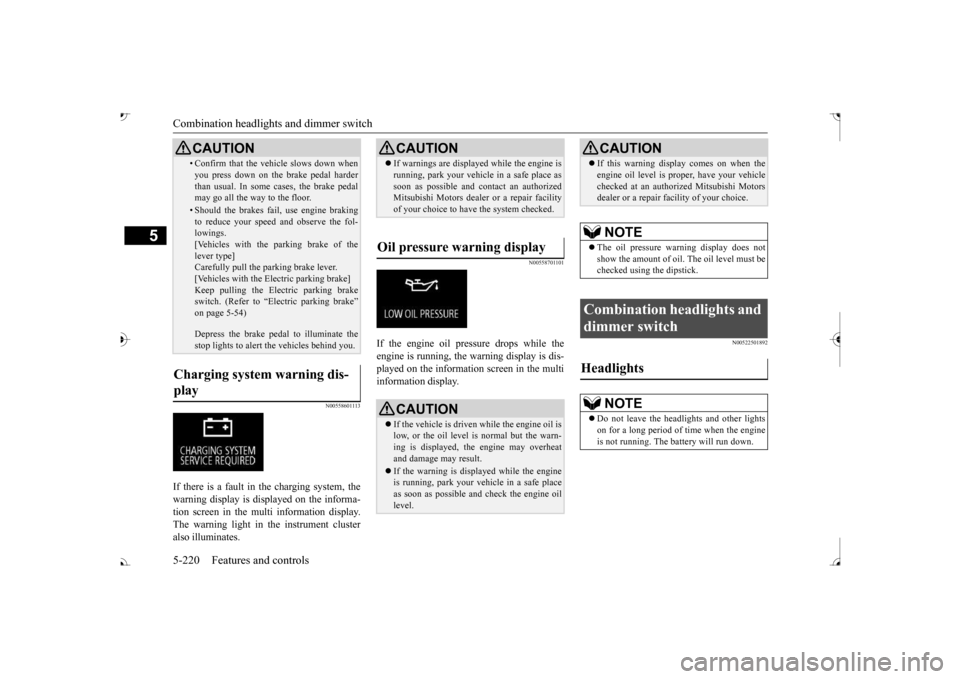
If there is a fault in the charging system, the warning display is displayed on the informa- tion screen in the multi information display.The warning light in the instrument cluster also illuminates.
N00558701101
If the engine oil pressure drops while the engine is running, the warning display is dis-played on the information screen in the multi information display.
N00522501892
• Confirm that the vehicle slows down when you press down on the brake pedal harderthan usual. In some cases, the brake pedalmay go all the way to the floor.• Should the brakes fail, use engine brakingto reduce your speed and observe the fol- lowings. [Vehicles with the parking brake of thelever type] Carefully pull the parking brake lever. [Vehicles with the Electric parking brake]Keep pulling the Electric parking brake switch. (Refer to “Electric parking brake” Depress the brake peda
l to illuminate the
stop lights to alert th
e vehicles behind you.
Charging system warning dis- play
CAUTION
CAUTION If warnings are displa
yed while the engine is
running, park your vehicl
e in a safe place as
soon as possible and c
ontact an authorized
Mitsubishi Motors dealer
or a repair facility
of your choice to have the system checked.
Oil pressure warning display
CAUTION If the vehicle is driven while the engine oil is low, or the oil level is normal but the warn-ing is displayed, th
e engine may overheat
and damage may result. If the warning is displayed while the engine is running, park your ve
hicle in a safe place
as soon as possible and
check the engine oil
level.
If this warning display comes on when the engine oil level is pr
oper, have your vehicle
checked at an authorized Mitsubishi Motorsdealer or a repair fa
cility of your choice.
NOTE
The oil pressure wa
rning display does not
show the amount of oil. The oil level must be checked using the dipstick.
Combination headlights and dimmer switch Headlights
NOTE
Do not leave the headli
ghts and other lights
on for a long period of time when the engine is not running. The battery will run down.CAUTION
BK0239700US.book 220 ページ 2016年6月16日 木曜日 午前10時58分
Page 302 of 521
Combination headlights and dimmer switch
Features and controls 5-221
5
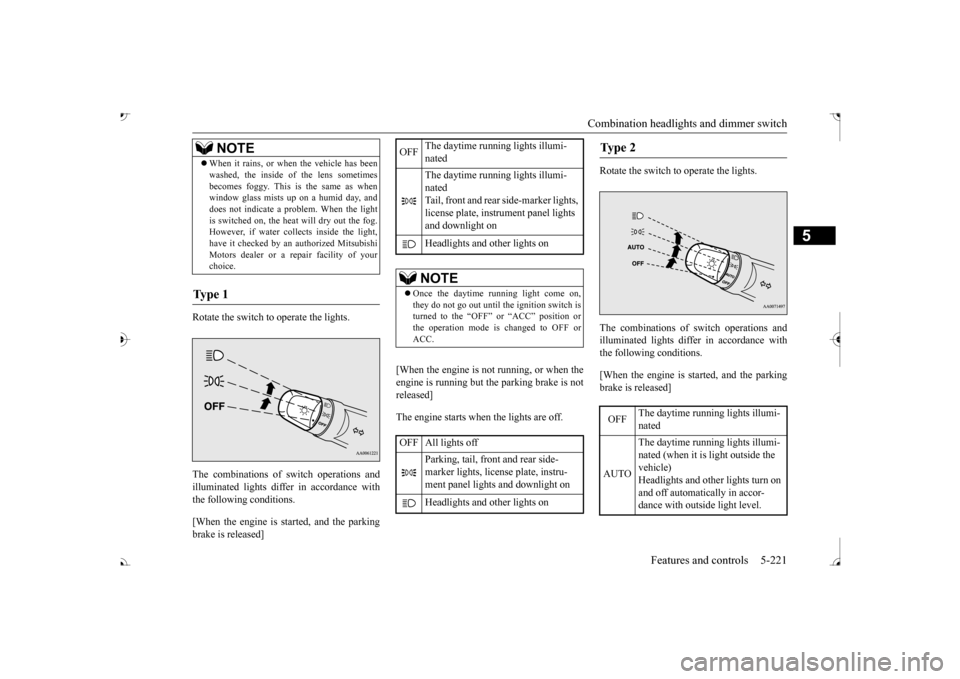
Rotate the switch to operate the lights. The combinations of switch operations and illuminated lights differ in accordance with the following conditions. [When the engine is started, and the parking brake is released]
[When the engine is not running, or when the engine is running but the parking brake is notreleased] The engine starts when the lights are off.
Rotate the switch to operate the lights. The combinations of switch operations and illuminated lights differ in accordance withthe following conditions. [When the engine is started, and the parking brake is released]
When it rains, or wh
en the vehicle has been
washed, the inside of the lens sometimesbecomes foggy. This is the same as whenwindow glass mists up
on a humid day, and
does not indicate a problem. When the light is switched on, the heat
will dry out the fog.
However, if water collects inside the light, have it checked by an
authorized Mitsubishi
Motors dealer or a repair facility of yourchoice.
Ty p e 1
NOTE
OFF
The daytime running lights illumi- nated The daytime running lights illumi- nated Tail, front and rear side-marker lights, license plate, instrument panel lights and downlight on Headlights and other lights onNOTE
Once the daytime running light come on, they do not go out until the ignition switch is turned to the “OFF” or “ACC” position or the operation mode is changed to OFF orACC.
OFF All lights off
Parking, tail, front and rear side- marker lights, license plate, instru- ment panel lights and downlight on Headlights and other lights on
Ty p e 2 OFF
The daytime running lights illumi- nated
AUTO
The daytime running lights illumi- nated (when it is light outside the vehicle) Headlights and other lights turn on and off automatically in accor-dance with outside light level.
BK0239700US.book 221 ページ 2016年6月16日 木曜日 午前10時58分
Page 303 of 521
![MITSUBISHI OUTLANDER 2017 3.G Owners Manual Combination headlights and dimmer switch 5-222 Features and controls
5
[When the engine is not running, or when the engine is running but the parking brake is notreleased] The engine starts when the l MITSUBISHI OUTLANDER 2017 3.G Owners Manual Combination headlights and dimmer switch 5-222 Features and controls
5
[When the engine is not running, or when the engine is running but the parking brake is notreleased] The engine starts when the l](/img/19/7536/w960_7536-302.png)
Combination headlights and dimmer switch 5-222 Features and controls
5
[When the engine is not running, or when the engine is running but the parking brake is notreleased] The engine starts when the lights are off.
N00532601580
If the following operation is performed with the combination headlights and dim- mer switch in the “ ” or “ ” position, the lights automatically turn off. [Except for vehicles
equipped with the
F. A . S . T. - k e y ]The ignition switch is turned to the “OFF” from the ignition switch and the driver’sdoor is opened. [For vehicles equipped
with the F.A.S.T.-
key] The operation mode is changed to OFF orACC and the driver’s door is opened. If the following operation is performed with the combination headlights and dim- mer switch in the “ ” or “ ” position, the lights automatically turn off afterabout 3 minutes. [Except for vehicles
equipped with the
F. A . S . T. - k e y ] The ignition switch is turned to the “OFF” from the ignition switch and the driver’s door is not opened.
The daytime running lights illumi- nated Tail, front and rear side-marker lights, license pl
ate, instrument
panel lights and downlight on Headlights and other lights on
NOTE
Once the daytime running light come on, they do not go out until the ignition switch isturned to the “OFF” or “ACC” position or the operation mode is changed to OFF or ACC.OFF All lights off AUTO
Headlights and other lights turn on and off automatically in accor- dance with outside light level. Parking, tail, front
and rear side-
marker lights, license plate, instru- ment panel lights and downlight on Headlights and other lights on
NOTE
The sensitivity of the automatic on/off con- trol can be adjusted.For further informati
on, please contact your
authorized Mitsubishi Motors dealer or a repair facility of your choice. On vehicles equipped
with Mitsubishi Multi-
Communication System,
screen operations
can be used to make the adjustment. Refer to the separate owner’s manual fordetails. Do not cover the sensor (A) for the automatic on/off control by affixing
a sticker or label to
the windshield. If the lights do not turn on or off with the switch in the “AUTO” operate the switch. Have
the system checked
by an authorized Mitsubishi Motors dealer ora repair facility
of your choice.
Light auto-cutout function (headlights and other lights)
BK0239700US.book 222 ページ 2016年6月16日 木曜日 午前10時58分
Page 304 of 521
![MITSUBISHI OUTLANDER 2017 3.G Owners Manual Combination headlights and dimmer switch
Features and controls 5-223
5
[For vehicles equipped with the F.A.S.T.- key]The operation mode is changed to OFF or ACC and the driver’s door is not opened. MITSUBISHI OUTLANDER 2017 3.G Owners Manual Combination headlights and dimmer switch
Features and controls 5-223
5
[For vehicles equipped with the F.A.S.T.- key]The operation mode is changed to OFF or ACC and the driver’s door is not opened.](/img/19/7536/w960_7536-303.png)
Combination headlights and dimmer switch
Features and controls 5-223
5
[For vehicles equipped with the F.A.S.T.- key]The operation mode is changed to OFF or ACC and the driver’s door is not opened.
If the combination
headlights and dimmer
switch is turned to the “ ” or “ ” posi- tion again after the engine is turned off, the about 3-minute auto
-cutout function
described above will not
work. The lights (the
parking lights, tail lig
hts and license plate
lights) will stay on and will not turn off auto- matically.
N00584500028
This warning light will illuminate when thereis a malfunction in the LED headlights.
N00549801236
[When using a key to
start the engine]
If the driver’s door is opened with the key in the “OFF” or “LOCK” or “ACC” position orremoved from the ignition switch while the lights are on, the tone will sound to remind you to turn off the lights. [When using the F.A.S.T.-key to start the engine] If the driver’s door is opened with the opera-tion mode is put in OFF or ACC, or if the operation mode is changed to OFF while the lights are on, the tone will sound to remindyou to turn off the lights. In either case, the lights will turn off automat- ically and so will the tone. Or you can turn the light switch to th
e “OFF” position to stop
the tone.
N00549901178
To change the headlights from high beam to low beam and vice vers
a, pull the turn signal
lever to (1). Switch the headlights to lowbeam as a courtesy whenever there are oncoming vehicles, or when there is traffic moving ahead of you. An illuminated blue
NOTE
The light auto-cutout f
unction can be deacti-
vated. See your authorized Mitsubishi Motorsdealer for details. For vehicles equipped
with the Mitsubishi
Multi-Communication System, adjustmentscan be made using screen operations. For further details, refer to the separate owner’s manual.
When you want to keep the lights on:
LED headlight warning light
(if
so equipped)
NOTE
If the warning light illuminates, there may be a malfunction in the unit. Contact an autho- rized Mitsubishi Motors
dealer or a repair
facility of your choice
to have the system
checked.Type 1 Type 2
Headlight reminder buzzer Dimmer (high/low beam change)
BK0239700US.book 223 ページ 2016年6月16日 木曜日 午前10時58分
Page 305 of 521
Combination headlights and dimmer switch 5-224 Features and controls
5
light in the instrument cluster indicates when the headlights are on high beam.
N00550001209
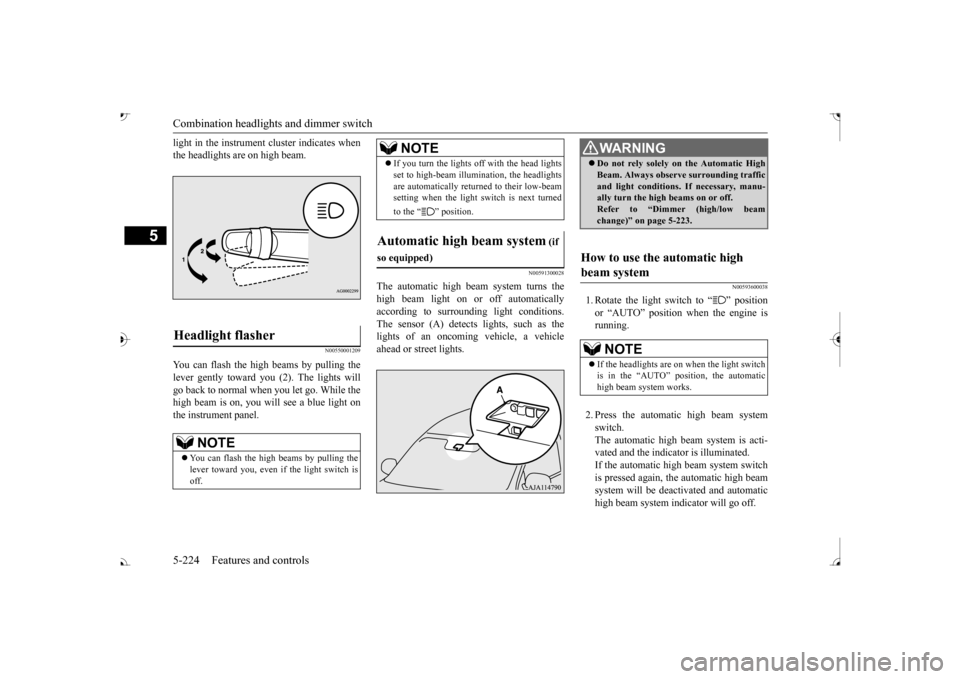
You can flash the high beams by pulling the lever gently toward you (2). The lights will go back to normal when you let go. While thehigh beam is on, you will
see a blue light on
the instrument panel.
N00591300028
The automatic high beam system turns the high beam light on
or off automatically
according to surrounding light conditions. The sensor (A) detects lights, such as thelights of an oncoming vehicle, a vehicle ahead or street lights.
N00593600038
1. Rotate the light switch to “ ” position or “AUTO” position when the engine isrunning. 2. Press the automatic high beam system switch. The automatic high beam system is acti-vated and the indicator is illuminated. If the automatic high beam system switch is pressed again, the automatic high beamsystem will be deactivated and automatic high beam system indicator will go off.
Headlight flasher
NOTE
You can flash the high beams by pulling the lever toward you, even if the light switch isoff.
If you turn the lights off with the head lights set to high-beam illumi
nation, the headlights
are automatically returned to their low-beamsetting when the light
switch is next turned
to the “ ” position.
Automatic high beam system
(if
so equipped)
WA R N I N G Do not rely solely on the Automatic High Beam. Always observe
surrounding traffic
and light conditions. If necessary, manu-ally turn the high beams on or off. Refer to “Dimmer (high/low beam change)” on page 5-223.
How to use the automatic high beam system
NOTE
If the headlights are on when the light switch is in the “AUTO” position, the automatic high beam system works.
BK0239700US.book 224 ページ 2016年6月16日 木曜日 午前10時58分
Page 306 of 521
Combination headlights and dimmer switch
Features and controls 5-225
5
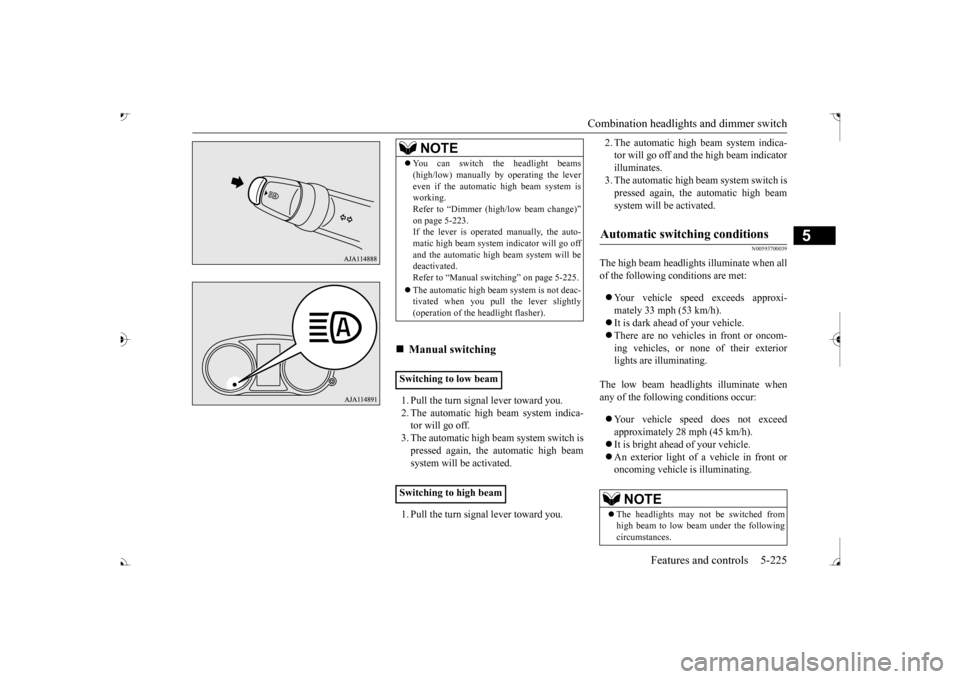
1. Pull the turn signal lever toward you. 2. The automatic high beam system indica-tor will go off. 3. The automatic high beam system switch is pressed again, the
automatic high beam
system will be activated. 1. Pull the turn signal lever toward you.
2. The automatic high beam system indica- tor will go off and the high beam indicatorilluminates. 3. The automatic high beam system switch is pressed again, the
automatic high beam
system will be activated.
N00593700039
The high beam headlight
s illuminate when all
of the following
conditions are met:
Your vehicle speed exceeds approxi- mately 33 mph (53 km/h). It is dark ahead of your vehicle. There are no vehicles in front or oncom- ing vehicles, or none
of their exterior
lights are illuminating.
The low beam headlights illuminate when any of the followi
ng conditions occur:
Your vehicle speed does not exceed approximately 28 mph (45 km/h). It is bright ahead of your vehicle. An exterior light of a vehicle in front or oncoming vehicle is illuminating.
NOTE
You can switch the headlight beams (high/low) manually
by operating the lever
even if the automatic high beam system isworking. Refer to “Dimmer (high/low beam change)” on page 5-223.If the lever is operated manually, the auto- matic high beam system
indicator will go off
and the automatic high beam system will bedeactivated. Refer to “Manual swit
ching” on page 5-225.
The automatic high beam
system is not deac-
tivated when you pull
the lever slightly
(operation of the he
adlight flasher).
Manual switching
Switching to low beam Switching to high beam
Automatic switching conditions
NOTE
The headlights may not be switched from high beam to low beam under the following circumstances.
BK0239700US.book 225 ページ 2016年6月16日 木曜日 午前10時58分
Page 307 of 521

Combination headlights and dimmer switch 5-226 Features and controls
5
The sensitivity of the se
nsor can be temporar-
ily lowering in the following ways. 1. Park your vehicle in a safe place and the ignition switch is turned to the “OFF” or “LOCK” position or the operation mode is put in OFF.2. Press the automatic high beam system switch more than 15 times within 5 sec- onds after operation mode is turned on.
• A vehicle in front
or oncoming vehicle is
hindered by any object
such as continuous
bends, elevated median/i
sland, traffic signs,
roadside trees. • Your vehicle passes
an oncoming vehicle
suddenly on a bend with poor visibility. • Another vehicle crosse
s ahead of your vehi-
cle.
The headlights may remain at low beam (or be switched from high beam to low beam) when a reflective object (e.g. street light, traffic signal, noticeboard and signboard) Any of the following factors may influence the headlight beam switching timing: • How brightly the exteri
or lights of a vehicle
in front or oncoming
vehicle il
luminate.
• Movement or direction
of a vehicle in front
or oncoming vehicle. • Only right or left exte
rior light of a vehicle
in front or oncoming
vehicle is illuminat-
ing. • A vehicle in front or
oncoming vehicle is a
motorcycle. • Road conditions (gradient, bends and road surface). • The number of occupa
nts and luggage load.
The automatic high beam
system recognises
environmental conditi
ons by sensing a light
source ahead of your ve
hicle. Therefore, you
may feel like someth
ing is not quite right
when the headlight beams are switched auto- matically.NOTE
The system may not de
tect a light vehicle
such as a bicycle. The system may not detect an ambient brightness precisely. Th
is causes the traffic
to be dazzled by high beam or the low beamto be maintained. In such cases, you should switch the headli
ght beams manually.
• In bad weather (heavy
rain, fog, snow or
sandstorm). • The windshield is dirty or fogged up. • The windshield is cracked or broken.• The sensor is deformed or dirty. • A light, which is simila
r to the headlights or
tail lights, is shining around your vehicle. • A vehicle in front
or oncoming vehicle is
driven without lights, the exterior lights are dirty or discoloured, or the direction of theheadlight beams is adjusted improperly. • It becomes dark and bright suddenly and continuously around your vehicle. • Your vehicle is driven on uneven surfaces.• Your vehicle is driven on a winding road. • A reflective object such as a noticeboard or a mirror reflects a li
ght ahead of your vehi-
cle. • When lights of the vehicle in front or head- lights of an oncoming ve
hicle blend into the
other lights. • The rear end of a vehicle in front (such as a container truck) re
flect a strong light.
• Your vehicle's headlight
is broken or dirty.
NOTE
• Your vehicle is inclined due to a flat tire or towing. • The warning display appears. (Refer to “System
problem warning” on
page 5-227.)
Observe the precautions below to maintain good usage conditions: • Do not attempt to di
sassemble the sensor.
• Do not affix a sticker or label on the wind- shield near the sensor. • Avoid overload. • Do not modify your vehicle.• When the windshield is replaced, use the Mitsubishi Motors
genuine parts.
To adjust the sensitivity of the sensor
NOTE
BK0239700US.book 226 ページ 2016年6月16日 木曜日 午前10時58分
Page 308 of 521
Combination headlights and dimmer switch
Features and controls 5-227
5
N00593800027
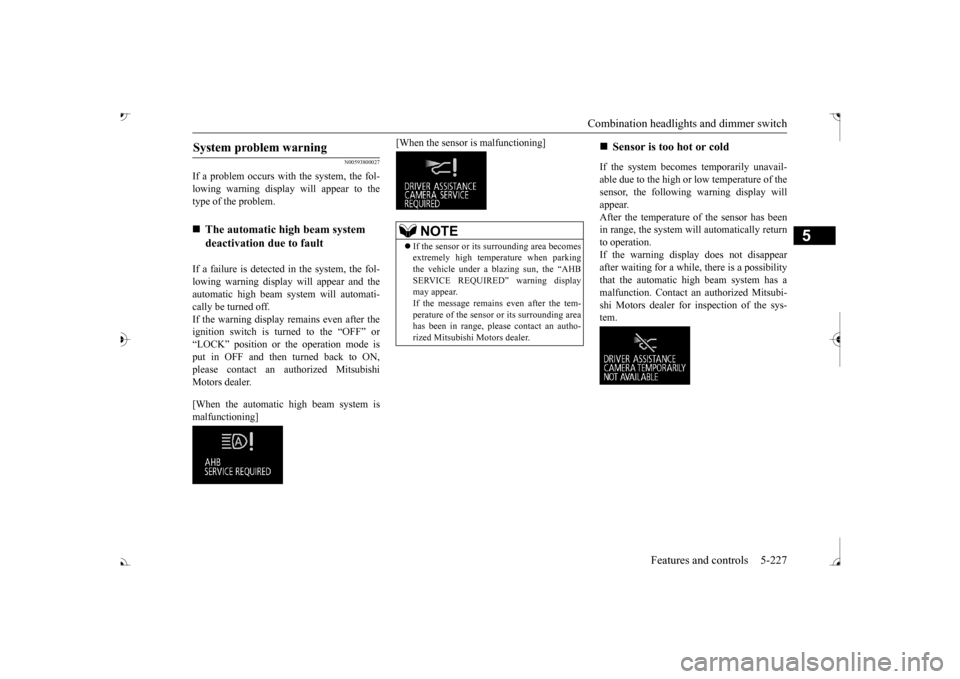
If a problem occurs with the system, the fol- lowing warning display will appear to the type of the problem. If a failure is detected in the system, the fol- lowing warning display will appear and the automatic high beam system will automati- cally be turned off. If the warning display remains even after theignition switch is turned to the “OFF” or “LOCK” position or the operation mode is put in OFF and then turned back to ON,please contact an au
thorized Mitsubishi
Motors dealer. [When the automatic high beam system is malfunctioning]
[When the sensor is malfunctioning]
If the system becomes temporarily unavail- able due to the high or low temperature of thesensor, the following warning display will appear. After the temperature of the sensor has beenin range, the system will automatically return to operation. If the warning display does not disappearafter waiting for a while, there is a possibility that the automatic high beam system has a malfunction. Contact an
authorized Mitsubi-
shi Motors dealer for inspection of the sys- tem.
System problem warning
The automatic high beam system deactivation due to fault
NOTE
If the sensor or its surrounding area becomes extremely high temperature when parking the vehicle under a blazing sun, the “AHB SERVICE REQUIRED” warning displaymay appear. If the message remains even after the tem- perature of the sensor or its surrounding areahas been in range, plea
se contact an autho-
rized Mitsubishi Motors dealer.
Sensor is too hot or cold
BK0239700US.book 227 ページ 2016年6月16日 木曜日 午前10時58分
Page 309 of 521

Combination headlights and dimmer switch 5-228 Features and controls
5
If the automatic high beam system determines that its performance has been degraded, the warning display will appear.This can occur when Foreign objects, such as dirt, snow or ice, adhere to the windshield of the sensor portion. In adverse weather
conditions, such as
rain, snow, sand storms, etc. A front vehicle or an oncoming vehicle is splashing water, snow or dirt.
When the sensor performance returns, the automatic high beam system will resumeoperation. If the warning display does not disappear after waiting for a while, there is a possibilitythat the sensor has a malfunction. Contact an authorized Mitsubishi Motors dealer for inspection of the sensor.
N00563201234
This function turns on
the front side-marker
and parking lights for
about 30 seconds after
the UNLOCK button on the remote controltransmitter is pressed when the combination headlights and dimmer sw
itch is in the “OFF” ehicles equipped with
the automatic light control). The welcome light function will ope
rate only when it is
dark outside the vehicle.
N00547301178
This function turns on the headlights in thelow beam setting for a
bout 30 seconds after
the ignition switch is turned to the “OFF” or “LOCK” position or the operation mode is put in OFF. 1. Turn the combination headlights and dim- mer switch to the “OFF” or “AUTO” matic light control).2. Turn the ignition switch to the “OFF” or “LOCK” position or put the operation mode in OFF. Also, if a key was used tostart the engine, remove the key from the ignition switch.
Windshield is dirty
Welcome light
NOTE
While the welcome light
function is operat-
ing, perform one of th
e following operations
to cancel the function. • Push the LOCK button on the remote con- trol transmitter. • Turn the combination headlights and dim- mer switch to the “ ” or “ ” position. • Turn the ignition switch to the “ON” posi- tion or put the opera
tion mode in ON.
It is possible to modify functions as follows: • The headlights can be set to come on in the low beam setting. • The welcome light fu
nction can be deacti-
vated.
For details, consult a Mitsubishi Motorsdealer.On vehicles e
quipped with Mitsubishi Multi-
Communication System, screen operations can be used to ma
ke the adjustment.
Refer to the separate
owner’s manual for
details.
Coming home light
NOTE
BK0239700US.book 228 ページ 2016年6月16日 木曜日 午前10時58分
Page 310 of 521
Headlight leveling switch (if so equipped)
Features and controls 5-229
5
3. Within 60 seconds of
turning the ignition
switch to the “OFF” or “LOCK” positionor putting the operation mode in OFF, pull the turn signal lever toward you. 4. The headlights will come on in the low beam setting for about 30 seconds. After the headlights go off, the headlights can be turned on again in
the low beam setting
for about 30 seconds by pulling the turnsignal lever toward you within 60 seconds of turning the ignition switch to the “OFF” or “LOCK” position or putting theoperation mode in OFF. To turn on the headlights again after 60 seconds of turn- ing the ignition switch to the “OFF” or“LOCK” position or
putting the operation
mode in OFF, repeat the process from step 1.
N00537101115
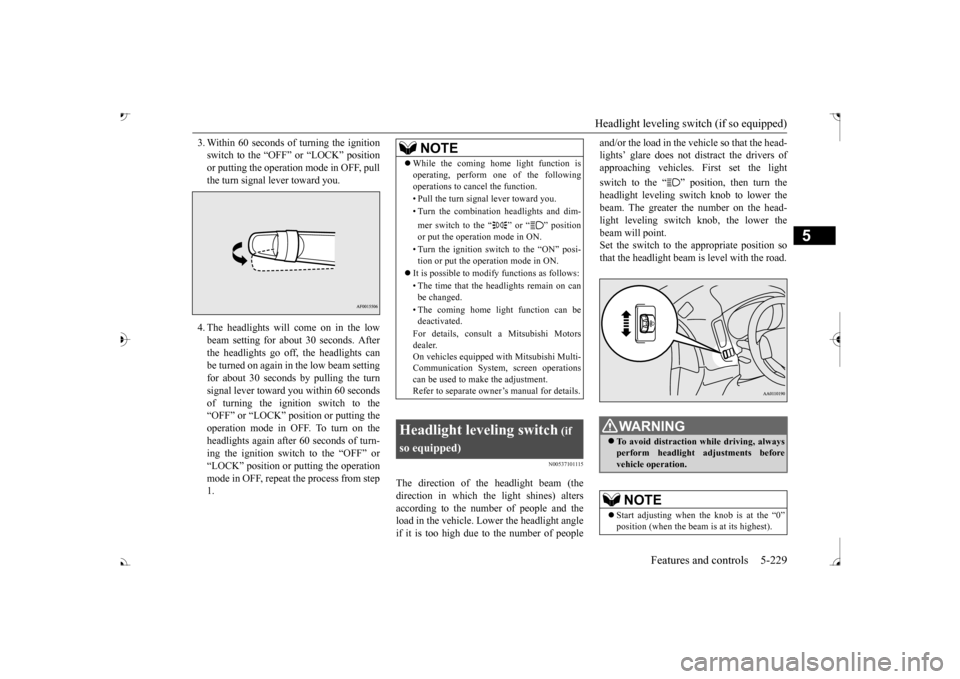
The direction of the headlight beam (thedirection in which the light shines) alters according to the number of people and the load in the vehicle. Lo
wer the headlight angle
if it is too high due to the number of people
and/or the load in the vehicle so that the head- lights’ glare does not distract the drivers ofapproaching vehicles
. First set the light
switch to the “ ” position, then turn the headlight leveling swit
ch knob to lower the
beam. The greater th
e number on the head-
light leveling switch knob, the lower the beam will point. Set the switch to the appropriate position sothat the headlight beam is level with the road.
NOTE
While the coming home light function is operating, perform one of the followingoperations to cancel the function. • Pull the turn signal lever toward you. • Turn the combination headlights and dim- mer switch to the “ ” or “ ” position or put the operation mode in ON. • Turn the ignition switch to the “ON” posi- tion or put the operation mode in ON.
It is possible to modify functions as follows: • The time that the he
adlights remain on can
be changed. • The coming home light function can be deactivated. For details, consult a Mitsubishi Motors dealer. On vehicles equipped
with Mitsubishi Multi-
Communication System, screen operationscan be used to ma
ke the adjustment.
Refer to separate owne
r’s manual for details.
Headlight leveling switch
(if
so equipped)
To avoid distraction while driving, always perform headlight adjustments before vehicle operation.NOTE
Start adjusting when the knob is at the “0”
is at its highest).
BK0239700US.book 229 ページ 2016年6月16日 木曜日 午前10時58分