ESP MITSUBISHI OUTLANDER PHEV 2016 (in English) User Guide
[x] Cancel search | Manufacturer: MITSUBISHI, Model Year: 2016, Model line: OUTLANDER PHEV, Model: MITSUBISHI OUTLANDER PHEV 2016Pages: 490, PDF Size: 22.02 MB
Page 84 of 490
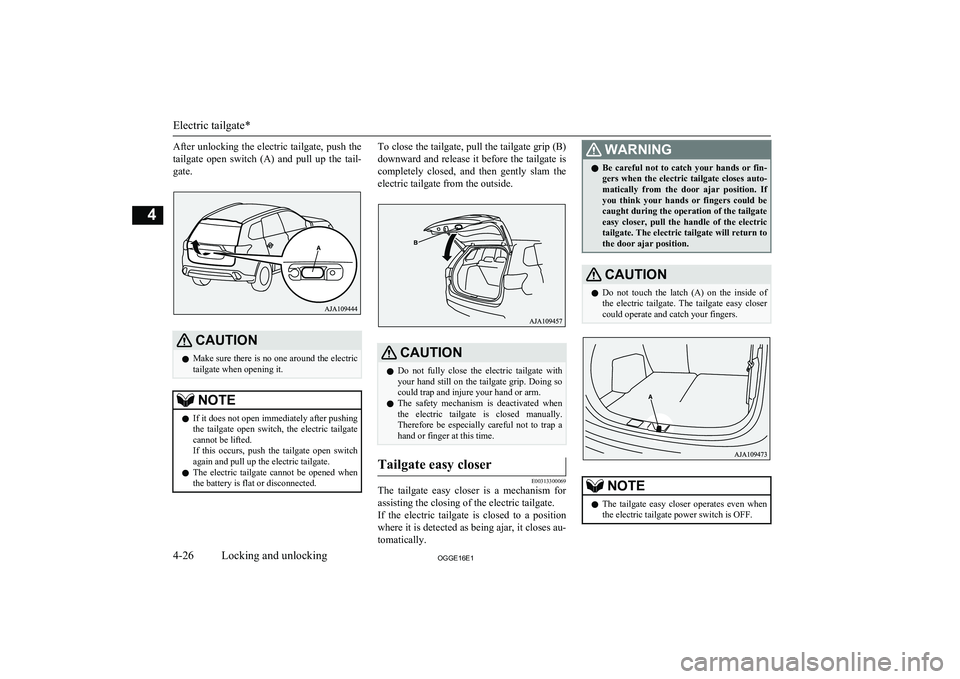
After unlocking the electric tailgate, push thetailgate open switch (A) and pull up the tail- gate.CAUTIONl Make sure there is no one around the electric
tailgate when opening it.NOTEl If it does not open immediately after pushing
the tailgate open switch, the electric tailgatecannot be lifted.
If this occurs, push the tailgate open switch
again and pull up the electric tailgate.
l The electric tailgate cannot be opened when
the battery is flat or disconnected.To close the tailgate, pull the tailgate grip (B)
downward and release it before the tailgate is completely closed, and then gently slam the
electric tailgate from the outside.CAUTIONl Do not fully close the electric tailgate with
your hand still on the tailgate grip. Doing socould trap and injure your hand or arm.
l The safety mechanism is deactivated when
the electric tailgate is closed manually.
Therefore be especially careful not to trap a hand or finger at this time.Tailgate easy closer
E00313300069
The tailgate easy closer is a mechanism for
assisting the closing of the electric tailgate.
If the electric tailgate is closed to a position
where it is detected as being ajar, it closes au- tomatically.
WARNINGl Be careful not to catch your hands or fin-
gers when the electric tailgate closes auto- matically from the door ajar position. If
you think your hands or fingers could be caught during the operation of the tailgate
easy closer, pull the handle of the electric tailgate. The electric tailgate will return to
the door ajar position.CAUTIONl Do not touch the latch (A) on the inside of
the electric tailgate. The tailgate easy closer
could operate and catch your fingers.NOTEl The tailgate easy closer operates even when
the electric tailgate power switch is OFF.
Electric tailgate*
4-26OGGE16E1Locking and unlocking4
Page 92 of 490
lPressing the LOCK or UNLOCK switch
on the remote control switch.
(After pressing the LOCK switch, the
vehicle will lock if all the doors and the
tailgate are closed, after which the sys- tem preparation mode will once again go
into effect.)
l Putting the operation mode in ON.
l Holding the keyless operation key and
locking or unlocking the doors and the tailgate using the keyless operation func-tion.NOTEl When the operation mode is put in ON, the
buzzer sounds 4 times. This operation indi-
cates that the alarm was activated while the
vehicle was parked.
Please check the inside of the vehicle to con- firm that nothing was stolen.
l Even if the battery is disconnected, the alarm
activation memory will not be erased.Electric window control
E00302201632
The electric windows can only be operatedwith the operation mode in ON.
Electric window control switch
E00302301822
Each door window opens or closes while the
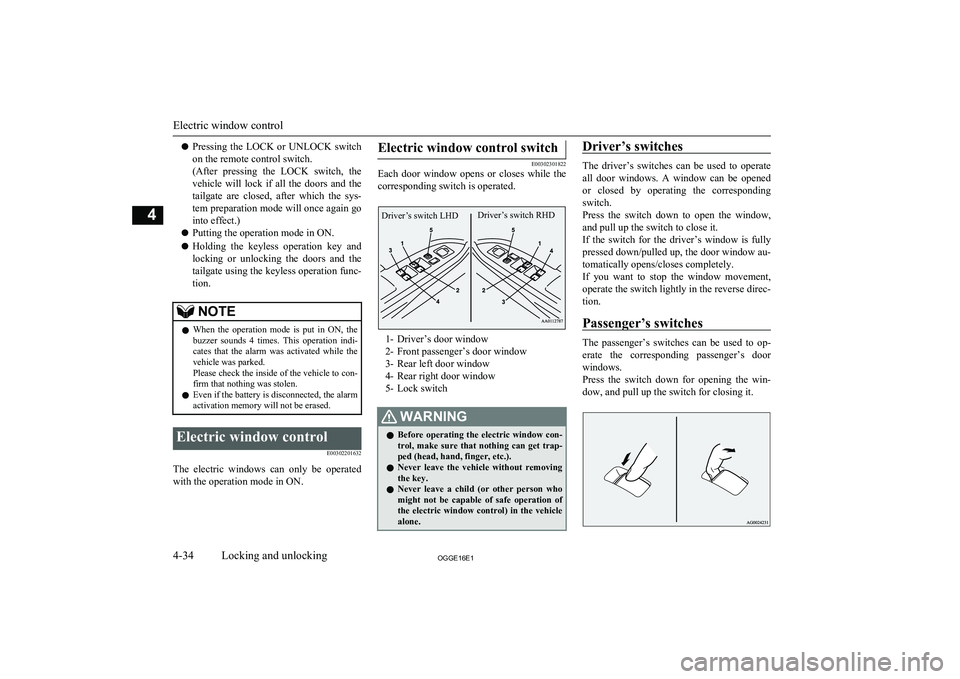
corresponding switch is operated.
1- Driver’s door window
2- Front passenger’s door window
3- Rear left door window
4- Rear right door window
5- Lock switch
WARNINGl Before operating the electric window con-
trol, make sure that nothing can get trap-
ped (head, hand, finger, etc.).
l Never leave the vehicle without removing
the key.
l Never leave a child (or other person who
might not be capable of safe operation of the electric window control) in the vehicle alone.Driver’s switches
The driver’s switches can be used to operate
all door windows. A window can be opened or closed by operating the correspondingswitch.
Press the switch down to open the window, and pull up the switch to close it.
If the switch for the driver’s window is fully
pressed down/pulled up, the door window au- tomatically opens/closes completely.
If you want to stop the window movement,
operate the switch lightly in the reverse direc-
tion.
Passenger’s switches
The passenger’s switches can be used to op-
erate the corresponding passenger’s door
windows.
Press the switch down for opening the win- dow, and pull up the switch for closing it.
Electric window control
4-34OGGE16E1Locking and unlocking4 Driver’s switch RHDDriver’s switch LHD
Page 93 of 490
NOTElRepeated operation with the engine stopped
will run down the battery. Operate the win-
dow switches only while the engine is run- ning.
l The rear door windows only open halfway.Lock switch
E00303101263
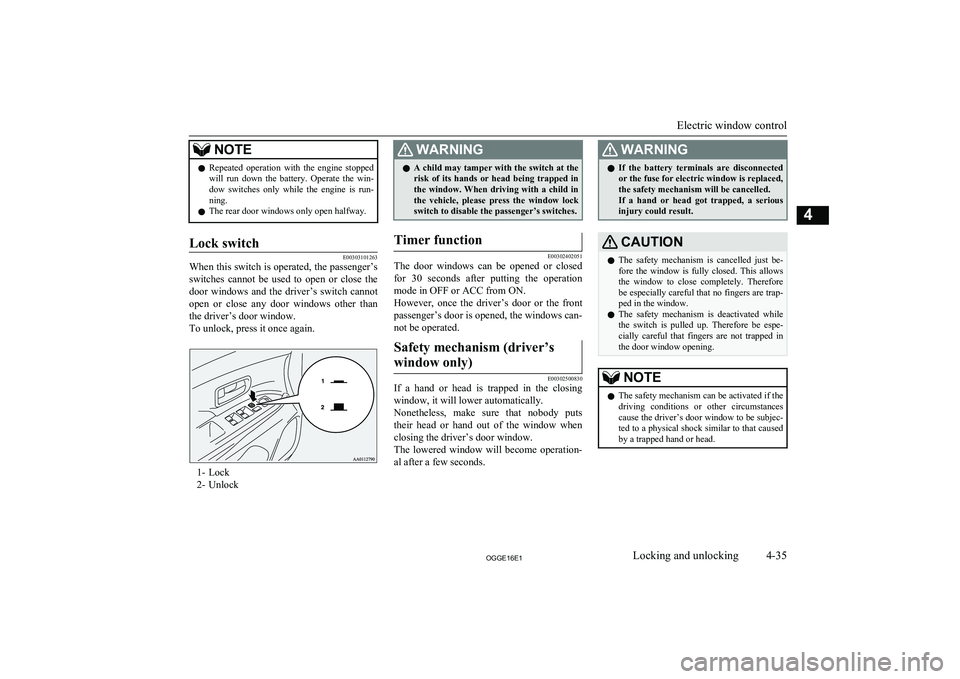
When this switch is operated, the passenger’s
switches cannot be used to open or close the door windows and the driver’s switch cannot
open or close any door windows other than
the driver’s door window.
To unlock, press it once again.
1- Lock
2- Unlock
WARNINGl A child may tamper with the switch at the
risk of its hands or head being trapped in
the window. When driving with a child in the vehicle, please press the window lockswitch to disable the passenger’s switches.Timer function
E00302402051
The door windows can be opened or closed
for 30 seconds after putting the operation mode in OFF or ACC from ON.
However, once the driver’s door or the front
passenger’s door is opened, the windows can-
not be operated.
Safety mechanism (driver’s
window only)
E00302500830
If a hand or head is trapped in the closing window, it will lower automatically.
Nonetheless, make sure that nobody puts
their head or hand out of the window when
closing the driver’s door window.
The lowered window will become operation-
al after a few seconds.
WARNINGl If the battery terminals are disconnected
or the fuse for electric window is replaced,
the safety mechanism will be cancelled. If a hand or head got trapped, a serious injury could result.CAUTIONl The safety mechanism is cancelled just be-
fore the window is fully closed. This allows the window to close completely. Therefore be especially careful that no fingers are trap-
ped in the window.
l The safety mechanism is deactivated while
the switch is pulled up. Therefore be espe-
cially careful that fingers are not trapped in the door window opening.NOTEl The safety mechanism can be activated if the
driving conditions or other circumstancescause the driver’s door window to be subjec- ted to a physical shock similar to that caused
by a trapped hand or head.
Electric window control
4-35OGGE16E1Locking and unlocking4
Page 95 of 490
NOTElThe safety mechanism can be activated if the
driving conditions or other circumstancescause the sunroof to be subjected to a physi-
cal shock similar to that caused by a trapped hand or head.CAUTIONl The safety mechanism is cancelled just be-
fore the sunroof is fully closed. This allows the sunroof to close completely.
Therefore be especially careful that no fin-
gers are trapped in the sunroof.WARNINGl Before operating the sunroof, make sure
that nothing is capable of being trapped (head, hand, finger, etc.).
l Do not put head, hands or anything else
out of the sunroof opening while driving
the vehicle.
l Never leave the vehicle without removing
the key.
l Never leave a child (or other person who
might not be capable of safe operation ofthe sunroof switch) in the vehicle alone.NOTEl The sunroof stops just before reaching the
fully open position.
If the vehicle is driven with the sunroof in
this position, wind buffeting is lower than with the sunroof fully open.
l When leaving the vehicle unattended, make
sure you close the sunroof.
l Do not try to operate the sunroof if it is fro-
zen closed (after snow fall or during extremecold).
l Do not sit or place heavy luggage on the
sunroof or roof opening edge.
l Release the switch as soon as the sunroof
reaches the fully open or fully closed posi-
tion.
l If the sunroof does not operate when the
sunroof switch is operated, release the
switch and check whether something is trap-
ped by the sunroof. If nothing is trapped, have the sunroof checked at an authorized MITSUBISHI MOTORS dealer.
l Depending on the models of ski carriers or
roof carriers, the sunroof may contact the
carrier when the sunroof is tilted up. Be
careful when tilting up the sunroof if such a
ski carrier or a roof carrier is installed.
l Be sure to close the sunroof completely
when washing the vehicle or when leaving
the vehicle.
l Be careful, not to put any wax on the weath-
erstrip (black rubber) around the sunroof opening. If stained with wax, the weather-
strip cannot maintain a weatherproof seal with the sunroof.NOTEl After washing the vehicle or after it has
rained, wipe off any water that is on the sun- roof before operating it.Sunshade
E00307901227
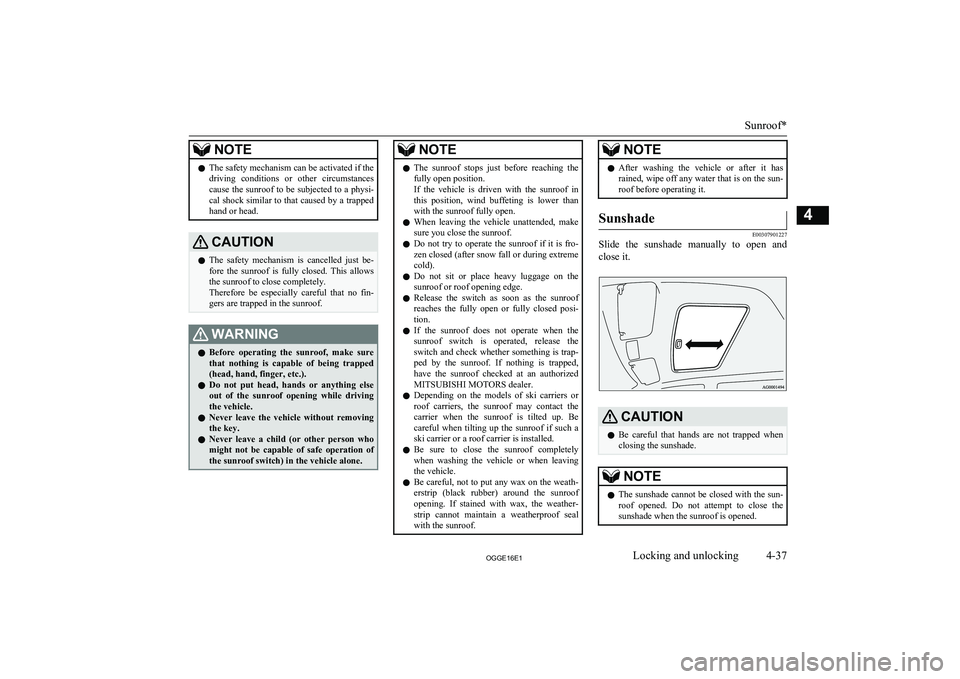
Slide the sunshade manually to open and
close it.
CAUTIONl Be careful that hands are not trapped when
closing the sunshade.NOTEl The sunshade cannot be closed with the sun-
roof opened. Do not attempt to close thesunshade when the sunroof is opened.
Sunroof*
4-37OGGE16E1Locking and unlocking4
Page 106 of 490
WARNINGlSeat belts should always be worn by every
adult who drives or rides in this vehicle,
and by all children who are tall enough to wear seat belts properly.
Other children should always use proper child restraint systems.
l Always place the shoulder belt over your
shoulder and across your chest. Never put
it behind you or under your arm.
l One seat belt should be used by only one
person. Doing otherwise can be danger-
ous.
l The seat belt will provide its wearer with
maximum protection if the recliner seat-
back is placed in fully upright position.
When the seatback is reclined, there is greater risk that the passenger will slide
under the belt, especially in a forward im-
pact accident, and may be injured by the
belt or by striking the instrument panel or seatbacks.
l Remove any twists when using the belt.
l No modifications or additions should be
made by the user which will either pre- vent the seat belt adjusting devices fromoperating to remove slack, or prevent the
seat belt assembly from being adjusted to
remove slack.
l Never hold a child in your arms or on
your lap when riding in this vehicle, even
if you are wearing your seat belt. To do so risks severe or fatal injury to the child in
a collision or sudden stop.WARNINGl Always adjust the belt to a snug fit.
l Always wear the lap portion of the belt
over your hips.3-point type seat belt (with
emergency locking mechanism)
E00404902699
This type of belt requires no length adjust- ment. Once worn, the belt adjusts itself to the
movement of the wearer, but in the event of a sudden or strong shock, the belt automatical-
ly locks to hold the wearer’s body.
NOTEl You can check if the belt locks by pulling it
forward quickly.
l If the seat belt buckles in the rear seating po-
sition are not found, you will find them un-
der the rear seat cushion. Refer to “Making a
luggage area” on page 5-07 for how to put
the seat belt buckles at the proper position.
To fasten
1. Pull the seat belt out slowly while hold-
ing the latch plate.
NOTEl When the seat belts cannot be pulled out in a
locked condition, pull the belts once force-
fully and then return them. After that, pull
the belts out slowly once again.
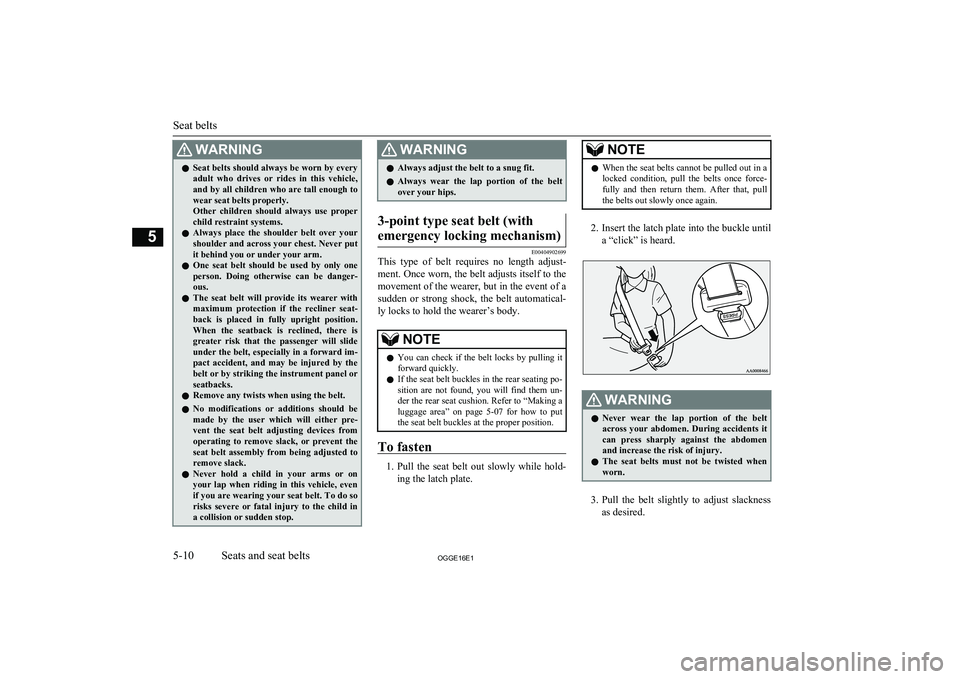
2. Insert the latch plate into the buckle until
a “click” is heard.
WARNINGl Never wear the lap portion of the belt
across your abdomen. During accidents it
can press sharply against the abdomen and increase the risk of injury.
l The seat belts must not be twisted when
worn.
3. Pull the belt slightly to adjust slackness
as desired.
Seat belts
5-10OGGE16E1Seats and seat belts5
Page 111 of 490
Pretensioner system
E00405802406
When the operation mode of the power
switch is in ON, if there is a frontal impact or a side impact severe enough to injure the
driver and/or front passenger, the pretension- er system will retract their respective seat
belts instantaneously, thus maximizing the seat belt’s effectiveness.
WARNINGl To obtain the best results from your pre-
tensioner seat belt, make sure you have adjusted your seat correctly and wear your seat belt properly.CAUTIONl Installation of audio equipment or repairs in
the vicinity of the pretensioner seat belts or
floor console must be performed in line with MITSUBISHI MOTORS guidelines. It is
important to do so because the work could affect the pretensioner systems.
l If you need to scrap the vehicle, please con-
sult a MITSUBISHI MOTORS Authorized
Service Point.
It is important to do so because unexpected activation of the pretensioner seat belts
could cause injuries.NOTEl The pretensioner seat belts will be activated
if the vehicle suffers a severe impact, even if the seat belts are not worn.
l The pretensioner seat belts are designed to
work only once. After the pretensioner seat
belts have been activated, we recommend you have it replaced by a MITSUBISHI
MOTORS Authorized Service Point.SRS warning
E00405900360
The same warning lamp/display is shared by
the SRS airbags and the pretensioner seat
belts.
Refer to “SRS warning lamp/display” on page 5-38.
Force limiter system
E00406000209
In the event of a collision, each force limitersystem will effectively absorb the load ap- plied to the seat belt to minimize the impact
to the passenger.
Child restraint
E00406403507
When transporting children in your vehicle,some type of child restraint system should al-
ways be used according to the size of the child. This is required by law in most coun-
tries.
The regulations concerning driving with chil-
dren in the front seat may differ from country
to country. You are advised to comply with the relevant regulations.WARNINGl When possible, put children in the rear
seat. Accident statistics indicate that chil- dren of all sizes and ages are safer when
properly restrained in the rear seat rather than in the front seat.
l Holding a child in your arms is no substi-
tute for a restraint system. Failure to use
a proper restraint system can result in se- vere or fatal injury to the child.
l Each child restraint device or fixing is to
be used only by one child.
l When attaching a child restraint system
to the rear seat, prevent the front seat- backs from touching the child restraintsystem.
Otherwise, the child could be seriously in-
jured in the event of hard braking or a
collision.
Child restraint
5-15OGGE16E1Seats and seat belts5
Page 126 of 490
Only when the operation mode of the powerswitch is in ON, the airbags will operate.The airbags deployment produces a sudden,
loud noise, and releases some smoke and powder, but these conditions are not injuri- ous, and do not indicate a fire in the vehicle.
People with respiratory problems may feel
some temporary irritation from chemicals used to produce the deployment; open the
windows after airbag deployment, if safe to
do so.
The airbags deflate very rapidly after deploy- ment, so there is little danger of obscured vi-
sion.CAUTIONl Airbags inflate at an extremely rapid speed.
In certain situations, contact with inflatingairbags can result in abrasions, bruises, light
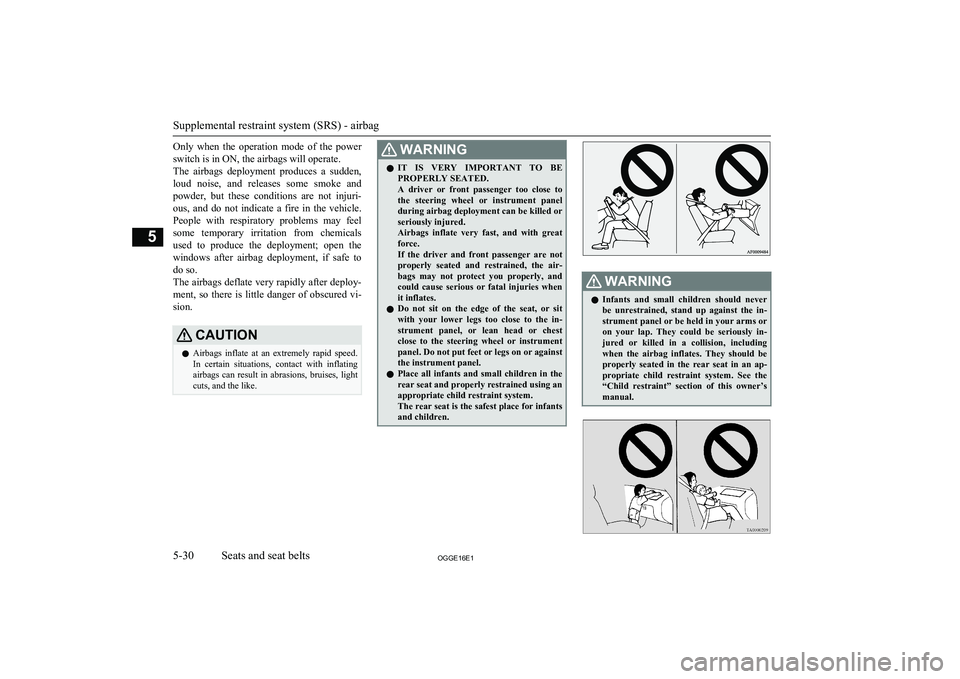
cuts, and the like.WARNINGl IT IS VERY IMPORTANT TO BE
PROPERLY SEATED.
A driver or front passenger too close to the steering wheel or instrument panel
during airbag deployment can be killed or seriously injured.
Airbags inflate very fast, and with great force.
If the driver and front passenger are not
properly seated and restrained, the air-
bags may not protect you properly, and could cause serious or fatal injuries whenit inflates.
l Do not sit on the edge of the seat, or sit
with your lower legs too close to the in-
strument panel, or lean head or chest close to the steering wheel or instrument panel. Do not put feet or legs on or againstthe instrument panel.
l Place all infants and small children in the
rear seat and properly restrained using an
appropriate child restraint system.
The rear seat is the safest place for infants
and children.WARNINGl Infants and small children should never
be unrestrained, stand up against the in-strument panel or be held in your arms or on your lap. They could be seriously in-jured or killed in a collision, including when the airbag inflates. They should be
properly seated in the rear seat in an ap- propriate child restraint system. See the
“Child restraint” section of this owner’s
manual.
Supplemental restraint system (SRS) - airbag
5-30OGGE16E1Seats and seat belts5
Page 132 of 490
The label shown here is attached to the seat-backs with a side airbag.Curtain airbag system
E00409101686
The curtain airbags are contained in the front pillars and roof side rail. The curtain airbag is
designed to inflate only on the side of the ve- hicle that is impacted, even with no passen- ger in the front seat or rear seat.
Deployment of side airbags and
curtain airbags
E00407702513
The side airbags and curtain airbags ARE DESIGNED TO
DEPLOY when...
The side airbags and curtain airbags are de- signed to deploy when the vehicle suffers a
moderate-to-severe side impact to the middle of the passenger compartment.
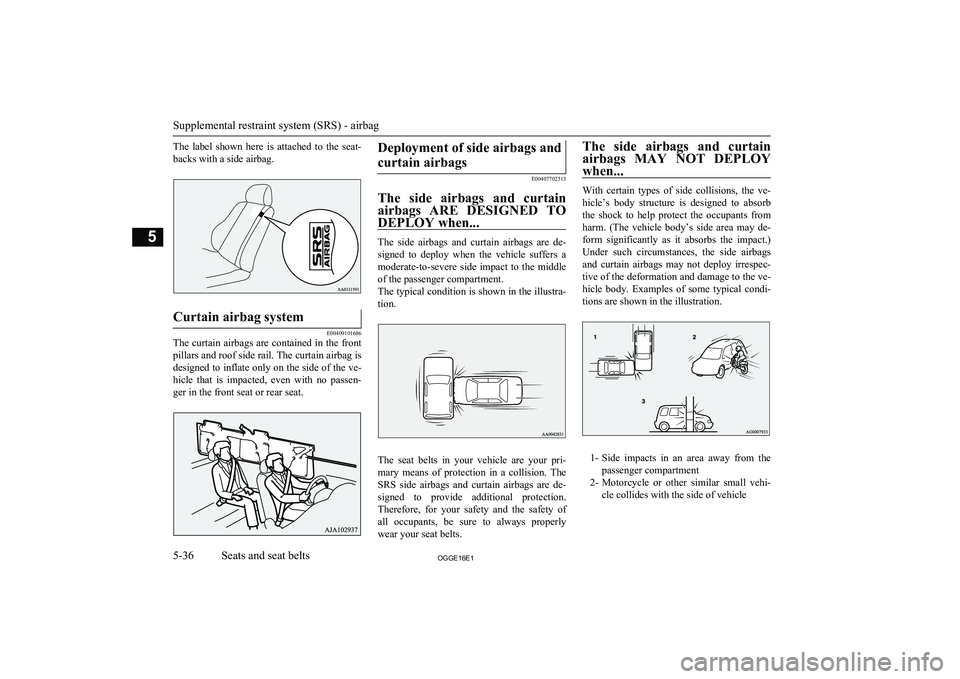
The typical condition is shown in the illustra- tion.
The seat belts in your vehicle are your pri-mary means of protection in a collision. The SRS side airbags and curtain airbags are de-
signed to provide additional protection. Therefore, for your safety and the safety of all occupants, be sure to always properly
wear your seat belts.
The side airbags and curtain
airbags MAY NOT DEPLOY
when...
With certain types of side collisions, the ve- hicle’s body structure is designed to absorb
the shock to help protect the occupants fromharm. (The vehicle body’s side area may de-form significantly as it absorbs the impact.) Under such circumstances, the side airbags
and curtain airbags may not deploy irrespec- tive of the deformation and damage to the ve-
hicle body. Examples of some typical condi- tions are shown in the illustration.
1- Side impacts in an area away from the
passenger compartment
2- Motorcycle or other similar small vehi-
cle collides with the side of vehicle
Supplemental restraint system (SRS) - airbag
5-36OGGE16E1Seats and seat belts5
Page 138 of 490
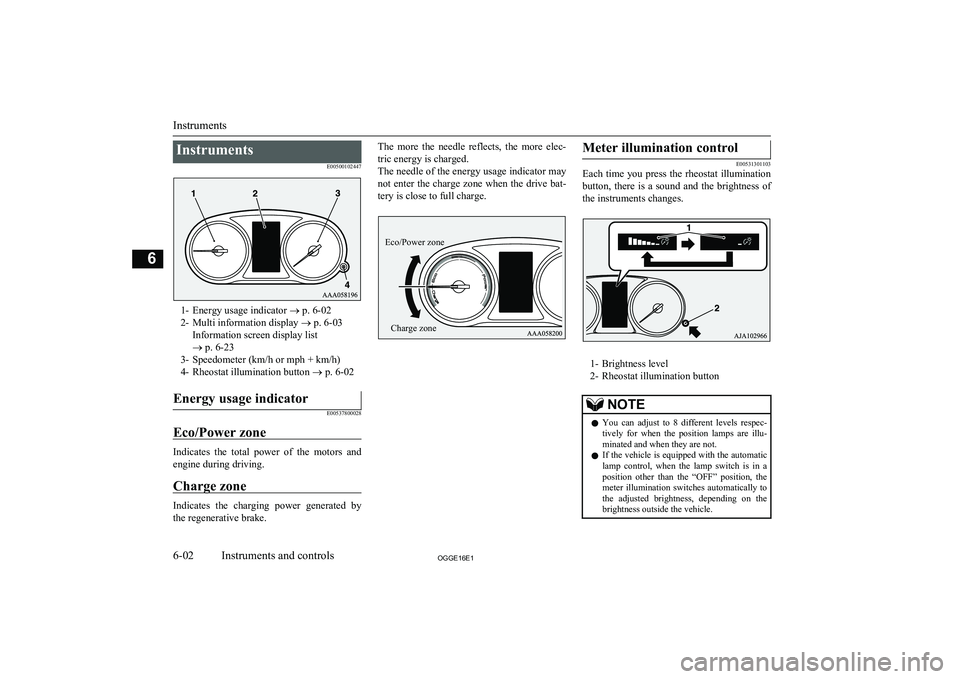
InstrumentsE00500102447
1- Energy usage indicator ® p. 6-02
2- Multi information display ® p. 6-03
Information screen display list
® p. 6-23
3- Speedometer (km/h or mph + km/h)
4- Rheostat illumination button ® p. 6-02
Energy usage indicator
E00537800028
Eco/Power zone
Indicates the total power of the motors and
engine during driving.
Charge zone
Indicates the charging power generated by the regenerative brake.
The more the needle reflects, the more elec-
tric energy is charged.
The needle of the energy usage indicator may not enter the charge zone when the drive bat-tery is close to full charge.Meter illumination control
E00531301103
Each time you press the rheostat illumination
button, there is a sound and the brightness of the instruments changes.
1- Brightness level
2- Rheostat illumination button
NOTEl You can adjust to 8 different levels respec-
tively for when the position lamps are illu- minated and when they are not.
l If the vehicle is equipped with the automatic
lamp control, when the lamp switch is in a position other than the “OFF” position, the
meter illumination switches automatically to
the adjusted brightness, depending on the brightness outside the vehicle.
Instruments
6-02OGGE16E1Instruments and controls6 Eco/Power zoneCharge zone
Page 149 of 490
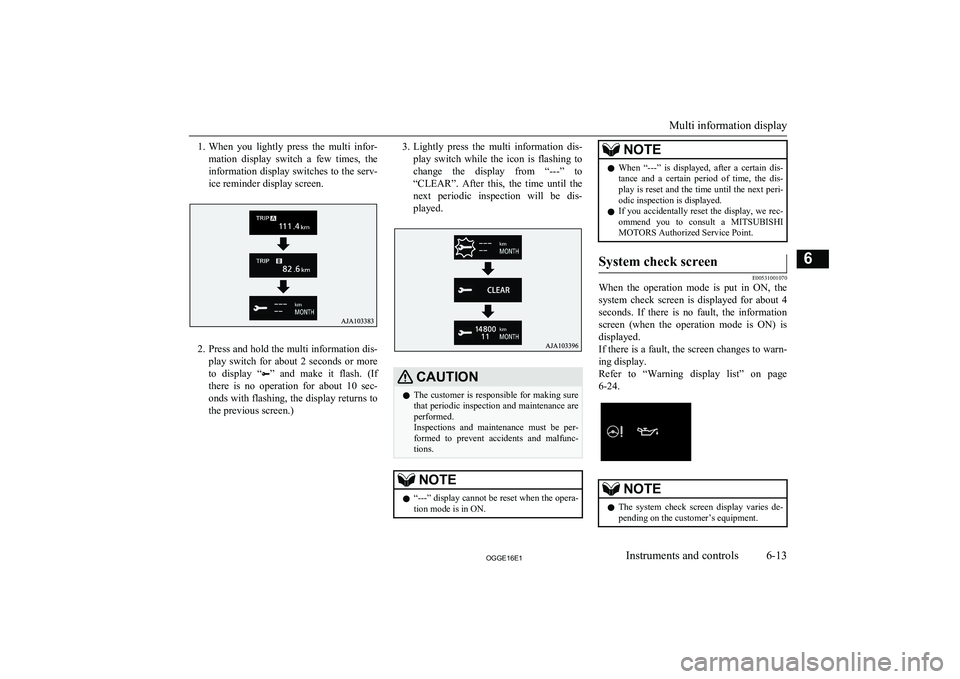
1.When you lightly press the multi infor-
mation display switch a few times, the information display switches to the serv-
ice reminder display screen.
2. Press and hold the multi information dis-
play switch for about 2 seconds or more to display “
” and make it flash. (If
there is no operation for about 10 sec- onds with flashing, the display returns tothe previous screen.)
3. Lightly press the multi information dis-
play switch while the icon is flashing to
change the display from “---” to
“CLEAR”. After this, the time until the
next periodic inspection will be dis- played.CAUTIONl The customer is responsible for making sure
that periodic inspection and maintenance are
performed.
Inspections and maintenance must be per- formed to prevent accidents and malfunc- tions.NOTEl “---” display cannot be reset when the opera-
tion mode is in ON.NOTEl When “---” is displayed, after a certain dis-
tance and a certain period of time, the dis-
play is reset and the time until the next peri- odic inspection is displayed.
l If you accidentally reset the display, we rec-
ommend you to consult a MITSUBISHI
MOTORS Authorized Service Point.System check screen
E00531001070
When the operation mode is put in ON, the
system check screen is displayed for about 4
seconds. If there is no fault, the information
screen (when the operation mode is ON) is displayed.
If there is a fault, the screen changes to warn-
ing display.
Refer to “Warning display list” on page
6-24.
NOTEl The system check screen display varies de-
pending on the customer’s equipment.
Multi information display
6-13OGGE16E1Instruments and controls6