language MITSUBISHI OUTLANDER PHEV 2018 Owner's Manual (in English)
[x] Cancel search | Manufacturer: MITSUBISHI, Model Year: 2018, Model line: OUTLANDER PHEV, Model: MITSUBISHI OUTLANDER PHEV 2018Pages: 538, PDF Size: 25.01 MB
Page 148 of 538
1- NORMAL indicator display screenDisplayed when the ECO mode switchand 4WD lock switch are OFF.
2- ECO mode indicator display screen Displayed when the ECO mode switch isON and the 4WD lock switch is OFF.
3- ECO LOCK indicator display screen Displayed when the ECO mode switchand 4WD lock switch are ON.
4- 4WD LOCK indicator display screen Displayed when the ECO mode switch isOFF and the 4WD lock switch is ON.ECO mode switch ® p. 6-61
4WD lock switch ® p. 7-21
5- Battery charge mode display screen
® p. 7-28
6- Battery save mode display screen
® p. 7-27
7- EV priority mode display screen
® p. 7-25
8-
mark display screen ® p. 6-09
9- Forward Collision Mitigation System
(FCM) OFF display screen* ® p. 7-64
Ultrasonic misacceleration Mitigation System (UMS) OFF display screen*
® p. 7-74
10- Lane Departure Warning (LDW) display
screen* ® p. 7-85
11- Cruise control display screen*
® p. 7-42
12- Adaptive Cruise Control System (ACC)
display screen* ® p. 7-52
13- Speed limiter display screen*
® p. 7-47
14- Drive battery level display screen
® p. 6-09
15- Odometer ® p. 6-10
16- “
” or “ ” mark indicator ® p. 6-08
17- Information screen ® p. 6-07
18- Select position indicator ® p. 7-17
19- Fuel remaining display screen
® p. 6-09
20- Outside temperature display screen
® p. 6-10
Multi information display
switch
E00520001911
Each time the multi information display
switch is operated, the buzzer sounds and the multi information display changes betweeninformation such as warnings, tripmeter,
average fuel consumption, EV cruising range,
total cruising range, EVHV driving rate, en- ergy flow, etc.
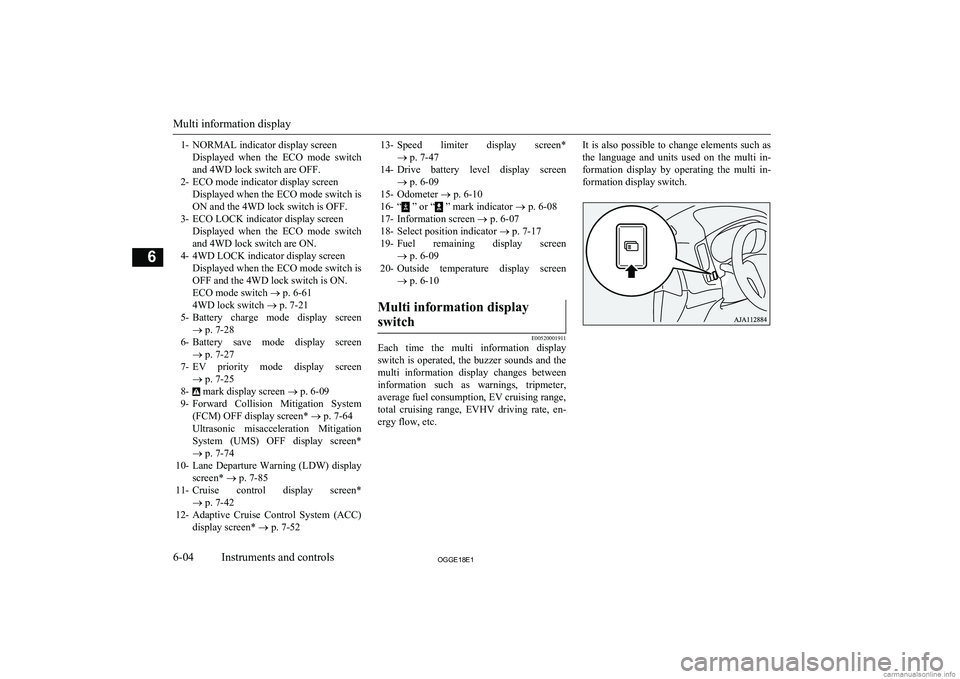
It is also possible to change elements such as
the language and units used on the multi in- formation display by operating the multi in- formation display switch.
Multi information display
6-04OGGE18E1Instruments and controls6
Page 159 of 538
When charging the drive battery
When there is no energy flow
ECO Score
E00531601207
ECO score indicates the points you havescored on fuel-efficient driving by the num-
ber of leaves as follows:
[When the operation mode is ON]
The display shows the score you achieved in the last several minutes.
[When the operation mode is put in OFF]
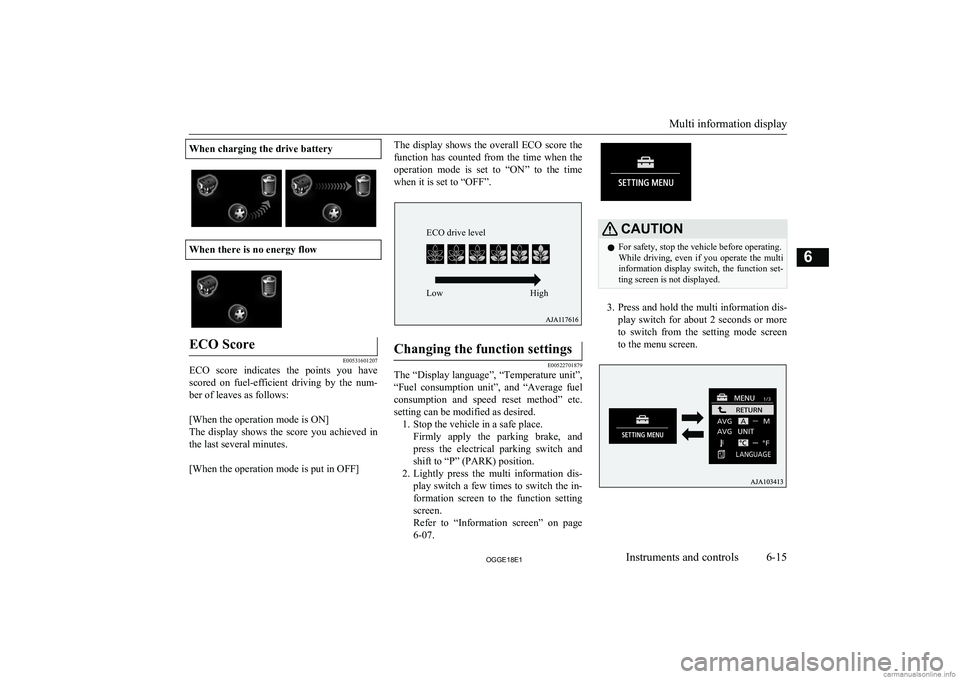
The display shows the overall ECO score the
function has counted from the time when the operation mode is set to “ON” to the time when it is set to “OFF”.Changing the function settings
E00522701879
The “Display language”, “Temperature unit”,
“Fuel consumption unit”, and “Average fuel
consumption and speed reset method” etc. setting can be modified as desired. 1. Stop the vehicle in a safe place.
Firmly apply the parking brake, andpress the electrical parking switch andshift to “P” (PARK) position.
2. Lightly press the multi information dis-
play switch a few times to switch the in-
formation screen to the function setting screen.
Refer to “Information screen” on page
6-07.
CAUTIONl For safety, stop the vehicle before operating.
While driving, even if you operate the multi information display switch, the function set- ting screen is not displayed.
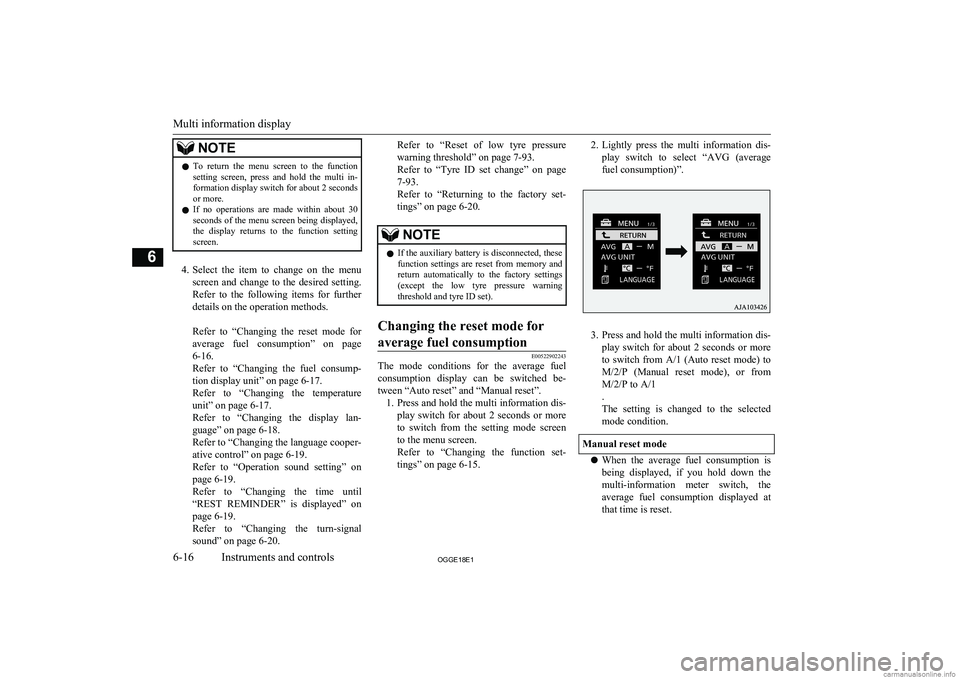
3. Press and hold the multi information dis-
play switch for about 2 seconds or more to switch from the setting mode screen
to the menu screen.
Multi information display
6-15OGGE18E1Instruments and controls6 ECO drive level
Low High
Page 160 of 538
NOTElTo return the menu screen to the function
setting screen, press and hold the multi in-formation display switch for about 2 seconds or more.
l If no operations are made within about 30
seconds of the menu screen being displayed, the display returns to the function setting
screen.
4. Select the item to change on the menu
screen and change to the desired setting. Refer to the following items for further
details on the operation methods.
Refer to “Changing the reset mode for
average fuel consumption” on page
6-16.
Refer to “Changing the fuel consump- tion display unit” on page 6-17.
Refer to “Changing the temperature
unit” on page 6-17.
Refer to “Changing the display lan- guage” on page 6-18.
Refer to “Changing the language cooper-
ative control” on page 6-19.
Refer to “Operation sound setting” on
page 6-19.
Refer to “Changing the time until “REST REMINDER” is displayed” on
page 6-19.
Refer to “Changing the turn-signal
sound” on page 6-20.
Refer to “Reset of low tyre pressure
warning threshold” on page 7-93.
Refer to “Tyre ID set change” on page
7-93.
Refer to “Returning to the factory set- tings” on page 6-20.NOTEl If the auxiliary battery is disconnected, these
function settings are reset from memory and
return automatically to the factory settings (except the low tyre pressure warning threshold and tyre ID set).Changing the reset mode for
average fuel consumption
E00522902243
The mode conditions for the average fuel consumption display can be switched be- tween “Auto reset” and “Manual reset”. 1. Press and hold the multi information dis-
play switch for about 2 seconds or more to switch from the setting mode screen
to the menu screen.
Refer to “Changing the function set-
tings” on page 6-15.
2. Lightly press the multi information dis-
play switch to select “AVG (average fuel consumption)”.
3. Press and hold the multi information dis-
play switch for about 2 seconds or more to switch from A/1 (Auto reset mode) to M/2/P (Manual reset mode), or fromM/2/P to A/1
.
The setting is changed to the selected
mode condition.
Manual reset mode
l When the average fuel consumption is
being displayed, if you hold down the multi-information meter switch, the
average fuel consumption displayed at that time is reset.
Multi information display
6-16OGGE18E1Instruments and controls6
Page 162 of 538
1.Press and hold the multi information dis-
play switch for about 2 seconds or more to switch from the setting mode screen
to the menu screen.
Refer to “Changing the function set-
tings” on page 6-15.
2. Lightly press the multi information dis-
play switch to select “
” (temperature
unit setting).
3. Press and hold the multi information dis-
play switch for about 2 seconds or more
to switch in from °C to °F, or from °F to °C. The setting is changed to the selec-
ted temperature unit.
NOTEl The temperature value on air conditioner
panel is switched in conjunction with outside
temperature display unit of the multi infor-
mation display.
However, “°C” or “°F” are not shown to
temperature display of an air conditioner.
l On vehicles equipped with the Smartphone
Link Display Audio or the MITSUBISHI
Multi- Communication System (MMCS), the temperature value of Smartphone Link
Display Audio or MITSUBISHI Multi-Com-
munication System (MMCS) is switched in conjunction with the outside temperature
display unit of the multi information display.
However, “°C” or “°F” is not shown to the
air conditioner screen of MITSUBISHI Mul-
ti- Communication System (MMCS).Changing the display language
E00523201741
The language of the multi information dis-
play can be switched. 1. Press and hold the multi information dis-
play switch for about 2 seconds or more to switch from the setting mode screen
to the menu screen.
Refer to “Changing the function set-
tings” on page 6-15.
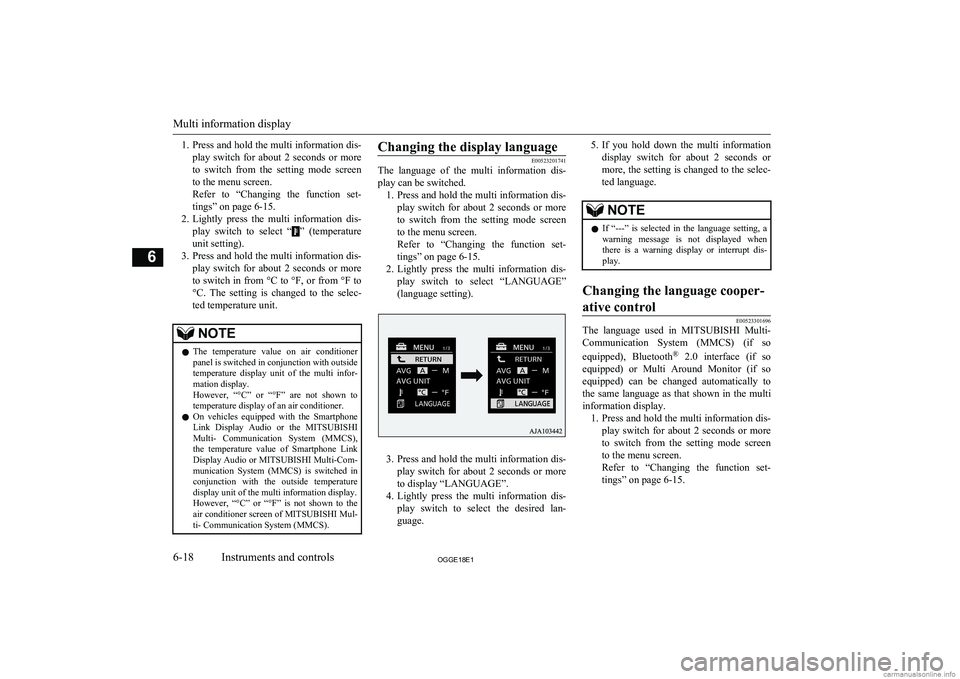
2. Lightly press the multi information dis-
play switch to select “LANGUAGE”
(language setting).
3. Press and hold the multi information dis-
play switch for about 2 seconds or more to display “LANGUAGE”.
4. Lightly press the multi information dis-
play switch to select the desired lan-guage.
5. If you hold down the multi information
display switch for about 2 seconds or
more, the setting is changed to the selec- ted language.NOTEl If “---” is selected in the language setting, a
warning message is not displayed whenthere is a warning display or interrupt dis-
play.Changing the language cooper-
ative control
E00523301696
The language used in MITSUBISHI Multi-
Communication System (MMCS) (if so
equipped), Bluetooth ®
2.0 interface (if so
equipped) or Multi Around Monitor (if so equipped) can be changed automatically to
the same language as that shown in the multi
information display. 1. Press and hold the multi information dis-
play switch for about 2 seconds or more to switch from the setting mode screen to the menu screen.
Refer to “Changing the function set-
tings” on page 6-15.
Multi information display
6-18OGGE18E1Instruments and controls6
Page 163 of 538
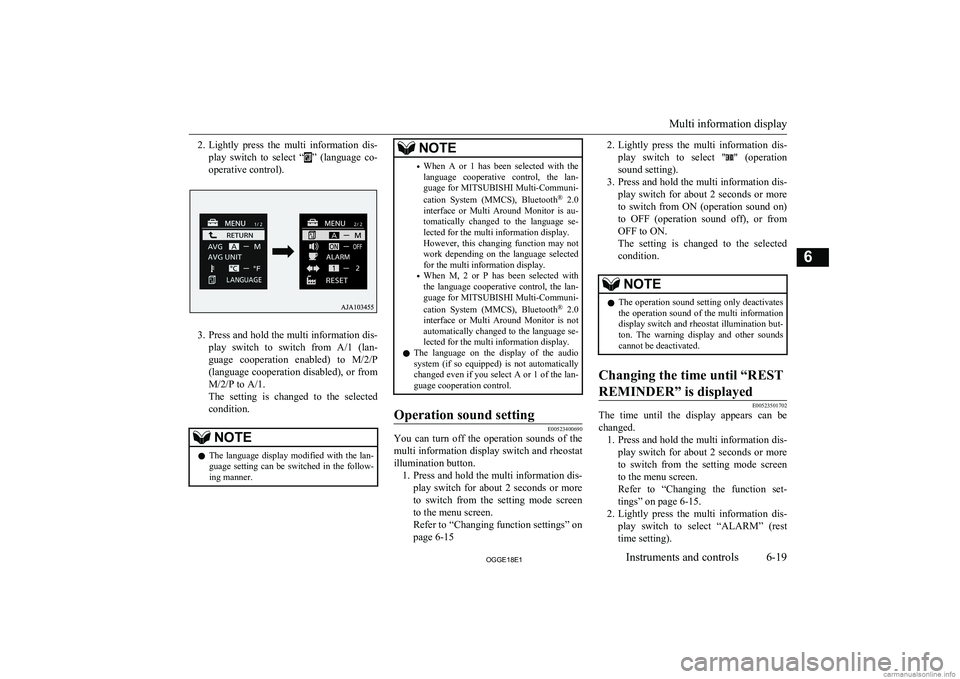
2.Lightly press the multi information dis-
play switch to select “
” (language co-
operative control).
3. Press and hold the multi information dis-
play switch to switch from A/1 (lan- guage cooperation enabled) to M/2/P
(language cooperation disabled), or from
M/2/P to A/1.
The setting is changed to the selected condition.
NOTEl The language display modified with the lan-
guage setting can be switched in the follow-ing manner.NOTE• When A or 1 has been selected with the
language cooperative control, the lan- guage for MITSUBISHI Multi-Communi-
cation System (MMCS), Bluetooth ®
2.0
interface or Multi Around Monitor is au- tomatically changed to the language se-lected for the multi information display.
However, this changing function may not
work depending on the language selected for the multi information display.
• When M, 2 or P has been selected with
the language cooperative control, the lan-
guage for MITSUBISHI Multi-Communi-
cation System (MMCS), Bluetooth ®
2.0
interface or Multi Around Monitor is not automatically changed to the language se-
lected for the multi information display.
l The language on the display of the audio
system (if so equipped) is not automatically changed even if you select A or 1 of the lan-
guage cooperation control.Operation sound setting
E00523400690
You can turn off the operation sounds of the
multi information display switch and rheostat illumination button. 1. Press and hold the multi information dis-
play switch for about 2 seconds or more to switch from the setting mode screen
to the menu screen.
Refer to “Changing function settings” on
page 6-15
2. Lightly press the multi information dis-
play switch to select "
" (operation
sound setting).
3. Press and hold the multi information dis-
play switch for about 2 seconds or moreto switch from ON (operation sound on)
to OFF (operation sound off), or from OFF to ON.
The setting is changed to the selected
condition.NOTEl The operation sound setting only deactivates
the operation sound of the multi information
display switch and rheostat illumination but- ton. The warning display and other soundscannot be deactivated.Changing the time until “REST
REMINDER” is displayed
E00523501702
The time until the display appears can be changed. 1. Press and hold the multi information dis-
play switch for about 2 seconds or more to switch from the setting mode screen
to the menu screen.
Refer to “Changing the function set-
tings” on page 6-15.
2. Lightly press the multi information dis-
play switch to select “ALARM” (rest time setting).
Multi information display
6-19OGGE18E1Instruments and controls6
Page 164 of 538
3.Press and hold the multi information dis-
play switch for about 2 seconds or more to display “ALARM”.
4. Lightly press the multi information dis-
play switch to select the time until thedisplay.
5. Press and hold the multi information dis-
play switch for about 2 seconds or more, the setting is changed to the selected time.NOTEl The drive time is reset when the operation
mode of the power switch is put in OFF.Changing the turn-signal sound
E00529100396
It is possible to change the turn-signal sound.
1. Press and hold the multi information dis-
play switch for about 2 seconds or more to switch from the setting mode screen
to the menu screen.
Refer to “Changing the function set-
tings” on page 6-15.
2. Lightly press the multi information dis-
play switch to select
(changing the
turn-signal sound).
3. Press and hold the multi information dis-
play switch for about 2 seconds or moreto switch from 1 (turn-signal sound 1) to
2 (turn-signal sound 2), or from 2 to 1.
The setting changes to the selected turn-
signal sound.Returning to the factory set-
tings
E00523601921
Many of the function settings can be returned
to their factory settings. 1. Press and hold the multi information dis-
play switch for about 2 seconds or more to switch from the setting mode screen
to the menu screen.
Refer to “Changing the function set- tings” on page 6-15.
2. Lightly press the multi information dis-
play switch to select “RESET” (return- ing to the factory settings).
3. When you press and hold the multi in-
formation display switch for about 5 sec-
onds or more, the buzzer sounds and all of the function settings are returned to
the factory settings.
NOTEl The factory settings are as follows.
• Average fuel consumption reset mode: A
(Auto reset)NOTE• Fuel consumption display unit: L/100 km
• Temperature unit: °C (Celsius)
• Display language: ENGLISH or RUSSI-
AN
• Cooperative language setting: A (lan-
guage cooperation enabled)
• Operation sounds: ON (Operation sounds
on)
• “REST REMINDER” display: OFF
• Turn-signal sound: Turn-signal sound 1
l The low tyre pressure warning threshold and
tyre ID set cannot be returned to their facto-
ry settings.
Multi information display
6-20OGGE18E1Instruments and controls6
Page 375 of 538
Adjust-ment
itemsTurn counter- clockwiseTurn clock- wiseSCVOFF, LOW
(SCV effect is
OFF/low)MID, HIGH
(SCV effect is middle/high)System Settings
E00738301188
Change system settings such as product time.1. Press the MENU key.
2. Press the
/SEL key to select settings
items.
Each time the
/SEL key is pressed,
this switches in the order DAB setting* 1
,
Gracenote DB* 2
, AF, REG, TP-S, PI-S,
PTY language settings, PHONE settings,
CT, Adjust time, and Cancel.
3. Turn the
/SEL key to set.
4. Press the
/SEL key to determine.
This completes settings, and displays the
next settings item.
* 1
:Displayed when a DAB tuner is con-
nected.* 2
:Displayed when playing back audio
files (vehicles with a Bluetooth ®
2.0 in-
terface).DAB Setting*
Change DAB settings
(“Set value” bold typeface indicates factory
default settings.)
Settings nameSettings val- ueSettings con-tentDAB-DAB
Link settingsOFFIf low recep-
tion sensitivi-
ty, switch to
another serv-
ice.ONDAB Band settingsBAND IIISet used
broadcast
band to 174
to 239 MHz.L-BANDSet used
broadcast
band to 1452
to 1490 MHz.BOTHSet used
broadcast
band to Band
III and L-
Band.RDS Setting
Change RDS settings
(“Set value” bold typeface indicates factory
default settings.)
Settings nameSettings val- ueSettings con-tentAFAF ONAutomatical-
ly track the
same station
as the pro-
gram being
received.AF OFFDo not auto-
matically
track the
same station
as the pro-
gram being
received.REGREG ONDo not auto-
matically
track the lo-
cal station for
the program
being re-
ceived.
System Settings
8-43OGGE18E1For pleasant driving8
Page 376 of 538
SettingsnameSettings val- ueSettings con-tentREG OFFAutomatical-
ly track the
local station
for the pro-
gram being
received.TP-STP-S ONAutomatical-
ly search for
traffic mes-
sages (TP sta-
tions).TP-S OFFDo not auto-
matically
search for
traffic mes-
sages (TP sta-
tions).PI-SPI-S ONSearch for the
same station
or local sta-
tion for that
registered in
the preset
channel.Settings nameSettings val- ueSettings con-tentPI-S OFFDo not search
for the same
station or lo-
cal station for
that regis-
tered in the
preset chan-
nel.PTYENGLISHSet the dis-
play language
for the pro-
gram content
search (PTY
search) to
English.FRANÇAISSet the dis-
play language
for the pro-
gram content
search (PTY
search) to
French.DEUTSCHSet the dis-
play language
for the pro-
gram content
search (PTY
search) to
German.Settings nameSettings val- ueSettings con-tentSVENSKSet the dis-
play language
for the pro-
gram content
search (PTY
search) to
Swedish.ESPAÑOLSet the dis-
play language
for the pro-
gram content
search (PTY
search) to
Spanish.ITALIANOSet the dis-
play language
for the pro-
gram content
search (PTY
search) to
Italian.CTCT ONUpdate the
time if time
data is re-
ceived.
System Settings
8-44OGGE18E1For pleasant driving8
Page 384 of 538
NOTElFor best performance and further reduction
of ambient noise, close the vehicle windows,lower the blower speed and refrain from
conversation with your passengers while en- gaging the voice recognition function.
l Some voice commands have alternative
commands.
l Depending on the selected language, some
functions may not be available.
Selecting the Language
1. Press the SPEECH button.
2. Say “Setup”.
3. Say “Language.”
4. The voice guide will say “Select a lan-
guage: English, French, Spanish, Italian,
German, Dutch, Portuguese or Russian” Say the desired language. (Example: Say“English.”)
5. The voice guide will say “English
(French, Spanish, Italian, German, Dutch, Portuguese or Russian) selected.
Is this correct?” Say “Yes.”
Answer “No” to return to Step 4.
NOTEl The voice guide will repeat the same mes-
sage twice. The first message is in the cur-rent language, and the second message is in the selected language.NOTEl If many entries are registered in the vehicle
phone book, changing the language will take
longer.
l Changing the language deletes the mobile
phone book imported to the Bluetooth ®
2.0
interface. If you wish to use it, you will have
to import it again.
6. When the voice guide says “English
(French, Spanish, Italian, German, Dutch, Portuguese or Russian) selected,”the language change process will be
completed and the system will return to the main menu.
Useful voice commands
E00760000019
Help function
E00760100010
The Bluetooth ®
2.0 interface is equipped
with a help function.
If you say “Help” when the system is waiting for a voice command input, the system will
tell you a list of the commands that can be used under the circumstances.
Cancelling
E00760201021
There are two cancel functions.
If you are at the main menu, say “Cancel” to
exit from the Bluetooth ®
2.0 interface.
If you are anywhere else within the system,
say “Cancel” to return to the main menu.NOTEl You can return to the previous menu by say-
ing “Go Back.” (if so equipped)Confirmation function setting
E00760400013
The Bluetooth ®
2.0 interface is equipped
with a confirmation function.
With the confirmation function activated, you are given more opportunities than normal to
confirm a command when making various
settings to the Bluetooth ®
2.0 interface. This
allows you to decrease the possibility that a setting is accidentally changed.
The confirmation function can be turned on
or off by following the steps below. 1. Press the SPEECH button.
2. Say “Setup”.
3. Say “Confirmation prompts”.
4. The voice guide will say “Confirmation
prompts are
turn confirmation prompts
5. The voice guide will say “Confirmation
prompts are
Bluetooth ®
2.0 interface*
8-52OGGE18E1For pleasant driving8
Page 386 of 538
Speaker enrollment function
E00727400209
The Bluetooth ®
2.0 interface can use the
speaker enrollment function to create a voice model for one person per language.
This makes it easier for the Bluetooth ®
2.0
interface to recognise voice commands said
by you.
You can turn a voice model registered with the speaker enrollment function on and off
whenever you want.
Speaker enrollment
E00727501294
It takes about 2 to 3 minutes to complete the speaker enrollment process.
To ensure the best results, run through the
process while in the driver’s seat, in an envi- ronment that is as quiet as possible (whenthere is no rain or strong winds and the vehi-cle windows are closed). Please turn off your
phone while in speaker enrollment to prevent
interruption of the process.
Use the following procedure for speaker en- rollment. 1. Stop your vehicle in a safe area, firmly
apply the parking brake and push the
electrical parking switch.
NOTEl Speaker enrollment is not possible unless the
vehicle is parked. Make sure you park the
vehicle in a safe area before attempting speaker enrollment.
2. Press the SPEECH button.
3. Say “Voice training”.
4. The voice guide will say “This operation
must be performed in a quiet environ- ment while the vehicle is stopped. See
the owner’s manual for the list of re- quired training phrases. Press and re-
lease the SPEECH button when you are ready to begin. Press the HANG-UP but-
ton to cancel at any time”.
Press the SPEECH button to start the
speaker enrollment process.
NOTEl If you do not start the speaker enrollment
process within 3 minutes of pressing the SPEECH button, the speaker enrollment function will time out.
The voice guide will say “Speaker Enroll-
ment has timed out”. The system will then beep and the voice recognition mode will be
deactivated.
5. The voice guide will prompt for phrase
1. Repeat the corresponding phrase lis-
ted in table “Enrollment commands” on
page 8-69.
The system will register your voice and
then move on to the registration of the next command. Continue the process un-
til all phrases have been registered.NOTEl To repeat the most recent voice training
command, press and release the SPEECH button.
l If you press the HANG-UP button anytime
during the process, the system will beep and
stop the speaker enrollment process.
6. When all enrollment commands have
been read out, the voice guide will say “Speaker enrollment is complete”. The
system will then end the speaker enroll-
ment process and return to the main
menu.
NOTEl Completing the speaker enrollment process
will turn on the voice model automatically.
l The commands “Help” and “Cancel” will
not work in this mode.
Bluetooth ®
2.0 interface*
8-54OGGE18E1For pleasant driving8