check oil MITSUBISHI OUTLANDER PHEV 2018 Owner's Manual (in English)
[x] Cancel search | Manufacturer: MITSUBISHI, Model Year: 2018, Model line: OUTLANDER PHEV, Model: MITSUBISHI OUTLANDER PHEV 2018Pages: 538, PDF Size: 25.01 MB
Page 176 of 538
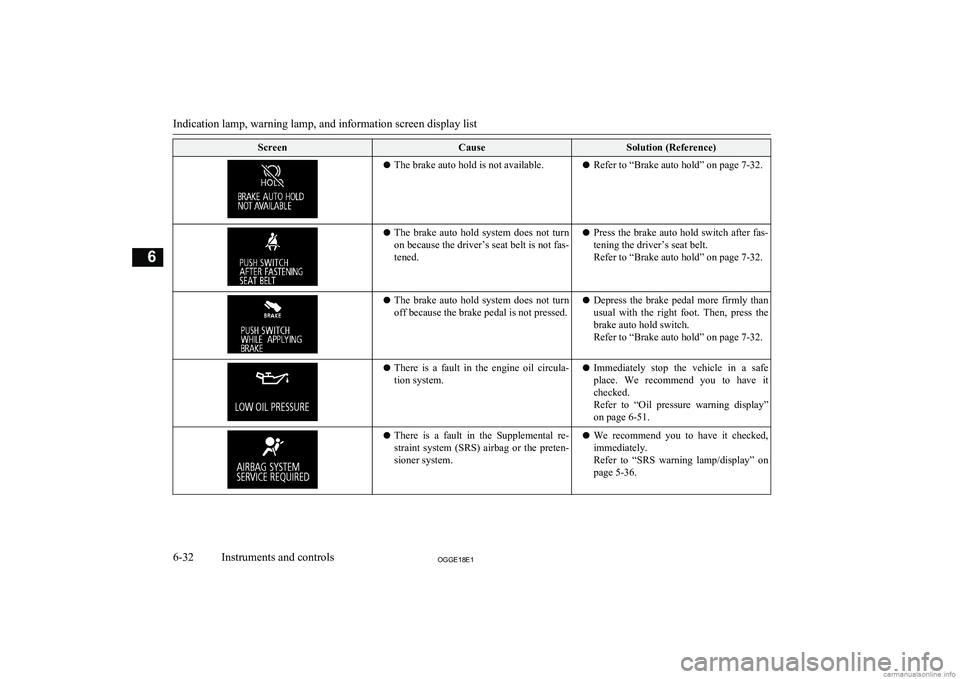
ScreenCauseSolution (Reference)lThe brake auto hold is not available.l Refer to “Brake auto hold” on page 7-32.lThe brake auto hold system does not turn
on because the driver’s seat belt is not fas-
tened.l Press the brake auto hold switch after fas-
tening the driver’s seat belt.
Refer to “Brake auto hold” on page 7-32.l The brake auto hold system does not turn
off because the brake pedal is not pressed.l Depress the brake pedal more firmly than
usual with the right foot. Then, press the
brake auto hold switch.
Refer to “Brake auto hold” on page 7-32.l There is a fault in the engine oil circula-
tion system.l Immediately stop the vehicle in a safe
place. We recommend you to have it checked.
Refer to “Oil pressure warning display” on page 6-51.l There is a fault in the Supplemental re-
straint system (SRS) airbag or the preten-
sioner system.l We recommend you to have it checked,
immediately.
Refer to “SRS warning lamp/display” on
page 5-36.
Indication lamp, warning lamp, and information screen display list
6-32OGGE18E1Instruments and controls6
Page 195 of 538
Regenerative brake warninglamp
E00537200048
This warning lamp will illu-
minate when the regenera-
tive brake cannot be used,
while the Plug-in Hybrid EV System is operating.
The warning is also dis-
played on the multi information display.
Normally, this warning lamp illuminates
when the operation mode of the power switch is put in ON, and goes off after the Plug-in
Hybrid EV System is activated.
CAUTIONl If the lamp illuminates while the Plug-in Hy-
brid EV System is operating, we recommend
you to have the vehicle inspected by a MITSUBISHI MOTORS Authorized Serv-
ice Point.Information screen display
E00524601117Brake warning display
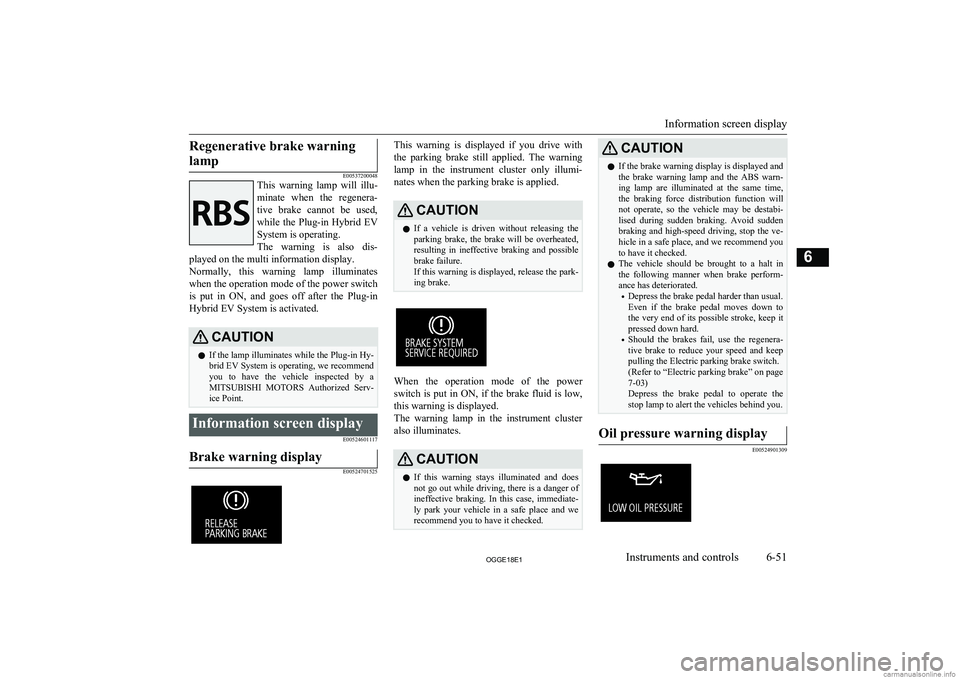
E00524701525
This warning is displayed if you drive withthe parking brake still applied. The warning lamp in the instrument cluster only illumi-
nates when the parking brake is applied.CAUTIONl If a vehicle is driven without releasing the
parking brake, the brake will be overheated, resulting in ineffective braking and possiblebrake failure.
If this warning is displayed, release the park-
ing brake.
When the operation mode of the power
switch is put in ON, if the brake fluid is low,
this warning is displayed.
The warning lamp in the instrument cluster
also illuminates.
CAUTIONl If this warning stays illuminated and does
not go out while driving, there is a danger of ineffective braking. In this case, immediate-
ly park your vehicle in a safe place and we recommend you to have it checked.CAUTIONl If the brake warning display is displayed and
the brake warning lamp and the ABS warn-
ing lamp are illuminated at the same time,
the braking force distribution function will not operate, so the vehicle may be destabi-
lised during sudden braking. Avoid sudden braking and high-speed driving, stop the ve-
hicle in a safe place, and we recommend you
to have it checked.
l The vehicle should be brought to a halt in
the following manner when brake perform- ance has deteriorated.
• Depress the brake pedal harder than usual.
Even if the brake pedal moves down to
the very end of its possible stroke, keep it
pressed down hard.
• Should the brakes fail, use the regenera-
tive brake to reduce your speed and keep
pulling the Electric parking brake switch.
(Refer to “Electric parking brake” on page
7-03)
Depress the brake pedal to operate the
stop lamp to alert the vehicles behind you.Oil pressure warning display
E00524901309
Information screen display
6-51OGGE18E1Instruments and controls6
Page 196 of 538
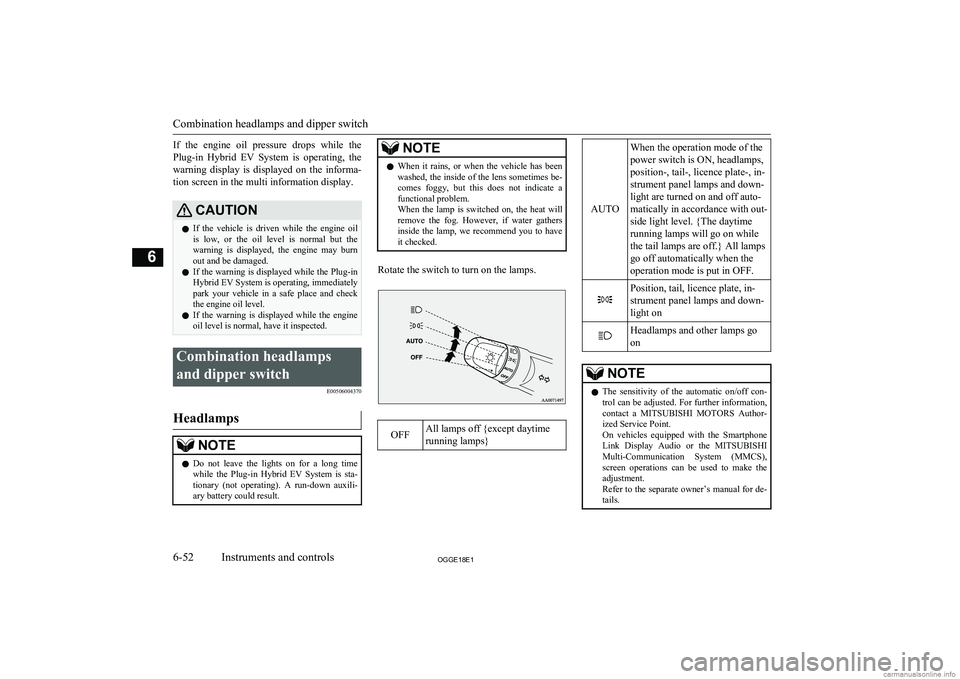
If the engine oil pressure drops while thePlug-in Hybrid EV System is operating, thewarning display is displayed on the informa-
tion screen in the multi information display.CAUTIONl If the vehicle is driven while the engine oil
is low, or the oil level is normal but the warning is displayed, the engine may burn
out and be damaged.
l If the warning is displayed while the Plug-in
Hybrid EV System is operating, immediately
park your vehicle in a safe place and check
the engine oil level.
l If the warning is displayed while the engine
oil level is normal, have it inspected.Combination headlamps
and dipper switch E00506004370
Headlamps
NOTElDo not leave the lights on for a long time
while the Plug-in Hybrid EV System is sta-tionary (not operating). A run-down auxili- ary battery could result.NOTEl When it rains, or when the vehicle has been
washed, the inside of the lens sometimes be-
comes foggy, but this does not indicate a functional problem.
When the lamp is switched on, the heat will
remove the fog. However, if water gathers inside the lamp, we recommend you to have
it checked.
Rotate the switch to turn on the lamps.
OFFAll lamps off {except daytime
running lamps}
AUTO
When the operation mode of the
power switch is ON, headlamps,
position-, tail-, licence plate-, in-
strument panel lamps and down-
light are turned on and off auto-
matically in accordance with out-
side light level. {The daytime
running lamps will go on while
the tail lamps are off.} All lamps
go off automatically when the
operation mode is put in OFF.Position, tail, licence plate, in-
strument panel lamps and down-
light onHeadlamps and other lamps go
onNOTEl The sensitivity of the automatic on/off con-
trol can be adjusted. For further information,contact a MITSUBISHI MOTORS Author-
ized Service Point.
On vehicles equipped with the Smartphone
Link Display Audio or the MITSUBISHI
Multi-Communication System (MMCS), screen operations can be used to make theadjustment.
Refer to the separate owner’s manual for de-
tails.
Combination headlamps and dipper switch
6-52OGGE18E1Instruments and controls6
Page 238 of 538
NOTElWhen moving out of mud, sand or fresh
snow, pressing the accelerator pedal may not
allow the Plug-in Hybrid EV system output to increase. In such situations, switching to
“4WD LOCK” with the 4WD lock switch and temporarily turning off the Active Sta- bility Control (ASC) with the “ASC OFF”
switch will make it easier to move out your vehicle.
Refer to “Operation under adverse driving
conditions: If your vehicle becomes stuck in sand, mud or snow” on page 9-20.
Climbing/descending sharp
grades
Your vehicle may not provide sufficient hill
climbing ability and regenerative brake on steep slope. Avoid driving on steep slopes
even though the vehicle is a 4-wheel drive vehicle.
Inspection and maintenance
following rough roadoperation E00606701407
After operating the vehicle in rough road
conditions, be sure to perform the following inspection and maintenance procedures:
l Check that the vehicle has not been dam-
aged by rocks, gravel, etc.
l Carefully wash the vehicle with water.
Drive the vehicle slowly while lightly
depressing the brake pedal in order to dry out the brakes. If the brakes still do
not function properly, we recommend you to have the brakes checked as soon
as possible.
l Remove the insects, dried grass, etc.
clogging the radiator core.
l Check the inside of the vehicle. If water
entry is found, dry the carpet etc.
l Inspect the headlamps. If the headlamp
bulb is flooded with water, we recom-
mend you to have it drained.Cautions on handling of 4-
wheel drive vehicles E00606801844
Tyres and wheels
Since the driving torque can be applied to the
4 wheels, the driving performance of the ve- hicle when operating in 4-wheel drive is
greatly affected by the condition of the tyres.
Pay close attention to the tyres.
l Install only the specified tyres on all
wheels. Refer to “Tyres and wheels” on page 12-08.
l Be sure all 4 tyres and wheels are the
same size and type.
When it is necessary to replace any of
the tyres or wheels, replace all 4 tyres.
l All tyres should be rotated before the
wear difference between the front and
rear tyres is recognizable.
Good vehicle performance cannot be expec- ted if there is a difference in wear between tyres. Refer to “Tyre rotation” on page 11-11.
l Check the tyre inflation pressure regular-
ly.CAUTIONl Always use tyres of the same size, same
type, and same brand, and which have no wear differences. Using tyres of differentsize, type, brands or degree of wear, will in-
crease the differential oil temperature, result-
ing in possible damage to the driving sys-
tem. Further, the drive train will be subjec- ted to excessive loading possibly leading tooil leakage, component seizure, or other seri-
ous faults.
Inspection and maintenance following rough road operation
7-24OGGE18E1Starting and driving7
Page 318 of 538
NOTElBecause the rear-view camera has a special
lens, the lines on the ground between park-
ing spaces may not look parallel on the screen.
l In the following situations, the screen indi-
cation may be difficult to see. There is no abnormality.
• Low light (nighttime).
• When the light of the sun or the light from
a vehicle’s headlamps shines directly into
the lens.
l If the camera is hot and is then cooled by
rain or a car wash, the lens can mist up. This
phenomenon does not indicate a malfunc- tion.
l It is not possible to fully see obstacles when
the lens is dirty. If the lens becomes conta- minated by water droplets, snow, mud or oil,
wipe off the contamination, taking care not to scratch the lens.
l Please observe the following cautions. Ig-
noring them could lead to a camera malfunc-
tion.
• Do not subject the camera to physical
shock.
• Do not apply wax to the camera.
• Do not splash the camera with boiling wa-
ter.
• Do not disassemble the camera.Reference lines on the screen
E00649100029
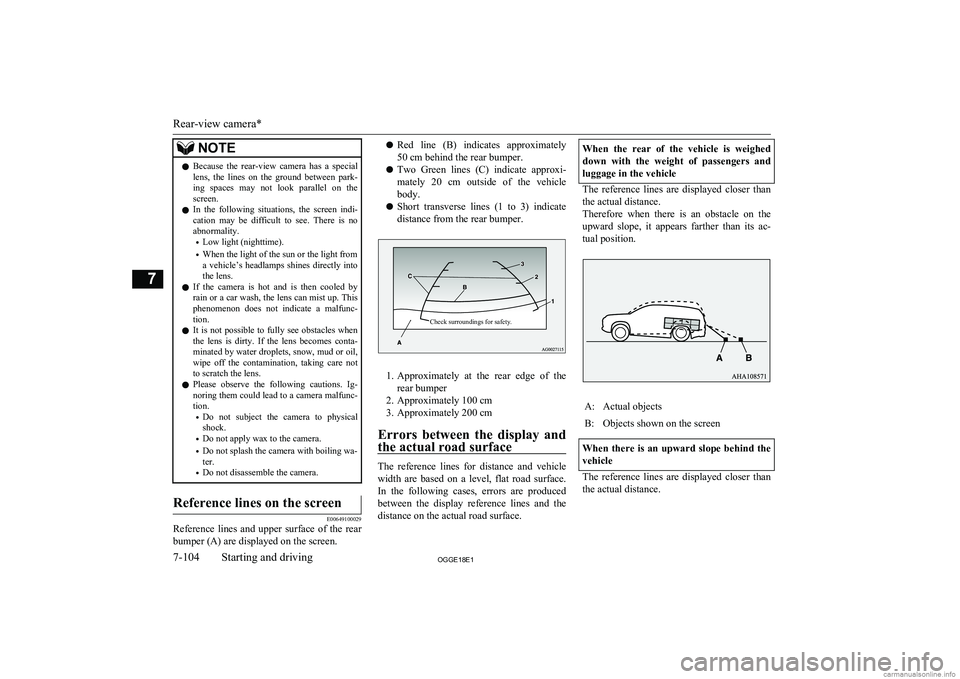
Reference lines and upper surface of the rear
bumper (A) are displayed on the screen.
l Red line (B) indicates approximately
50 cm behind the rear bumper.
l Two Green lines (C) indicate approxi-
mately 20 cm outside of the vehicle
body.
l Short transverse lines (1 to 3) indicate
distance from the rear bumper.Check surroundings for safety.
1. Approximately at the rear edge of the
rear bumper
2. Approximately 100 cm
3. Approximately 200 cm
Errors between the display and the actual road surface
The reference lines for distance and vehicle
width are based on a level, flat road surface. In the following cases, errors are produced between the display reference lines and the distance on the actual road surface.
When the rear of the vehicle is weighed
down with the weight of passengers and luggage in the vehicle
The reference lines are displayed closer than
the actual distance.
Therefore when there is an obstacle on the
upward slope, it appears farther than its ac- tual position.
A:Actual objectsB:Objects shown on the screen
When there is an upward slope behind the
vehicle
The reference lines are displayed closer than the actual distance.
Rear-view camera*
7-104OGGE18E1Starting and driving7
Page 424 of 538
WARNINGlMake sure that the engine and the Plug-in
Hybrid EV system have cooled down be- fore removing the radiator cap (D) and
the reserve tank cap (E), because hot steam or boiling water will otherwise gush from the filler port and may scald you.CAUTIONl Do not add coolant while the engine is hot.
Suddenly adding cold coolant could damage the engine. Wait for the engine to cool
down, then add coolant a little at a time.
6. Examine the radiator hoses for coolant
leakage and the drive belt for looseness
or damage.
If there is anything wrong with the cool-
ing system or drive belt, we recommend
you to have it checked and repaired.
Tools and jack
E00800902507
Storage
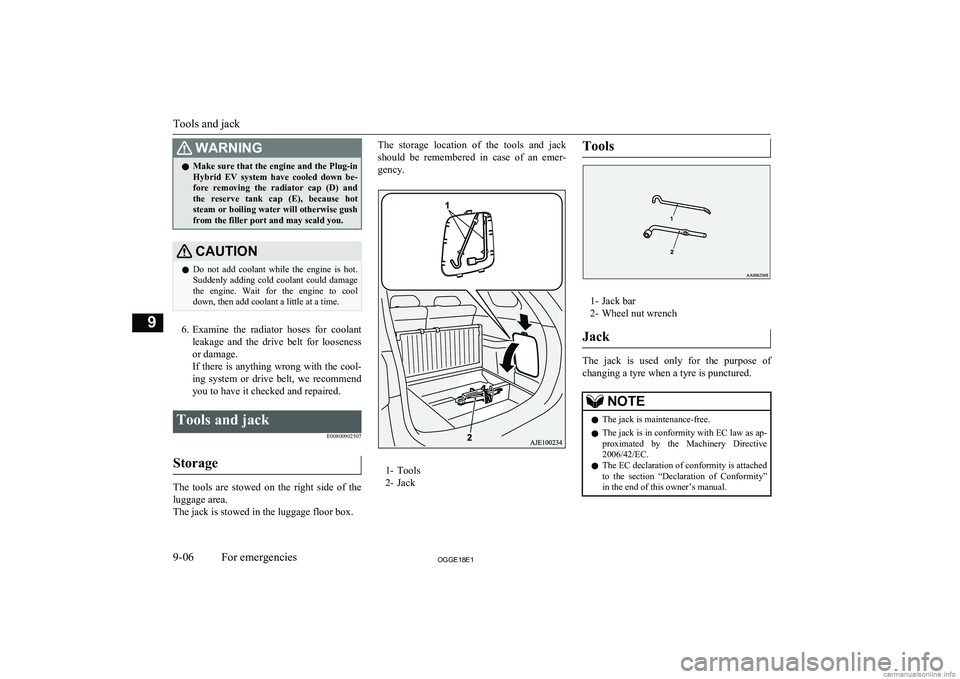
The tools are stowed on the right side of the
luggage area.
The jack is stowed in the luggage floor box.
The storage location of the tools and jack
should be remembered in case of an emer-
gency.
1- Tools
2- Jack
Tools
1- Jack bar
2- Wheel nut wrench
Jack
The jack is used only for the purpose of
changing a tyre when a tyre is punctured.
NOTEl The jack is maintenance-free.
l The jack is in conformity with EC law as ap-
proximated by the Machinery Directive
2006/42/EC.
l The EC declaration of conformity is attached
to the section “Declaration of Conformity”
in the end of this owner’s manual.
Tools and jack
9-06OGGE18E1For emergencies9
Page 434 of 538
nuts make light contact with the wheel
and the wheel is not loose.CAUTIONl Never apply oil to either the wheel bolts or
the nuts, or they will tighten too much.NOTEl If all 4 aluminium wheels are changed to
steel wheels. e. g. when fitting winter tyres,
use tapered nuts.8. Lower the vehicle slowly by rotating the
wheel nut wrench anticlockwise until the
tyre touches the ground.
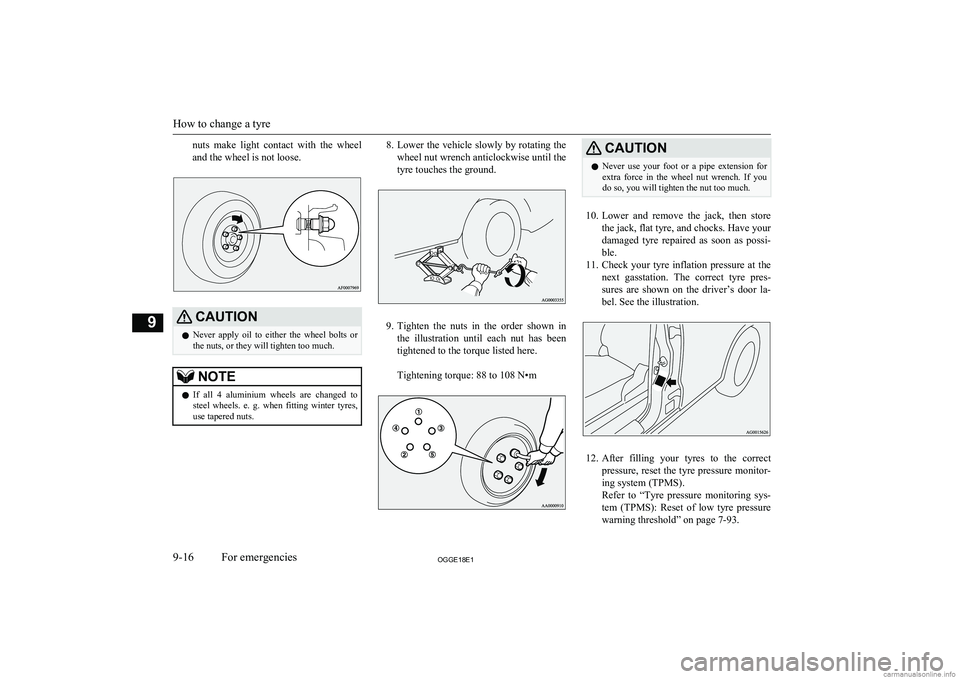
9. Tighten the nuts in the order shown in
the illustration until each nut has been tightened to the torque listed here.
Tightening torque: 88 to 108 N•m
CAUTIONl Never use your foot or a pipe extension for
extra force in the wheel nut wrench. If you
do so, you will tighten the nut too much.
10. Lower and remove the jack, then store
the jack, flat tyre, and chocks. Have your
damaged tyre repaired as soon as possi- ble.
11. Check your tyre inflation pressure at the
next gasstation. The correct tyre pres-
sures are shown on the driver’s door la-
bel. See the illustration.
12. After filling your tyres to the correct
pressure, reset the tyre pressure monitor-
ing system (TPMS).
Refer to “Tyre pressure monitoring sys- tem (TPMS): Reset of low tyre pressure
warning threshold” on page 7-93.
How to change a tyre
9-16OGGE18E1For emergencies9
Page 435 of 538
CAUTIONlAfter changing the tyre and driving the vehi-
cle about 1,000 km (620 miles), retighten the
wheel nuts to make sure that they have not come loose.
l If the steering wheel vibrates when driving
after changing the tyre, we recommend you to have the tyres checked for balance.
l Do not mix one type of tyre with another or
use a different size from the one listed. This
would cause early wear and poor handling.To store the tools and jack
E00803800037
Reverse the removing procedure when stor-
ing the jack, jack bar and wheel nut wrench.
Refer to “Tools and jack” on page 9-06.
Towing
E00801504953
If your vehicle needs to be tow-
ed
If you need to tow your vehicle, we recom- mend that you contact a MITSUBISHI
MOTORS Authorized Service Point or a
commercial tow truck service.
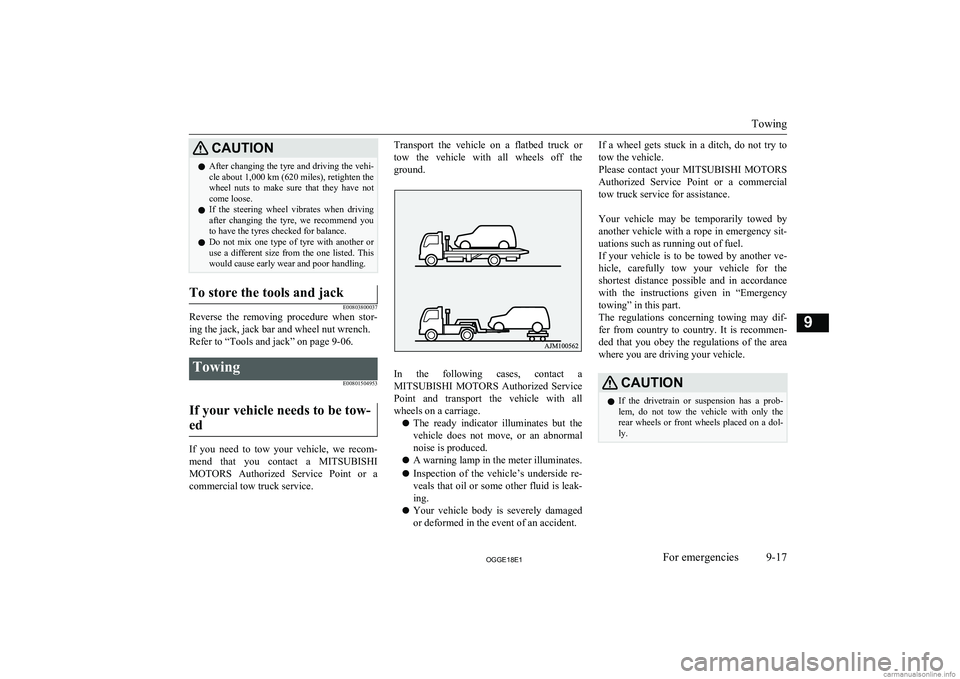
Transport the vehicle on a flatbed truck or
tow the vehicle with all wheels off the
ground.
In the following cases, contact a MITSUBISHI MOTORS Authorized Service
Point and transport the vehicle with all wheels on a carriage.
l The ready indicator illuminates but the
vehicle does not move, or an abnormal
noise is produced.
l A warning lamp in the meter illuminates.
l Inspection of the vehicle’s underside re-
veals that oil or some other fluid is leak- ing.
l Your vehicle body is severely damaged
or deformed in the event of an accident.
If a wheel gets stuck in a ditch, do not try to
tow the vehicle.
Please contact your MITSUBISHI MOTORS
Authorized Service Point or a commercial tow truck service for assistance.
Your vehicle may be temporarily towed by
another vehicle with a rope in emergency sit- uations such as running out of fuel.
If your vehicle is to be towed by another ve-
hicle, carefully tow your vehicle for the shortest distance possible and in accordance
with the instructions given in “Emergency
towing” in this part.
The regulations concerning towing may dif-
fer from country to country. It is recommen-
ded that you obey the regulations of the area where you are driving your vehicle.CAUTIONl If the drivetrain or suspension has a prob-
lem, do not tow the vehicle with only the
rear wheels or front wheels placed on a dol- ly.
Towing
9-17OGGE18E1For emergencies9
Page 451 of 538
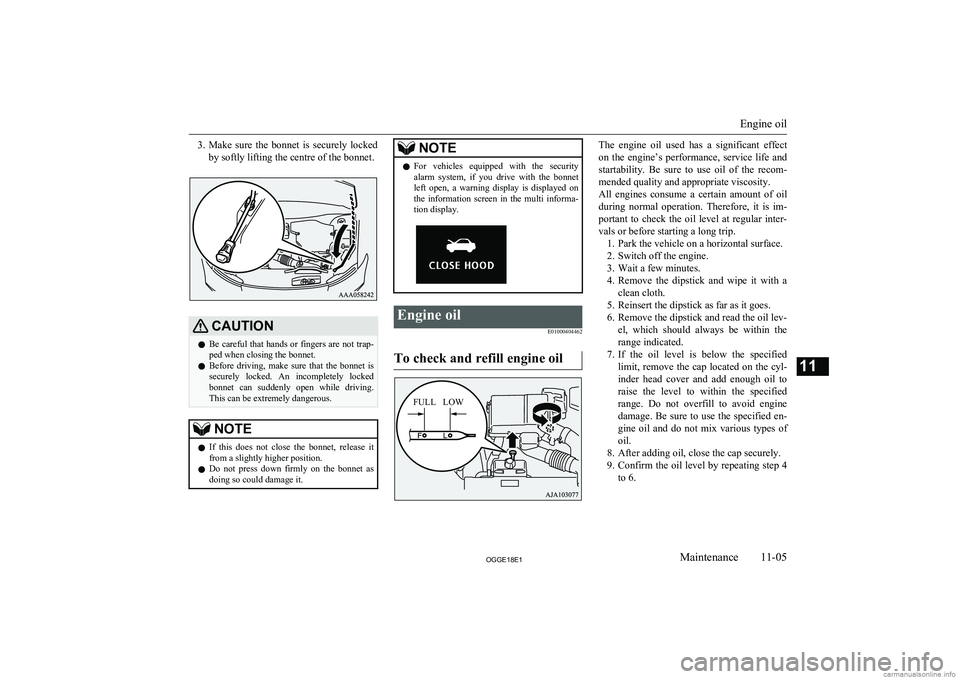
3.Make sure the bonnet is securely locked
by softly lifting the centre of the bonnet.CAUTIONl Be careful that hands or fingers are not trap-
ped when closing the bonnet.
l Before driving, make sure that the bonnet is
securely locked. An incompletely locked bonnet can suddenly open while driving.
This can be extremely dangerous.NOTEl If this does not close the bonnet, release it
from a slightly higher position.
l Do not press down firmly on the bonnet as
doing so could damage it.NOTEl For vehicles equipped with the security
alarm system, if you drive with the bonnetleft open, a warning display is displayed on
the information screen in the multi informa- tion display.Engine oil
E01000404462
To check and refill engine oil
The engine oil used has a significant effecton the engine’s performance, service life and
startability. Be sure to use oil of the recom- mended quality and appropriate viscosity.
All engines consume a certain amount of oil during normal operation. Therefore, it is im-portant to check the oil level at regular inter-
vals or before starting a long trip. 1. Park the vehicle on a horizontal surface.
2. Switch off the engine.
3. Wait a few minutes.
4. Remove the dipstick and wipe it with a
clean cloth.
5. Reinsert the dipstick as far as it goes.
6. Remove the dipstick and read the oil lev- el, which should always be within therange indicated.
7. If the oil level is below the specified
limit, remove the cap located on the cyl- inder head cover and add enough oil to
raise the level to within the specified
range. Do not overfill to avoid engine damage. Be sure to use the specified en-
gine oil and do not mix various types of
oil.
8. After adding oil, close the cap securely.
9. Confirm the oil level by repeating step 4
to 6.
Engine oil
11-05OGGE18E1Maintenance11 FULL LOW
Page 452 of 538
NOTElThe engine oil will deteriorate rapidly if the
vehicle is subjected to severe conditions, re-
quiring earlier oil replacement.
Please refer to the maintenance schedule.
l For information on how to dispose of used
engine oil, refer to page 2-17.
Recommended engine oil vis-
cosity
l Select engine oil of the proper SAE vis-
cosity number according to the atmos-
pheric temperature.
SAE 0W-20, 0W-30, 5W-30, and 5W-40
engine oils can only be used if they meet ACEA A3/B3, A3/B4 or A5/B5 and API
SM (or higher) specifications.
l Use engine oil conforming to the follow-
ing classification: • API classification: “For service SM”
or higher
• ILSAC certificated oil
• ACEA classification: “For service A1/B1, A3/B3 , A3/B4 or
A5/B5”NOTEl Use of additives is not recommended since
they may reduce the effectiveness of addi-
tives already included in the engine oil. It may result in failure of the mechanical as-
sembly.Engine coolant/Plug-in
hybrid EV system coolant E01000503466
To check the coolant level
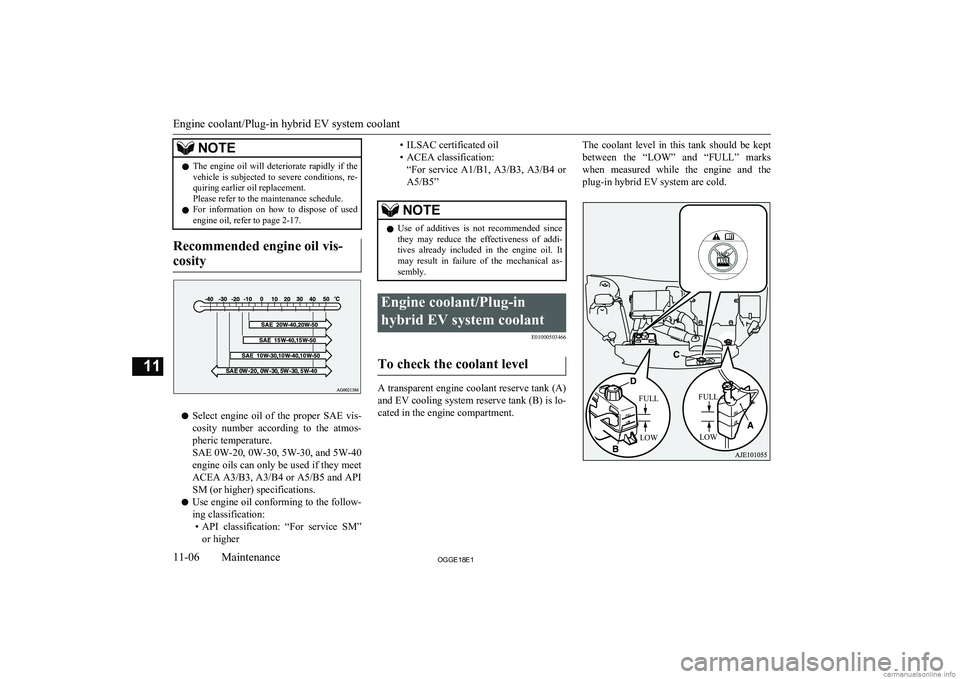
A transparent engine coolant reserve tank (A)
and EV cooling system reserve tank (B) is lo- cated in the engine compartment.
The coolant level in this tank should be kept
between the “LOW” and “FULL” marks
when measured while the engine and the
plug-in hybrid EV system are cold.
Engine coolant/Plug-in hybrid EV system coolant
11-06OGGE18E1Maintenance11 FULLLOW FULL
LOW