change time MITSUBISHI OUTLANDER SPORT 2016 3.G Owner's Manual
[x] Cancel search | Manufacturer: MITSUBISHI, Model Year: 2016, Model line: OUTLANDER SPORT, Model: MITSUBISHI OUTLANDER SPORT 2016 3.GPages: 398, PDF Size: 14.63 MB
Page 158 of 398
Multi-information display 5-96 Features and controls
5
When the warning is displayed, if you lightly press the multi-information meter switch a few times, the warning displayscreen you switched from is redisplayed. The operation status of each system is dis- played on the information screen. For further details, refer to the appropriate page in the warning display list.Refer to “Other interrupt displays” on page 5-117.
N00556400064
Shows the position of the selector lever.Refer to “Selector lever operation” on page 5-51.
N00556500065
Shows the temperature outside the vehicle.
N00568700019
This indicator will be displayed when fuel- efficient driving is achieved.
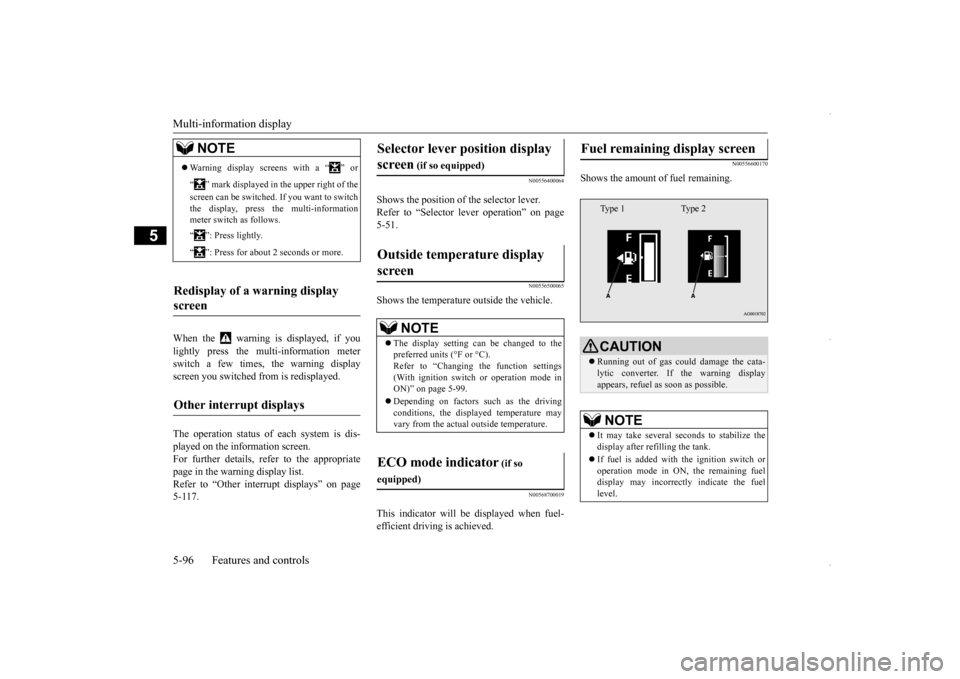
N00556600170
Shows the amount of fuel remaining.
NOTE
Warning display screens with a “ ” or “ ” mark displayed in the upper right of the screen can be switched. If you want to switch the display, press the multi-information meter switch as follows. “ ”: Press lightly. “ ”: Press for about 2 seconds or more.
Redisplay of a warning display screen Other interrupt displays
Selector lever position display screen
(if so equipped)
Outside temperature display screen
NOTE
The display setting can be changed to the preferred units (°F or °C).Refer to “Changing the function settings (With ignition switch or operation mode in ON)” on page 5-99. Depending on factors such as the driving conditions, the displayed temperature mayvary from the actual outside temperature.
ECO mode indicator
(if so
equipped)
Fuel remaining display screen
CAUTION Running out of gas could damage the cata- lytic converter. If the warning displayappears, refuel as soon as possible.NOTE
It may take several seconds to stabilize the display after refilling the tank. If fuel is added with the ignition switch or operation mode in ON, the remaining fueldisplay may incorrectly indicate the fuel level.Type 1 Type 2
BK0229600US.bo
ok 96 ページ 2015年10月1日 木曜日 午後2時29分
Page 159 of 398
Multi-information display
Features and controls 5-97
5
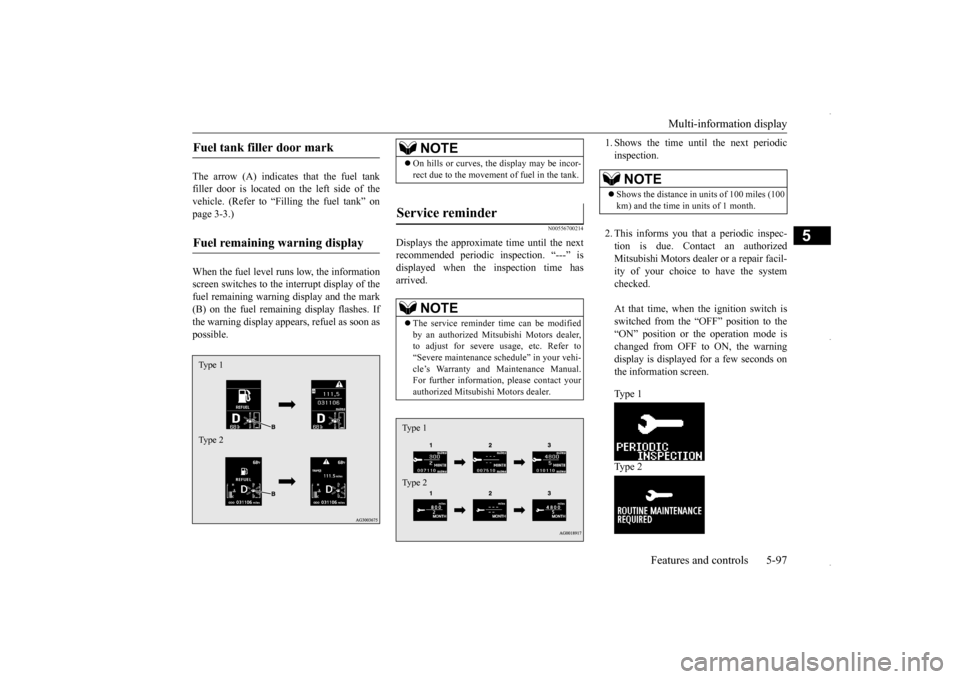
The arrow (A) indicates that the fuel tank filler door is located on the left side of thevehicle. (Refer to “Filling the fuel tank” on page 3-3.) When the fuel level runs low, the information screen switches to the interrupt display of the fuel remaining warning display and the mark (B) on the fuel remaining display flashes. Ifthe warning display appears, refuel as soon as possible.
N00556700214
Displays the approximate time until the nextrecommended periodic inspection. “---” is displayed when the inspection time hasarrived.
1. Shows the time until the next periodic inspection. 2. This informs you that a periodic inspec- tion is due. Contact an authorized Mitsubishi Motors dealer or a repair facil- ity of your choice to have the systemchecked. At that time, when the ignition switch is switched from the “OFF” position to the“ON” position or the operation mode is changed from OFF to ON, the warning display is displayed for a few seconds onthe information screen. Ty p e 1 Ty p e 2
Fuel tank filler door mark Fuel remaining warning display Type 1 Type 2
NOTE
On hills or curves, the display may be incor- rect due to the movement of fuel in the tank.
Service reminder
NOTE
The service reminder time can be modified by an authorized Mitsubishi Motors dealer, to adjust for severe usage, etc. Refer to“Severe maintenance schedule” in your vehi- cle’s Warranty and Maintenance Manual. For further information, please contact yourauthorized Mitsubishi Motors dealer.Type 1 Type 2
NOTE
Shows the distance in units of 100 miles (100 km) and the time in units of 1 month.
BK0229600US.bo
ok 97 ページ 2015年10月1日 木曜日 午後2時29分
Page 160 of 398
Multi-information display 5-98 Features and controls
5
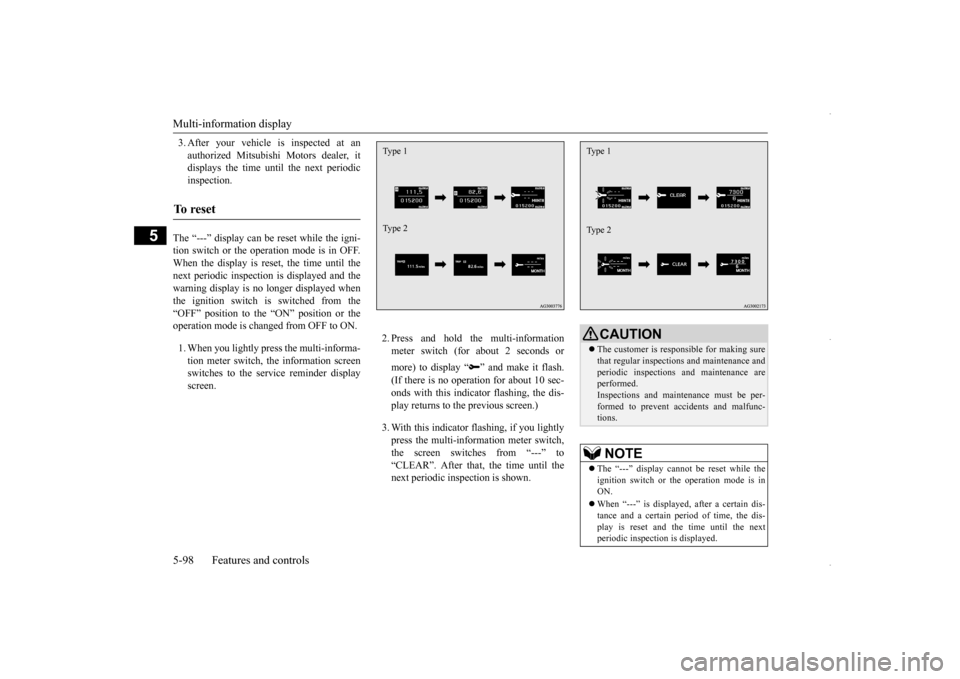
3. After your vehicle is inspected at an authorized Mitsubishi Motors dealer, it displays the time until the next periodic inspection.
The “---” display can be reset while the igni- tion switch or the operation mode is in OFF.When the display is reset, the time until thenext periodic inspection is displayed and the warning display is no longer displayed when the ignition switch is switched from the“OFF” position to the “ON” position or the operation mode is changed from OFF to ON. 1. When you lightly press the multi-informa- tion meter switch, the information screenswitches to the service reminder display screen.
2. Press and hold the multi-information meter switch (for about 2 seconds or more) to display “ ” and make it flash. (If there is no operation for about 10 sec- onds with this indicator flashing, the dis-play returns to the previous screen.) 3. With this indicator flashing, if you lightly press the multi-information meter switch, the screen switches from “---” to“CLEAR”. After that, the time until the next periodic inspection is shown.
To r e s e t
Type 1 Type 2
CAUTION The customer is responsible for making sure that regular inspections and maintenance and periodic inspections and maintenance are performed.Inspections and maintenance must be per- formed to prevent accidents and malfunc- tions.NOTE
The “---” display cannot be reset while the ignition switch or the operation mode is inON. When “---” is displayed, after a certain dis- tance and a certain period of time, the dis- play is reset and the time until the next periodic inspection is displayed.Type 1 Type 2
BK0229600US.bo
ok 98 ページ 2015年10月1日 木曜日 午後2時29分
Page 162 of 398
Multi-information display 5-100 Features and controls
5
4. Select the item to change on the menu screen and change to the desired setting.For further details on the operation meth- ods, refer to the following sections. Refer to “Changing the reset mode for average fuel consum
ption and average
speed” on page 5-100. Refer to “Changing the fuel consumptiondisplay unit” on page 5-101. Refer to “Changing the temperature unit” on page 5-102.Refer to “Changing the display language” on page 5-102. Refer to “Operation sound setting” onpage 5-103. Refer to “Changing the time until “REST REMINDER” is displayed” on page5-103. Refer to “Changing the turn signal sound” on page 5-104.Refer to “Changing the momentary fuel consumption display (Type 2)” on page 5-104.Refer to “Returning to the factory set- tings” on page 5-105.
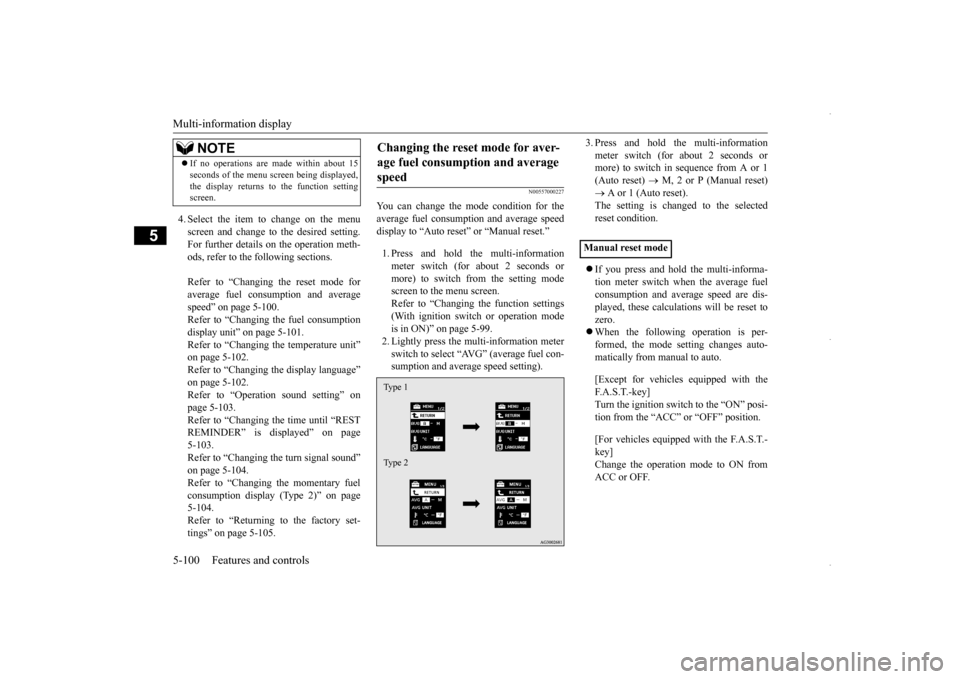
N00557000227
You can change the mode condition for the average fuel consumption and average speed display to “Auto reset” or “Manual reset.” 1. Press and hold the multi-information meter switch (for about 2 seconds ormore) to switch from the setting modescreen to the menu screen. Refer to “Changing the function settings (With ignition switch or operation modeis in ON)” on page 5-99. 2. Lightly press the multi-information meter switch to select “AVG” (average fuel con-sumption and average speed setting).
3. Press and hold the multi-information meter switch (for about 2 seconds or more) to switch in sequence from A or 1 (Auto reset)
M, 2 or P (Manual reset)
A or 1 (Auto reset). The setting is changed to the selected reset condition. If you press and hold the multi-informa- tion meter switch when the average fuelconsumption and average speed are dis- played, these calculations will be reset to zero. When the following operation is per- formed, the mode setting changes auto- matically from manual to auto. [Except for vehicles equipped with the F. A . S . T. - k e y ] Turn the ignition switch to the “ON” posi- tion from the “ACC” or “OFF” position. [For vehicles equipped with the F.A.S.T.- key] Change the operation mode to ON from ACC or OFF.
If no operations are made within about 15 seconds of the menu screen being displayed, the display returns to the function setting screen.NOTE
Changing the reset mode for aver- age fuel consumption and average speed Type 1 Type 2
Manual reset mode
BK0229600US.book
100 ページ 2015年10月1日 木曜日 午後2時29分
Page 165 of 398
Multi-information display
Features and controls 5-103
5
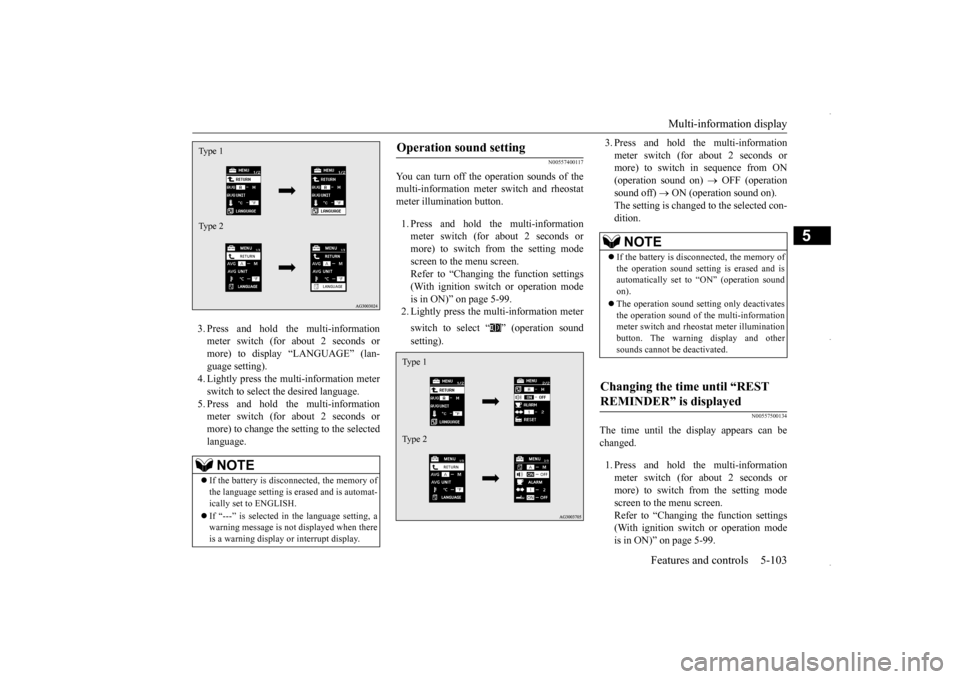
3. Press and hold the multi-information meter switch (for about 2 seconds or more) to display “LANGUAGE” (lan-guage setting). 4. Lightly press the multi-information meter switch to select the desired language.5. Press and hold the multi-information meter switch (for about 2 seconds or more) to change the setting to the selectedlanguage.
N00557400117
You can turn off the operation sounds of themulti-information meter switch and rheostatmeter illumination button. 1. Press and hold the multi-information meter switch (for about 2 seconds or more) to switch from the setting modescreen to the menu screen. Refer to “Changing the function settings (With ignition switch or operation modeis in ON)” on page 5-99.2. Lightly press the multi-information meter switch to select “ ” (operation sound setting).
3. Press and hold the multi-information meter switch (for about 2 seconds or more) to switch in sequence from ON (operation sound on)
OFF (operation
sound off)
ON (operation sound on).
The setting is changed to the selected con- dition.
N00557500134
The time until the display appears can bechanged. 1. Press and hold the multi-information meter switch (for about 2 seconds or more) to switch from the setting mode screen to the menu screen.Refer to “Changing the function settings (With ignition switch or operation mode is in ON)” on page 5-99.
NOTE
If the battery is disconnected, the memory of the language setting is erased and is automat-ically set to ENGLISH. If “---” is selected in the language setting, a warning message is not displayed when there is a warning display or interrupt display.Type 1 Type 2
Operation sound setting Type 1 Type 2
NOTE
If the battery is disconnected, the memory of the operation sound setting is erased and is automatically set to “ON” (operation sound on). The operation sound setting only deactivates the operation sound of the multi-informationmeter switch and rheostat meter illumination button. The warning display and other sounds cannot be deactivated.
Changing the time until “REST REMINDER” is displayed
BK0229600US.book
103 ページ 2015年10月1日 木曜日 午後2時29分
Page 166 of 398
Multi-information display 5-104 Features and controls
5
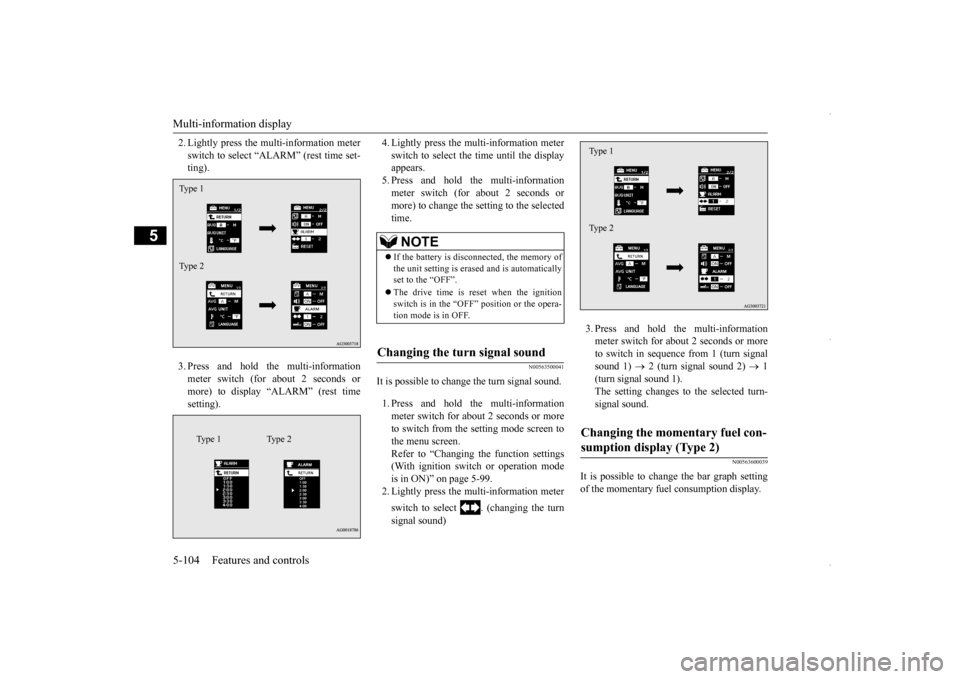
2. Lightly press the multi-information meter switch to select “ALARM” (rest time set- ting). 3. Press and hold the multi-information meter switch (for about 2 seconds or more) to display “ALARM” (rest timesetting).
4. Lightly press the multi-information meter switch to select the time until the display appears. 5. Press and hold the multi-informationmeter switch (for about 2 seconds or more) to change the setting to the selected time.
N00563500041
It is possible to change the turn signal sound. 1. Press and hold the multi-information meter switch for about 2 seconds or more to switch from the setting mode screen to the menu screen.Refer to “Changing the function settings (With ignition switch or operation mode is in ON)” on page 5-99.2. Lightly press the multi-information meter switch to select . (changing the turn signal sound)
3. Press and hold the multi-information meter switch for about 2 seconds or more to switch in sequence from 1 (turn signalsound 1)
2 (turn signal sound 2)
1
(turn signal sound 1). The setting changes to the selected turn-signal sound.
N00563600039
It is possible to change the bar graph settingof the momentary fuel consumption display.
Type 1 Type 2
Type 1 Type 2
NOTE
If the battery is disconnected, the memory of the unit setting is erased and is automatically set to the “OFF”. The drive time is reset when the ignition switch is in the “OFF” position or the opera- tion mode is in OFF.
Changing the turn signal sound
Changing the momentary fuel con- sumption display (Type 2) Type 1 Type 2
BK0229600US.book
104 ページ 2015年10月1日 木曜日 午後2時29分
Page 186 of 398
![MITSUBISHI OUTLANDER SPORT 2016 3.G Owners Manual Combination headlights and dimmer switch 5-124 Features and controls
5
[When the engine is started after the parking brake is released]
[When the engine is not running, or when the engine is started MITSUBISHI OUTLANDER SPORT 2016 3.G Owners Manual Combination headlights and dimmer switch 5-124 Features and controls
5
[When the engine is started after the parking brake is released]
[When the engine is not running, or when the engine is started](/img/19/7549/w960_7549-185.png)
Combination headlights and dimmer switch 5-124 Features and controls
5
[When the engine is started after the parking brake is released]
[When the engine is not running, or when the engine is started before the parking brake isreleased]
Rotate the switch to operate the lights. The combinations of switch operations and illuminated lights differ in accordance with the following conditions.
Except for vehicles equipped with day- time running lights OFF All lights off
Parking, tail, front and rear side- marker lights, license plate and instrument panel lights on Headlights and other lights on
Vehicles equipped with daytime running lights OFF
The daytime running lights illumi- nated The daytime running lights illumi- natedParking, tail, front and rear side- marker lights, license plate and instrument panel lights on Headlights and other lights on
NOTE
Once the daytime running light come on, they do not go out until the ignition switch is turned to the “OFF” or “ACC” position or the operation mode is changed to OFF or ACC.
OFF All lights off
Parking, tail, front and rear side- marker lights, license plate and instrument panel lights on Headlights and other lights onNOTE
Even if the daytime running lights are not on, they will come on once the vehicle starts moving. Once the daytime running light come on, they do not go out until the ignition switch isturned to the “OFF” or “ACC” position or the operation mode is changed to OFF or ACC.
Ty p e 2 Except for vehicles equipped with day- time running lights OFF All lights off AUTO
Headlights and other lights turn on and off automatically in accordance with outside light level. Parking, tail, front and rear side- marker lights, license plate and instrument panel lights on Headlights and other lights on
BK0229600US.book
124 ページ 2015年10月1日 木曜日 午後2時29分
Page 187 of 398
![MITSUBISHI OUTLANDER SPORT 2016 3.G Owners Manual Combination headlights and dimmer switch
Features and controls 5-125
5
[When the engine is started after the parking brake is released]
[When the engine is not running, or when the engine is started MITSUBISHI OUTLANDER SPORT 2016 3.G Owners Manual Combination headlights and dimmer switch
Features and controls 5-125
5
[When the engine is started after the parking brake is released]
[When the engine is not running, or when the engine is started](/img/19/7549/w960_7549-186.png)
Combination headlights and dimmer switch
Features and controls 5-125
5
[When the engine is started after the parking brake is released]
[When the engine is not running, or when the engine is started before the parking brake is released]
N00532601593
If the following operation is performed with the combination headlights and dim- mer switch in the “ ” or “ ” position, the lights automatically turn off. [Except for vehicles equipped with the F. A . S . T. - k e y ]The ignition switch is
turned to the “OFF”
or “ACC” position or the key is removed from the ignition swit
ch and the driver’s
door is opened.
Vehicles equipped with daytime running lights OFF
The daytime running lights illumi- nated
AUTO
The daytime running lights illumi- nated (when it is light outside the vehicle)Headlights and other lights turn on and off automatically in accordance with outside light level. The daytime running lights illumi- nated Parking, tail, front and rear side- marker lights, license plate and instrument panel lights on Headlights and other lights on
NOTE
Once the daytime running light come on, they do not go out until the ignition switch is turned to the “OFF” or “ACC” position orthe operation mode is changed to OFF or ACC.
OFF All lights off AUTO
Headlights and other lights turn on and off automatically in accordance with outside light level. Parking, tail, front and rear side- marker lights, license plate and instrument panel lights on Headlights and other lights on
NOTE
Even if the daytime running lights are not on, they will come on once the vehicle starts moving. Once the daytime running light come on, they do not go out until the ignition switch isturned to the “OFF” or “ACC” position or the operation mode is changed to OFF or ACC. The sensitivity of the automatic on/off con- trol can be adjusted.For further information, please contact your authorized Mitsubishi Motors dealer or a repair facility of your choice.
Do not cover the sensor (A) for the automatic on/off control by affixing a sticker or label to the windshield. If the lights do not turn on or off with the switch in the “AUTO” position, manuallyoperate the switch. Have the system checked by an authorized Mitsubishi Motors dealer or a repair facility of your choice.
Light auto-cutout function (headlights and other lights)
NOTE
BK0229600US.book
125 ページ 2015年10月1日 木曜日 午後2時29分
Page 190 of 398
Combination headlights and dimmer switch 5-128 Features and controls
5
N00547301123
This function turns on the headlights in the low beam setting for about 30 seconds afterthe ignition switch is turned to the “OFF”position or the operation mode is put in OFF.
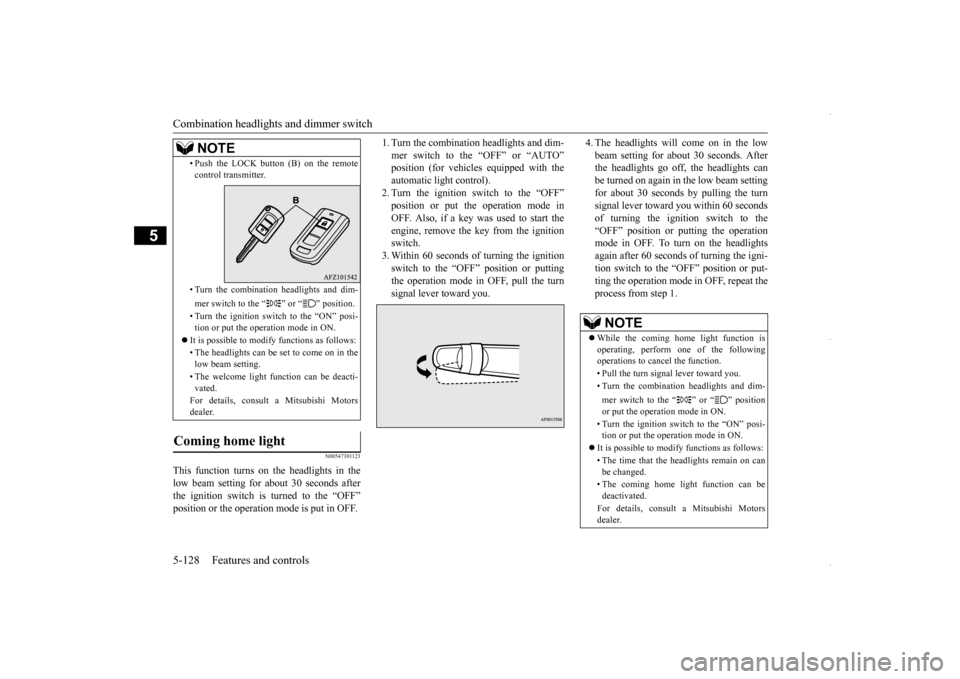
1. Turn the combination headlights and dim- mer switch to the “OFF” or “AUTO” automatic light control).2. Turn the ignition switch to the “OFF” position or put the operation mode in OFF. Also, if a key was used to start theengine, remove the key from the ignition switch. 3. Within 60 seconds of turning the ignitionswitch to the “OFF” position or puttingthe operation mode in OFF, pull the turn signal lever toward you.
4. The headlights will come on in the low beam setting for about 30 seconds. After the headlights go off, the headlights can be turned on again in the low beam settingfor about 30 seconds by pulling the turn signal lever toward you within 60 seconds of turning the ignition switch to the“OFF” position or putting the operation mode in OFF. To turn on the headlights again after 60 seconds of turning the igni-tion switch to the “OFF” position or put-ting the operation mode in OFF, repeat the process from step 1.
• Push the LOCK button (B) on the remote control transmitter. • Turn the combination headlights and dim- mer switch to the “ ” or “ ” position. • Turn the ignition switch to the “ON” posi- tion or put the operation mode in ON.
It is possible to modify functions as follows: • The headlights can be set to come on in the low beam setting. • The welcome light function can be deacti- vated. For details, consult a Mitsubishi Motors dealer.
Coming home light
NOTE
NOTE
While the coming home light function is operating, perform one of the followingoperations to cancel the function. • Pull the turn signal lever toward you.• Turn the combination headlights and dim- mer switch to the “ ” or “ ” position or put the operation mode in ON. • Turn the ignition switch to the “ON” posi- tion or put the operation mode in ON.
It is possible to modify functions as follows: • The time that the headlights remain on can be changed. • The coming home light function can be deactivated. For details, consult a Mitsubishi Motors dealer.
BK0229600US.book
128 ページ 2015年10月1日 木曜日 午後2時29分
Page 191 of 398
Headlight leveling switch (if so equipped)
Features and controls 5-129
5
N00537100105
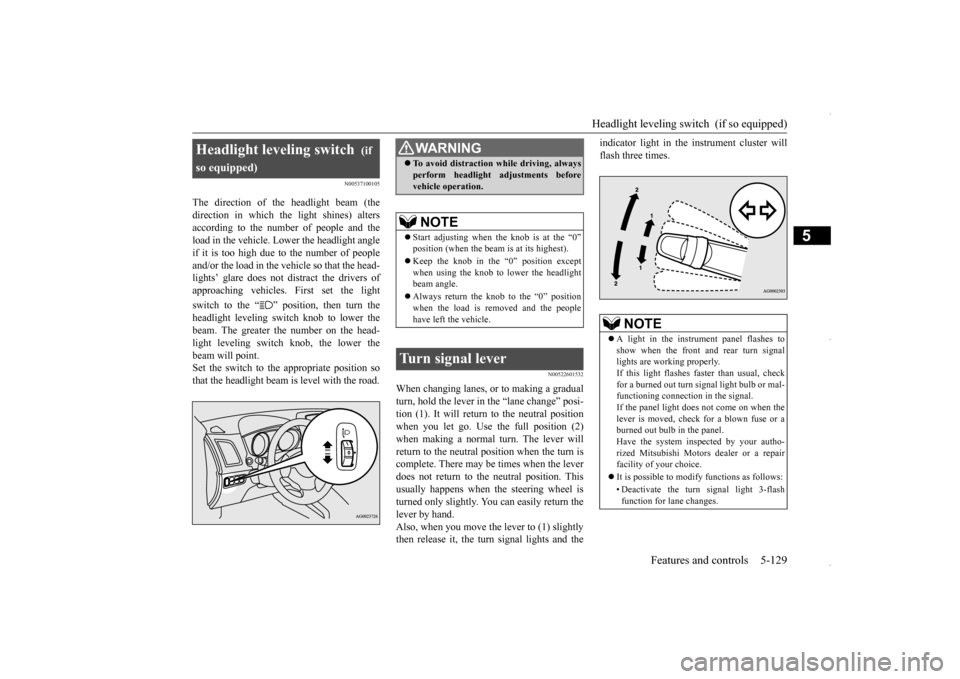
The direction of the headlight beam (the direction in which the light shines) alters according to the number of people and the load in the vehicle. Lower the headlight angleif it is too high due to the number of people and/or the load in the vehicle so that the head- lights’ glare does not distract the drivers ofapproaching vehicles. First set the light switch to the “ ” position, then turn the headlight leveling switch knob to lower the beam. The greater the number on the head- light leveling switch knob, the lower thebeam will point. Set the switch to the appropriate position so that the headlight beam is level with the road.
N00522601532
When changing lanes, or to making a gradual turn, hold the lever in
the “lane change” posi-
tion (1). It will return to the neutral positionwhen you let go. Use the full position (2) when making a normal turn. The lever will return to the neutral position when the turn iscomplete. There may be times when the lever does not return to the neutral position. This usually happens when the steering wheel isturned only slightly. You can easily return the lever by hand. Also, when you move the lever to (1) slightlythen release it, the turn signal lights and the
indicator light in the instrument cluster will flash three times.
Headlight leveling switch
(if
so equipped)
WA R N I N G To avoid distraction while driving, always perform headlight adjustments before vehicle operation.NOTE
Start adjusting when
the knob is at the “0”
position (when the beam is at its highest). Keep the knob in the “0” position except when using the knob to lower the headlightbeam angle. Always return the knob to the “0” position when the load is removed and the people have left the vehicle.
Turn signal lever
NOTE
A light in the instrument panel flashes to show when the front and rear turn signal lights are working properly. If this light flashes faster than usual, checkfor a burned out turn signal light bulb or mal- functioning connection in the signal. If the panel light does not come on when thelever is moved, check for a blown fuse or a burned out bulb in the panel. Have the system inspected by your autho-rized Mitsubishi Motors dealer or a repair facility of your choice. It is possible to modify functions as follows: • Deactivate the turn signal light 3-flash function for lane changes.
BK0229600US.book
129 ページ 2015年10月1日 木曜日 午後2時29分