battery location MITSUBISHI OUTLANDER SPORT 2016 3.G Owners Manual
[x] Cancel search | Manufacturer: MITSUBISHI, Model Year: 2016, Model line: OUTLANDER SPORT, Model: MITSUBISHI OUTLANDER SPORT 2016 3.GPages: 398, PDF Size: 14.63 MB
Page 75 of 398

Free-hand Advanced Security Transmitt
er (F.A.S.T.-key) (if so equipped)
Features and controls 5-13
5
N00503201207
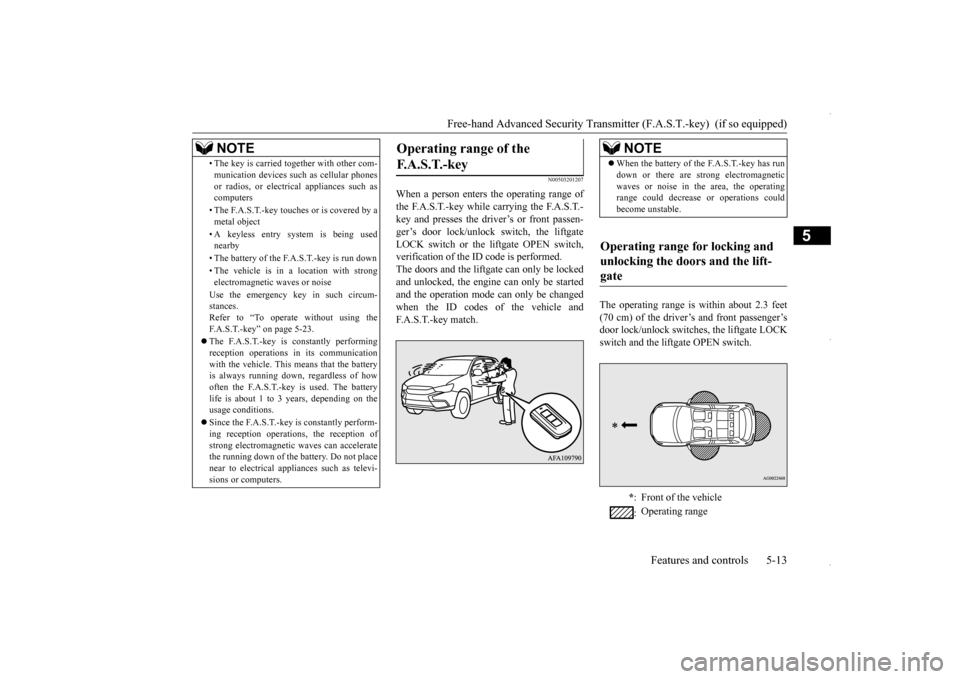
When a person enters the operating range of the F.A.S.T.-key while carrying the F.A.S.T.- key and presses the driver’s or front passen- ger’s door lock/unlock switch, the liftgateLOCK switch or the liftgate OPEN switch, verification of the ID code is performed. The doors and the liftgate can only be lockedand unlocked, the engine can only be startedand the operation mode can only be changed when the ID codes of the vehicle and F.A.S.T.-key match.
The operating range is within about 2.3 feet (70 cm) of the driver’s and front passenger’s door lock/unlock switches, the liftgate LOCKswitch and the liftgate OPEN switch.
• The key is carried together with other com- munication devices such as cellular phones or radios, or electrical appliances such as computers • The F.A.S.T.-key touches or is covered by a metal object • A keyless entry system is being used nearby • The battery of the F.A.S.T.-key is run down • The vehicle is in a location with strong electromagnetic waves or noise Use the emergency key in such circum- stances. Refer to “To operate without using the F.A.S.T.-key” on page 5-23. The F.A.S.T.-key is constantly performing reception operations in its communicationwith the vehicle. This means that the battery is always running down, regardless of how often the F.A.S.T.-key is used. The batterylife is about 1 to 3 years, depending on the usage conditions. Since the F.A.S.T.-key is constantly perform- ing reception operations, the reception of strong electromagnetic waves can acceleratethe running down of the battery. Do not place near to electrical appliances such as televi- sions or computers.NOTE
Operating range of the F. A . S . T. - k e y
NOTE
When the battery of the F.A.S.T.-key has run down or there are strong electromagnetic waves or noise in the area, the operating range could decrease or operations could become unstable.
Operating range for locking and unlocking the doors and the lift-gate
* : Front of the vehicle : Operating range
BK0229600US.bo
ok 13 ページ 2015年10月1日 木曜日 午後2時29分
Page 95 of 398

Inside liftgate release
Features and controls 5-33
5
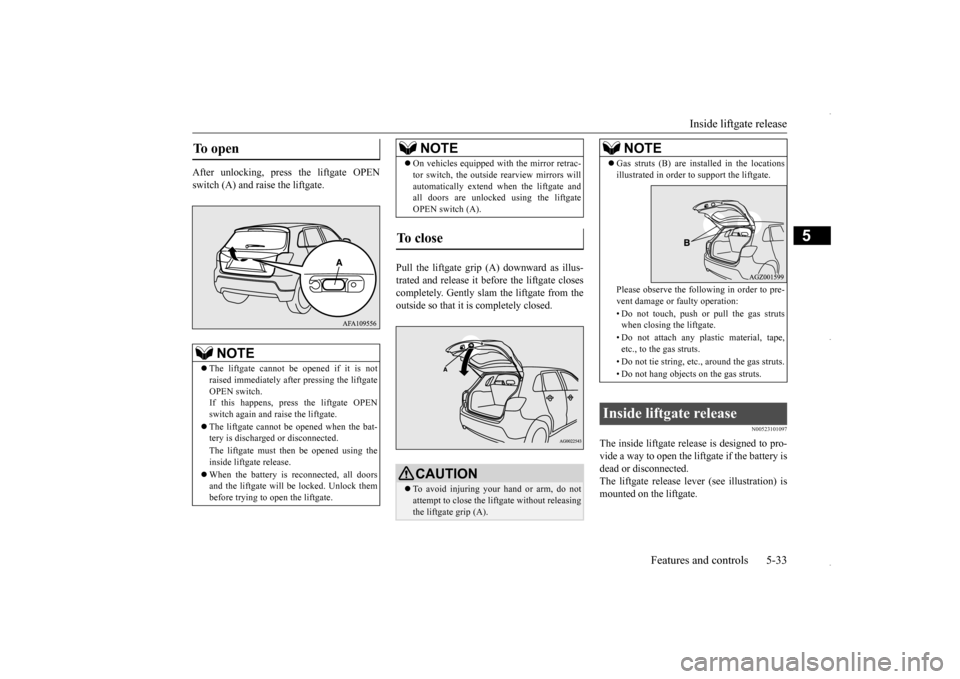
After unlocking, press the liftgate OPEN switch (A) and raise the liftgate.
Pull the liftgate grip
(A) downward as illus-
trated and release it before the liftgate closescompletely. Gently slam the liftgate from the outside so that it is completely closed.
N00523101097
The inside liftgate release is designed to pro- vide a way to open the liftgate if the battery isdead or disconnected. The liftgate release lever (see illustration) is mounted on the liftgate.
To open
NOTE
The liftgate cannot be opened if it is not raised immediately after pressing the liftgateOPEN switch. If this happens, press the liftgate OPEN switch again and raise the liftgate. The liftgate cannot be opened when the bat- tery is discharged or disconnected. The liftgate must then be opened using the inside liftgate release. When the battery is reconnected, all doors and the liftgate will be locked. Unlock thembefore trying to open the liftgate.
On vehicles equipped with the mirror retrac- tor switch, the outside rearview mirrors will automatically extend when the liftgate and all doors are unlocked using the liftgate OPEN switch (A).
To close
CAUTION To avoid injuring your hand or arm, do not attempt to close the liftgate without releasing the liftgate grip (A).NOTE
NOTE
Gas struts (B) are installed in the locations illustrated in order to support the liftgate. Please observe the following in order to pre- vent damage or faulty operation: • Do not touch, push or pull the gas struts when closing the liftgate. • Do not attach any plastic material, tape, etc., to the gas struts. • Do not tie string, etc., around the gas struts. • Do not hang objects on the gas struts.
Inside liftgate release
BK0229600US.bo
ok 33 ページ 2015年10月1日 木曜日 午後2時29分
Page 215 of 398

Bluetooth® 2.0 interface (if so equipped)
Features and controls 5-153
5
N00565900010
At any time during a call, you can mute the vehicle microphone. Pressing the SPEECH button and then saying “Mute” during a call will turn ON the mute function and mute the microphone.Saying “Mute off” in the same way will turn off the mute function and cancel the mute on the microphone.
N00566600014
The Bluetooth
® 2.0 interface can switch
between hands-free mode (hands-free calls) and private mode (calls using cellular phone). If you press the SPEECH button and say“Transfer call” during a hands-free call, you can stop the hands-free mode and talk in pri- vate mode. To return to hands-free mode, press the SPEECH button again and say “Transfer call.”
N00566000018
The Bluetooth
® 2.0 interface has 2 types of
unique phonebooks that are different from thephonebook stored in the cellular phone. They
are the vehicle phonebook and the mobile phonebook. These phonebooks are used to register tele- phone numbers and make calls to desirednumbers via voice recognition function.
N00566101146
This phonebook is us
ed when making calls
with the voice recognition function. Up to 32 names can be registered in the vehi- cle phonebook per language.Also, each entry has 4 locations associated with: home, work, mobile and other. You can register one telephone number for each loca-tion. You can register a desired name as a name for any phonebook entry registered in the vehicle phonebook.Names and telephone numbers can be changed later on. The vehicle phonebook can be used with all paired cellular phones.
N00580500062
You can register a telephone number in the vehicle phonebook in the following 2 ways: Reading out a telephone number, and select-ing and transferring 1 phonebook entry from the phonebook of the cellular phone.
N00580600092
1. Press the SPEECH button (except for vehicles with Mitsubishi Multi-Commu-nication System) or PICK-UP button (for vehicles with Mitsubishi Multi-Commu- nication System).2. Say “Phonebook.” 3. The voice guide will say “Select one of the following: new entry, edit number,edit name, list names, delete, erase all, or import contact.” Say “New entry.”Say your preferred name to register it.
Mute function
Switching between hands-free mode and private mode
Phonebook function
NOTE
Disconnecting the battery cable will not delete information registered in the phone- book.
Vehicle phonebook
To register a telephone number in the vehicle phonebook
To register by reading out a tele- phone number
BK0229600US.book
153 ページ 2015年10月1日 木曜日 午後2時29分
Page 228 of 398

HomeLink® Wireless Control System (if so equipped) 5-166 Features and controls
5
N00584600032
Some garage door openers manufactured after 1995 have “rolling code protection”. To program a garage door opener equipped with “rolling code protection”;you will need to access the garage door opener motor to press the motor’s “Learn” or “Smart” buttons. For conve-nience, use a ladder and another person toassist you. It is recommended that a new battery be placed in the hand-held transmitter of the device being programmed to HomeLink
®
for quicker training and accurate trans- mission of the radio-frequency signal.
N00584700033
To program HomeLink
® to operate a garage
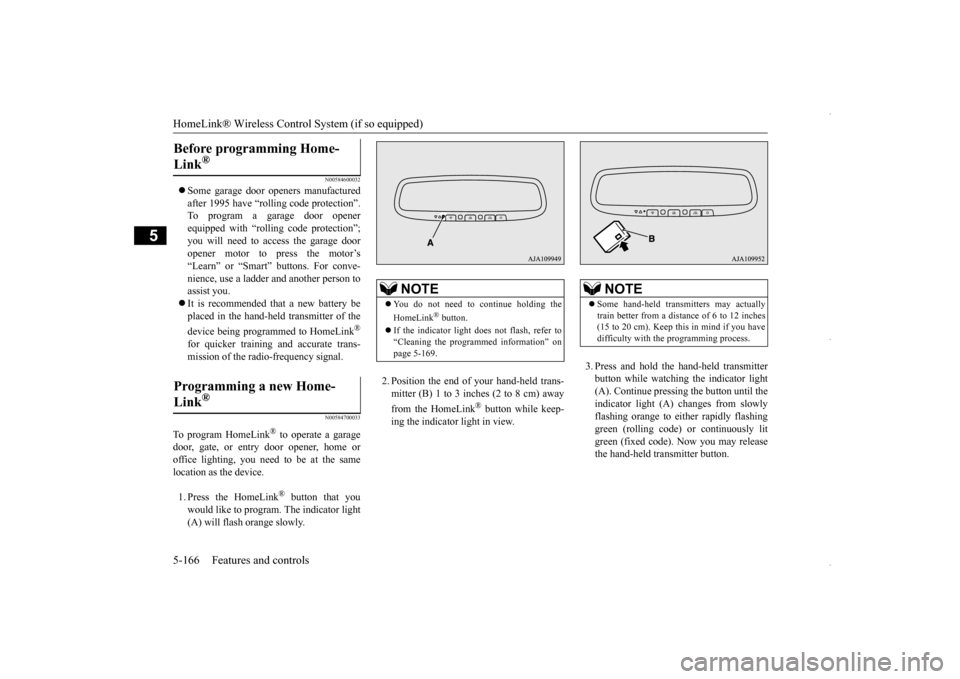
door, gate, or entry door opener, home or office lighting, you need to be at the same location as the device. 1. Press the HomeLink
® button that you
would like to program. The indicator light (A) will flash orange slowly.
2. Position the end of your hand-held trans- mitter (B) 1 to 3 inches (2 to 8 cm) away from the HomeLink
® button while keep-
ing the indicator light in view.
3. Press and hold the hand-held transmitter button while watching the indicator light(A). Continue pressing the button until theindicator light (A) changes from slowly flashing orange to either rapidly flashing green (rolling code) or continuously litgreen (fixed code). Now you may release the hand-held transmitter button.
Before programming Home- Link
®
Programming a new Home-Link
®
NOTE
You do not need to continue holding the HomeLink
® button.
If the indicator light does not flash, refer to “Cleaning the programmed information” on page 5-169.
NOTE
Some hand-held transmitters may actually train better from a distance of 6 to 12 inches (15 to 20 cm). Keep this in mind if you havedifficulty with the programming process.
BK0229600US.book
166 ページ 2015年10月1日 木曜日 午後2時29分